Connection
Docebo on Hire2Retire uses OAuth2 Authentication.
We at RoboMQ pay utmost attention to keeping your account secure. See our Security and Privacy Policies to learn more about how RoboMQ handles your account access.
Activating and setting up the Docebo API & SSO app
You’ll first need to activate and set up the API & SSO app in your Docebo platform and after that only you will be able to create an OAuth application on Docebo. Please follow the steps below to activate and set up the API & SSO in you Docebo instance:
-
Log into your Docebo instance with your admin credentials. You are provided an unique URL to log in for your Docebo instance that is similar to
https://<yoursubdomain.docebosaas.com> -
Access the Admin menu from the gear icon in the top right corner and click on the
Add new apps.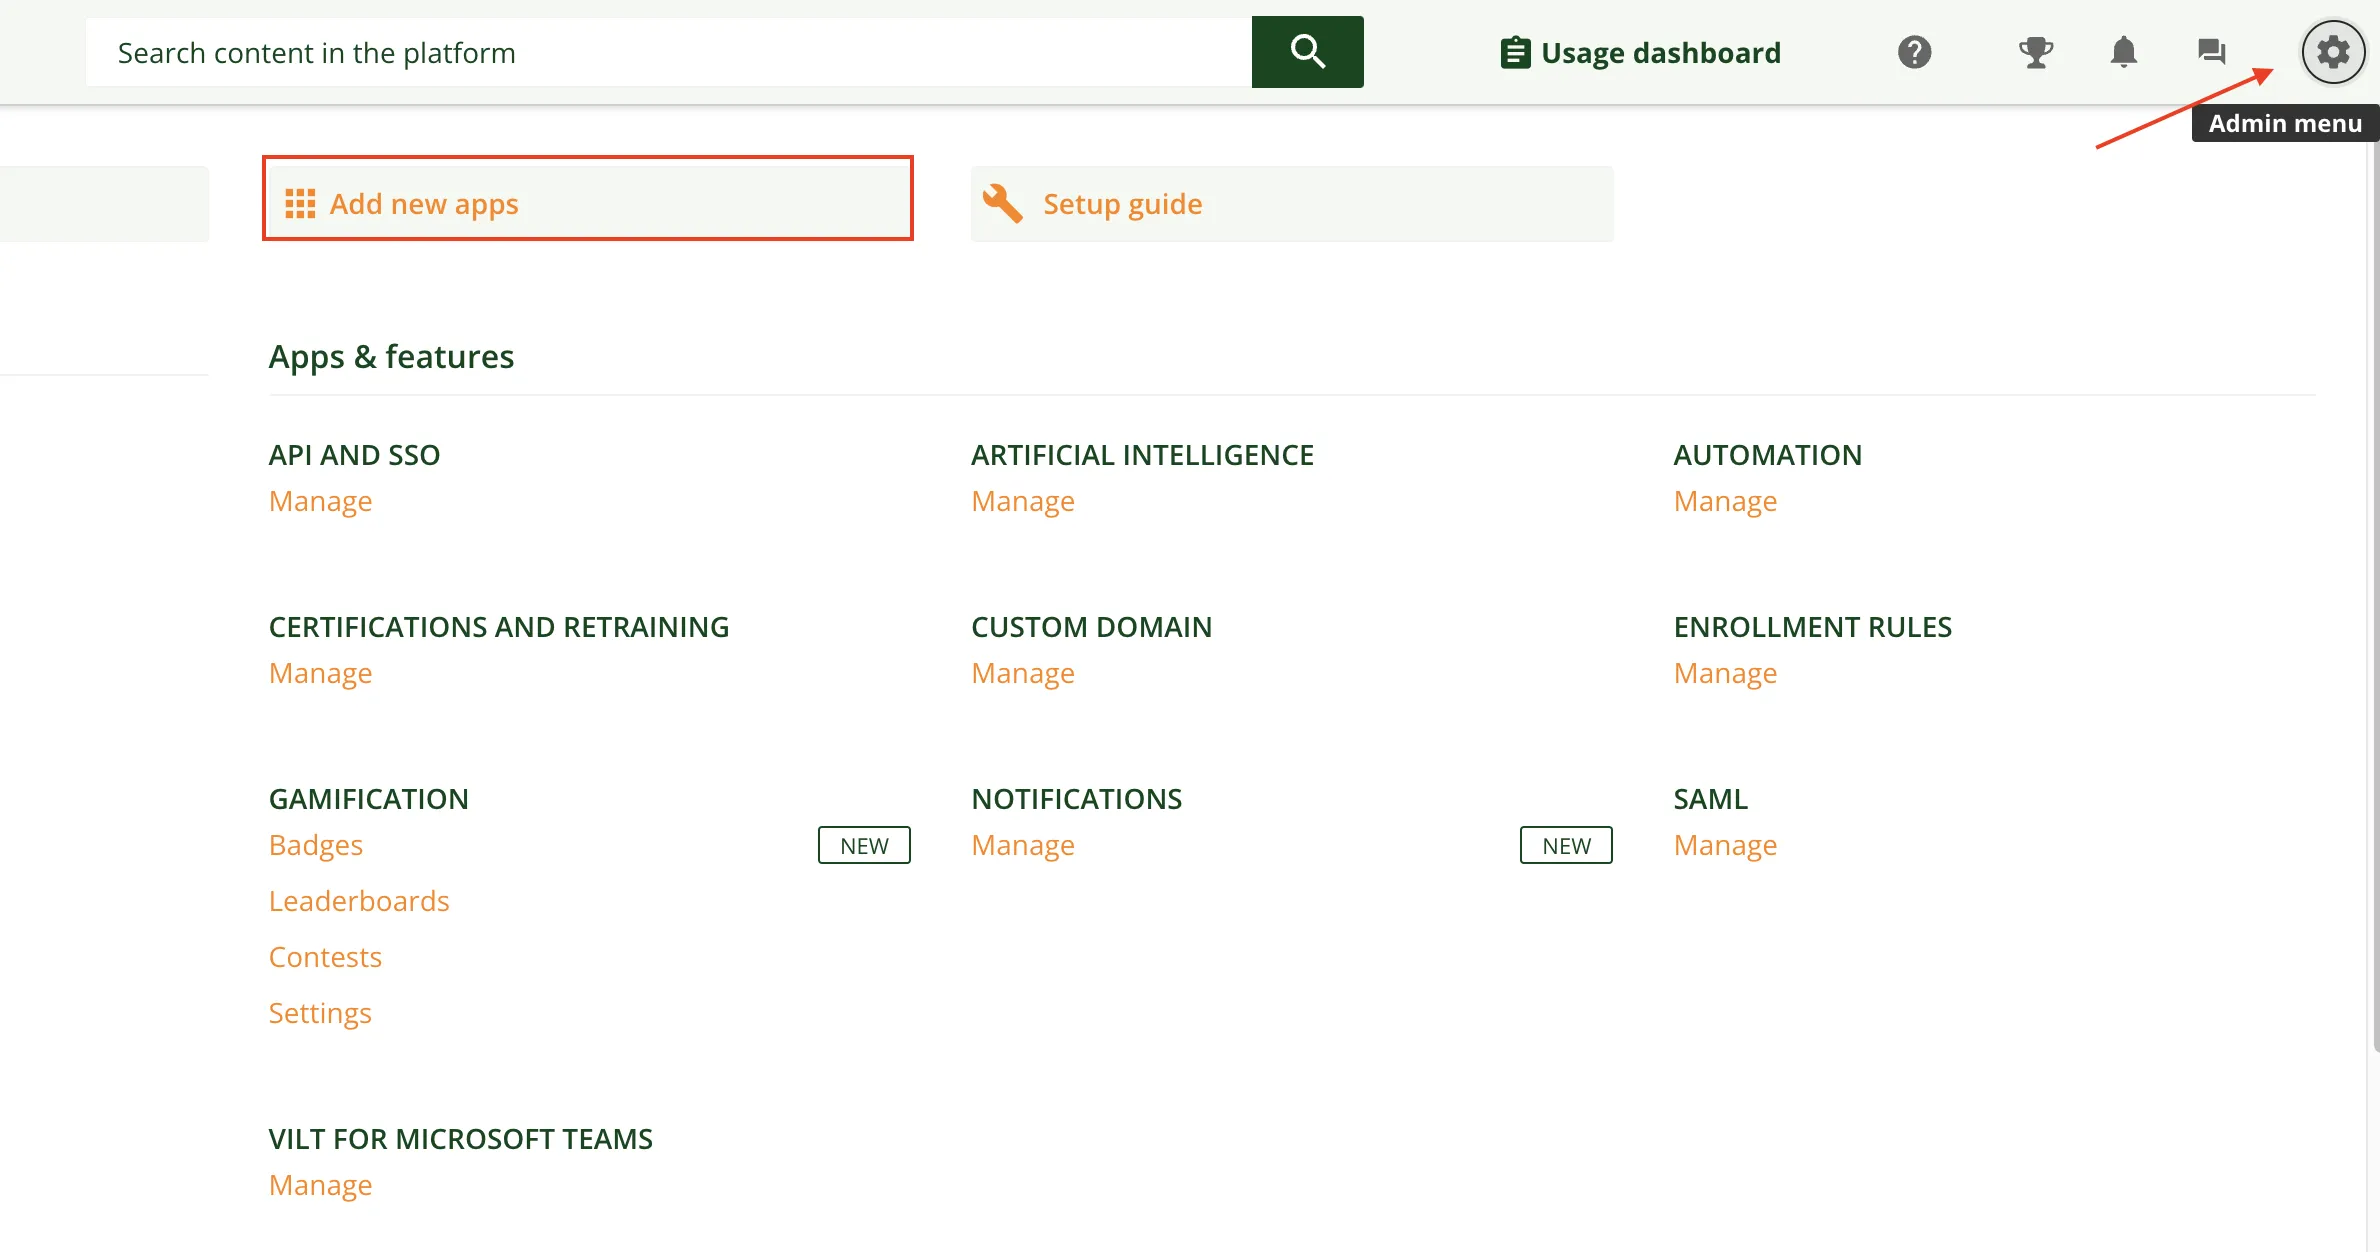 Figure 1. Add new apps on Docebo
 -
Click on the
My Appsand click on three dots icon next toAPI and SSO. Click on activate option and activate the API and SSO app.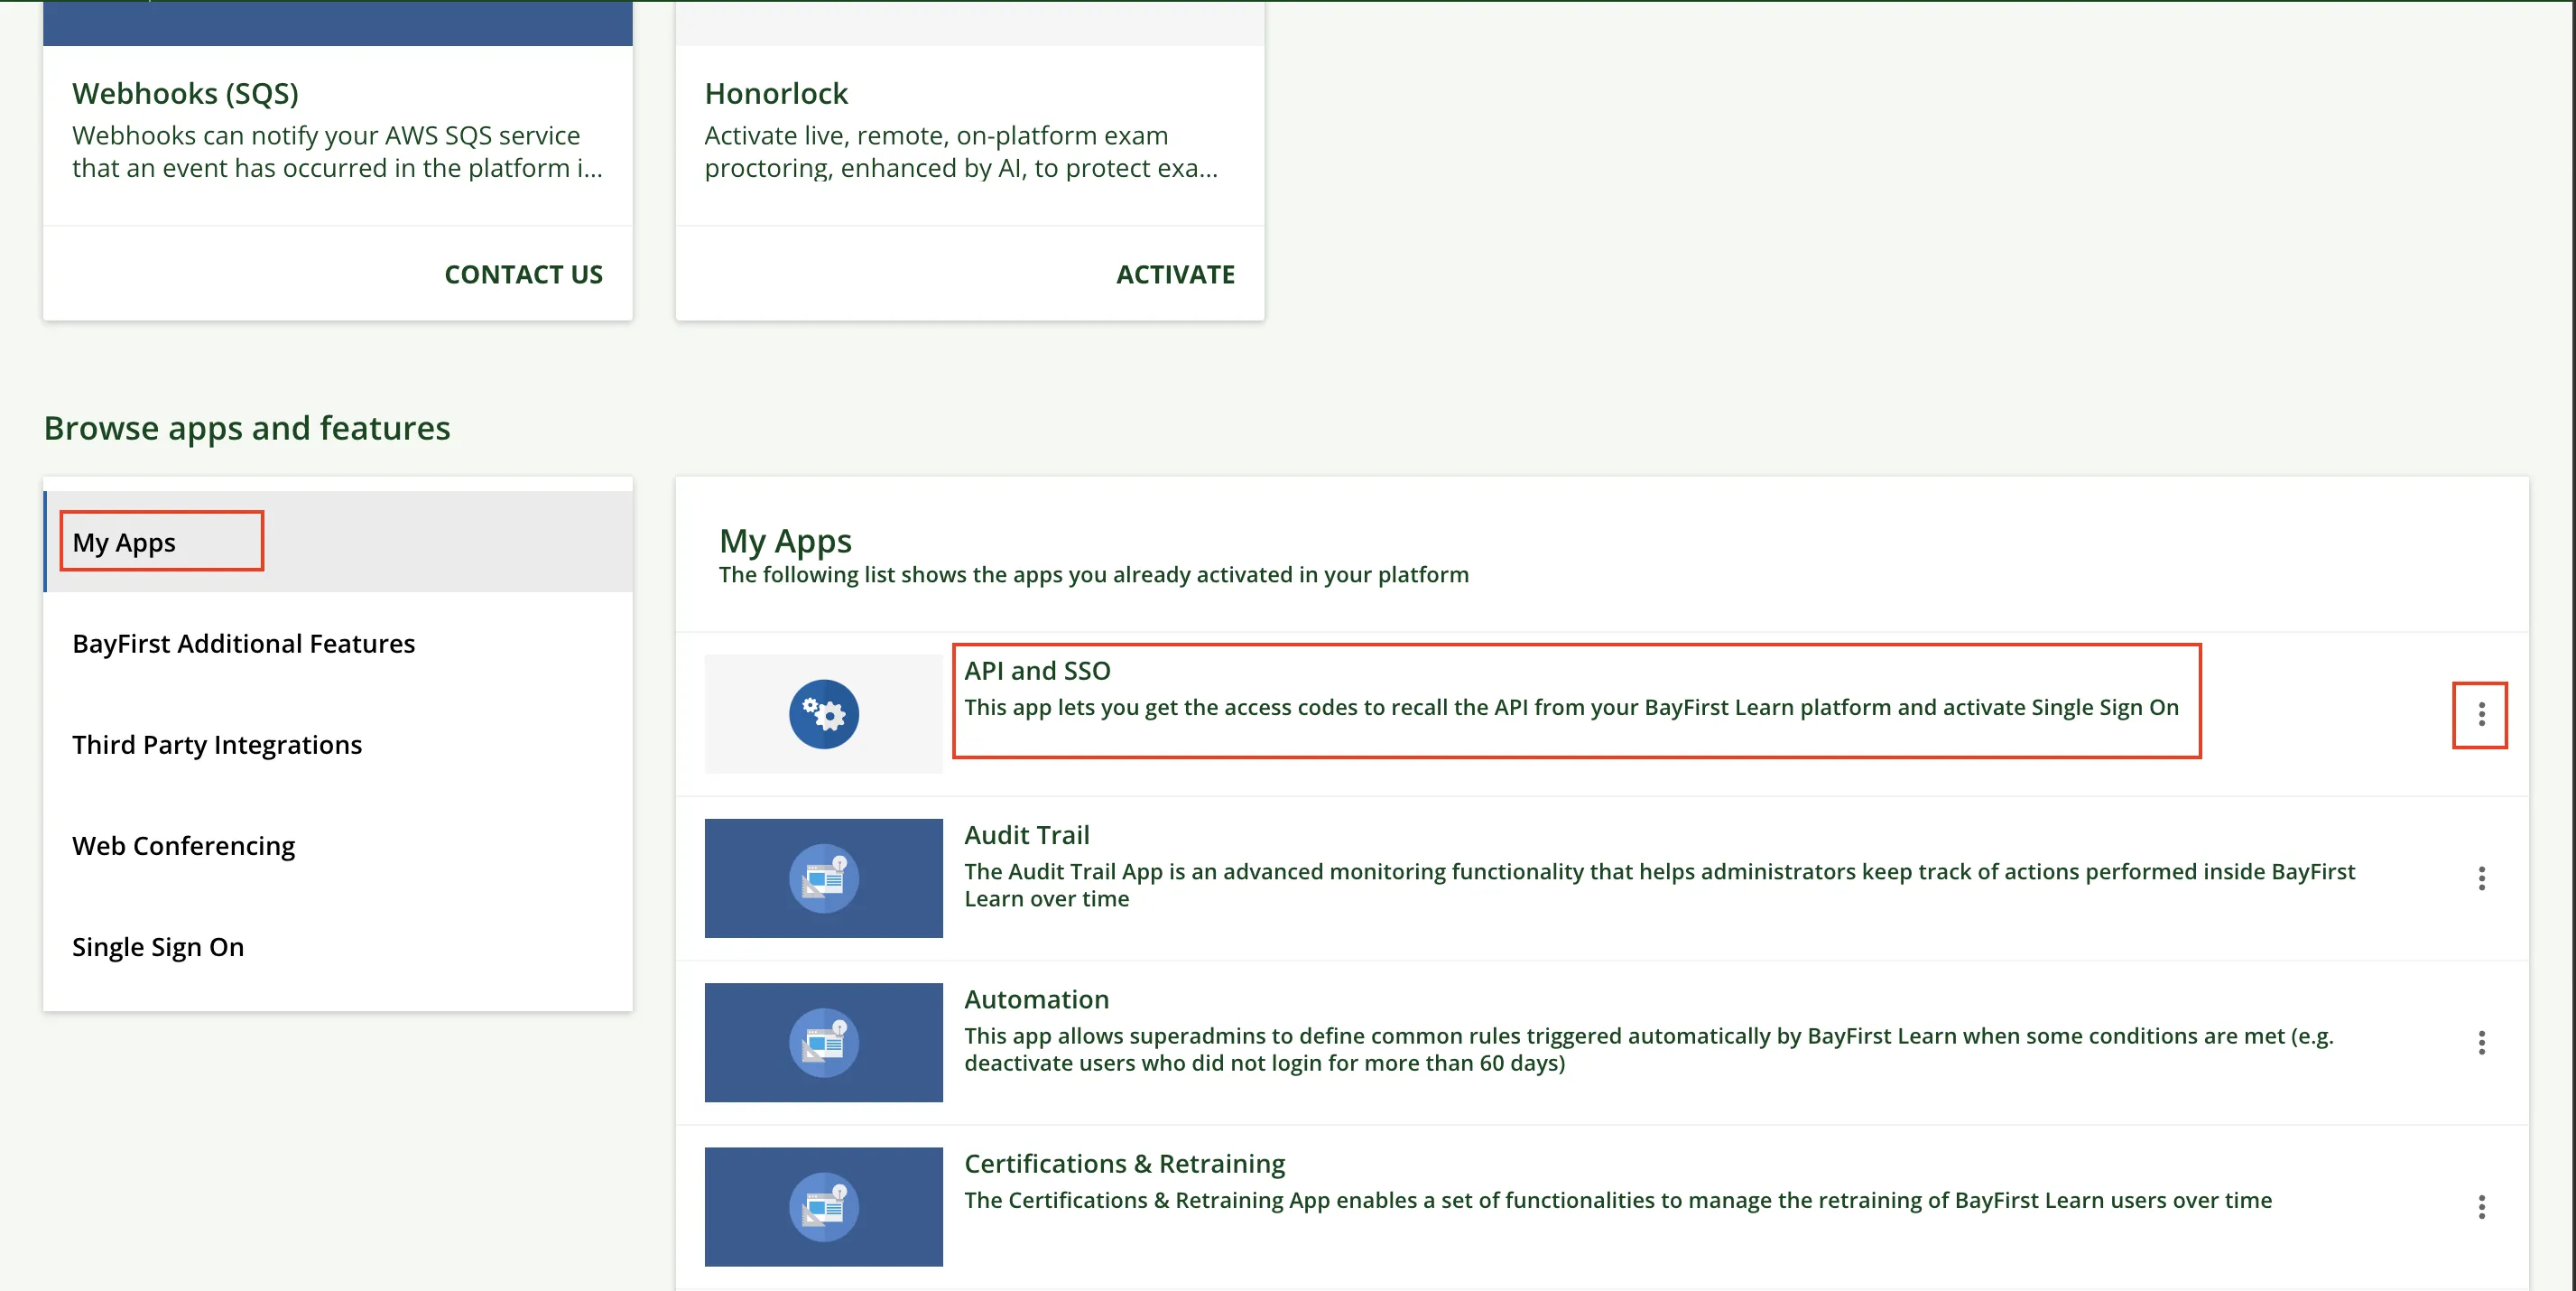 Figure 2. Activate the API and SSO app
How to create an OAuth app on Docebo
Once the API & SSO app is activated, API and SSO option will be visilbe under Apps and feature tab on Admin menu.
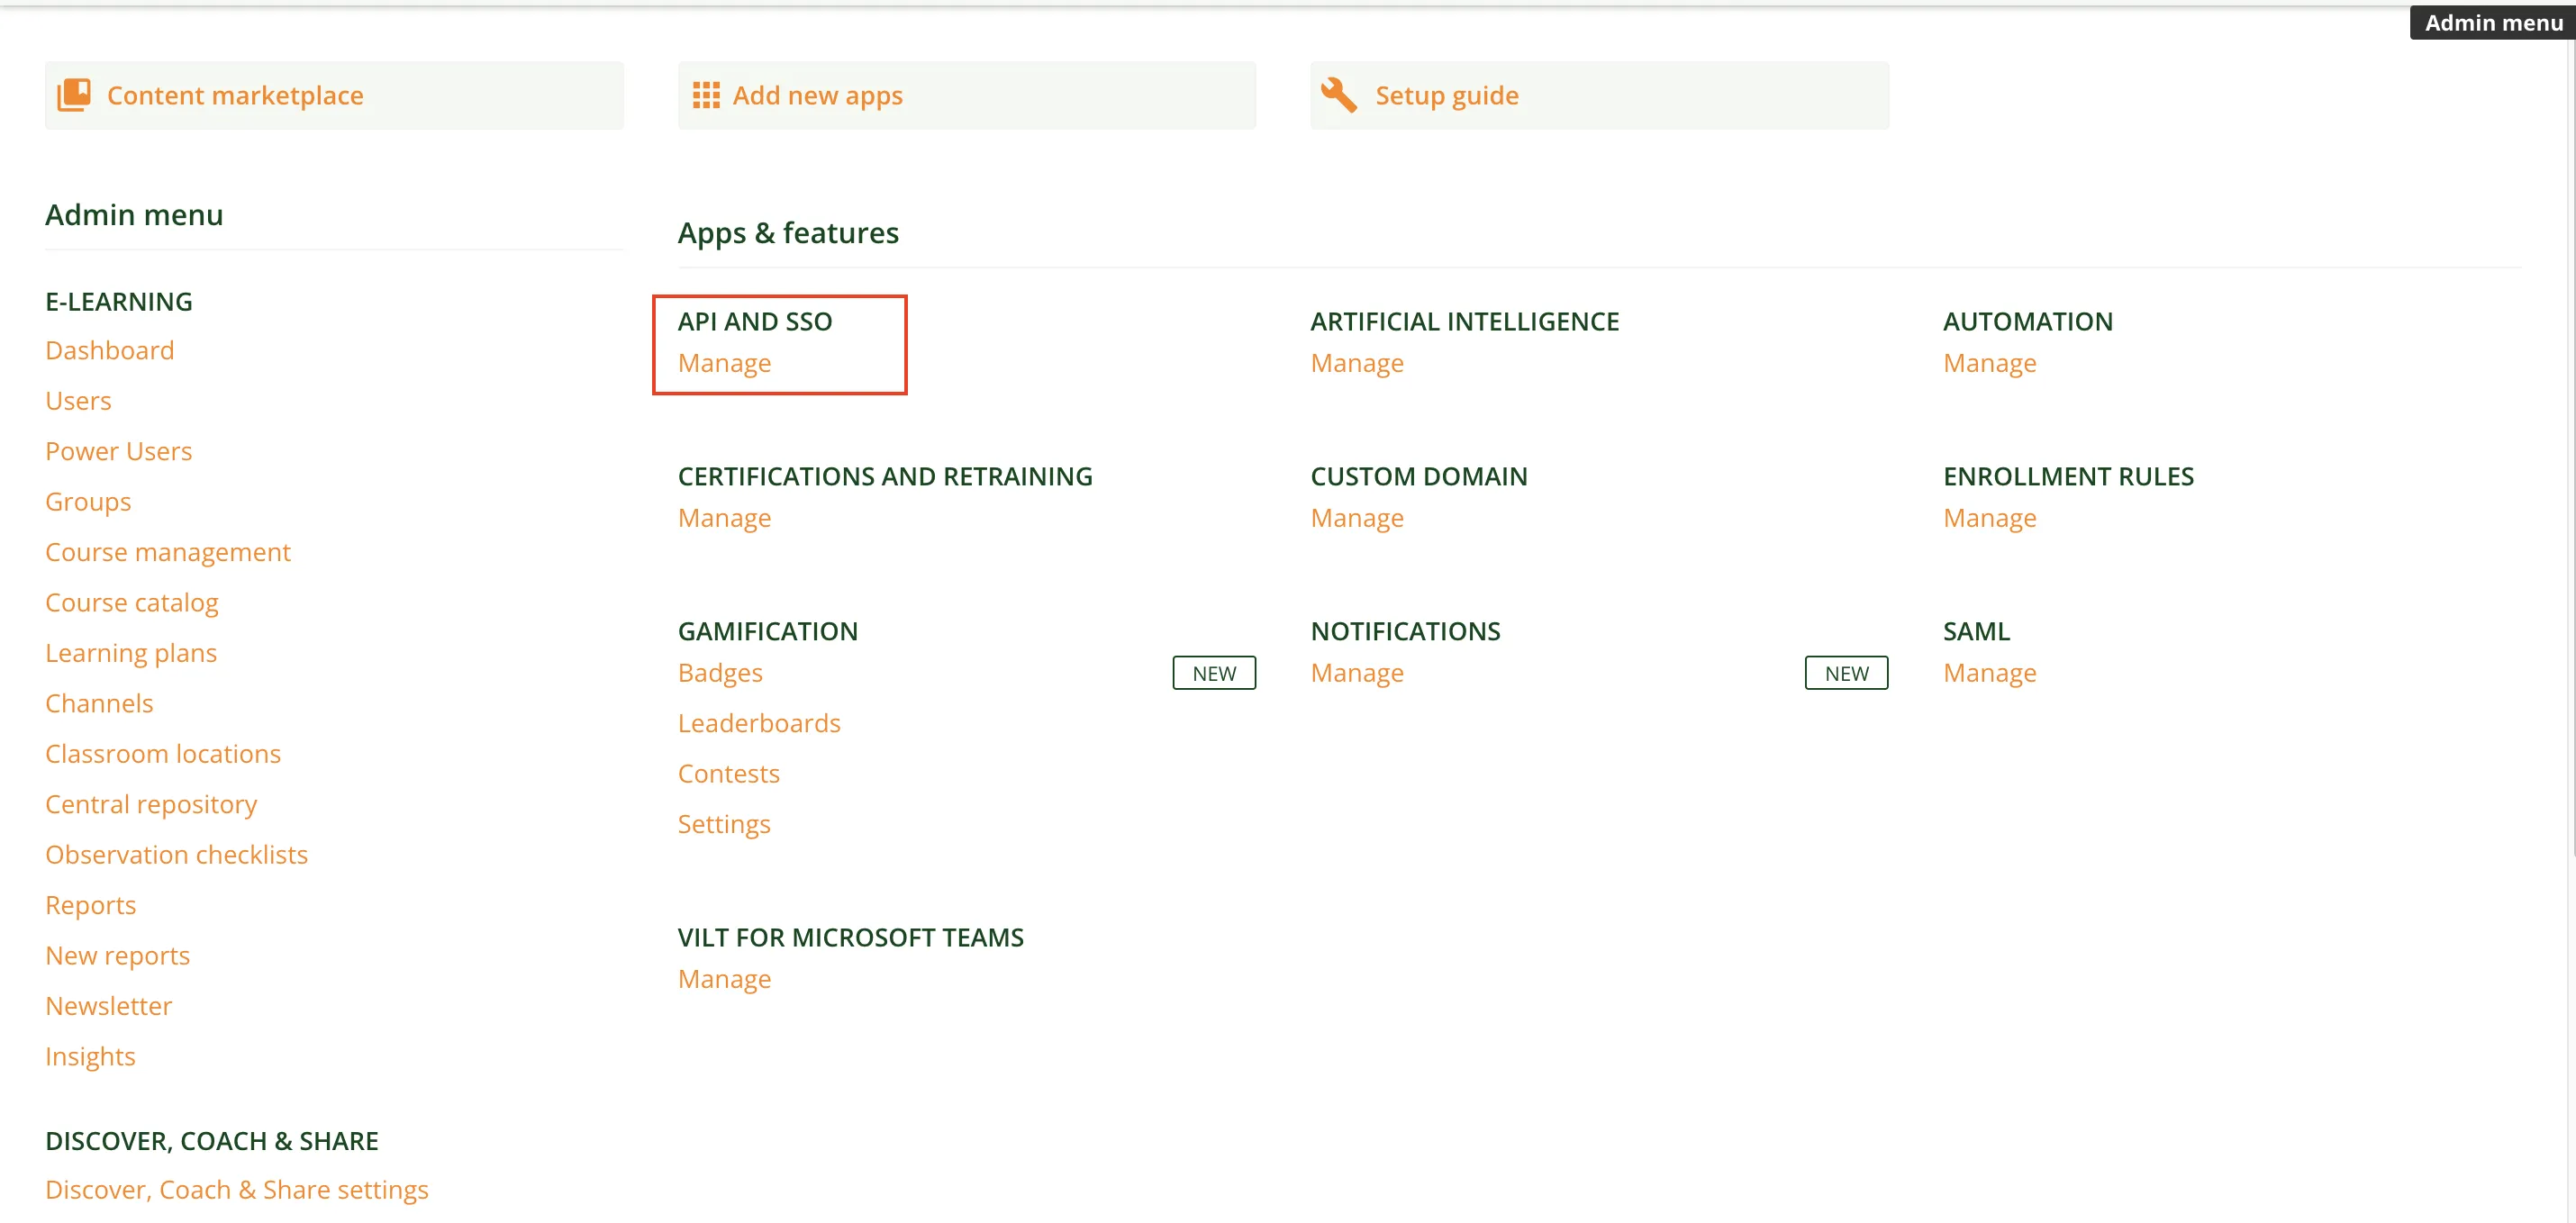
- Click on
Manageunder the API and SSO. -
Select the
API Credentialsoption andAdd OAuth2 appbutton.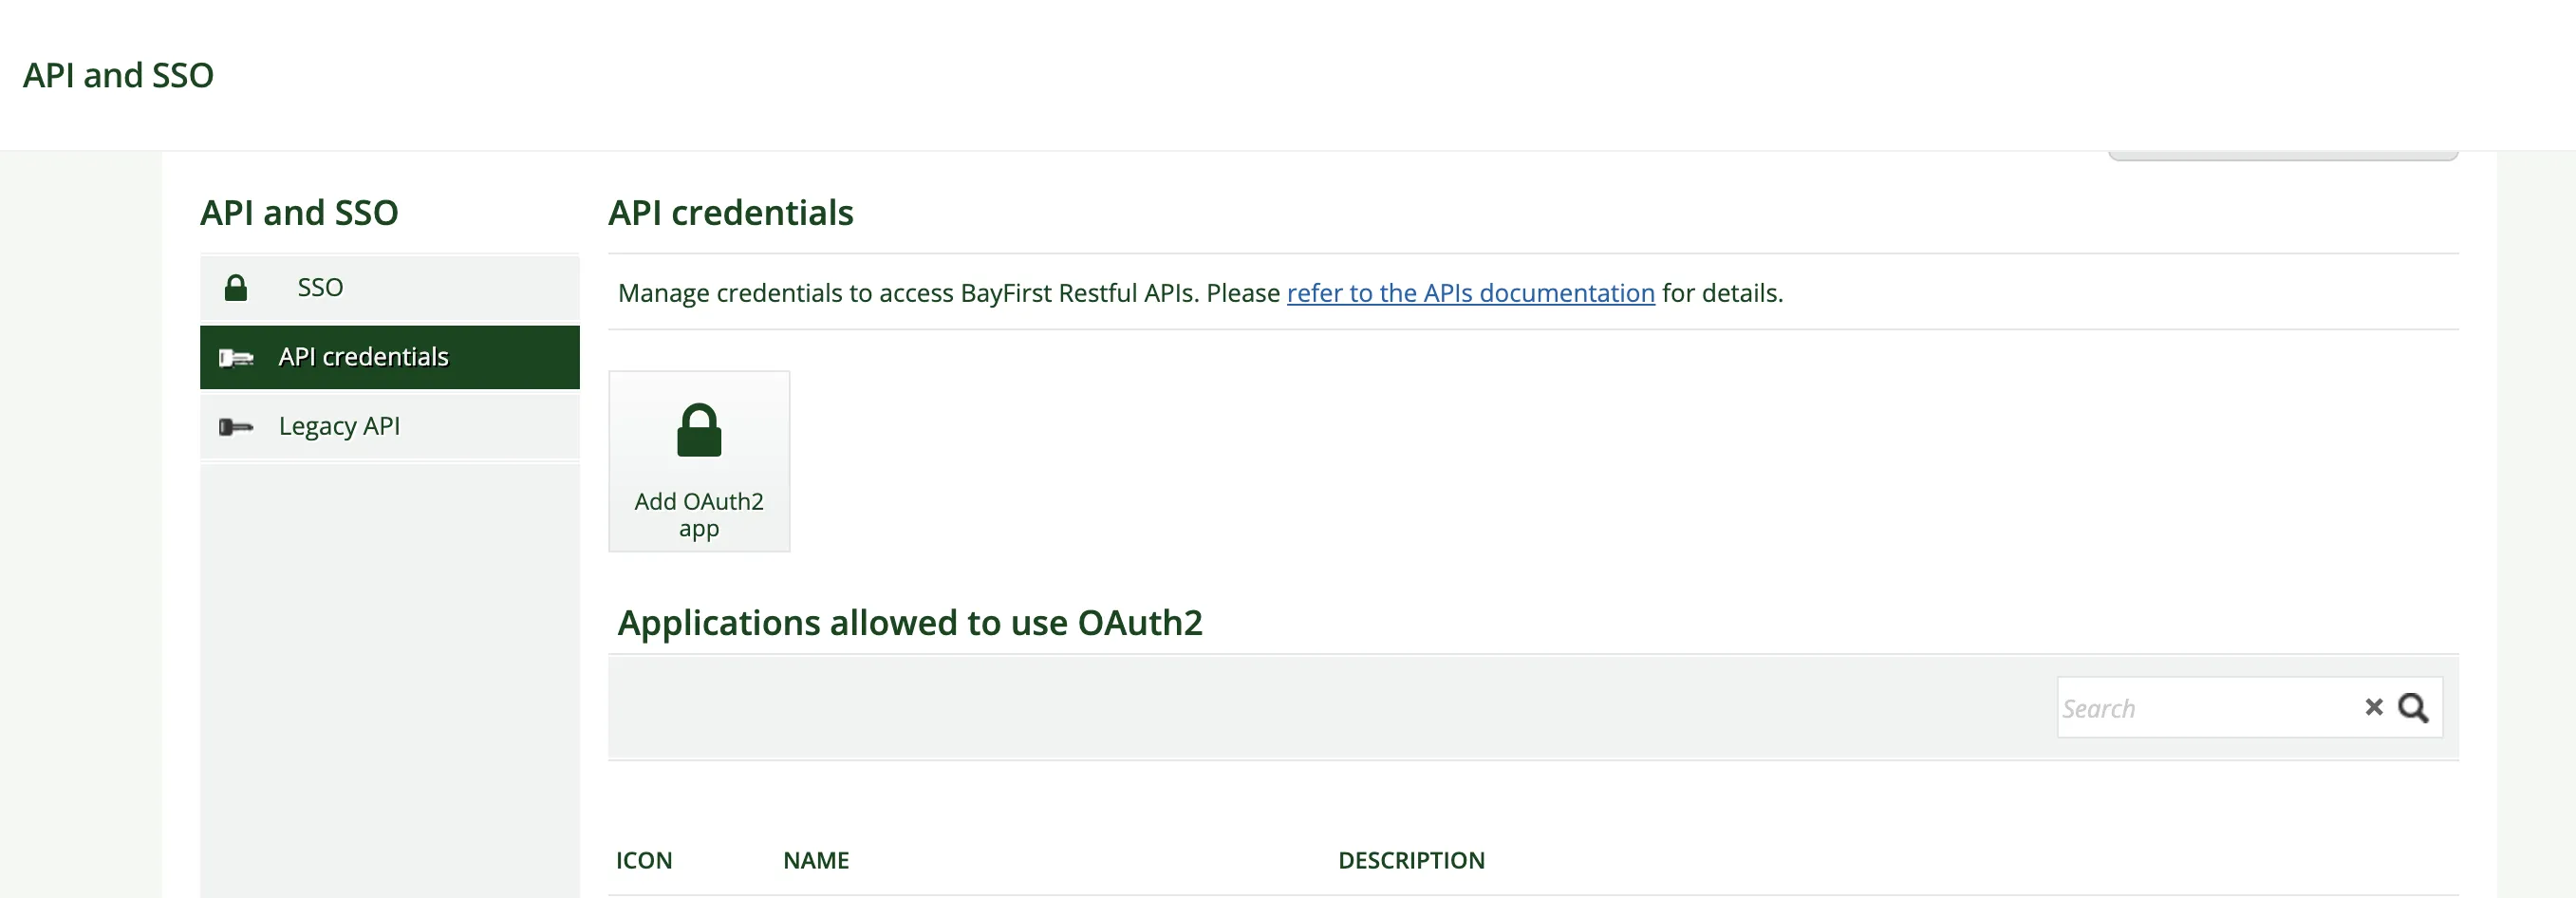 Figure 4. Add OAuth app on Docebo
 -
Give the name to your OAuth app, app description. The Client ID should be provided as a unique string with the pattern like
cb52388fbbe430c4637be. - Enter the URL
https://hire2retire.robomq.io/api/auth/callback/Doceboin the Redirect URI field. -
Under the advanced setting, select
Authorization code + implicit grantauthentication mechanism. Click on Confirm button.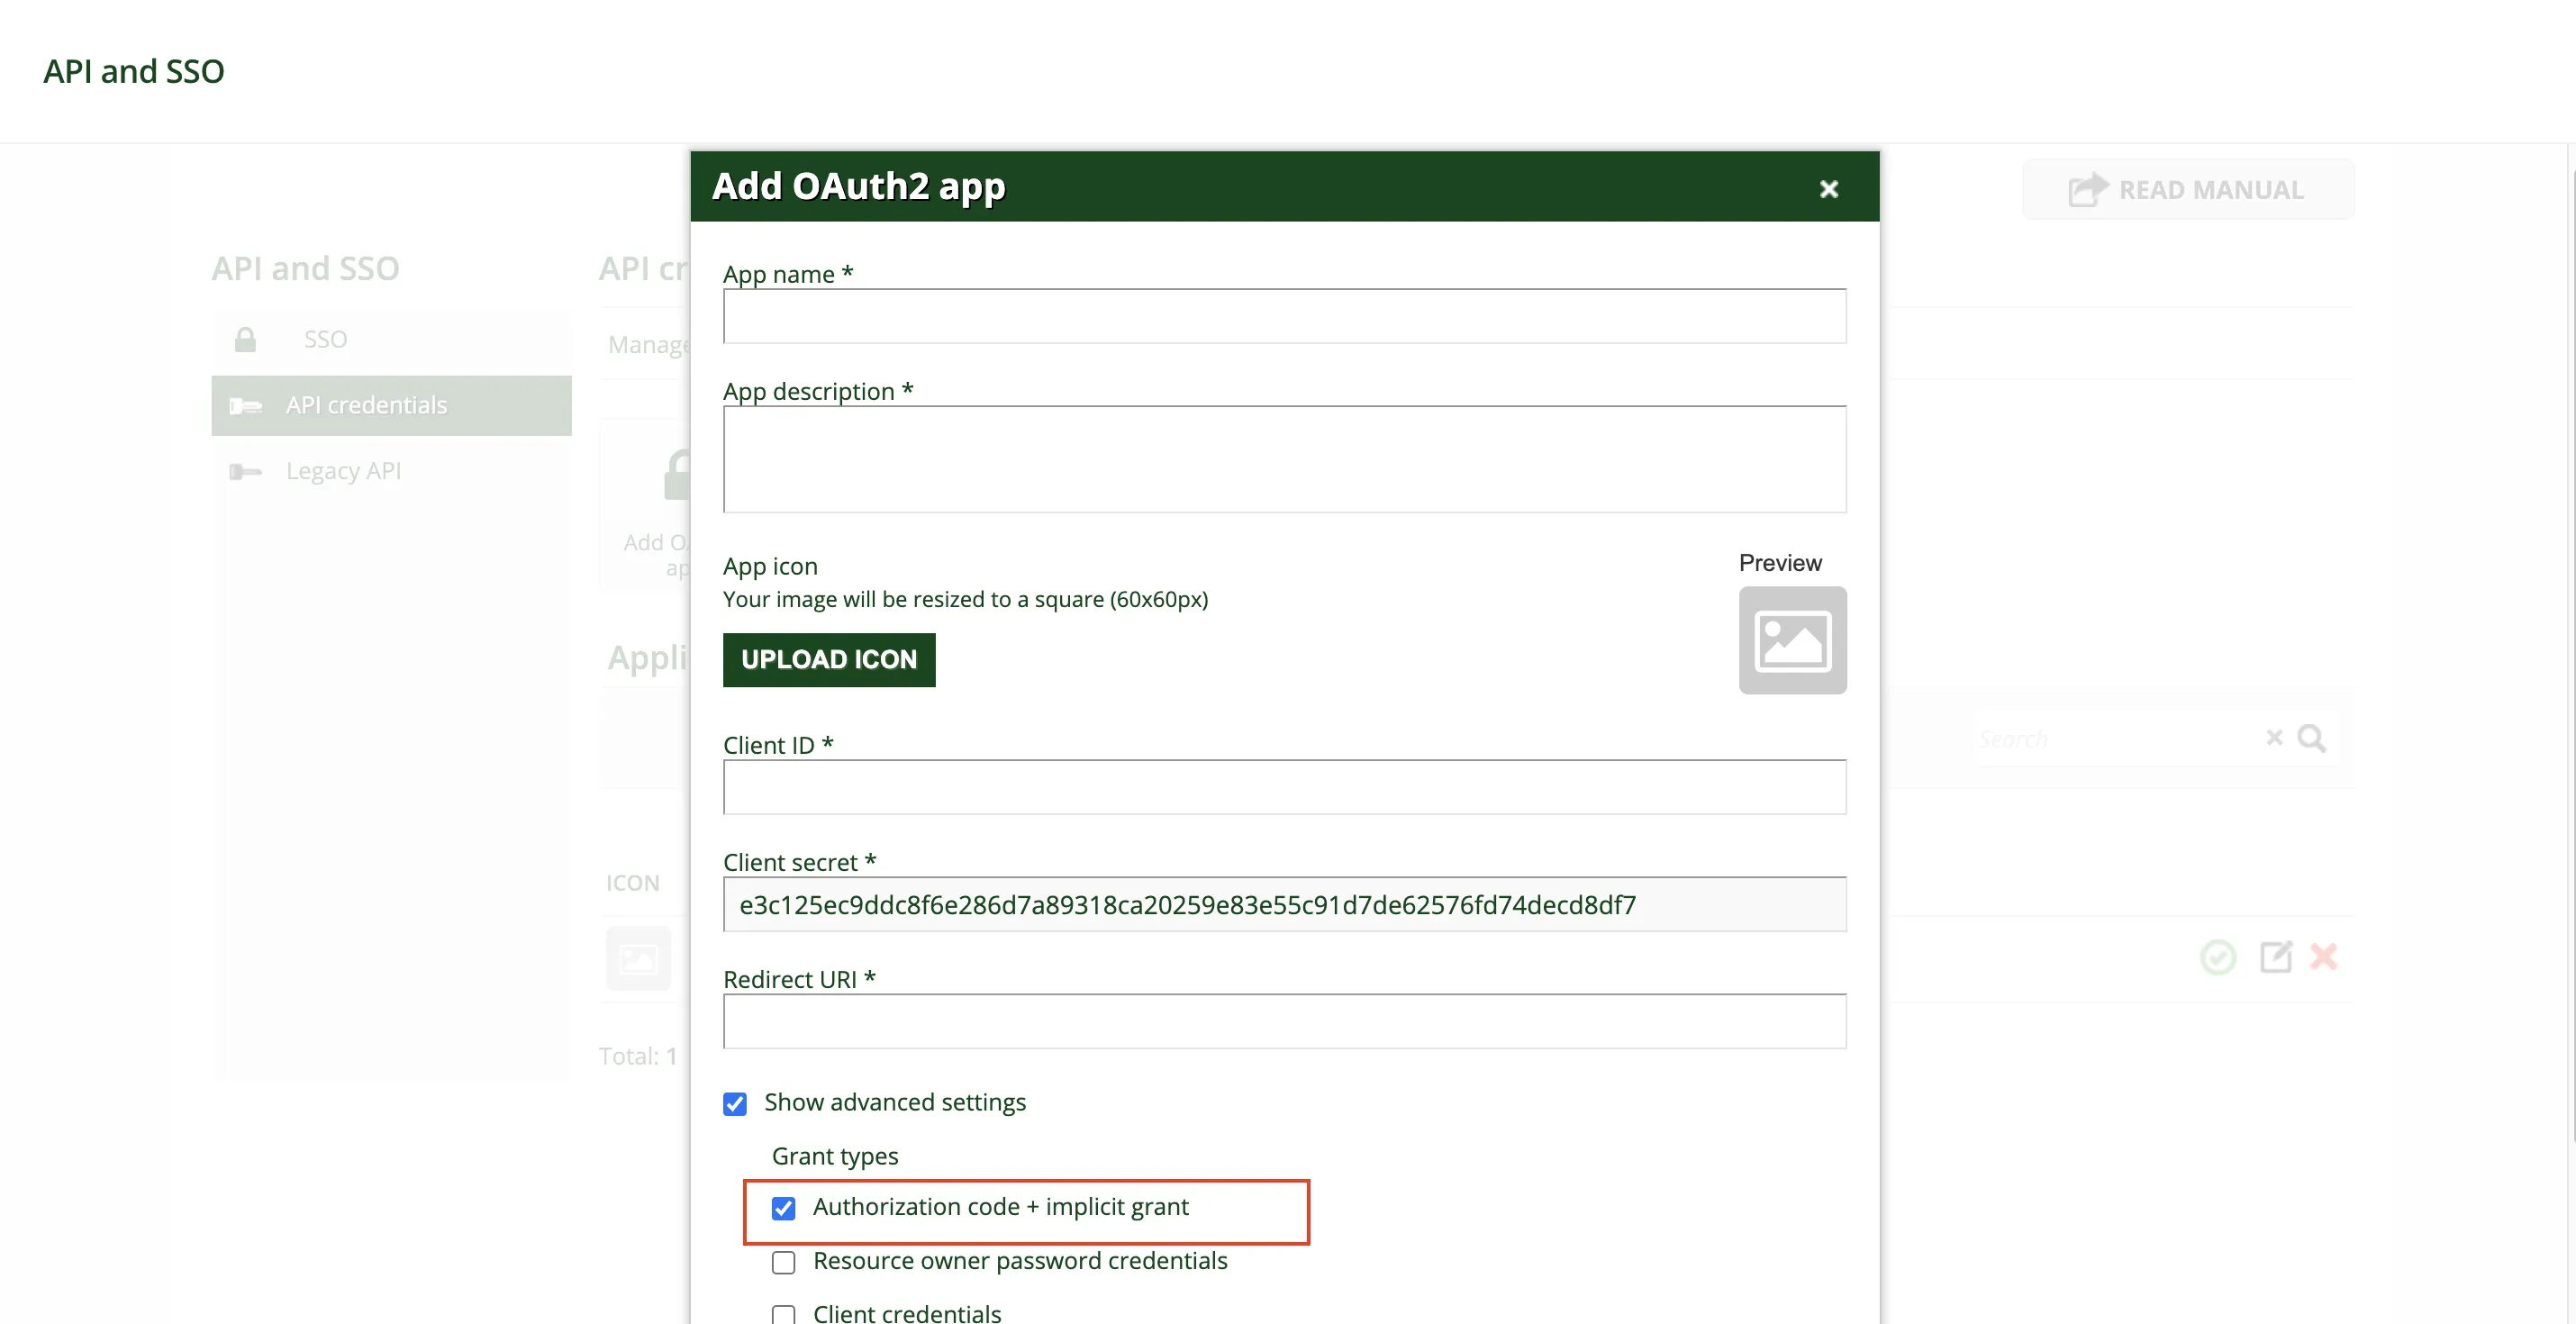 Figure 5. Obtaining the Client ID and Client Secret
 -
After the app creation, please make sure that the app is in active state by observing the green icon next to app name.
Link Docebo Account on Hire2Retire
To establish the connection with Docebo, please enter the instance URL, client ID, and client secret. You will be redirected to Docebo login page where you need to enter your admin username and password.
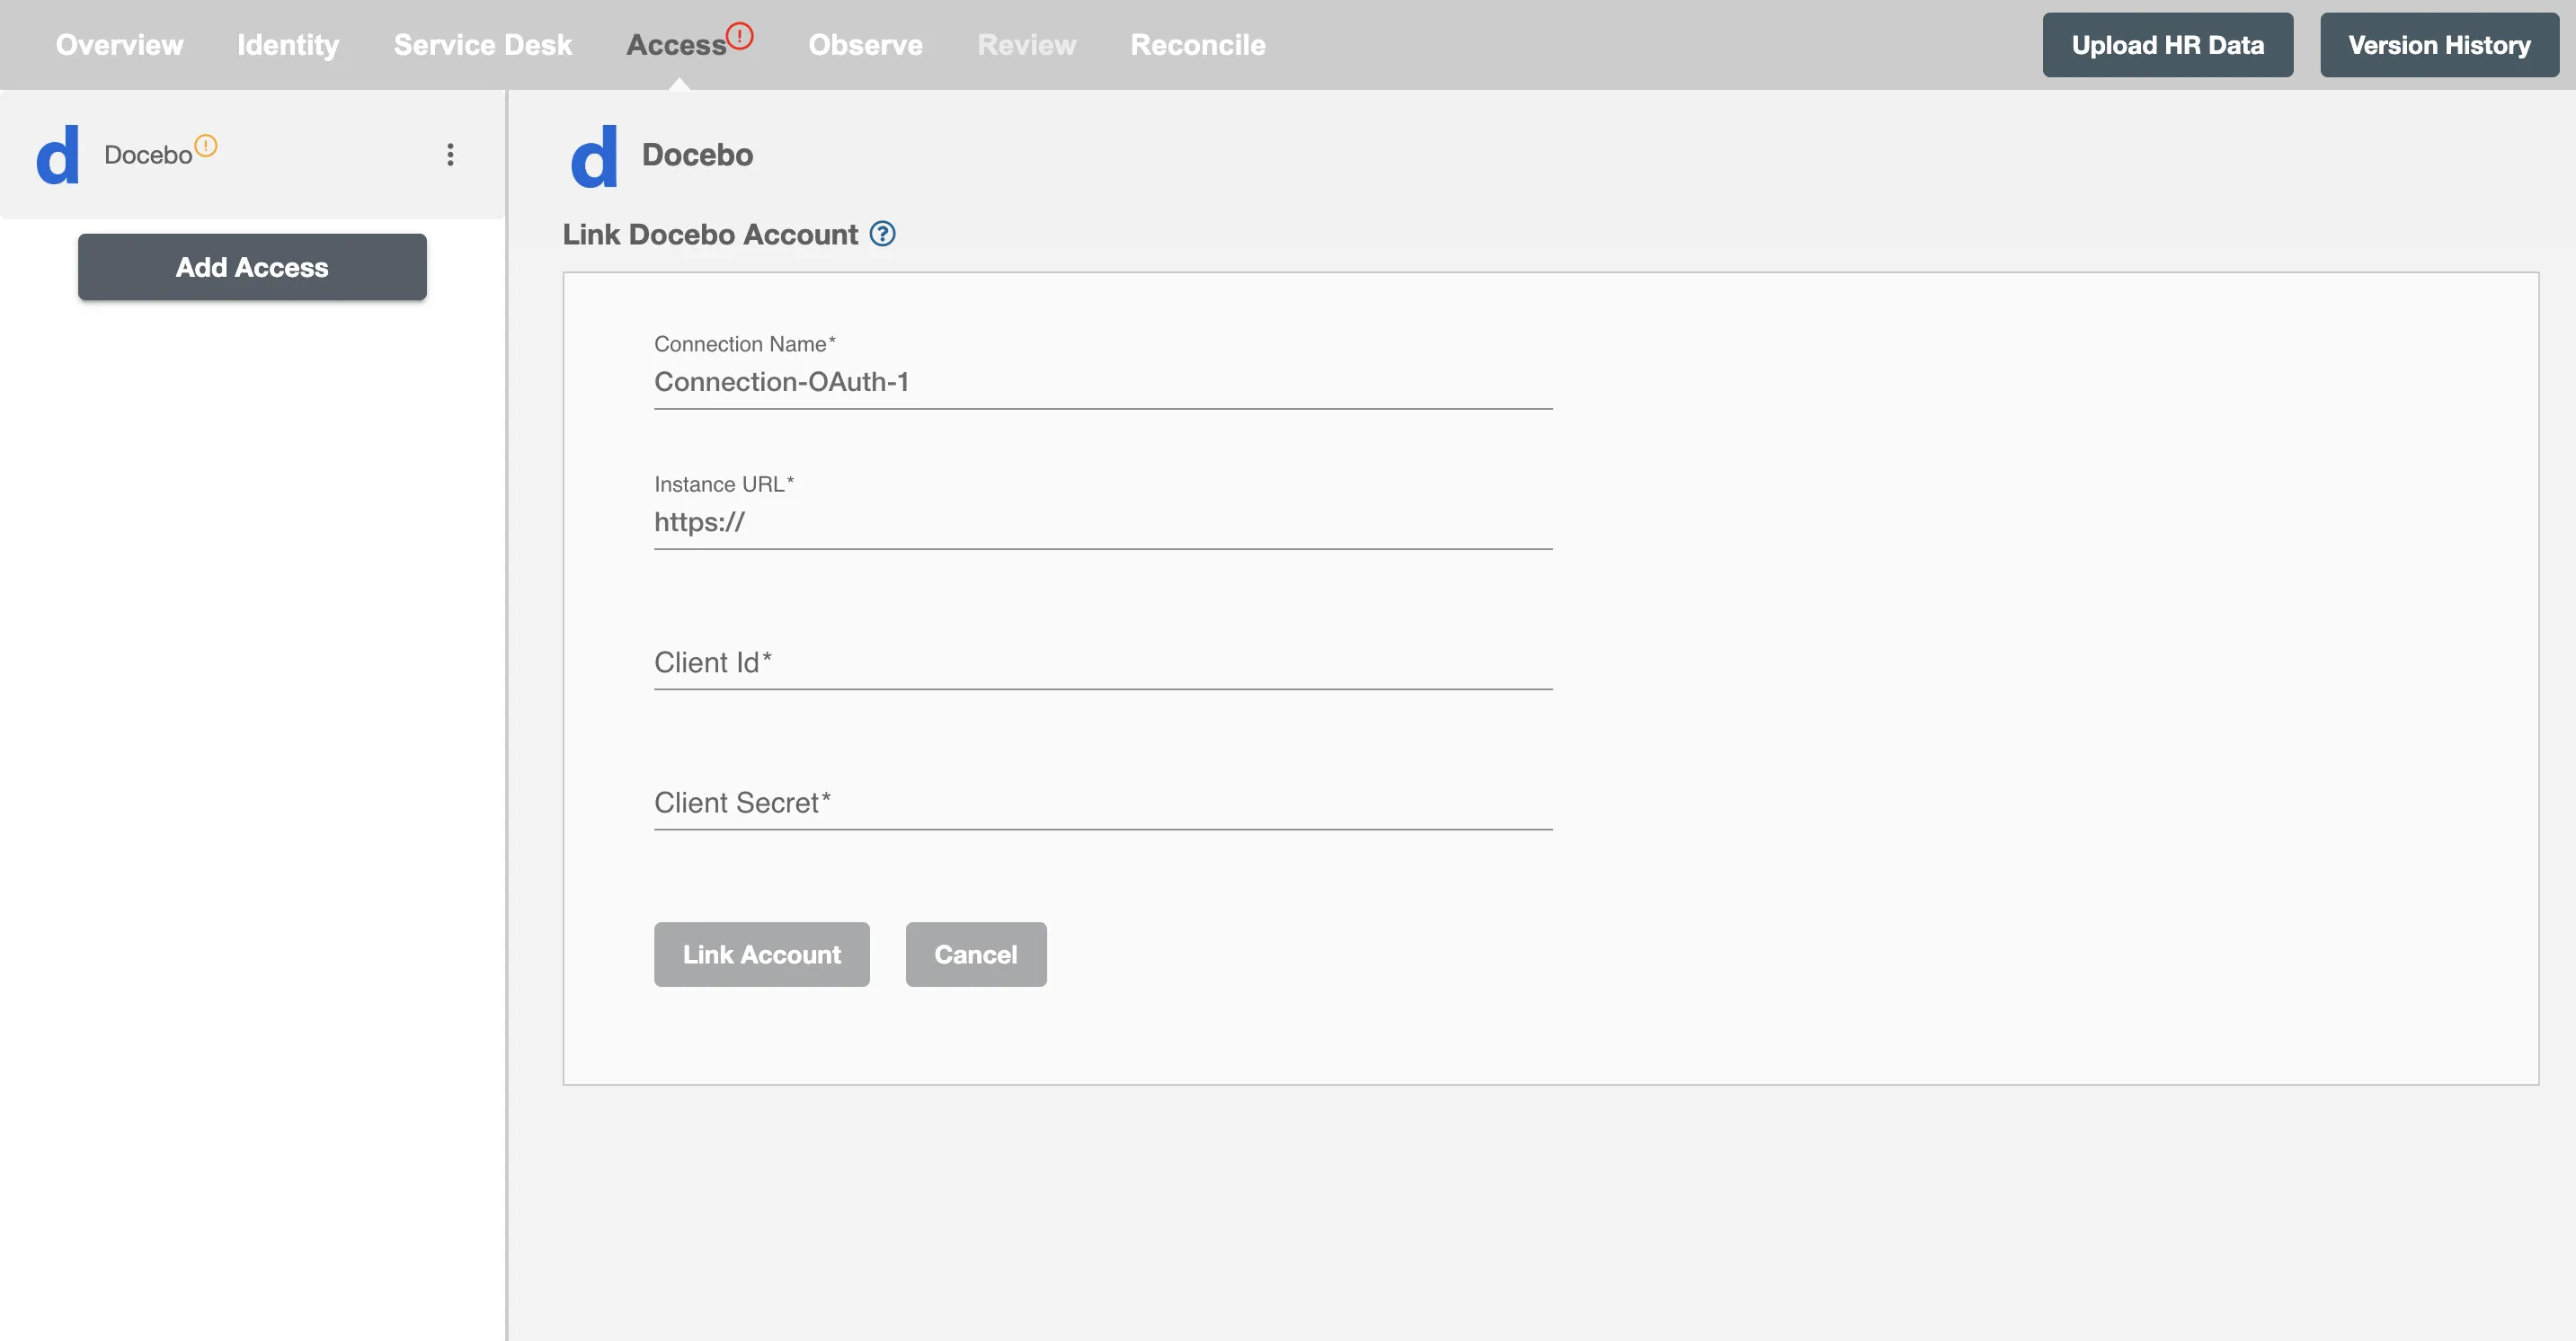
Once the connection is established successfully, then you can define the roles and mapping on Hire2Retire Access.