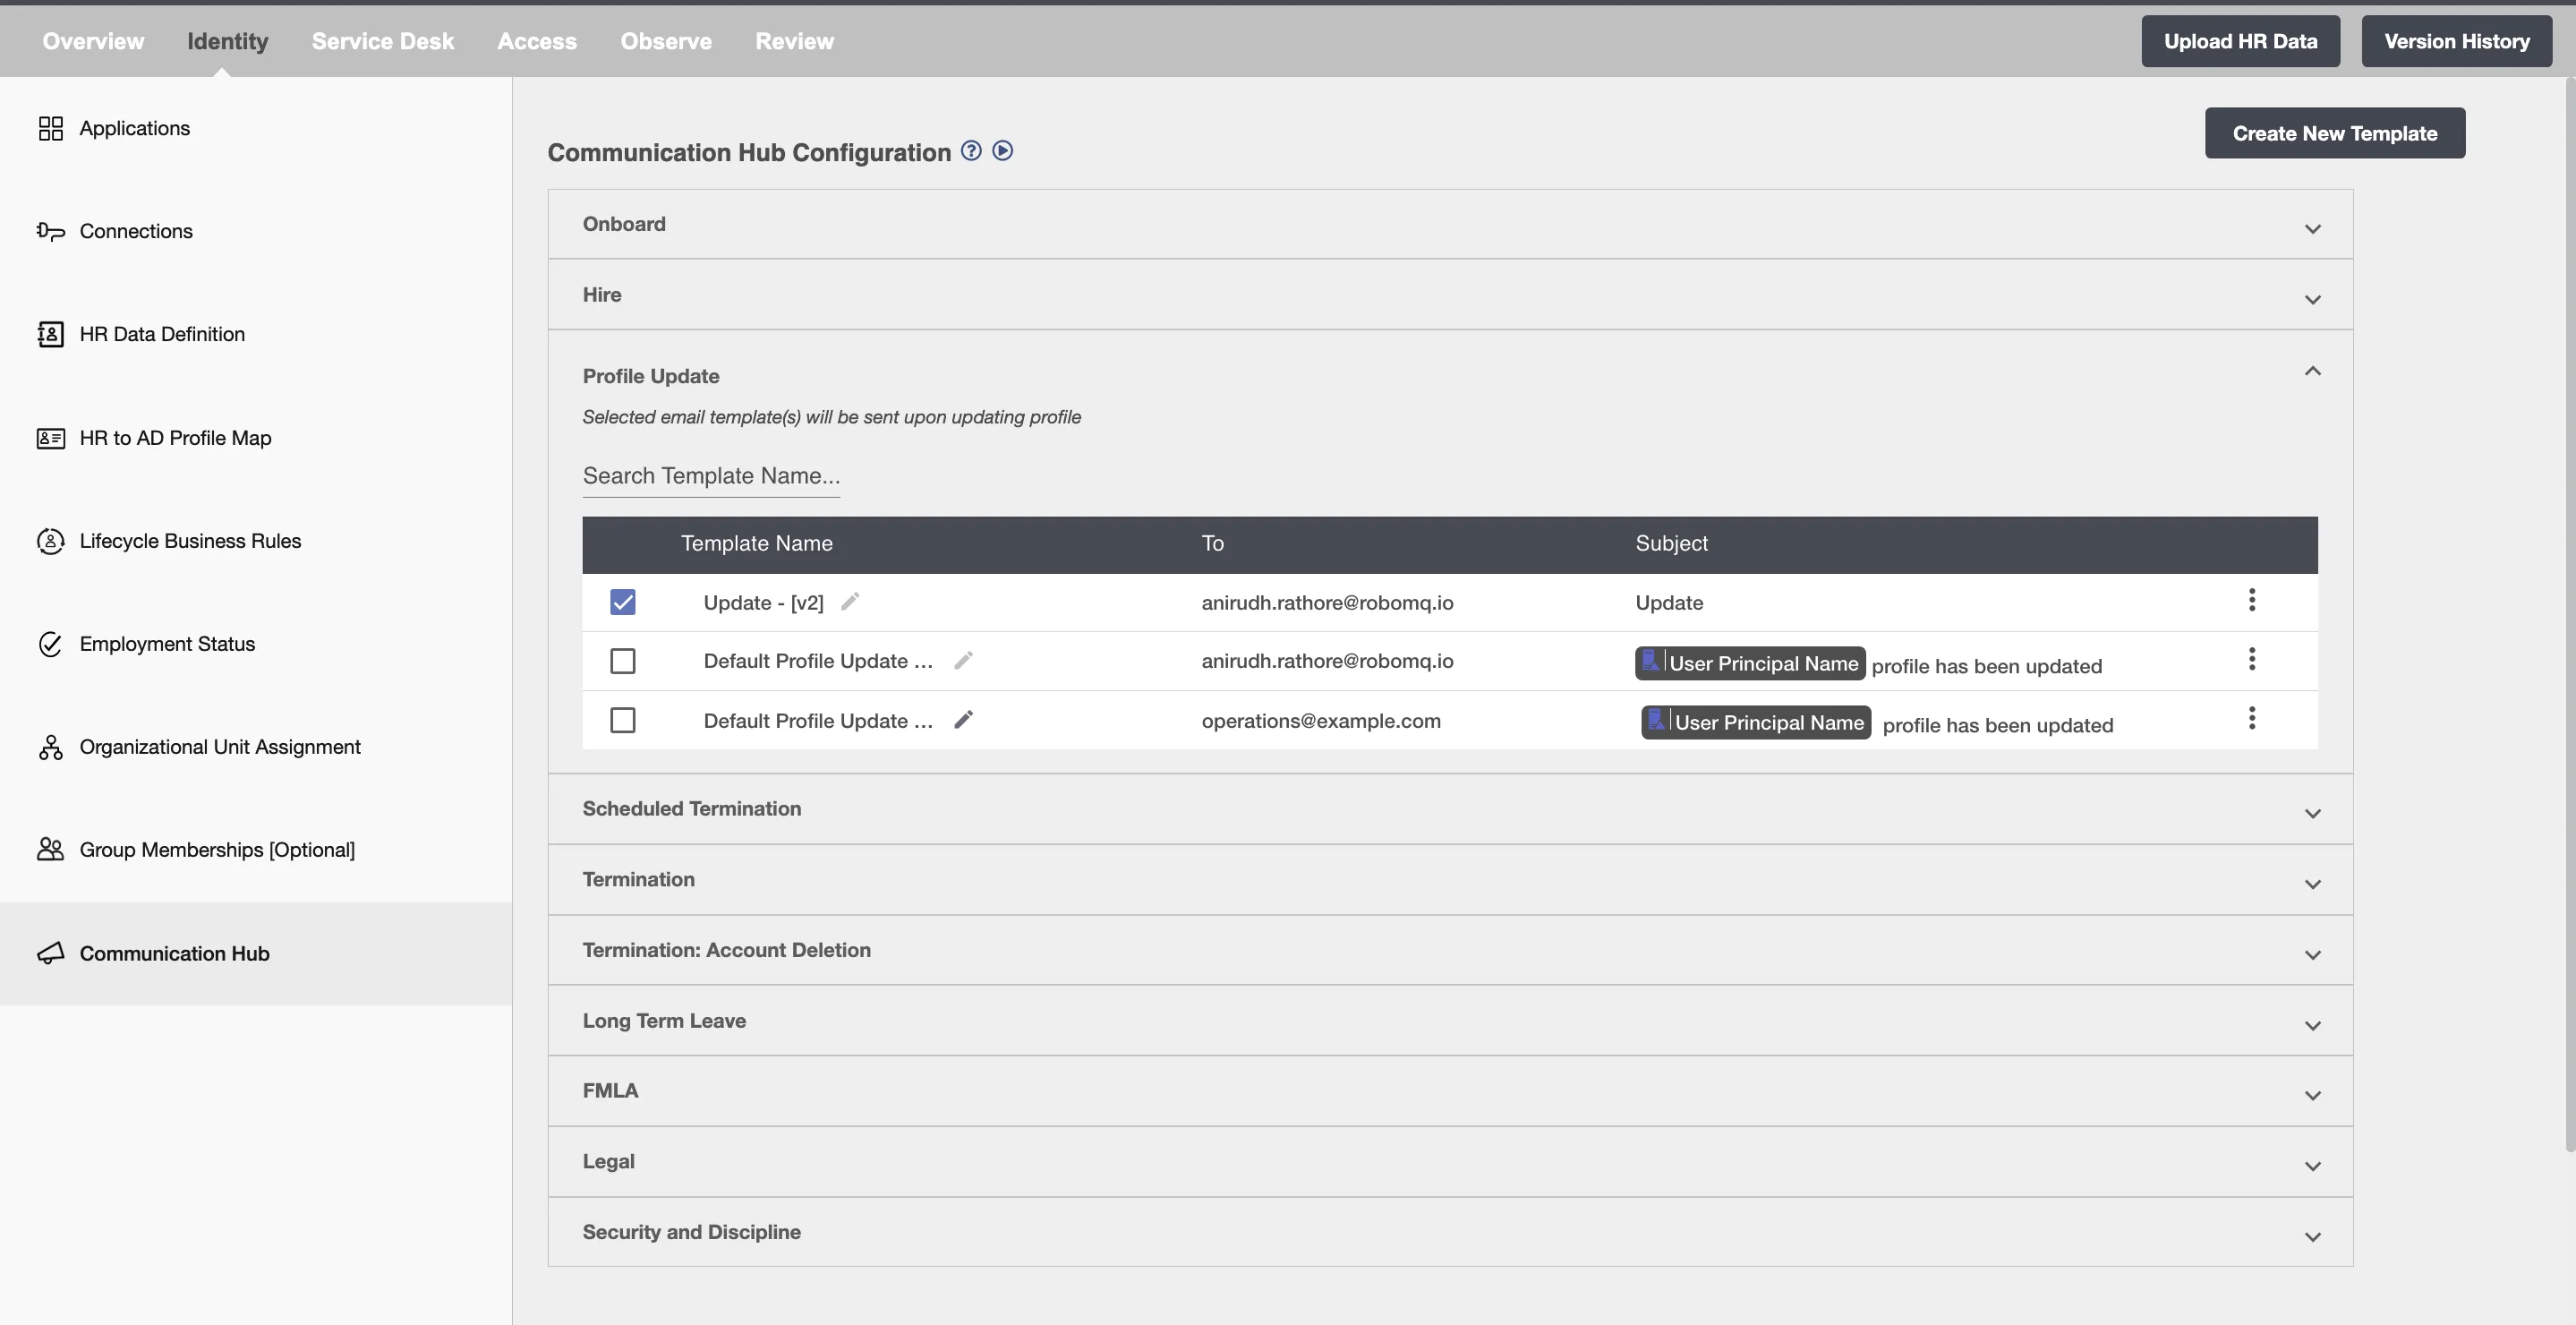
Communication Hub
Communication Hub is used to create custom email templates based on the lifecycle events that are performed such as Onboard, Hire, Profile Update, Role Transition, Scheduled Termination, Termination, Long Term Leave, FMLA, Legal Leave and Security and Discipline Leave.
Mail Templates allow you to use data from your Identity Management System (Active Directory, Entra ID or Google Workspace) as well as from different HR attributes to create an email subject or body.
An email template can be used in multiple flows. You can also use multiple email templates for a lifecycle event.
Creating an Email Template
You can create an email template for different Identity Management Systems and Lifecycle events.
-
Step 1: On this step, click on the
Create New Templatebutton on top, enter the Template Name, and select the lifecycle event(s) for which you want to create the template. An email template can be created for multiple lifecycle event(s). You can check toDefine a condition to send email based on employee attributeswhere the condition(s) will be defined by Directory attributes such as the first selected attribute, then operation for it, and then defining the condition according to requirement. You will receive mail when the condition(s) of attributes are satisfied.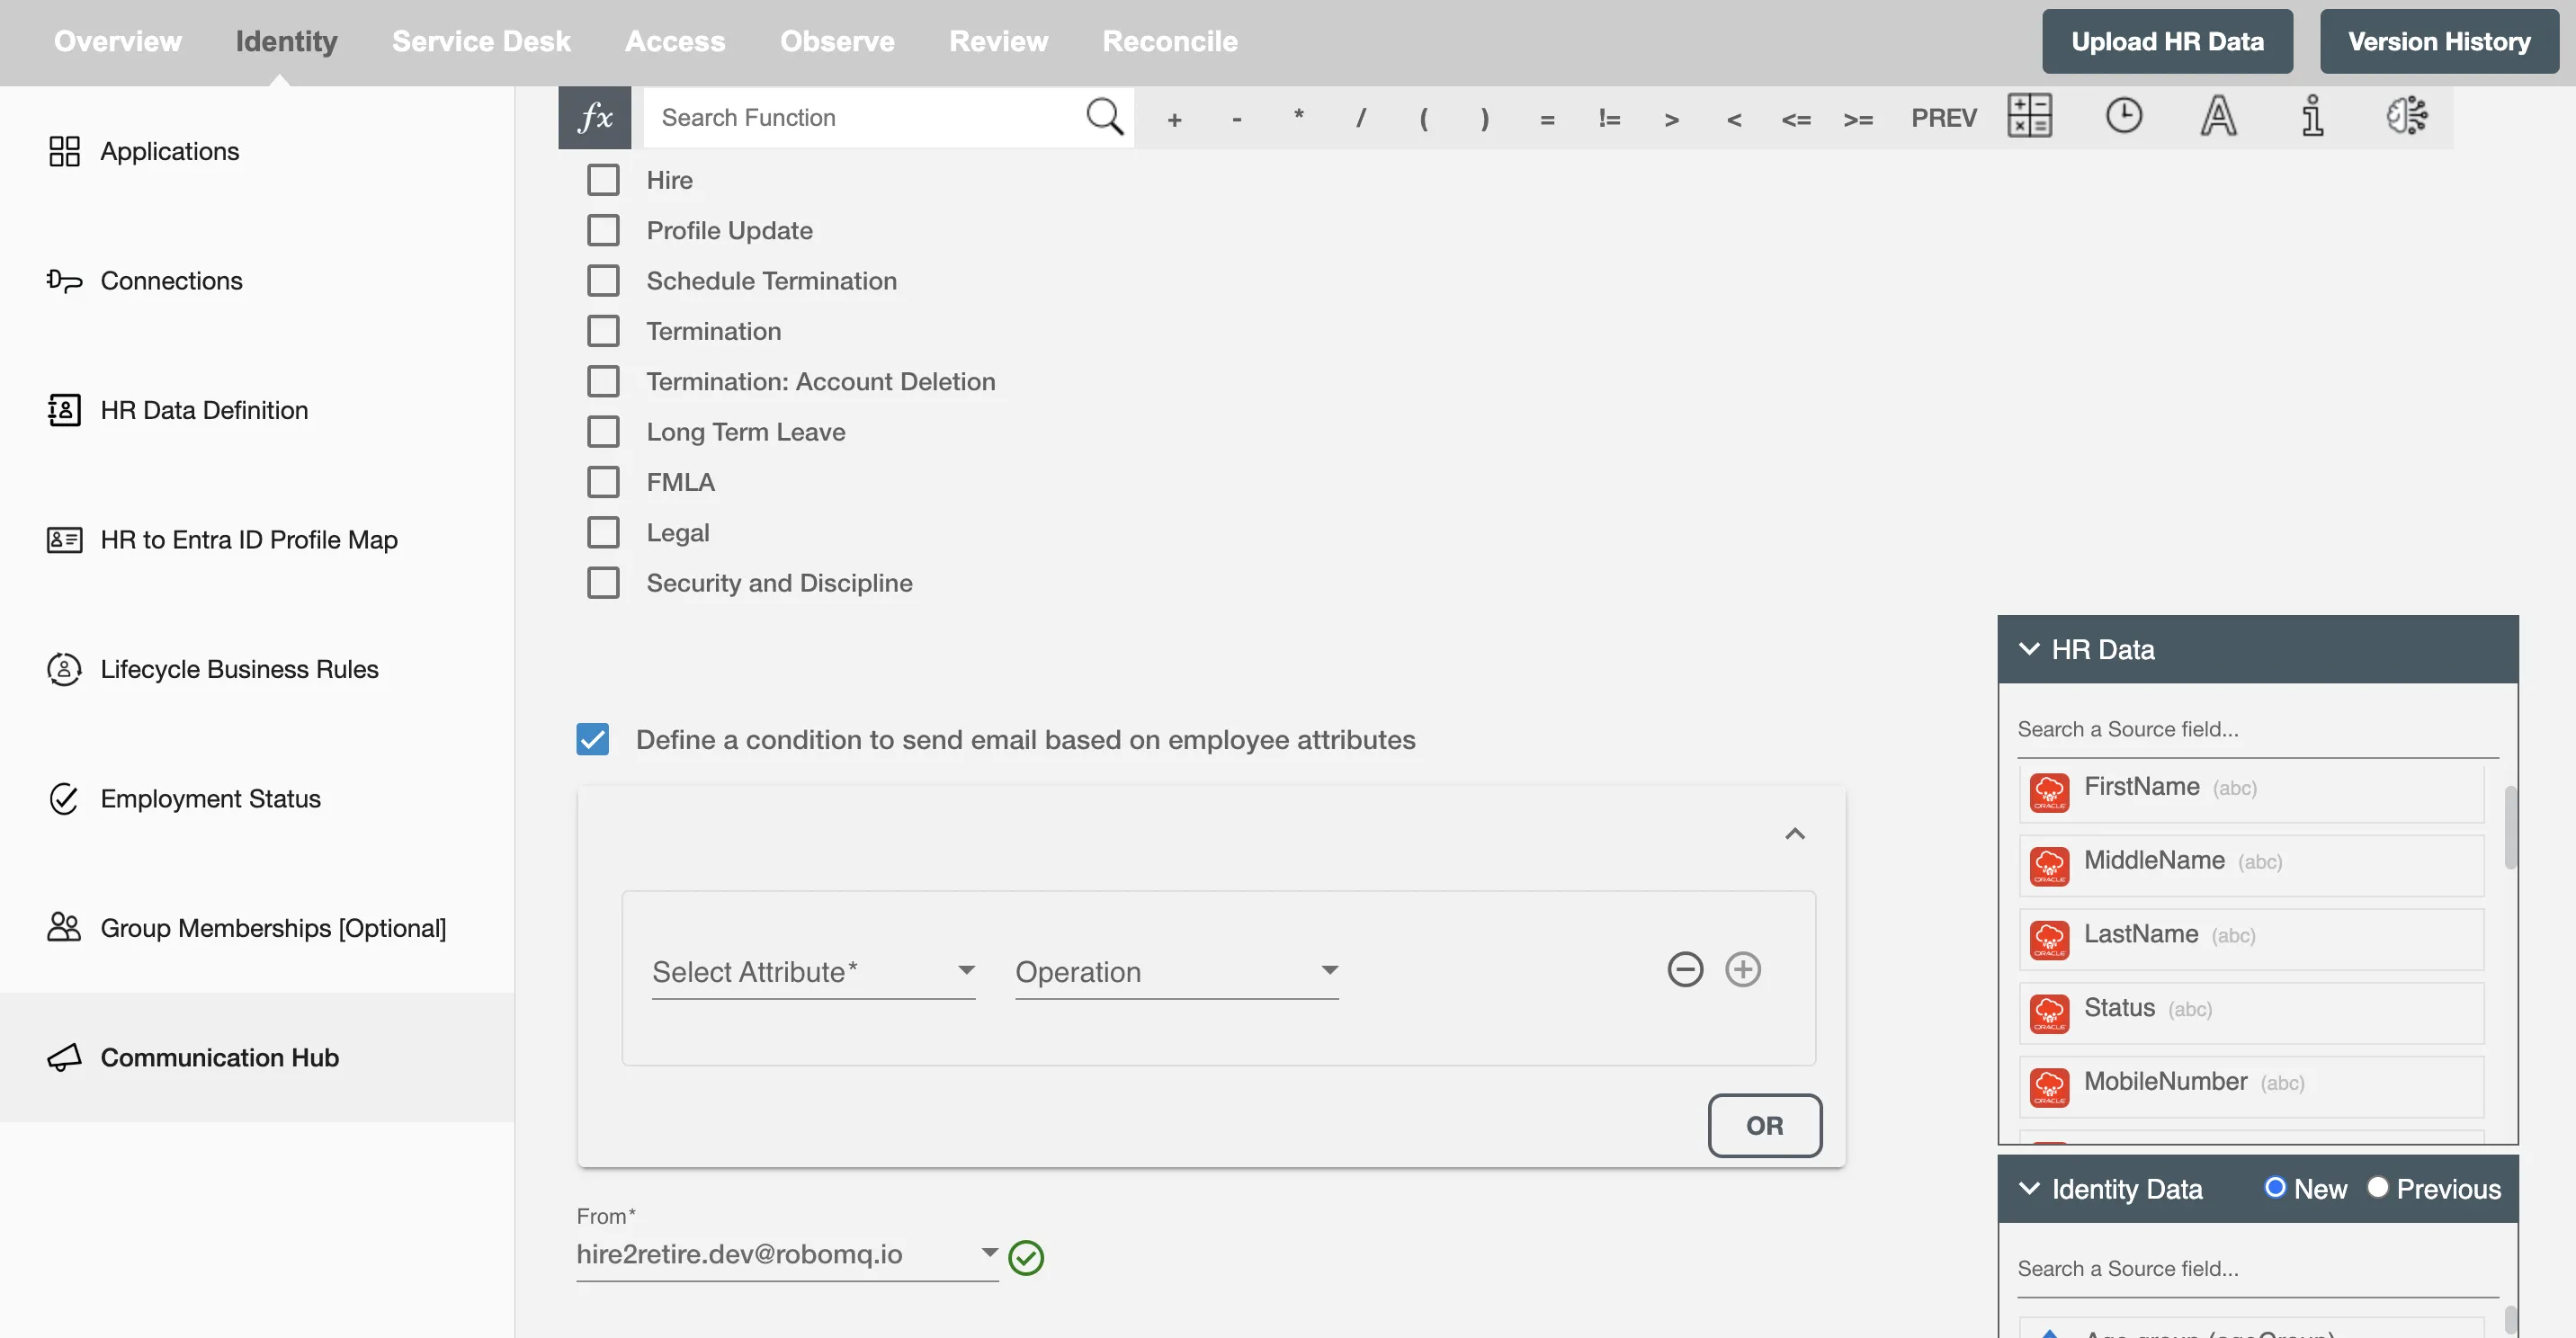 Figure 2. Creating a new Template
 -
Step 2: Fill in the email format. The From field is by default
[email protected]and disabled, Learn more about adding a sender. You can fill multiple comma-seperated values in To, cc, and Bcc. You can also check theNotify Managercheckbox if they want to send mail to the manager. Note that it is mandatory to fill either one of two fields, i.e.,ToorNotify Manger. TheReply tofield signifies the email of a person who should get a reply if someone replies to an email sent from[email protected]. Every field supports mapping from the mapping table available. -
Step 3: The "Enable Email Encryption" feature ensures that your emails are protected by applying advanced encryption techniques, enhancing privacy and security when communicating sensitive information. When this option is enabled, you can choose between two encryption methods:
-
Encrypt-Only : This option applies encryption to the email content, ensuring that only authorized recipients can access and view the message. It does not impose restrictions on how the recipient can interact with the email.
-
Do Not Forward : This option applies encryption and additional restrictions to prevent the recipient from forwarding.
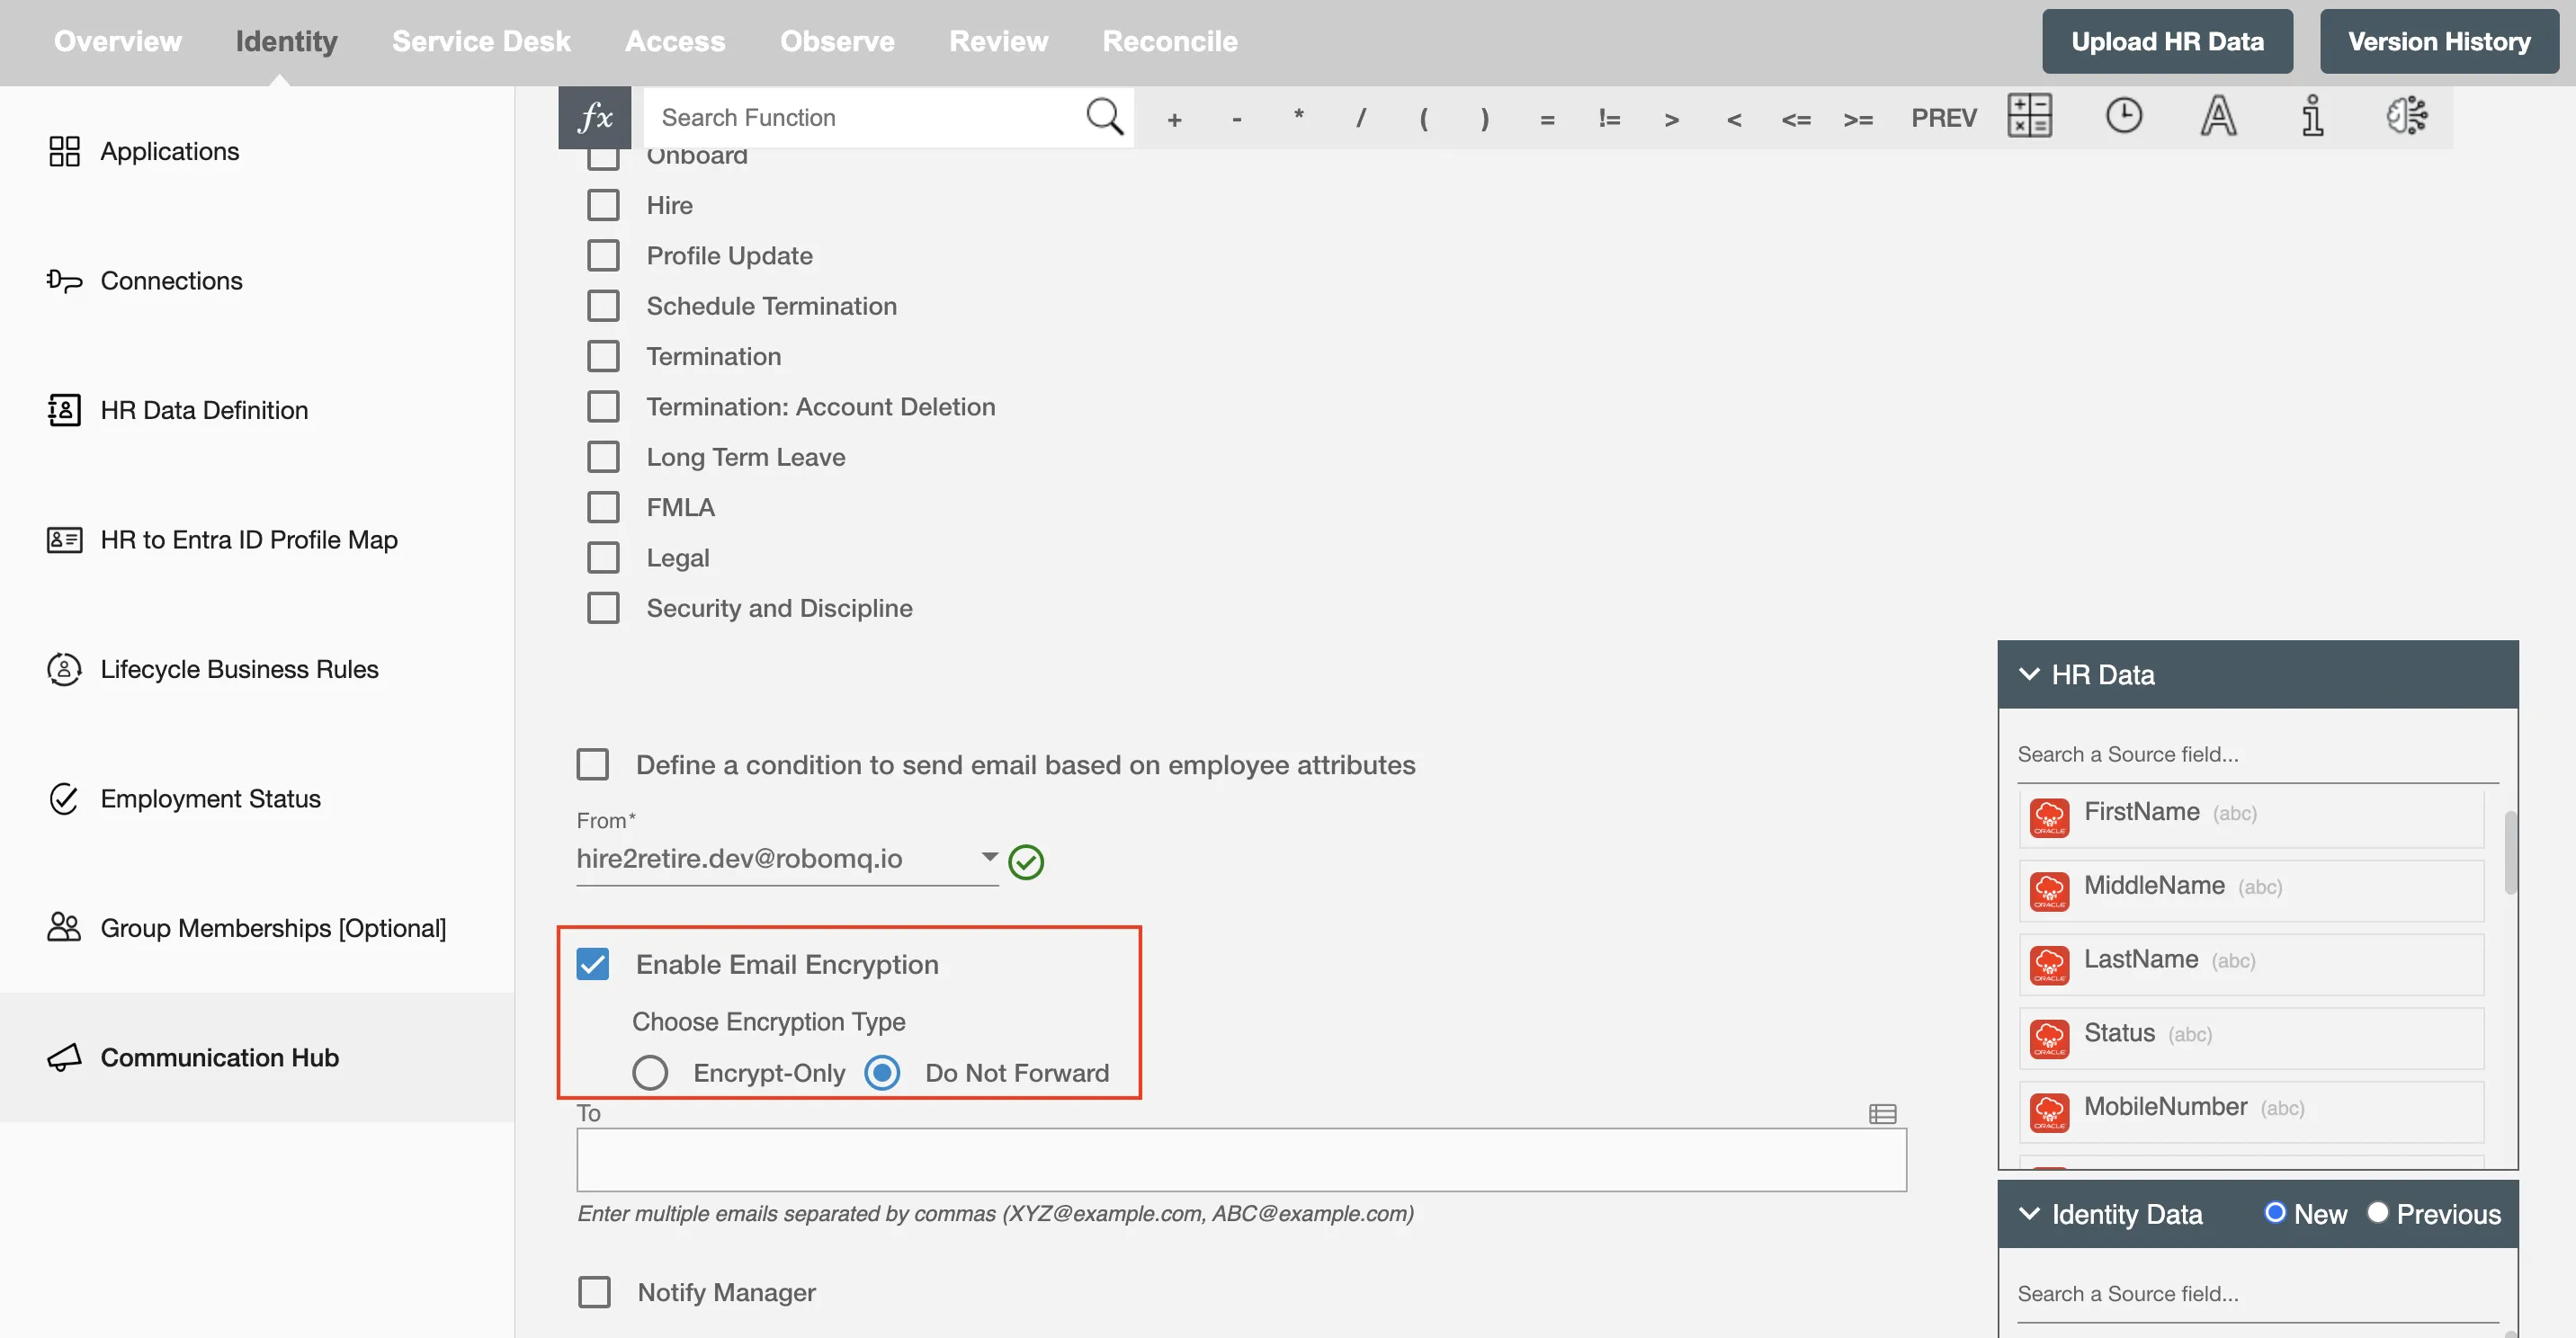 Figure 3. Email Encryption
 -
-
Step 4: Specify the desired email addresses in the
To,Cc,Bcc, andReply tofields. To include multiple addresses, separate them with commas. For conditional email sending, use the icon in the top-right corner of the field. Note that theDefaultvalue is optional if the corresponding field is not mandatory.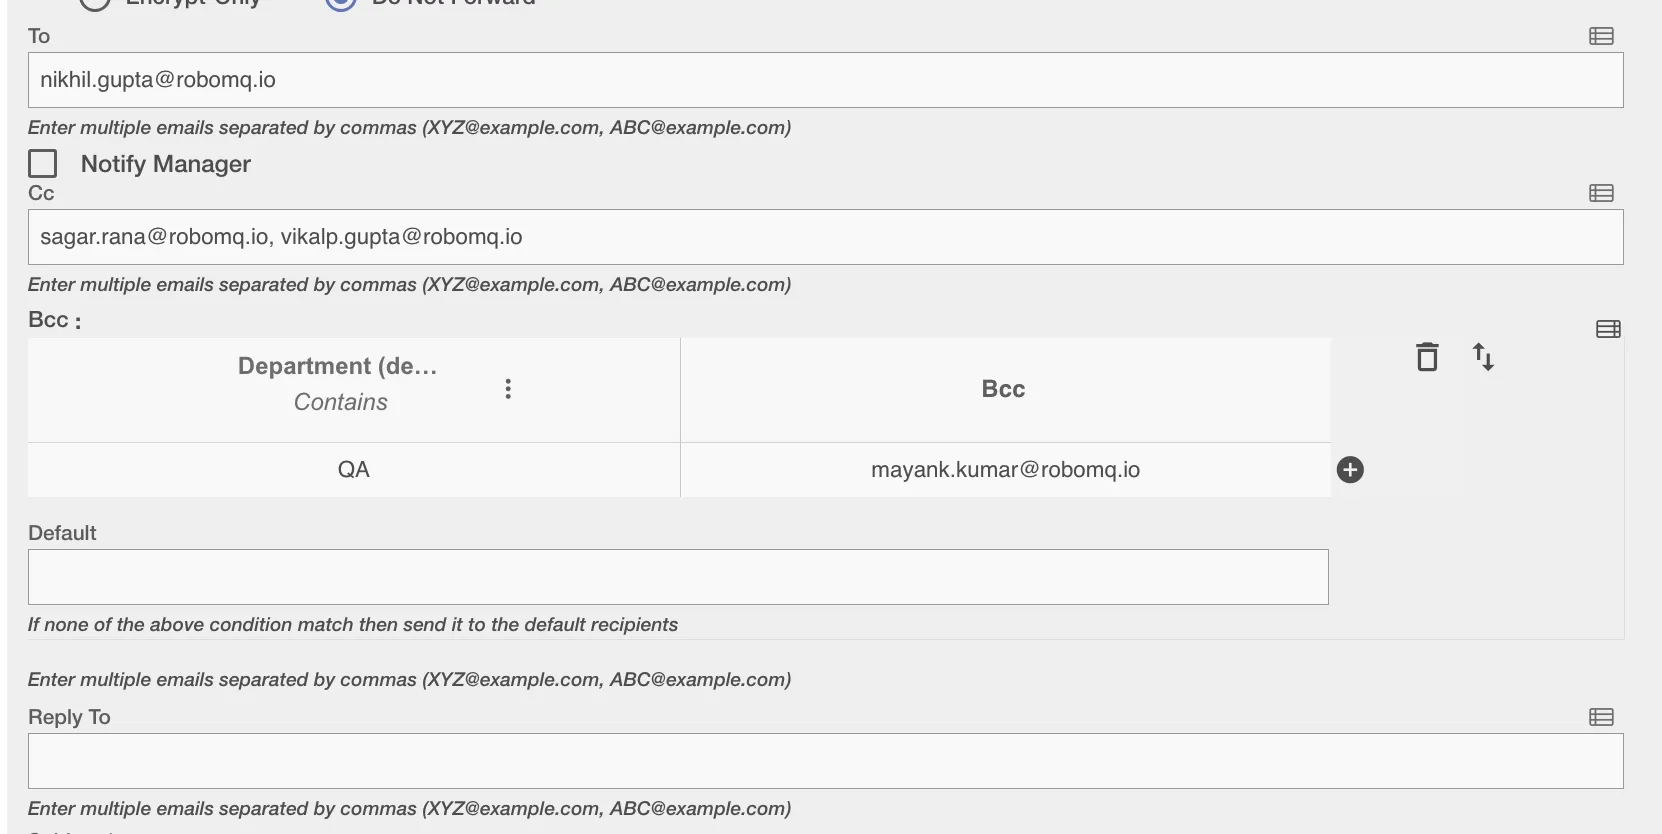 Figure 4. Provide Email Addresses
 -
Step 5: Check the "Notify Manager" option if you want the email to be sent to the manager of the corresponding employee. If this option is selected then the
Tofield becomes optional, you can choose not to provide any email address in it.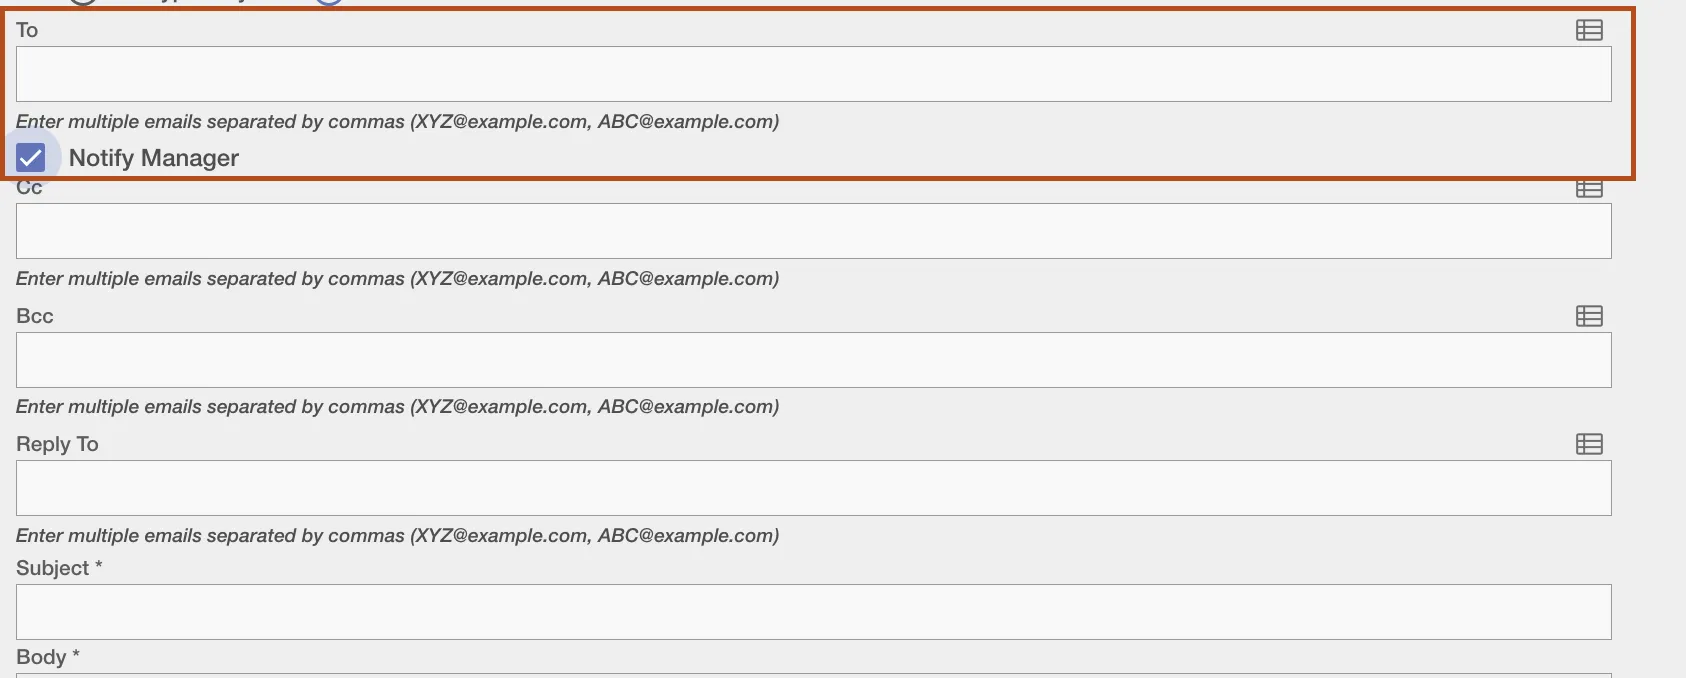 Figure 5. Notify Manager
 -
Step 6: Fill in the mandatory
subjectandbodyfield. The email body supports multiline text. A toolbar is also present in the email body, which supports editing tools like font styling, font size, and adding links. It also provides options for users to add images and signatures to the body. Additionally, you can attach files to your email using this toolbar. After filling in all mandatory fields, click on theSavebutton. You have successfully created your email template and it will be auto-selected in the respective lifecycle event.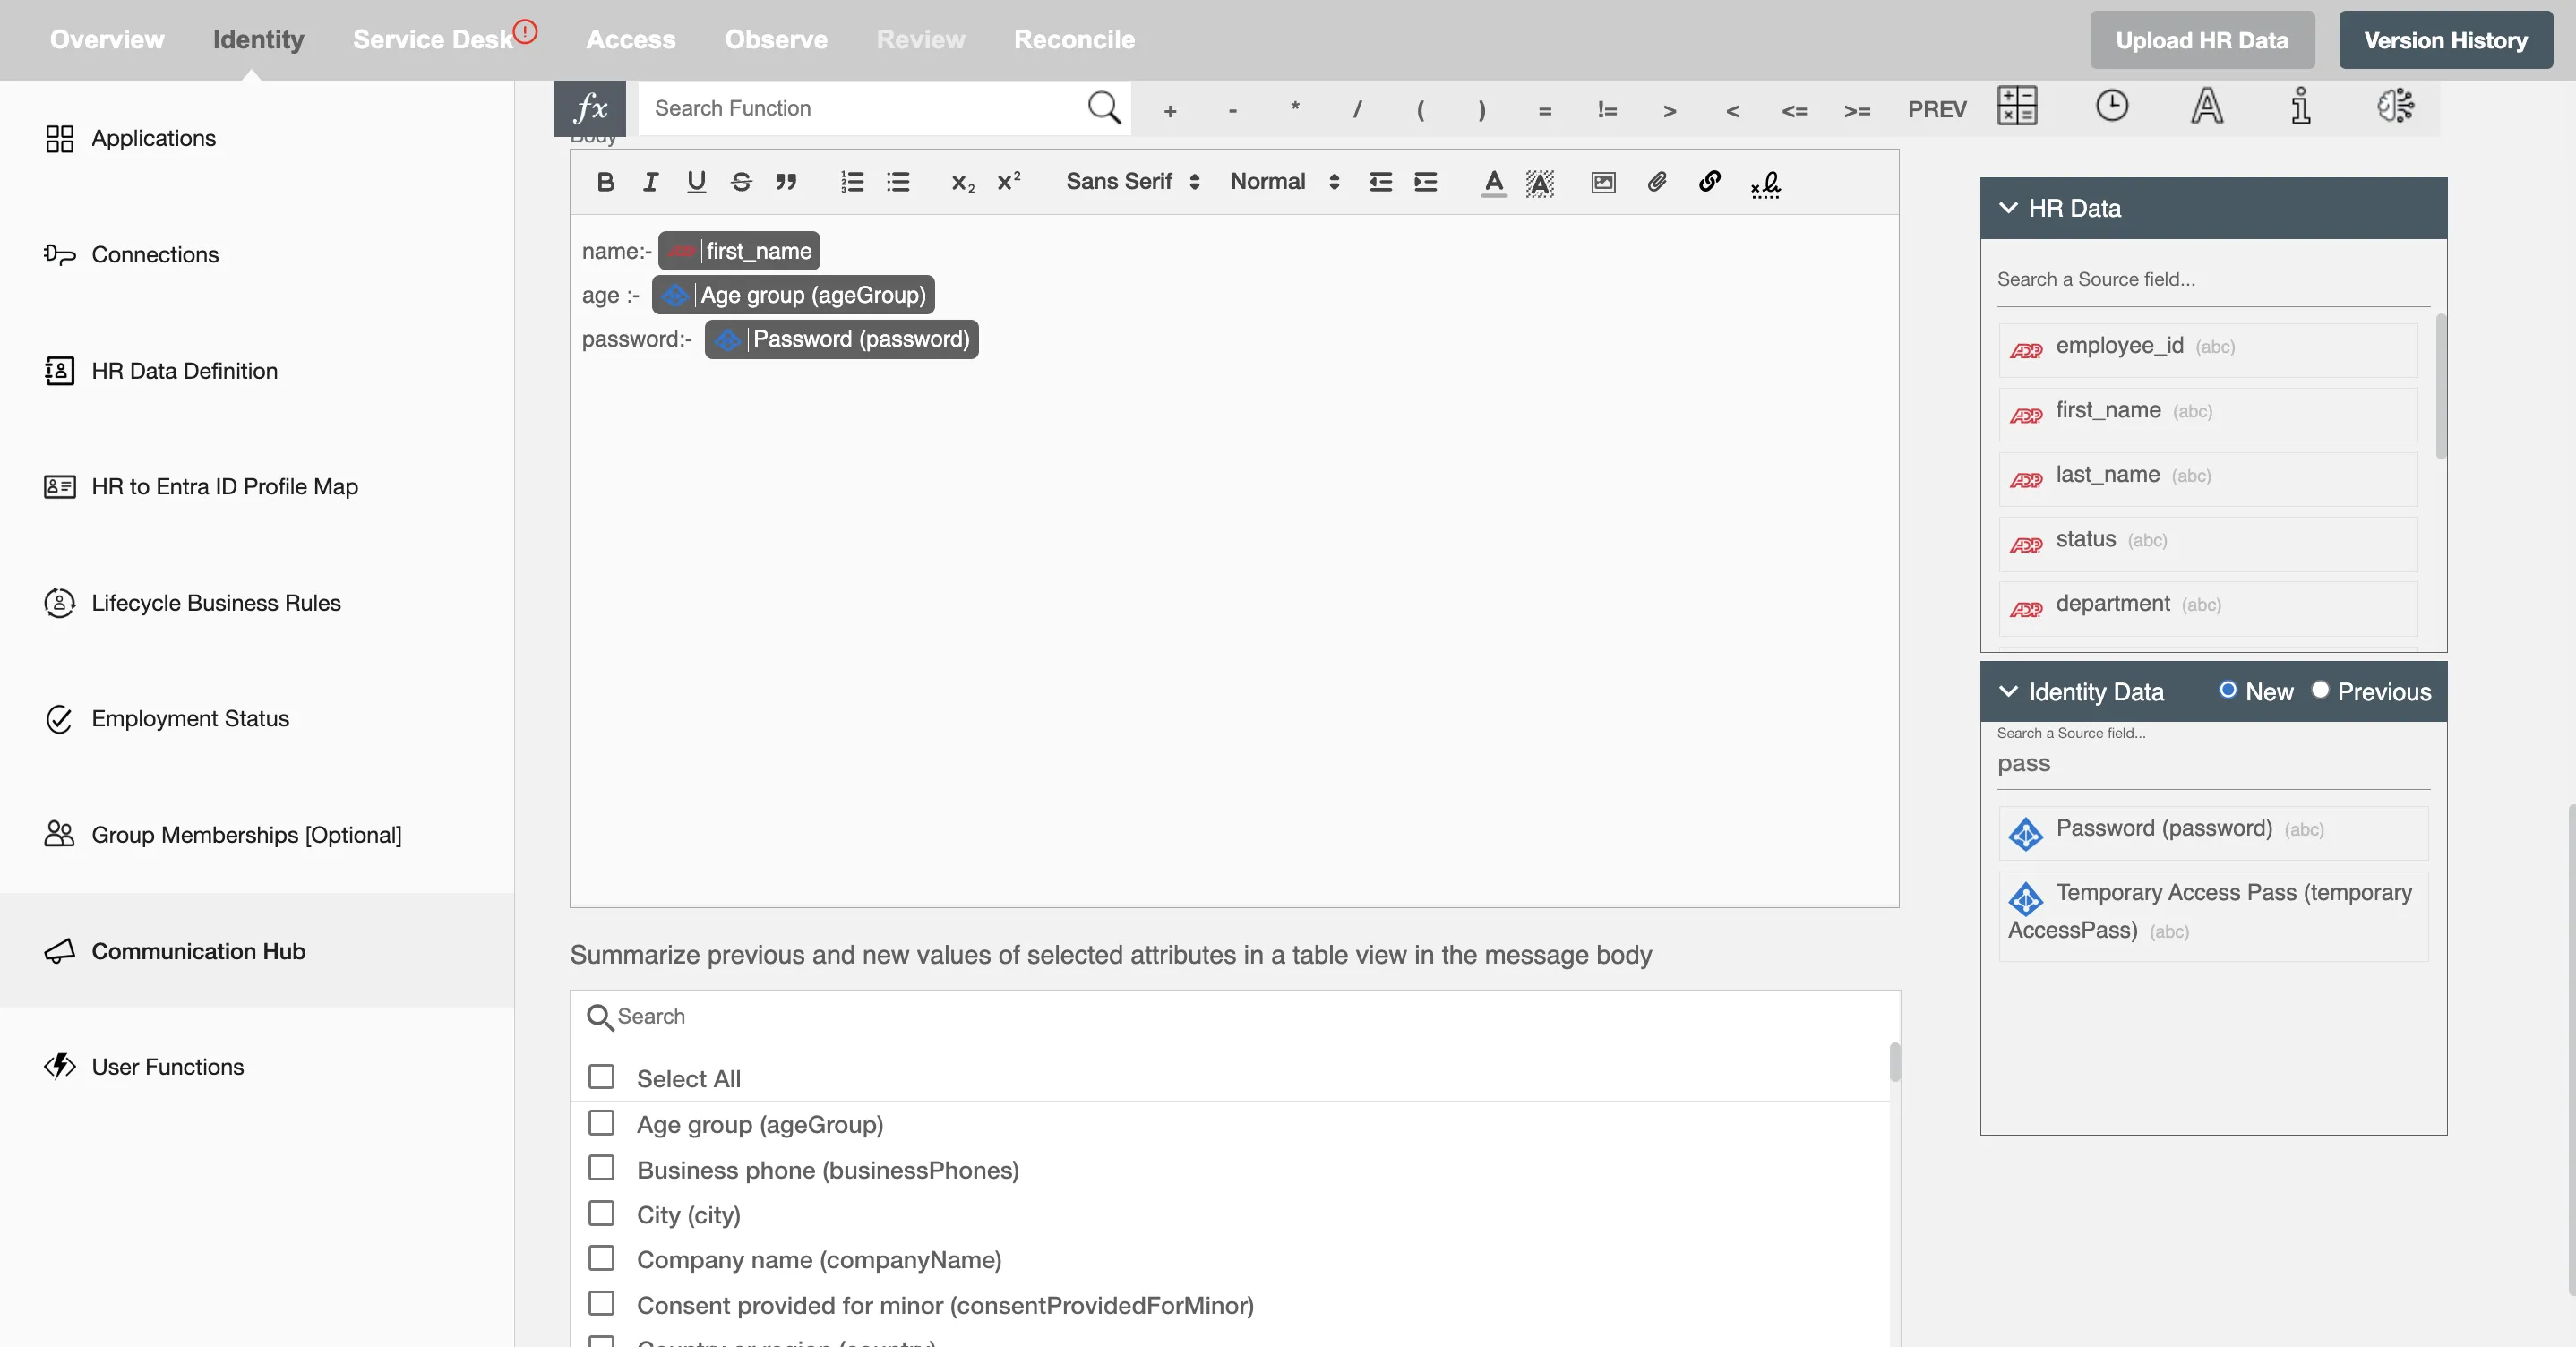 Figure 6. Filling subject and body
 -
Step 6: You can also choose the attributes from
Summarize previous and new values of selected attributes in a table view in the message bodyso, that if we made any changes in the selected Directory attributes while performing any lifecycle events then the email will be received by you with the updated attributes detail.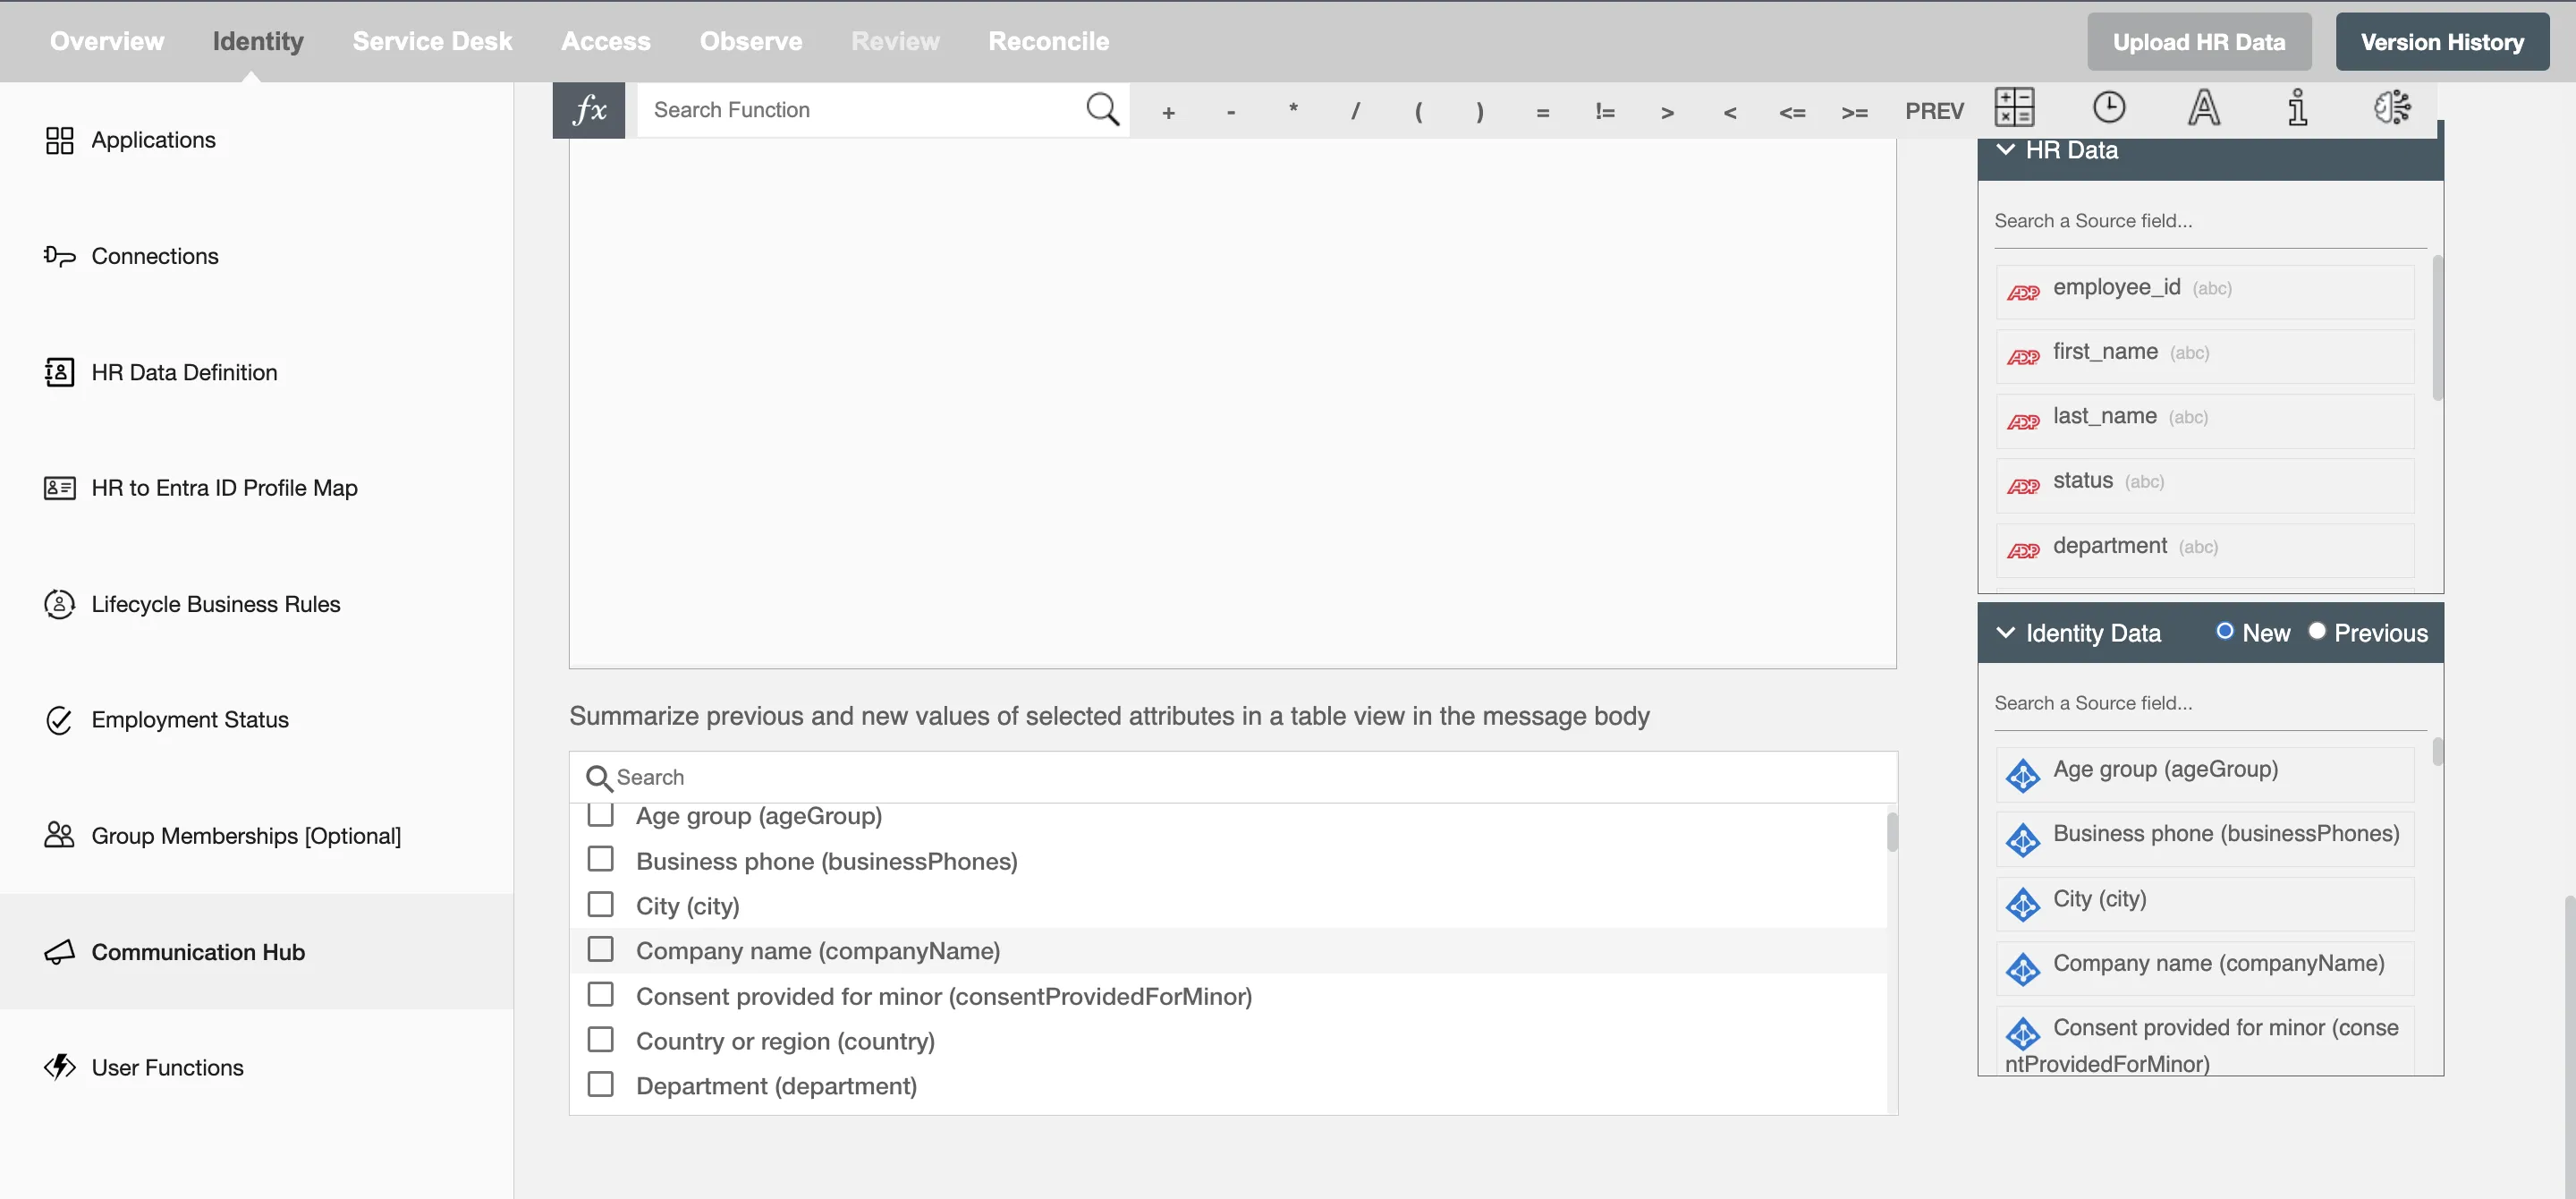 Figure 7. Selecting previous and new attribute options
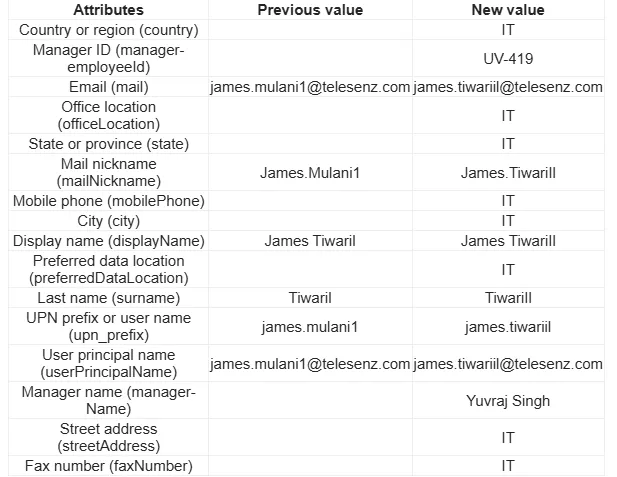 Figure 8. Preview of the table on Outlook
Rename an Email Template
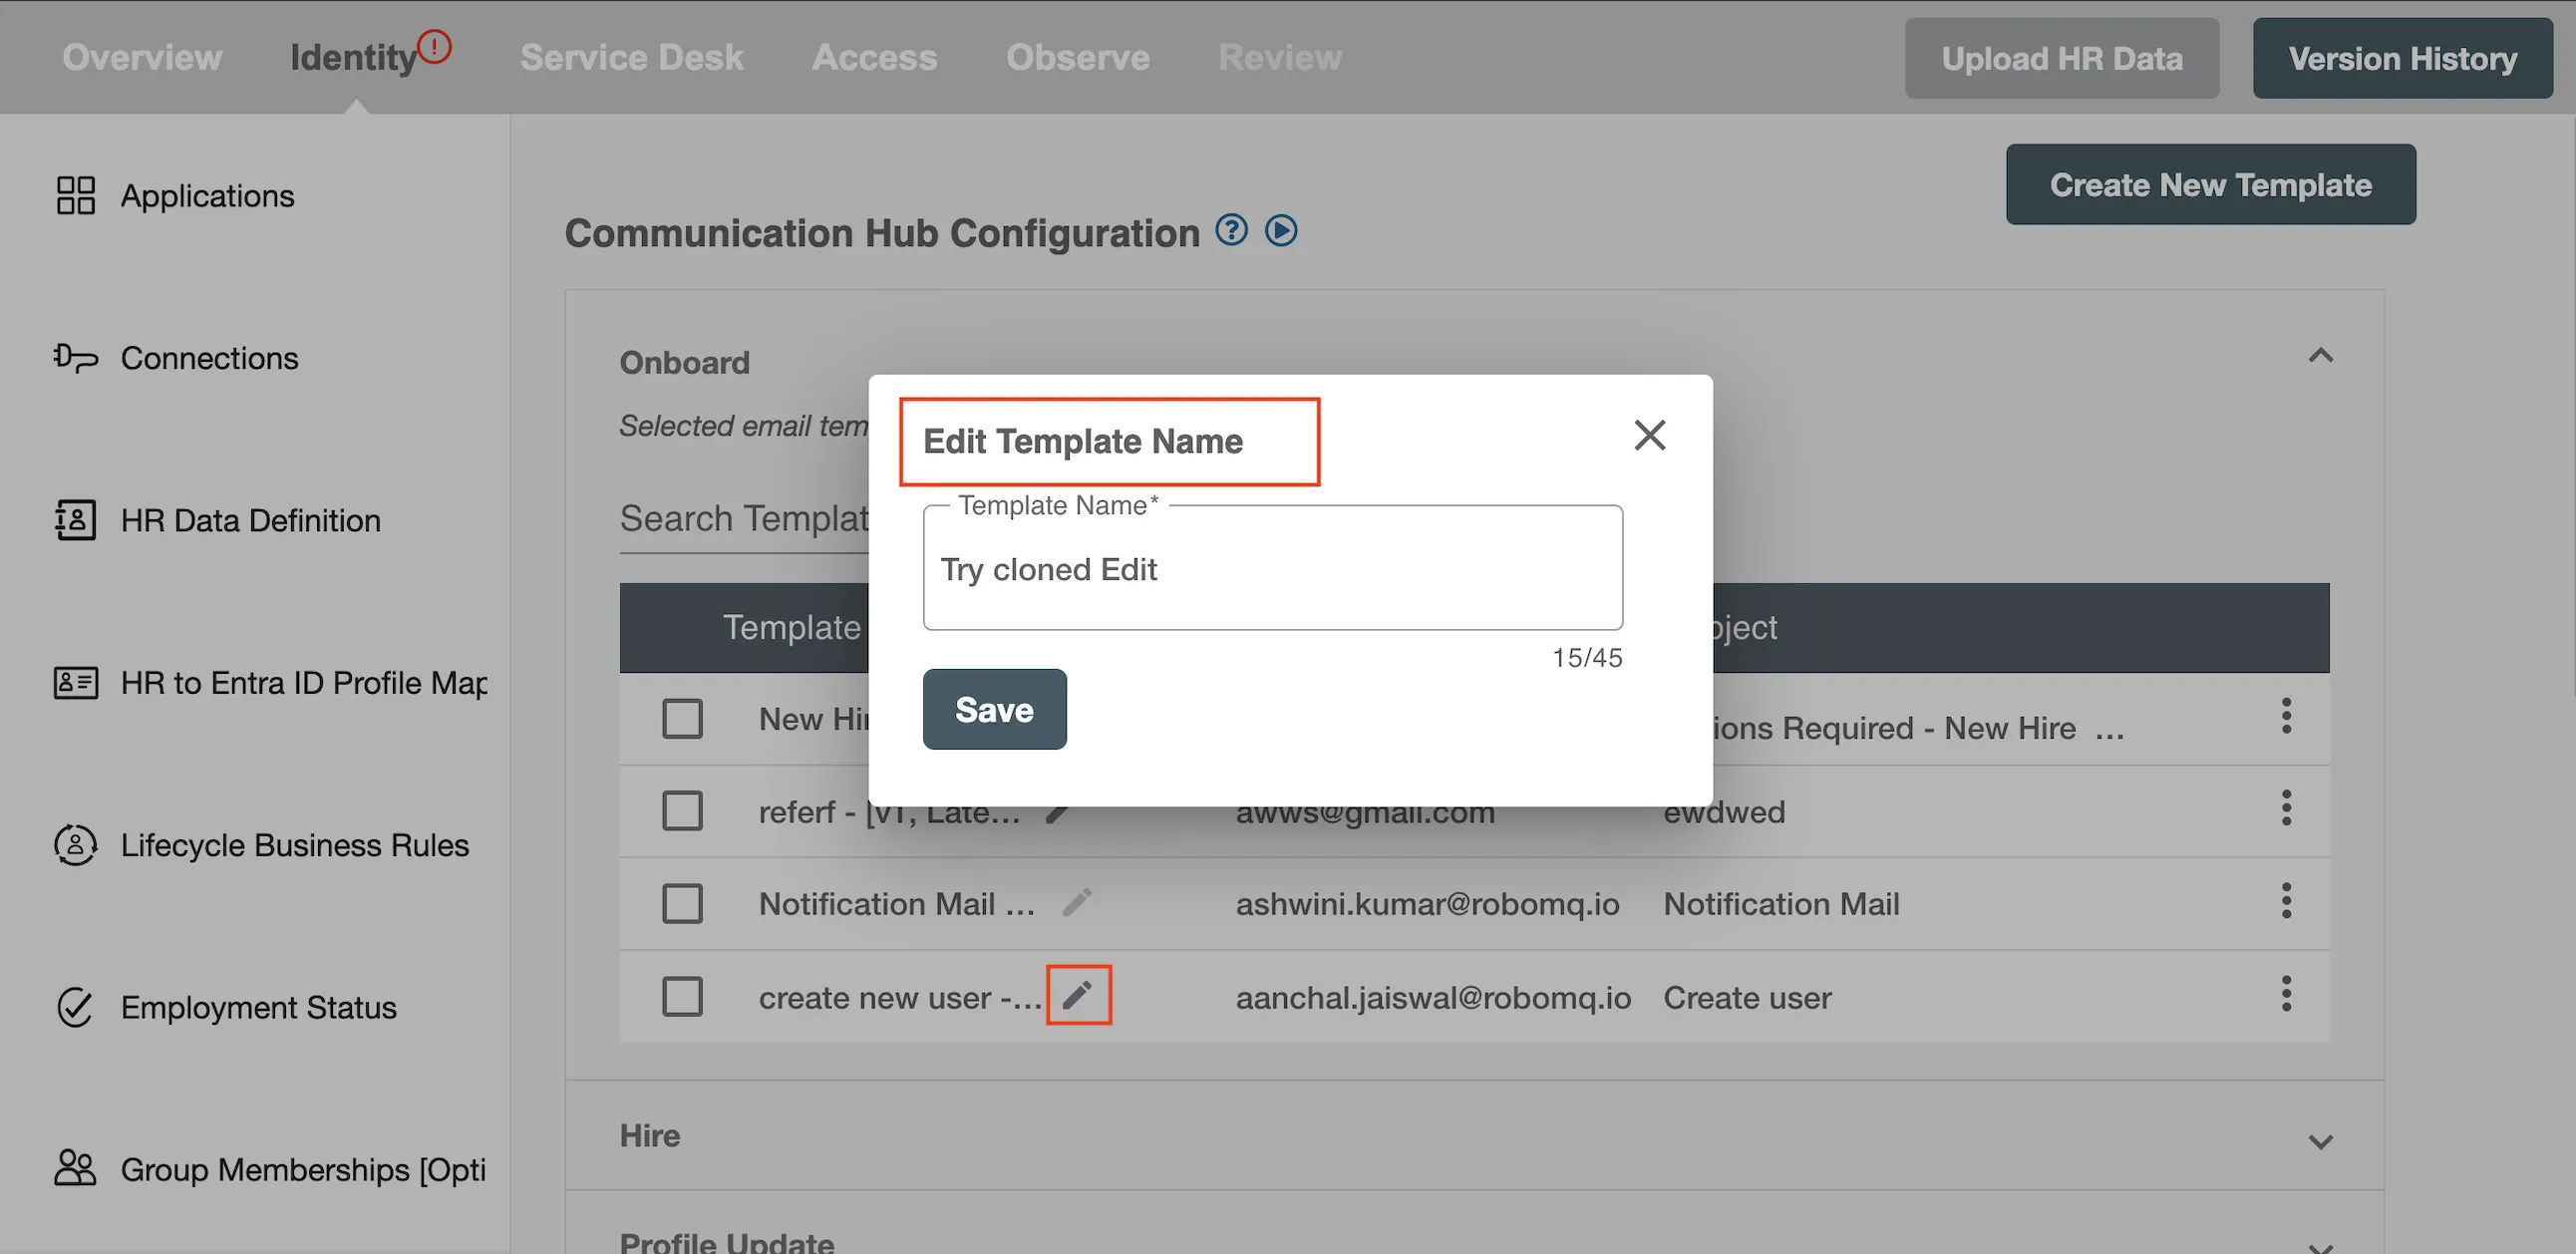
You can rename an email template unless it is used in running or paused flows. This will update the template name for all its versions.
Actions on an Email Template
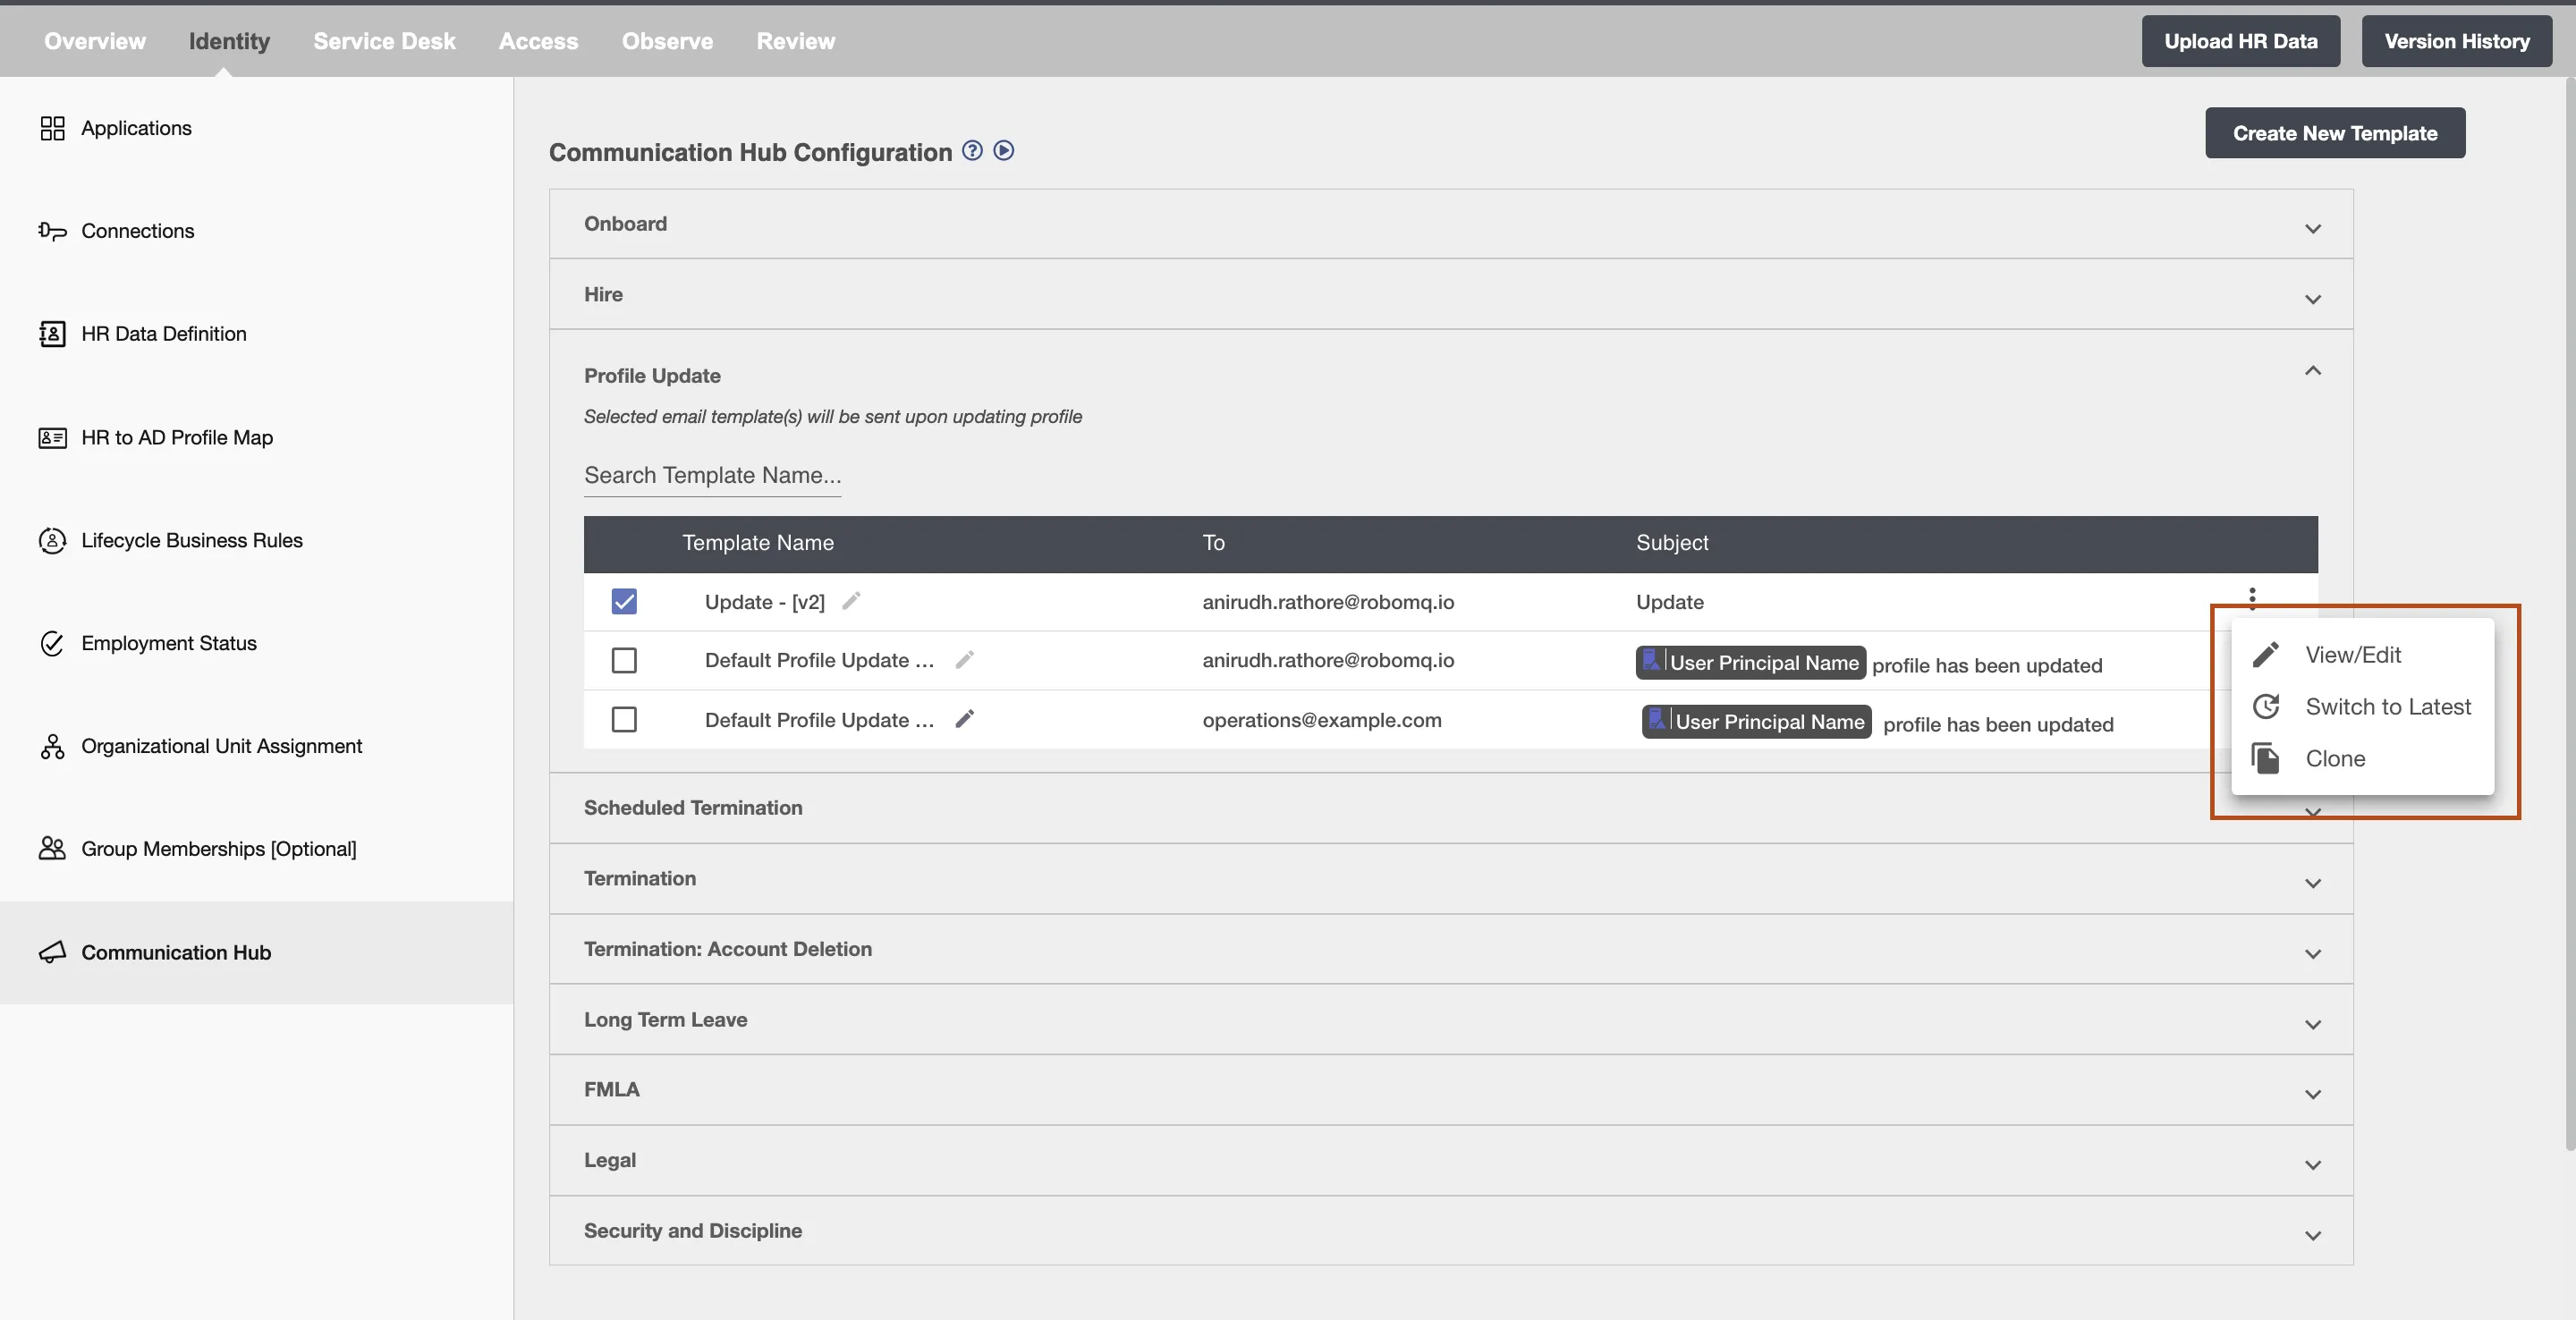
View/Edit a Template
You can view and edit a template and make changes in the form according to your needs. Then, there are two options available: Save which will save the edited template as a 'new version' of the template in the particular flow only and Save & Update, which will update the template in all flows and make it a [Latest] template.
Switch to latest
This option will help you switch to the latest version of your mail template.
Clone Template
This option creates a clone of the template. The clone is identical to the original template and can be edited to create similar changes.