Distribution List Memberships
In Active Directory, a distribution list group refers to any group that does not have a security context, whether it is mail-enabled or not. It is used for sending emails/notifications to a group of people.
In addition to rule-based distribution lists, you can also choose the default distribution lists which will be assigned to all users in the company.
Note- This is an optional step, you can skip this step if you do not want to assign any security groups by clicking on the Save & Next button.

How to create a Rule for assigning the Distribution List to users?
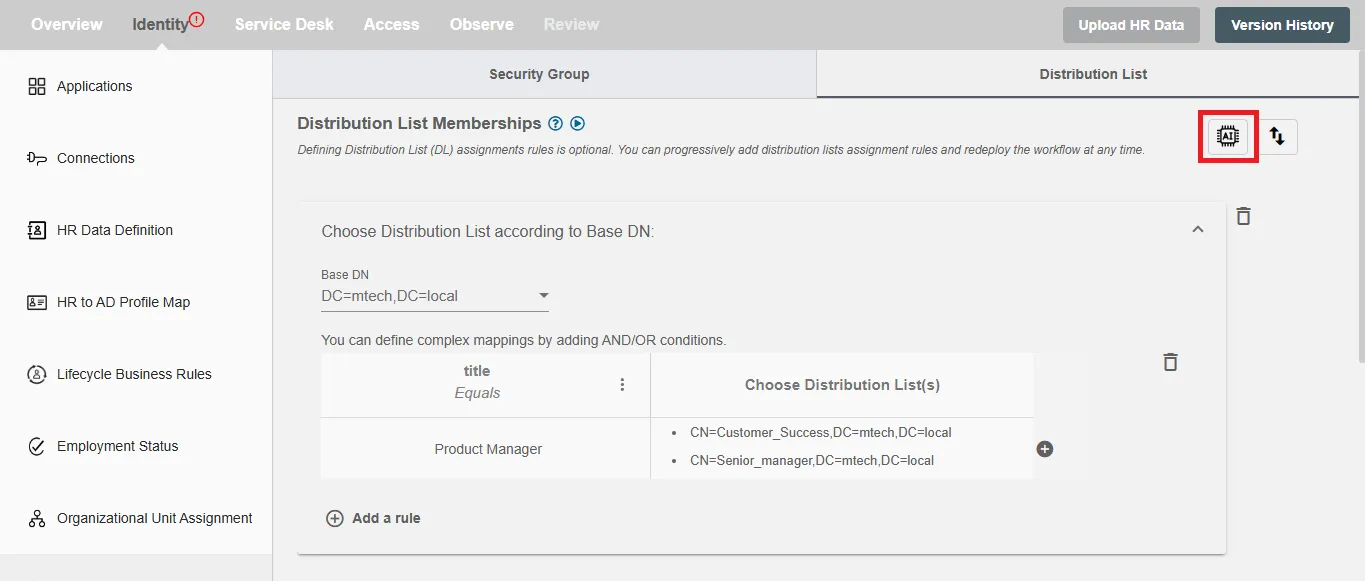
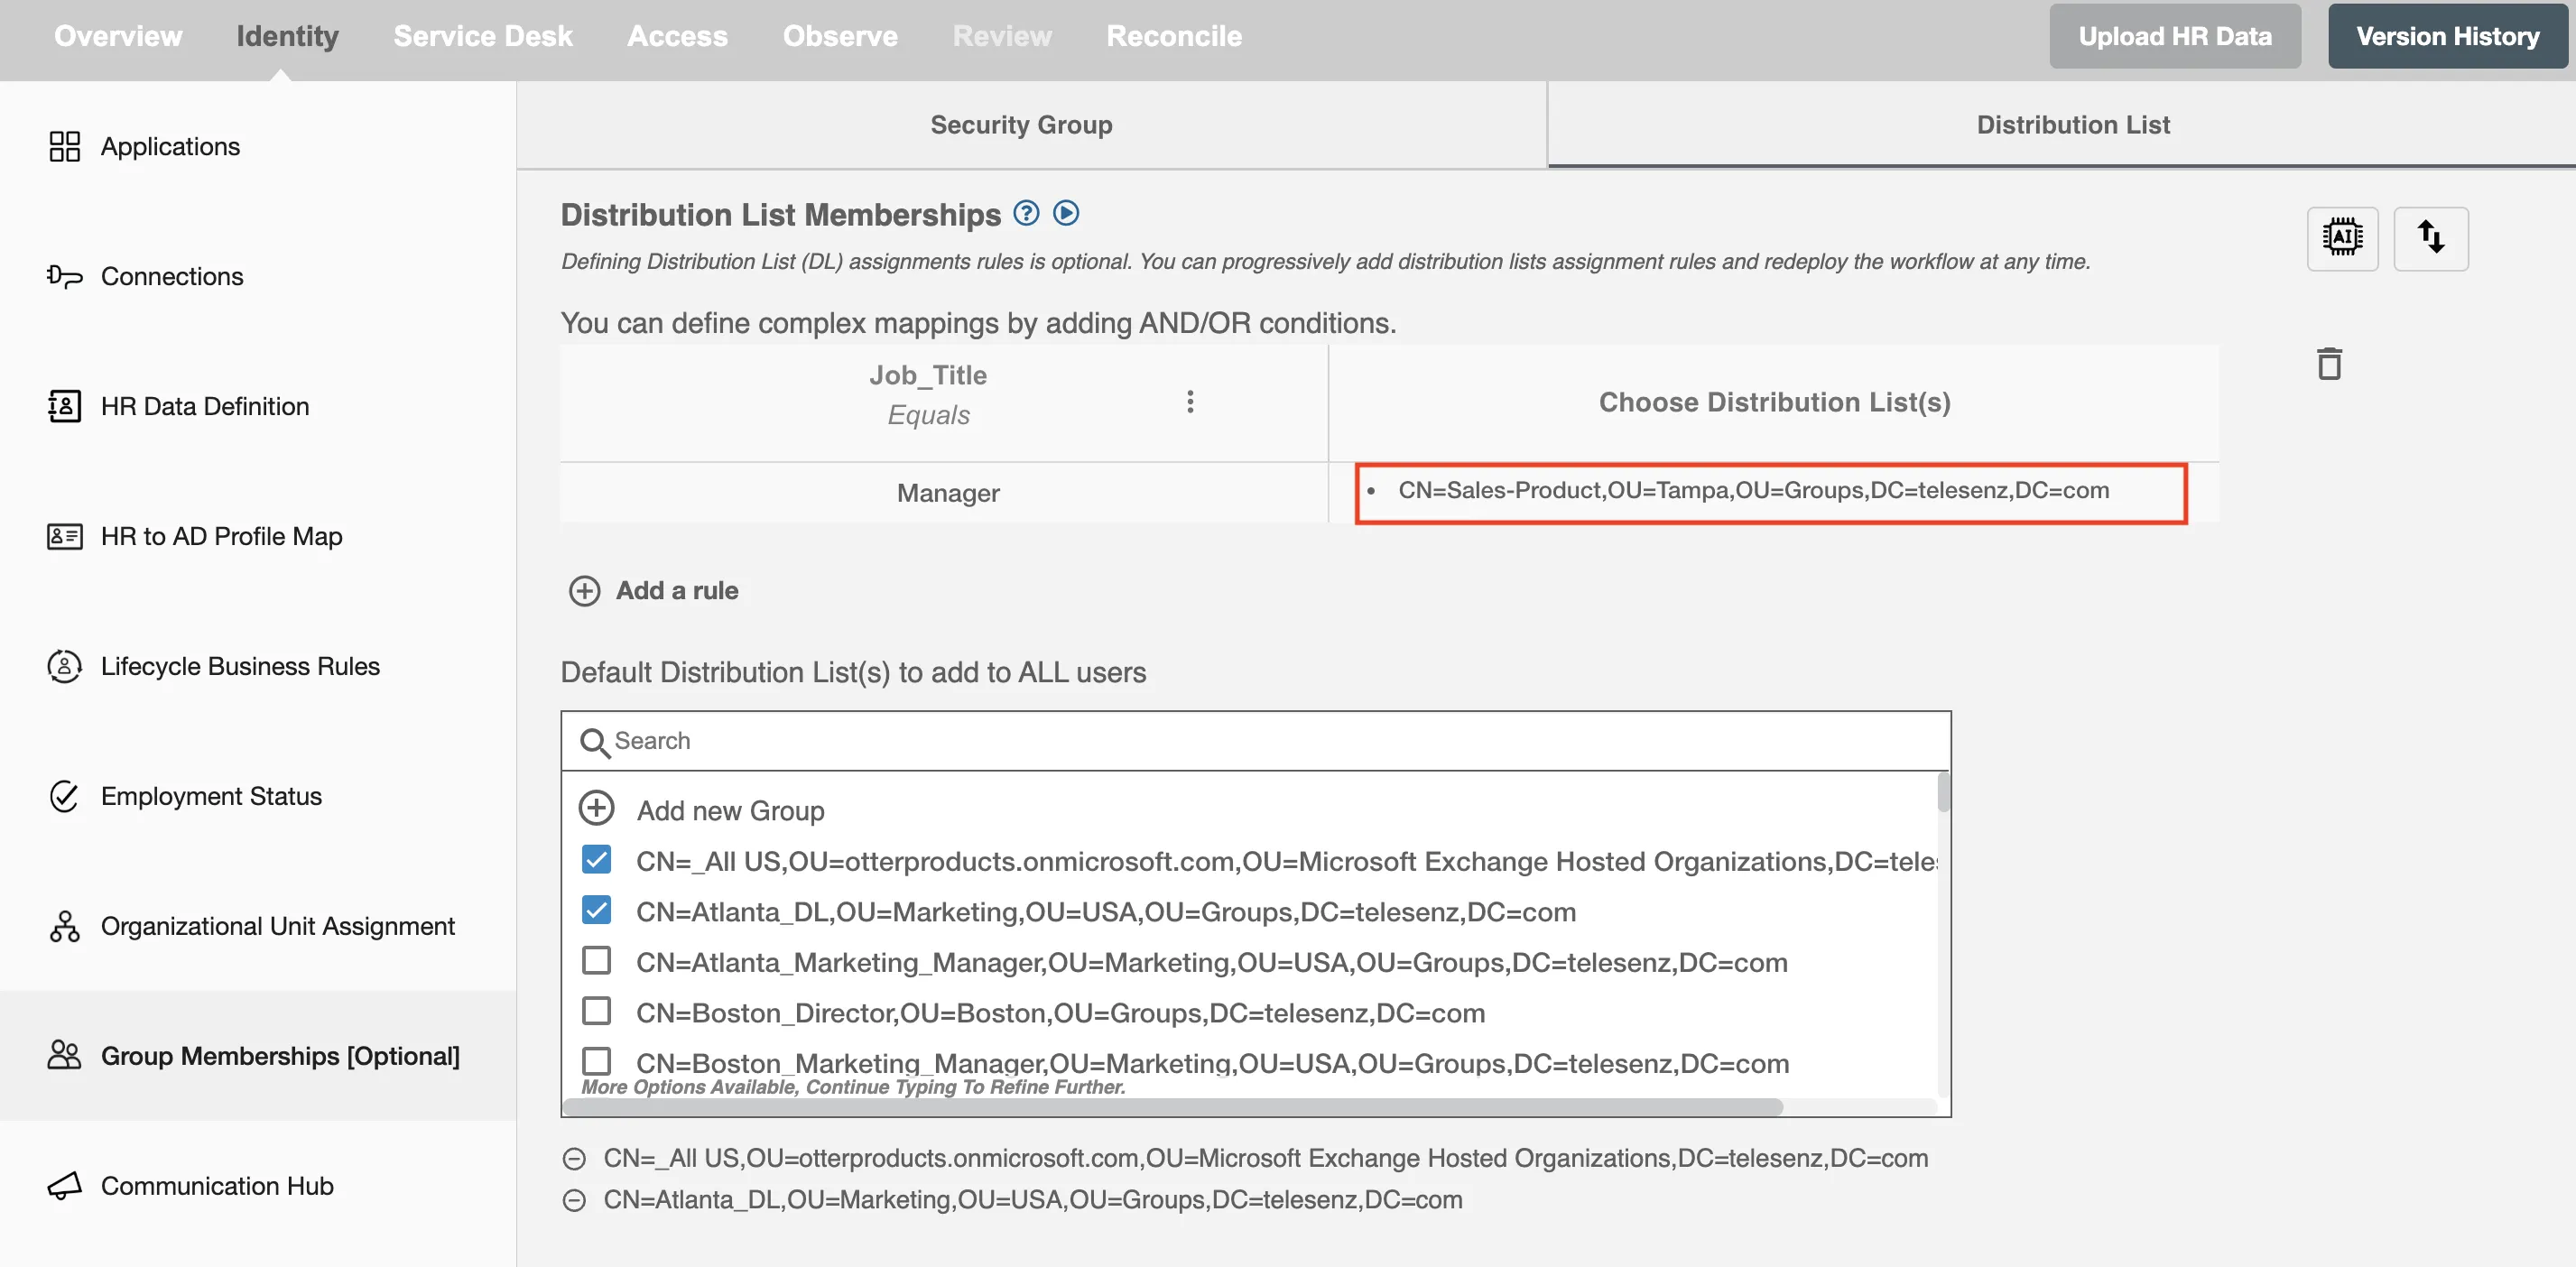
Once you are on this step you will see a section under the heading Distribution List Memberships. This section represents a rule based on which distribution lists can be assigned to selected users.
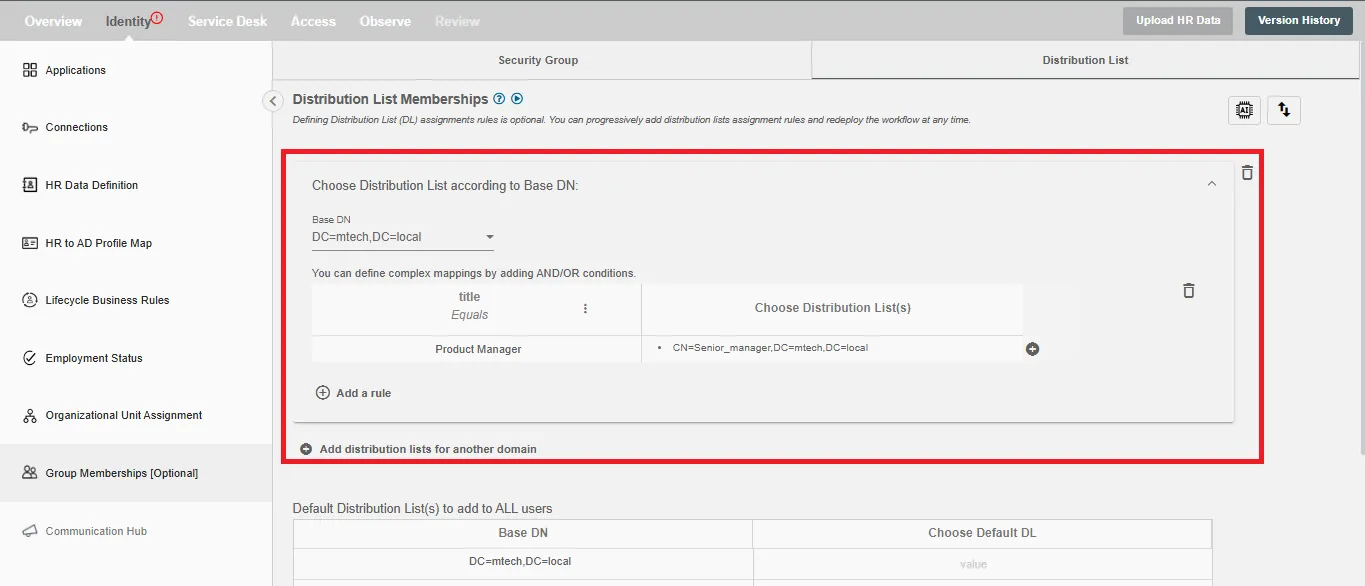
In a multi-domain controller setup, you can assign distribution lists to the user from any of the base DN depending on the condition.
Following are the steps to create a rule -
-
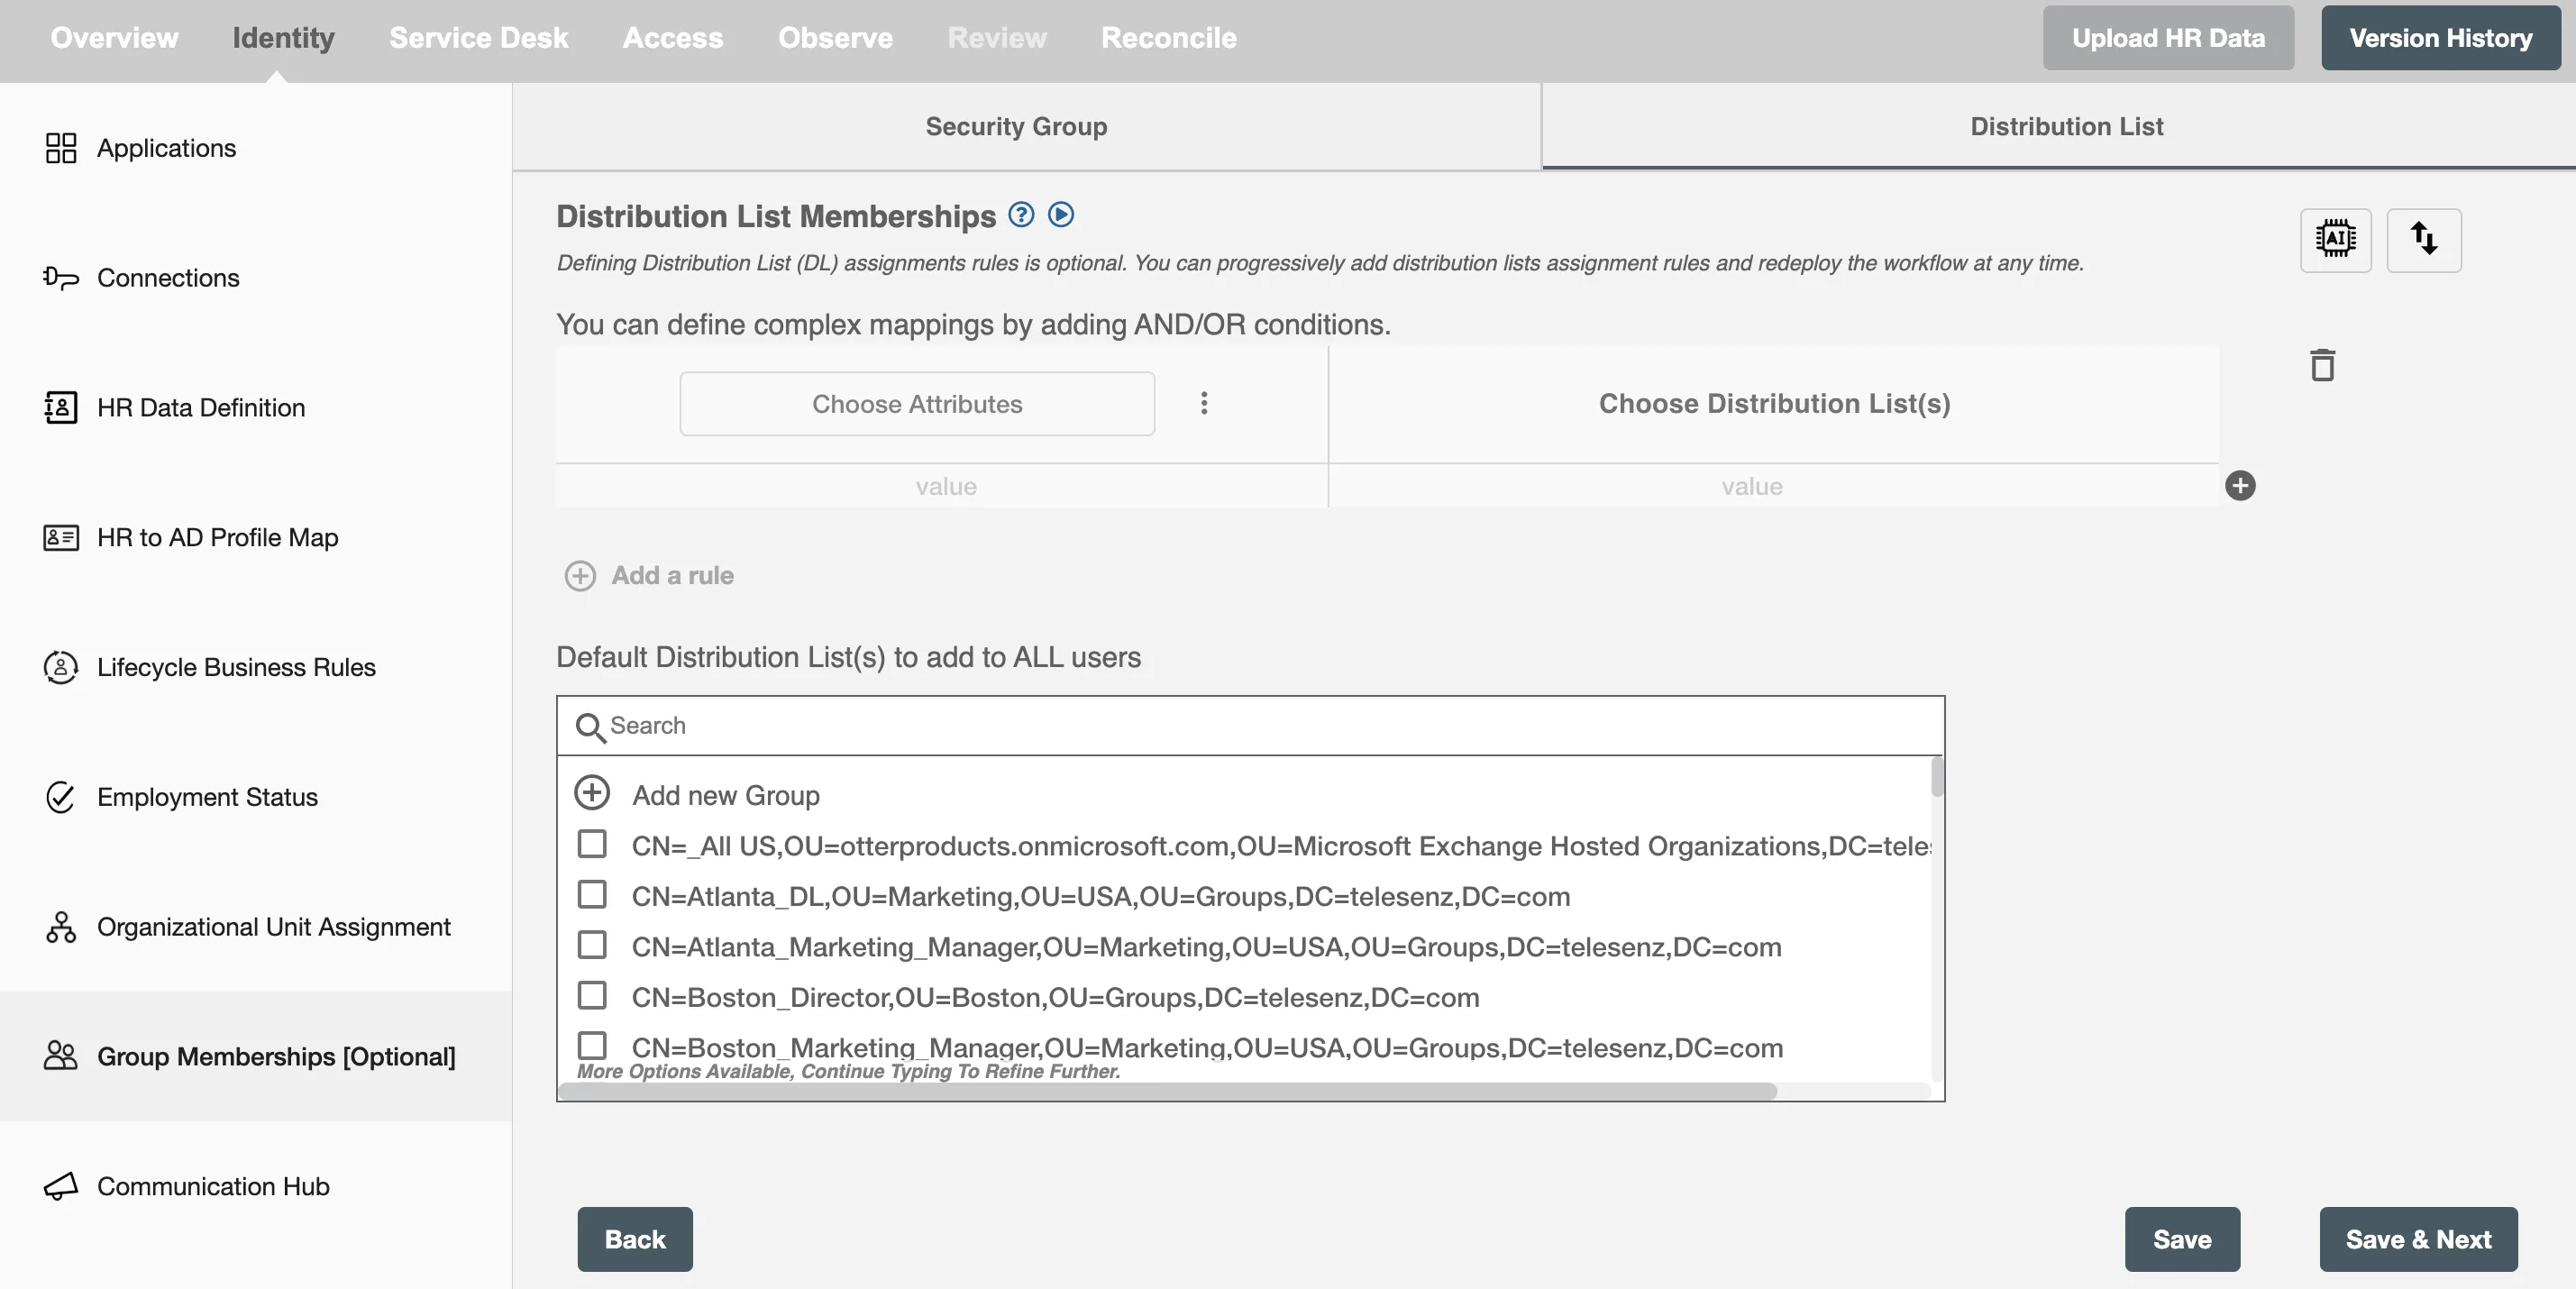
Firstly, you can set up the filters to select the users you want to assign Security groups to. You can create a filter using the following steps -
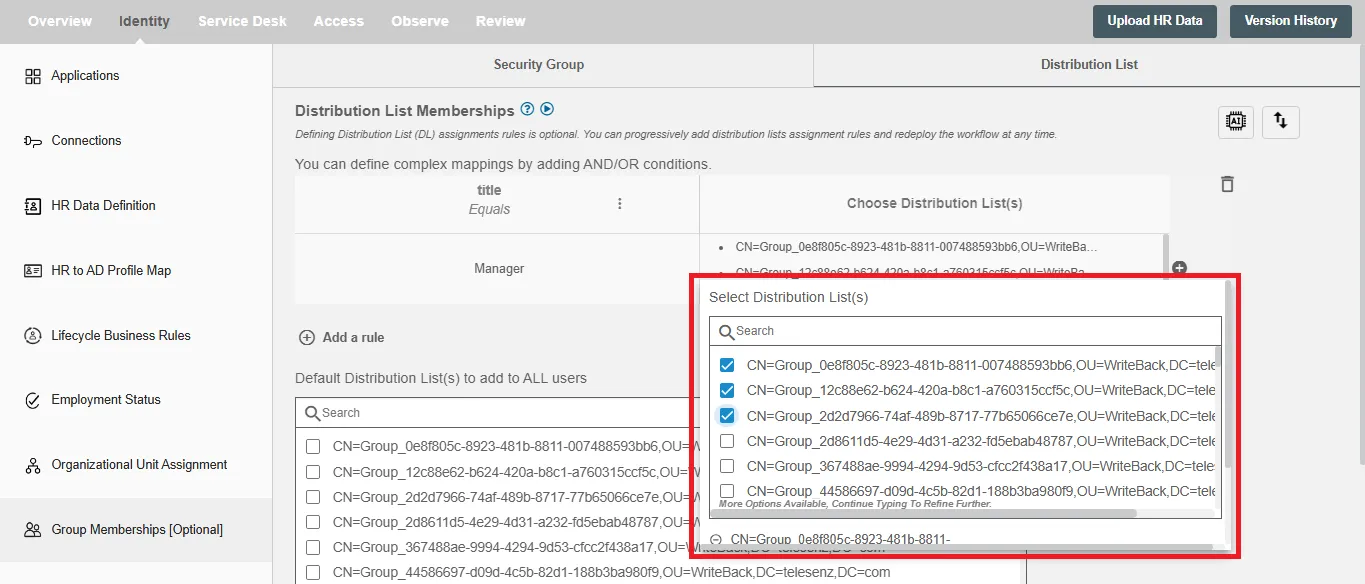
- Click on "Choose Attribute" and select the employee attribute and operation you want to apply to match that attribute.
- Next, you get a "Value" field where you type the value you want to match the attribute with and choose the OU you want to assign.
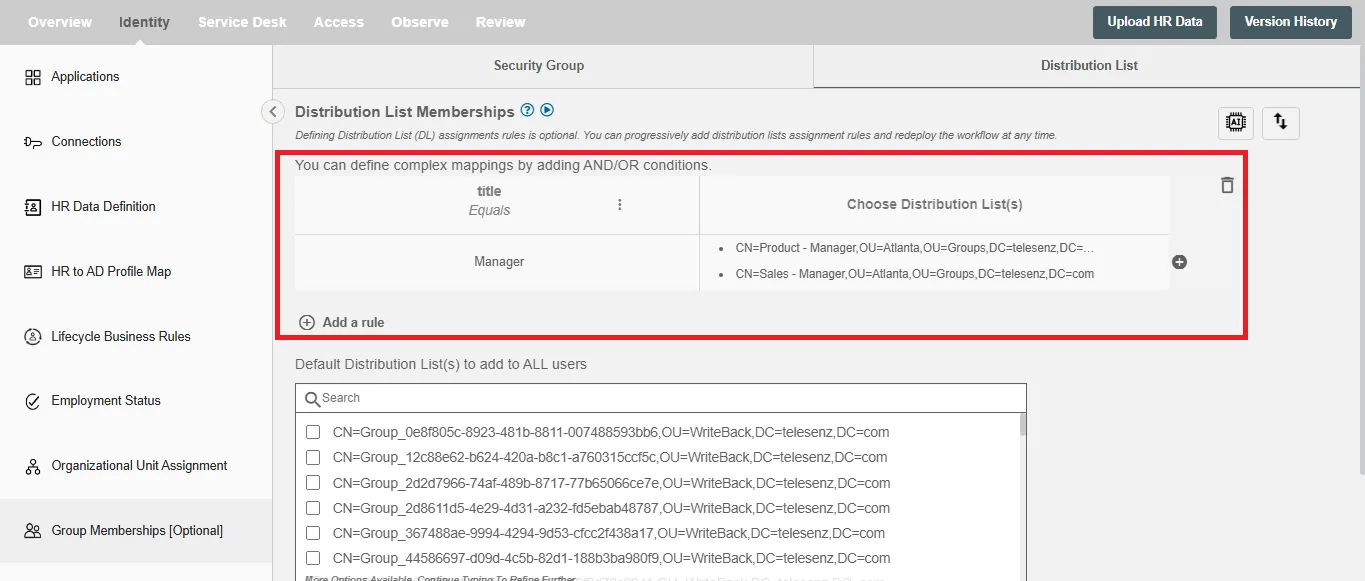 Figure 5. An example of a filter
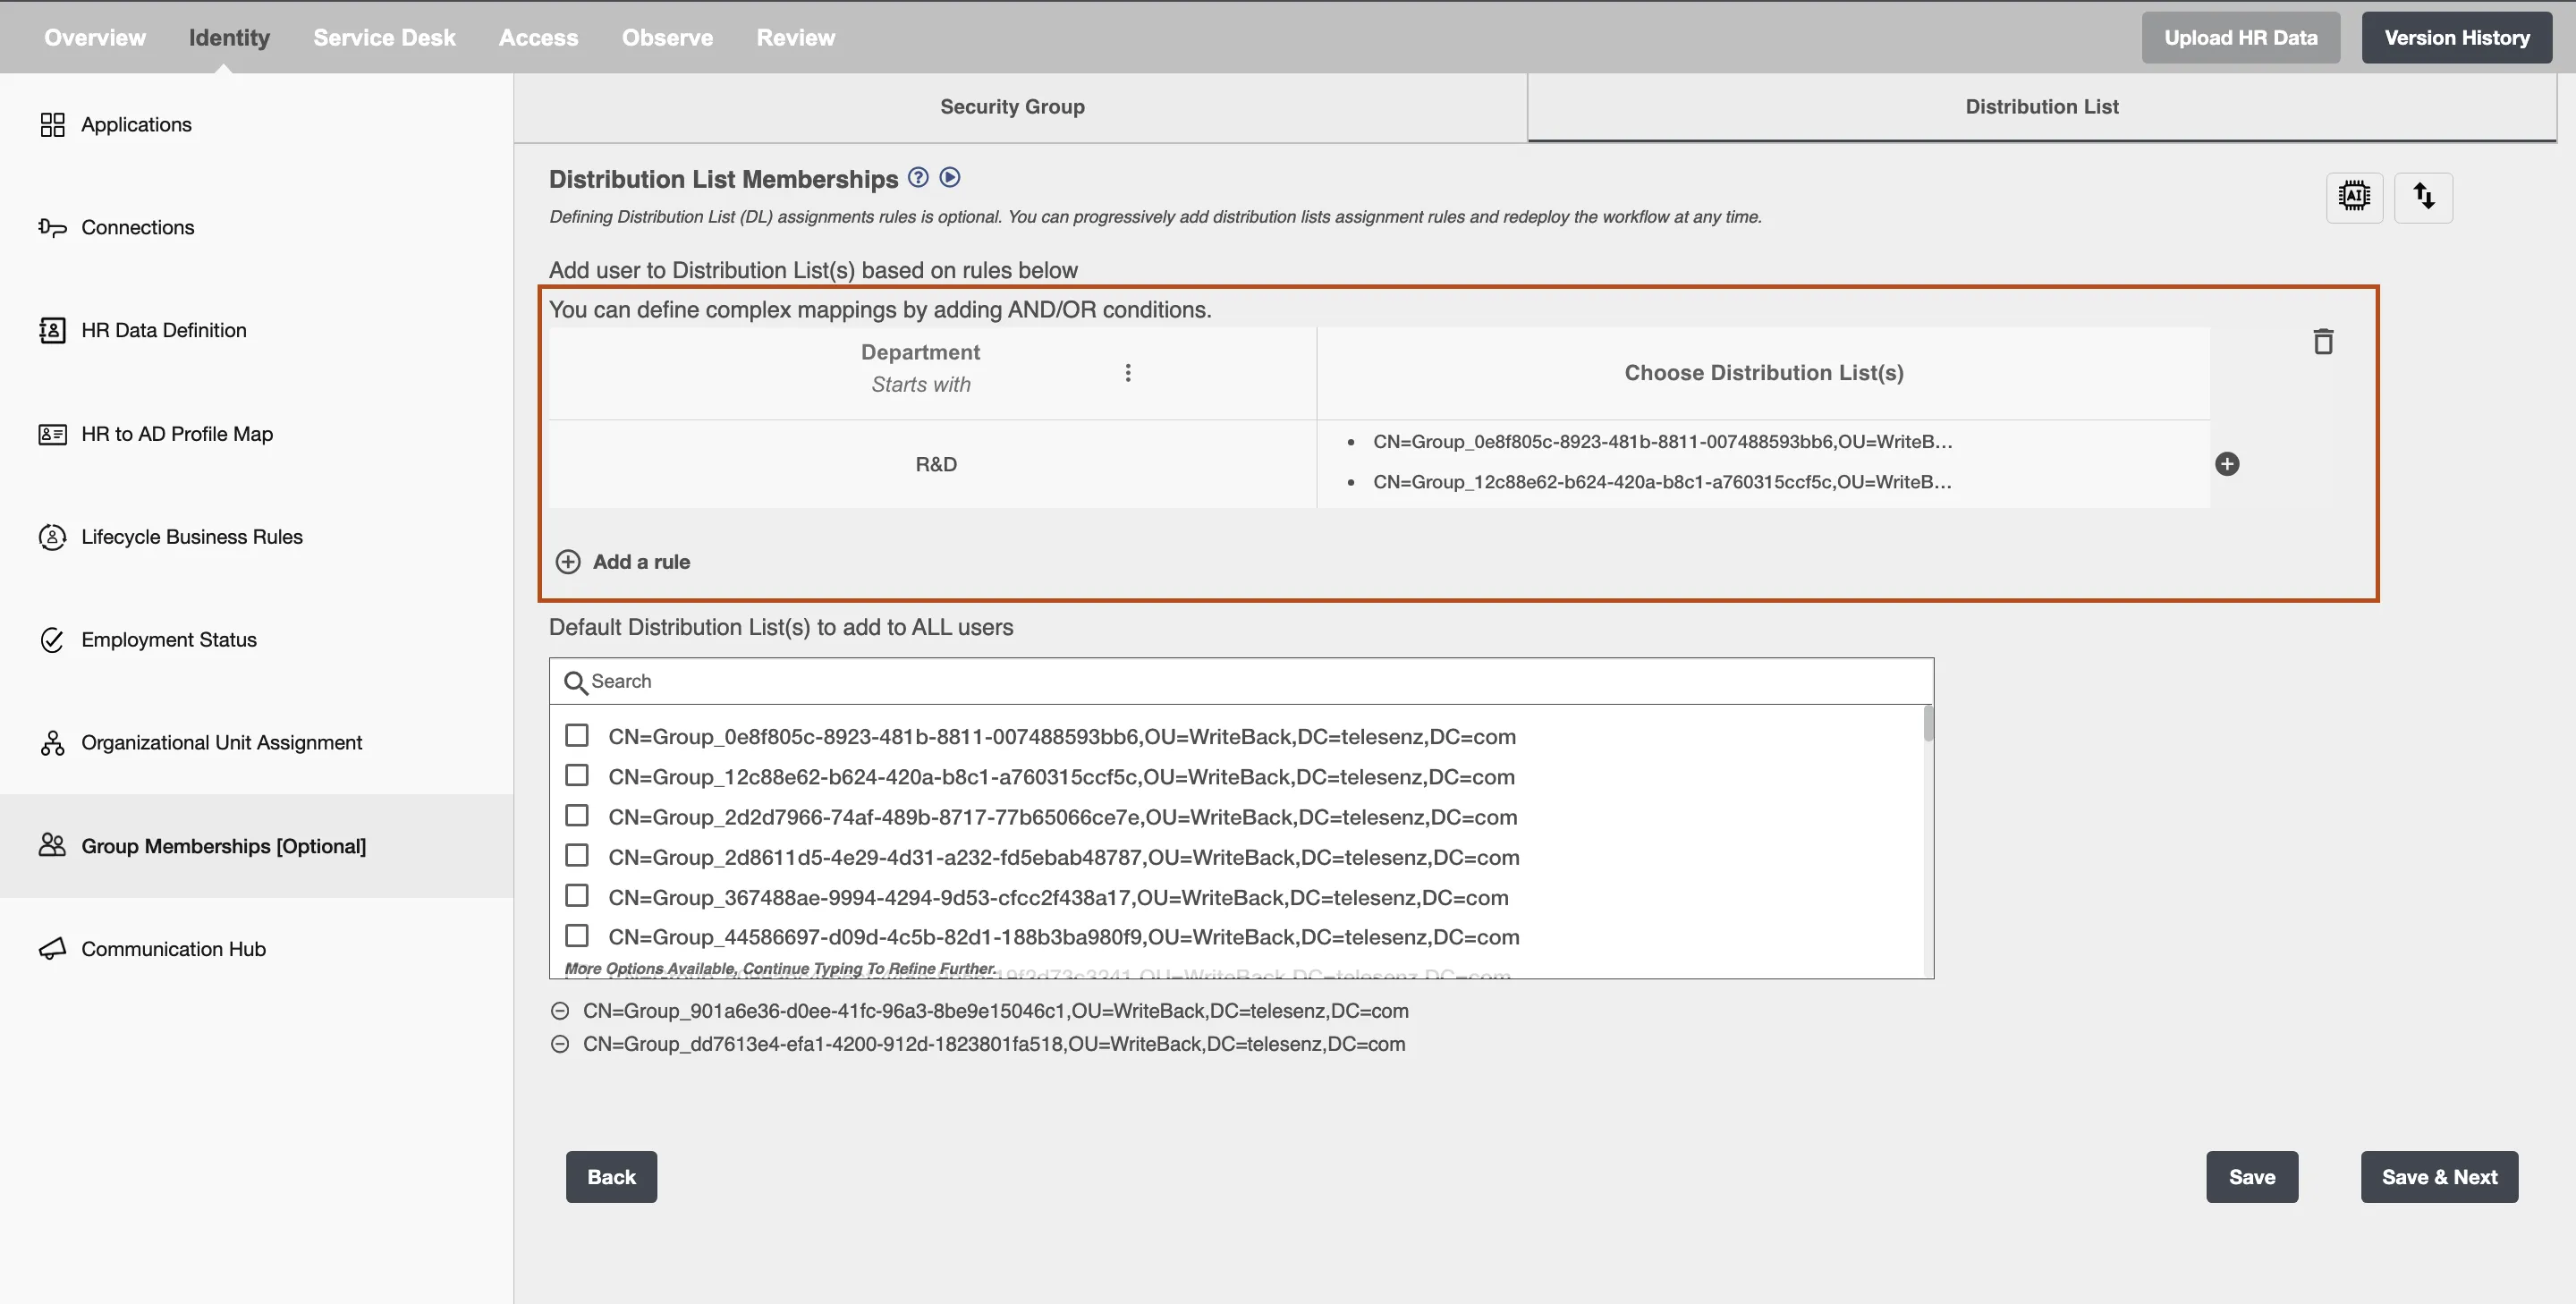
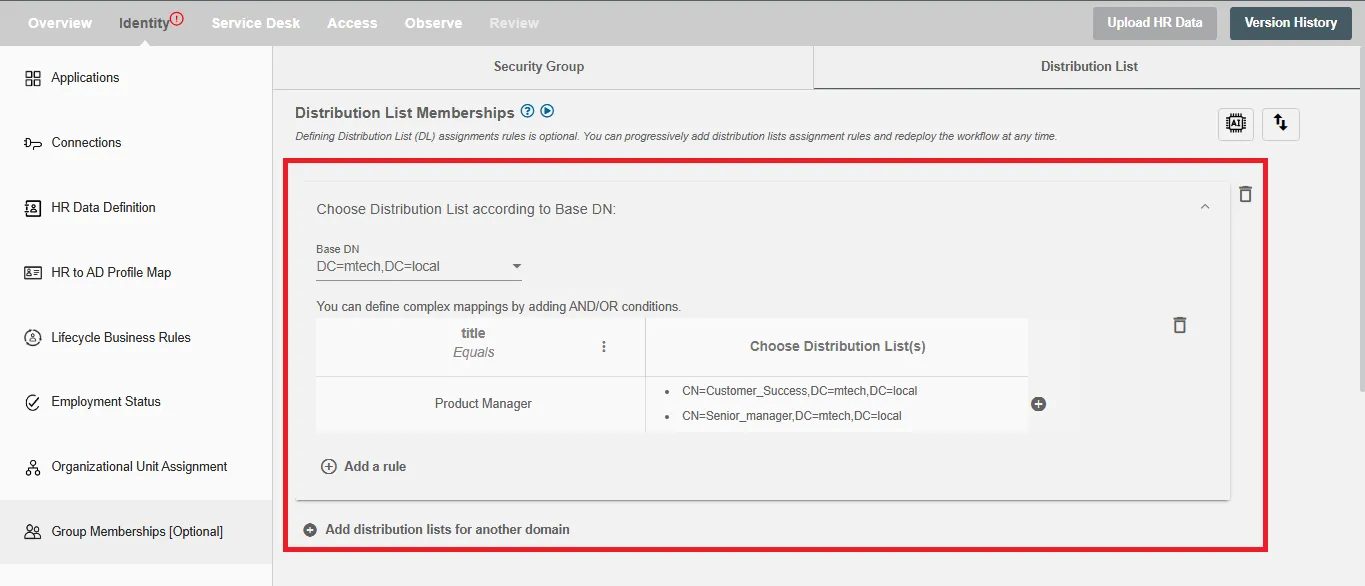 Figure 6. An example of a filter with Multi-Domain Controller
 -
You can add multiple filters using the "AND" and "OR" logic. These logics can be added using the
:button present on the right of the value input field. -
You can add multiple rows of the above filters using
+button as shown below.
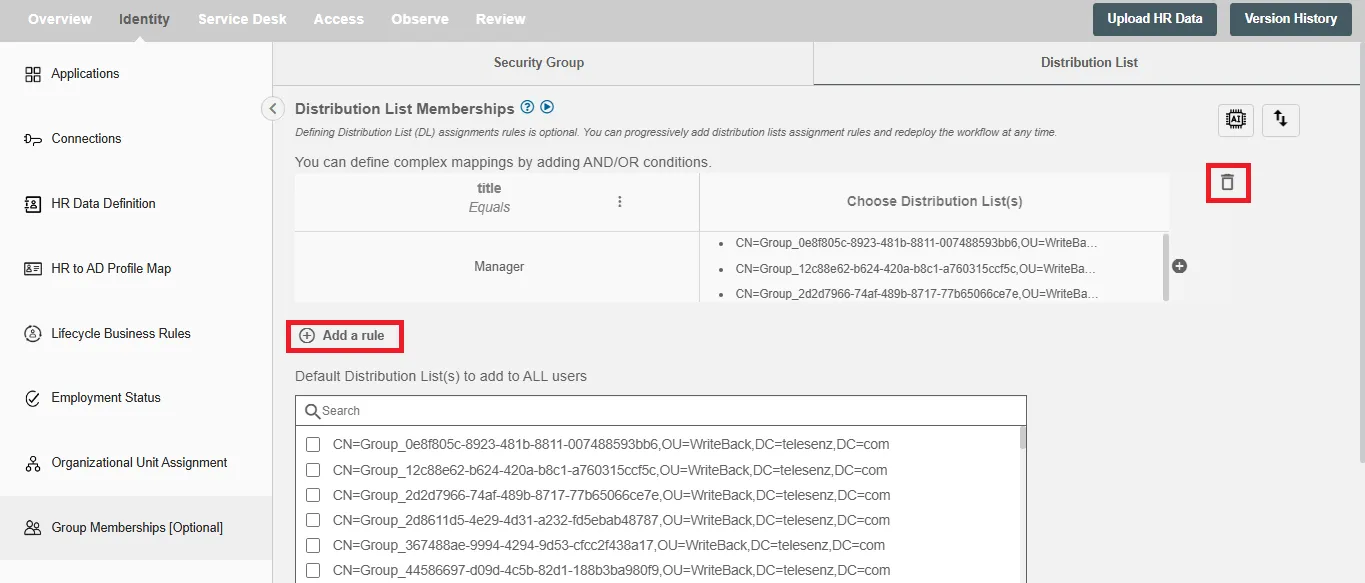
You can add or delete more rules with different priorities using the Add a rule or delete button respectively.
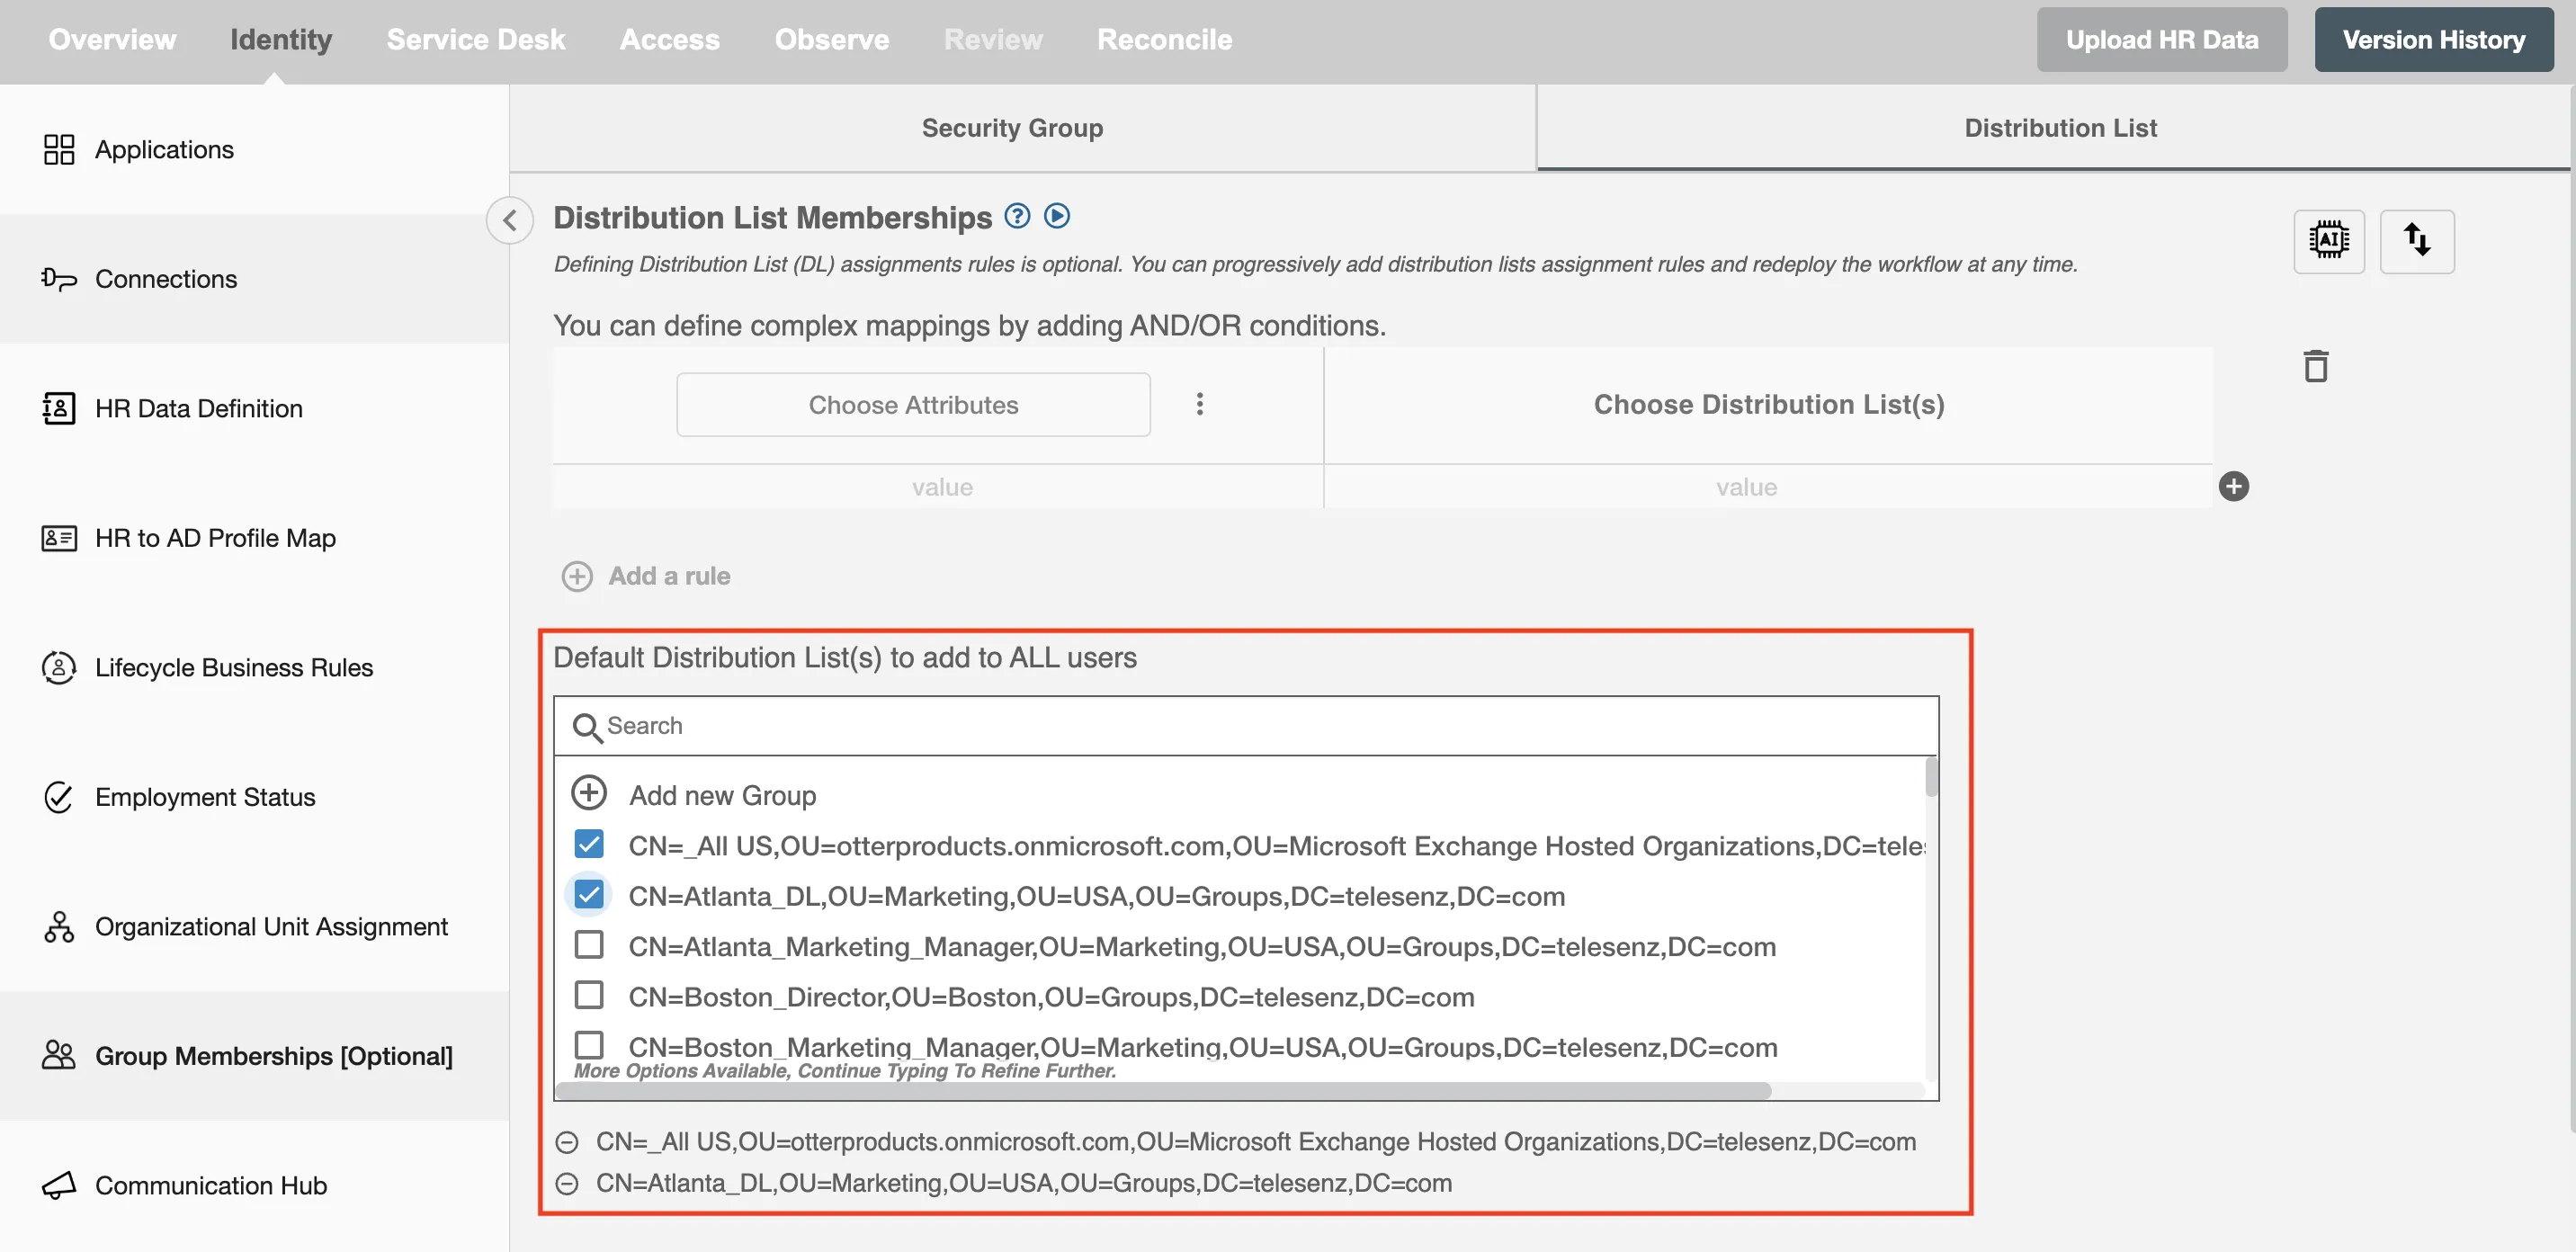
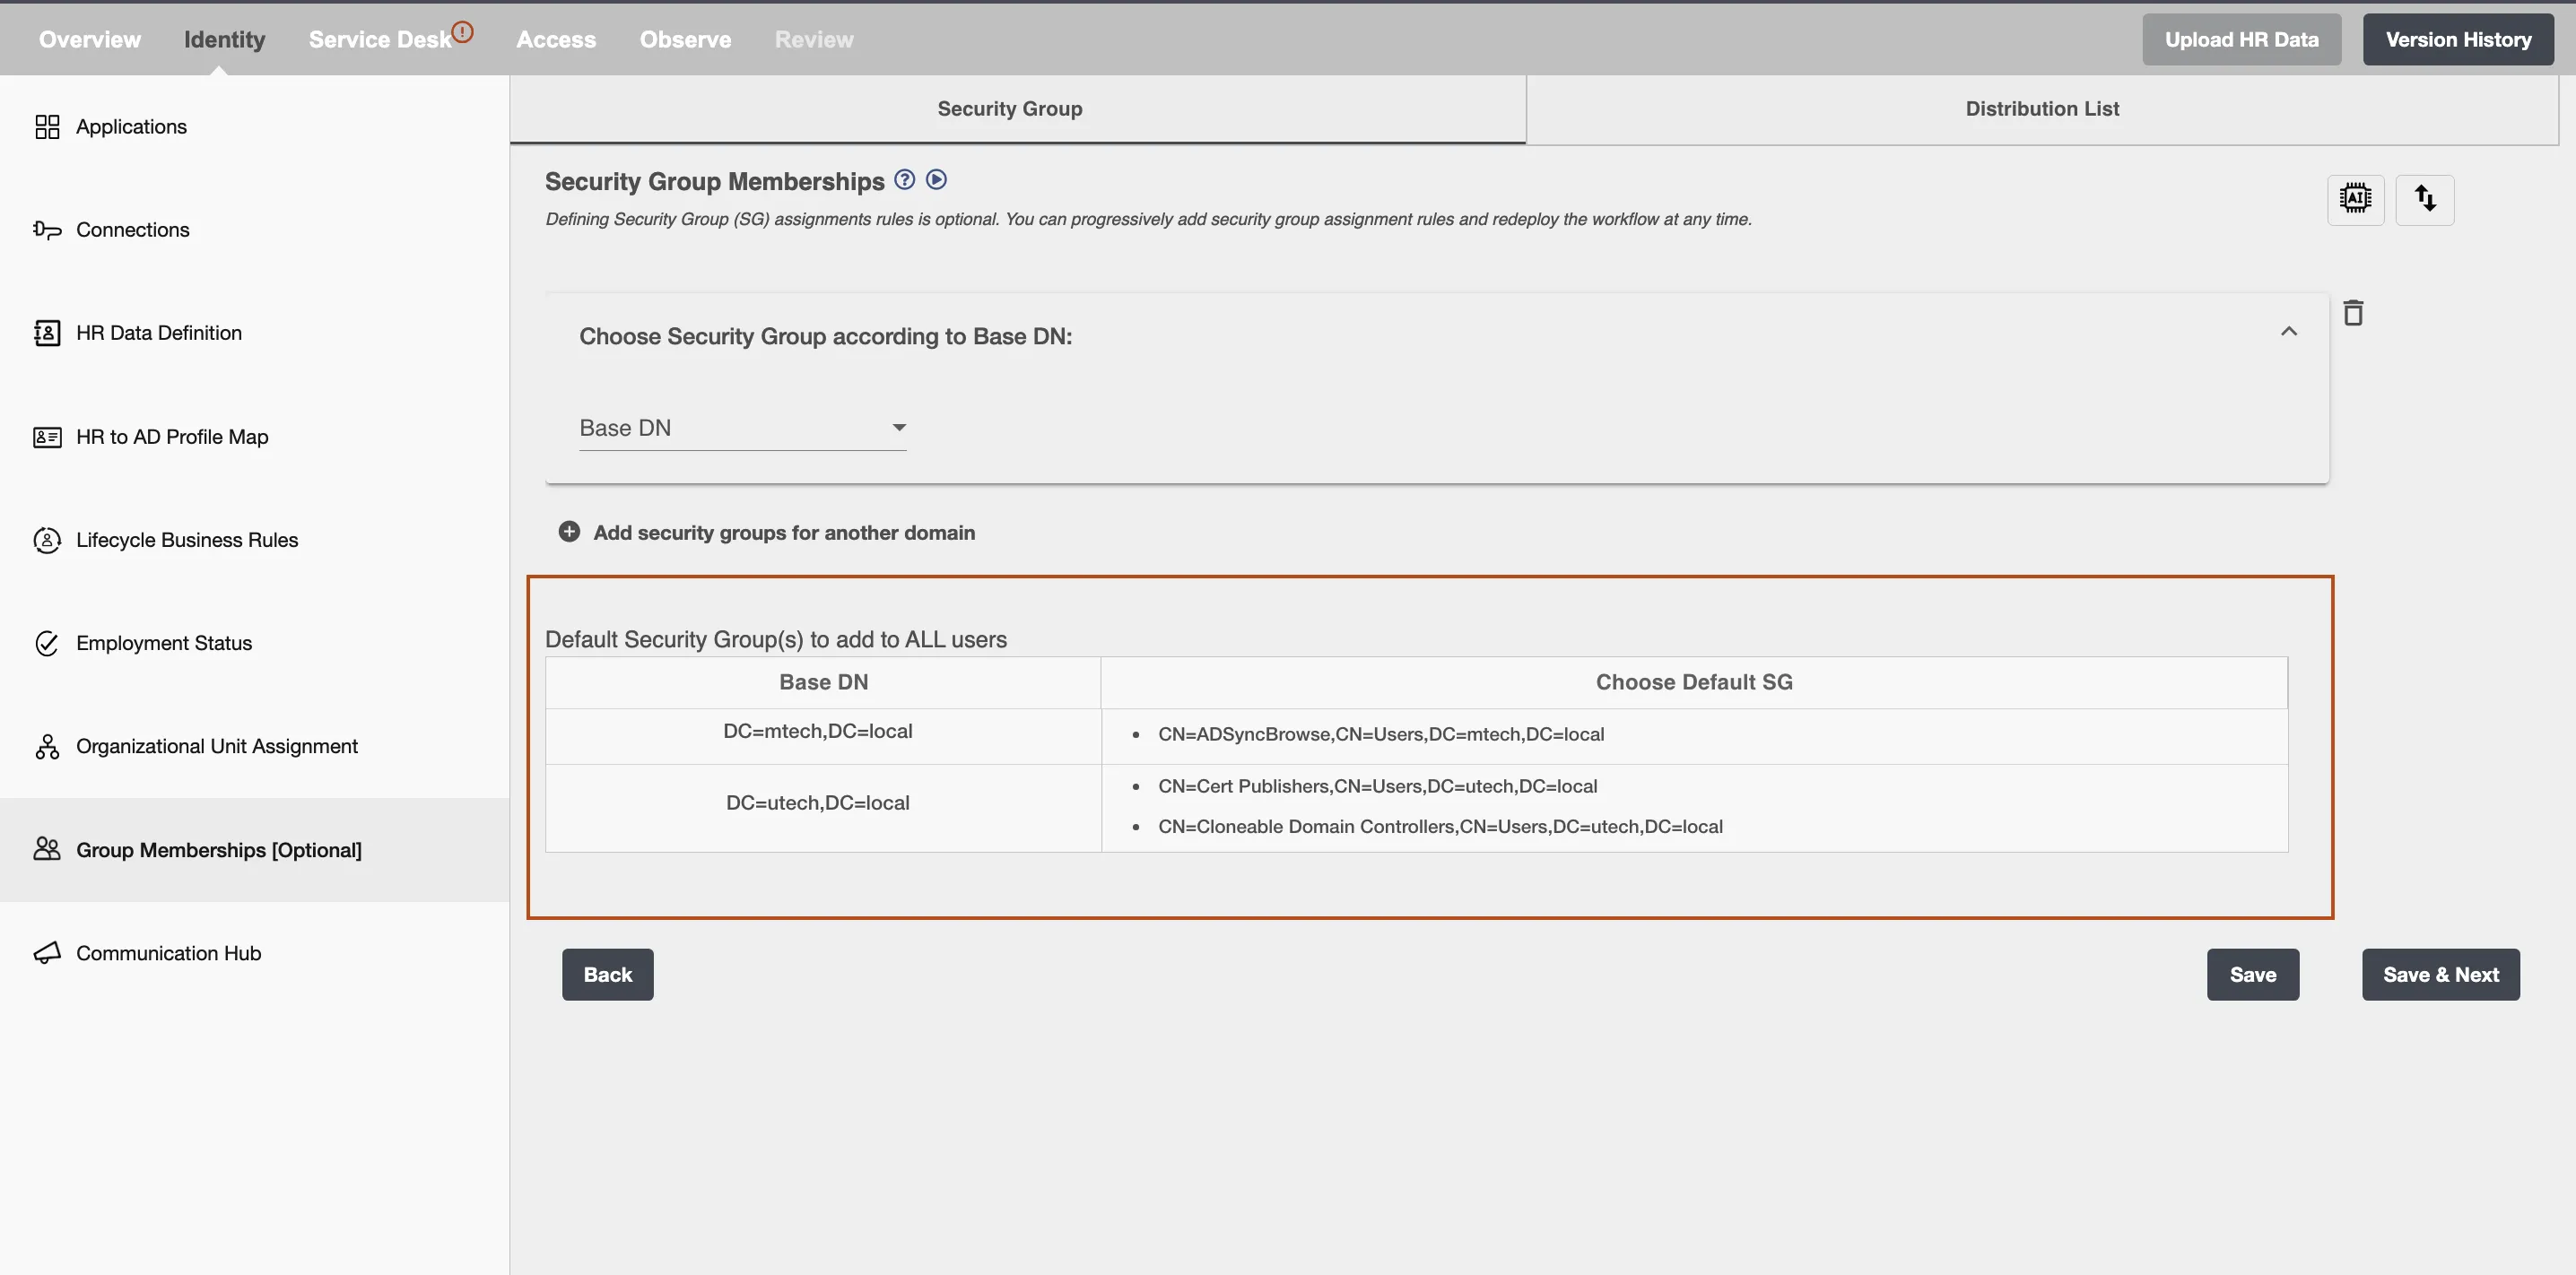
Adding the default distribution lists
In addition to rule-based distribution lists, all employees will also be assigned with default distribution lists. Simply search and select the distribution lists you want to apply to the entire company.
Import And Export Mapping Rules
Using this feature, you will be able to import all the mapping rules by uploading a .csv or .xlsx file. Also, you can export all the mapping rules as a .csv/.xlsx file.
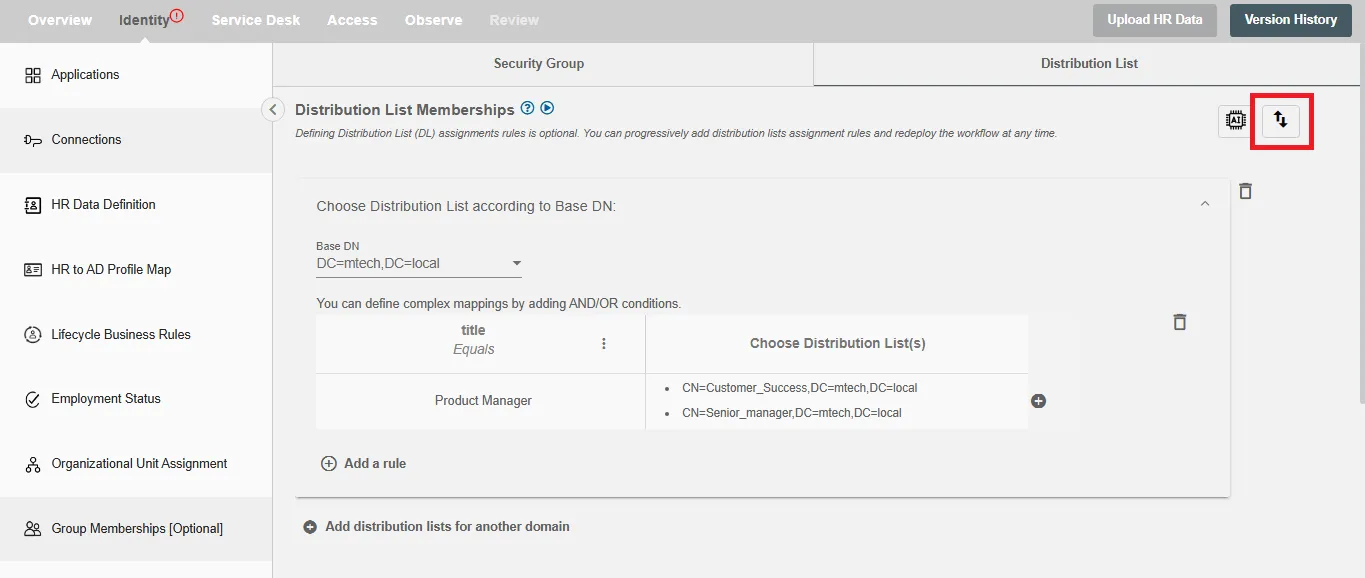
to import or export a file, you have to first click on Import/Export Mapping Rules button. Clicking on this button will open a Dialog box containing two tabs, one is for importing and the other is for exporting the mapping rules. By default, if the form is valid, you will be redirected to the Export tab. Otherwise, the Export tab will remain disabled, and you will be redirected to the Import tab.
Importing mapping rules
Steps for importing file:
-
Choose the import tab from the dialog box.
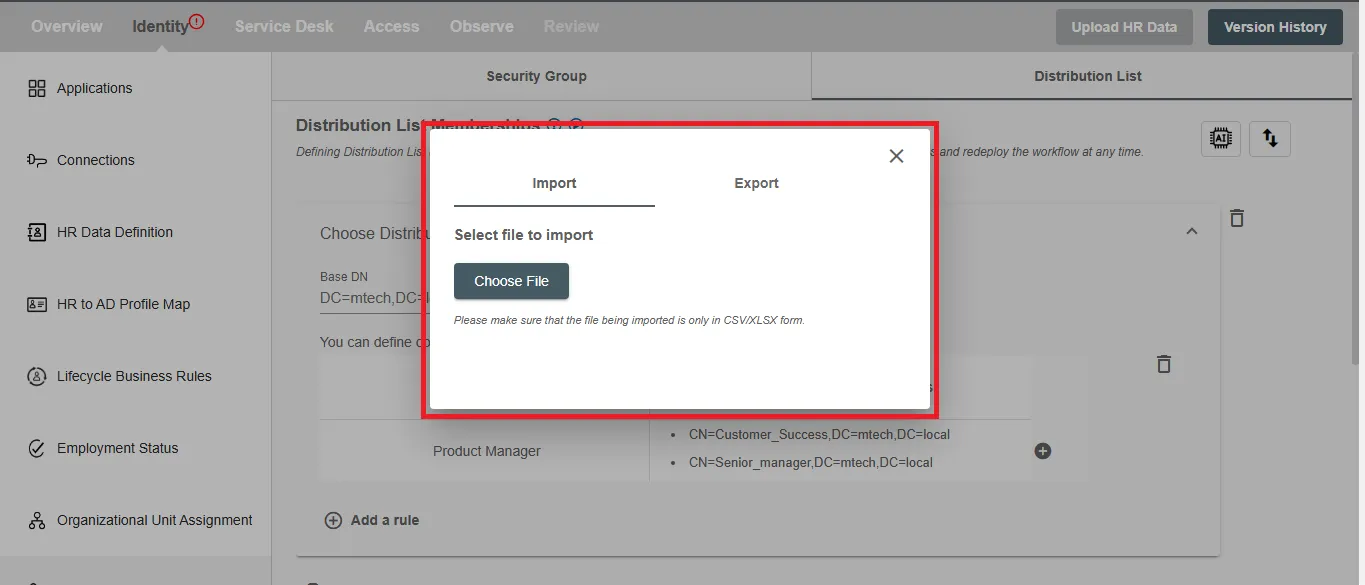 Figure 12. Dialog Box for Importing .xlsx or .csv File
 -
Now click on the Choose File button to choose the file you want to import. Clicking on the button will open a file directory from which you can select .csv or .xlsx file.
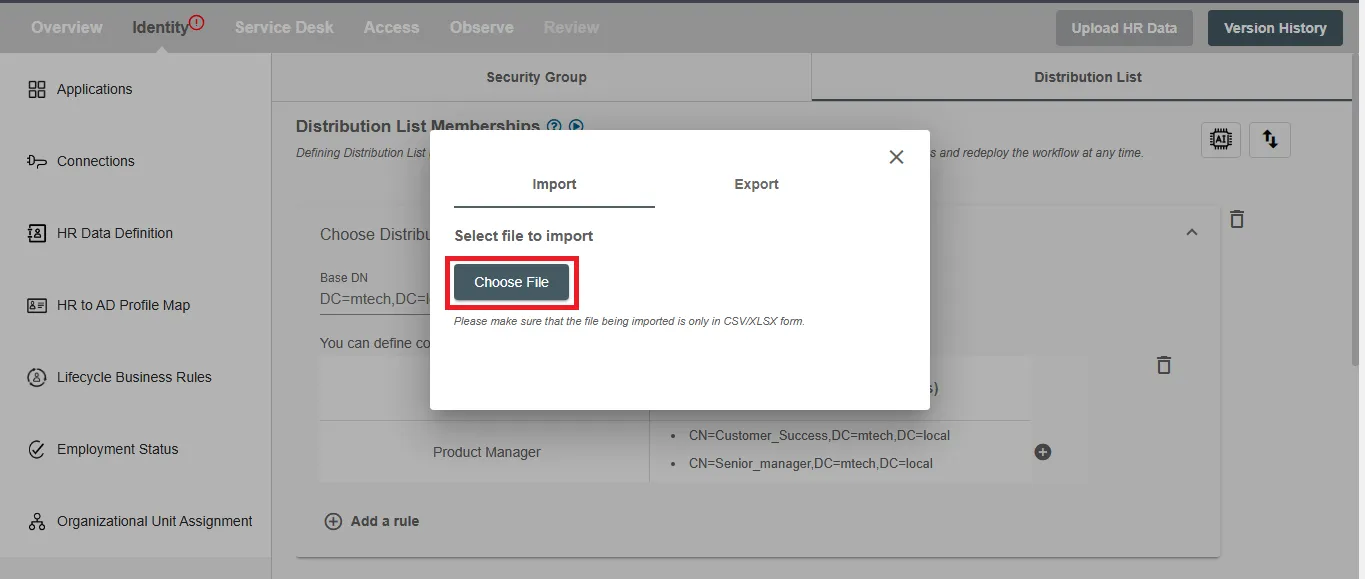 Figure 13. "Choose File" button for choosing the file to be imported.
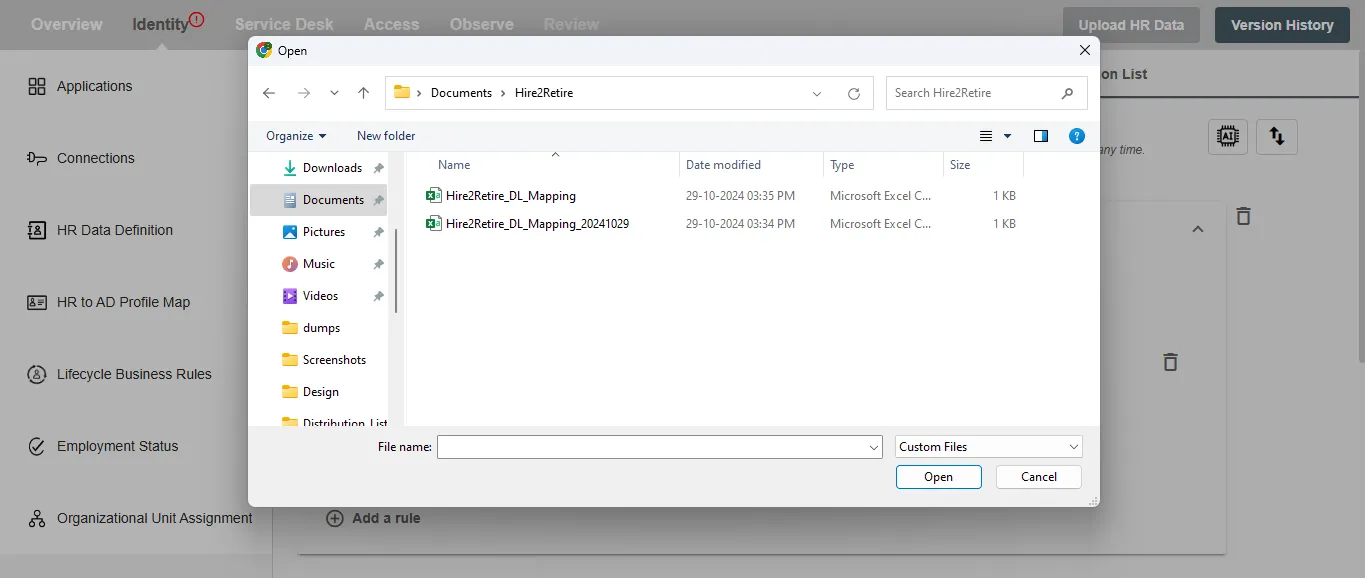 Figure 14. Windows Tab for choosing .xlsx or .csv File.
 -
After doing the first 2 steps, please wait while your file gets imported, and rules get created.
Exporting mapping rules
Steps for exporting file:
-
Choose the Export tab from a dialog box.
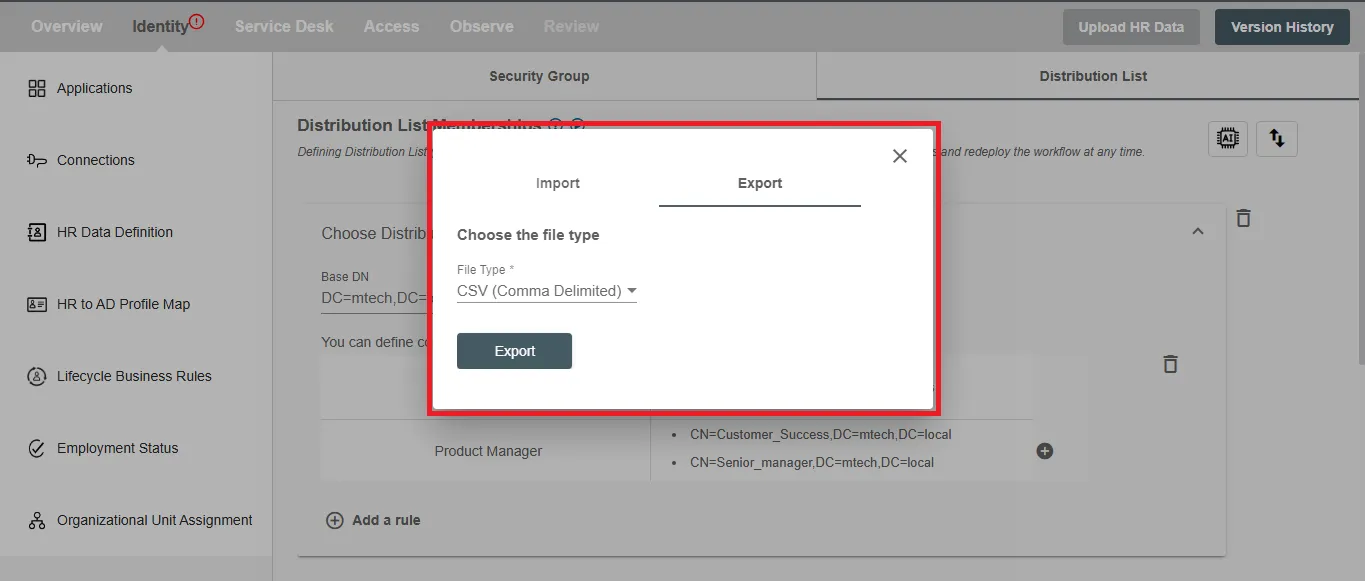 Figure 15. Dialog Box for Exporting File.
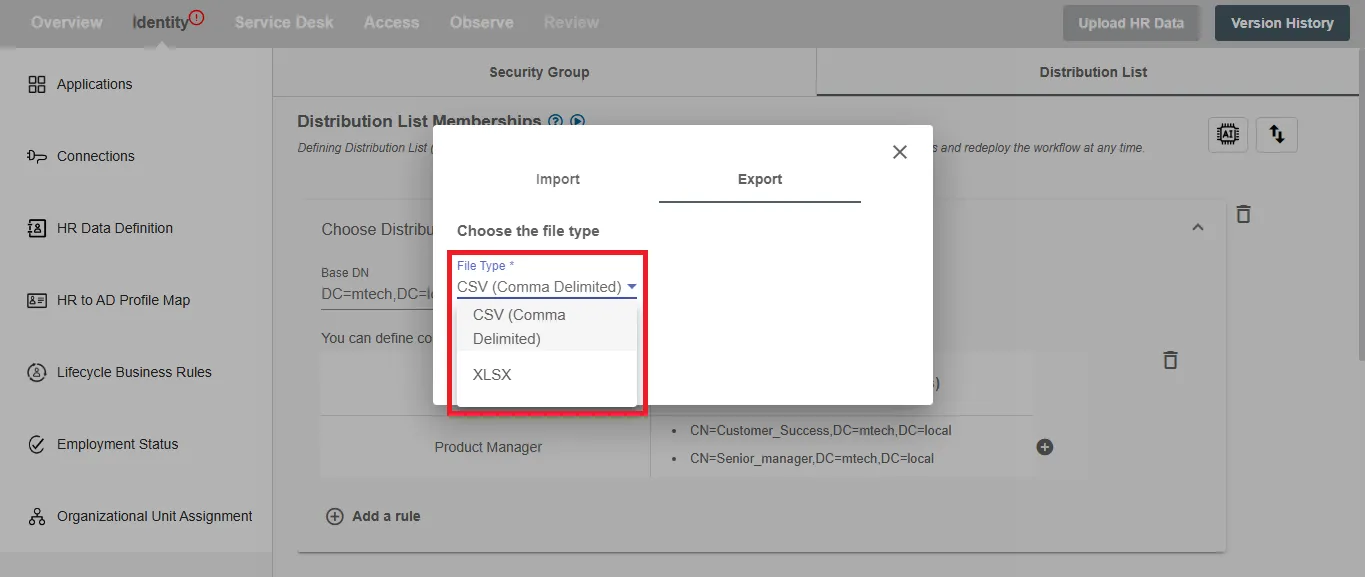 Figure 16. File Formats to Export.
 -
Now Select the file format from the dropdown and click on Export button. Once clicked your file will get exported in the selected format and the name of the file will be Hire2Retire_DL_Mapping_(TimeStamp).
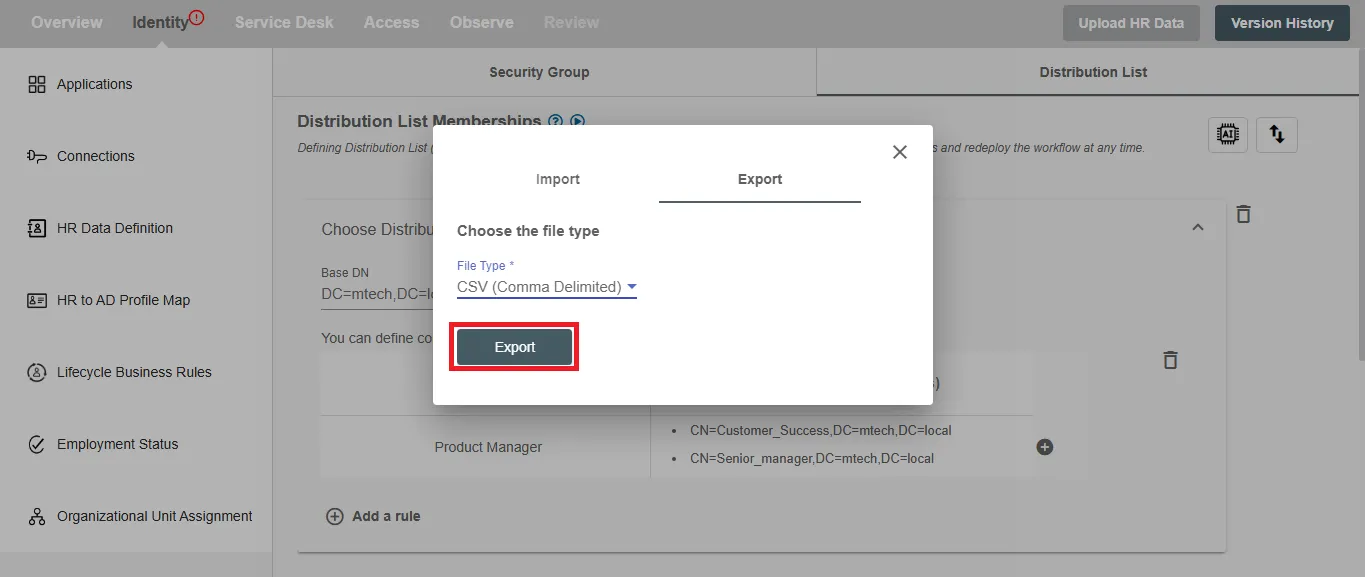 Figure 17. "Export" button.
Create a Group
This feature enables users to create distribution list at design time in Hire2Retire.
-
Step 1: Click on Add New Group
- Navigate to the section where you need to create the group.
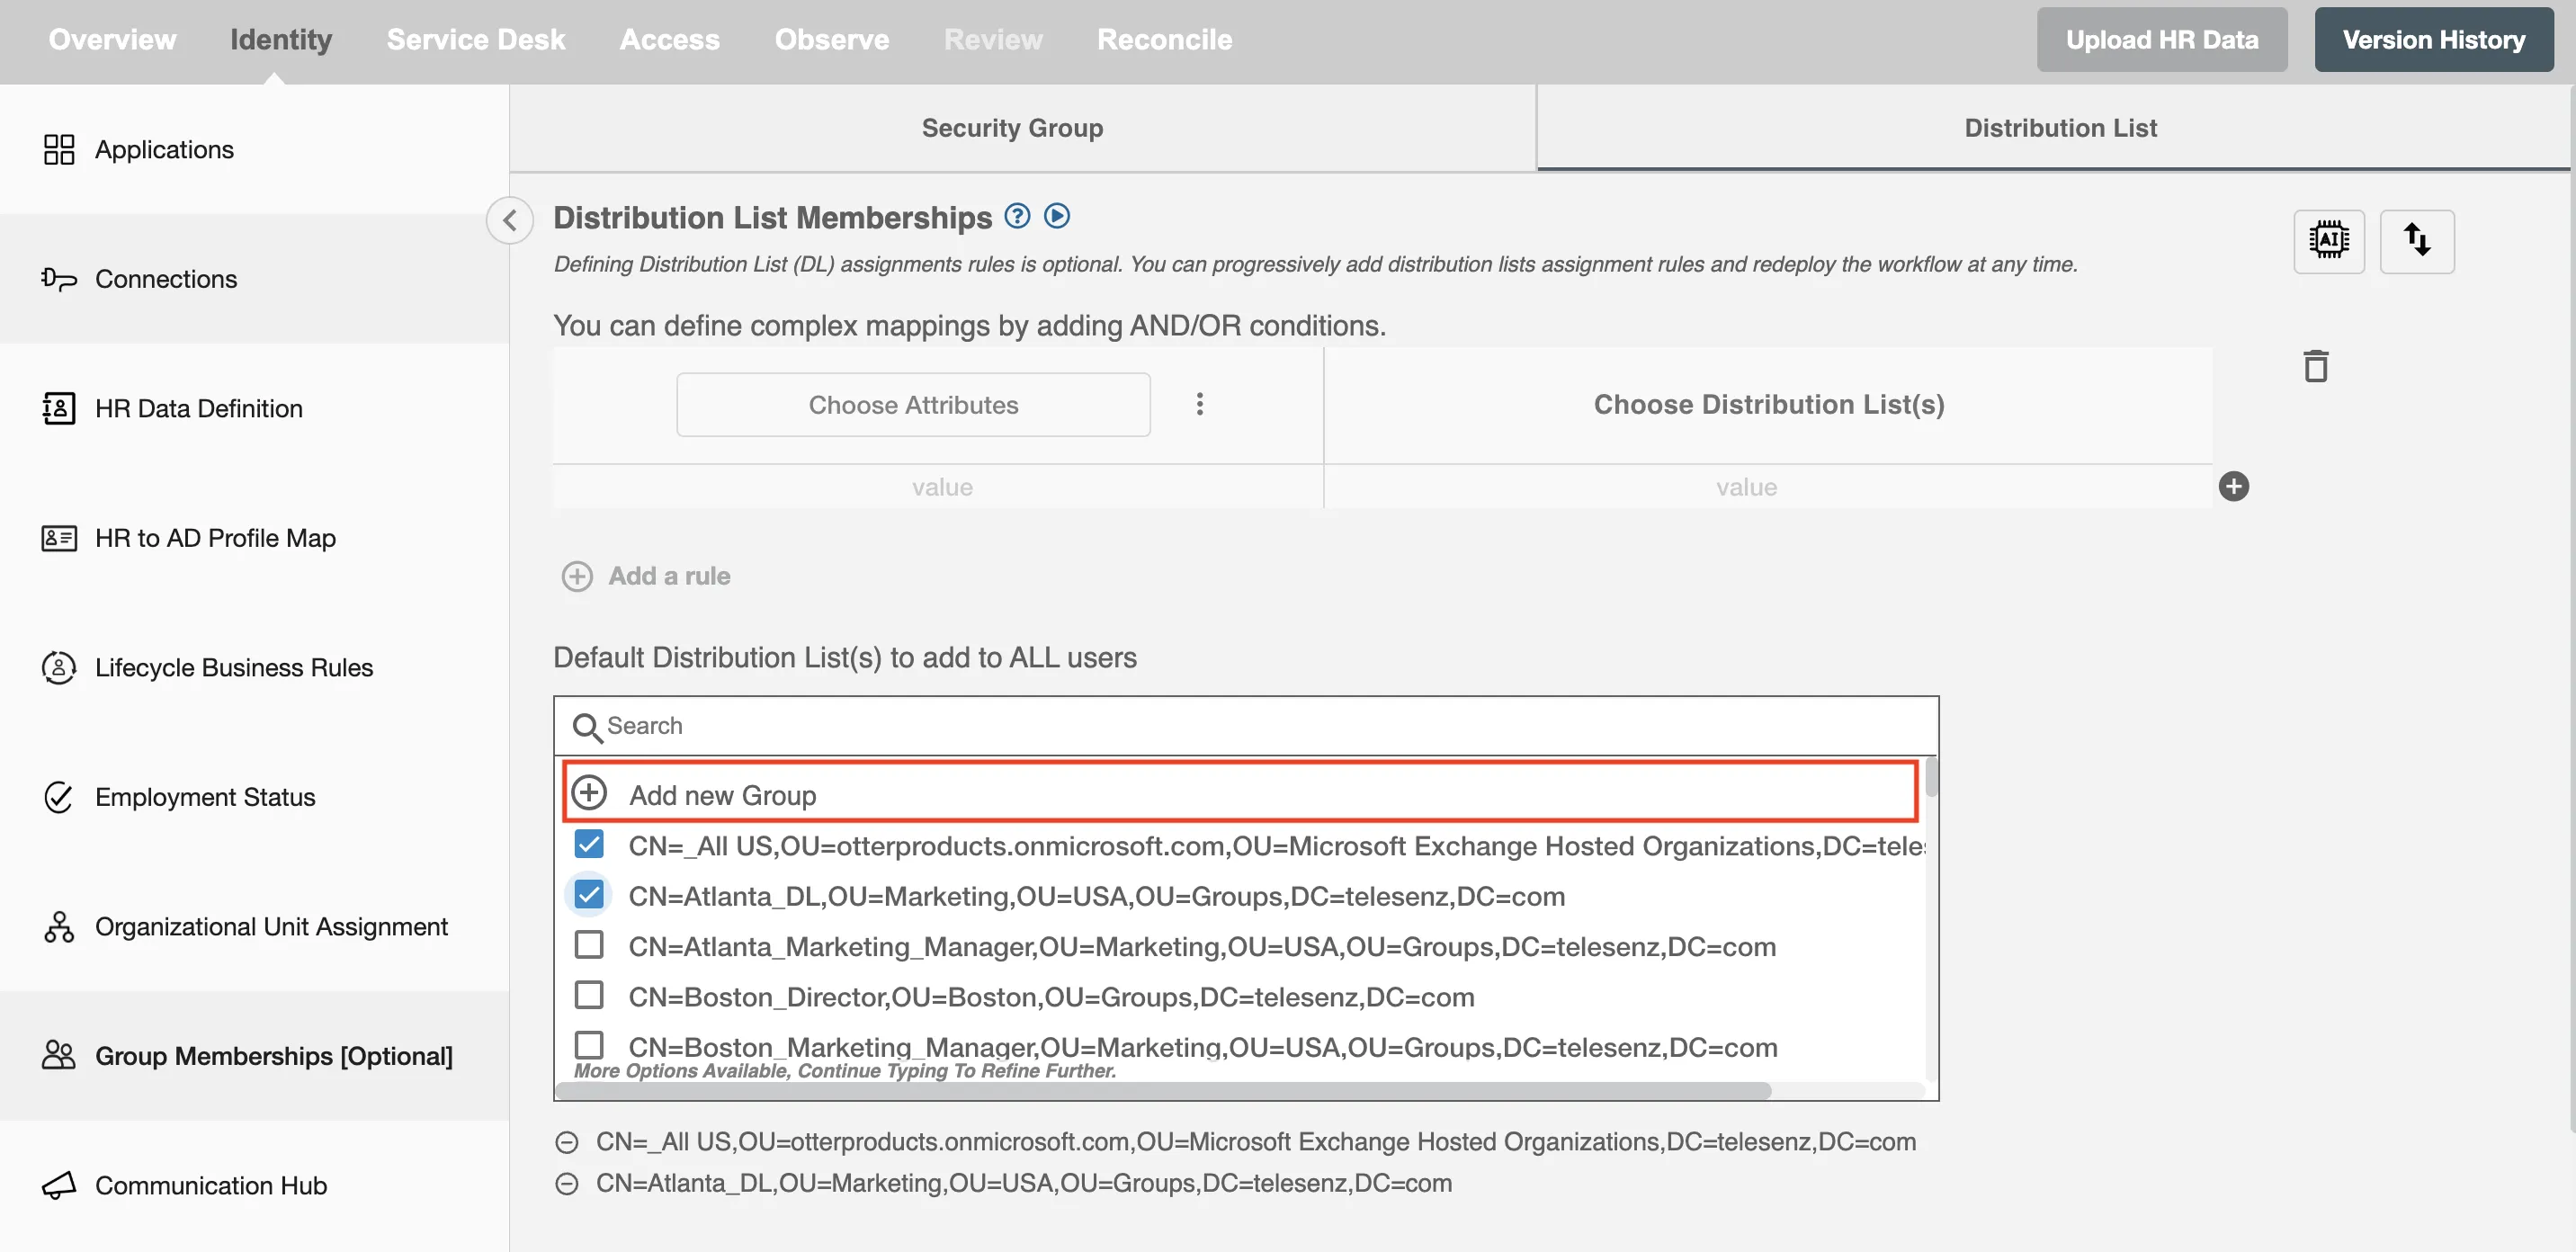 Figure 18. Create Group from Default Distribution List.
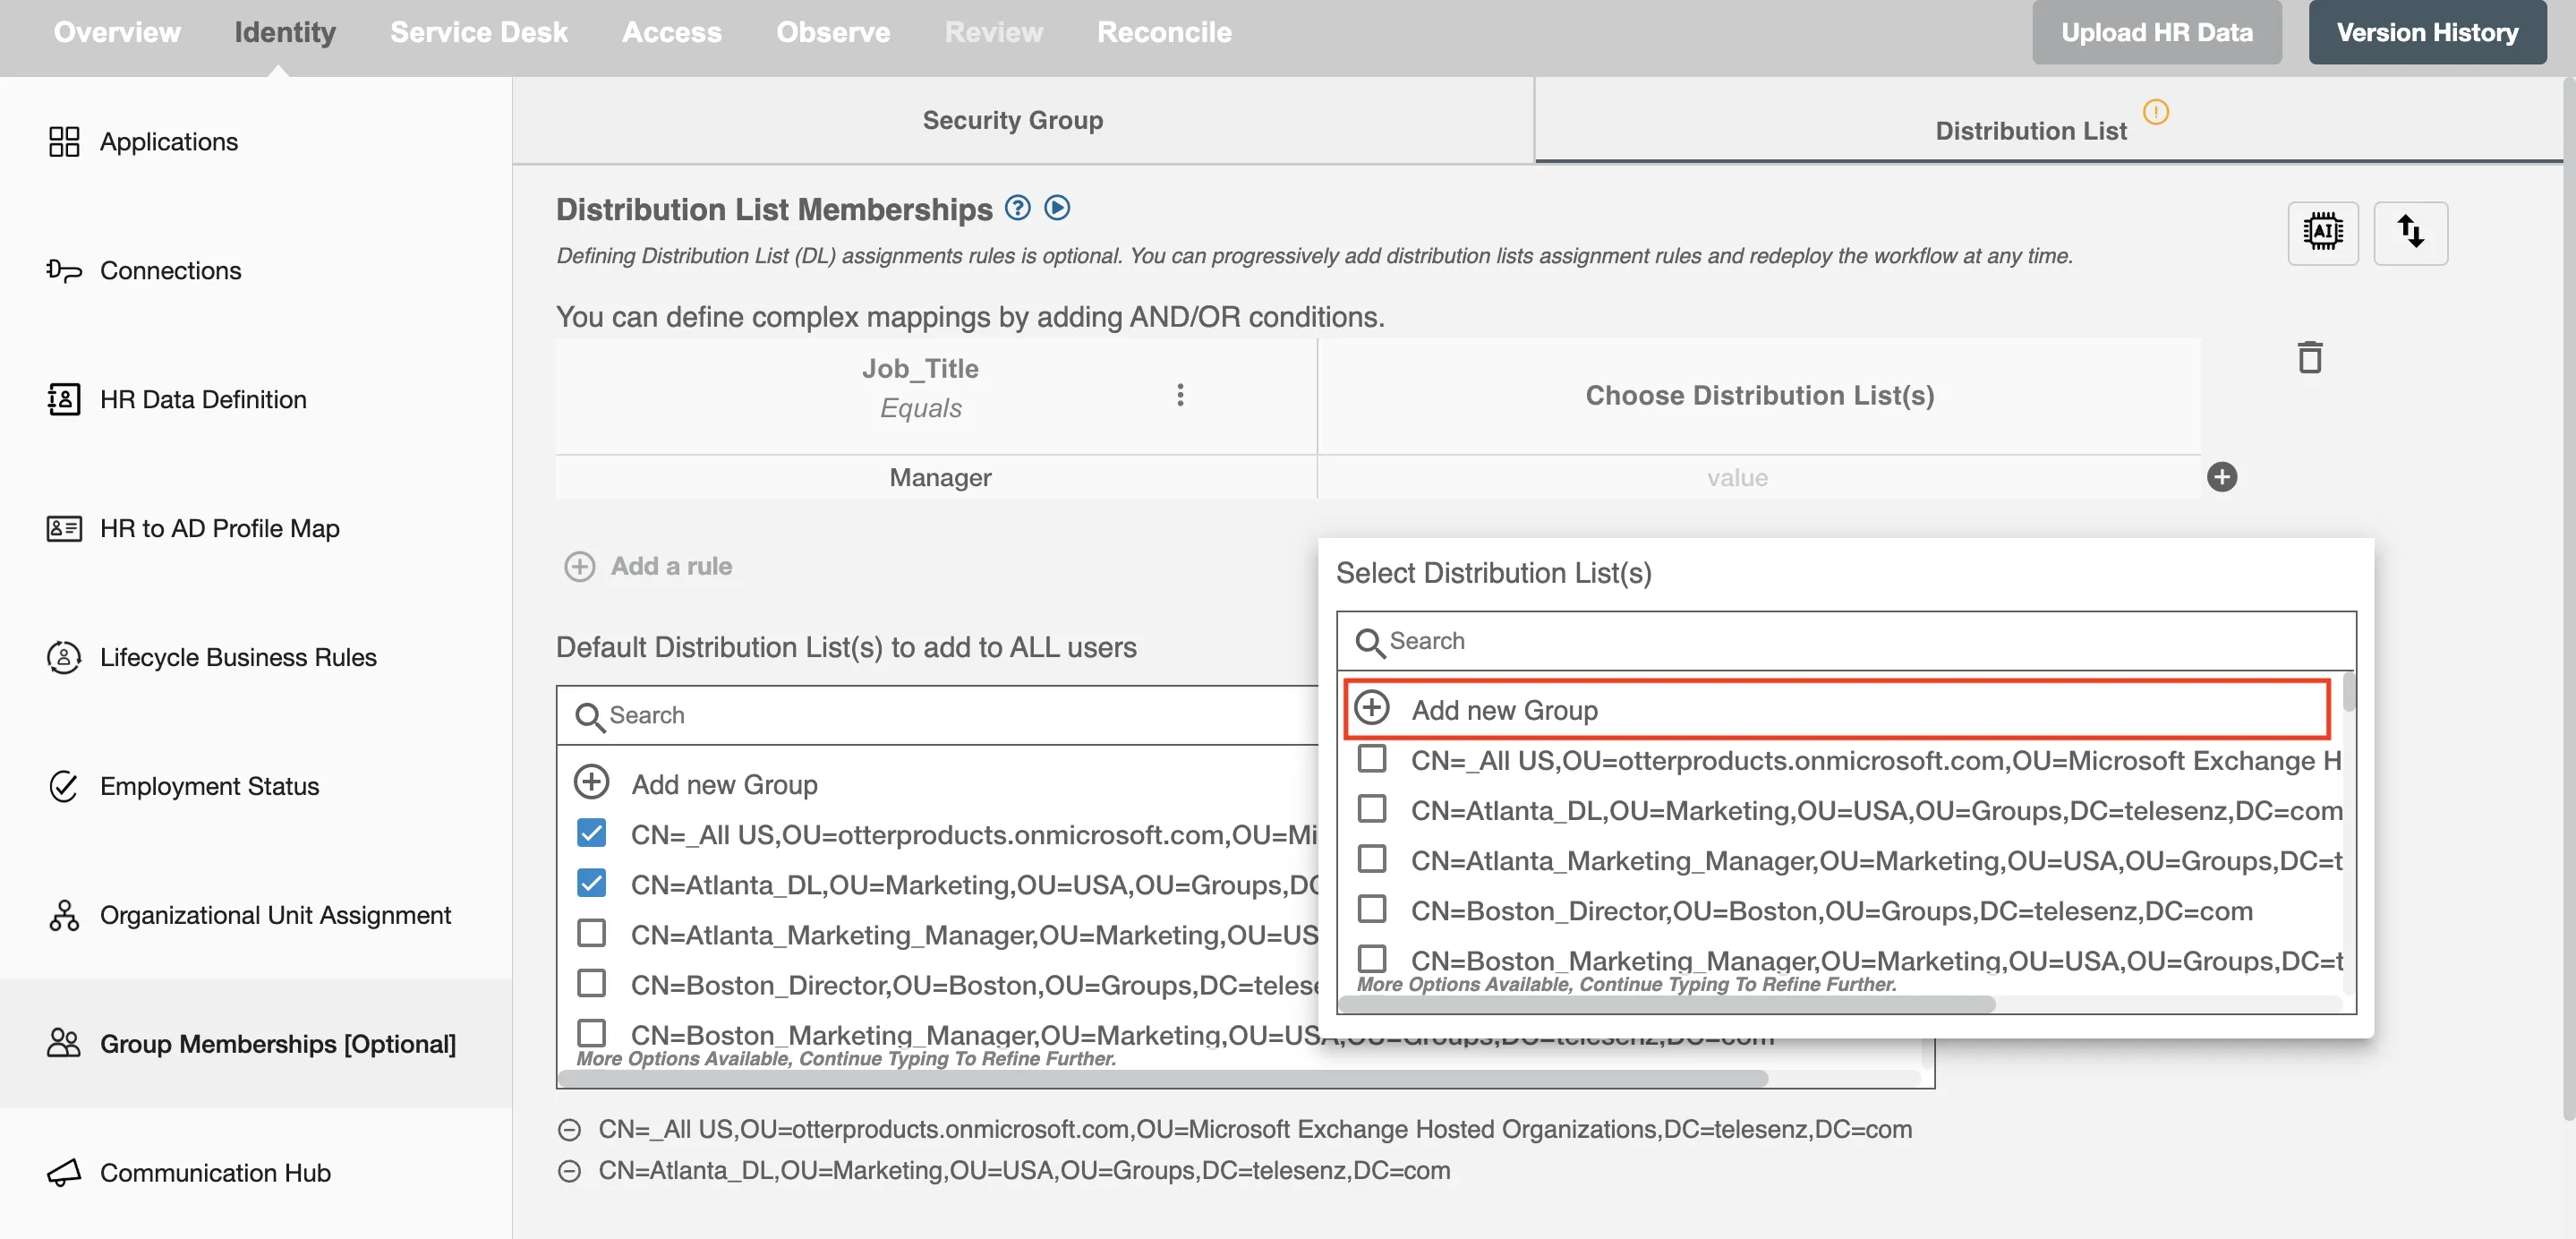 Figure 19. Create Group from Distribution List Mapping.
- Click the
Add New Groupbutton.
-
Step 2: Fill in Group Details. A form will appear prompting you to enter the required details:
- Group Name (Required)
- Group Description
- Group Scope
- Organizational Unit (Location of group)
- Group Owners (Optional)
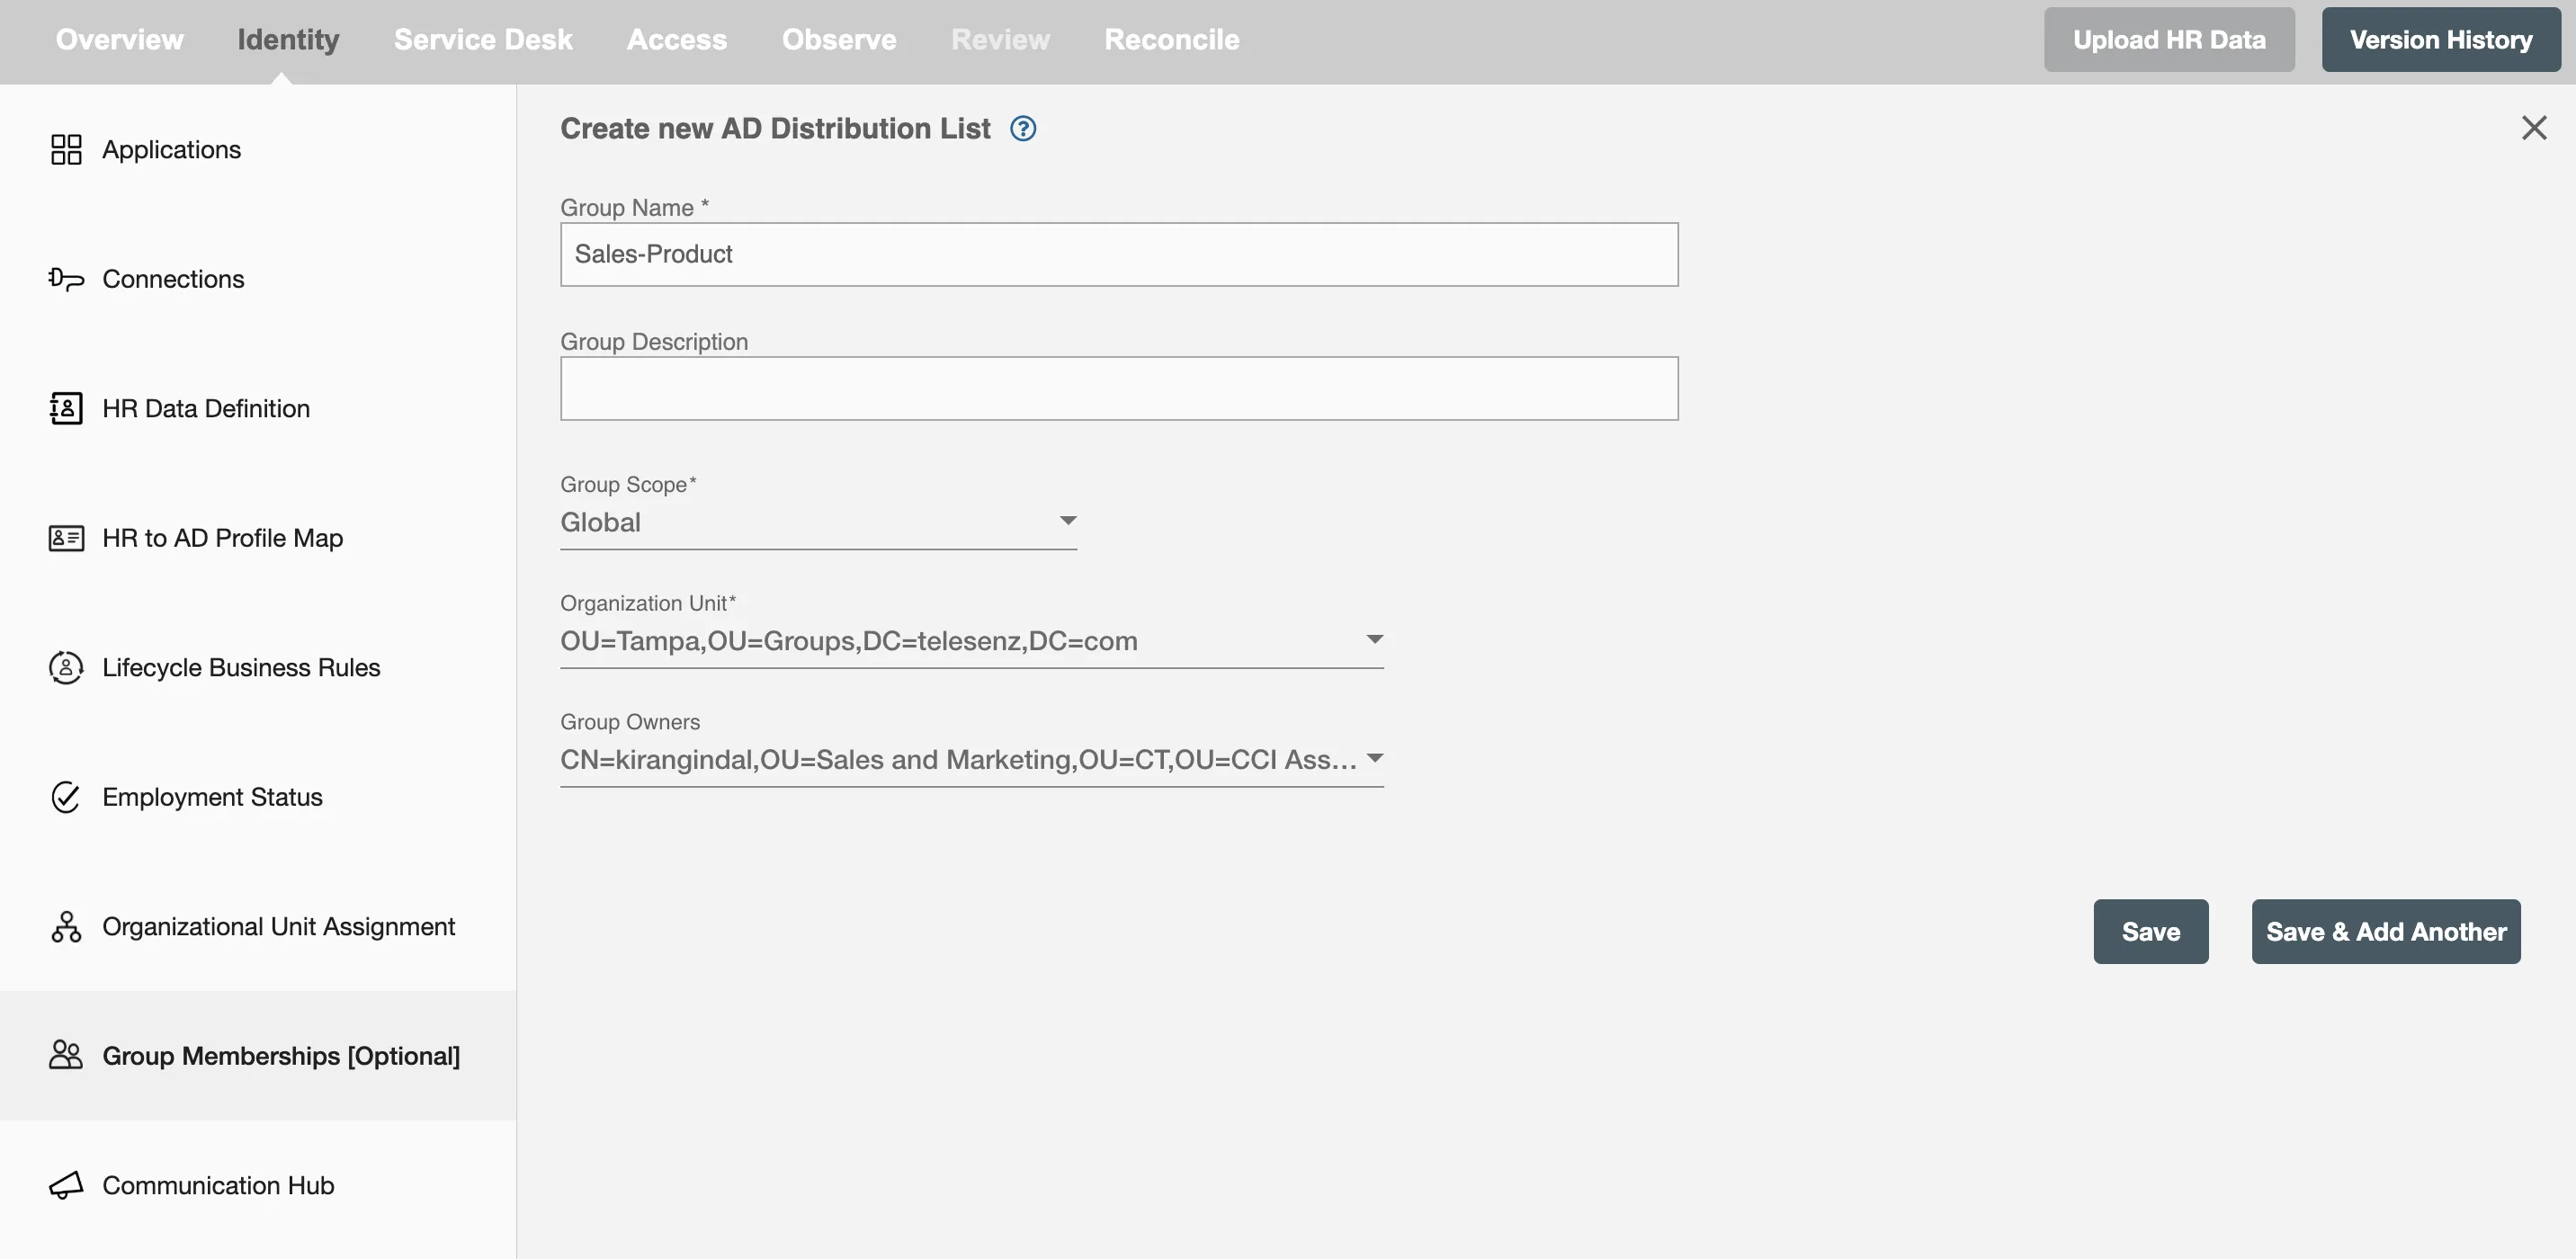 Figure 20. Create Distribution List Form.
 -
Step 3: Save the Group
- Click
Saveto create the group.
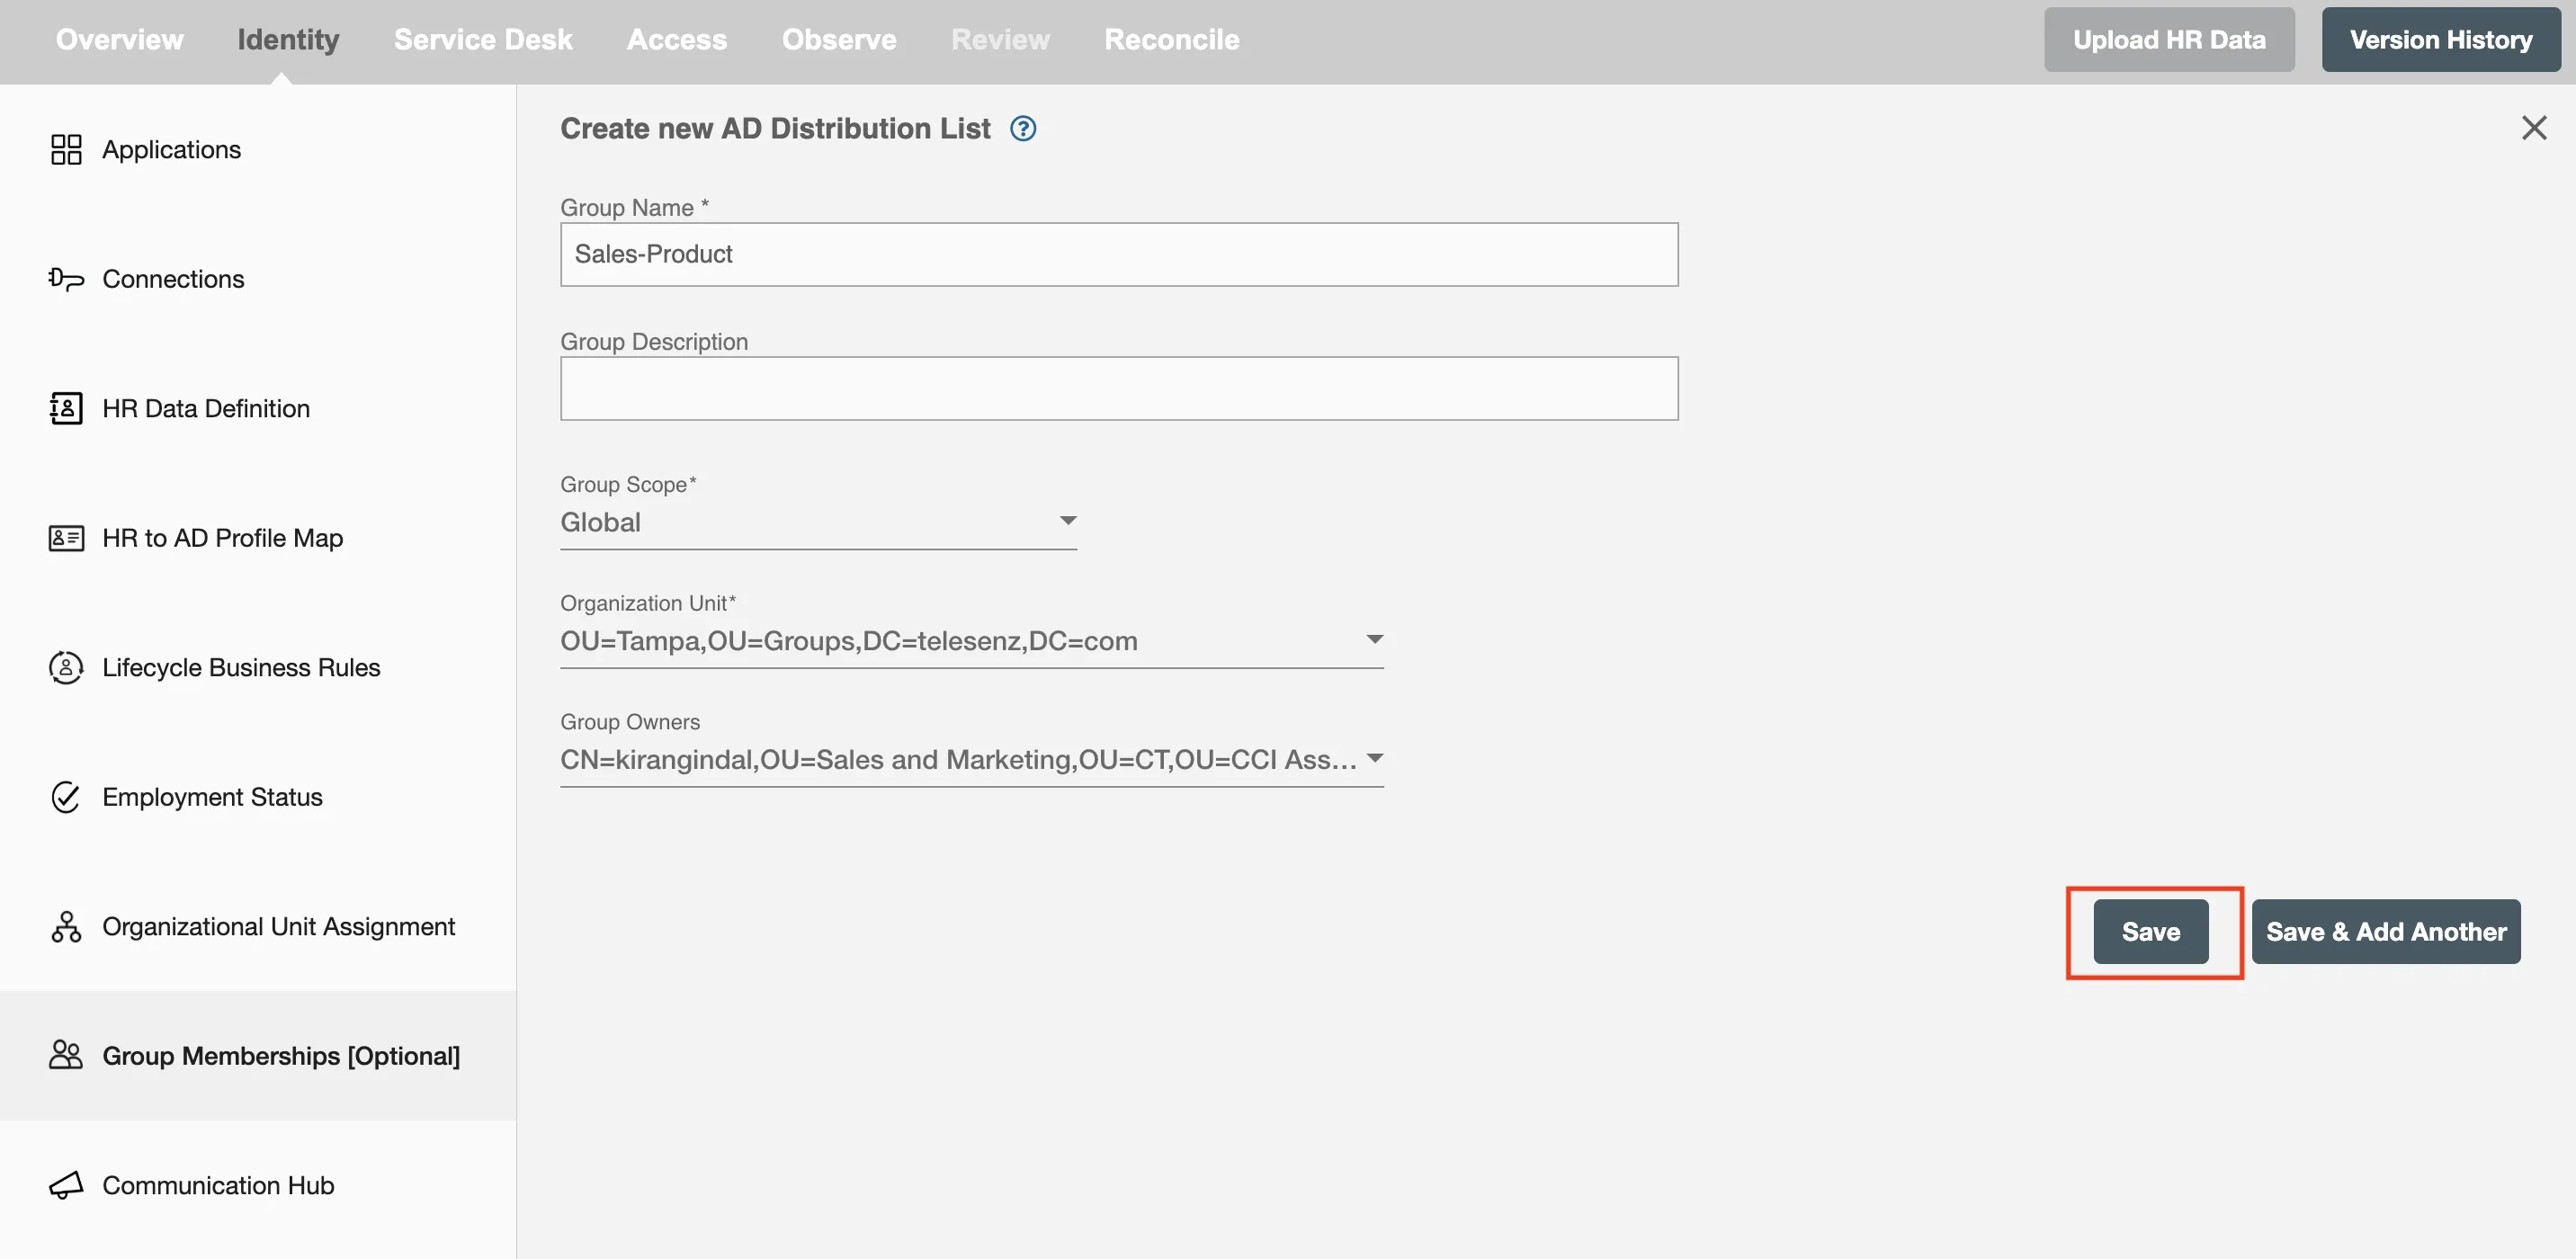 Figure 21. Save button to Create Distribution List.
- Alternatively, click
Save & Add Anotherto create multiple groups.
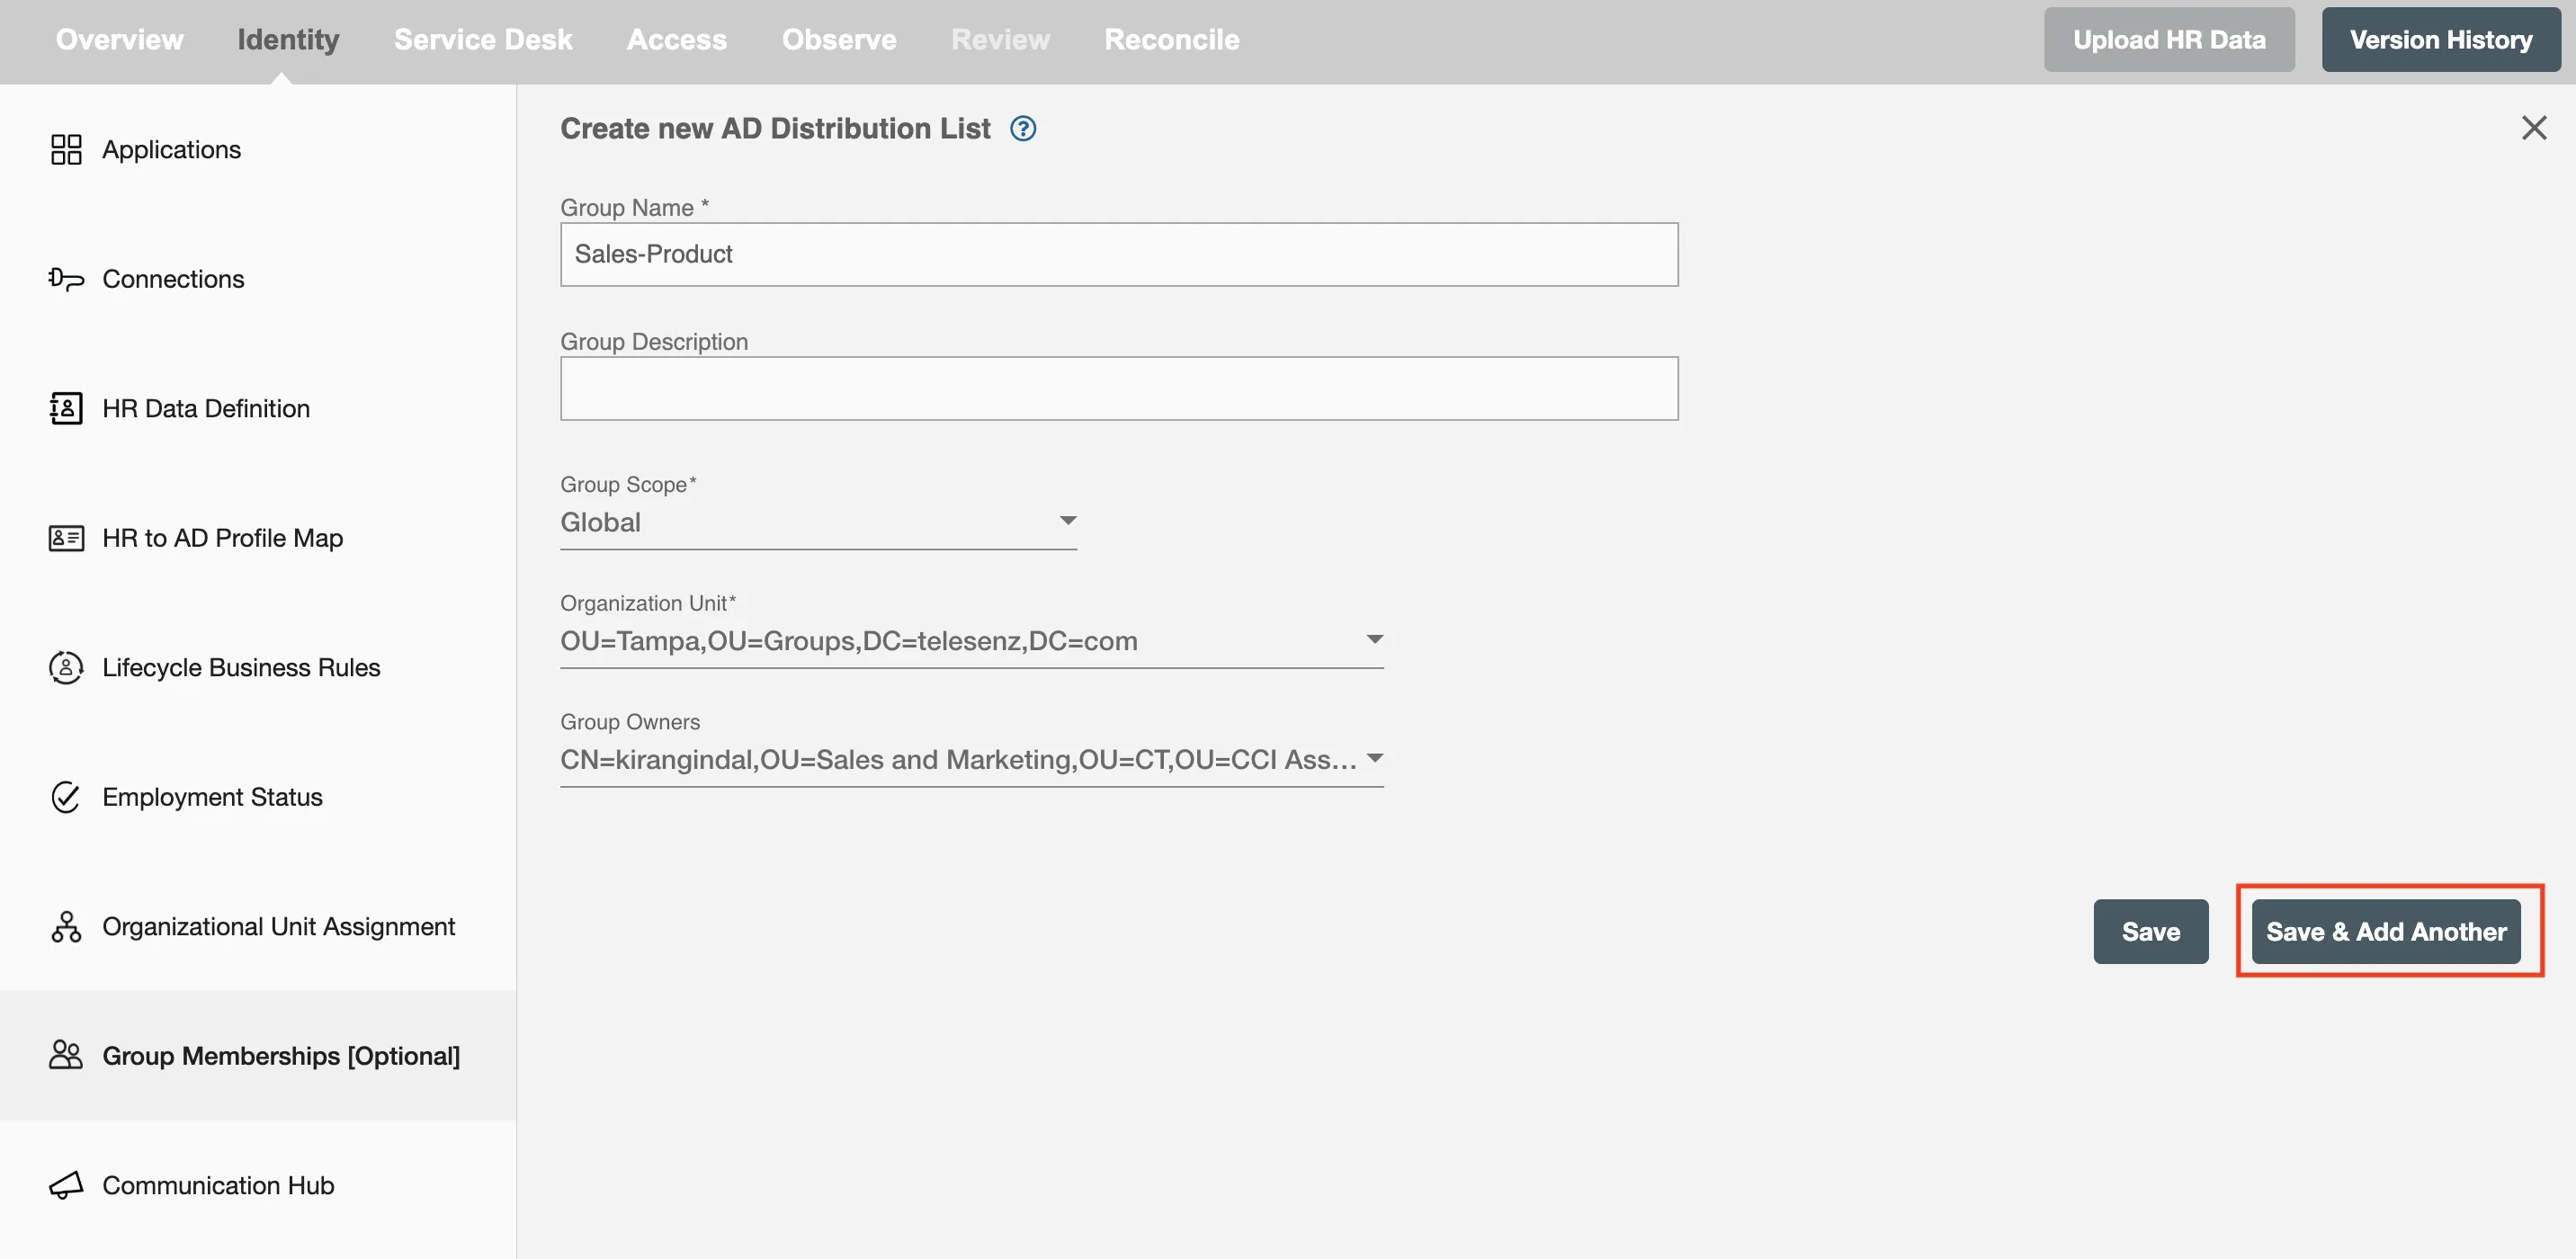 Figure 22. Save & Add Another button to Create Distribution List.
 - Click
AI Insights for Distribution List
With RoboMQ’s new AI model, rule sets for DLs can be seamlessly generated. Click the icon adjacent to 'Distribution List Memberships' in the workflow and fill out the form for more details. Upon submission, RoboMQ’s AI team will engage with you, craft rule sets, and deliver you as a CSV file.