Extension Functions
An Extension Function is a customizable extension point that allows organizations to enhance and personalize the behavior of the Hire2Retire workflow without modifying its core logic. It enables users to plug in their own scripts or subroutines hosted externally—to address specific business requirements or policies.
When integrated with Hire2Retire, these functions are executed at runtime, allowing dynamic interaction between the core workflow and your custom logic. This provides a flexible and powerful way to implement organization-specific validations, transformations, or actions.
In the current implementation, Hire2Retire supports integration with User Extension Functions, enabling you to configure and trigger your own Entra ID-hosted logic in response to lifecycle events such as hiring, role changes, or terminations.
When an employee is terminated, Hire2Retire publishes the employee lifecycle event to the configured Service Bus queue. An Extension Function can consume this message and perform additional actions such as removing all calendar events associated with the terminated user’s account. After processing the request, the Extension Function sends a response back to Hire2Retire indicating whether the operation was successful.
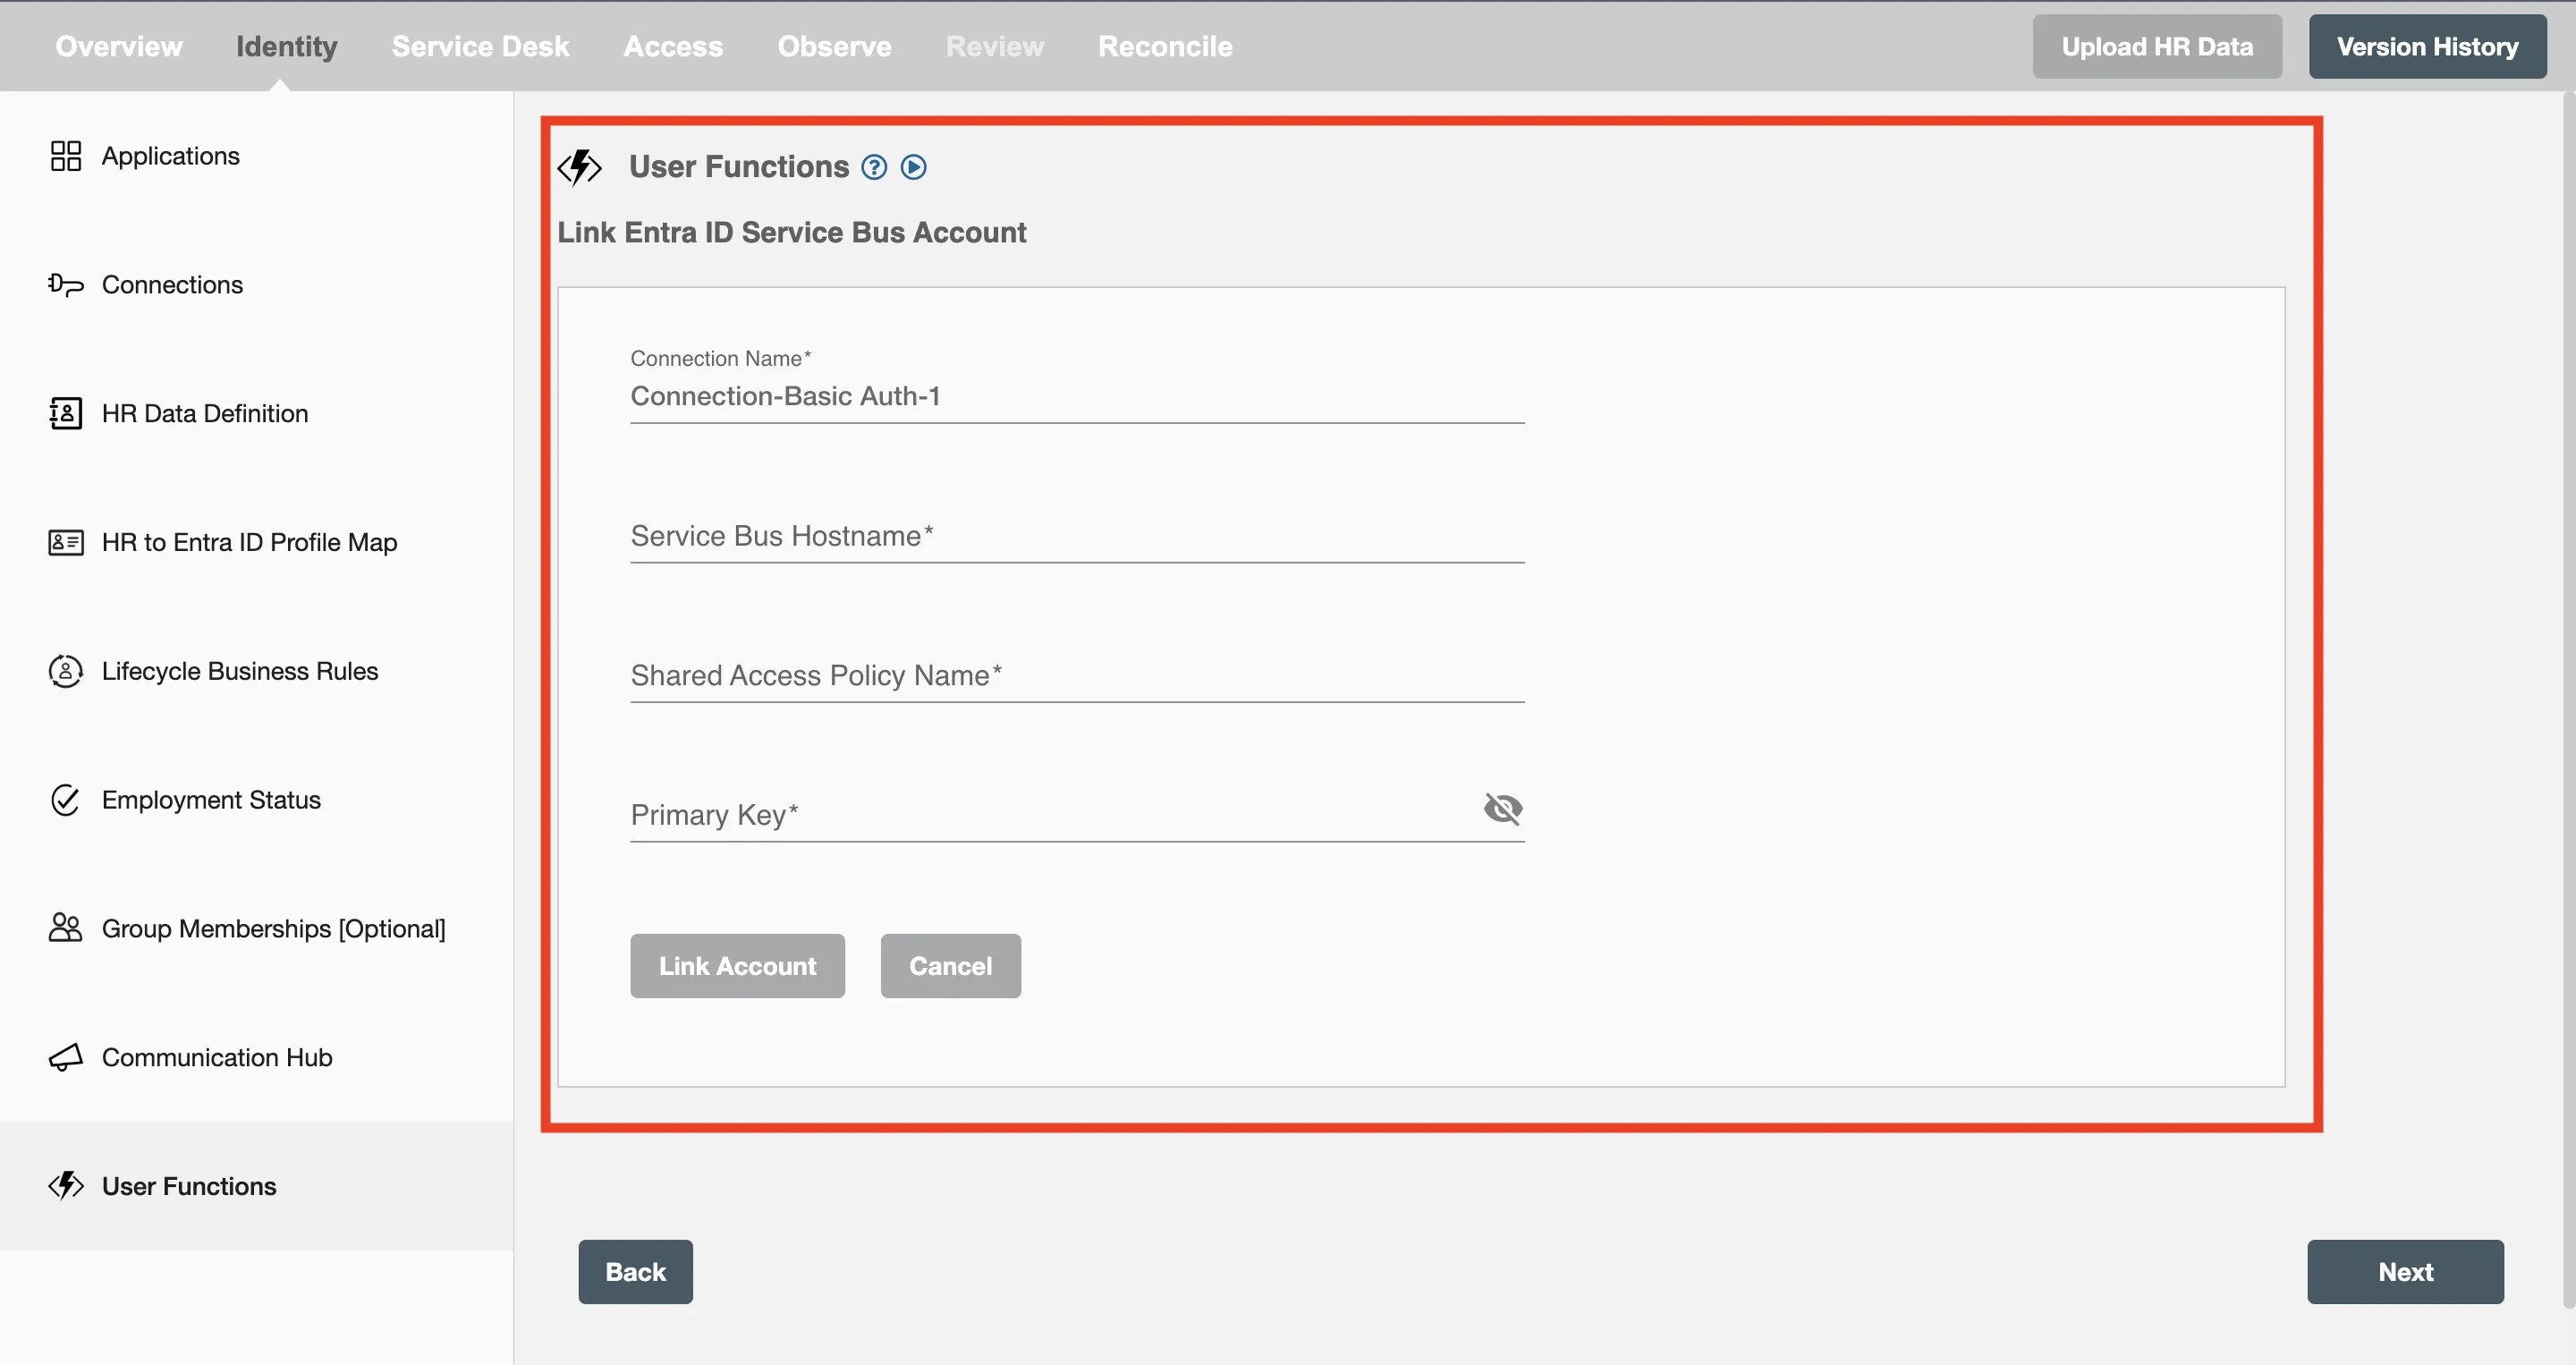
Entra ID Service Bus Connection Form
Hire2Retire uses Entra ID Service Bus to securely send employee lifecycle events (like hiring, role changes, and terminations) to your User Extension Functions. To establish this connection, the following details are required:
- Service Bus Namespace
- Shared Access Policy Name (Key Name)
- Primary Key
These credentials allow Hire2Retire to authenticate and publish messages to your Service Bus queue or topic, triggering your User Extension Functions as part of your automation flow.
-
Service Bus Namespace: This is the globally unique name of your Service Bus instance. You can create a new Service Bus namespace dedicated to Hire2Retire Extension Functions:
- Go to the Azure Portal → https://portal.azure.com
- Select the flyout menu from the top left and navigate to the All services page.
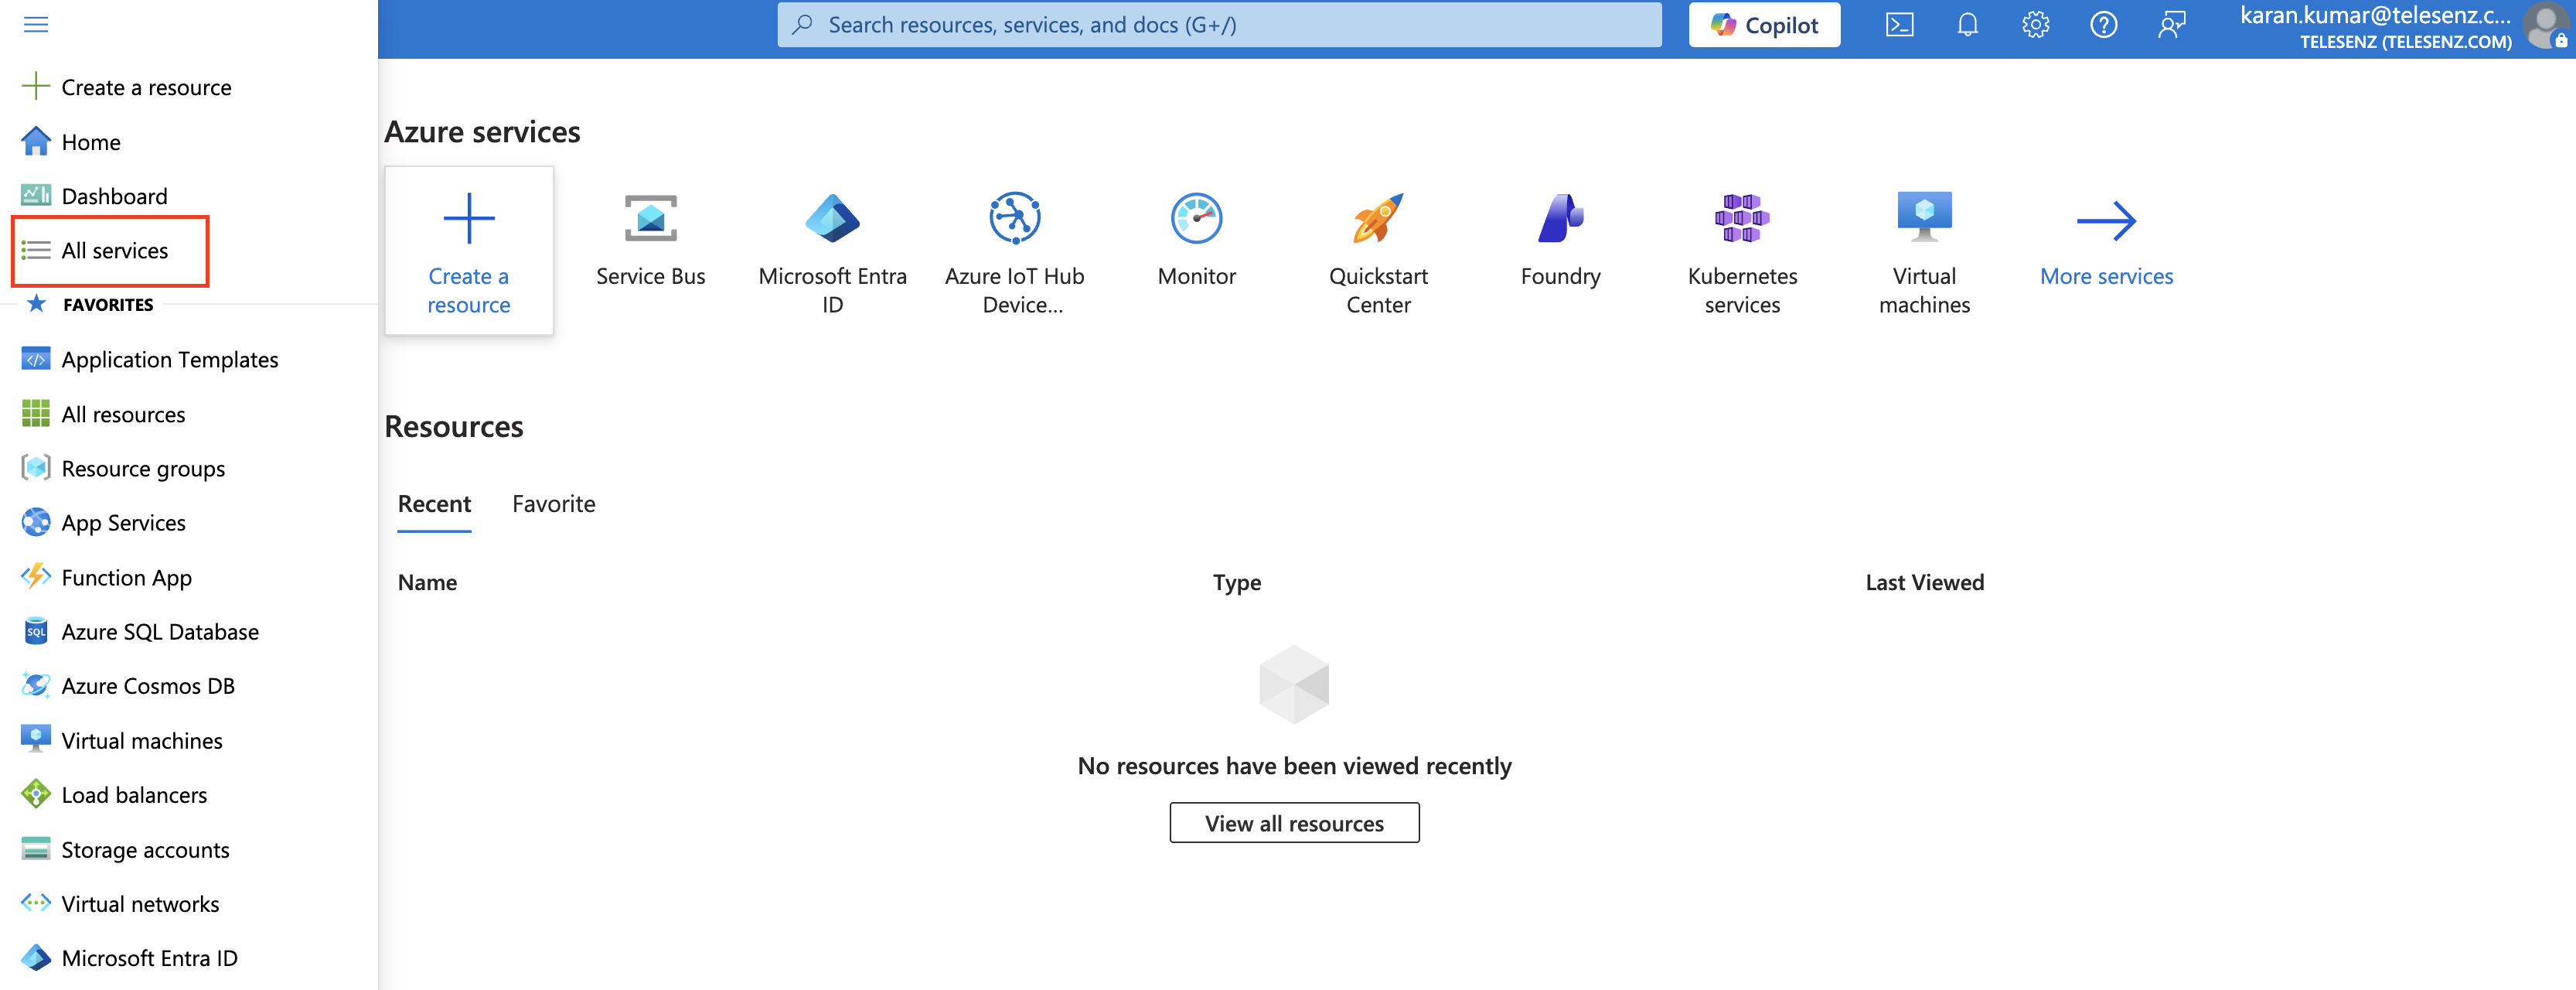
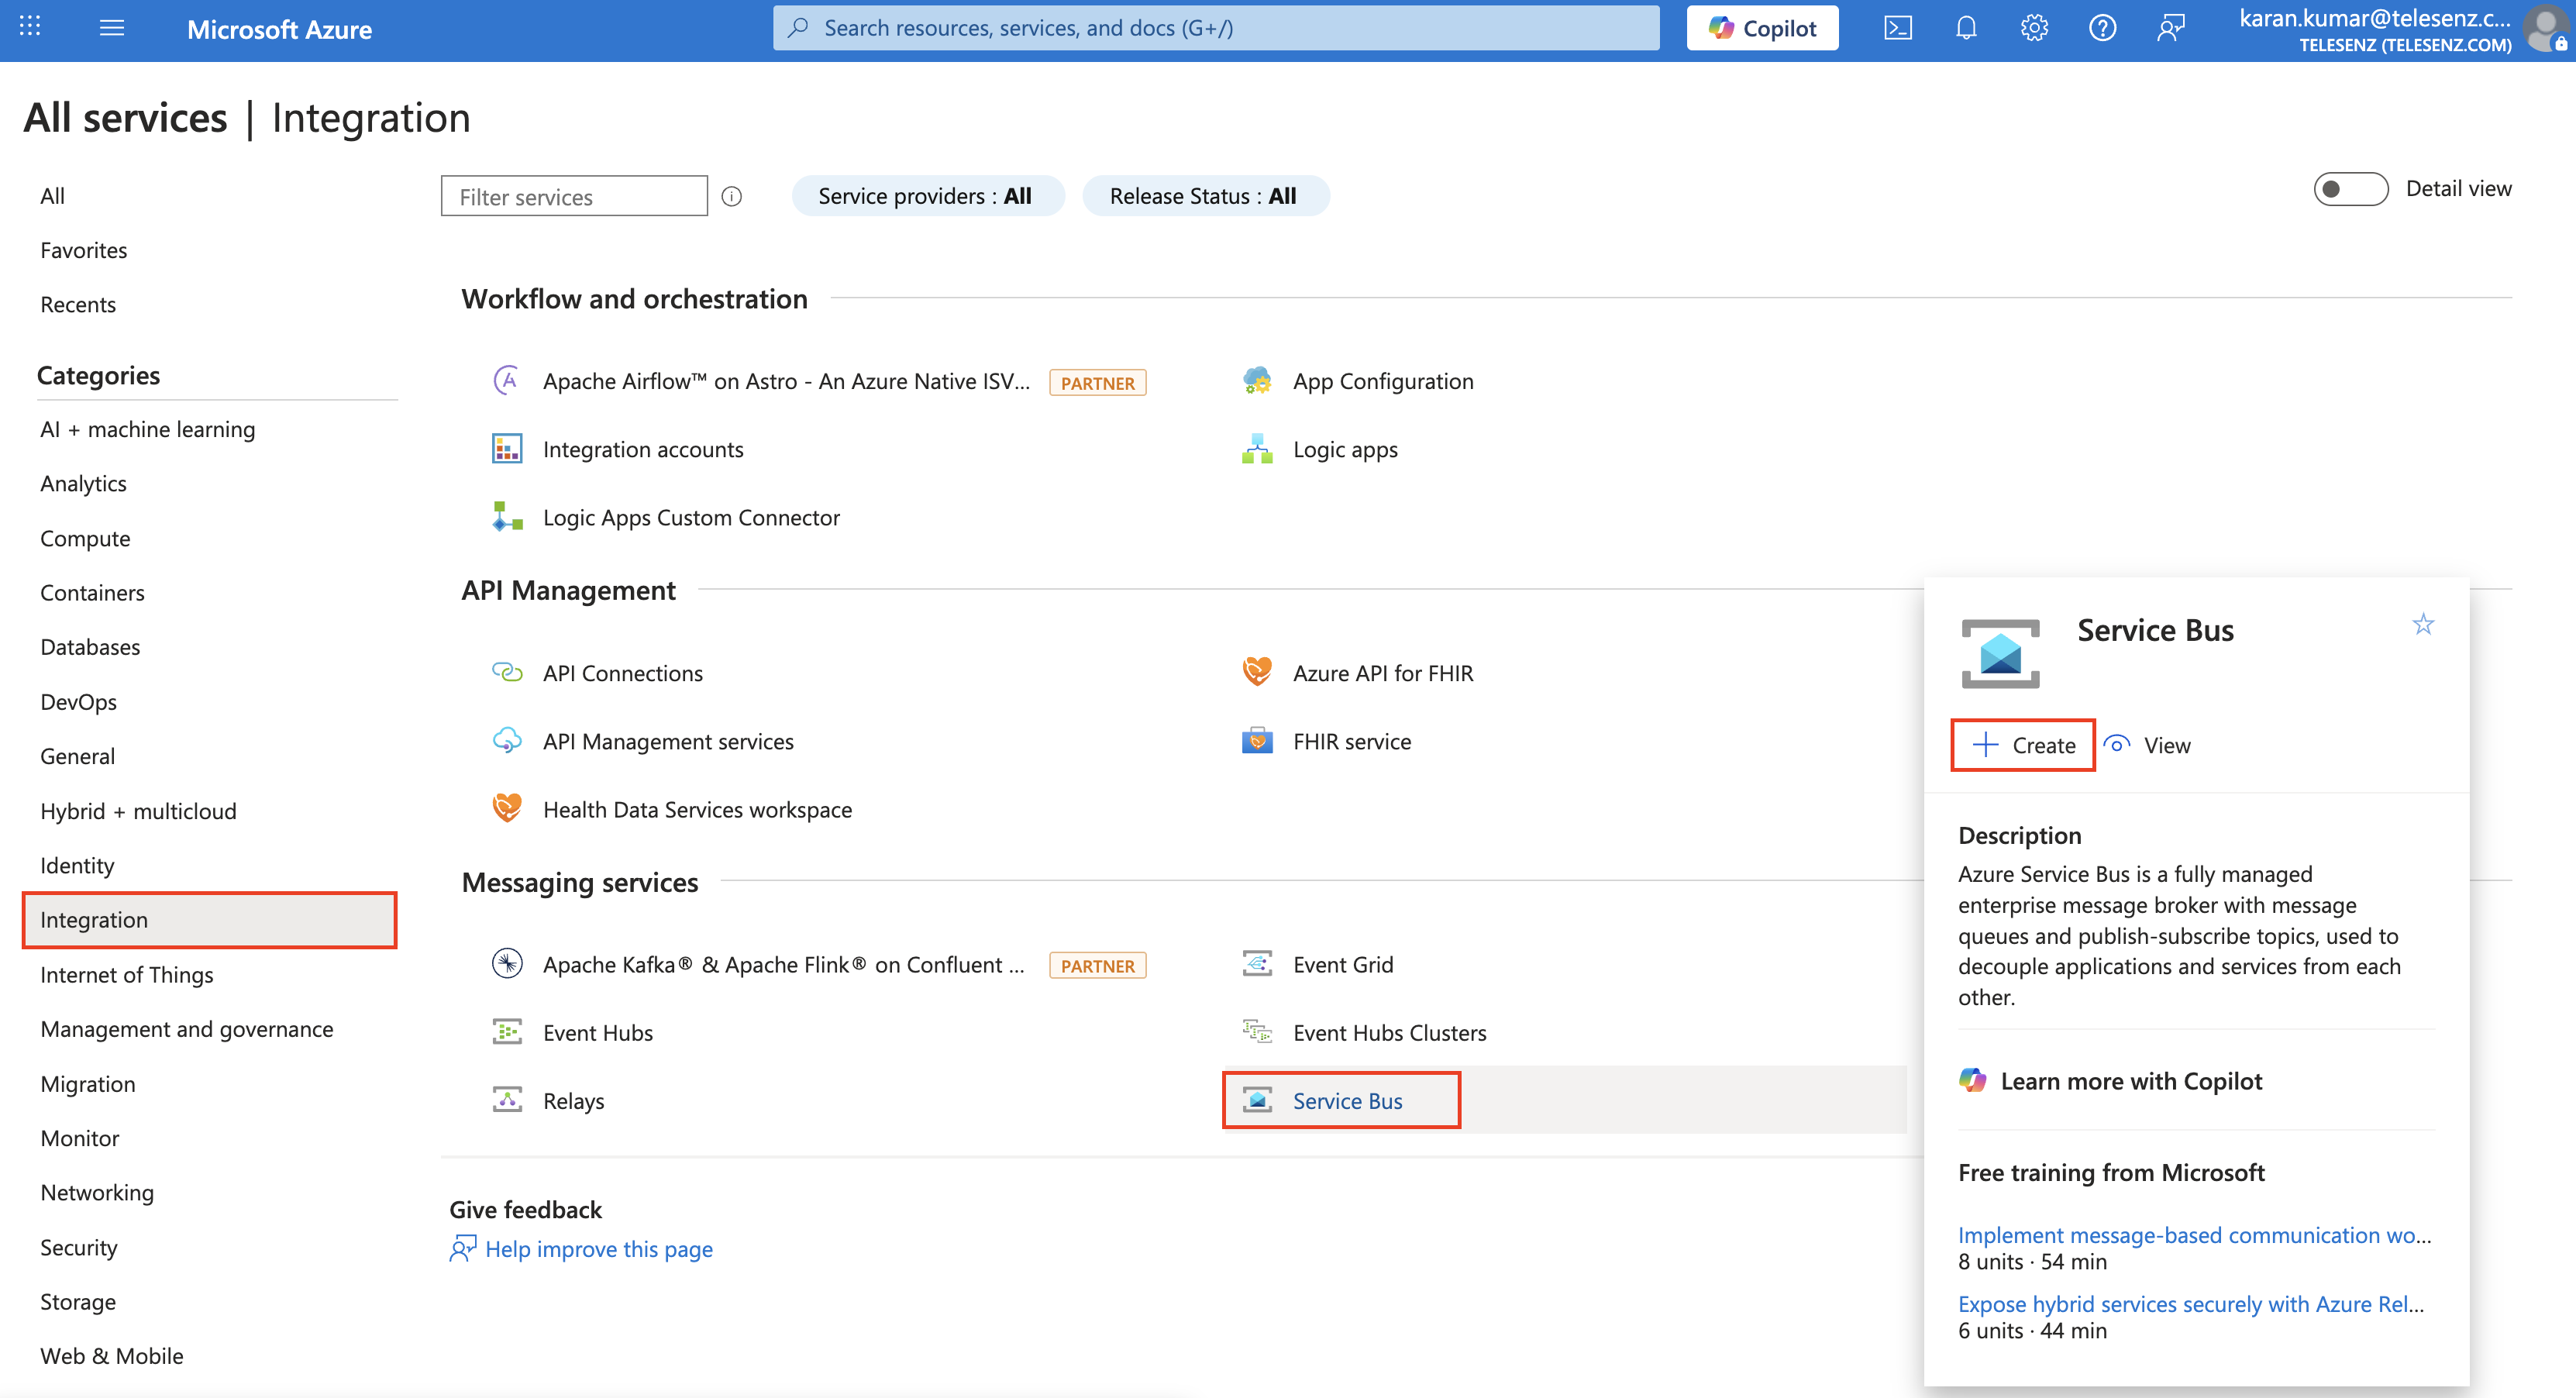
- On the left navigation bar, select Integration.
- Scroll down to Messaging Services → select Service Bus → click Create.
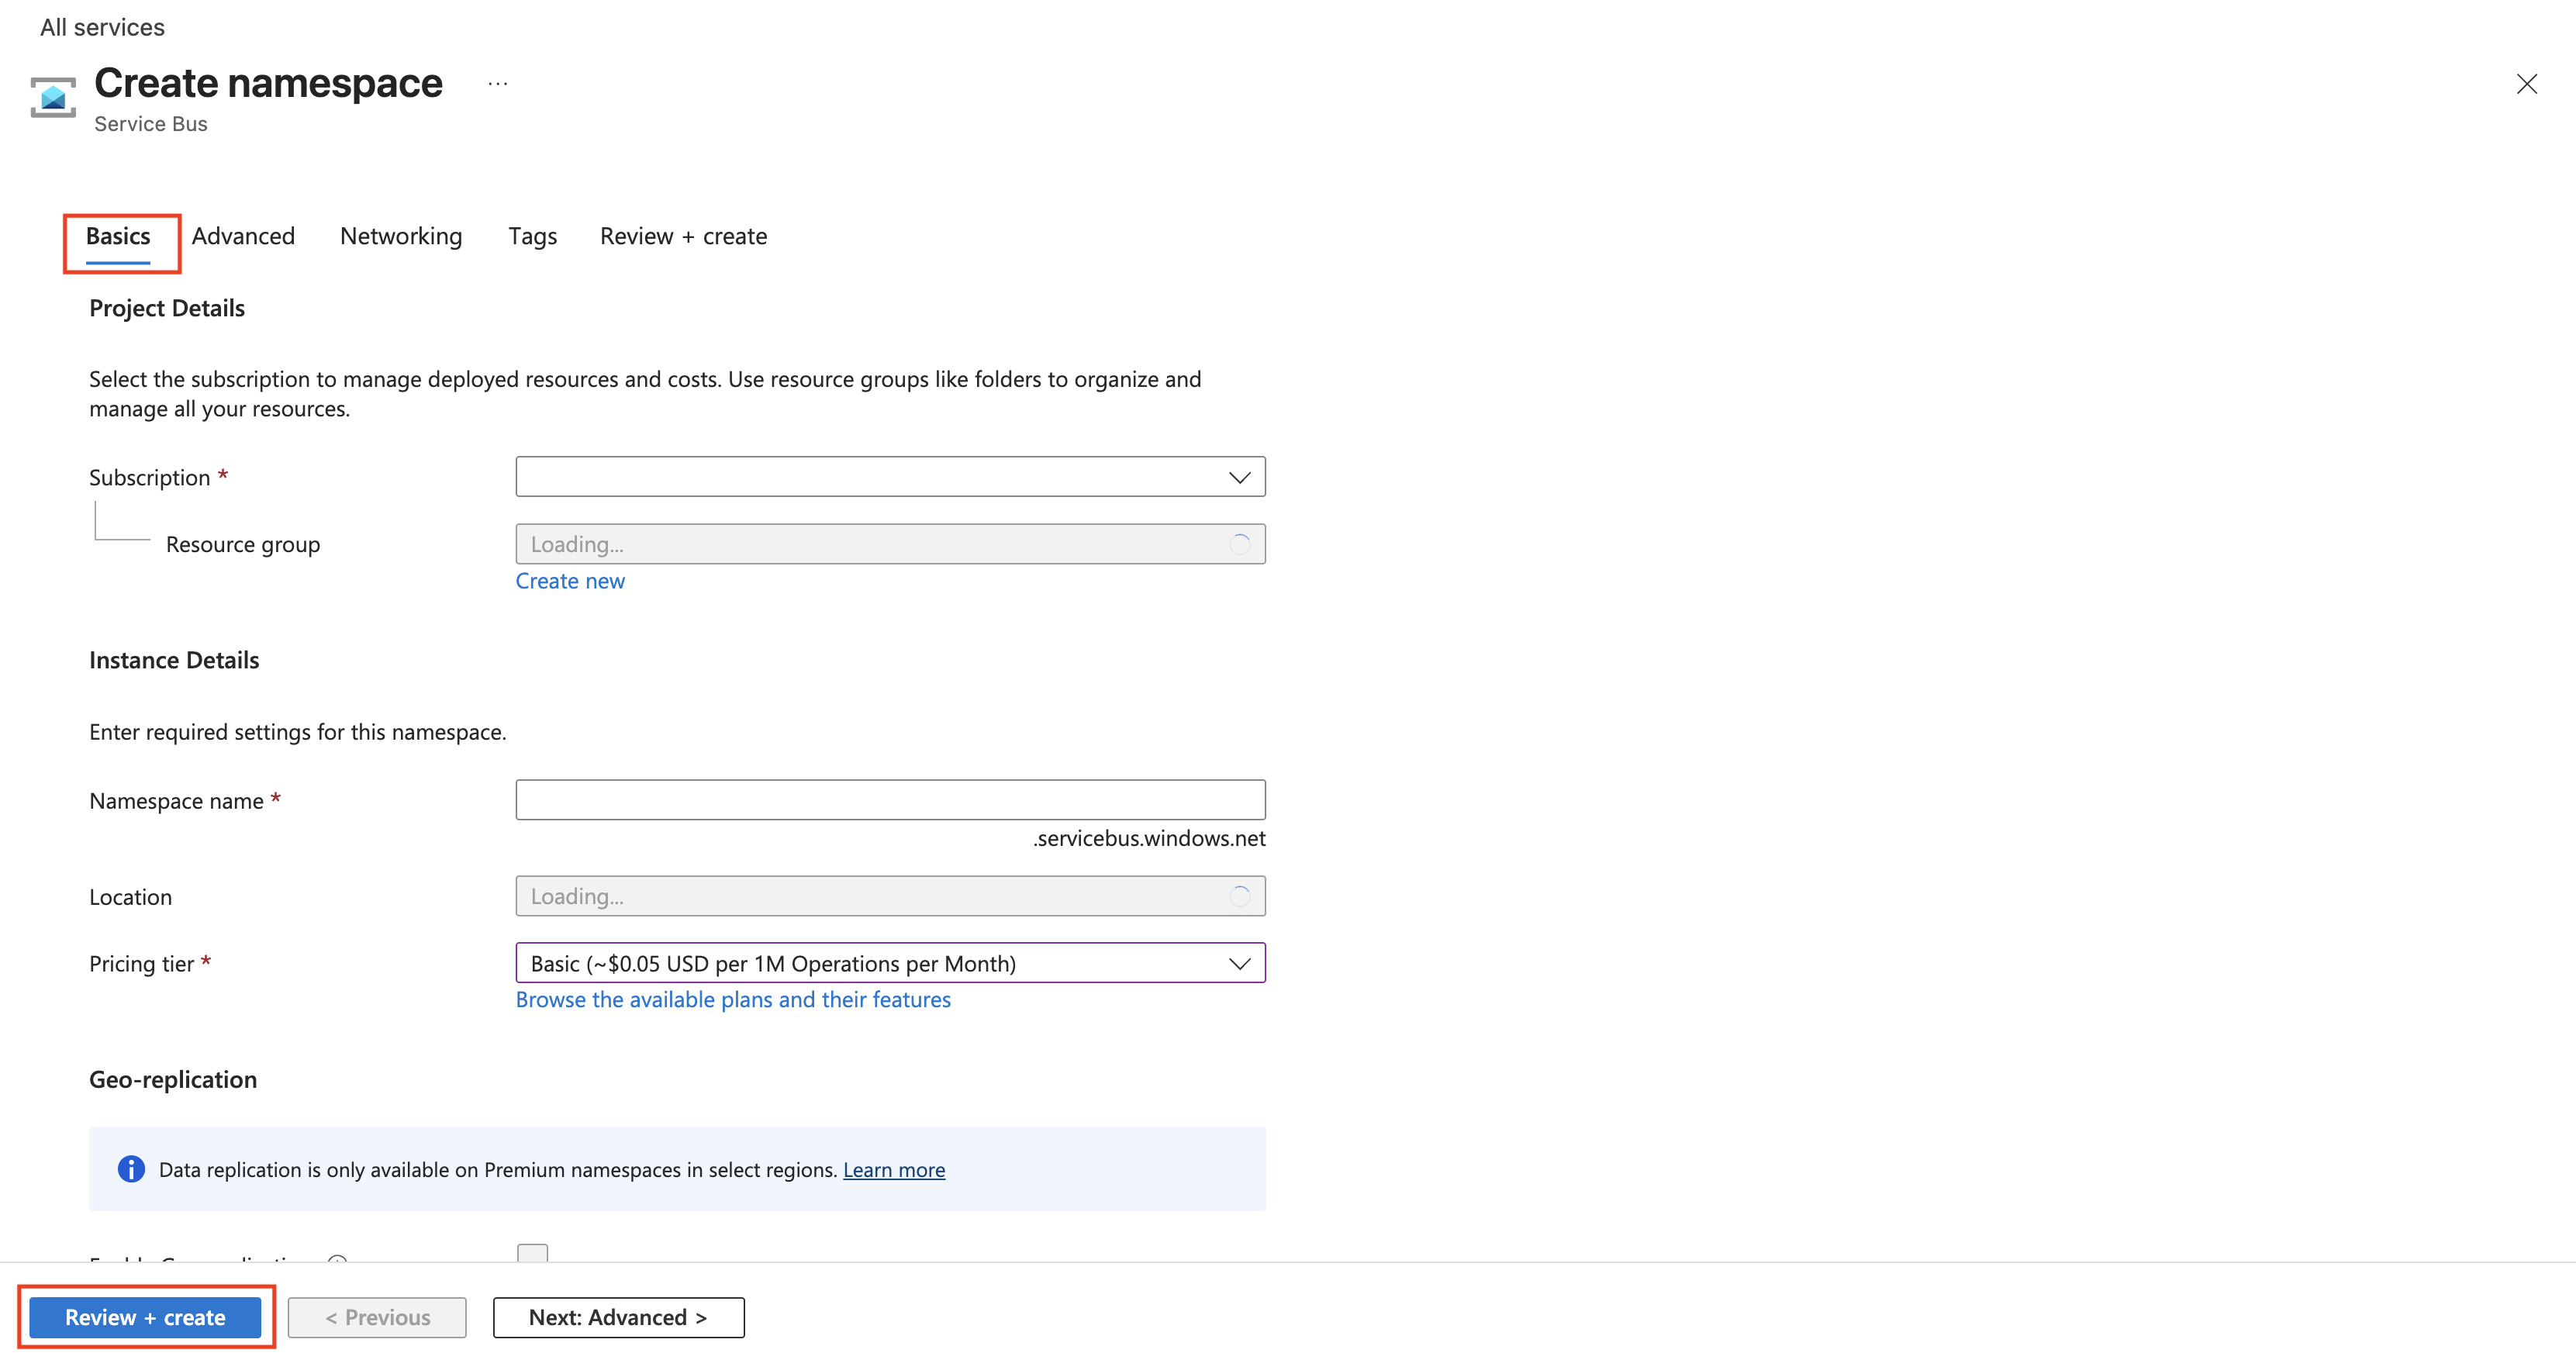
- In the Basics tab of the Create namespace page, follow these steps:
- For Subscription, choose the Azure subscription in which you want to create the namespace.
- For Resource group, select an existing resource group or create a new one.
- Enter a Namespace name.
- For Location, choose the region where the namespace will be hosted.
- For Pricing tier, select Basic.
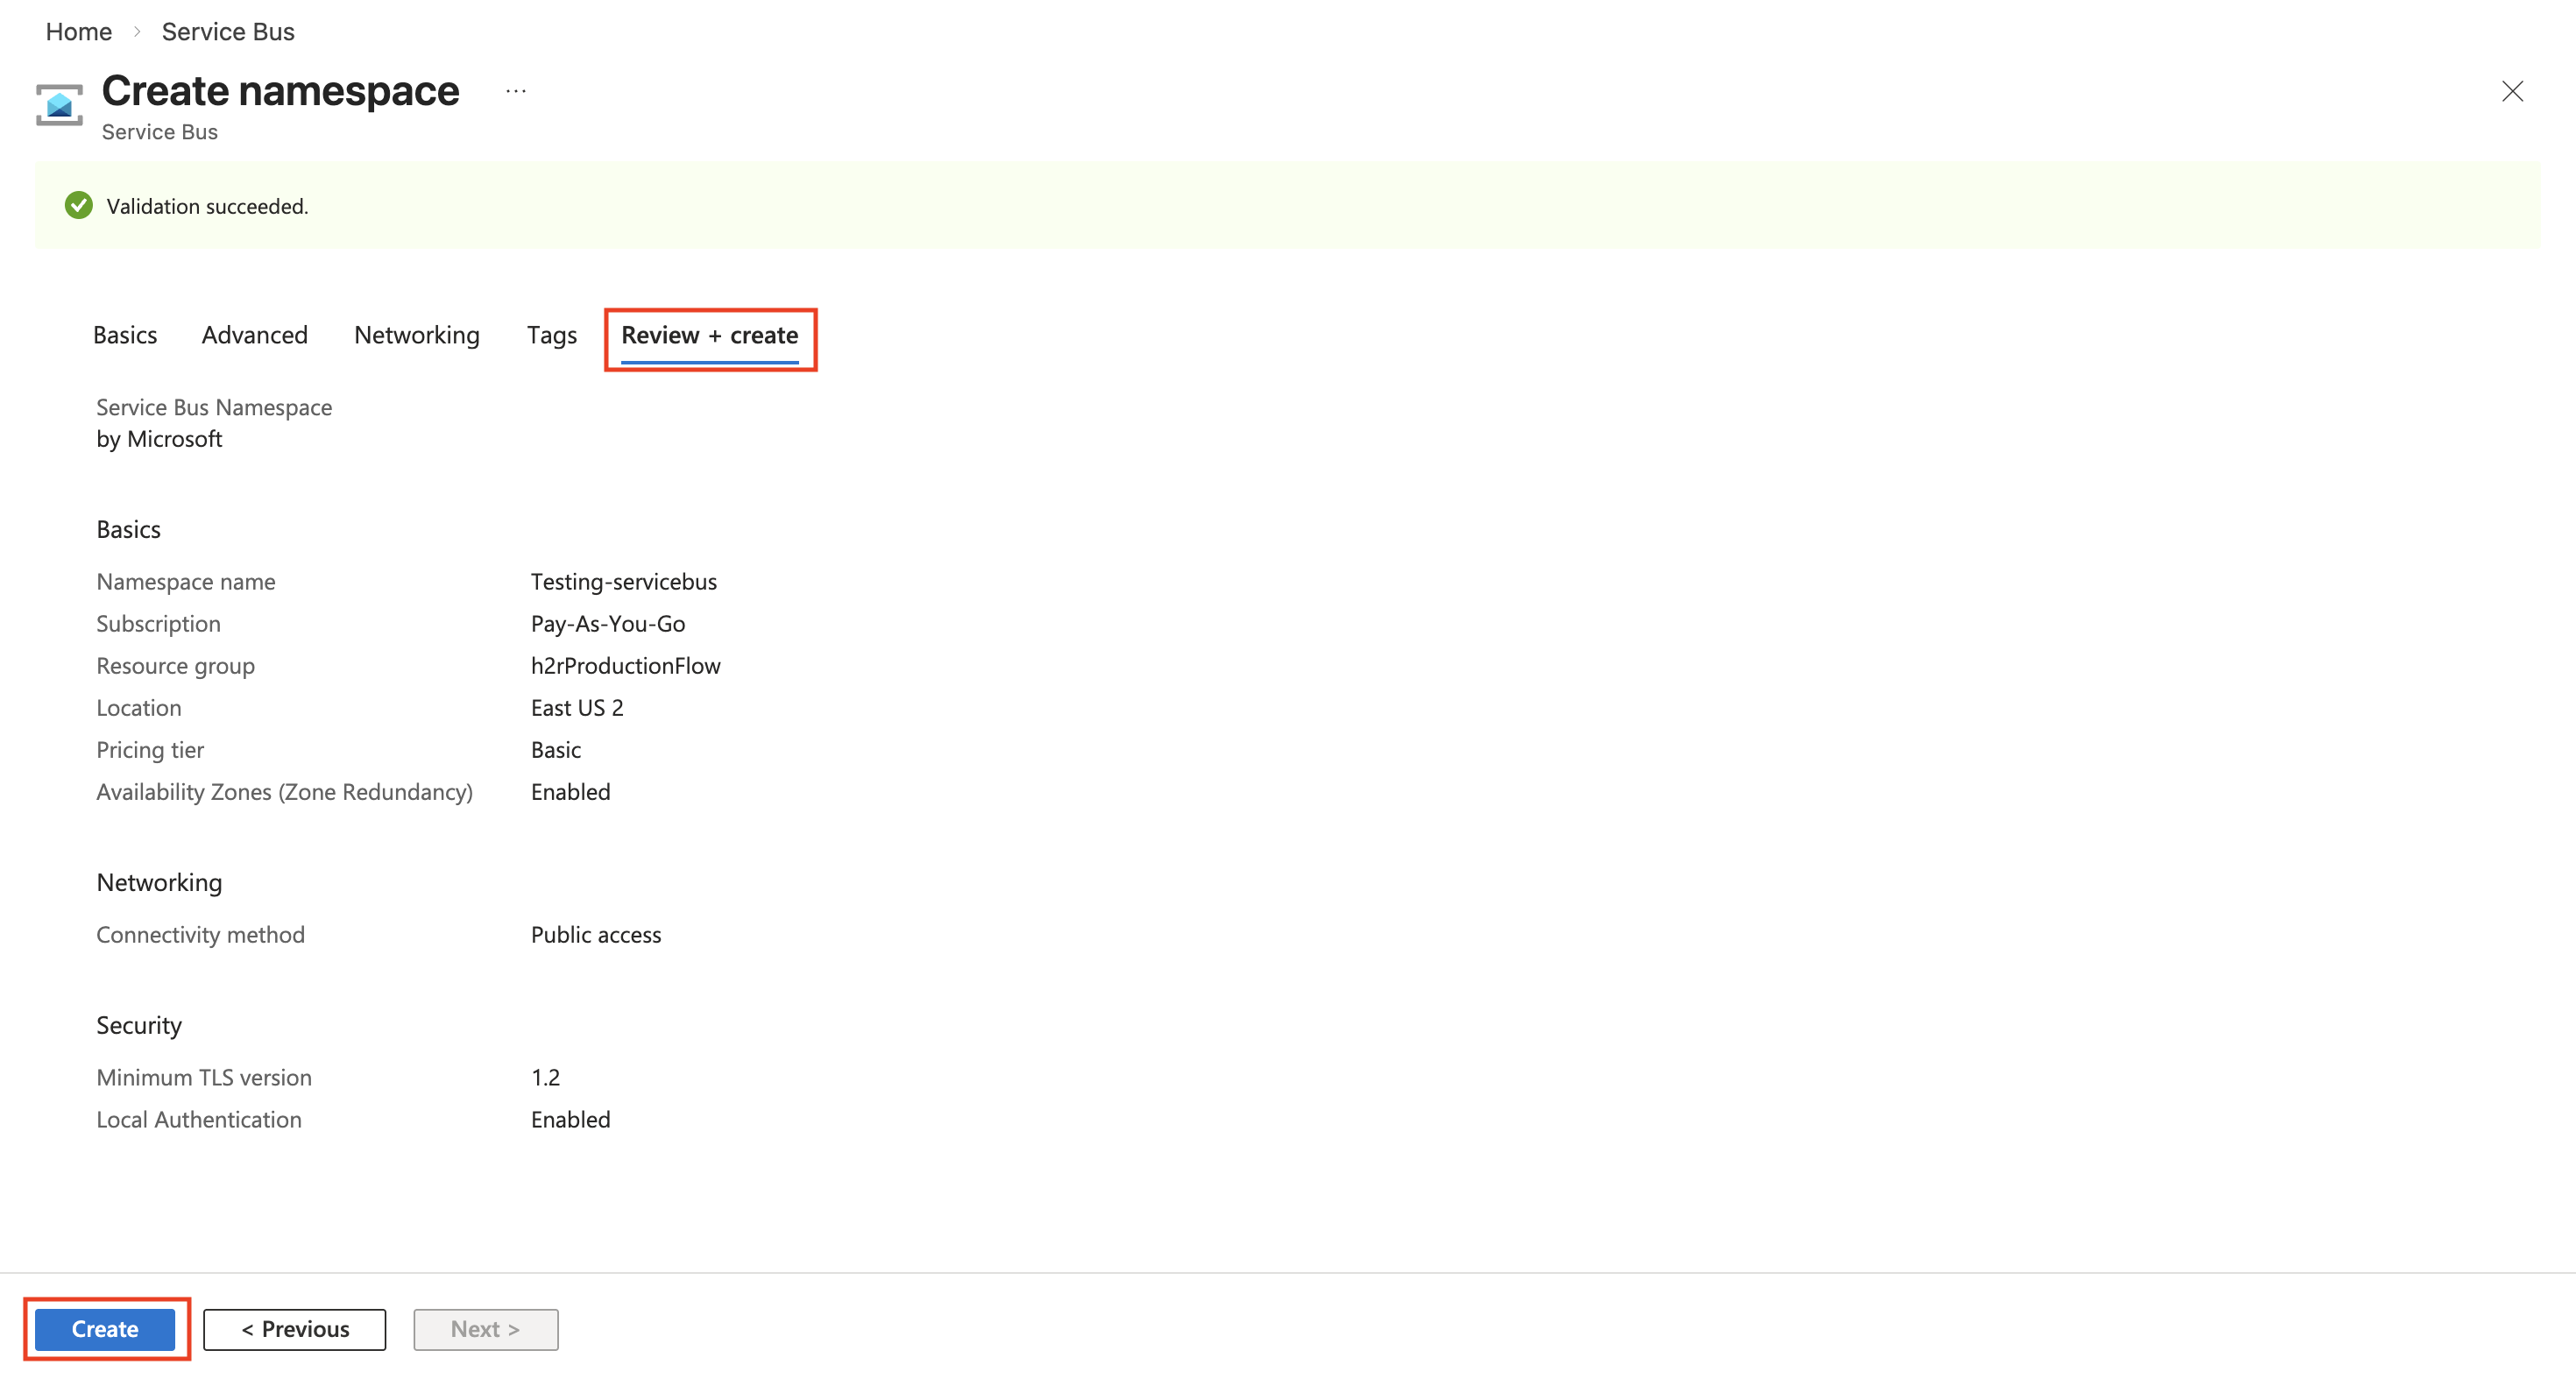
- Click Review + Create at the bottom of the page.
- On the Review + Create page, verify the settings and click Create.
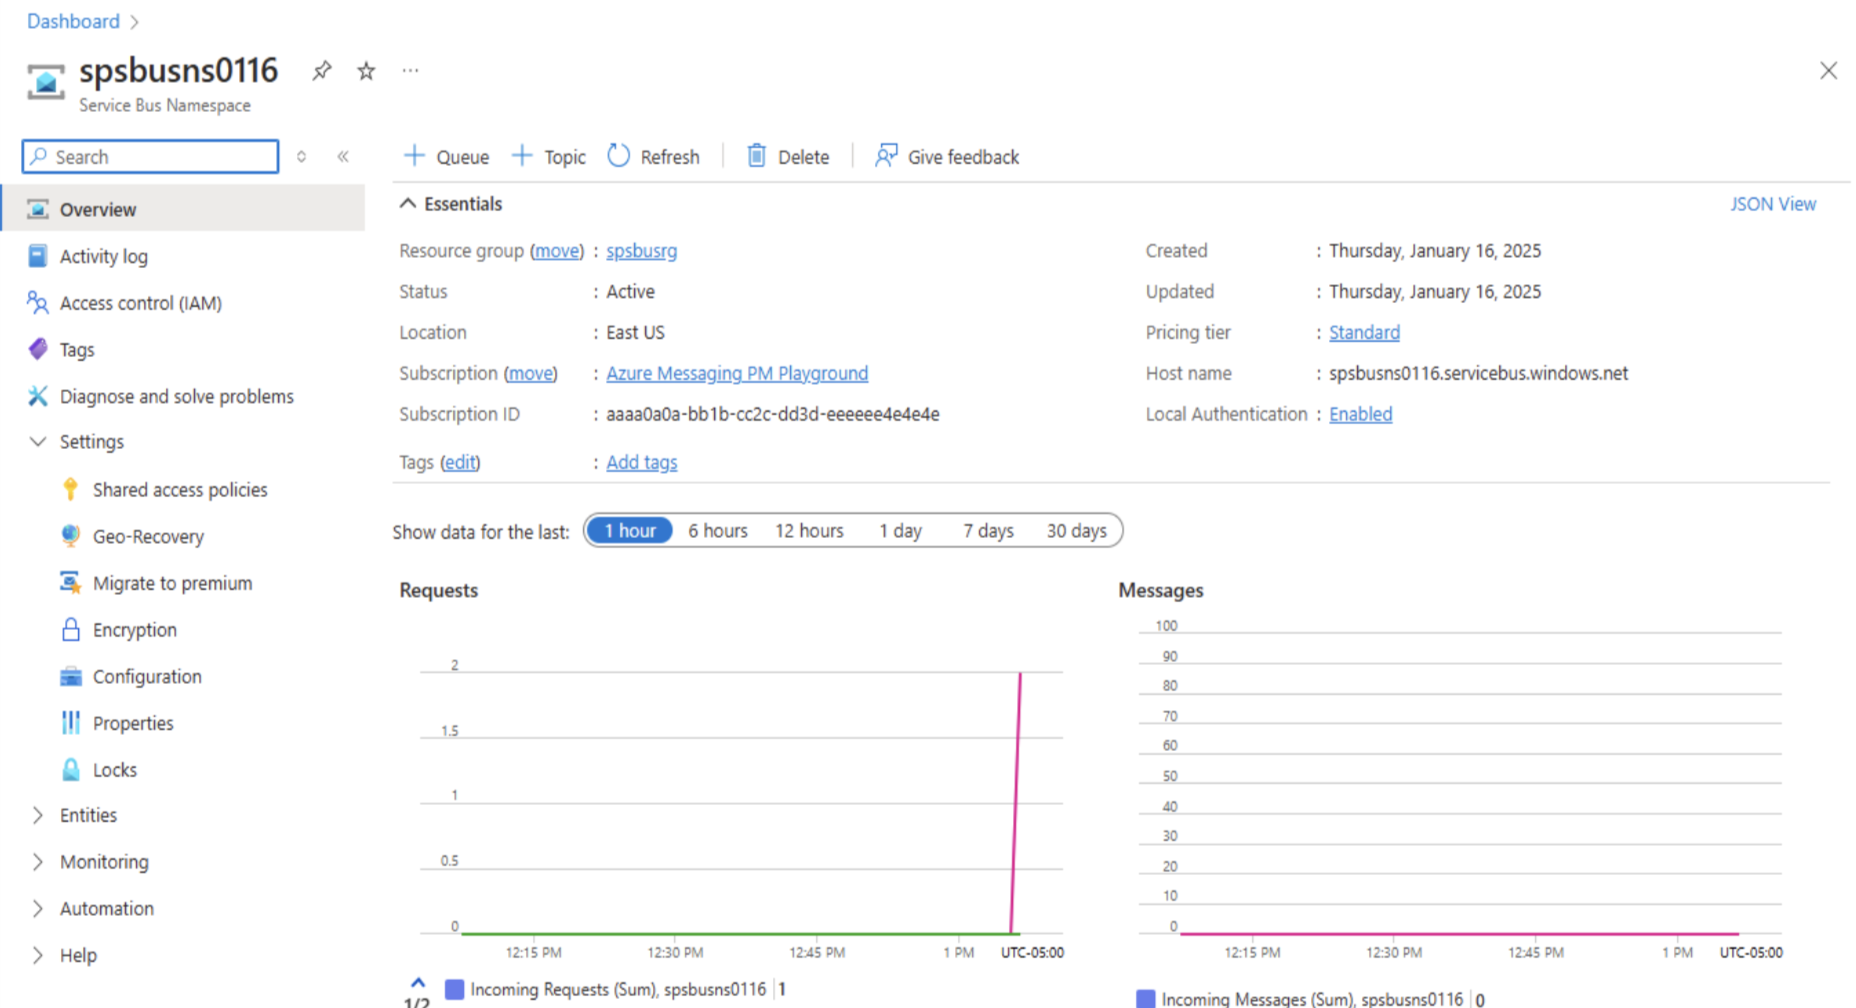
- After the deployment is successful, click Go to resource on the deployment page.

- You will see the home page for your Service Bus namespace.
-
Now create queues in the Azure portal for message exchange between Hire2Retire and your Extension Function:
- On the Service Bus Namespace page, expand Entities in the left navigation menu and select Queues.
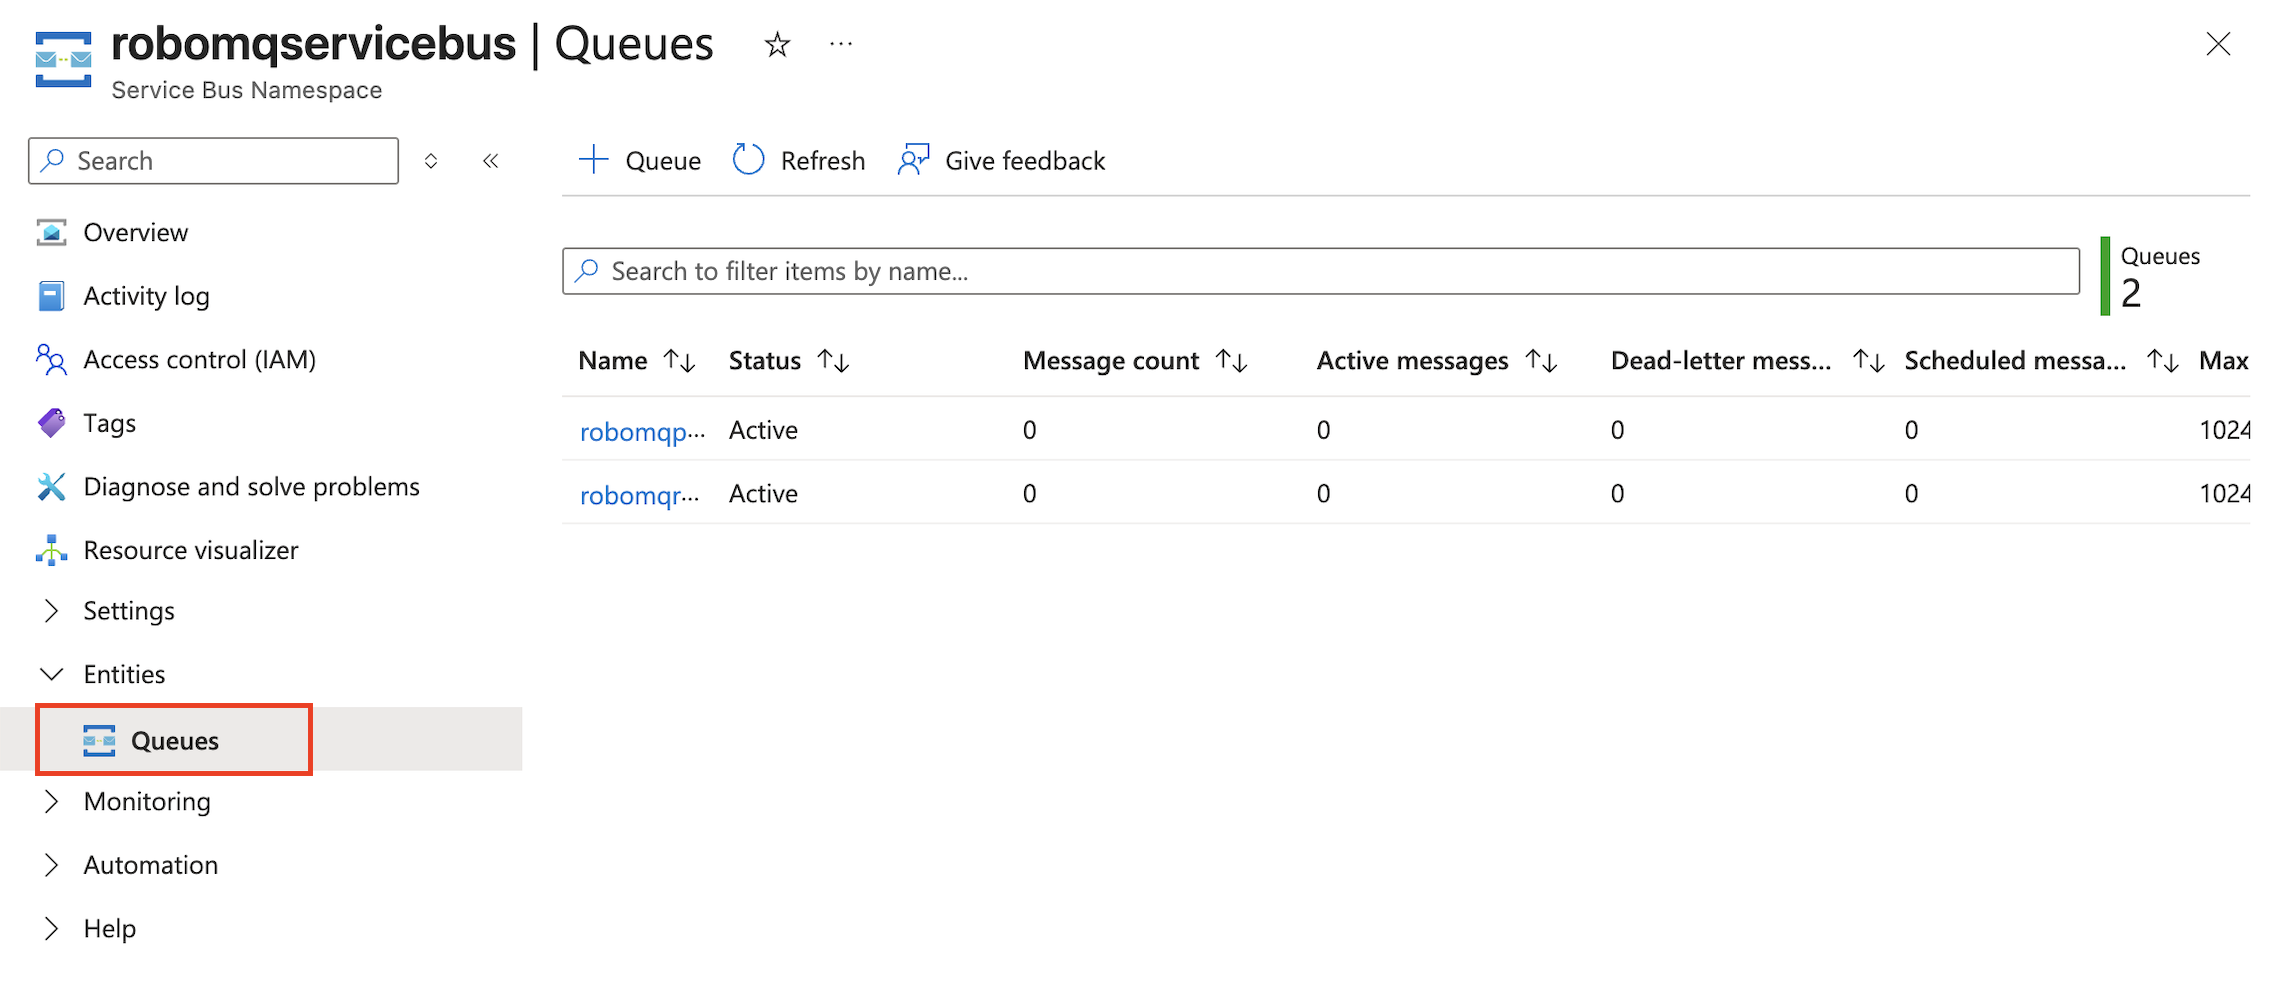
- On the Queues page, select + Queue from the toolbar.
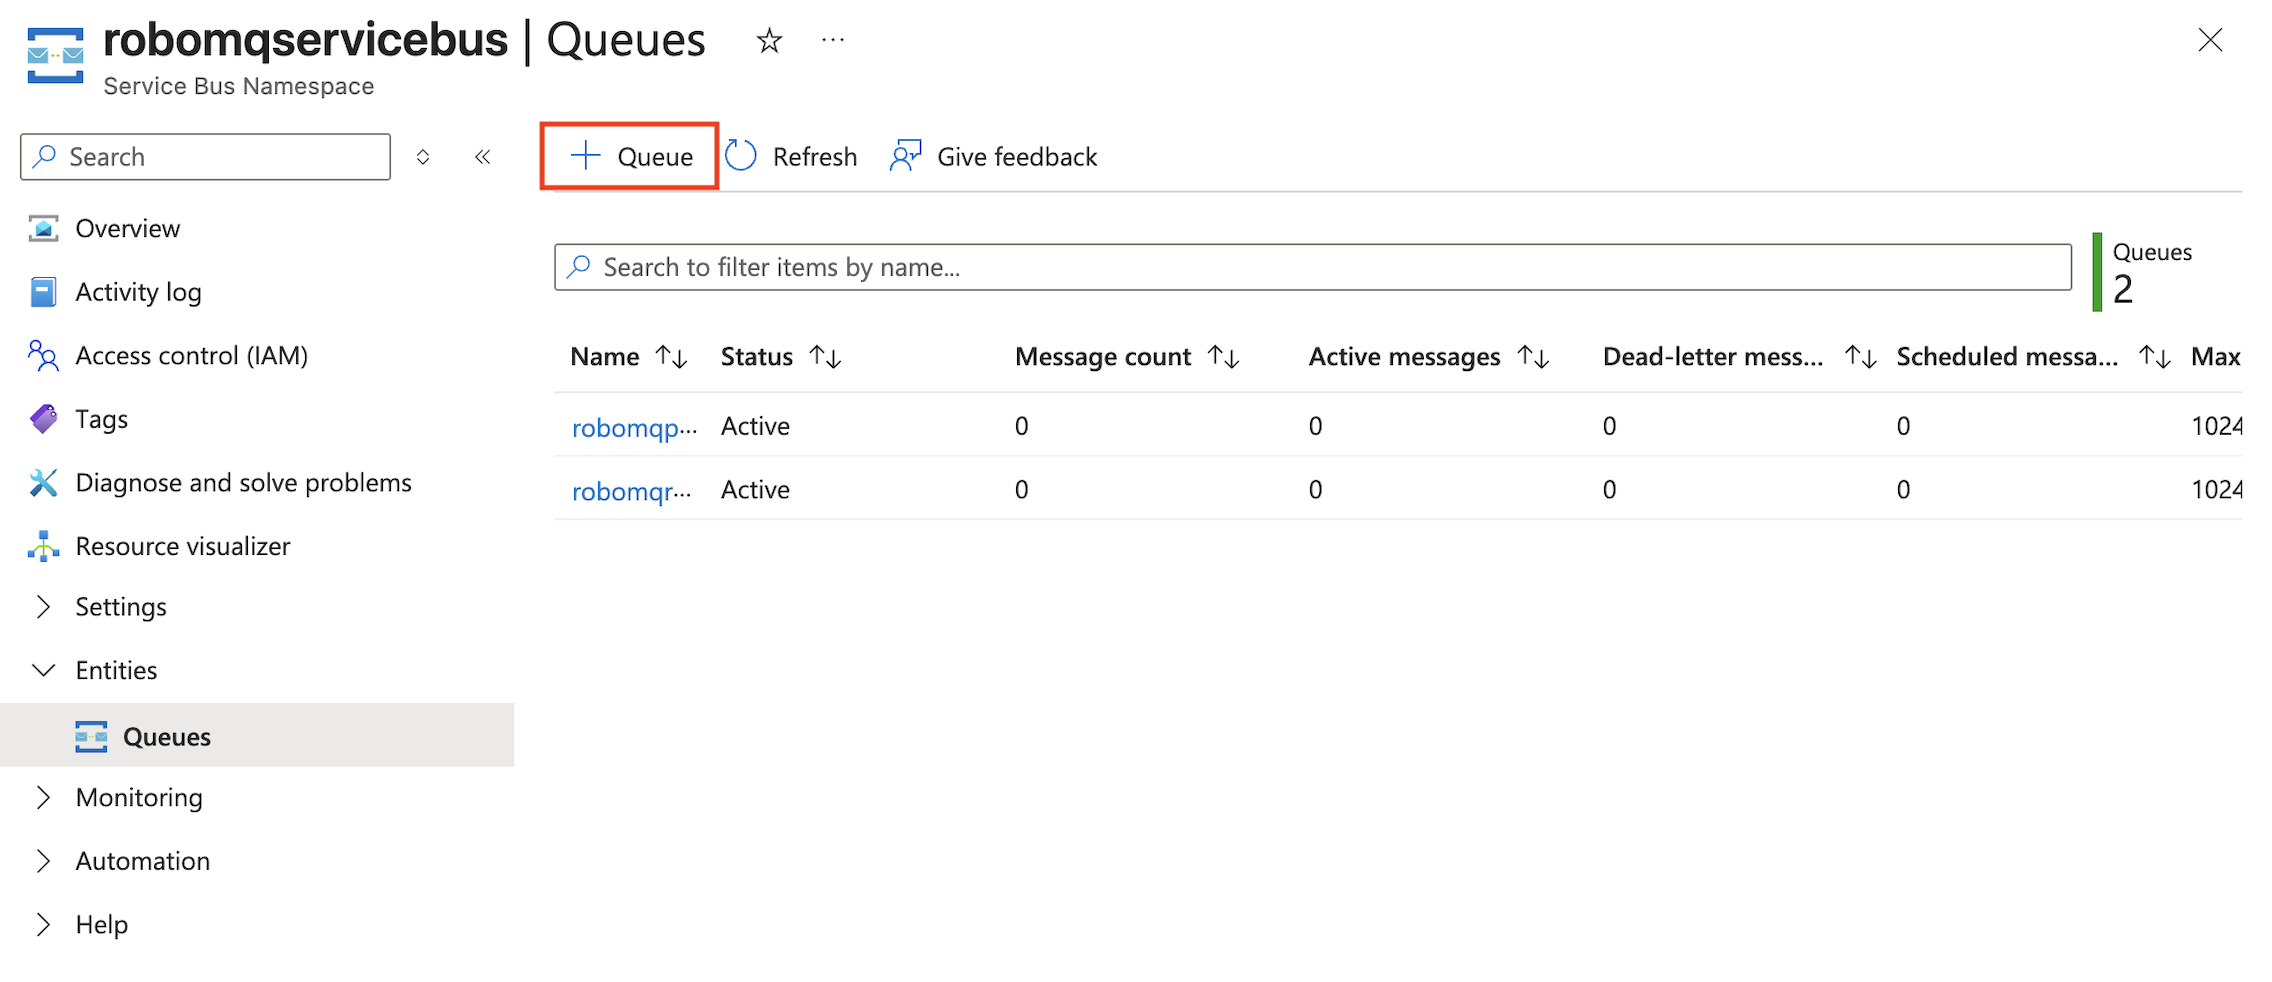
- Enter a name for the queue, for example, RoboMQToCompanyABC, and leave the other values with their default settings.
- Select Create.
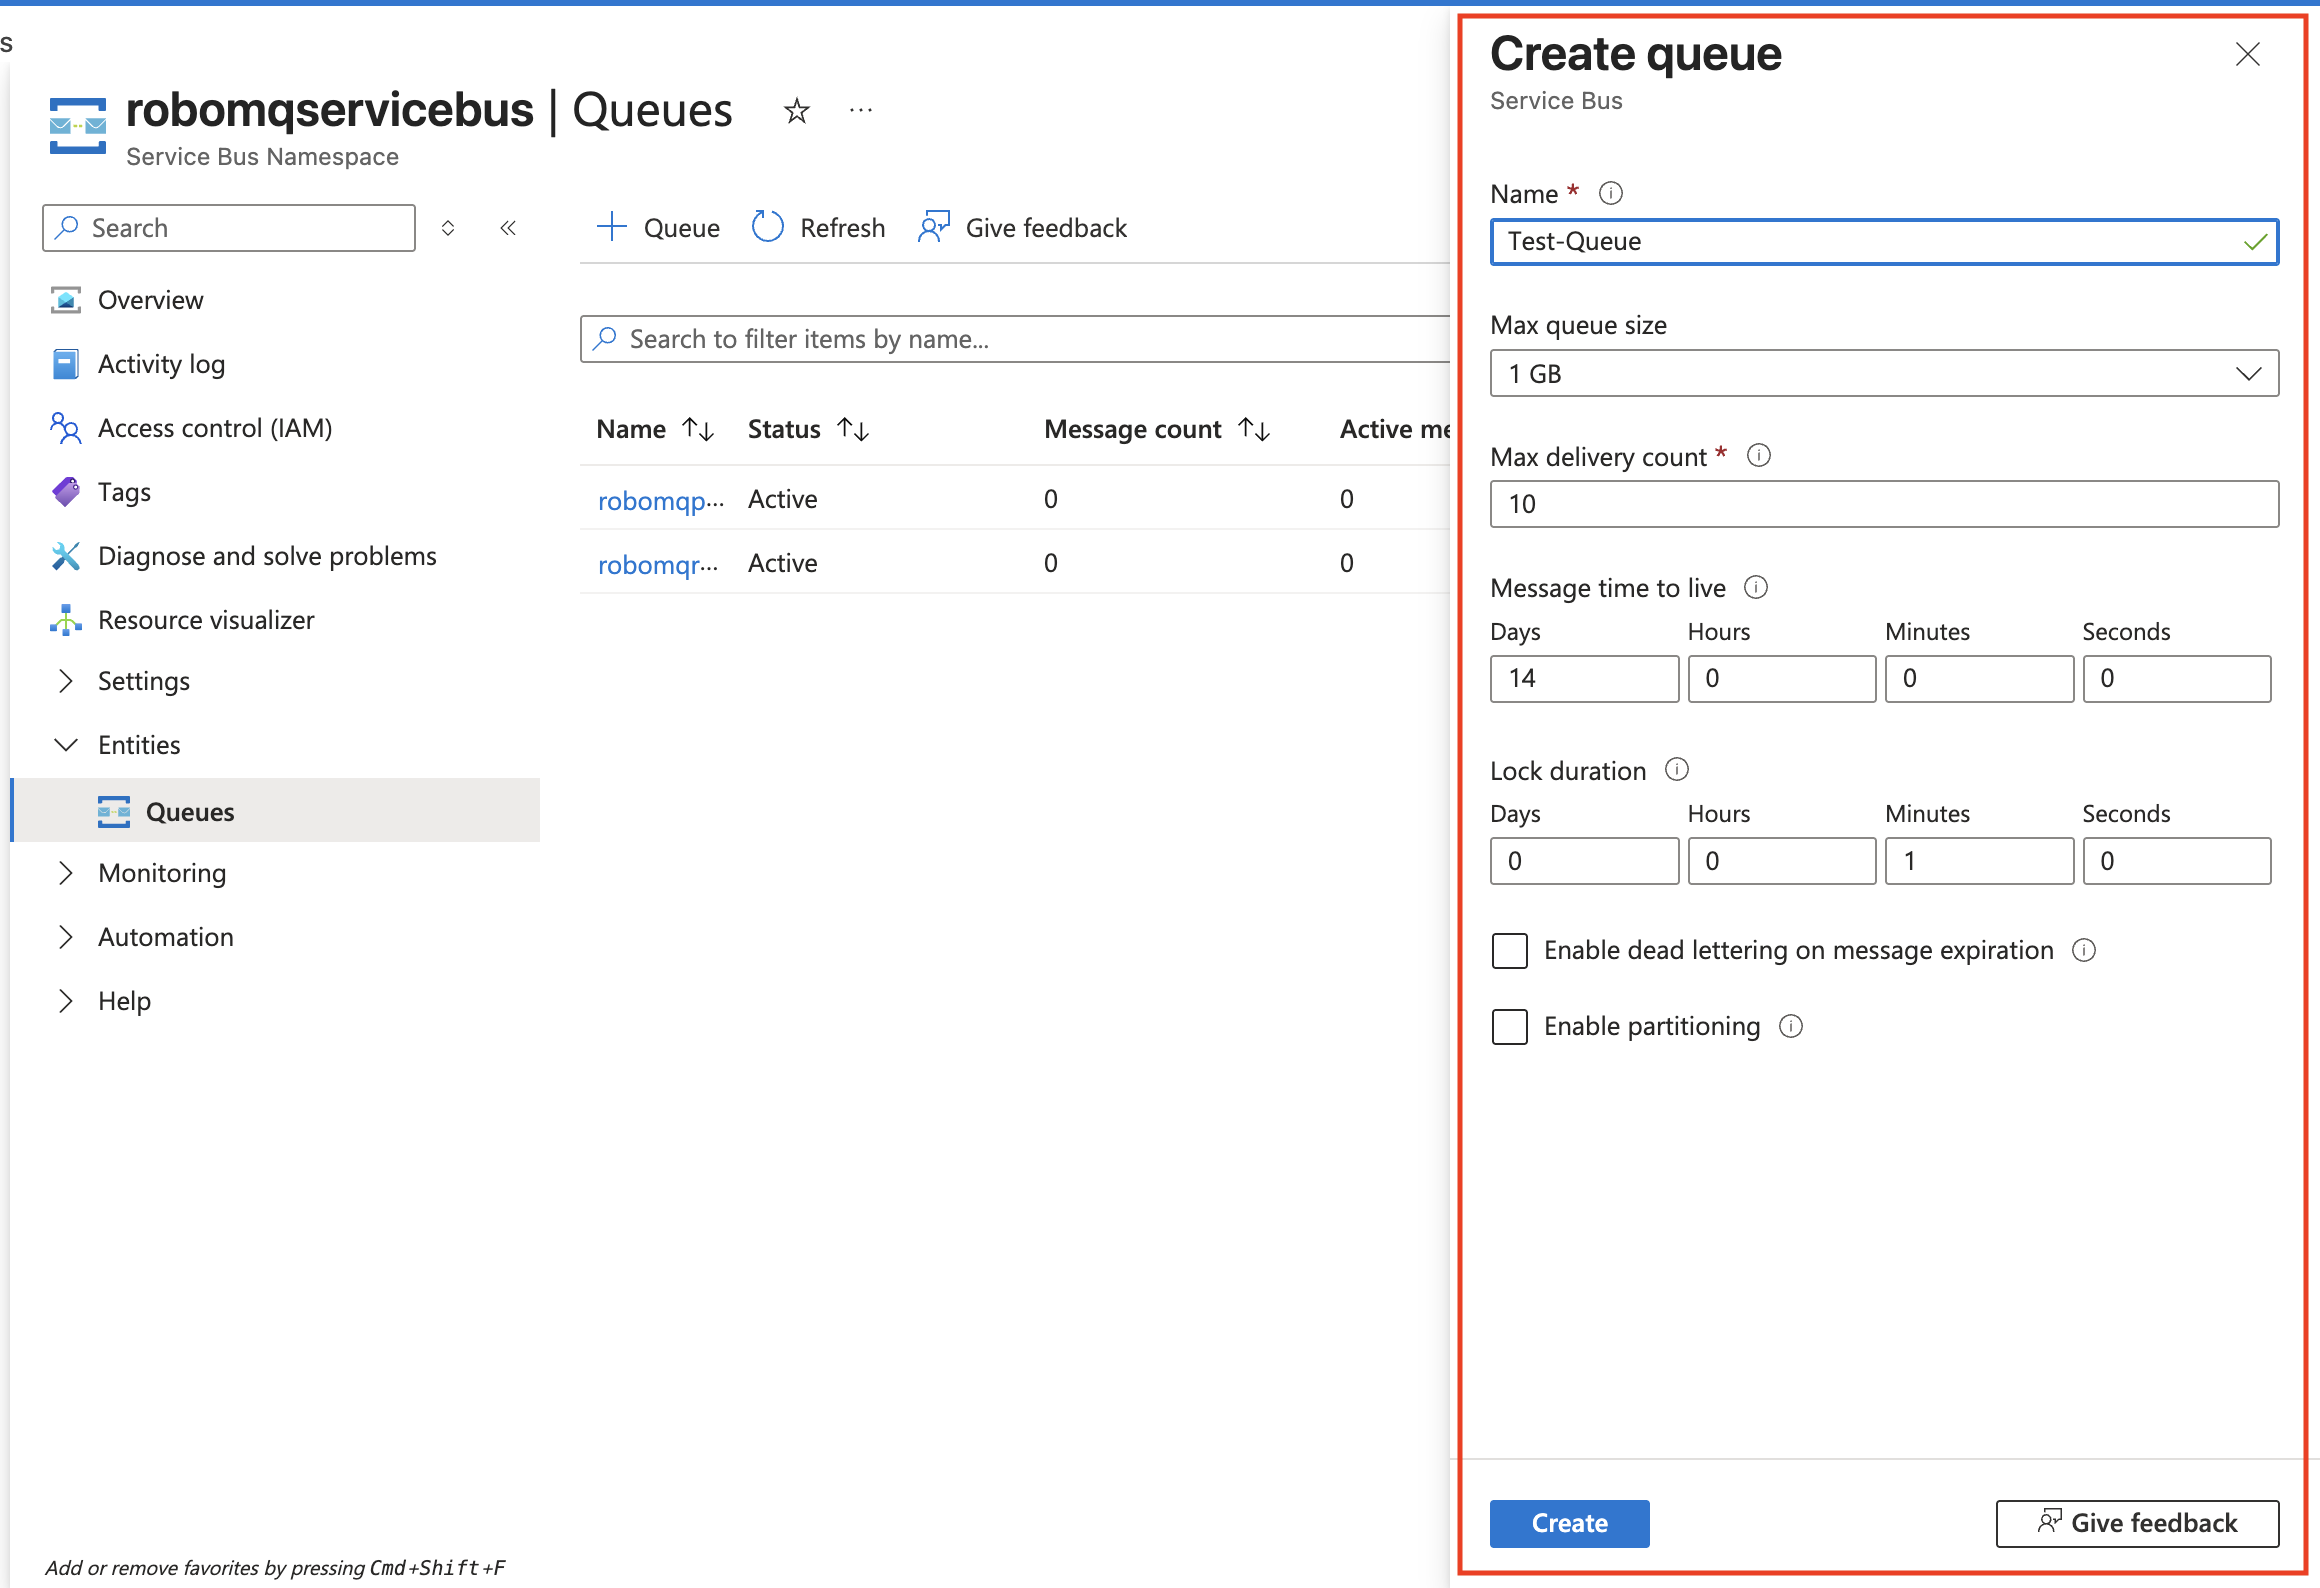
- Similarly, create another queue, for example, CompanyABCToRoboMQ.
- On the Service Bus Namespace page, expand Entities in the left navigation menu and select Queues.
-
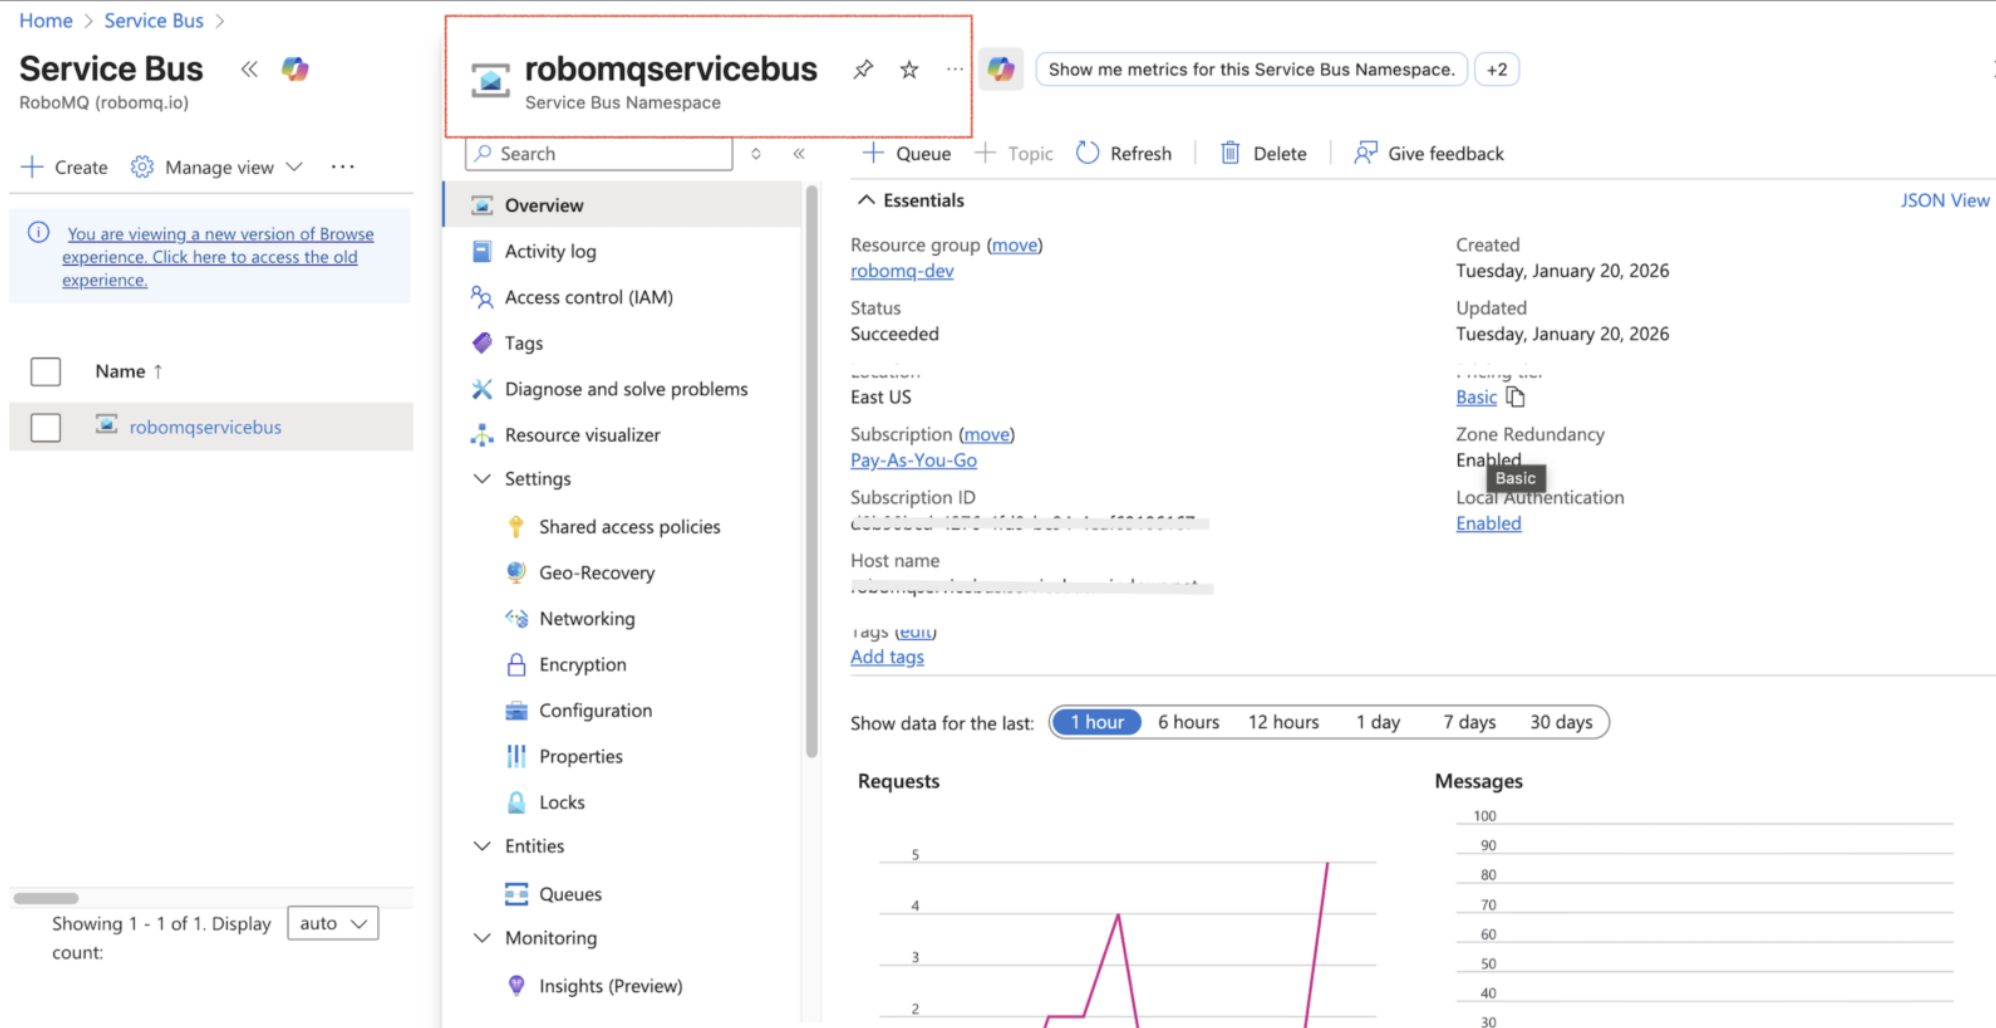
After the namespace is created, search for Service Bus in the Azure Portal and select your namespace.
- On the Overview tab, locate the Service Bus Namespace at the top.
- For example, in the screen below robomqservicebus is the namespace.
-
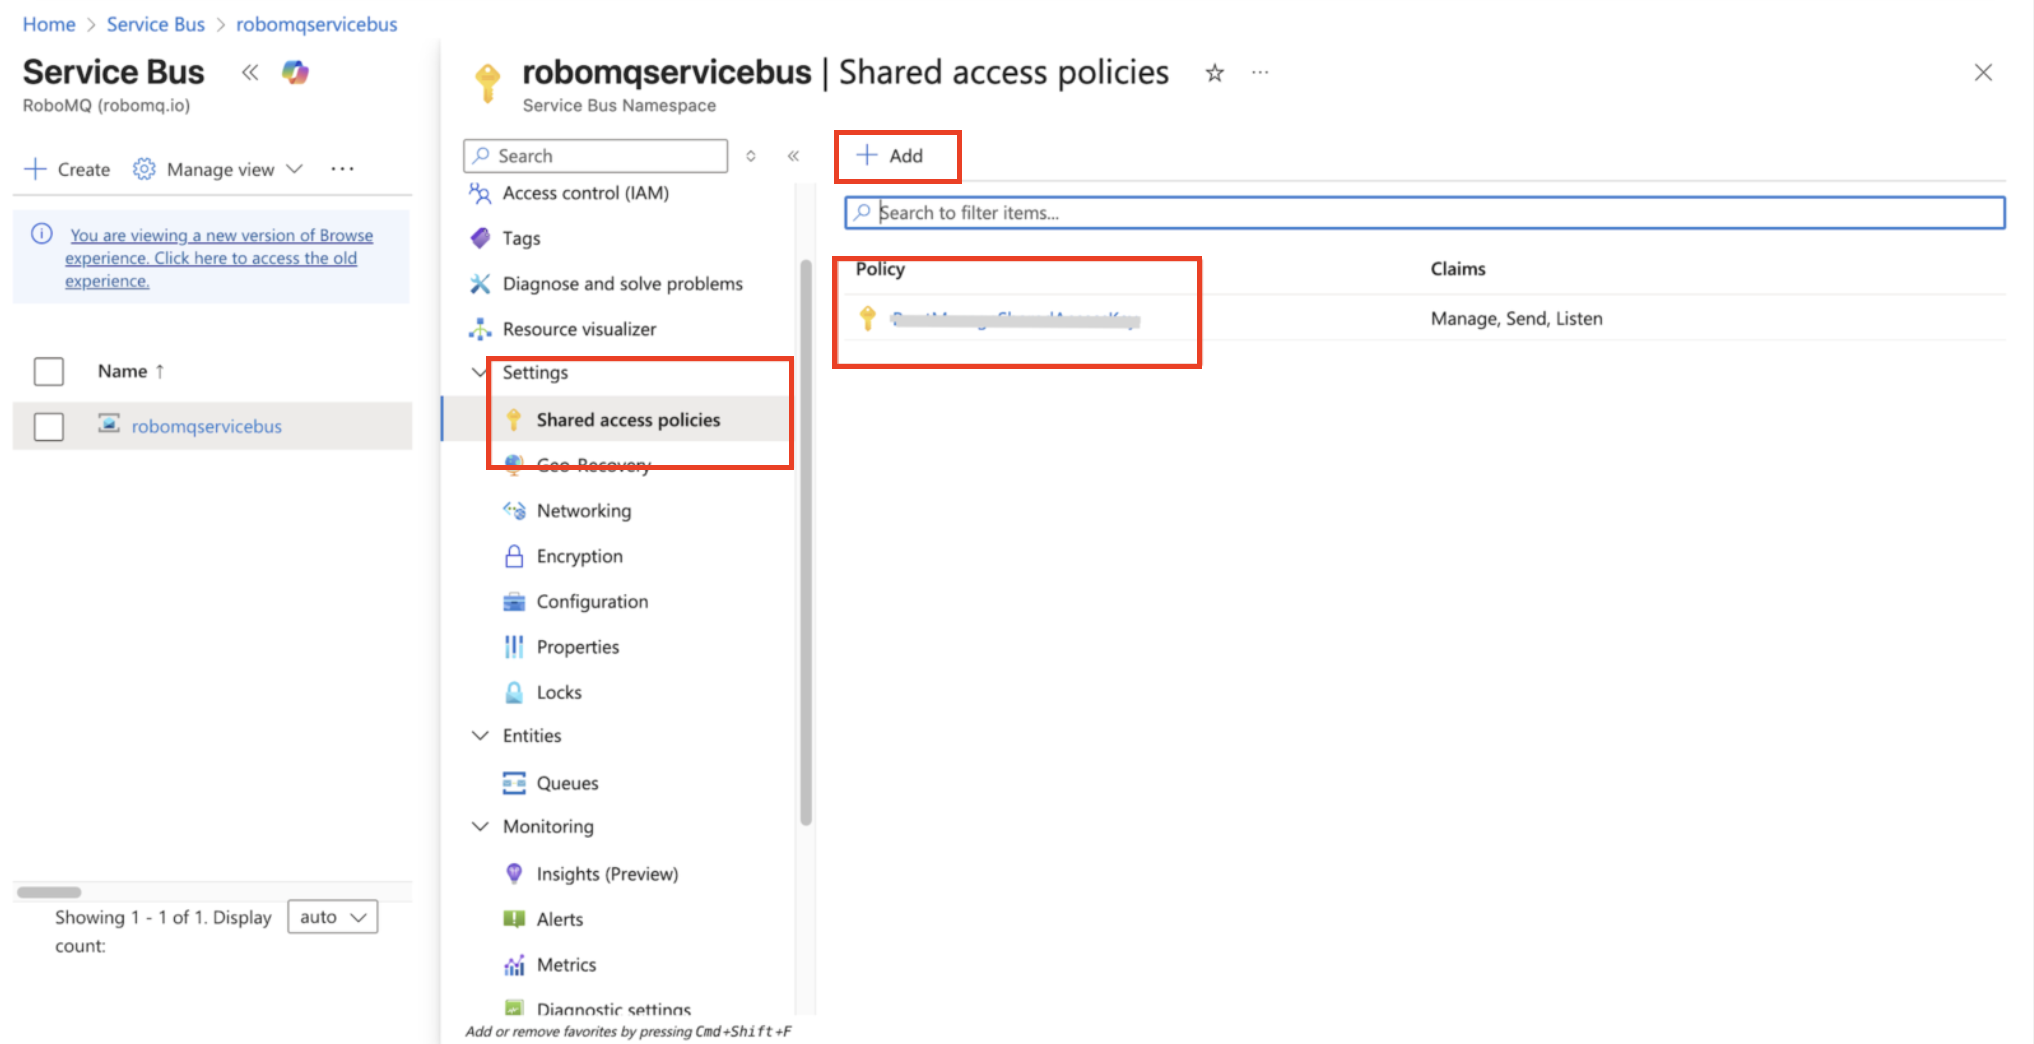
Shared Access Policy Name: This is the name of the Shared Access Policy used to authenticate. To find it:
- In your Service Bus namespace, go to Settings → Shared access policies.
- You'll see a list of policies – the policy name is the Key Name.
- If you do not have a policy, you can create one by clicking the Add button.
- On the same page in the Entra ID portal, go to Settings and select Shared access policies.
-
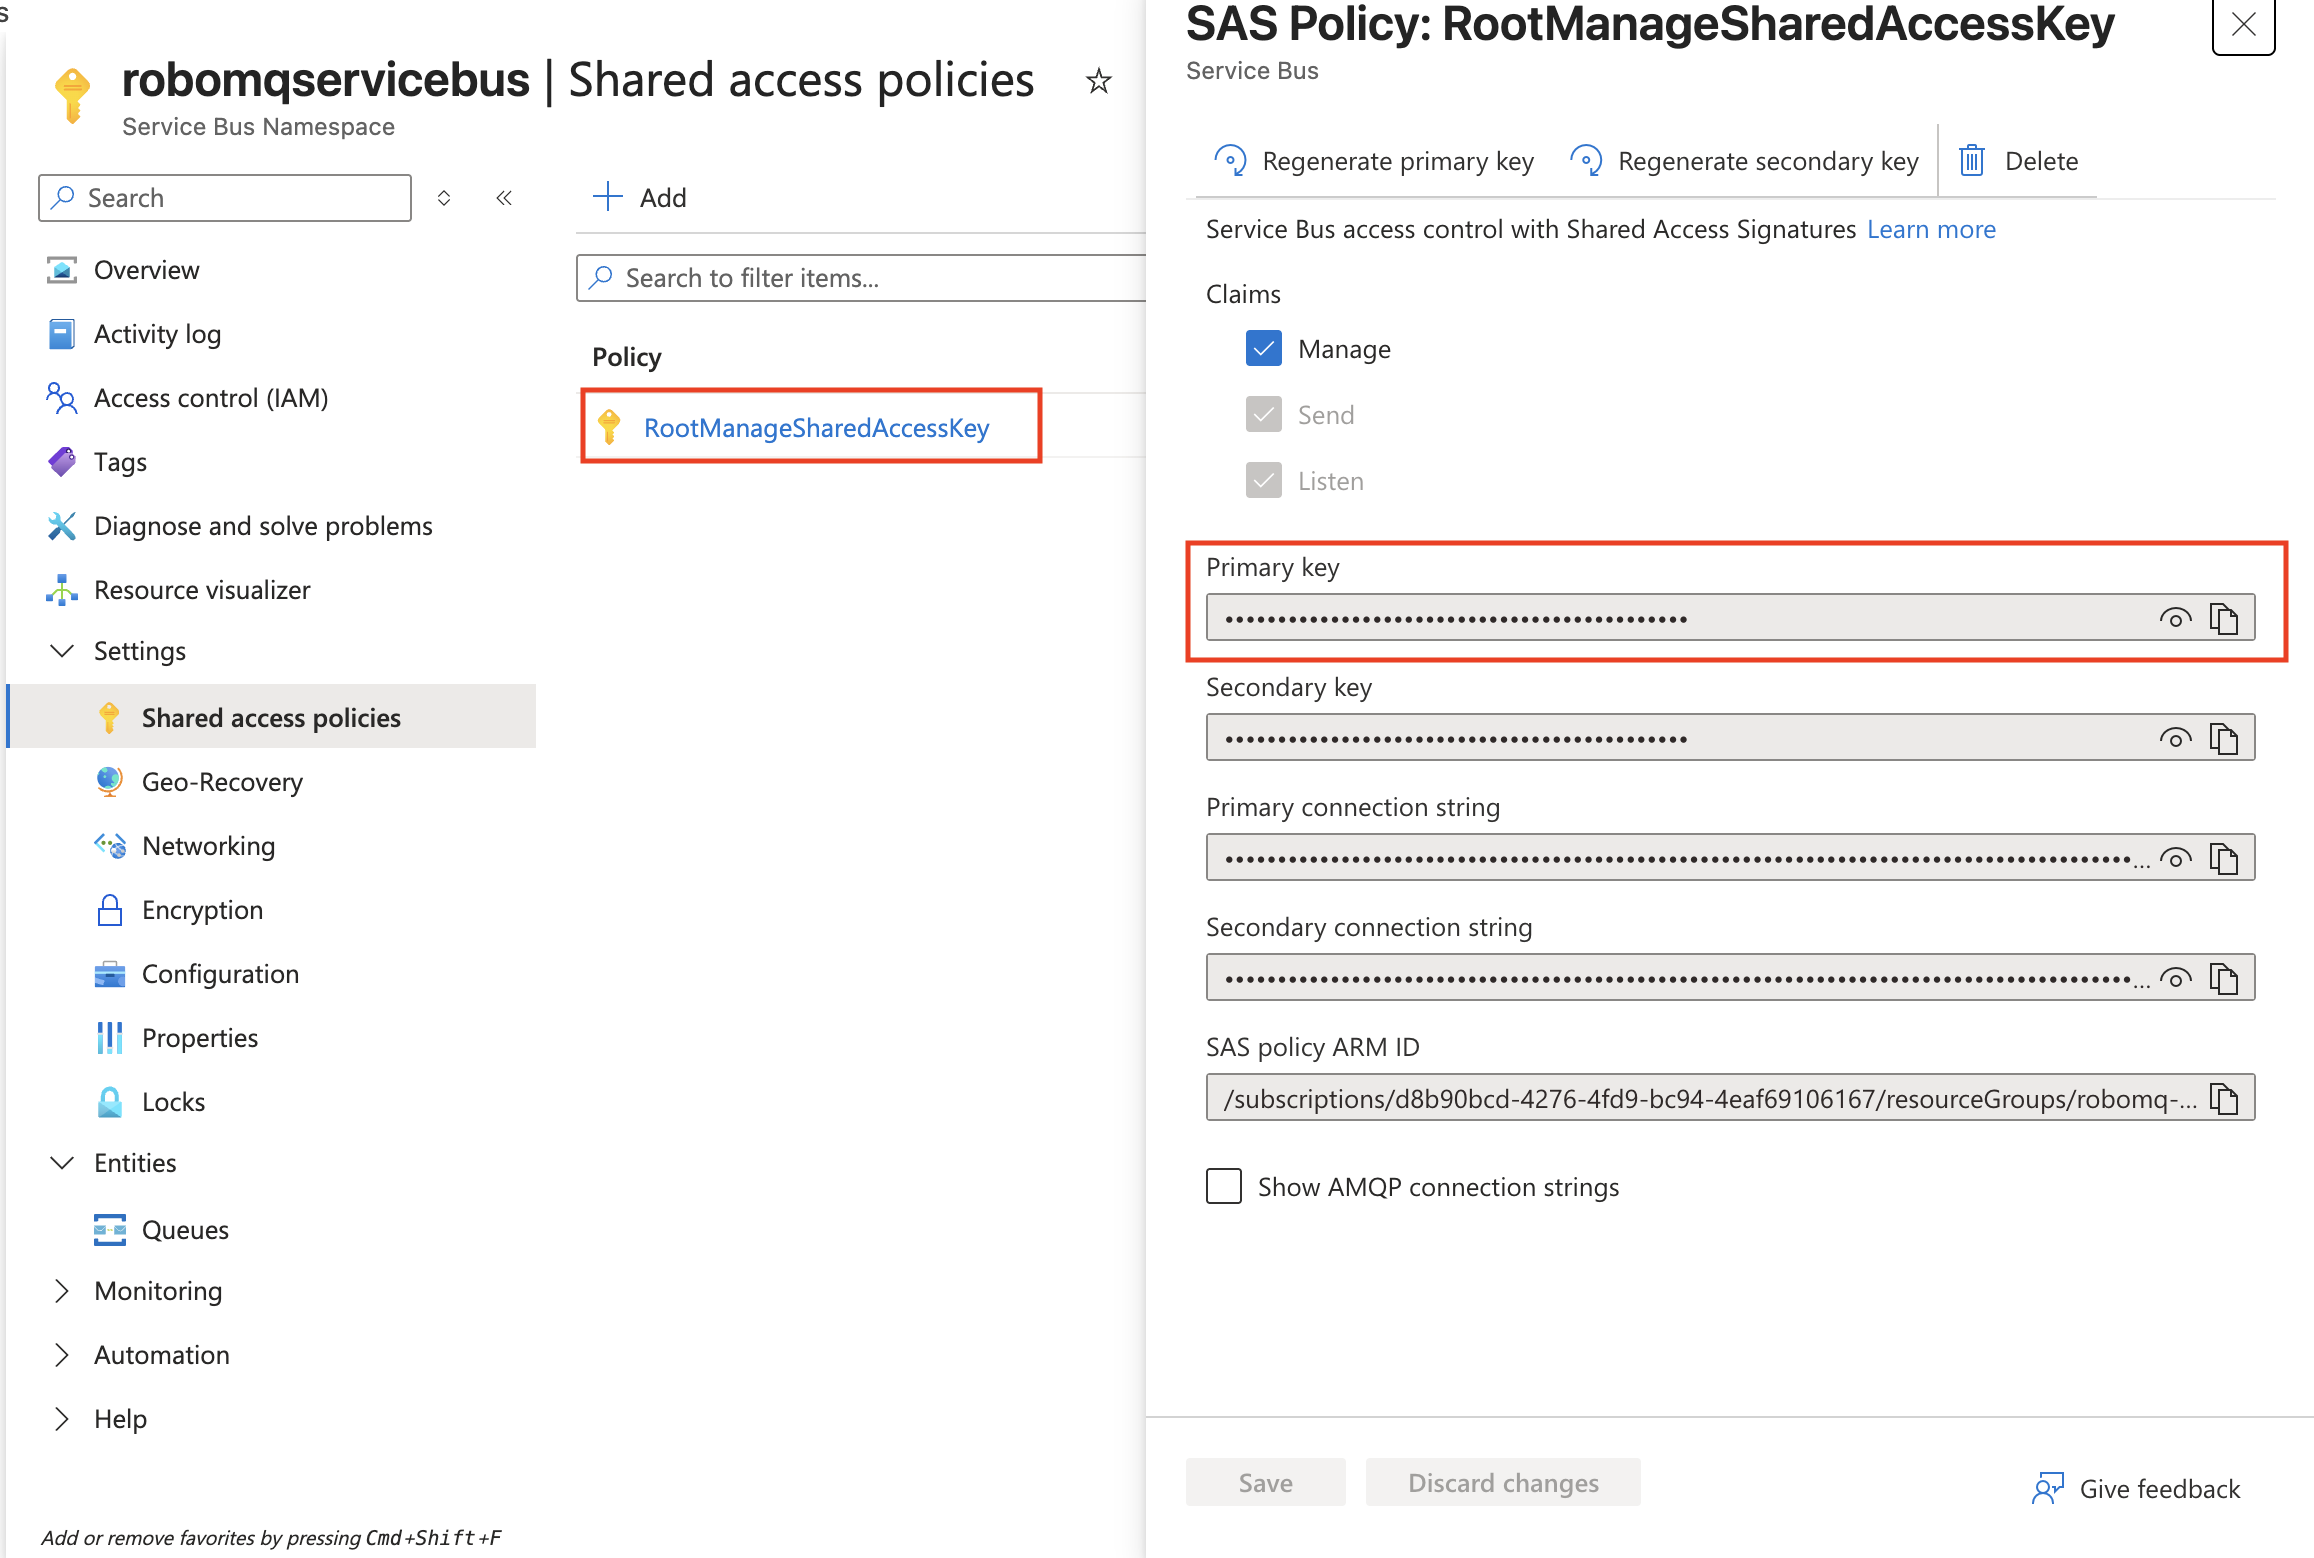
Primary Key: This is the actual secret used to sign and authorize Service Bus requests. To find it:
- Click on your chosen policy (from the previous step).
- The Primary Key is shown on the right.
- Click the copy icon to copy it securely.
Once you have all three values, enter them into the connection form to establish a secure link with your Entra ID Service Bus.
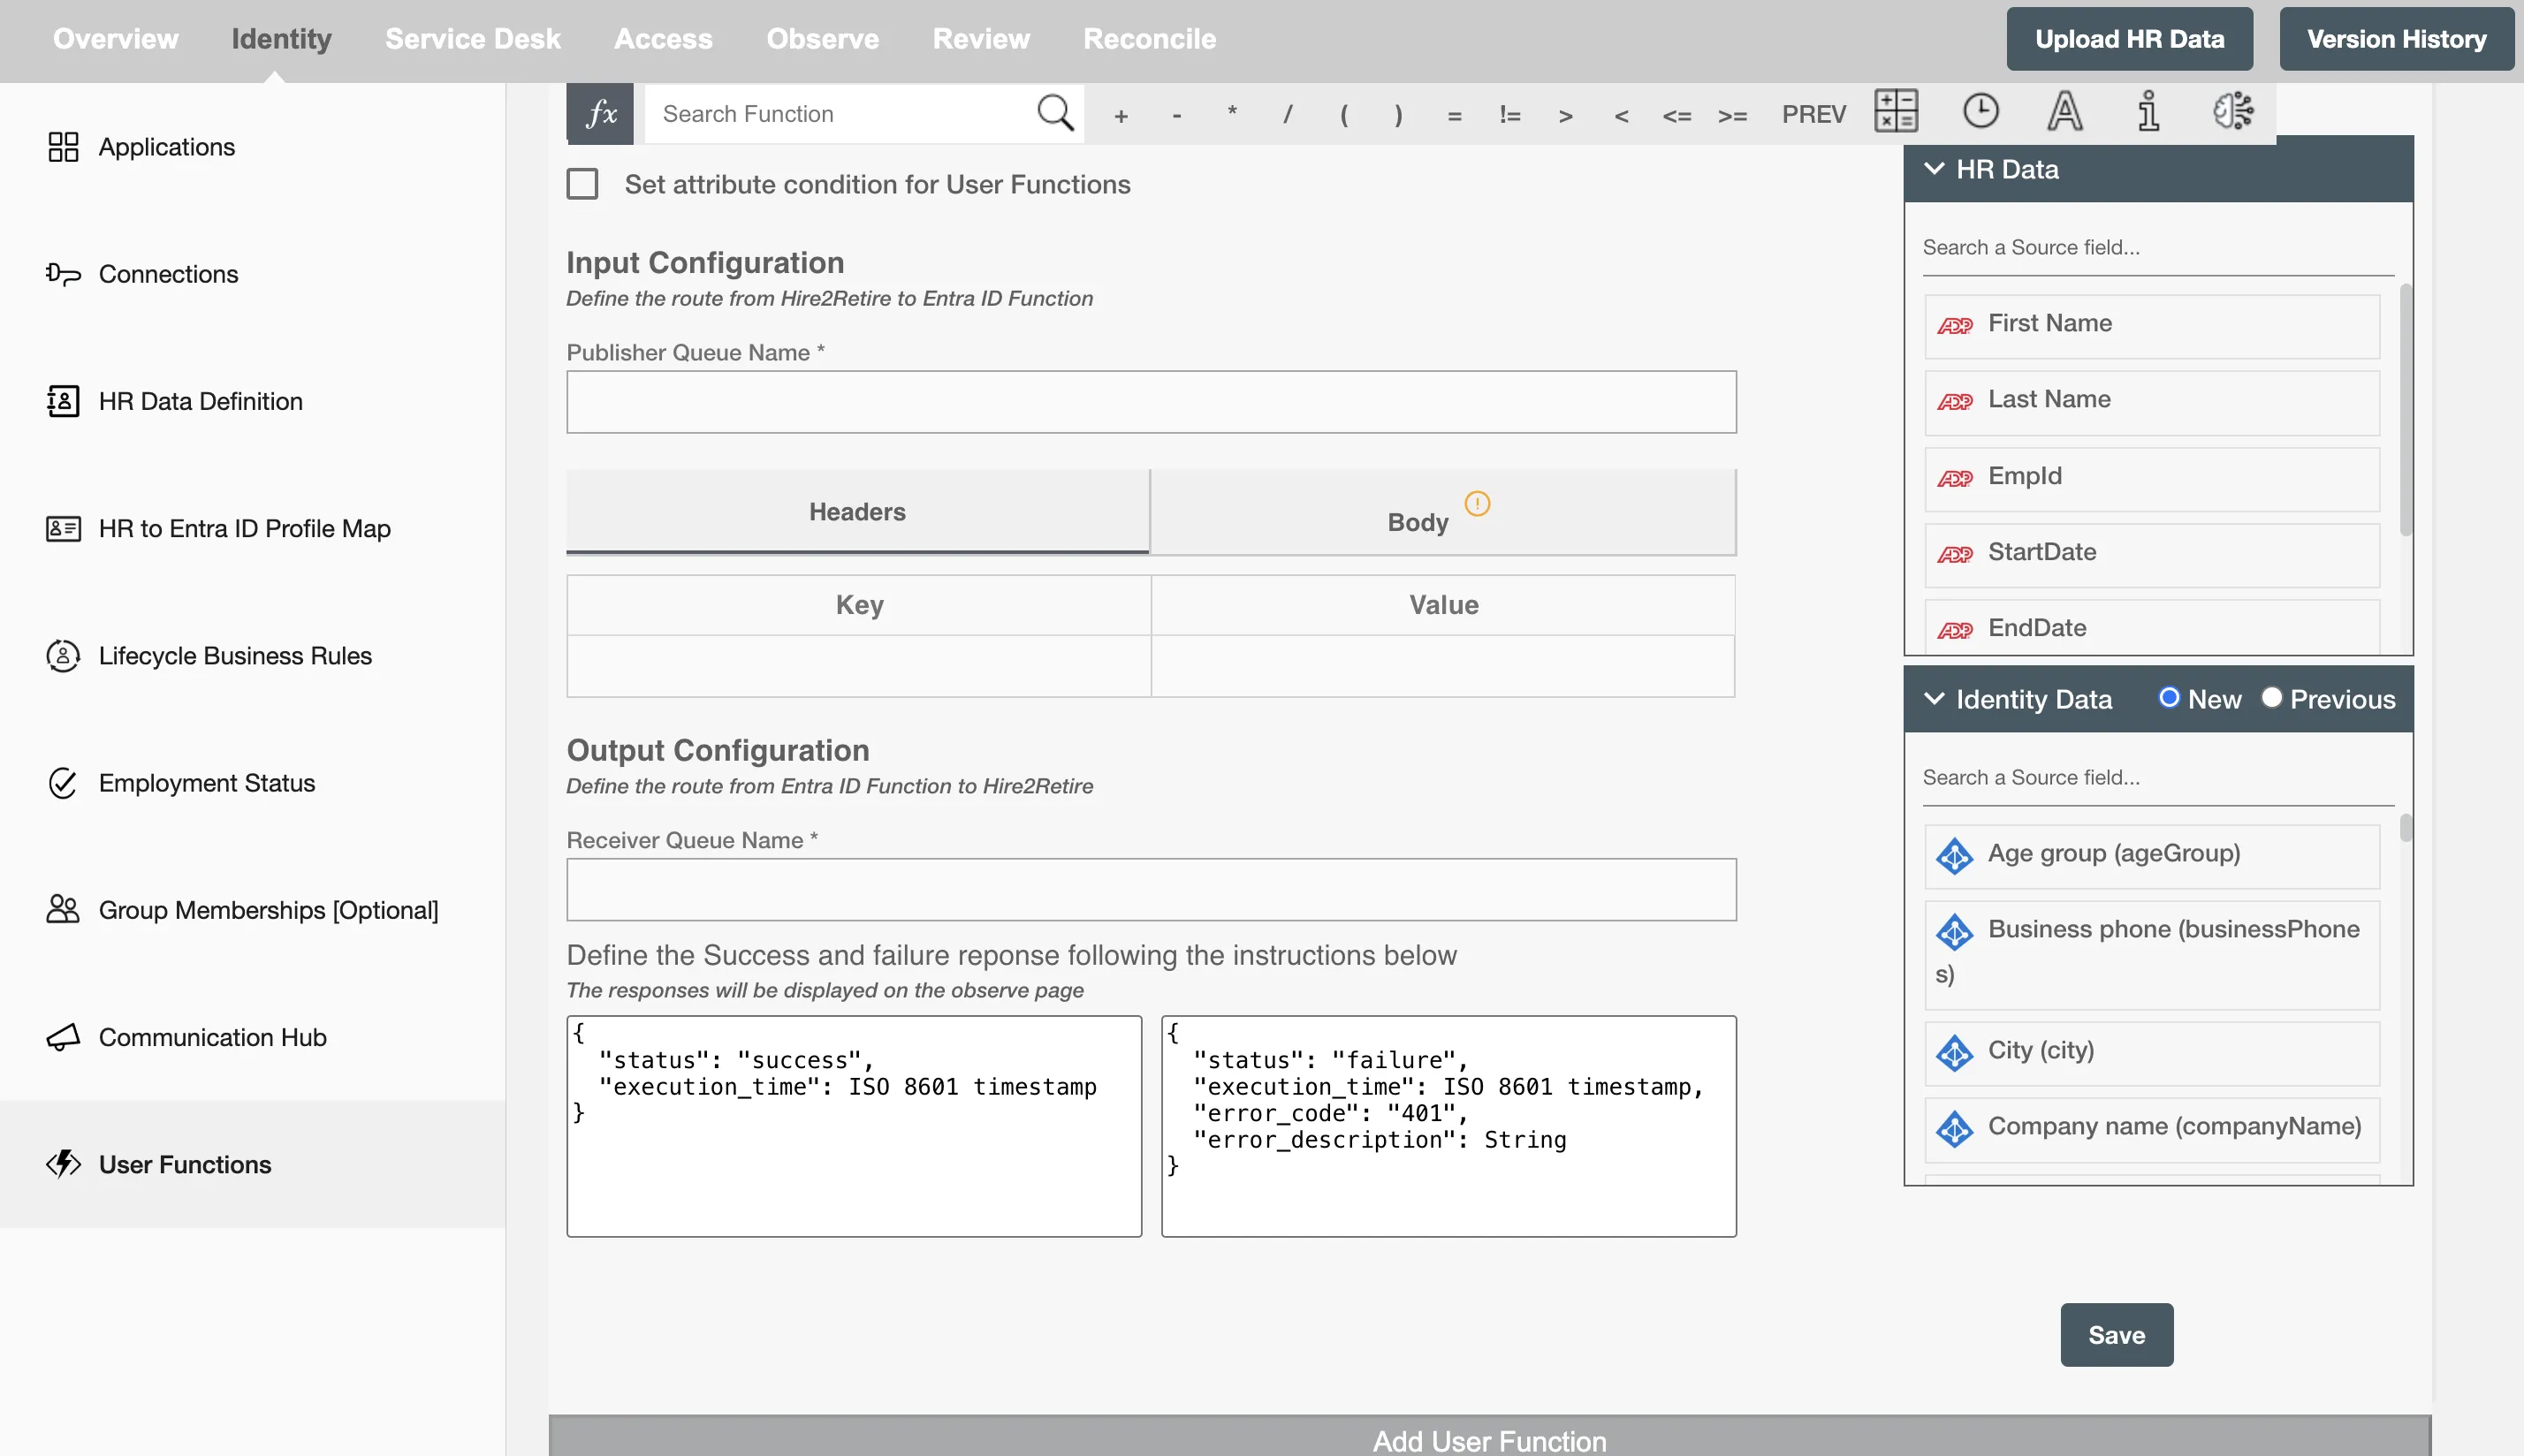
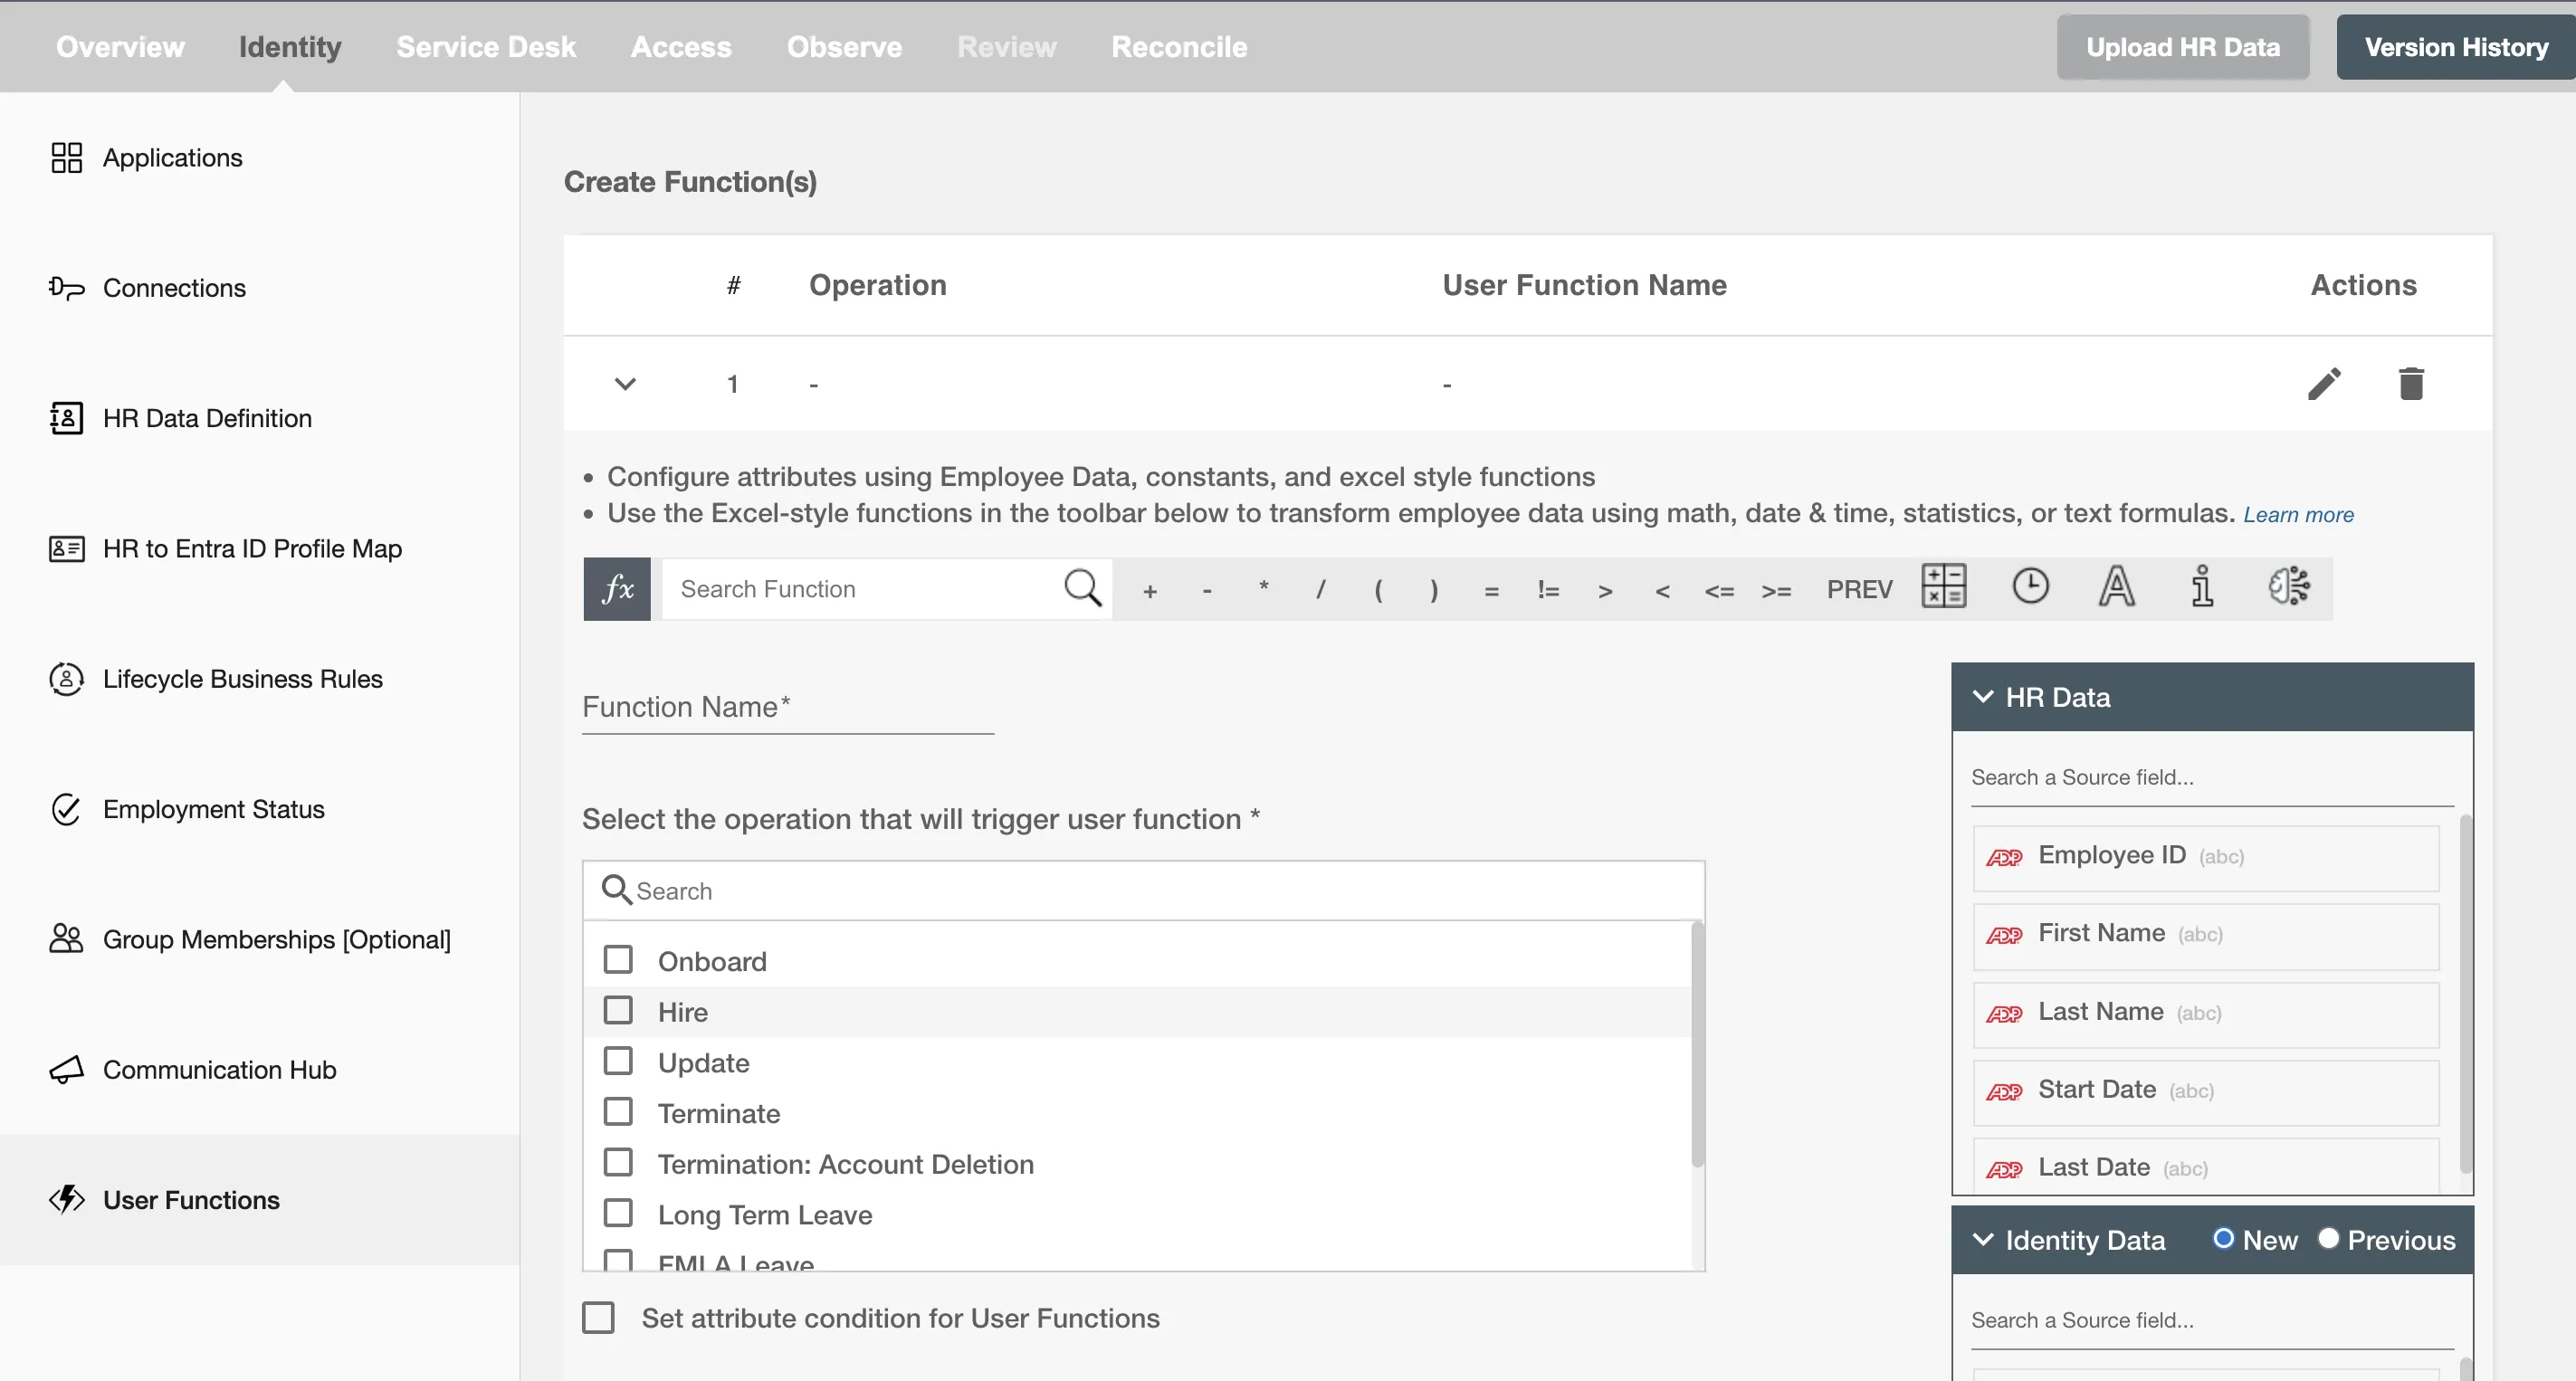
Extension Function configuration
-
Extension Function Configuration name: The name of the current configuration. This value will be displayed in the Observe page to identify events from this Extension Function. It is advised to have a unique name for each configuration.
-
Choose Lifecycle activity: Choose lifecycle operations on which the Extension Function will be triggered.
-
Employee processing condition: Process only employees who meet the defined conditions.
-
Publisher Queue Name: Queue where employee data will be sent. Your User Extension Functions should listen to this queue to receive the payload.
-
Message Headers: Each message will contain 2 system-defined headers:
Correlation ID: This will be added by Hire2Retire. This field will be used to correlate the Entra ID function response with the Hire2Retire core event. Response sent by the customer’s Entra ID function must have this field and the value should be the same as the one present in the payload received by it.Time to live: By default, this value is set for 14 days by Entra ID Service Bus. Customers can change it by defining it as a custom header on the Hire2Retire UI.- In addition to these system-defined headers, user can define
Custom Headersbased on their use case.
-
Message Payload: Users can define the payload according to their use case. They can either use a static value or map HR or AD attributes.
-
Receiver Queue Name: Queue from which Hire2Retire will receive the response from the User Extension Functions. Your User Extension Functions should publish response to this queue.
-
Sample Success/Failure Payload: A non-editable text box will be shown, which will contain all the required fields with their respective data type, as expected by Hire2Retire User Extension Functions response.