SAP SuccessFactors API Integration Connection
SAP SuccessFactors provides a cloud-based Human Capital Management (HCM) solutions for employers. In addition to the Data Extract method offered by Hire2Retire, we have implemented an API-based approach to facilitate integration between SAP SuccessFactors and Directory Services. API integration is user-friendly and allows for scheduled data retrieval, enabling daily or interval-based pulls of employee data reports.
Create a Connection
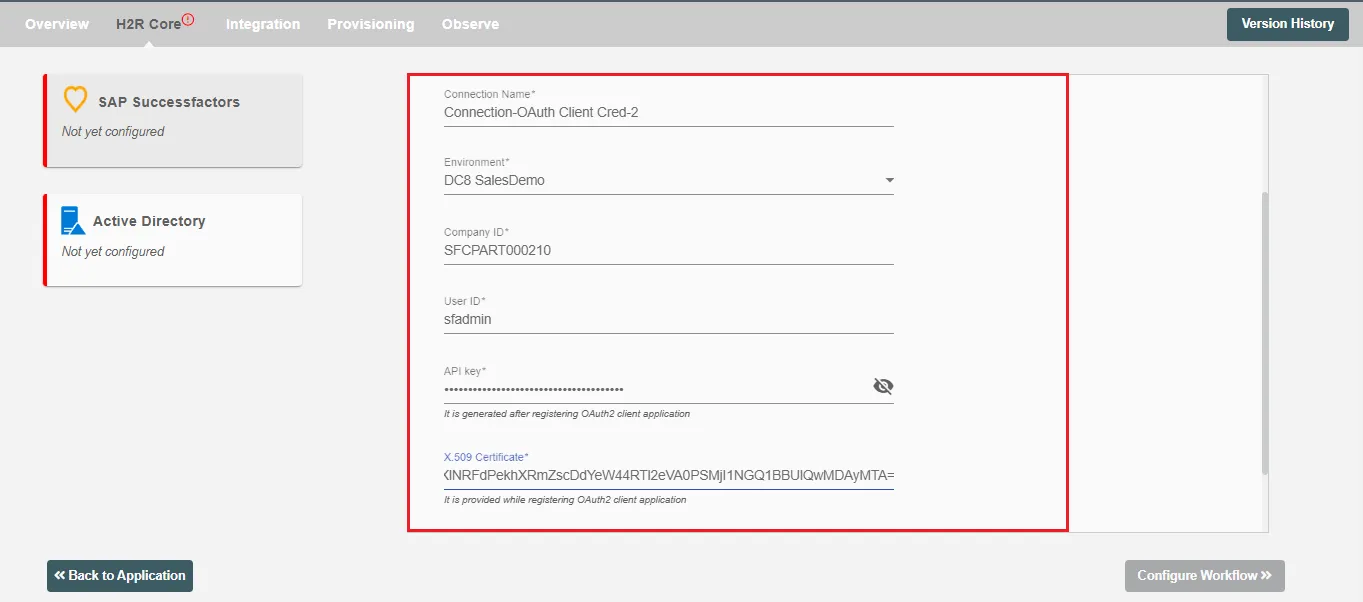
The API integration of SAP SuccessFactors uses OAuth2.0 mechanism for authentication. SuccessFactors requires the following keys to authenticate its clients using this mechanism:
-
Environment - A dropdown field which contains all the list of API-server provided by SuccessFactors. Users can identify their environment by examining the SuccessFactors URL of the page. For instance, in the URL https://pmsalesdemo8.successfactors.com, the required environment is 'Sales Demo 8'.
-
Company ID - The Company ID is a short string of characters that identifies each SAP SuccessFactors system.
-
User ID - This is the user id of the active account.
-
API Key - An API Key is generated and assigned to the user application when the user registers it for OAuth2.0 authentication. It is provided on the SAP SuccessFactors portal when a user registers a new OAuth client application using OData API. One can view the API key by choosing 'View' on the registered application list.
-
Private Key - This is the Private key value copied from X.509 certificate.
Registering Client Application using OAuth2 on SAP SuccessFactors
-
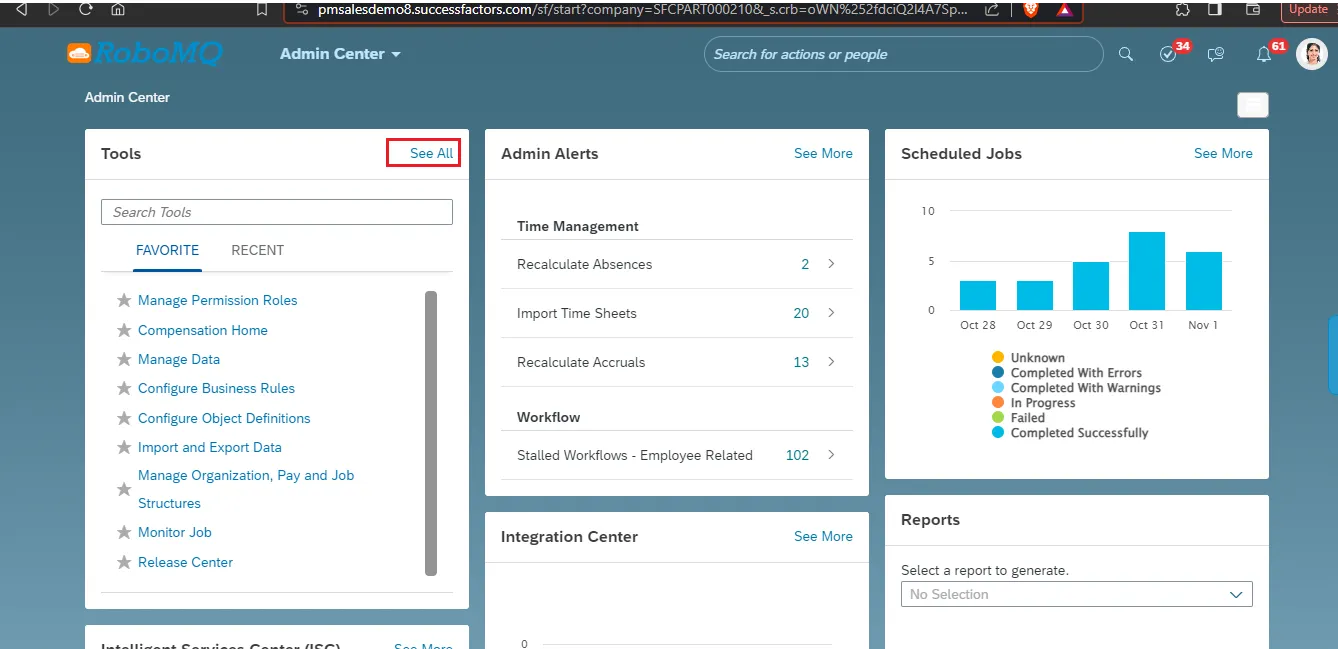
Log into your instance as an administrator.
-
Then, select 'API Center' under 'Company Settings'.

-
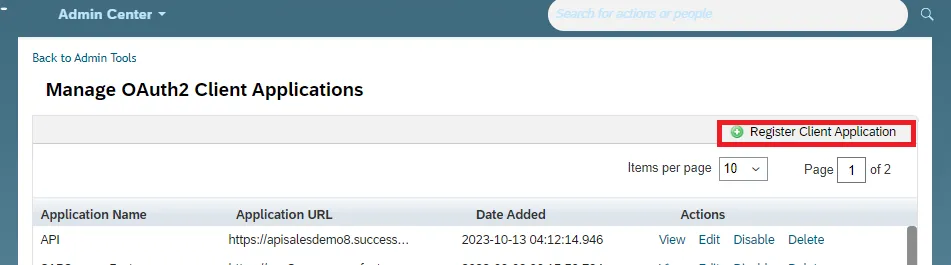
Go to Admin Center API Center OAuth Configuration for OData and choose Register Client Application. You can also access the tool by searching Manage OAuth2 Client Applications in Action Search.
-
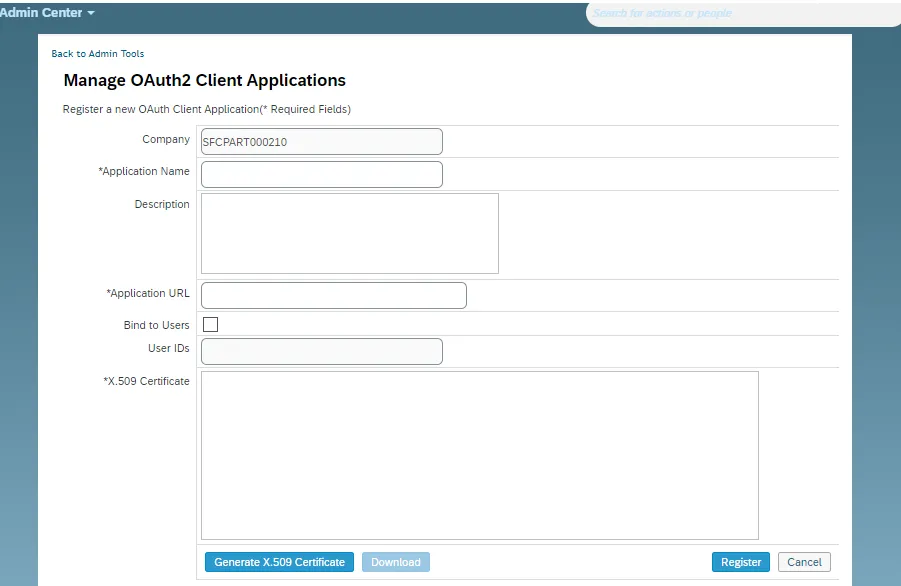
On the new OAuth client registration screen, enter the following:
-
Company - The name of your company. This value is prefilled based on the instance of the company currently logged in.
-
Application name - (Required) A unique name of your OAuth client.
-
Description - (Optional) A description of your application.
-
Application URL - (Required) A unique URL of the page that the client wants to display to the end user.
-
Blind to Users - (Optional) You can enable this option to restrict the access of the application to specific users including business users and technical users.
-
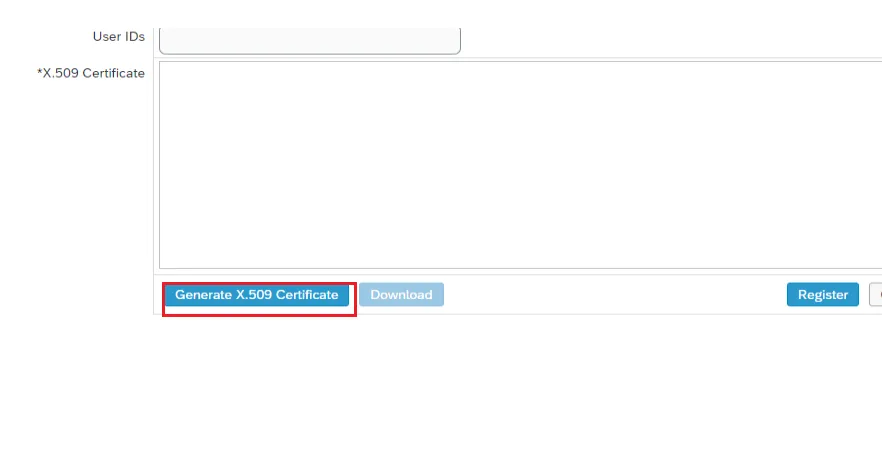
User IDs - (Required if you enabled the Bind to User option) Enter the user IDs separated by comma.
-
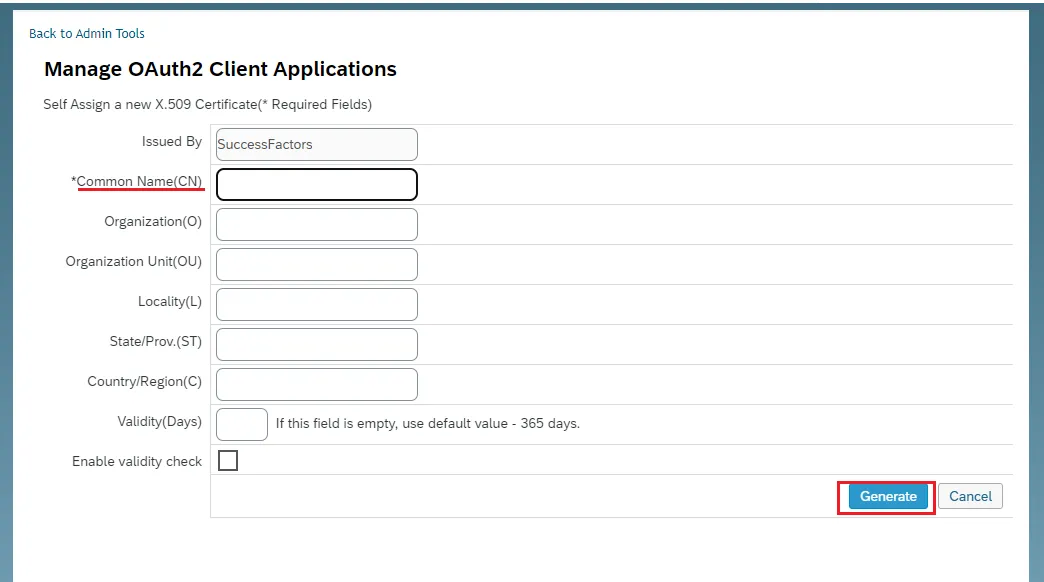
X.509 Certificate - (Required) The certificate corresponding to the private and public key used in the OAuth 2.0 authentication process. In this flow, SAP SuccessFactors require the public key and the client application has the private key. To register a client application, you must install the public key in SAP SuccessFactors. You can obtain a certificate from a service provider, or generate a self-signed certificate using a third-party tool. If neither option is available, you can also generate an X.509 certificate in SAP SuccessFactors by entering a common name of the user.
-
-
Choose Register to complete your registration.
After you’ve successfully registered your client application for OAuth2 authentication, An API key is generated and assigned to your application. You can view the API key by choosing View on the registered application list and use it for authentication.
Permissions Required
The user must have the following permissions:
- Employee export and User search permission is required to fetch employee data.
- Import employee data permission is required for writeback feature.
To grant the permissions, please follow these steps:
-
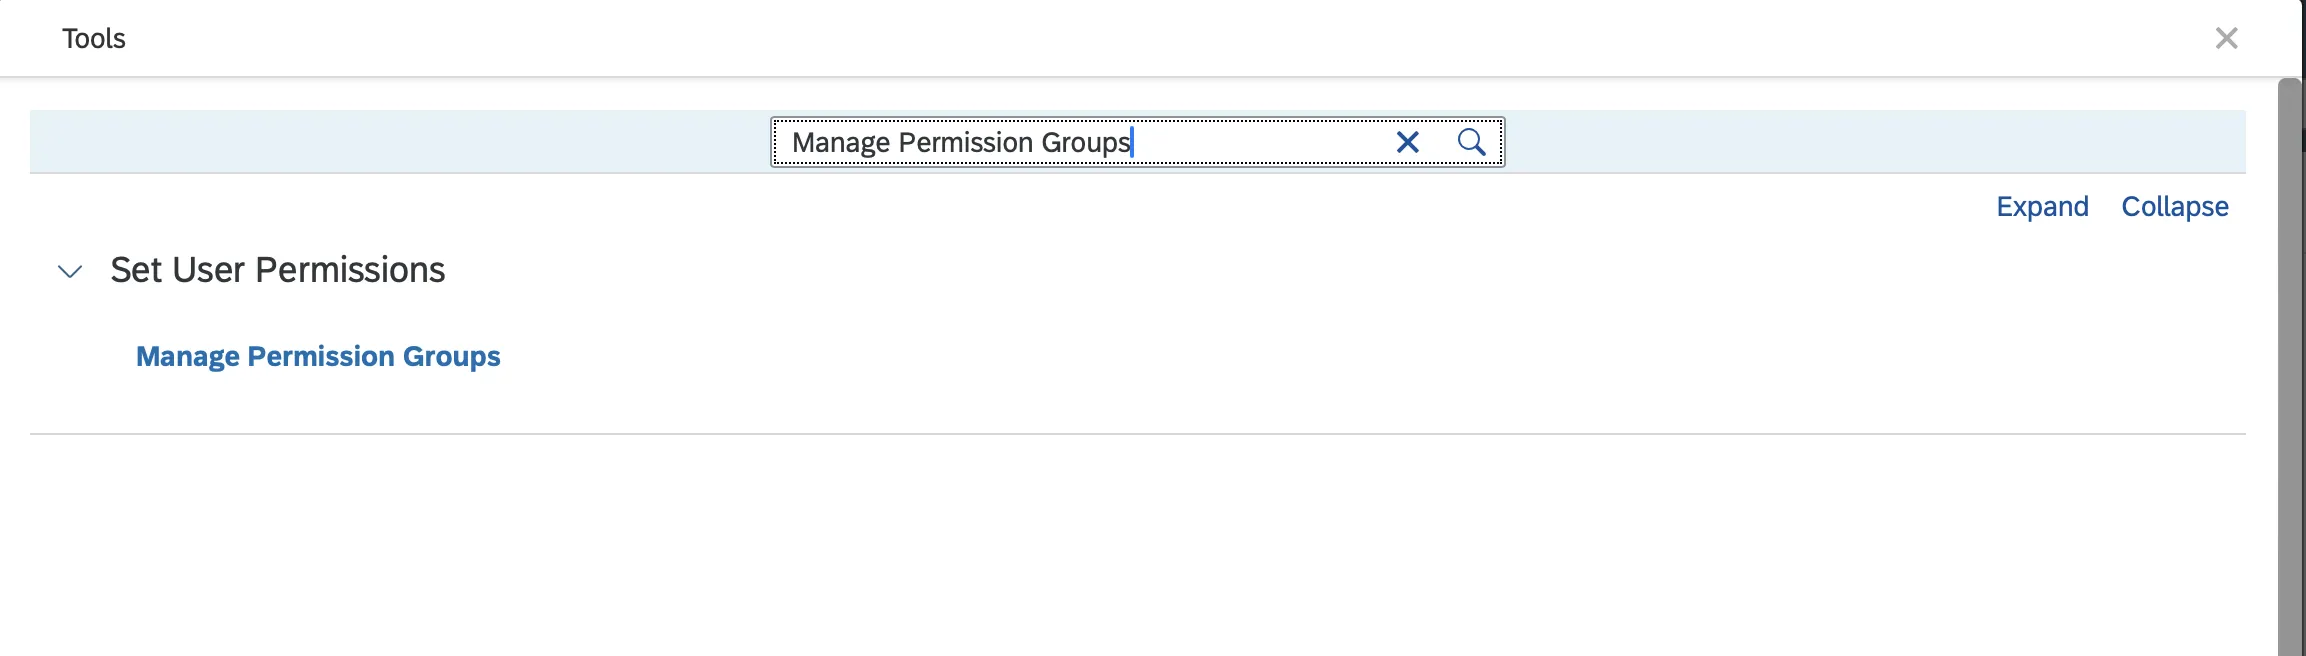
Go to the Admin Center and find the "Manage Permission Groups" section.
-
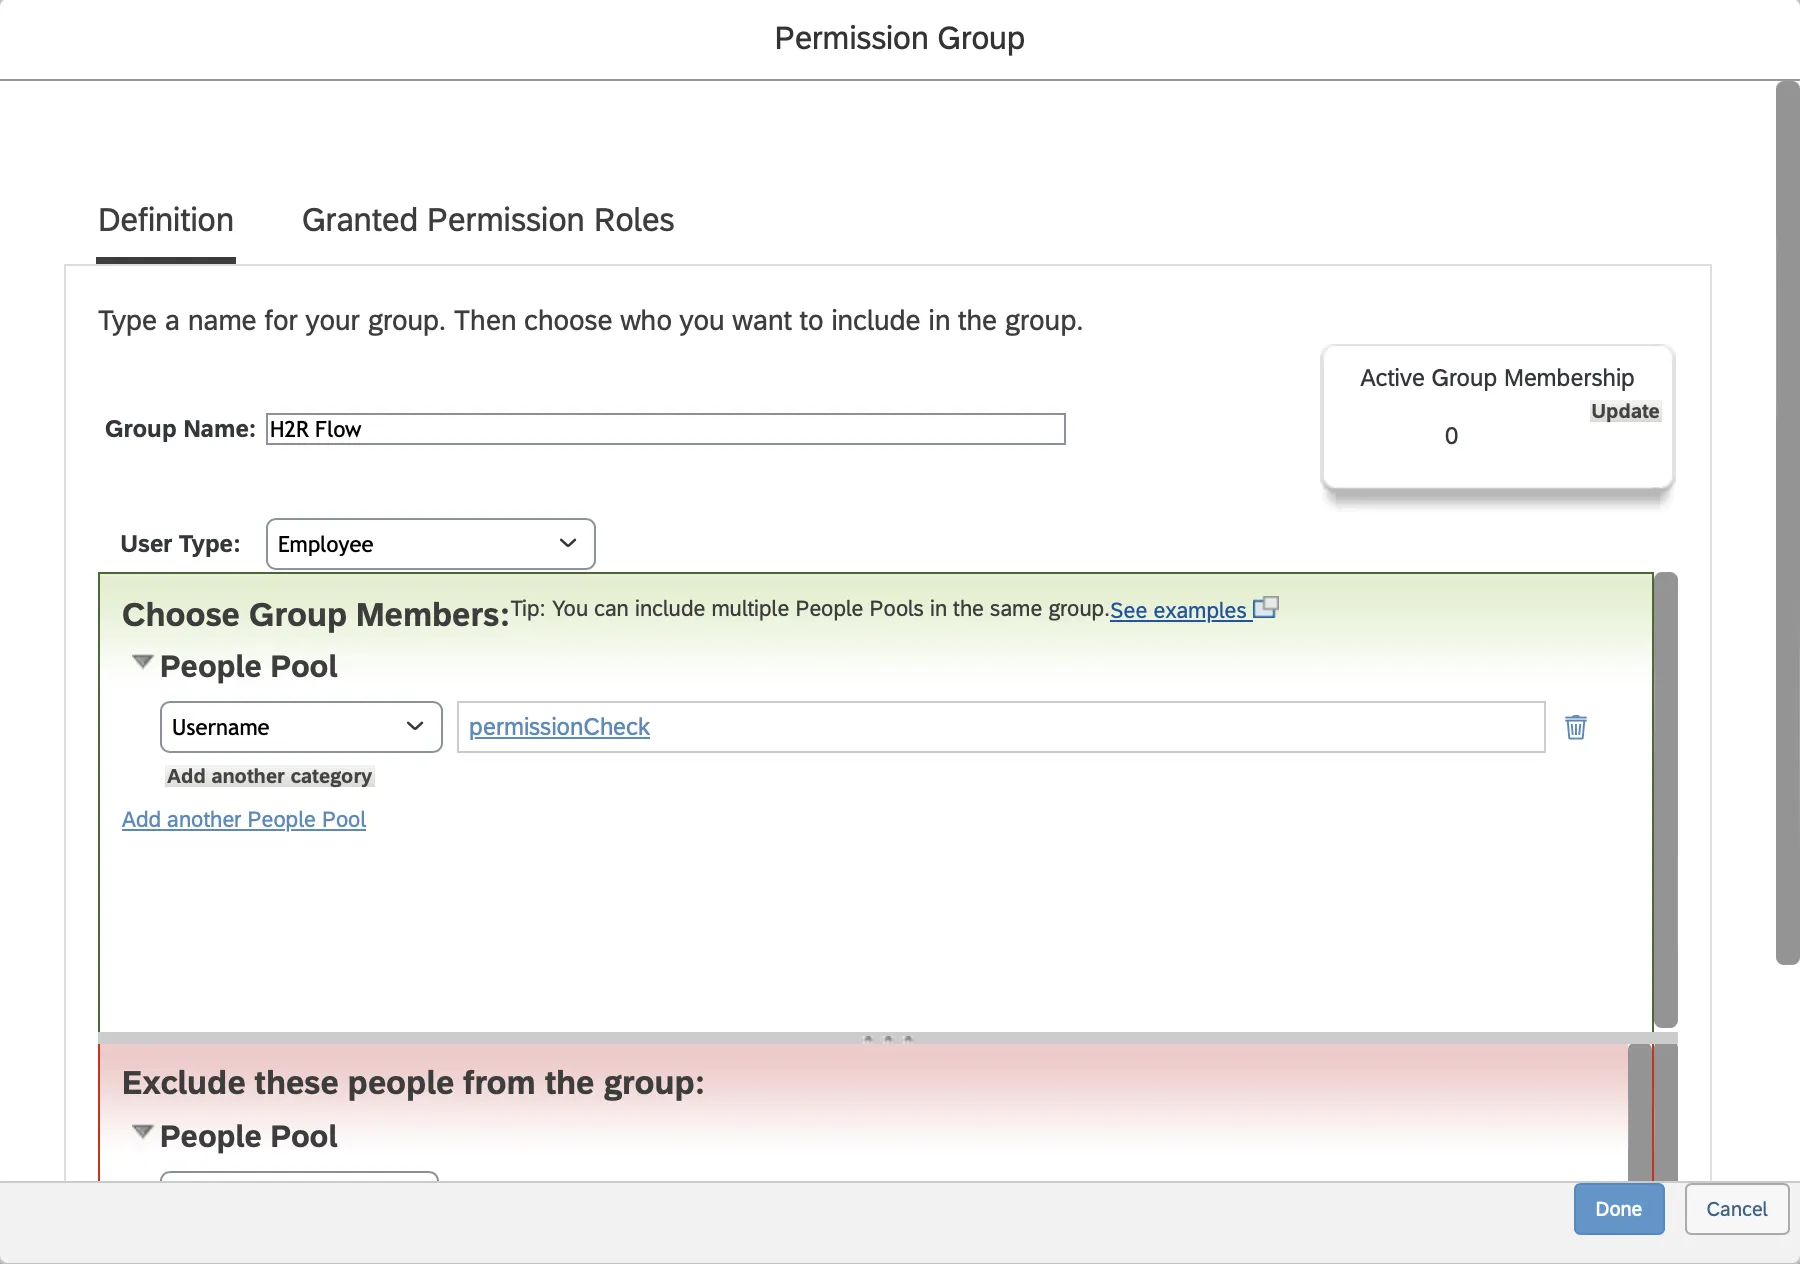
If you don't have an existing permission group, create a new one. Then, select the same user used for API integration within that group.
-
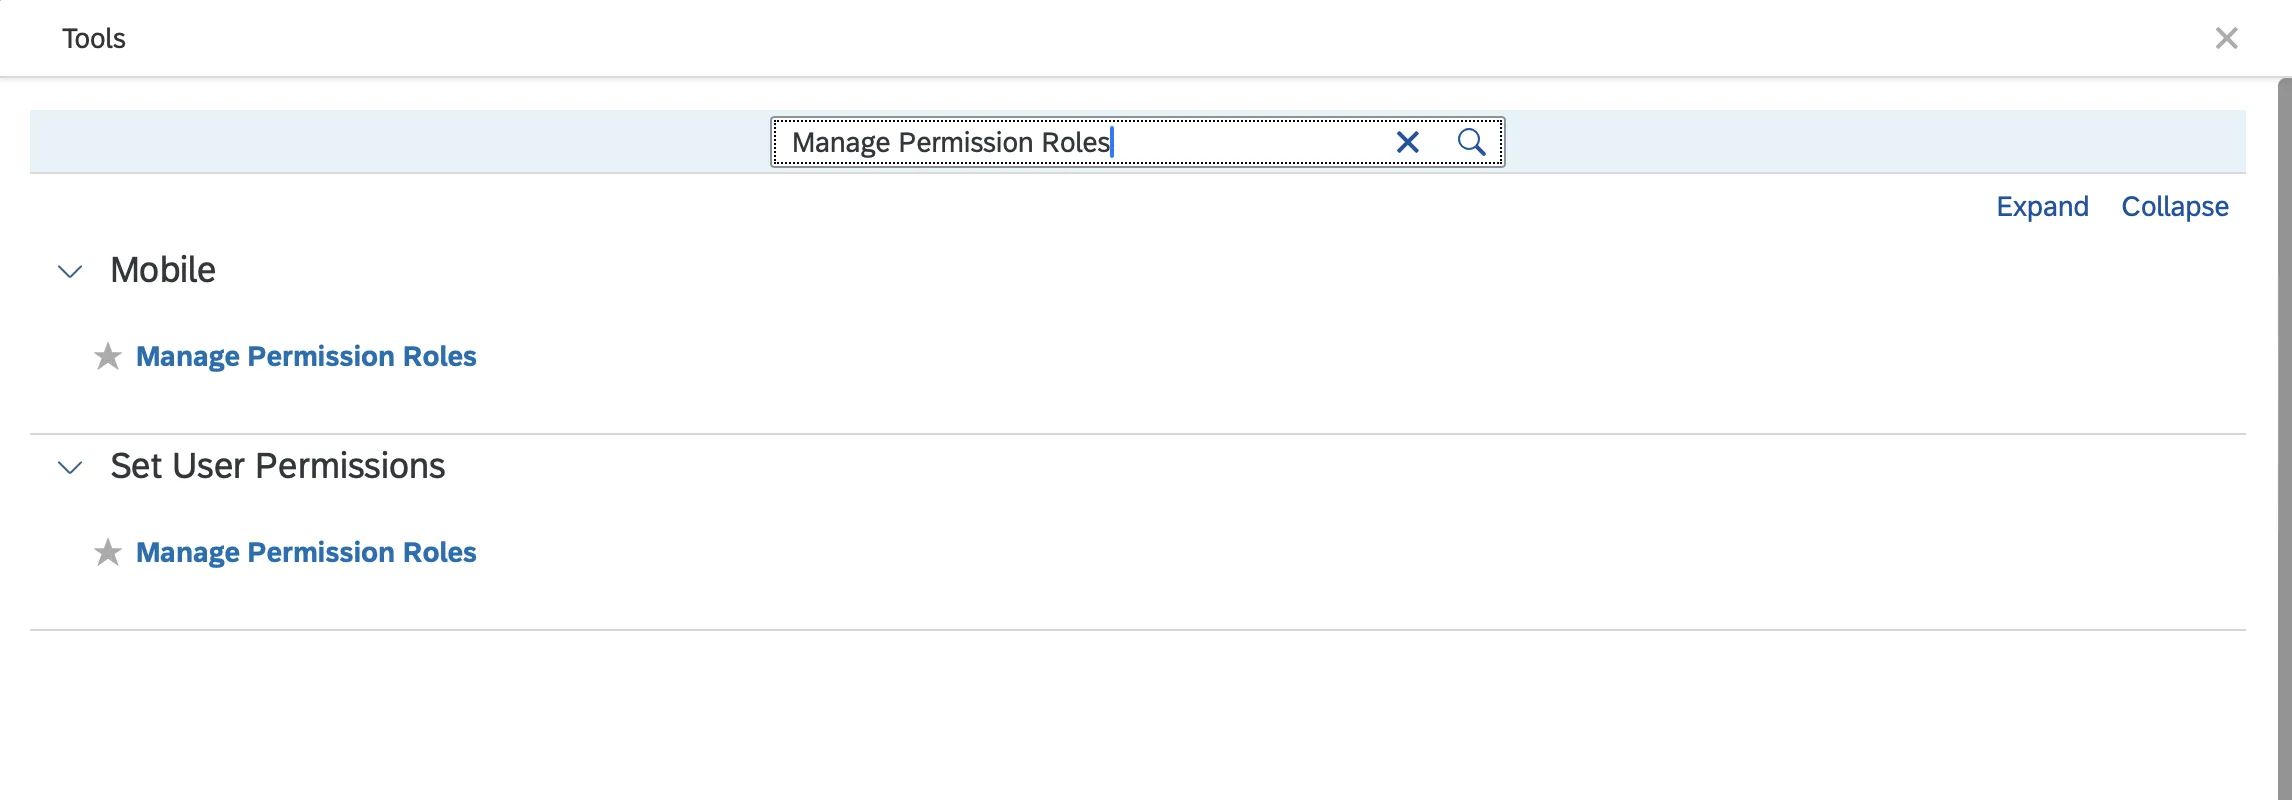
Once you've created the permission group, go to the "Manage Permission Roles" section.
-
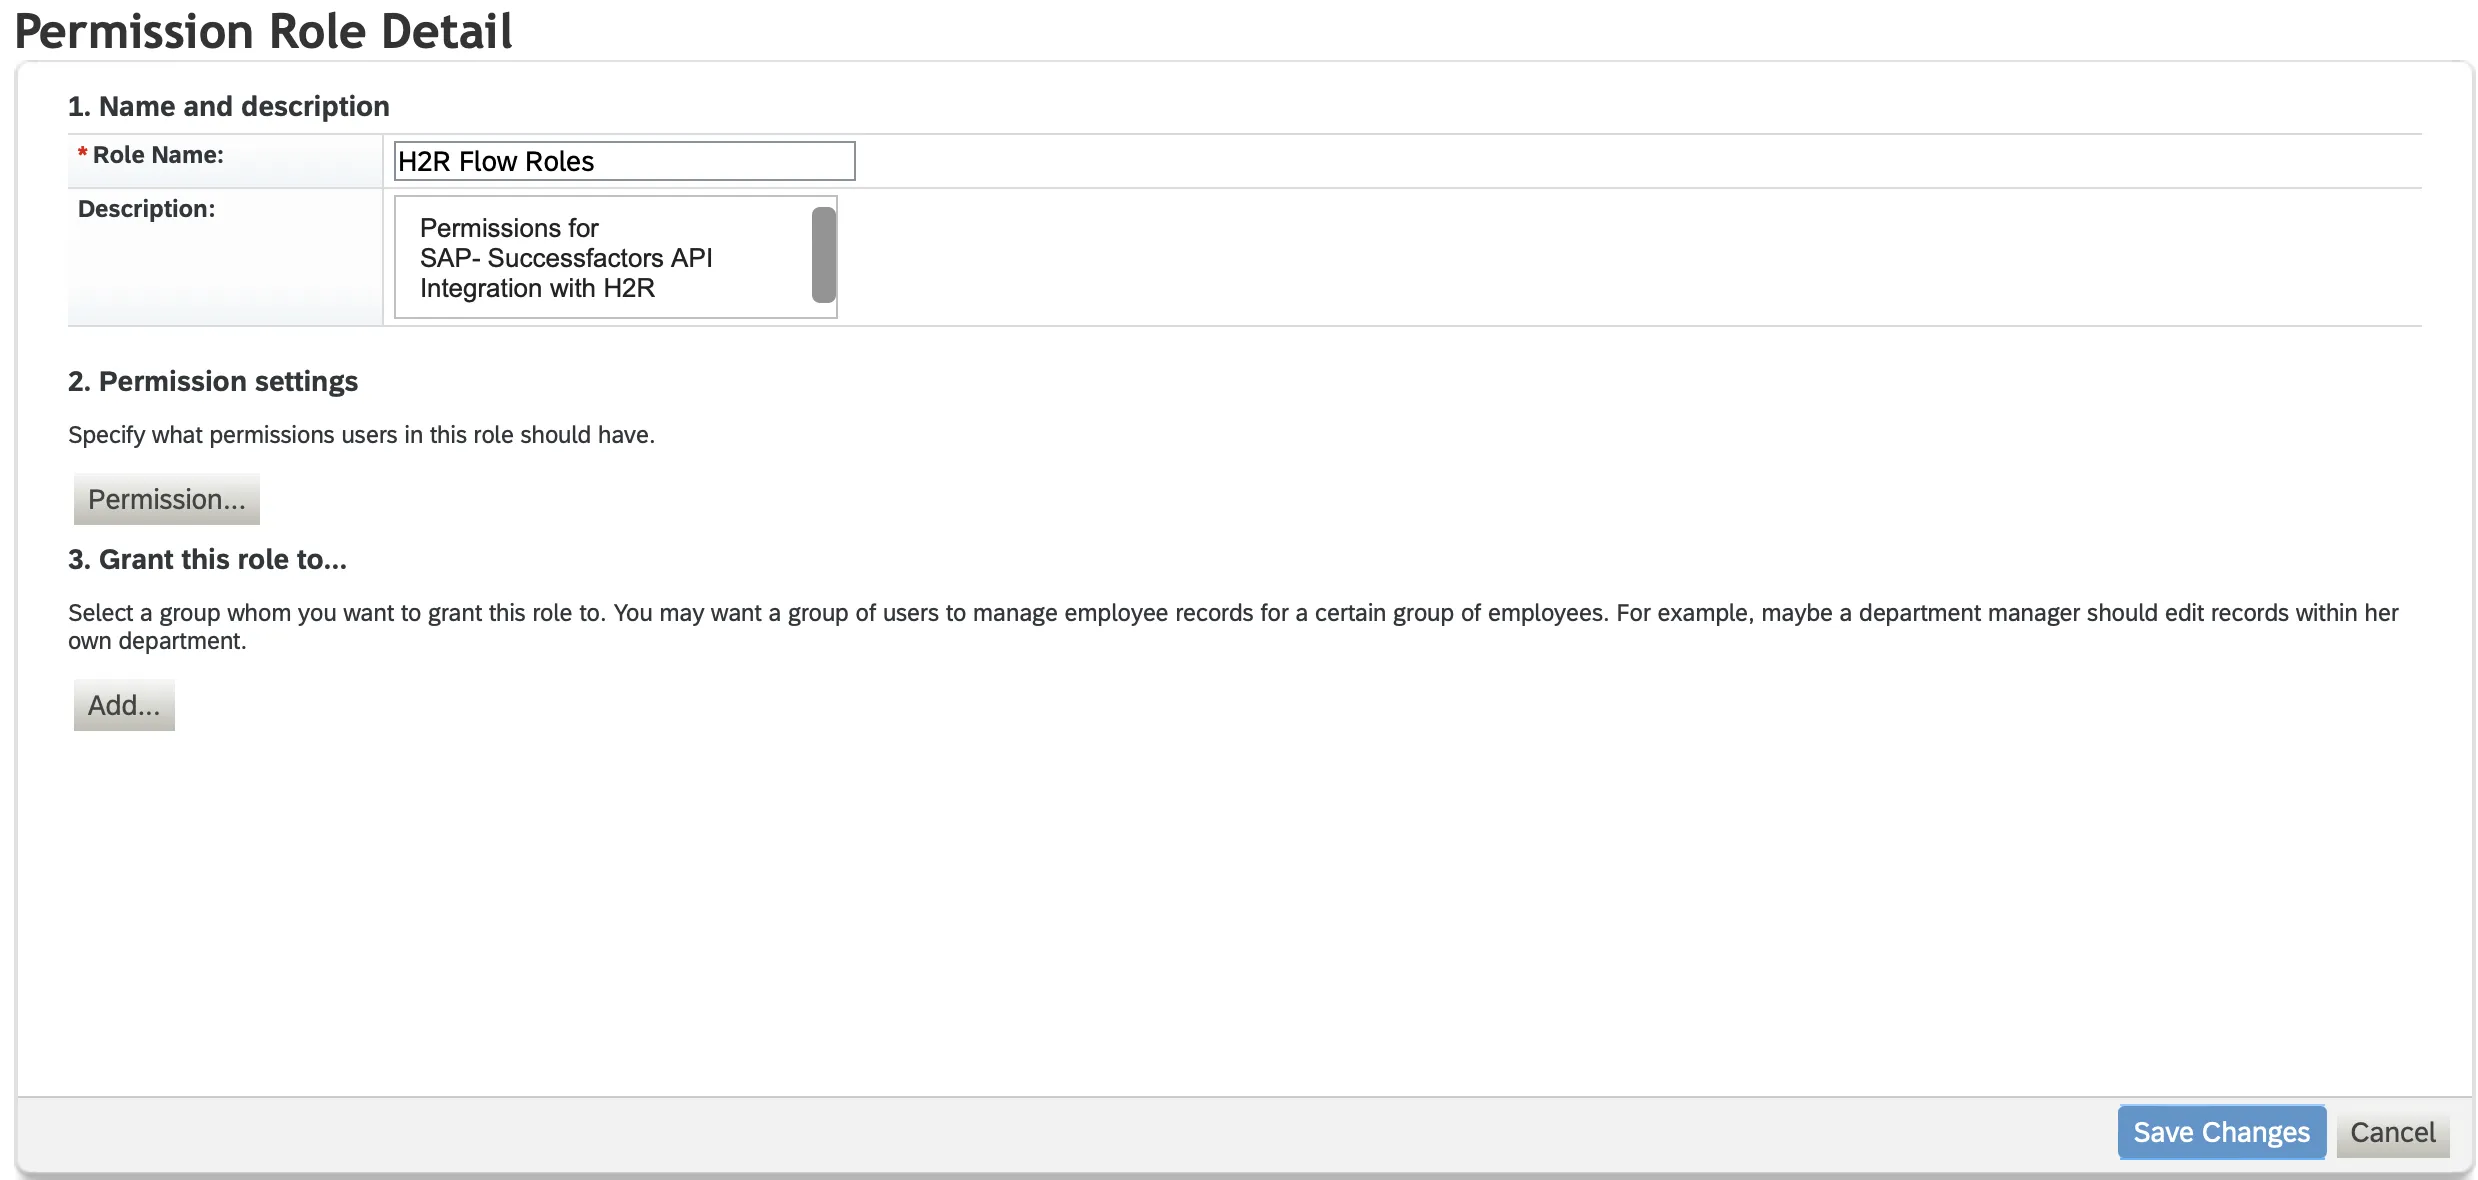
Create a new role, provide role name and description.
-
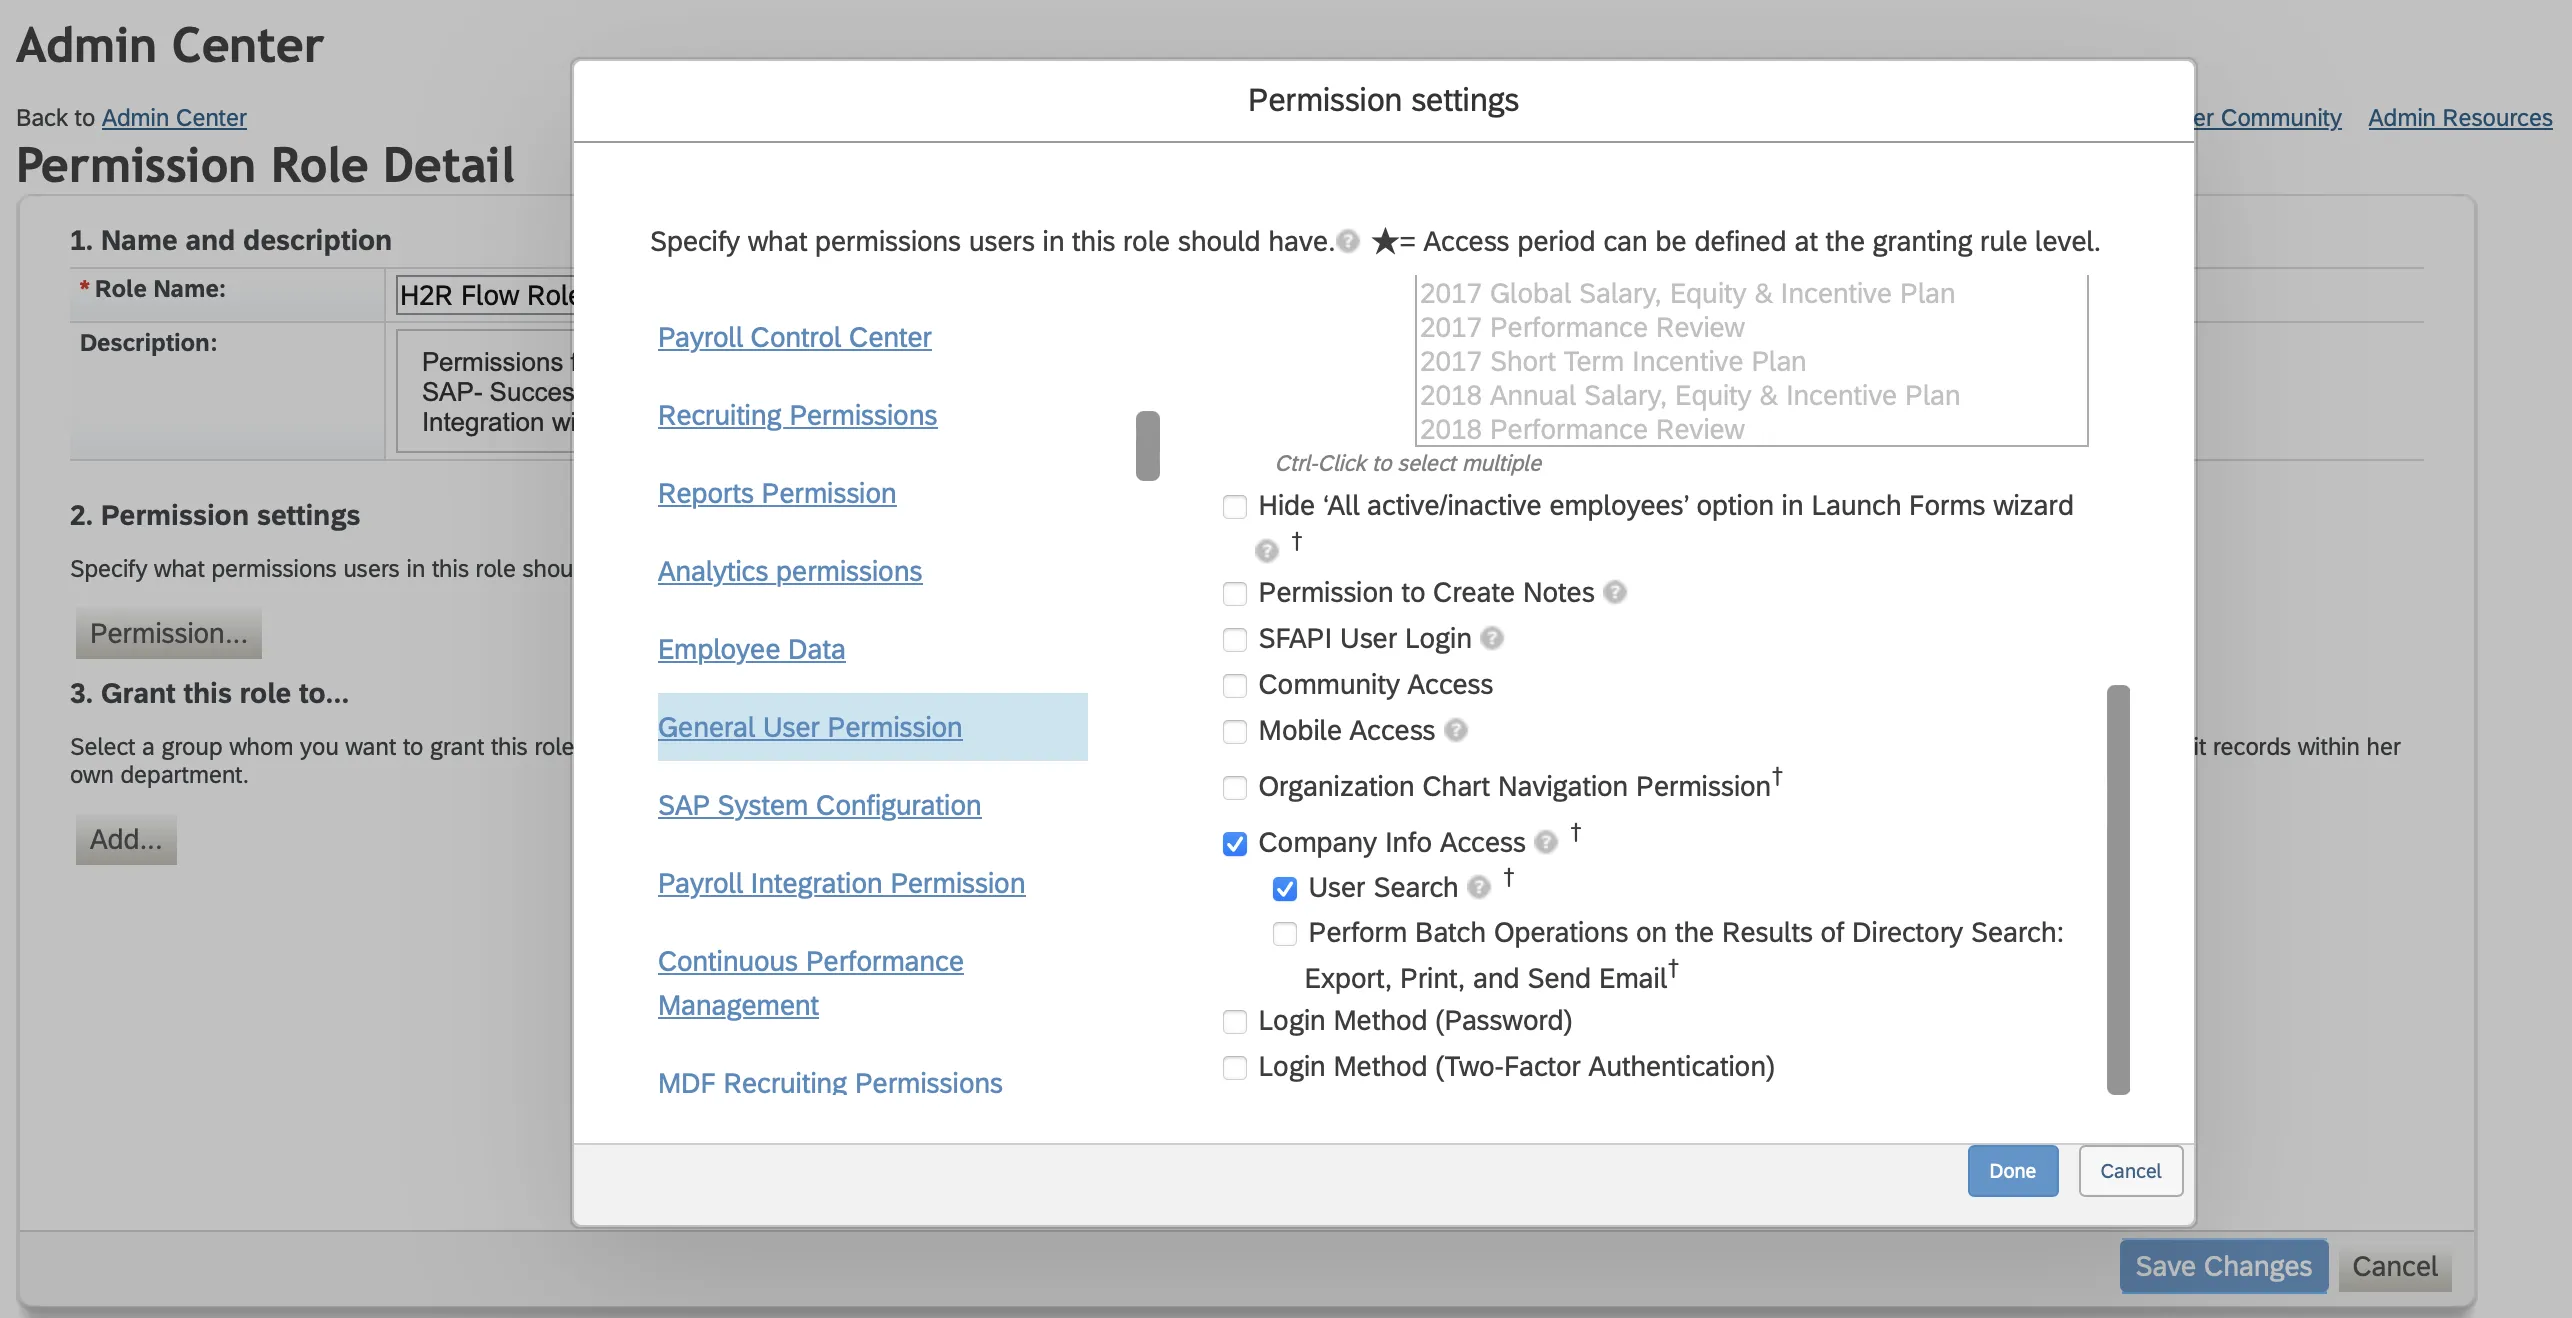
Choose the appropriate permissions:
-
User Search : Locate
General Userunder the User Permissions section and enable theUser Searchpermission.
-
Employee Export: Locate
Manager Userwithin the Administrator Permissions section and enable theEmployee Exportpermission.

-
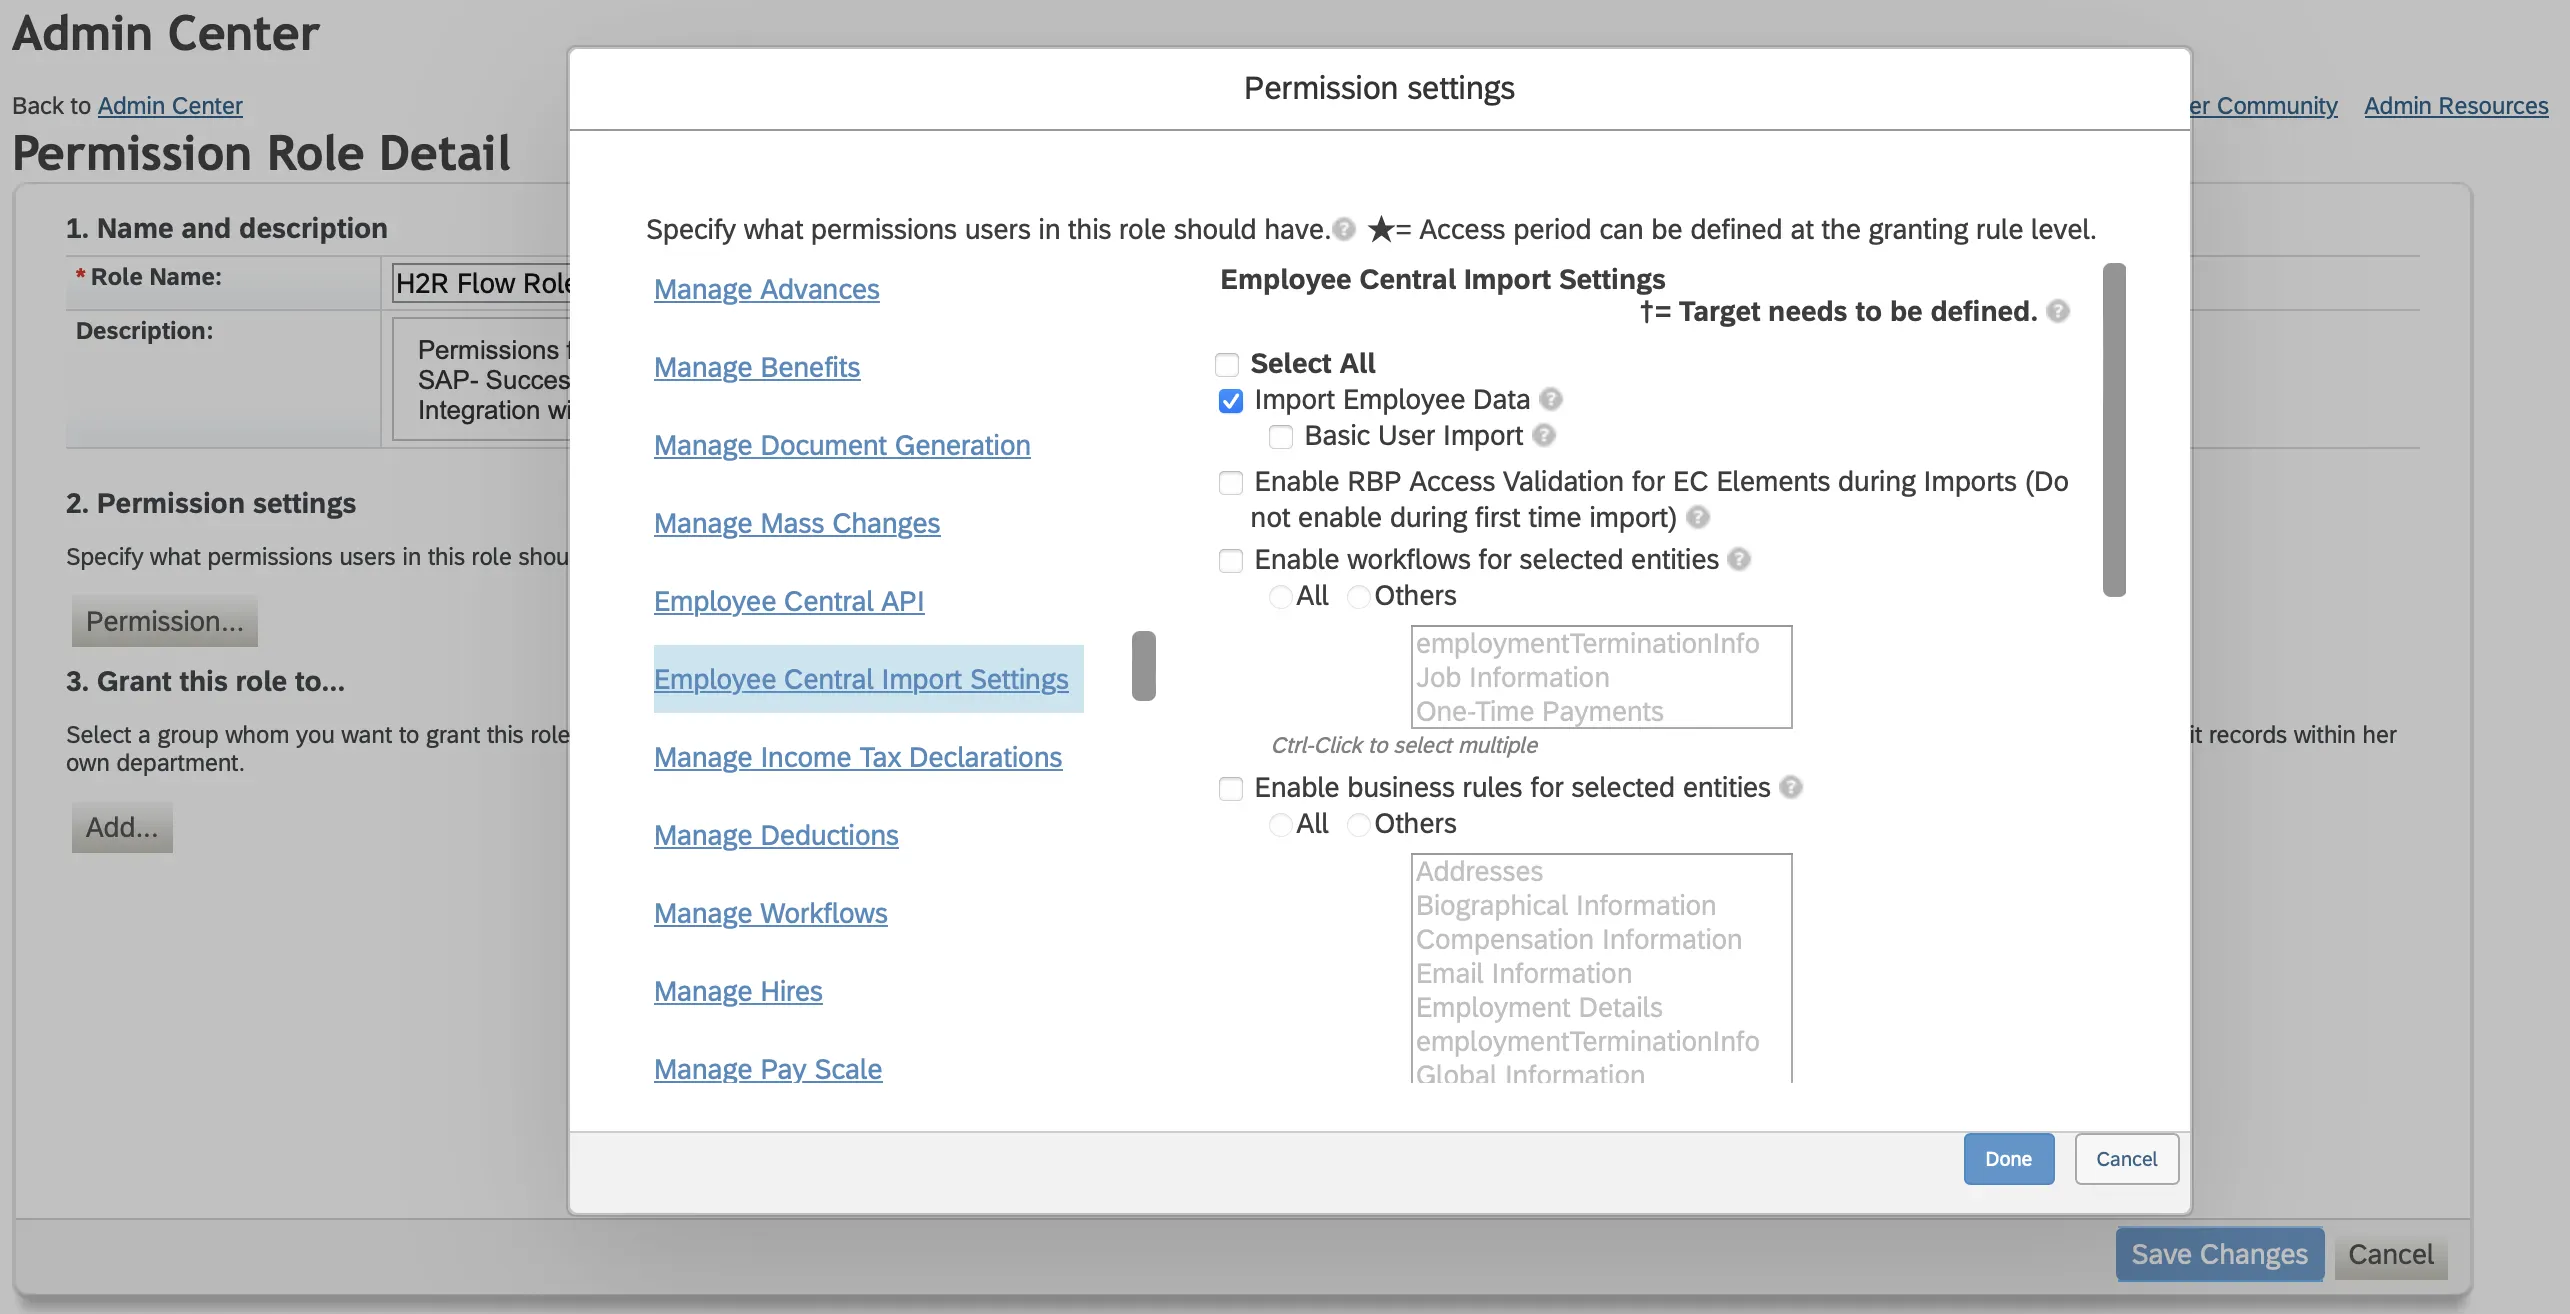
Import Employee Data (For Writeback feature only) : Locate 'Employee Central Import Settings' in the Administrator Permissions section, and then enable the 'Import Employee Data' permission.
-
-
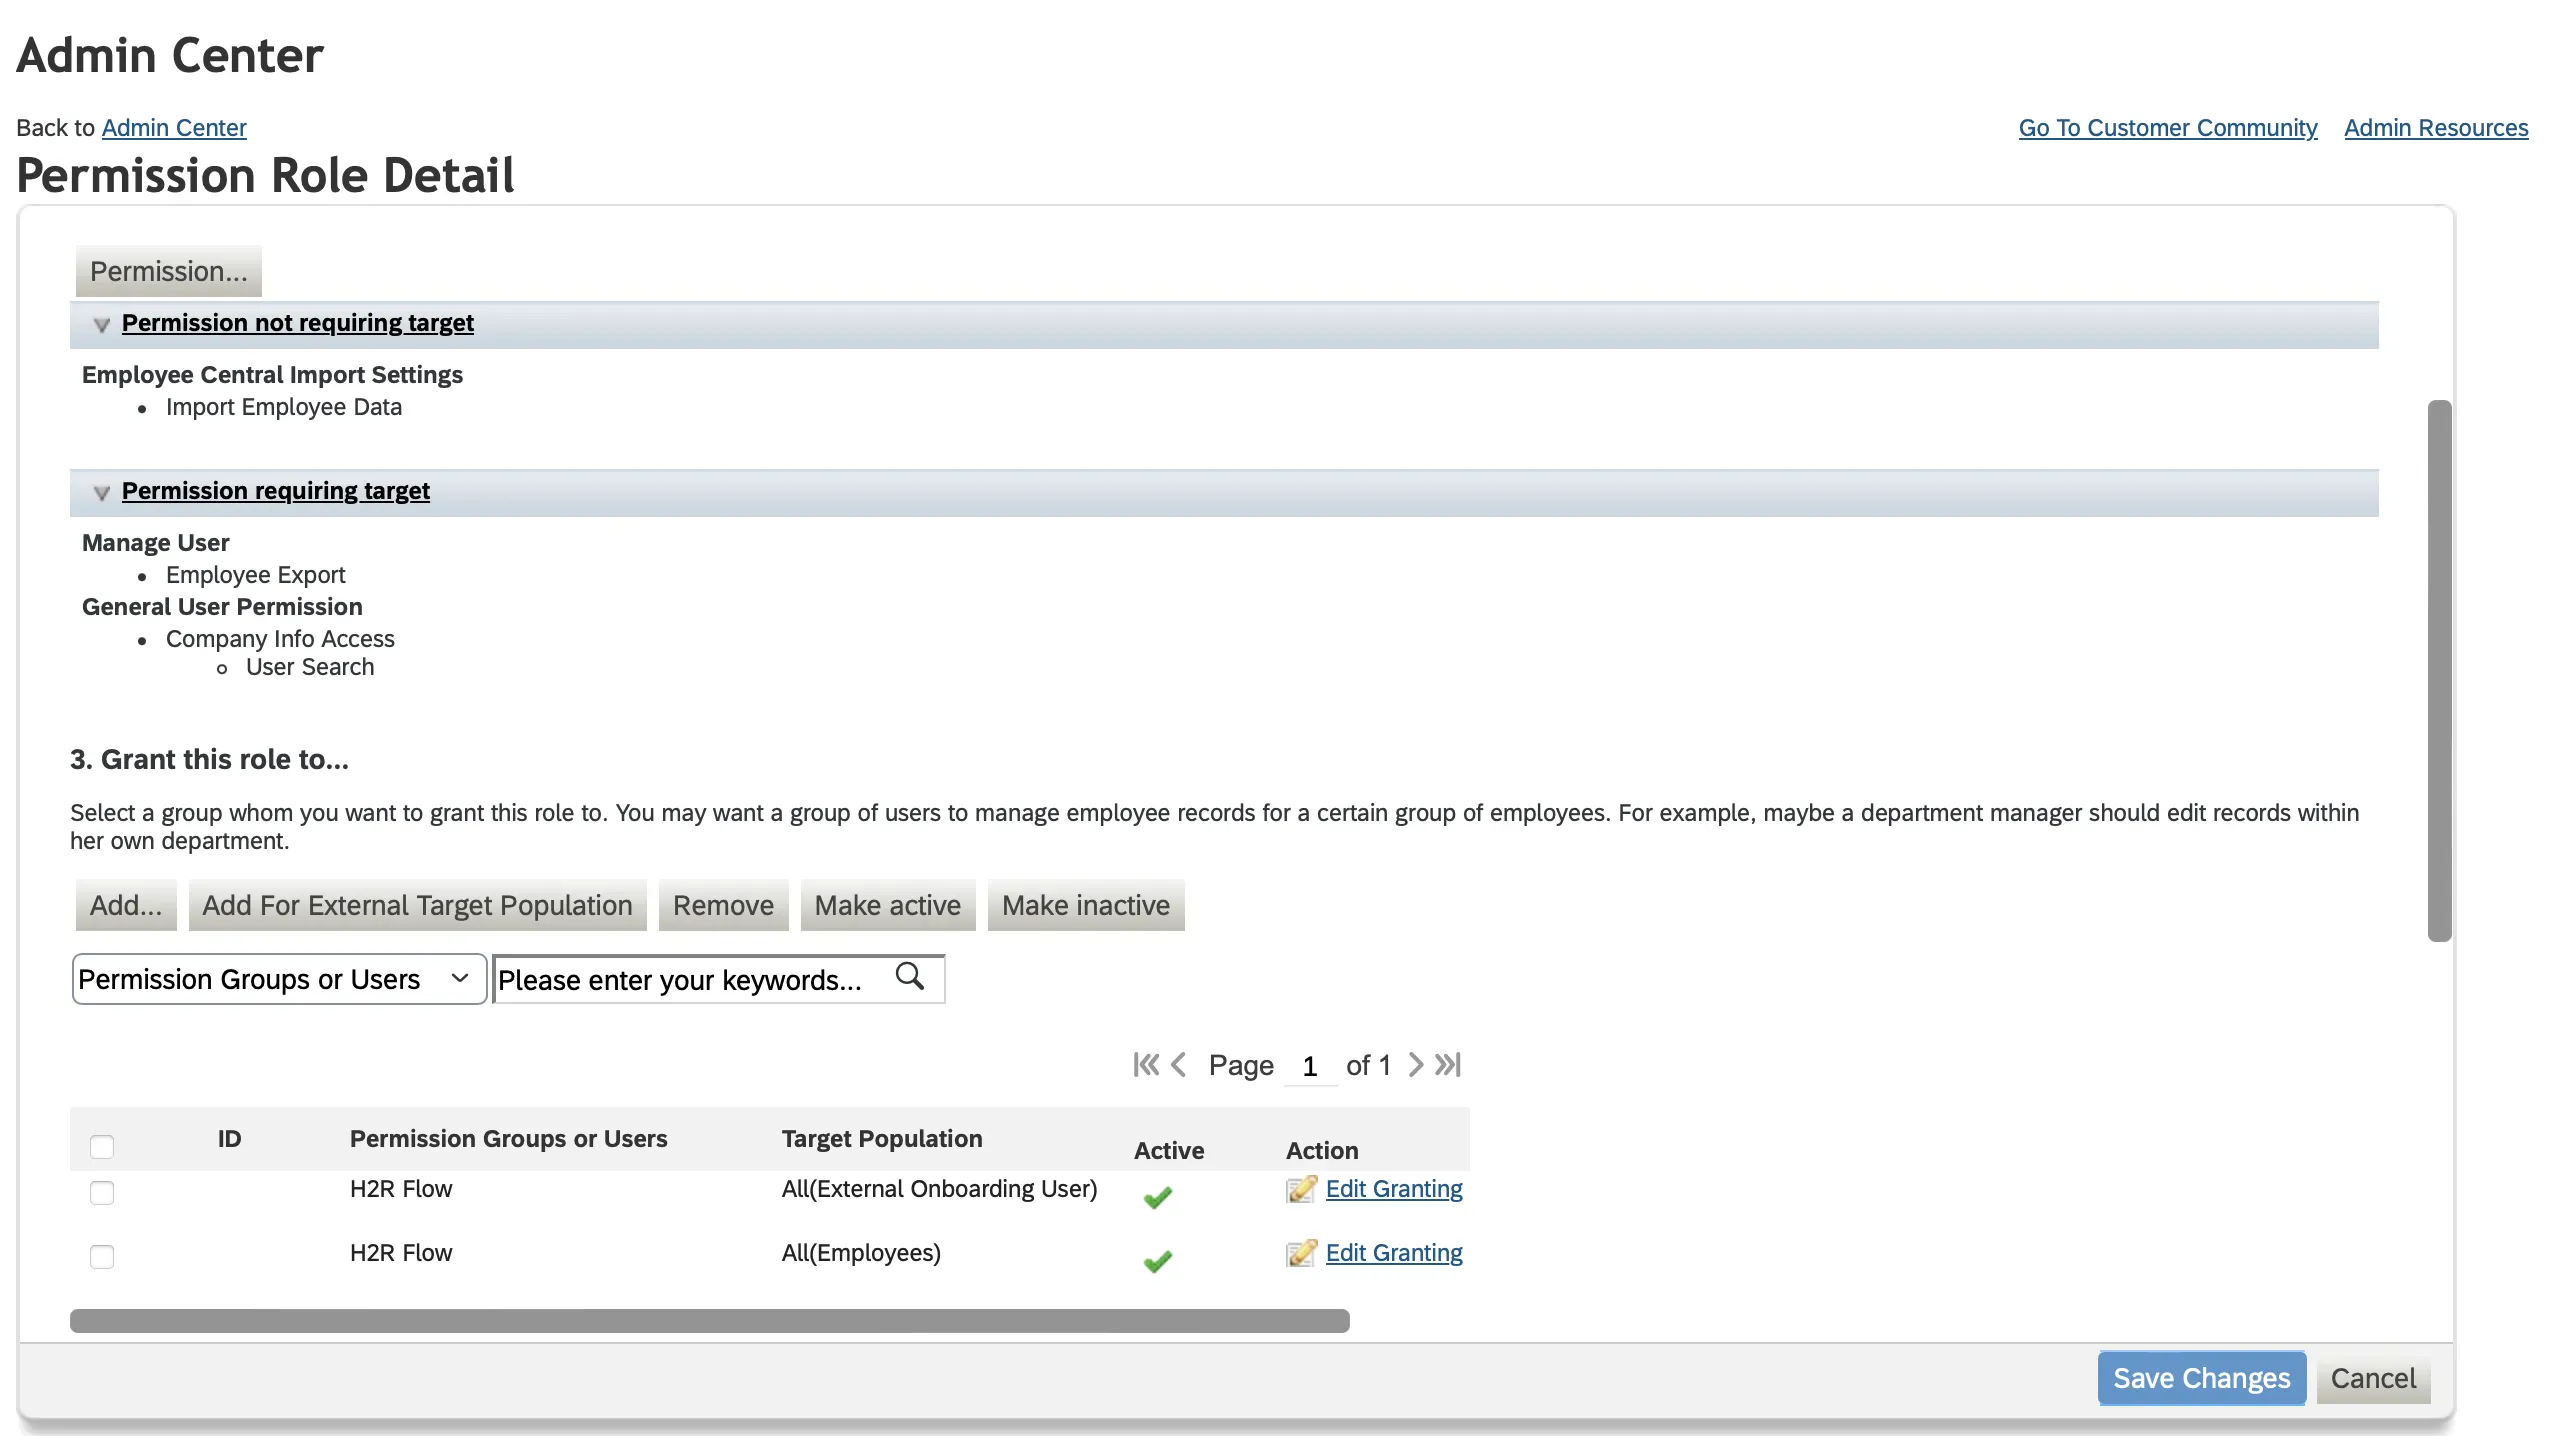
Now grant this role to user. Search for the permission group having the particular user.
- For Employees other than Learning and Onboarding employees.
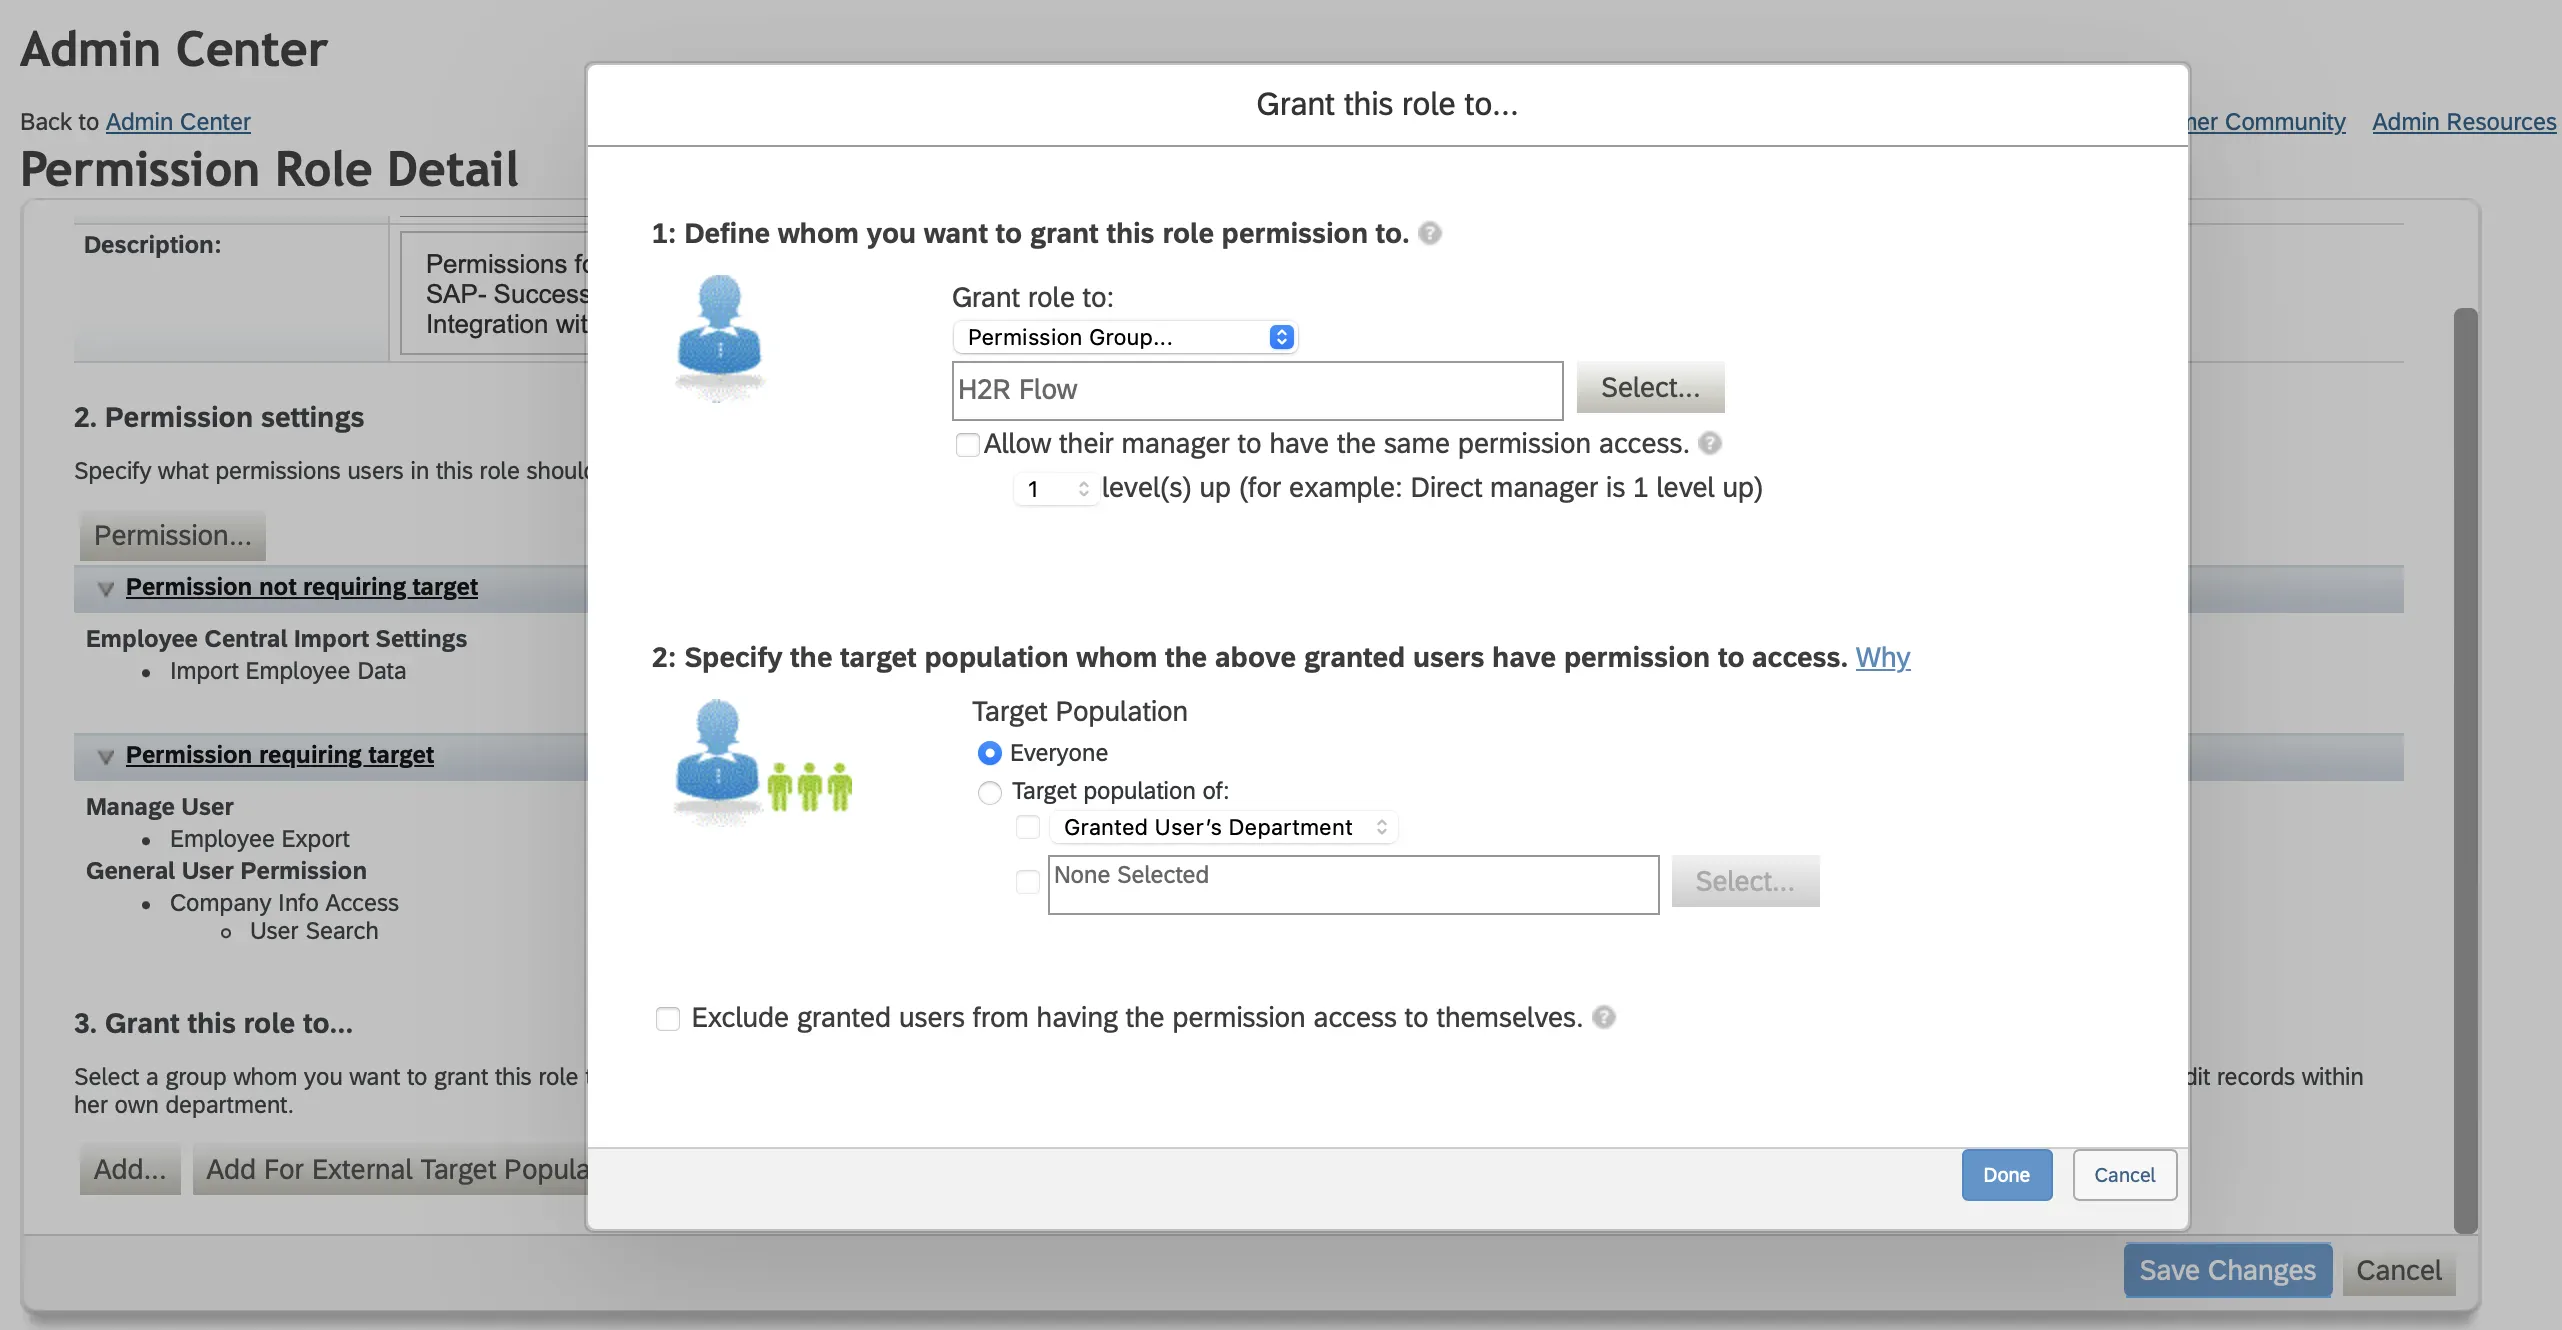
- For Learning and Onboarding employees.
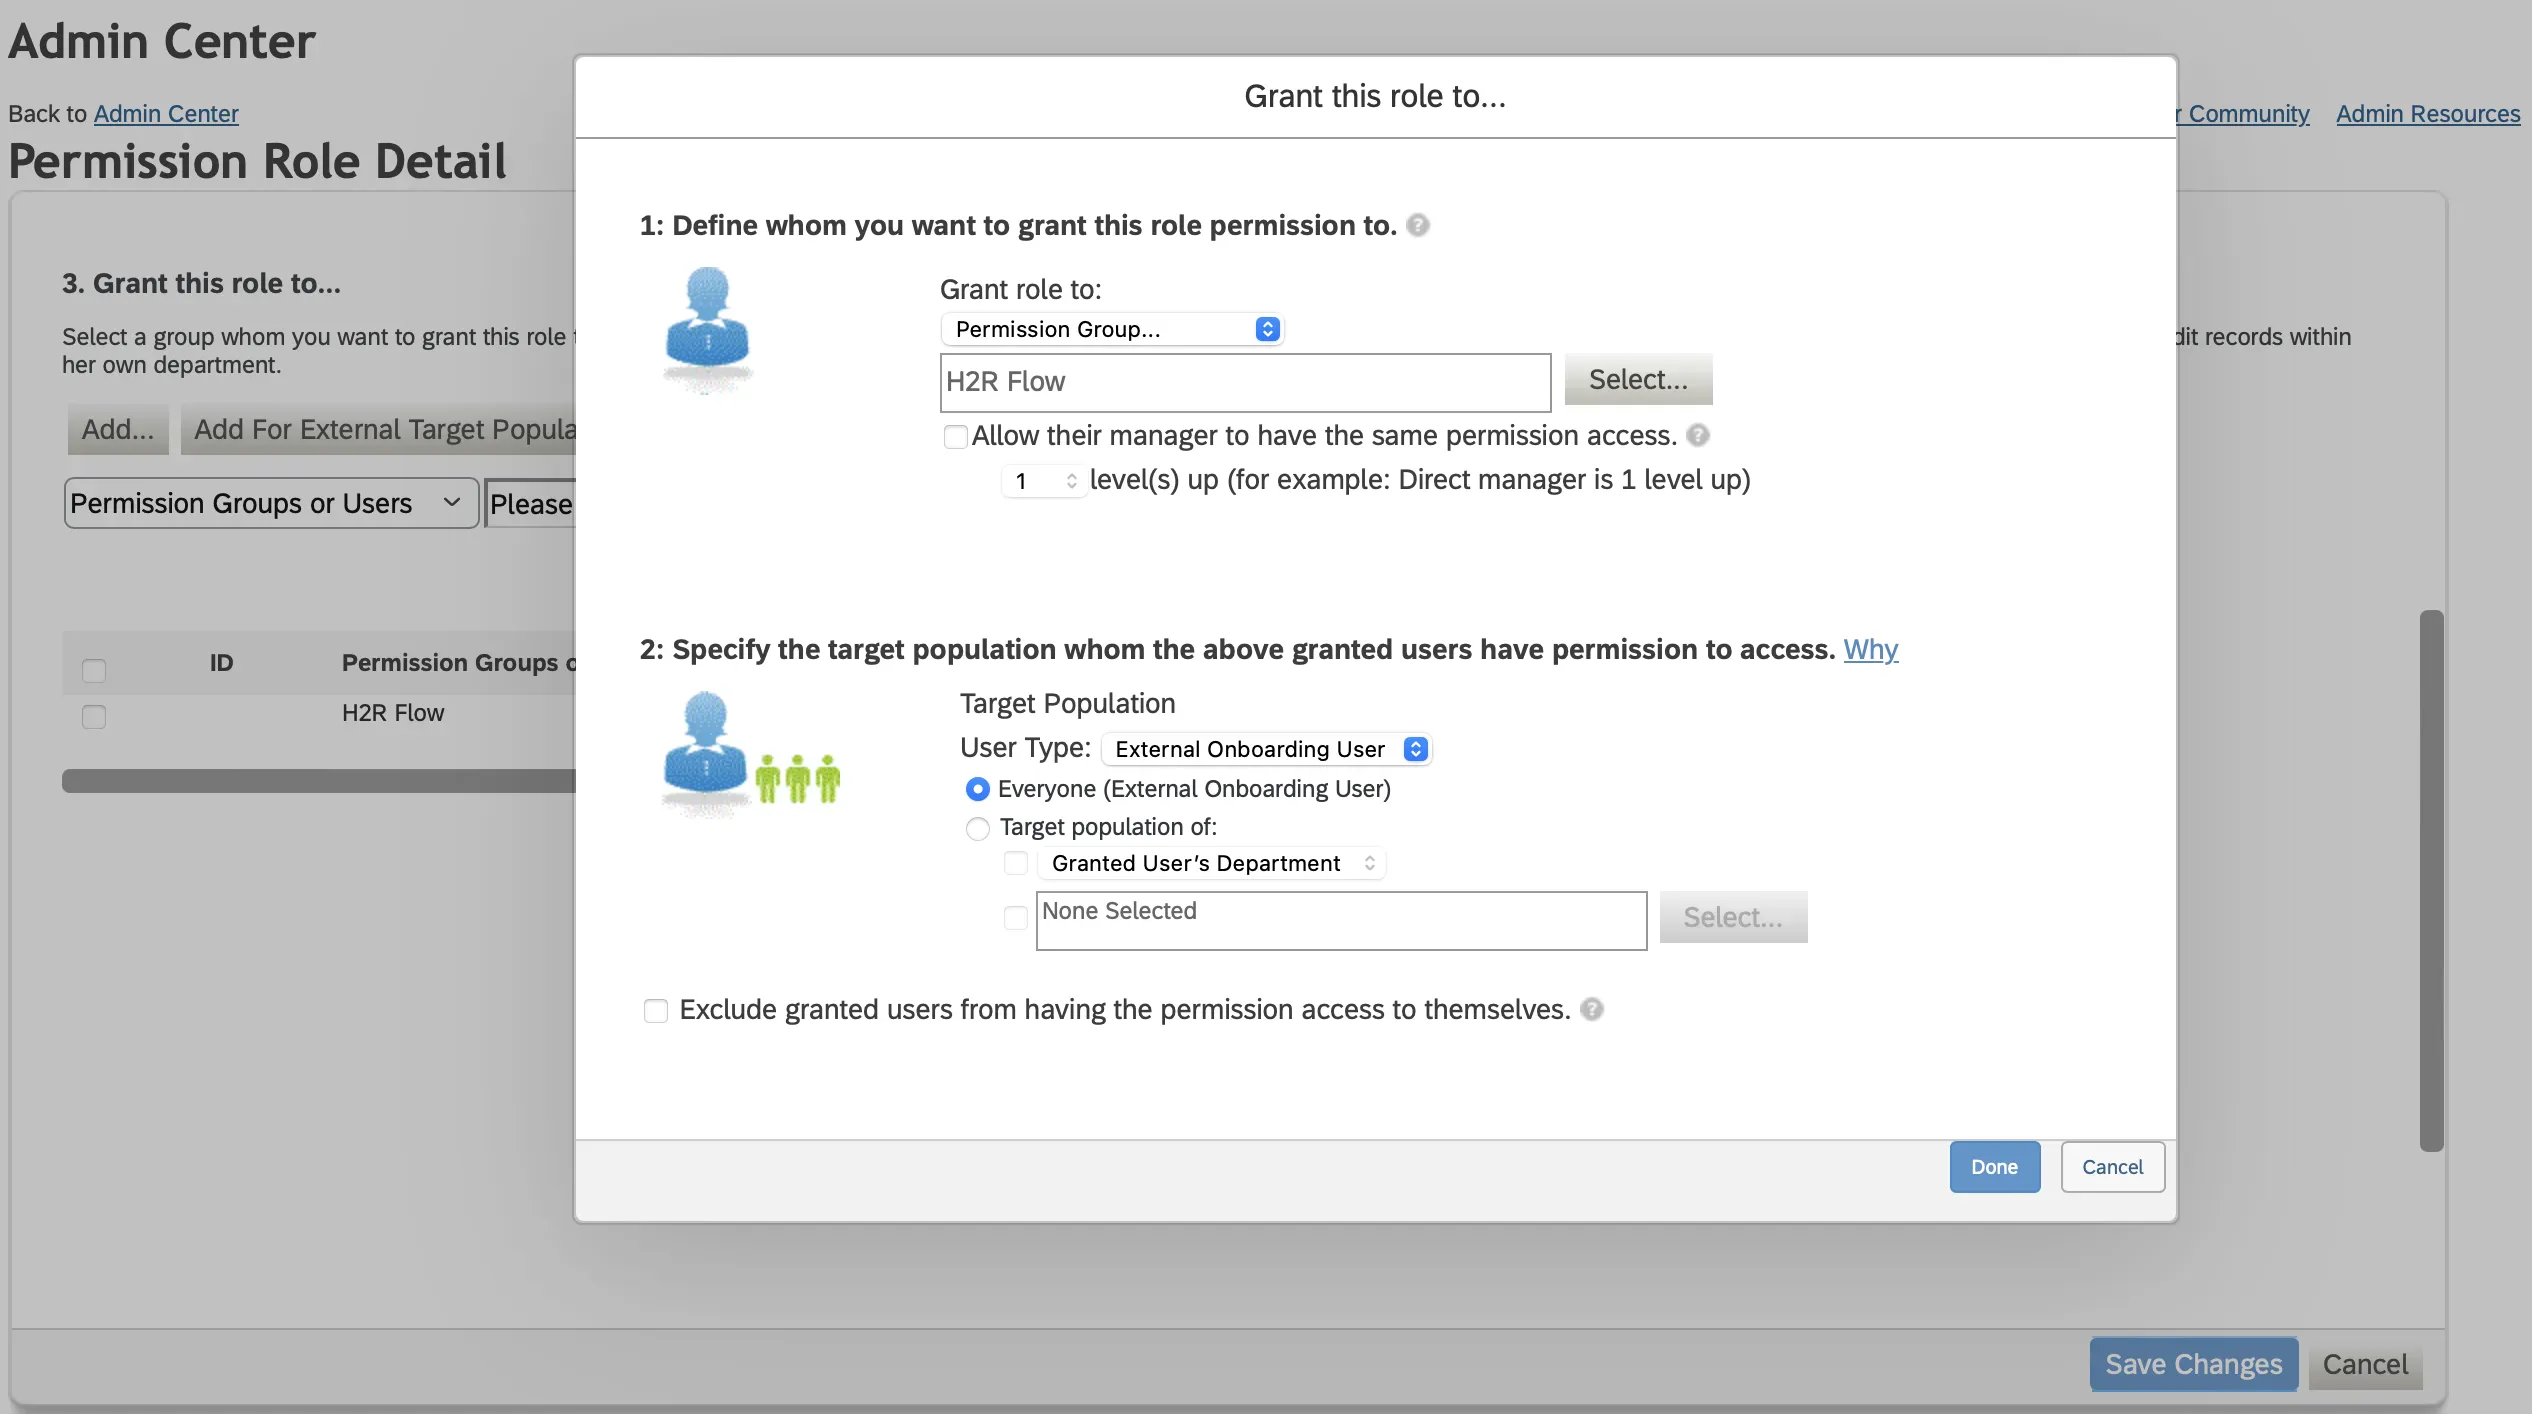
- For Employees other than Learning and Onboarding employees.
-
Save the changes.
Configuration
Once you have successfully configured the connections, you can continue with the Design section to configure the rest of the workflow following these steps in order.
- HR Data Definition
- HR to AD Profile Map
- Lifecycle Business Rules
- Employment Status
- Organizational Unit Assignment - Only defined in on-premise Active Directory
- Group Memberships
- Security Group Memberships
- Distribution List Memberships
- Microsoft 365 Groups Memberships Only defined in Hybrid (with Exchange Online Services) and Entra ID
- Entra ID Distribution List Memberships Only defined in Entra ID and Hybrid, when Exchange Online Services is configured
- Entra ID Security Groups Only defined in Hybrid (with Enable Entra ID Security Groups) and Entra ID
- Mail Enabled Security Group Memberships Only defined in Entra ID and Hybrid, when Exchange Online Services is configured
- Mailing List Assignment Provided in Google Workspace
- Communication Hub
Deployment
Once your workflow has been setup, you can optionally setup notifications and archival for your workflow.
- Compliance and Audit Trail
- Run Mode
- Error Notifications
- Monitor Receipt of Scheduled HR Extract
- Environment
Otherwise, you can proceed to deploy and test it on the Hire2Retire platform, see Deploy and Test Flow