Connection
Genesys on Hire2Retire uses OAuth Client Credentials.
We at RoboMQ pay utmost attention to keeping your account secure. See our Security and Privacy Policies to learn more about how RoboMQ handles your account access.
How to create an OAuth Client on Genesys
- After logging into your Genesys account, click on
admin. - Under
Integrations, clickOAuth. - Click
Add client, The Client Details tab appears. - Set App Name to a descriptive name of the app.
- (Optional) Type a brief description of the app in the Description box.
- Set Token Duration. Token Duration is the duration of time until tokens created with this client expire. Accept the default duration of 86,400, or enter a value between 300 and 38,880,000 seconds. This sets the lifetime of the token to a maximum of 450 days.
- Under Grant Types, select
Client Credentials. - Click the Roles tab and assign the
SCIM Integrationrole. - Click Save. Genesys Cloud creates a Client ID and a Client Secret.
You can refer the Genesys's official documentation to create an OAuth Client by following the link.
Link Genesys account on Hire2Retire
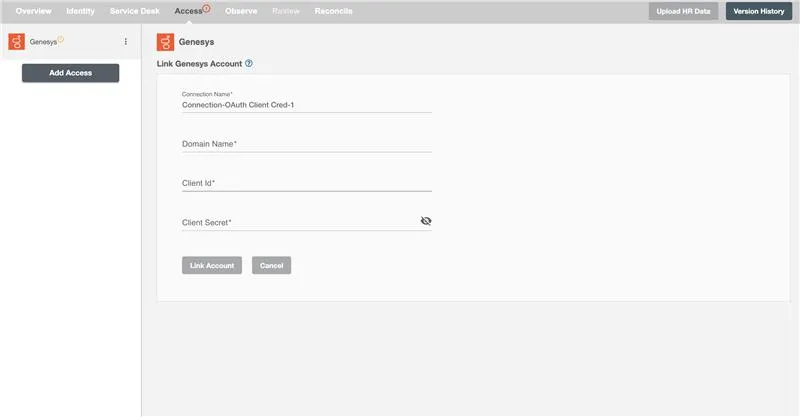
Figure 1. Connection setup for Genesys on RoboMQ Hire2Retire
Enter the domain name, Client ID, and Client Secret obtained by following the above mentioned steps. The domail name can be found in your browser's URL after loggin to Genesys account. Please follow the below format to find your Genesys domain name.
https://apps.<Genesys-domain-name>/
Once the connection is established successfully, then you can define the roles and mapping on Hire2Retire Provisioning.