HR Data Definition
In this step, you will define the file structure of the employee extract that HR platform will send to Hire2Retire workflow. At runtime, the workflow will validate the file structure before further processing individual employee records.
CSV Filename
You need to give a target CSV file name or pattern that Hire2Retire integration is listening to for the incoming HR Data.
For example, if HR report come with pattern employee_employee_*
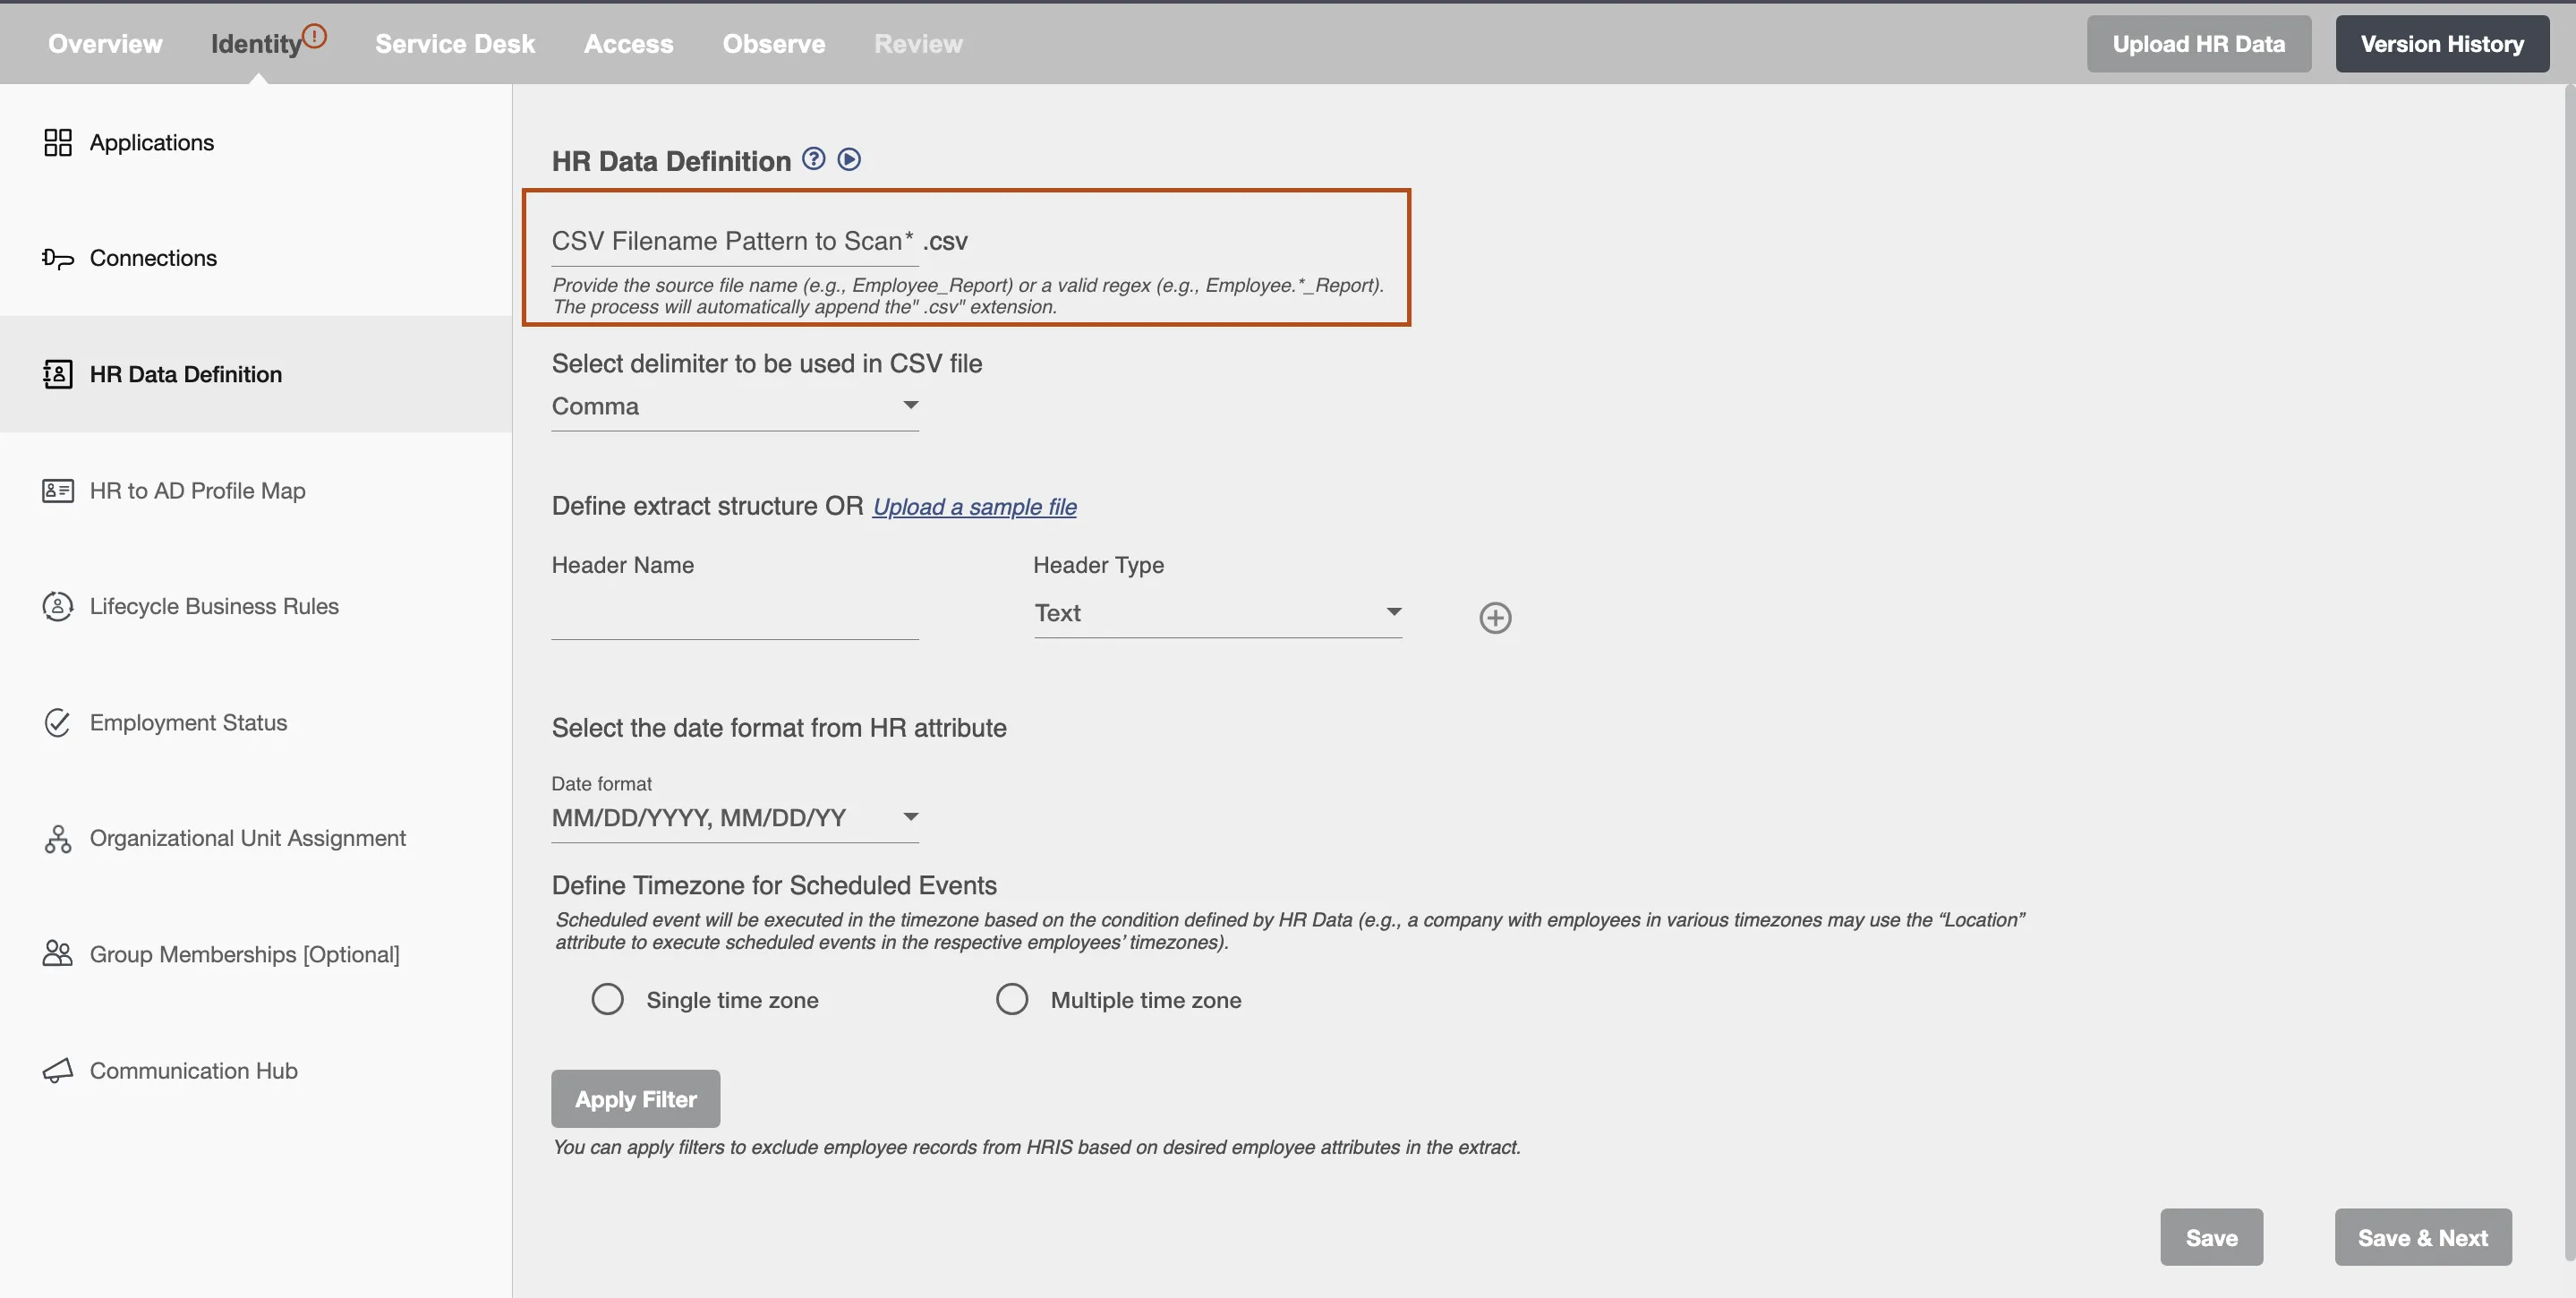
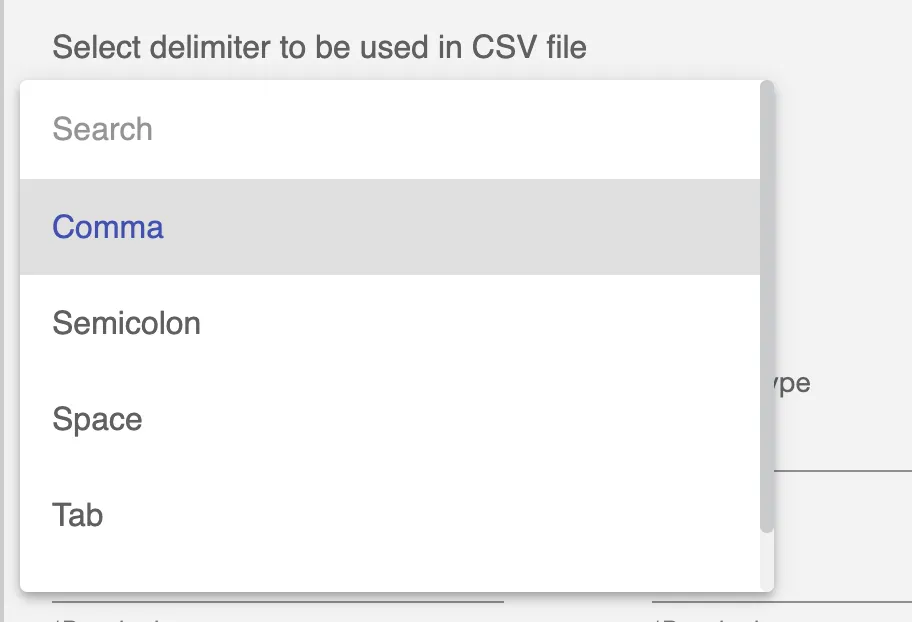
Select Delimiter
Choose the delimiter which is used in your delimited file. If the delimiter of choice is not available in the dropdown, you can write a custom one using the "Other" option.
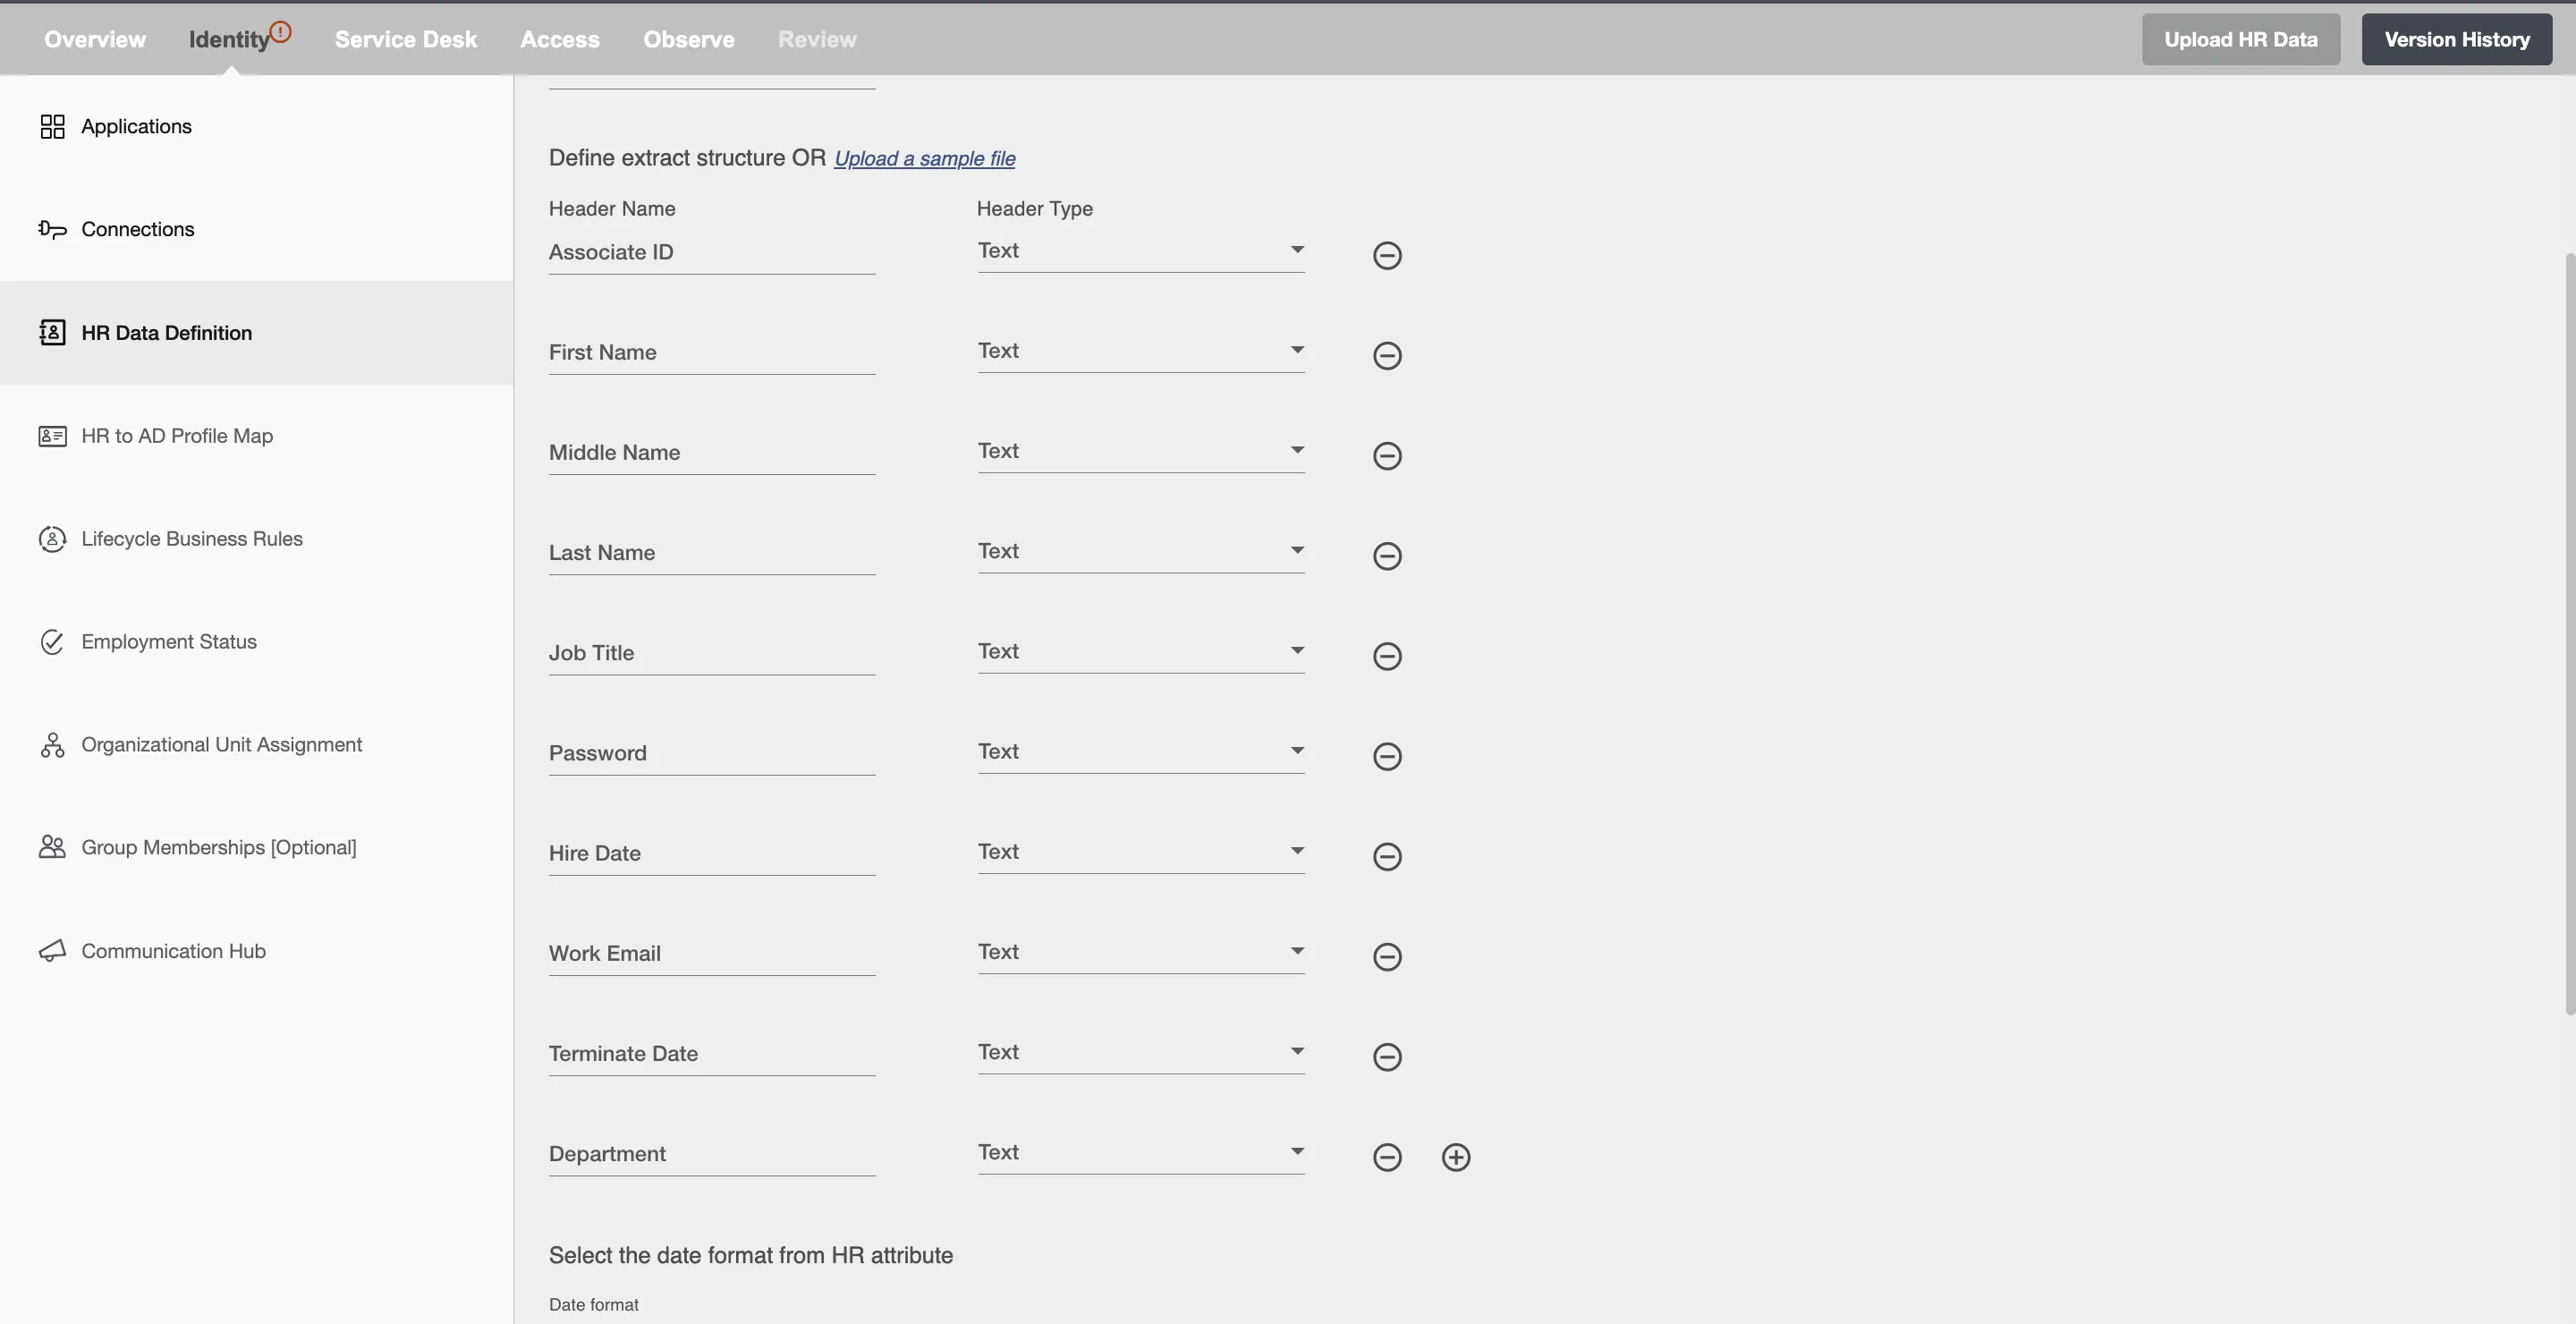
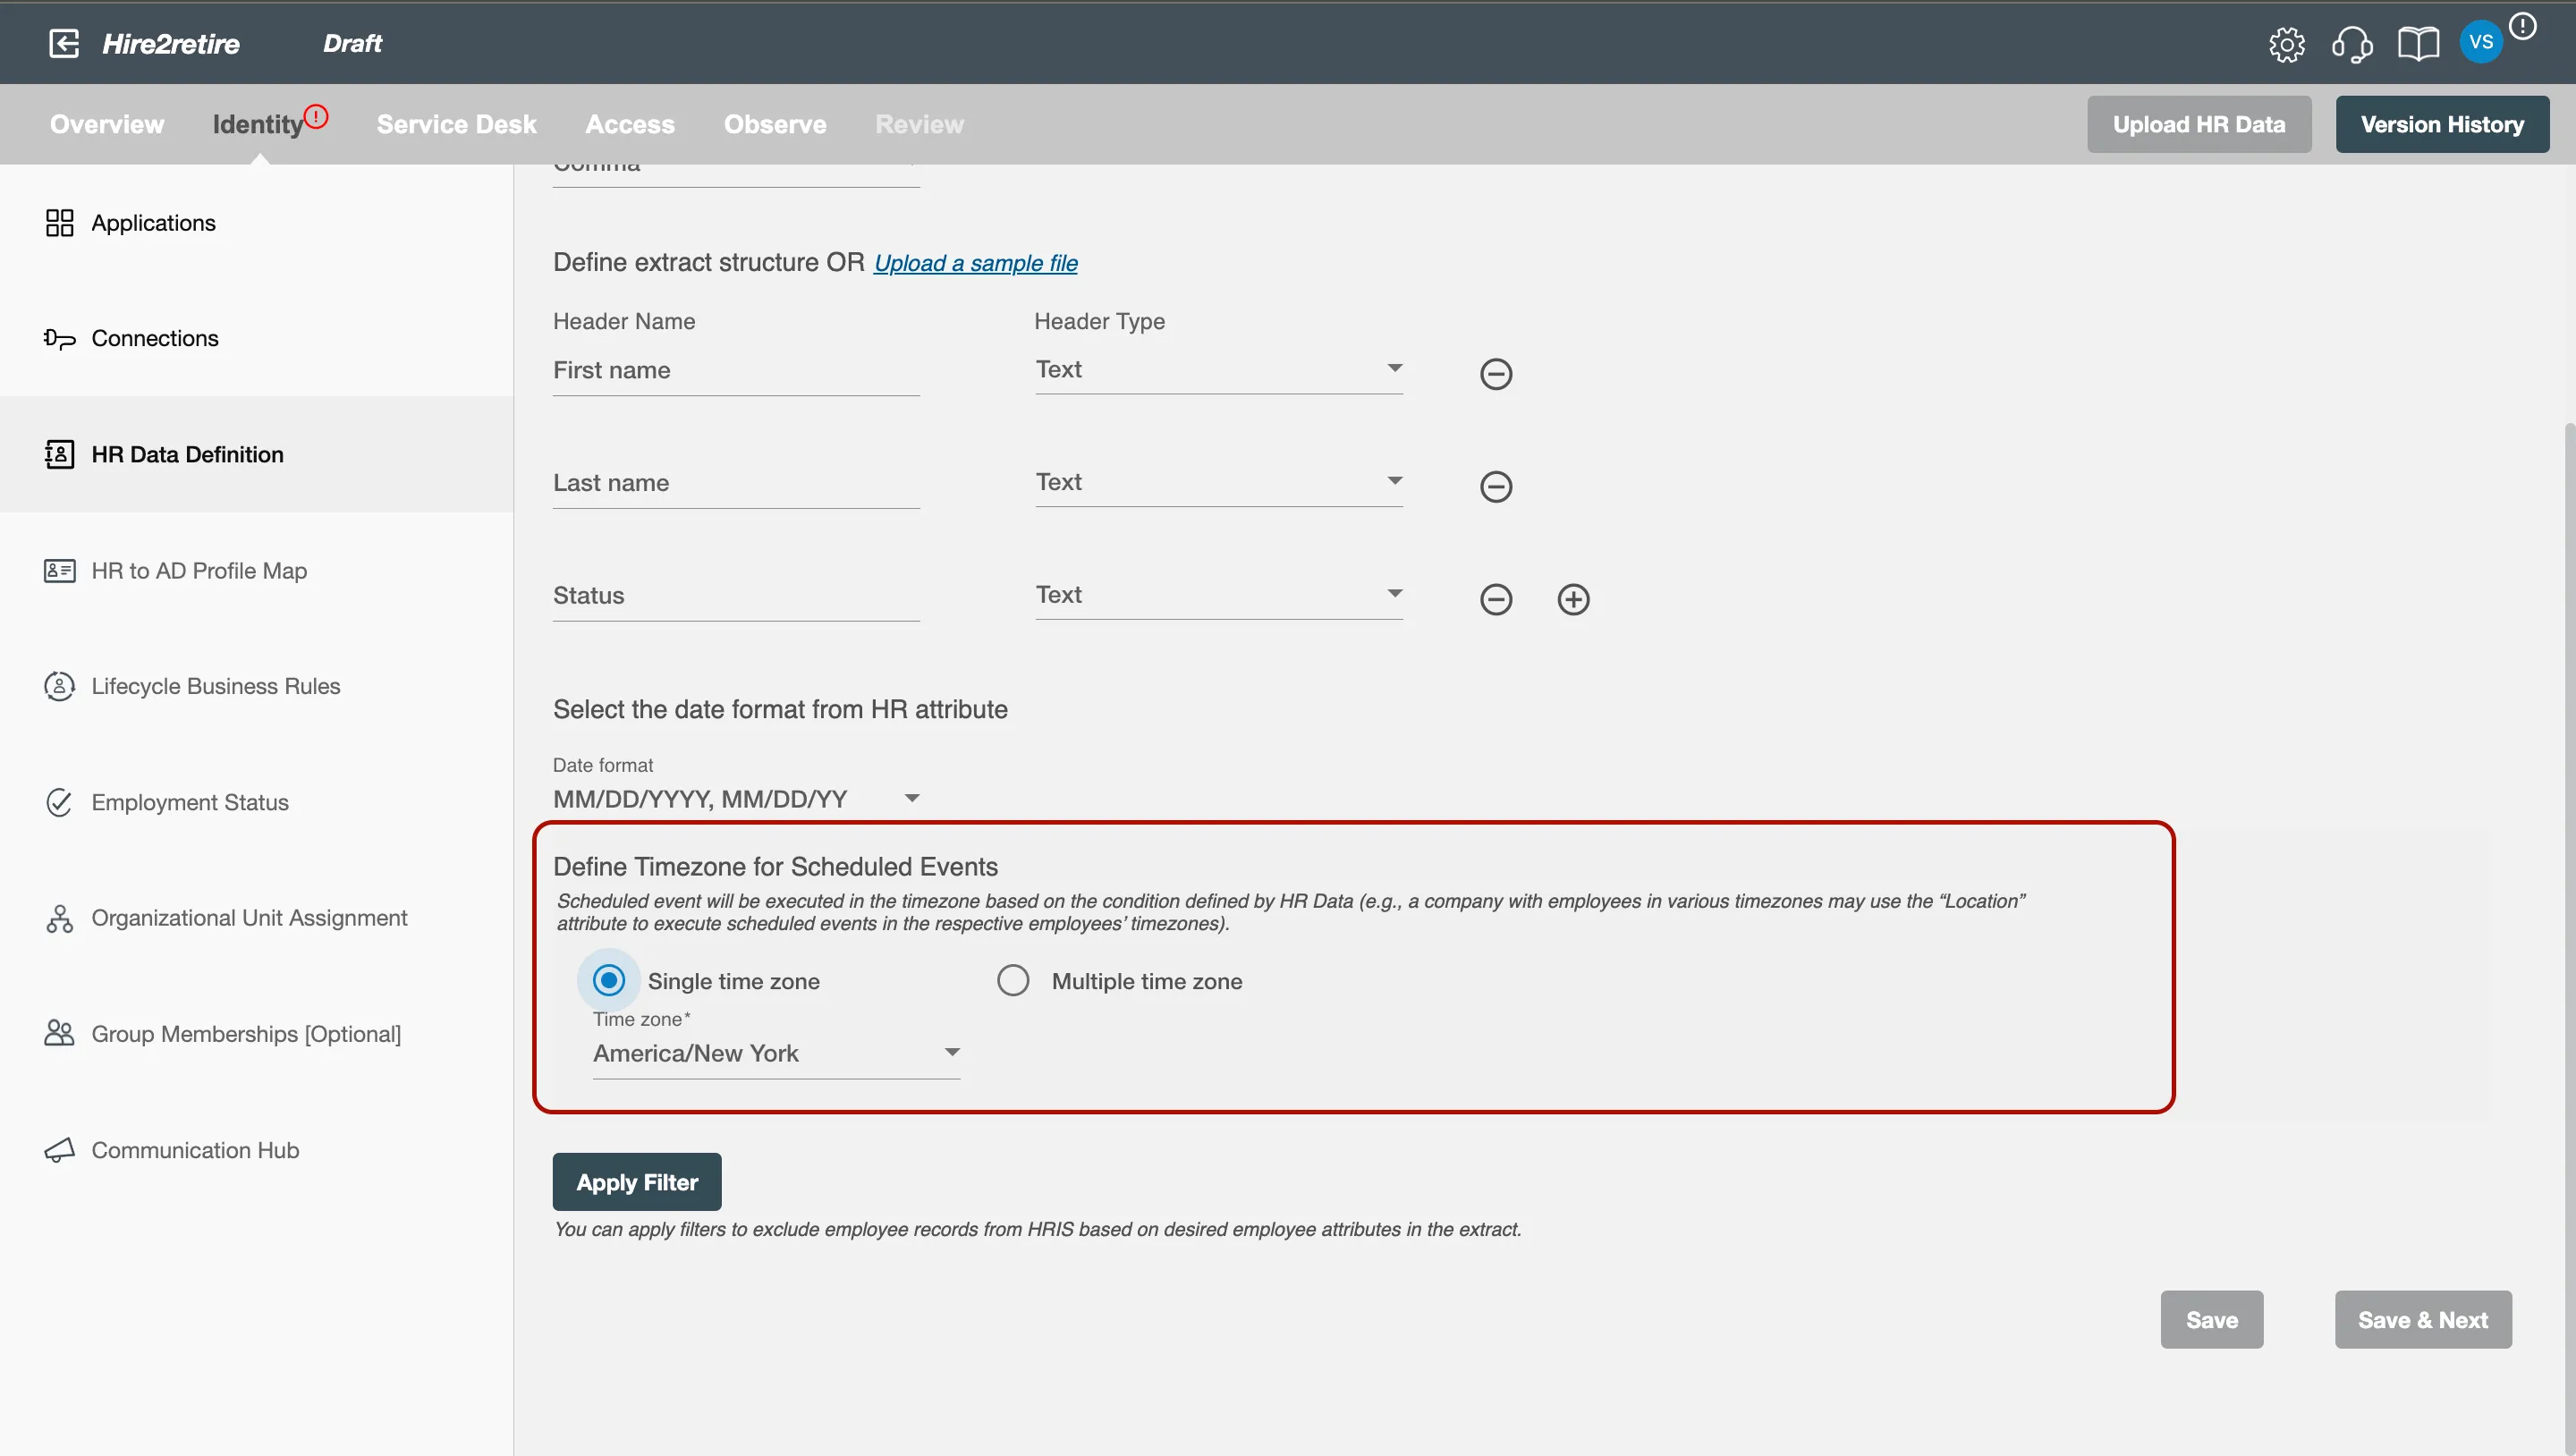
Define extract structure OR Upload a sample file
Set up the column headers from the top row of your CSV file. At runtime, the workflow will validate the file and process each record into events. You can add headers with their types using the "+" button or remove incorrect ones with the "–" button. To save time, upload a sample CSV file with the same delimiter as selected above, and the headers will be added automatically.
To see the most commonly used attributes and their use with Hire2Retire integration see our guide on HR Profile Attributes.
Please make sure the column headers you put match the header column in the CSV file. It will reject the file if the headers in the actual file do not match the column headers defined in workflow.
And, if you have enabled 'Future Hire, Rehire and Termination' on Application page then the following fields will appear like (Date Format and Time Zone).
Select Date Format
Select the date format of the HR attributes that are of date type. The default date format is MM/DD/YYYY, MM/DD/YY.

Select Time Zone
Choose the time zone in which you want to process the scheduled hire, rehire and termination records.
Single time zone
All the scheduled hire, rehire and termination events will be executed in a selected time zone. The default time zone is America/New York.
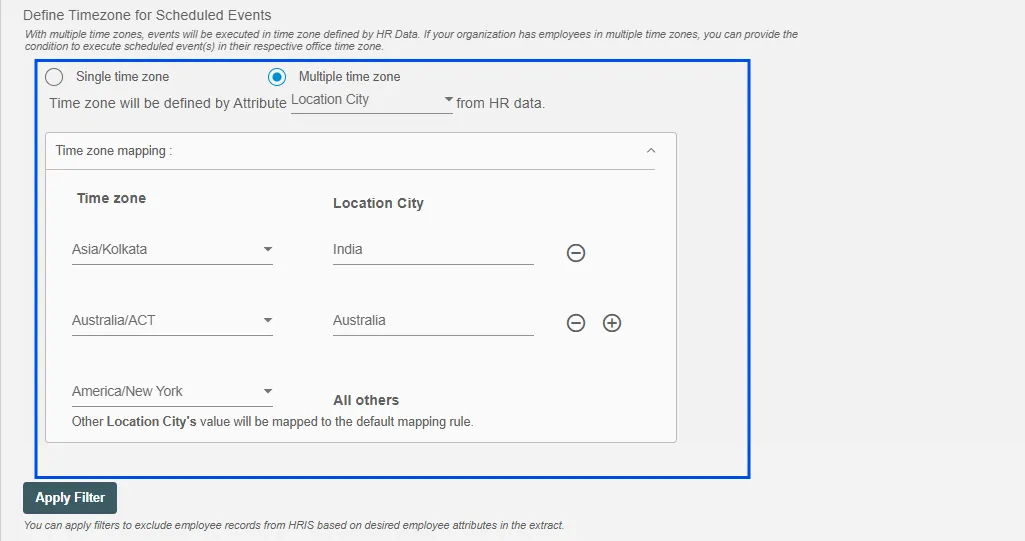
Multiple time zone
Here, scheduled hire, rehire and termination records will be executed in the time zone based on the condition defined by HR data. For eg. An organization can have multiple offices at different locations (time zones) for which they can select respective time zones according to their locations.
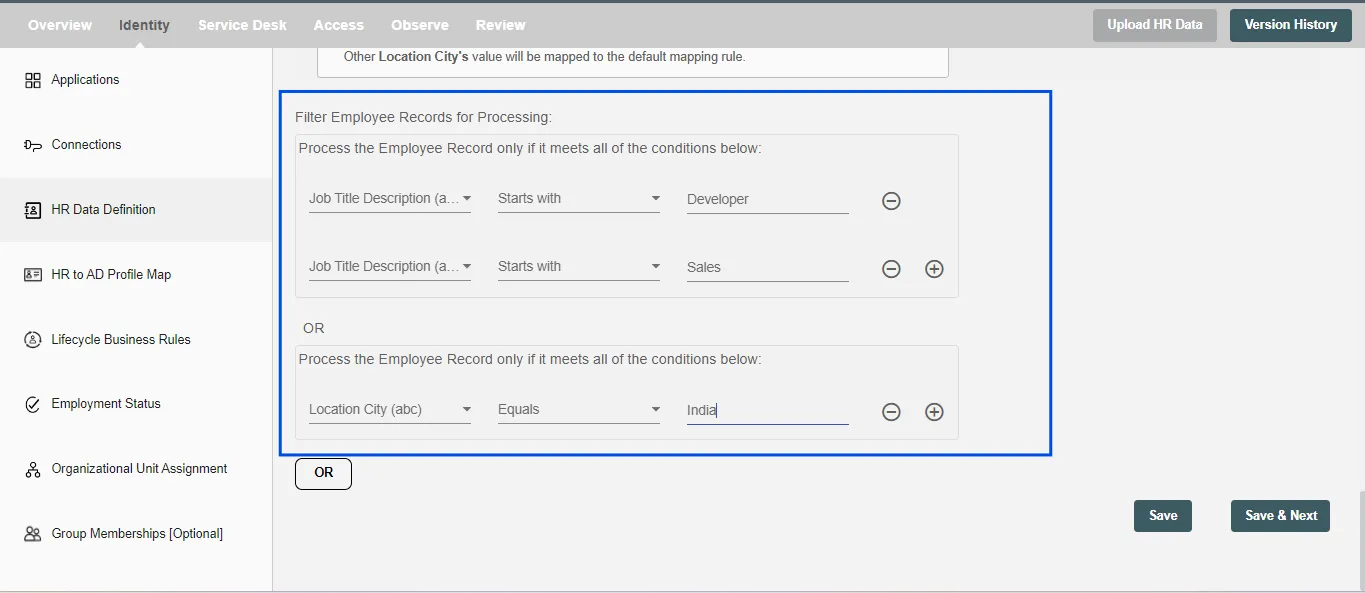
Selection Criteria
Hire2Retire enables you to process specific events and filter out the rest by defining filter criteria. On clicking the "Selection Criteria" button, you will be able to set up conditions using employee attributes. Only employees who match the conditions will be processed.