Connection
Salesforce on Hire2Retire uses OAuth2.0 authentication.
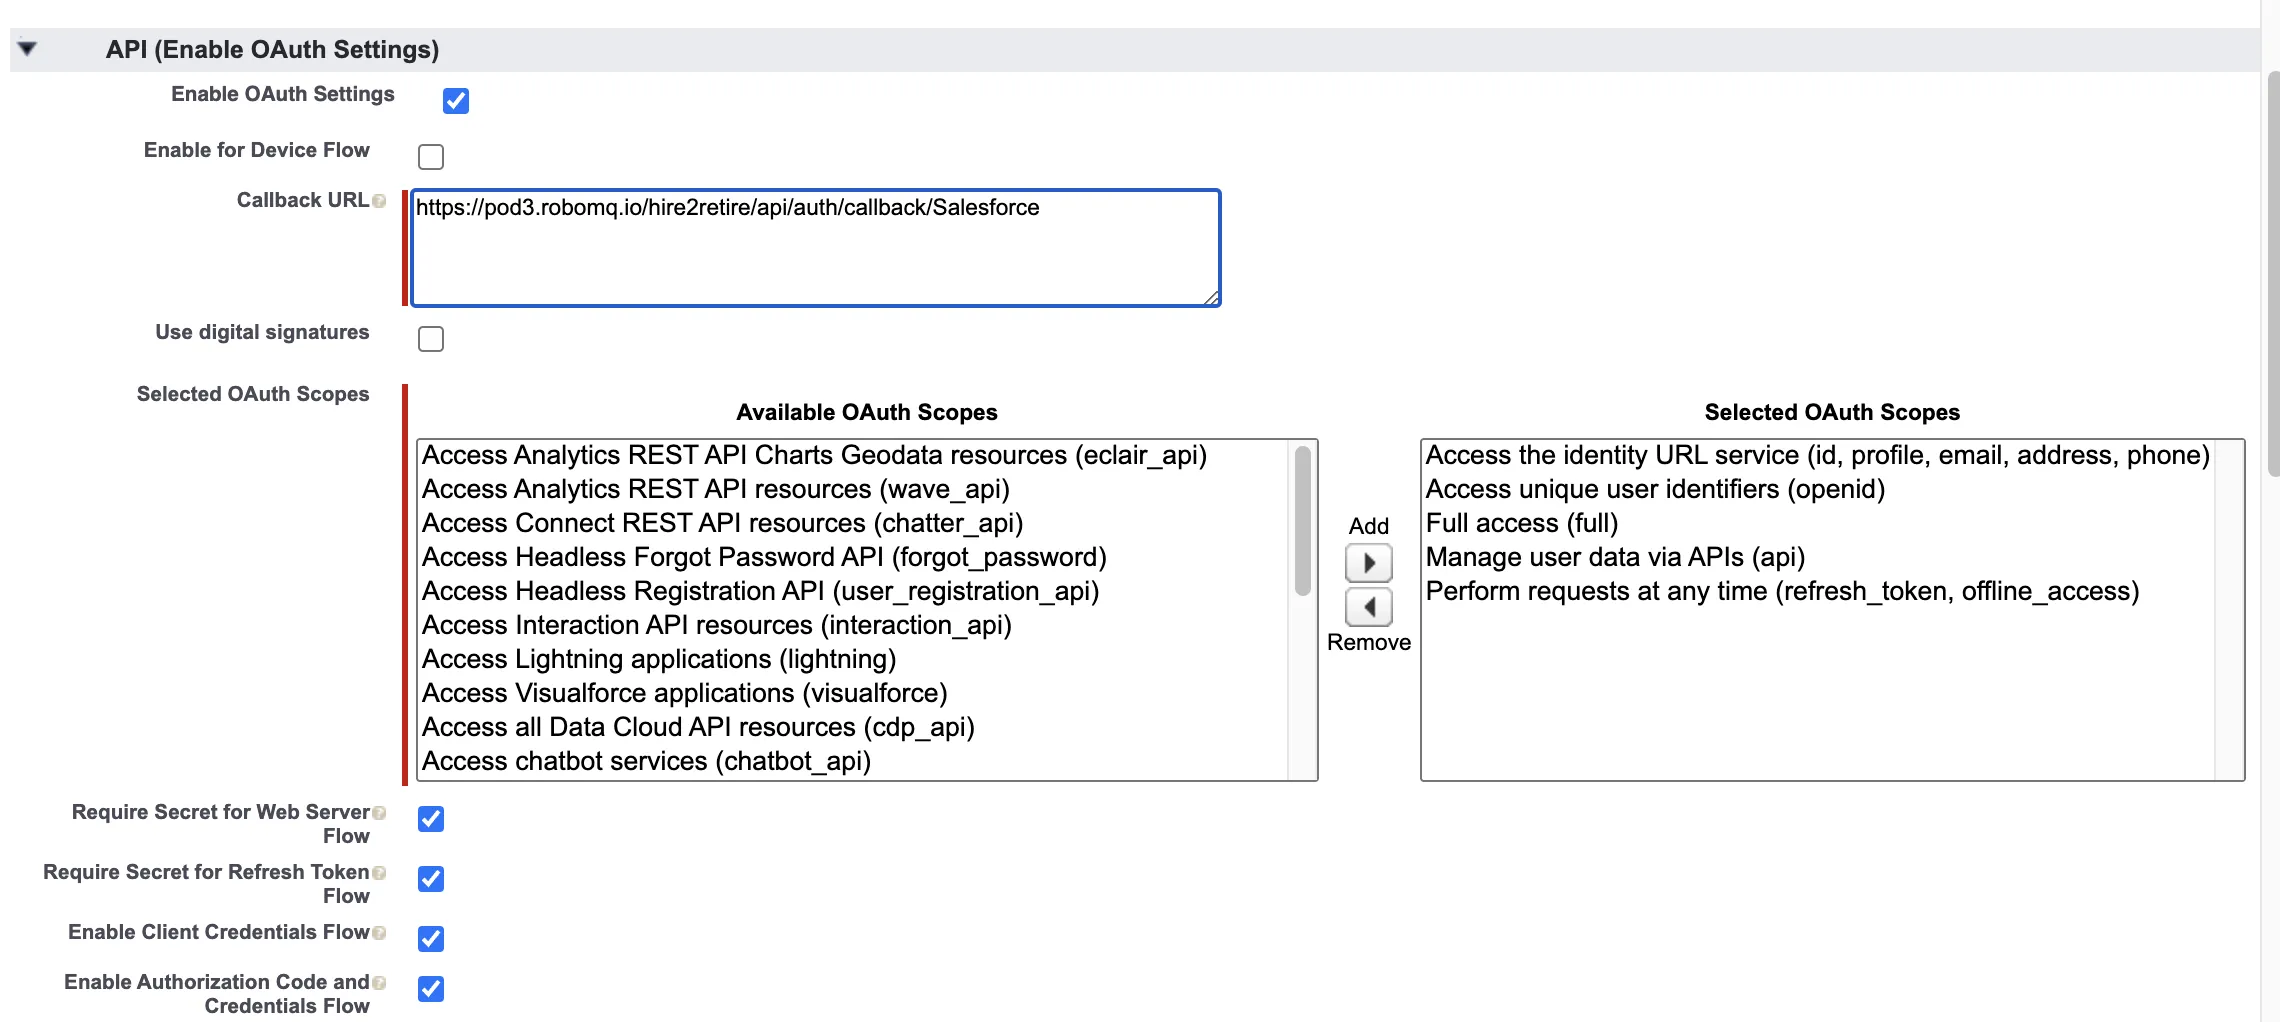
Please refer to the link to set up OAuth client on Salesforce. Integrate our provided redirect URI into your application to enable seamless access token retrieval on your behalf. The designated redirect URI is: https://hire2retire.robomq.io/api/auth/callback/Salesforce.
We at RoboMQ pay utmost attention to keep your account secure. See our Security and Privacy Policies to learn more about how RoboMQ handles your account access.
How to enable OAuth settings on Salesforce
Salesforce application on Hire2Retire uses OAuth authorization. By linking your Salesforce account with Hire2Retire, you can authorize RoboMQ to have a delegated access on your behalf. RoboMQ needs the following permissions on your account to provide a seamless integration experience:
| Scopes | Explanation |
|---|---|
| Access the identity URL service | Read and write identity profiles |
| Access unique user identifiers | To configure single sign-on (SSO) with Salesforce from Hire2Retire as a relying party to connect via OAuth. |
| Full Access | Application requires this scope to perform the identity creation, updation and deletion. |
| Manage user data via APIs | Application requires this scope to access data through APIs. |
| Perform requests at any time | Maintain access to data you have given it access to. When a user approves the offline_access scope, your app can receive refresh tokens from the Salesforce identity platform token endpoint. Refresh tokens are long-lived. Your app can get new access tokens as older ones expire. |
In Salesforce OAuth settings, you need to add the following settings to enable OAuth connection:
Link Salesforce account on Hire2Retire
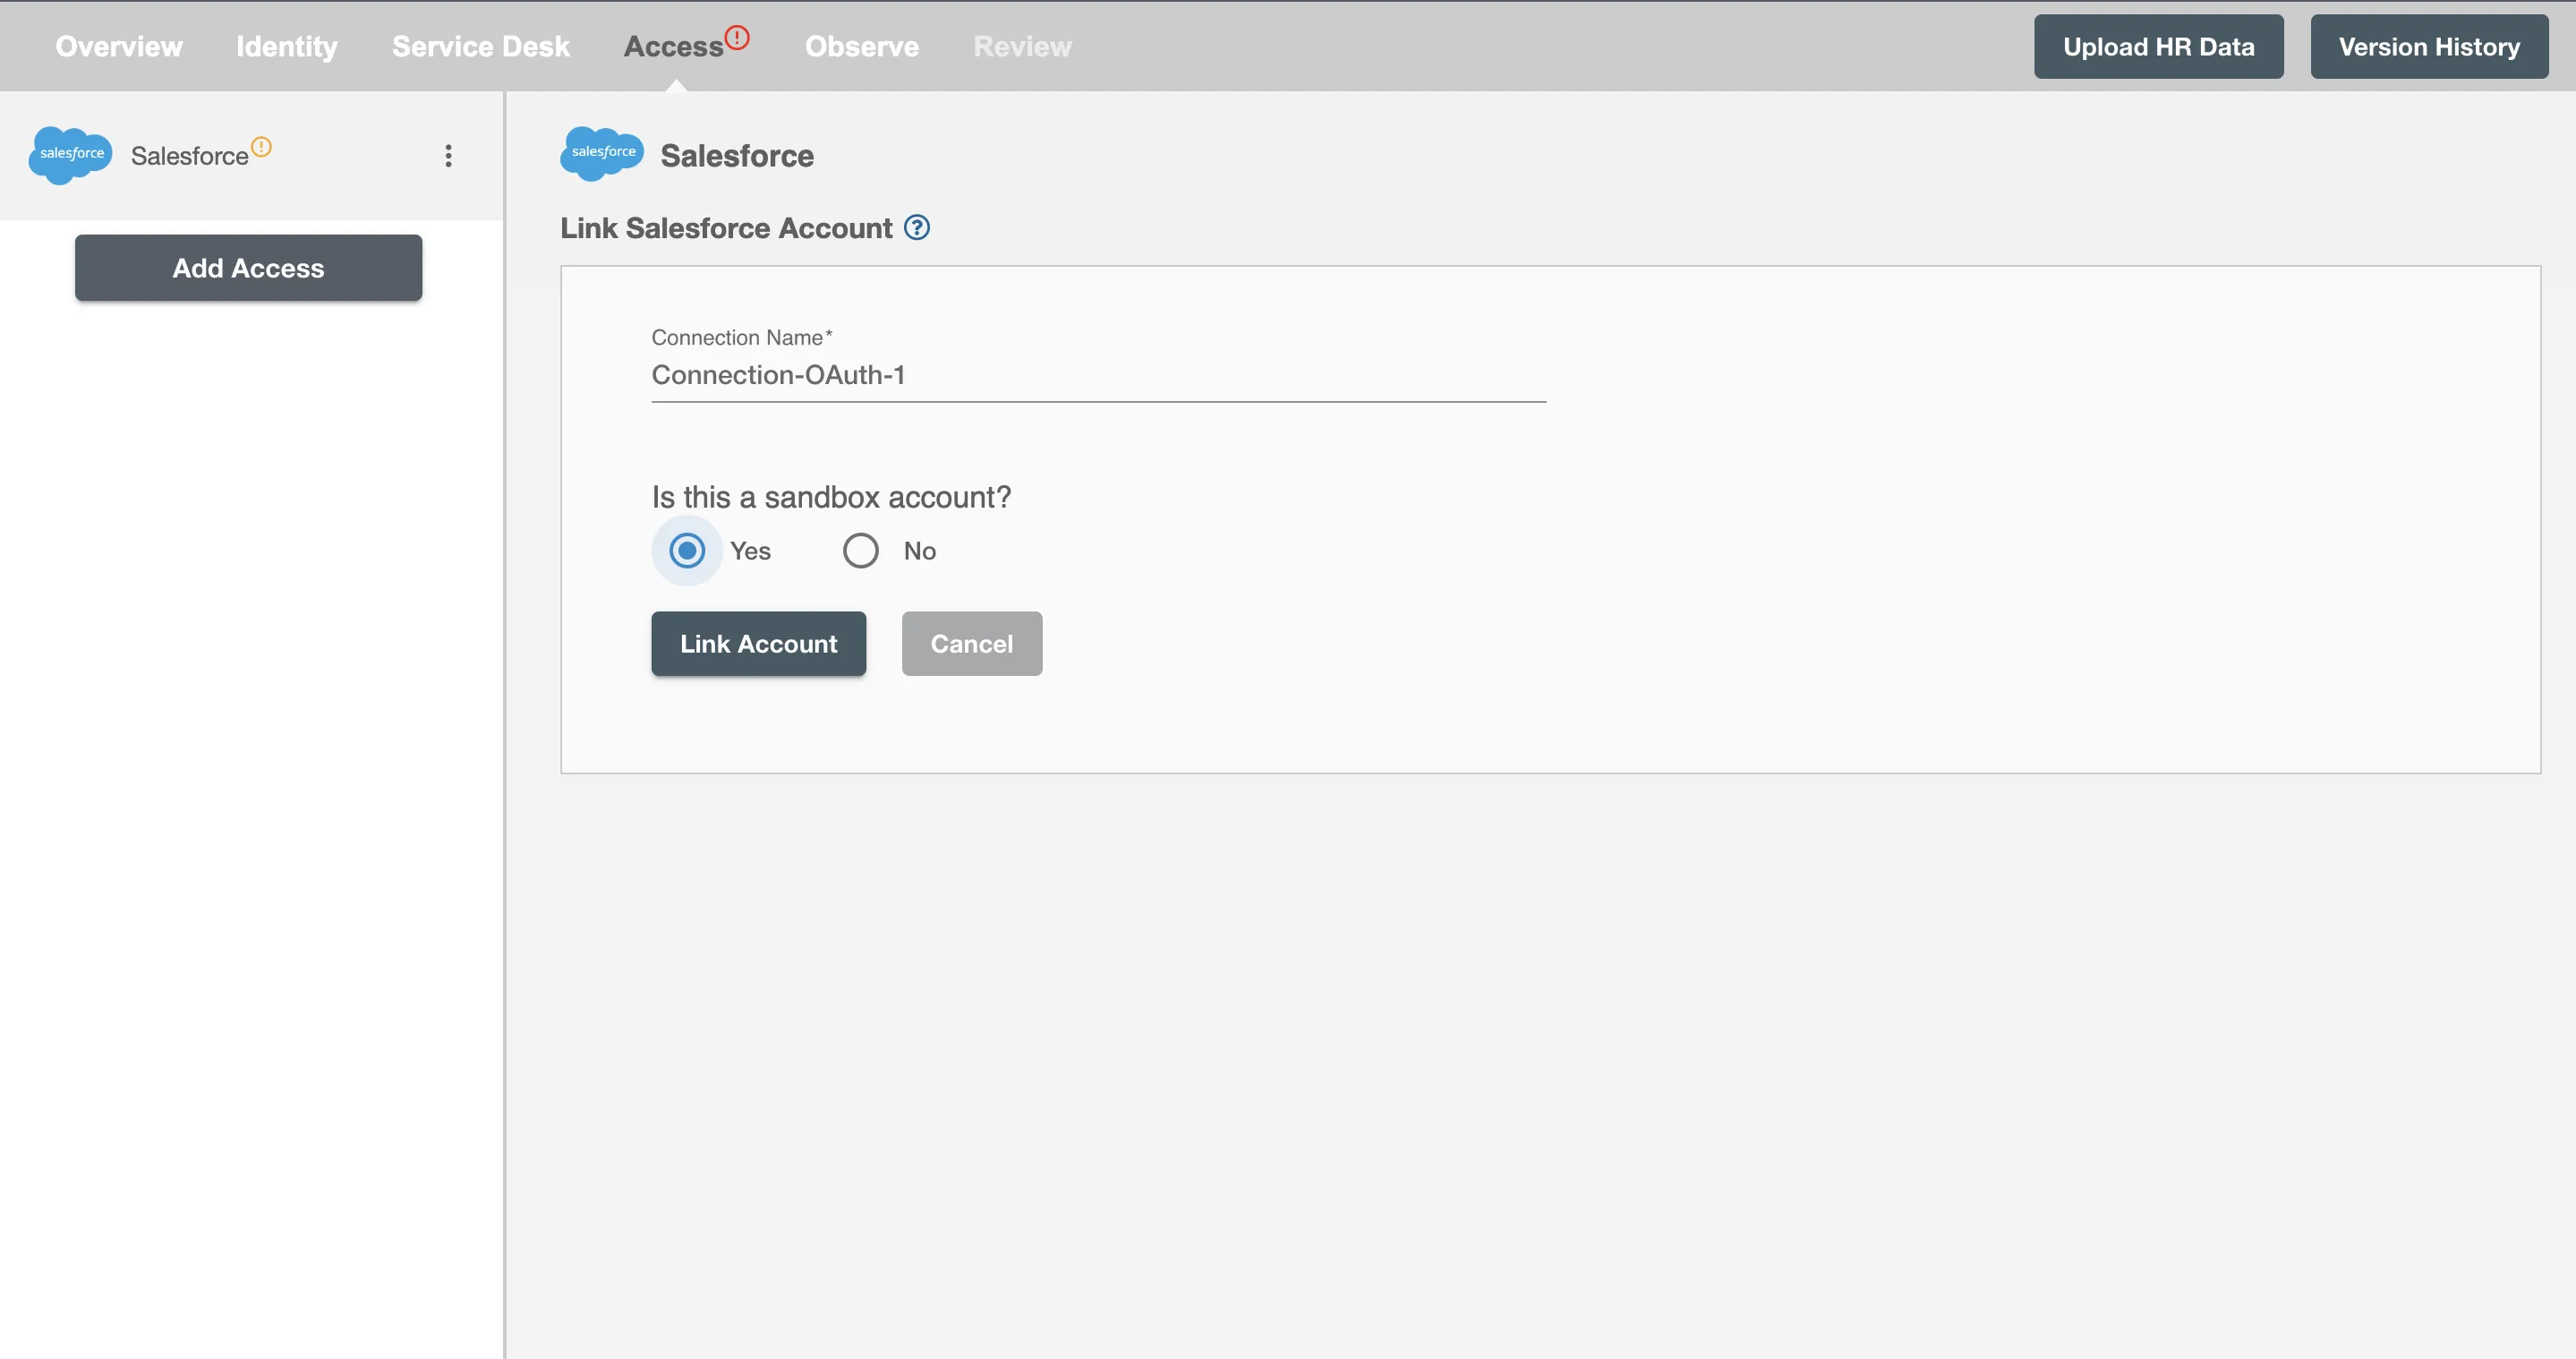
To establish a conneciton to the Salesforce on Hire2Retire Provisioning, you need to select your account type. If you have a sandbox account for testing purposes, you can select 'Yes', else for a production account, select 'No'.
On clicking the 'Link Account' button, you will be redirected to Salesforce Account Authorization screen.
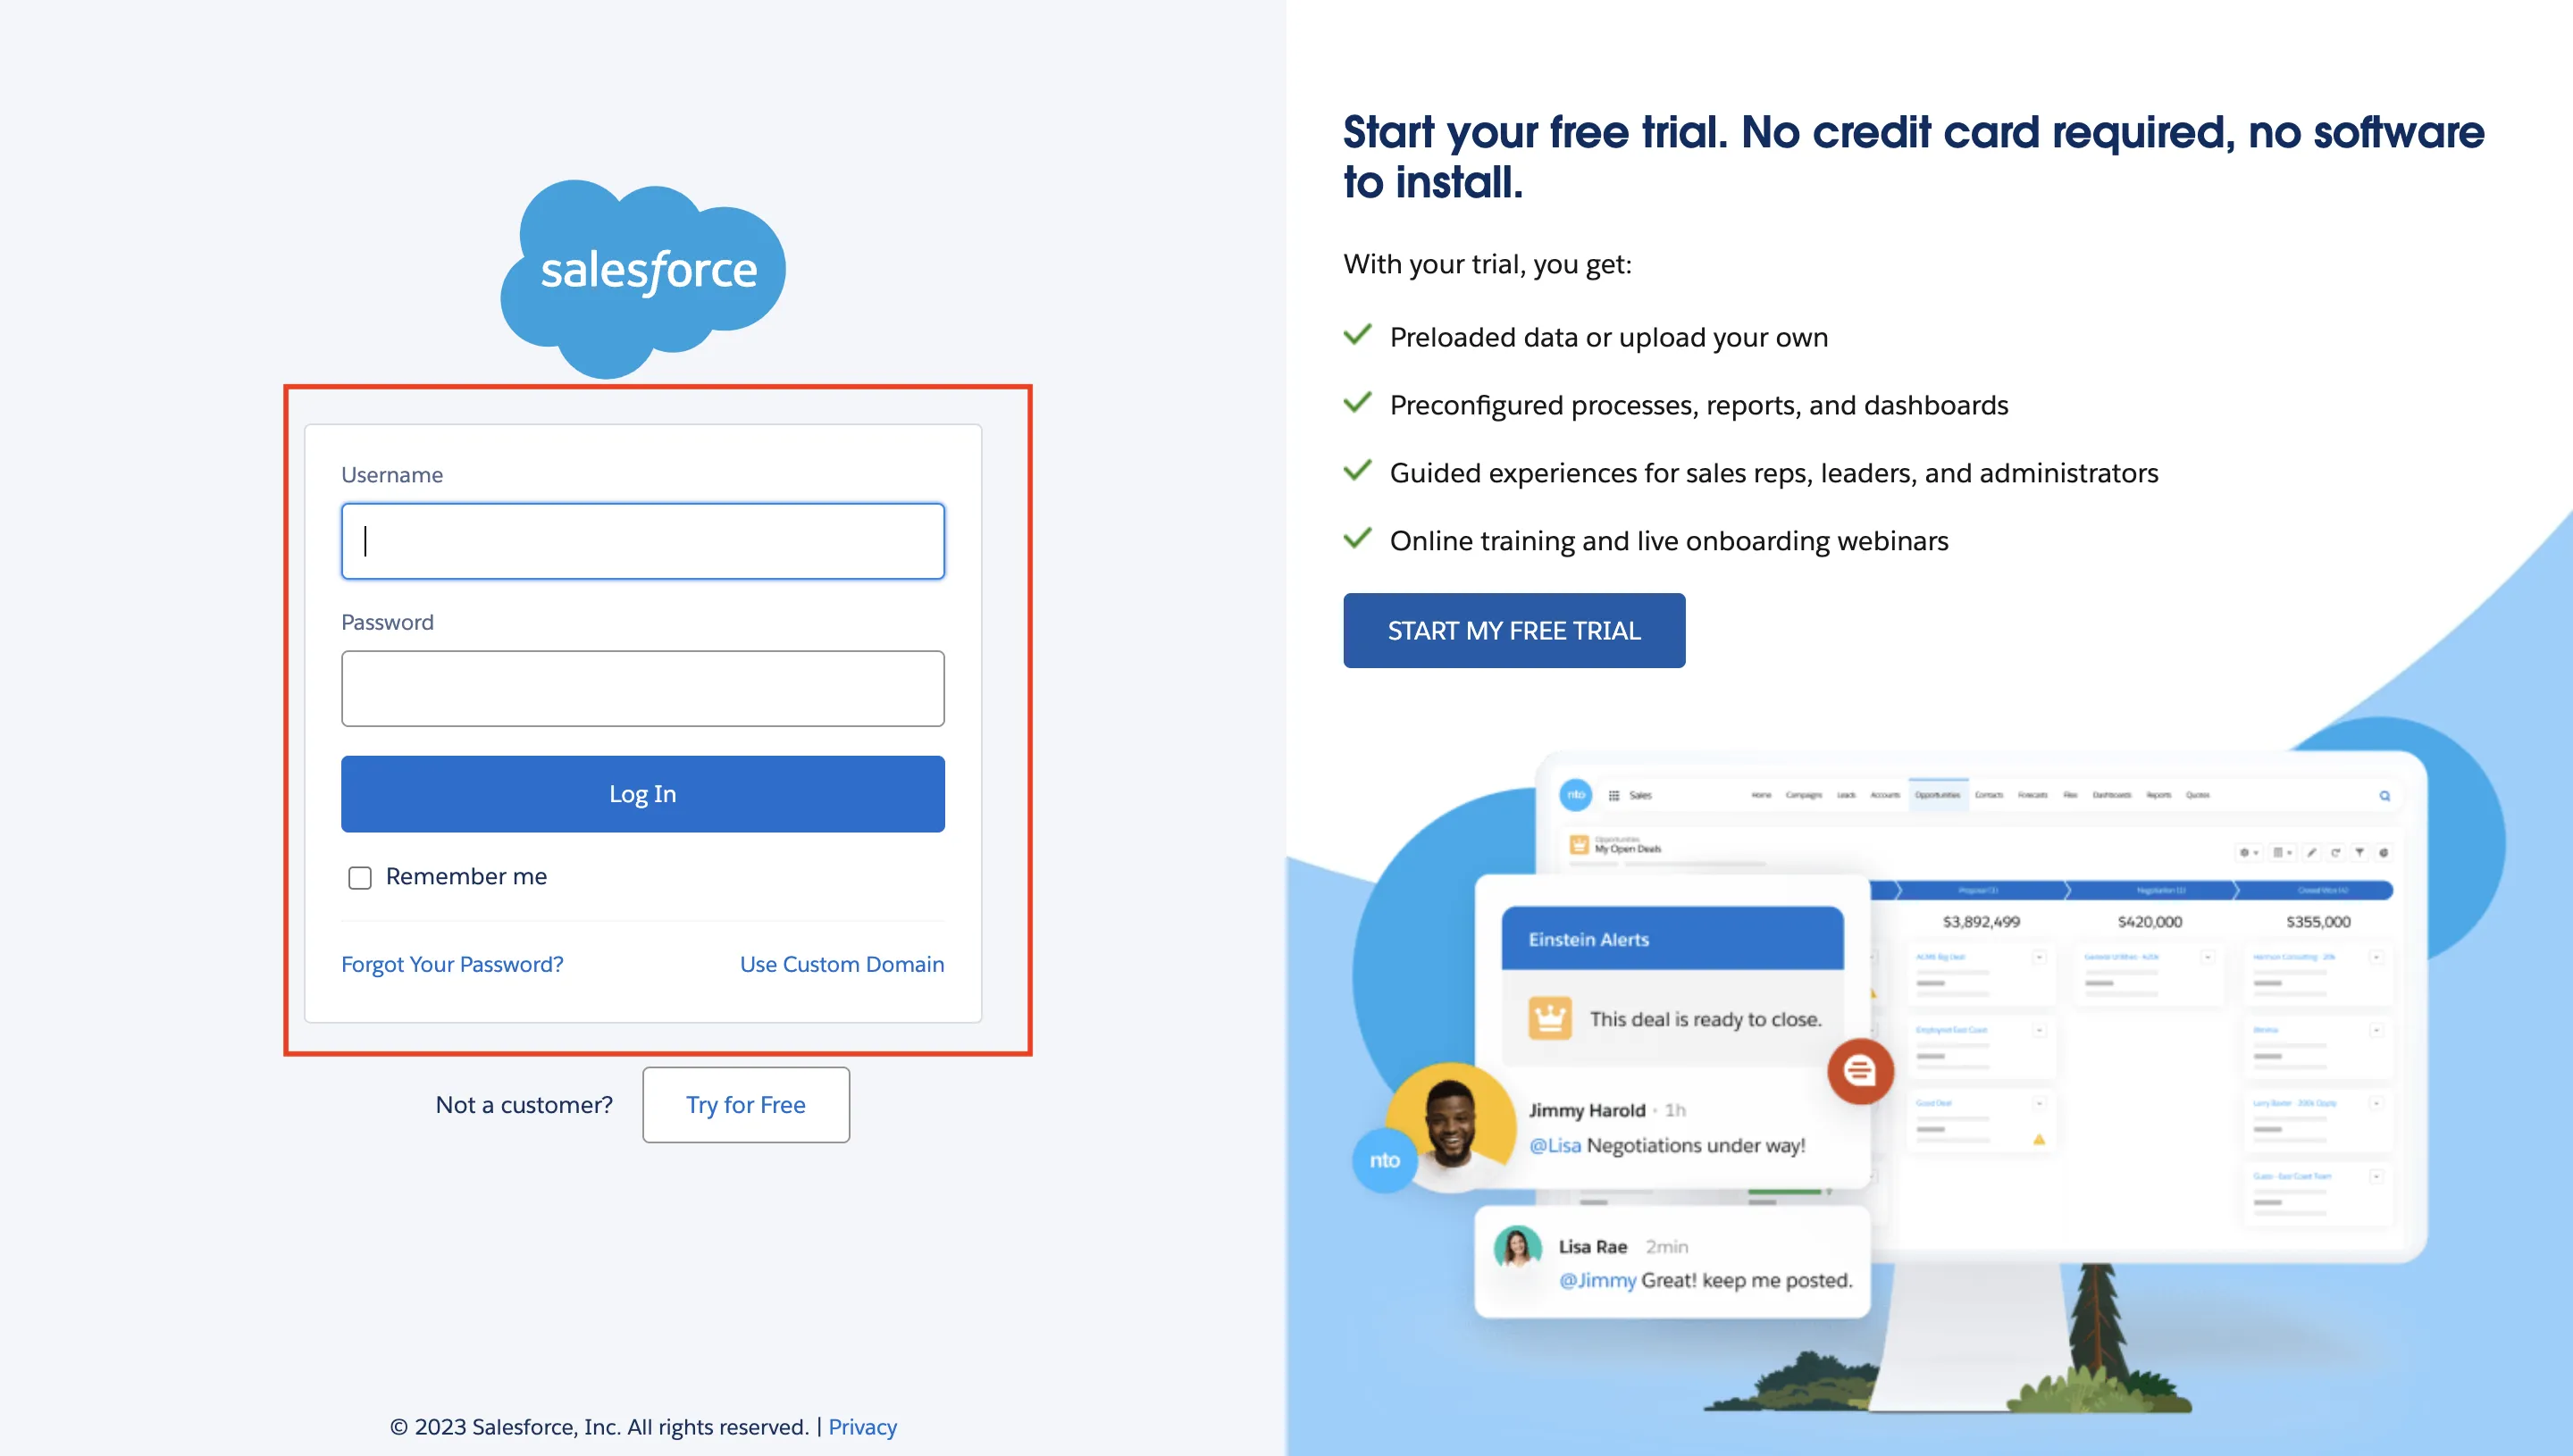
Enter the account details to use the Salesforce SCIM implementation for this flow.
Once the connection is established successfully, then you can define the roles and mapping on Hire2Retire Provisioning.