Connection
Hire2Retire uses Basic Authentication and OAuth 2.0 to connect to ServiceNow App on ServiceNow. By linking your ServiceNow App account with Hire2Retire, you can authorize RoboMQ to have a delegated access on your behalf. RoboMQ needs the following permissions on your account to provide a seamless integration experience.
| Scope | Description |
|---|---|
| x_srbtd_h2r (read and write) | Hire2Retire will need read and write capability to all the custom tables and import set web services in the ServiceNow App application scope |
| sys_user (read) | To get available user attributes and check if user already exists |
| incident (read) | To get available attributes for incident |
| sc_request (read) | To get available attributes for catalog items |
| api_key_credential (write) | Create API keys for user authentication |
| sc_cat_item_guide (read) | To retrieve list of order guides |
| sc_cat_item_guide_item (read) | To retrieve individual guide items within a order guide |
| sc_cat_item (read) | To display catalog item |
We at RoboMQ pay utmost attention to keep your account secure. See our Security and Privacy Policies to learn more about how RoboMQ handles your account access.
Create a Basic Authentication Connection
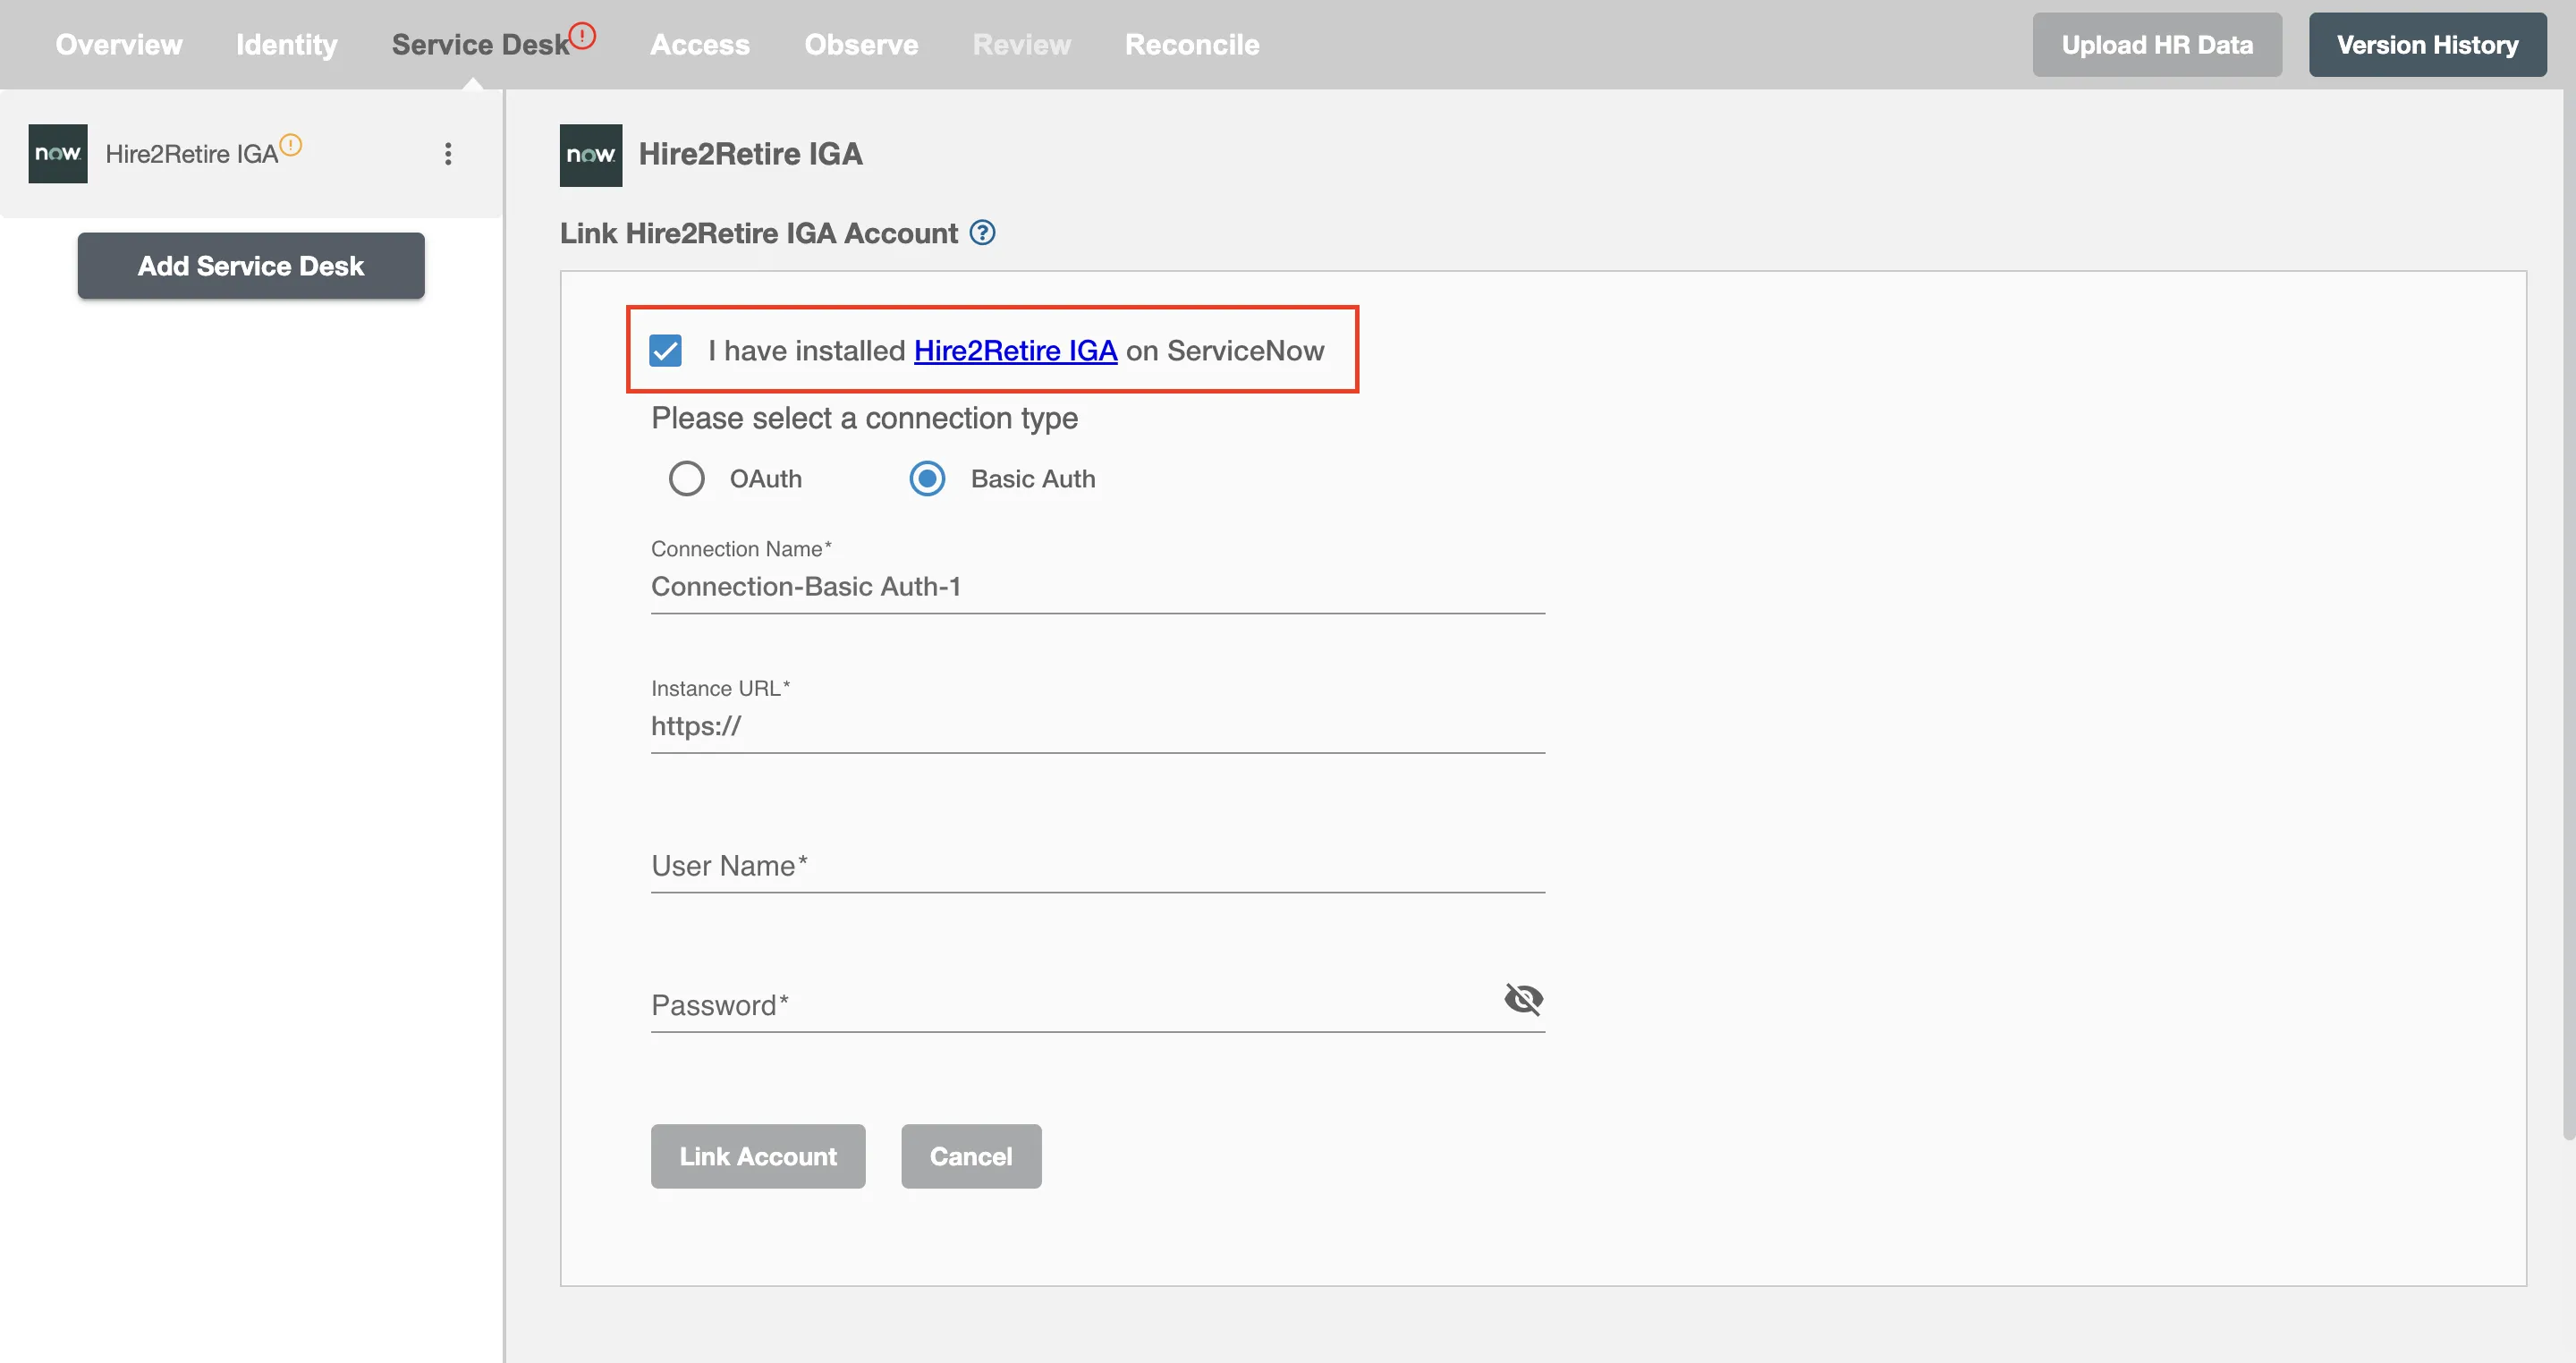
Step 1
Install the ServiceNow App application in your ServiceNow instance and check the checkbox on Connection form. You can follow these steps to install the application. If you cannot find the application on the ServiceNow Store, reach out to RoboMQ support.
Step 2
Specify your ServiceNow Instance URL. When you visit ServiceNow, you can find the ServiceNow Instance URL on the URL bar. It is of the format https://abc.service-now.com.

Step 3
Add user name and password of a user with the Integration admin persona.
Create an OAuth Connection
To link your ServiceNow App account using OAuth, you have to specify your ServiceNow Instance URL, Client ID, Client Secret. For getting the Client ID and Client Secret, you have to set up an OAuth application on the ServiceNow platform.

Setting up Connection using OAuth 2.0 On ServiceNow App
For detailed steps on configuring OAuth, see the OAuth Setup Guide.