Workday® API Integration Connection
Workday® is an American on‑demand (cloud-based) financial management, human capital management and Student information system software vendor. In addition to the Data Extract method offered by Hire2Retire, we have implemented an API-based approach to facilitate integration between Workday® and Directory Services. API integration is user-friendly and allows for scheduled data retrieval, enabling daily or interval-based pulls of employee data reports.
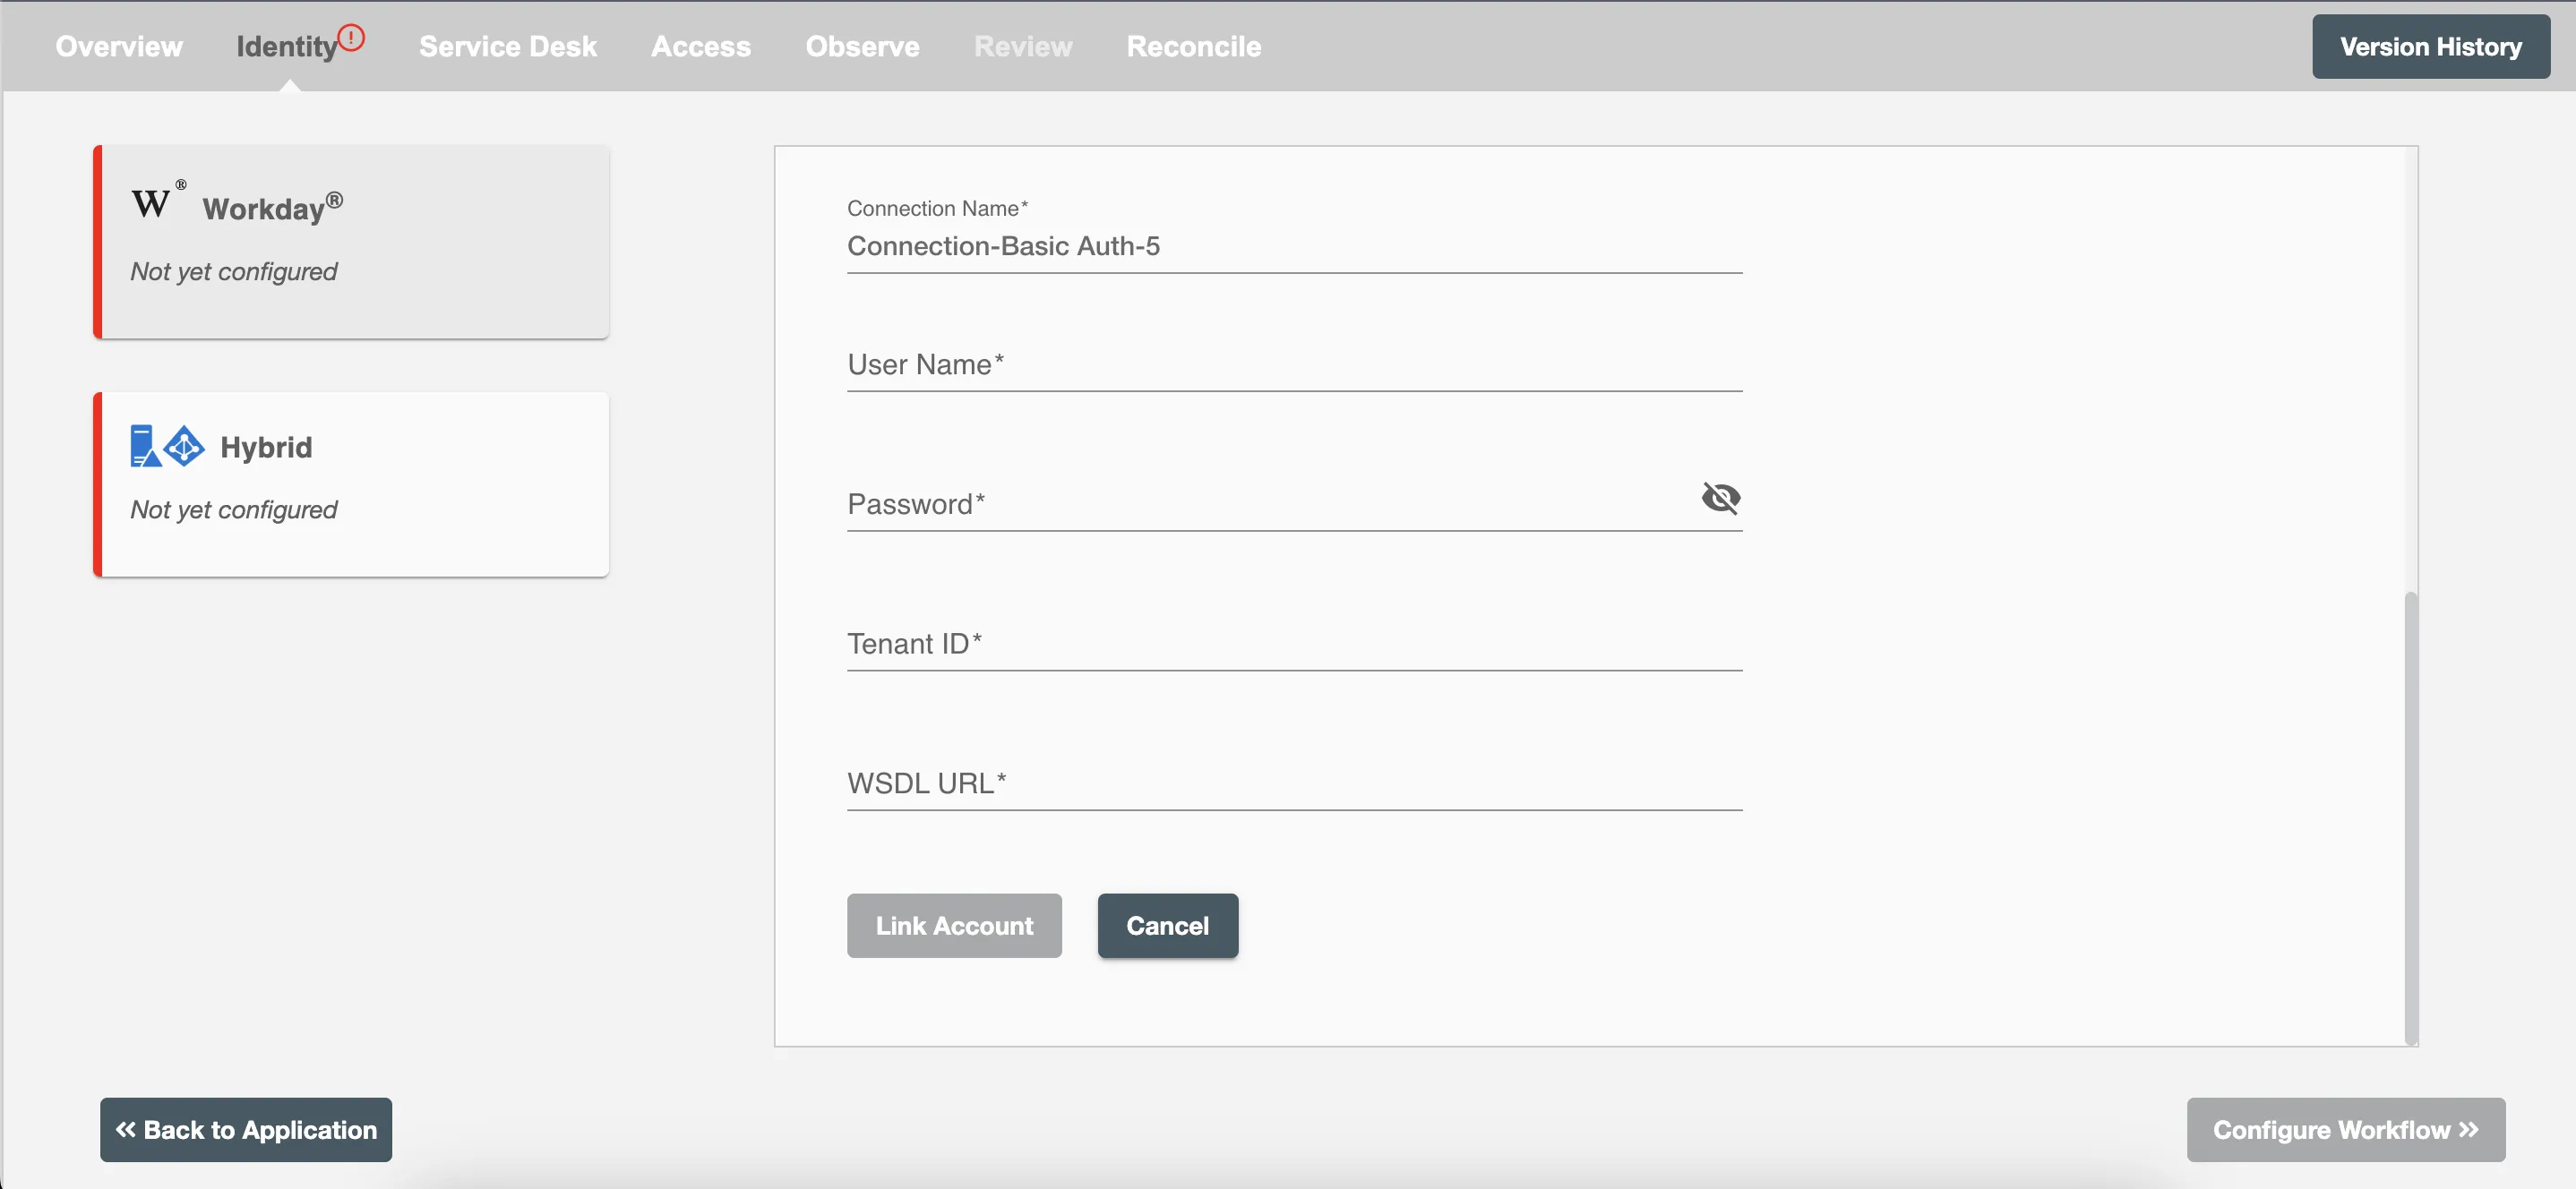
Create a Connection
The API integration of Workday® uses Basic Auth mechanism for authentication. Workday®requires the following keys to authenticate its clients using this mechanism:
-
User Name - The username for the active account.
-
Password - The password associated with the active account.
-
Tenant ID - The company name within the WSDL URL.
-
WSDL URL - The WSDL file's web address (URL) that describes the structure and operations of web services, enabling integration and interaction with external systems.
Obtaining WSDL URL for Workday®
-
Log into your account as an administrator.
-
Authenticate ISU (integration system user).
-
In the search bar, type: Public web services
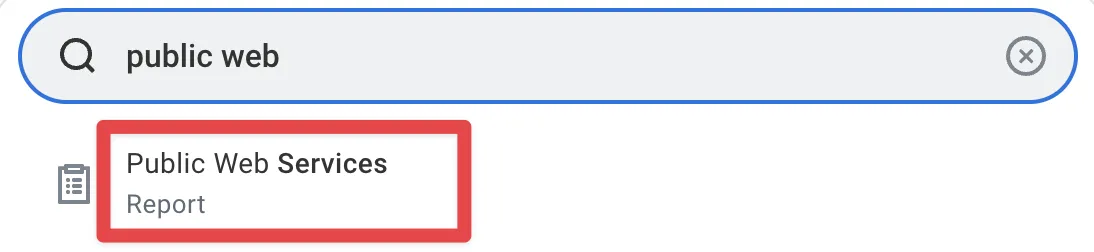 Figure 2. Workday® search bar
-
Select the Public Web Services report
-
Hover over Human Resources and click the three dots to access the menu.
-
Select Web Services.
-
Select View WSDL.
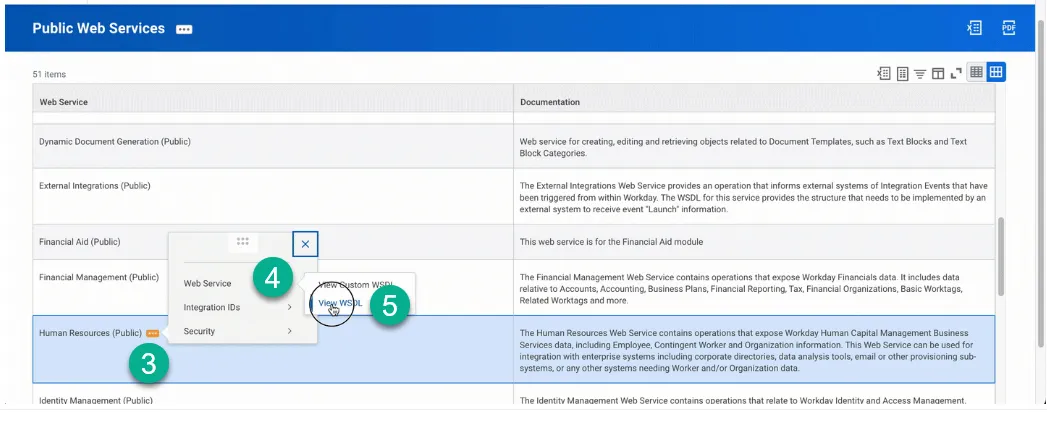 Figure 3. Public Web Services
-
Navigate to the bottom of the page that opens and you'll find the host.
-
Copy the URL text.
-
Return to the Workday API integration connection page in your Hire2Retire account and paste the URL in WSDL URL.
Make sure the service name should be correct in the WSDL URL.
Obtaining Tenant ID for Workday®
Tenant ID is the company name present in the url after service. Eg.
https://wd2-impl-services1.workday.com/ccx/service/{companyname}/Human_Resources/v41.0?wsdl
Configuration
Once you have successfully configured the connections, you can continue with the Design section to configure the rest of the workflow following these steps in order.
- HR Employee Data Definition
- HR to AD Profile Map
- Lifecycle Business Rules
- Employment Status
- Organizational Unit Assignment - Only defined in on-premise Active Directory
- Group Memberships
- Security Group Memberships
- Distribution List Memberships
- Microsoft 365 Groups Memberships Only defined in Hybrid (with Exchange Online Services) and Entra ID
- Entra ID Distribution List Memberships Only defined in Entra ID and Hybrid, when Exchange Online Services is configured
- Entra ID Security Groups Only defined in Hybrid (with Enable Entra ID Security Groups) and Entra ID
- Mail Enabled Security Group Memberships Only defined in Entra ID and Hybrid, when Exchange Online Services is configured
- Mailing List Assignment Provided in Google Workspace
- Communication Hub
Deployment
Once your workflow has been setup, you can optionally setup notifications and archival for your workflow.
- Compliance and Audit Trail
- Run Mode
- Error Notifications
- Monitor Receipt of Scheduled HR Extract
- Environment
Otherwise, you can proceed to deploy and test it on the Hire2Retire platform, see Deploy and Test Flow