Roles
In Hire2Retire, roles represent an employee’s functional or organizational identity and are used across provisioning, group mapping, conditional email notifications, and Service Desk ticket creation. Through the Roles section in Account Settings, administrators can create, manage, and update roles with precise eligibility criteria, ensuring that lifecycle workflows are applied accurately and consistently based on user directory attributes.
To add a new role, follow the steps outlined below:
-
Click on the Add Role button.
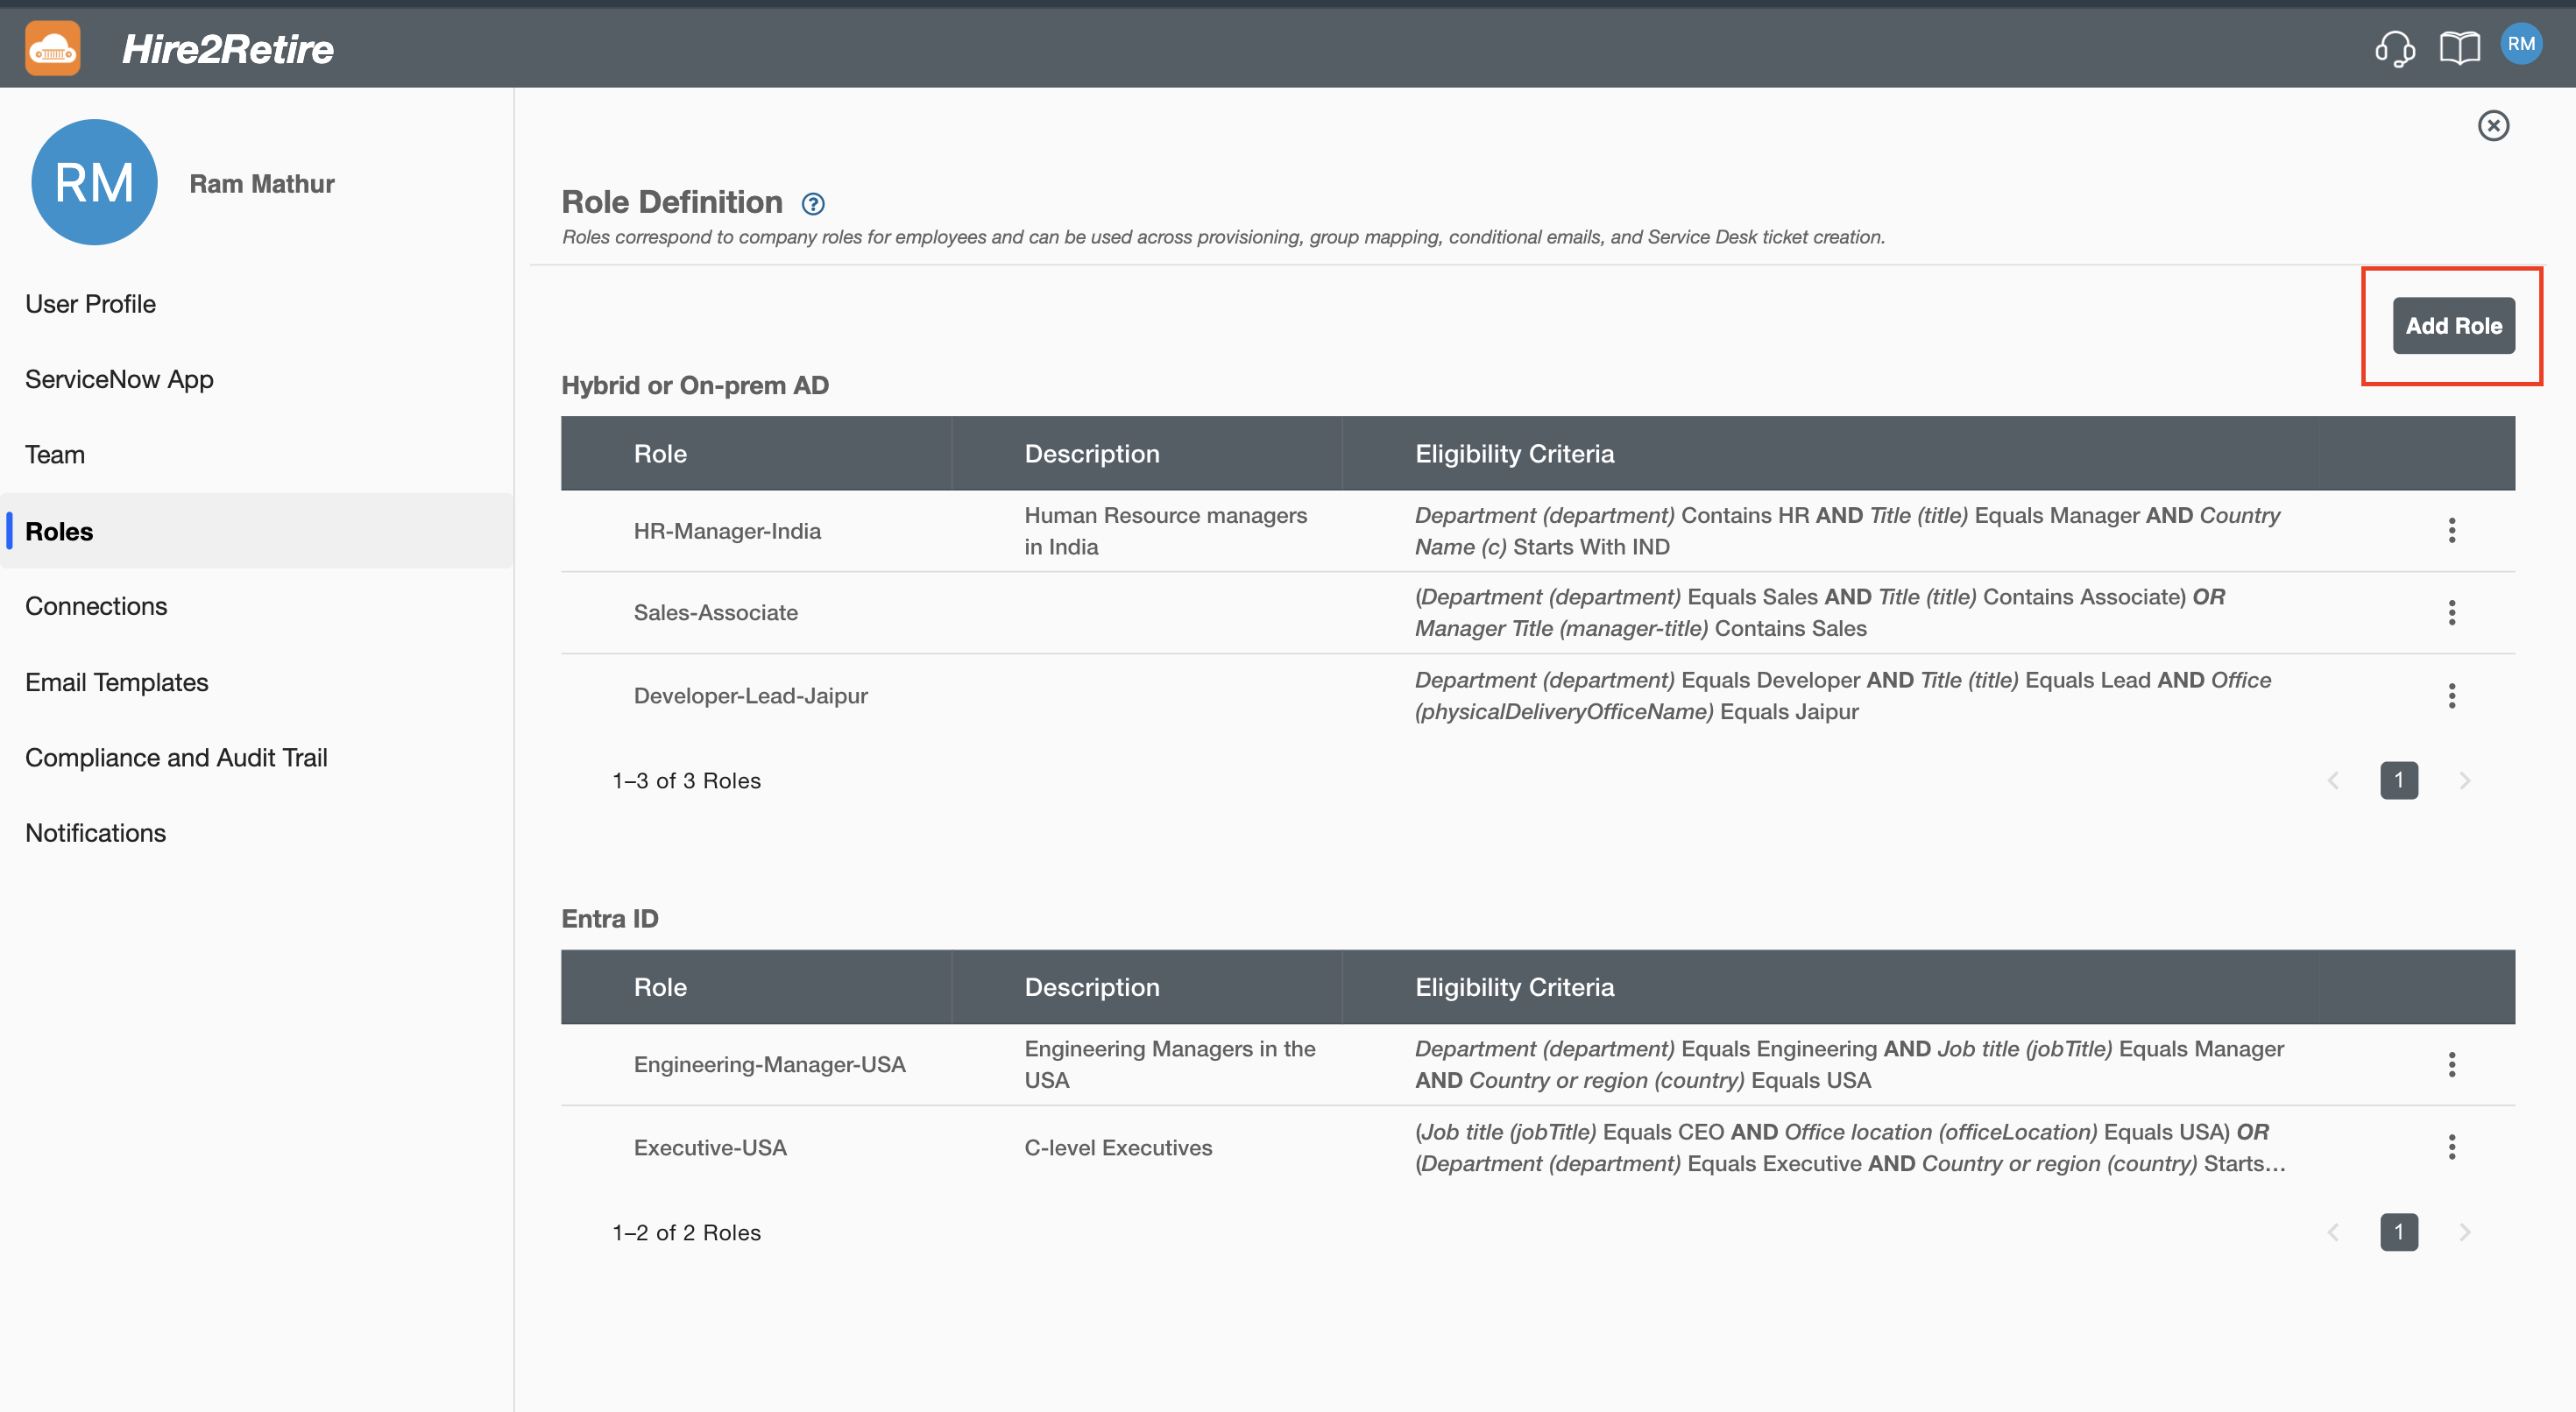 Figure 1 Add Role Button
 -
Select the identity system (such as Hybrid or On-prem AD, Entra ID, etc.) where this role will be applicable.
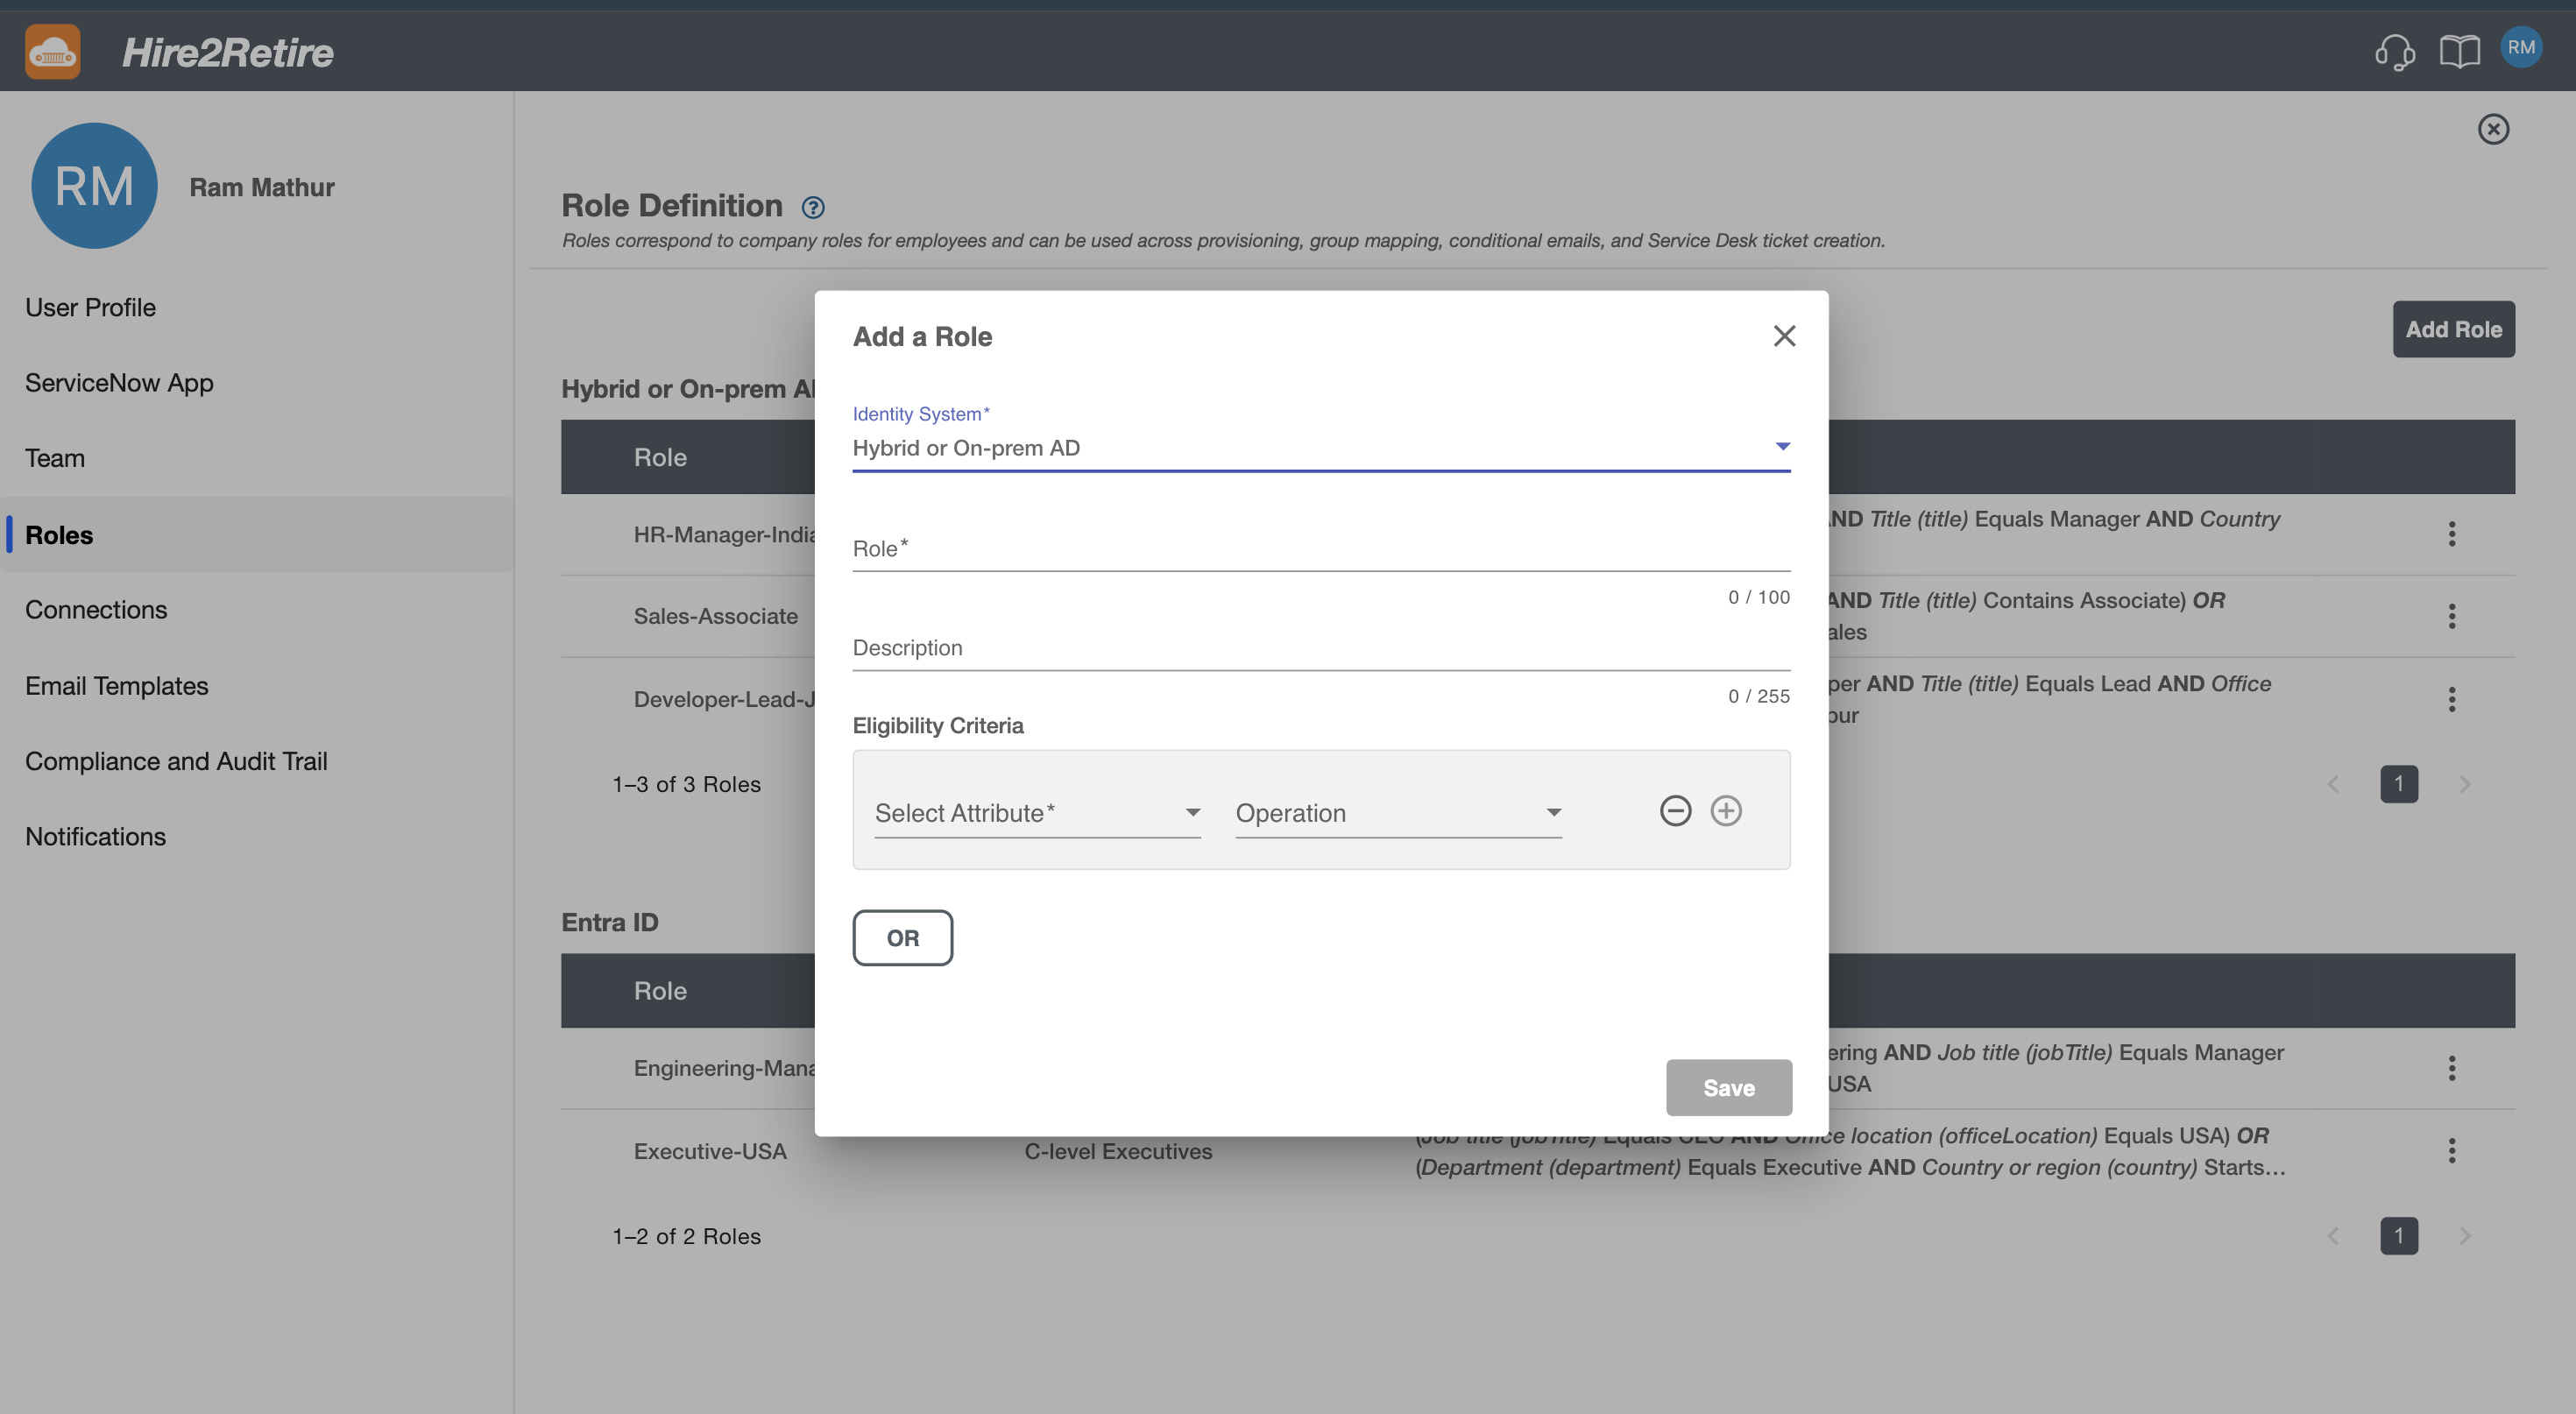 Figure 2 Add Role Dialog Box
 -
Enter a name for the role and add a detailed description explaining its purpose.
-
In the Eligibility Criteria section, you configure the conditions that determine when this role should apply to a user.
- Select the directory attribute.
- Choose the Operation (e.g., equals, contains, starts with).
- Enter the value that the attribute should match.
- You can add multiple conditions, and the role will be applied only when all defined criteria are satisfied.
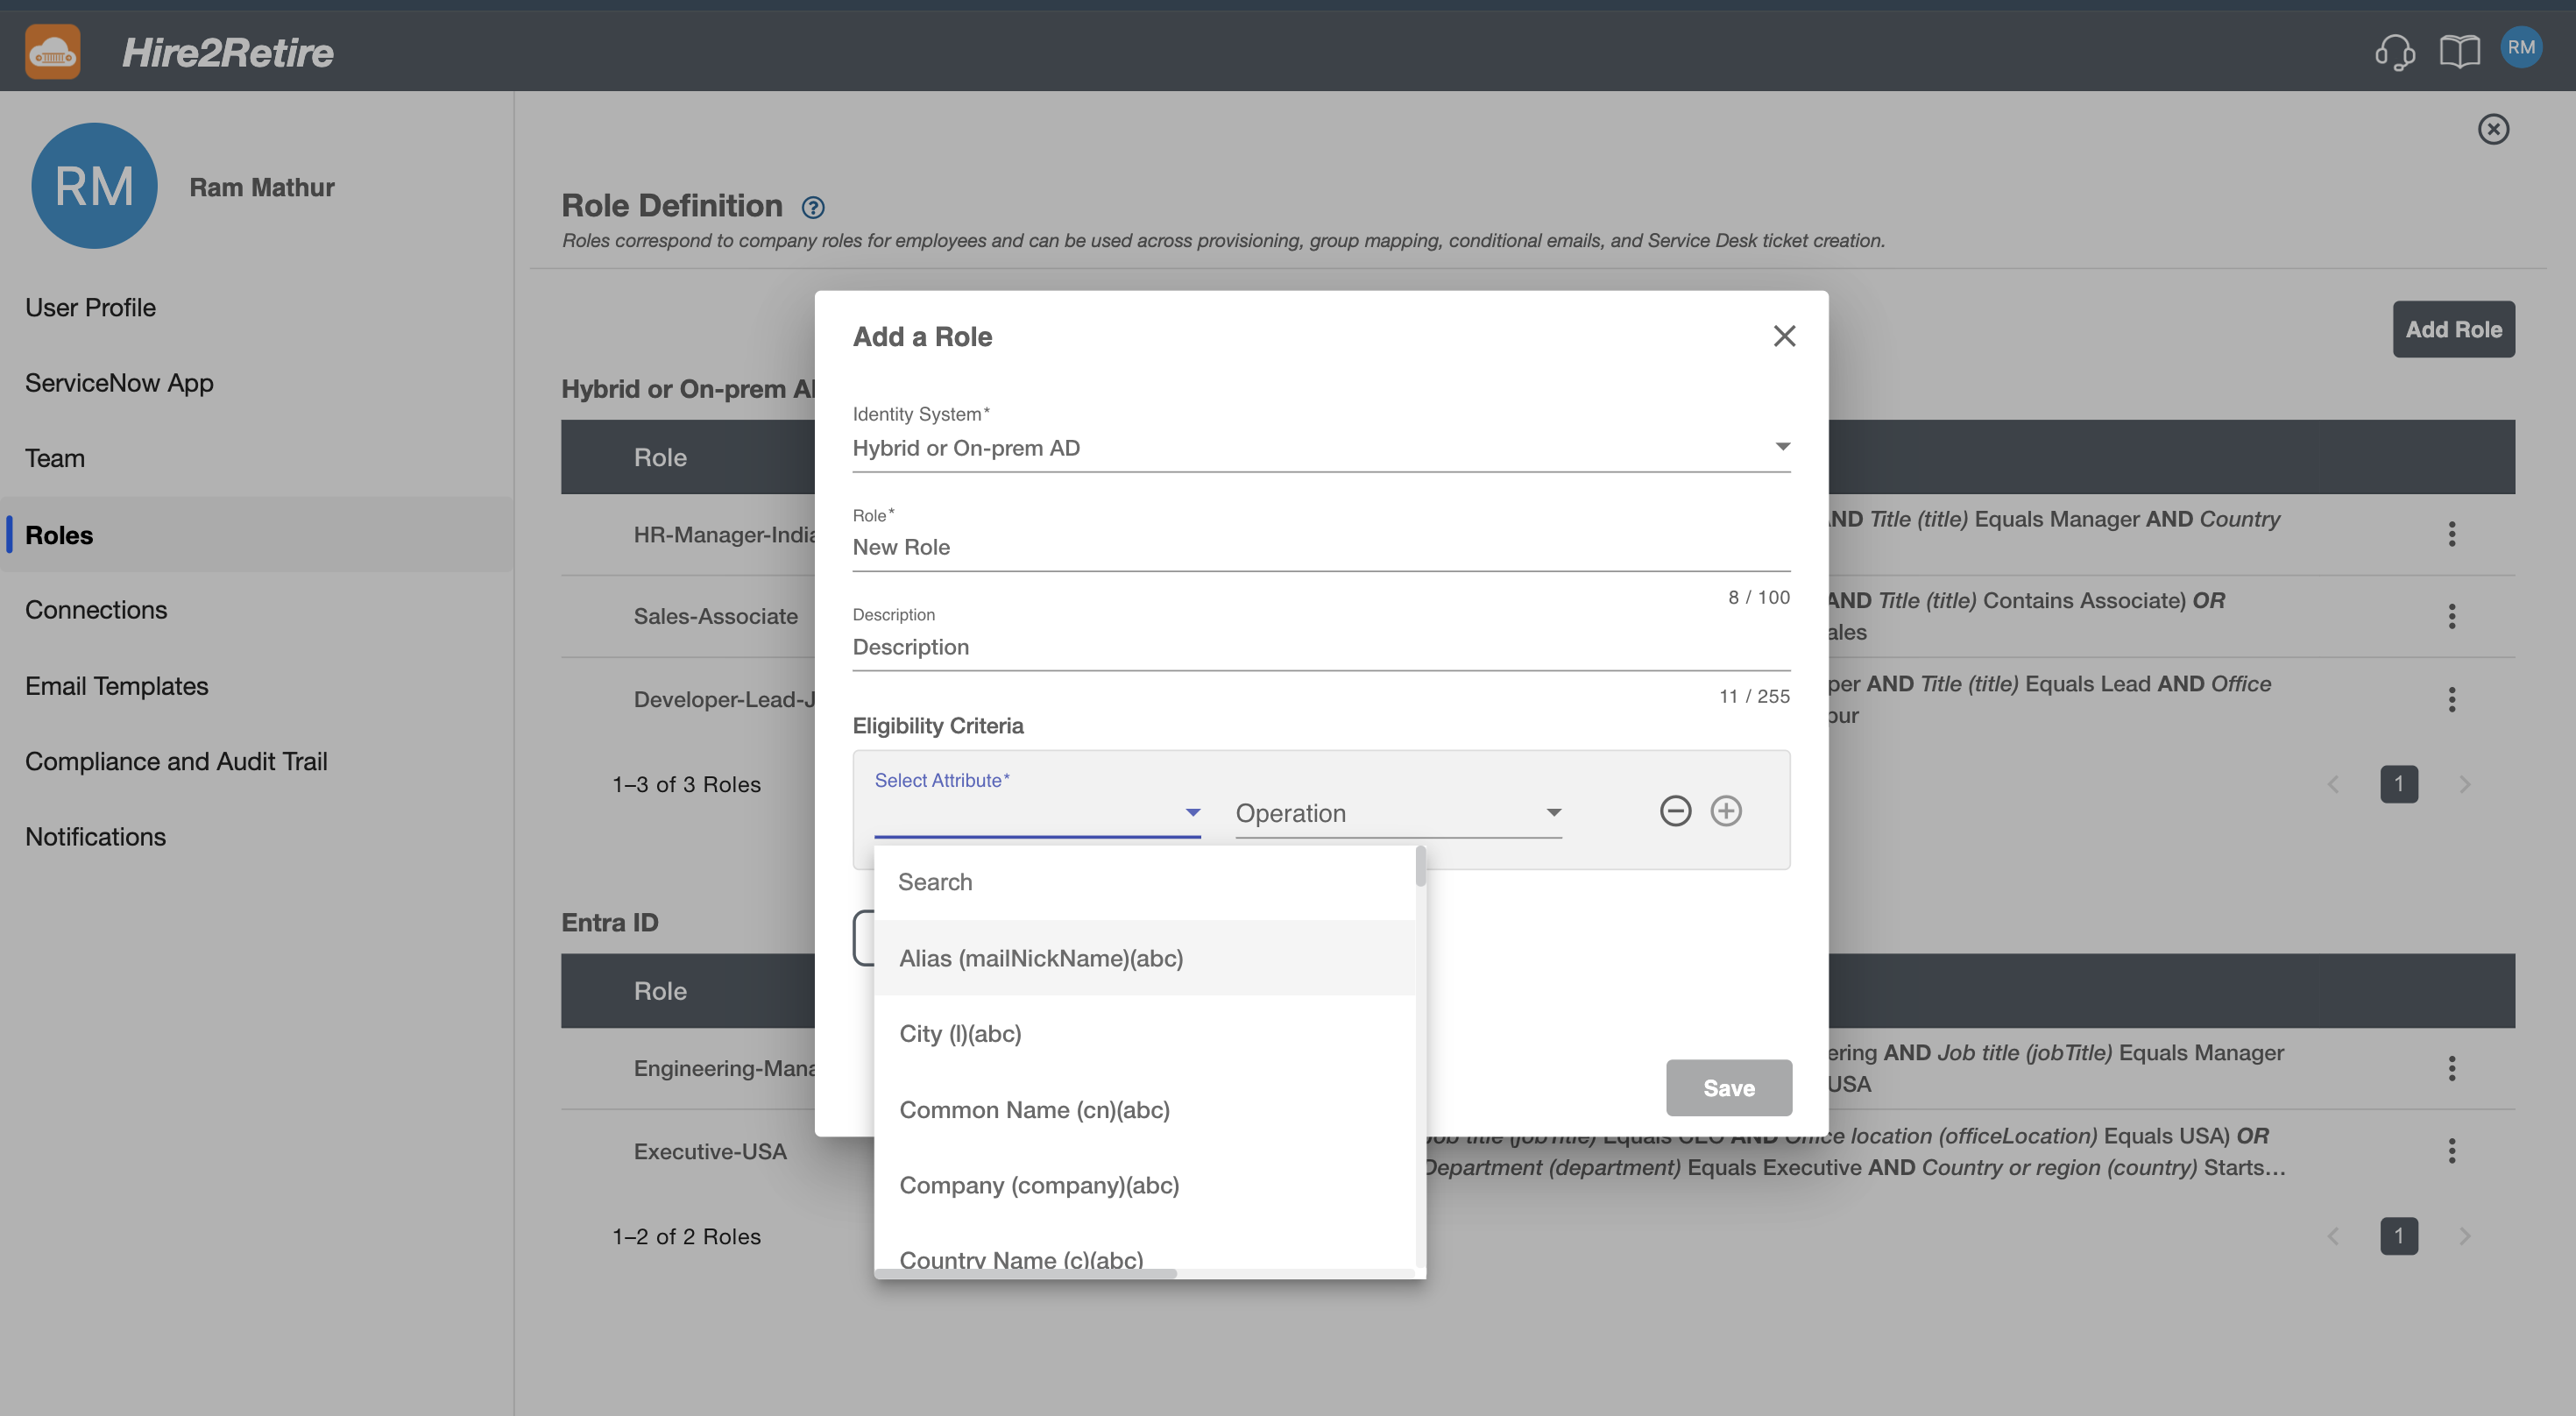 Figure 3 Eligibility Criteria Section5. Click on Save button.