Okta Directory Connection
Okta Directory, also known as Okta Universal Directory, is a directory service hosted in the cloud. It is an identity and access management platform that is fairly new to the market and helps enterprises manage their user authentication, access provisioning to data, devices and applications and more.
Hire2Retire integrates with Okta Directory using OAuth for secure authorization. When you link your Okta Directory account, you grant the RoboMQ application permission to access it on your behalf. To enable a seamless and effective integration, the following permissions are necessary:
| Scopes | Explanation |
|---|---|
| okta.schemas.read | Allows the app to read information about Schemas in your Okta organization. |
| okta.groups.manage | Allows the app to manage existing groups in your Okta organization. |
| okta.users.manage | Allows the app to create new users and to manage all users' profile and credentials information. |
Create a Connection
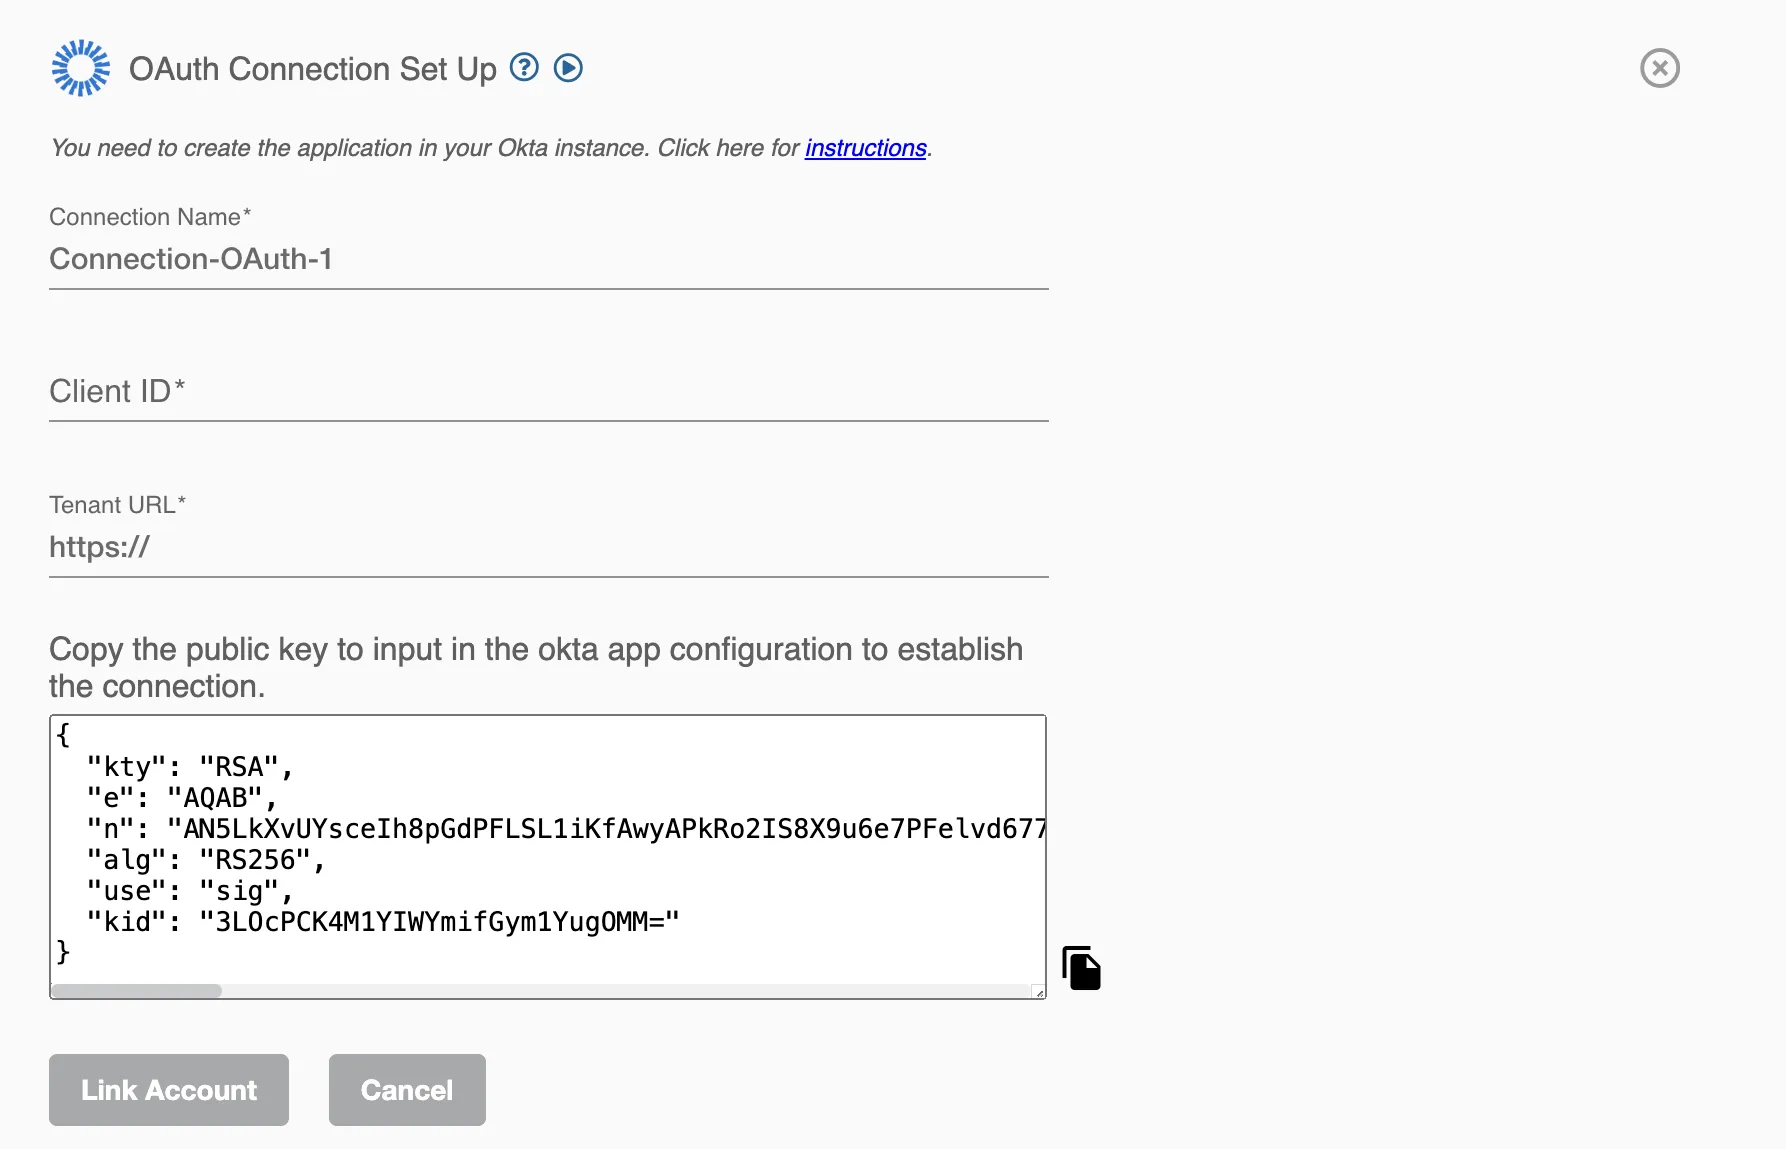
You must register the application in your tenant and grant the permission needed by Hire2Retire. The following information is required to establish the connection.
- Client ID - Application ID
- Tenant URL - Unique identifier of the Okta instance.
Go to the "General" tab of your registered application to find the Client or Application ID. To get the Tenant URL, use the dropdown menu in the top-right corner of the Okta Directory portal.
To create the application, follow these instructions stated below.
Application Registrations
- Log in to the Okta Directory portal.
- Go to the
Admin Console, open theApplications, and click Create App Integration. - Choose
API Servicesas the Sign-in method and click Next. - Enter a name for your app integration and hit Save.
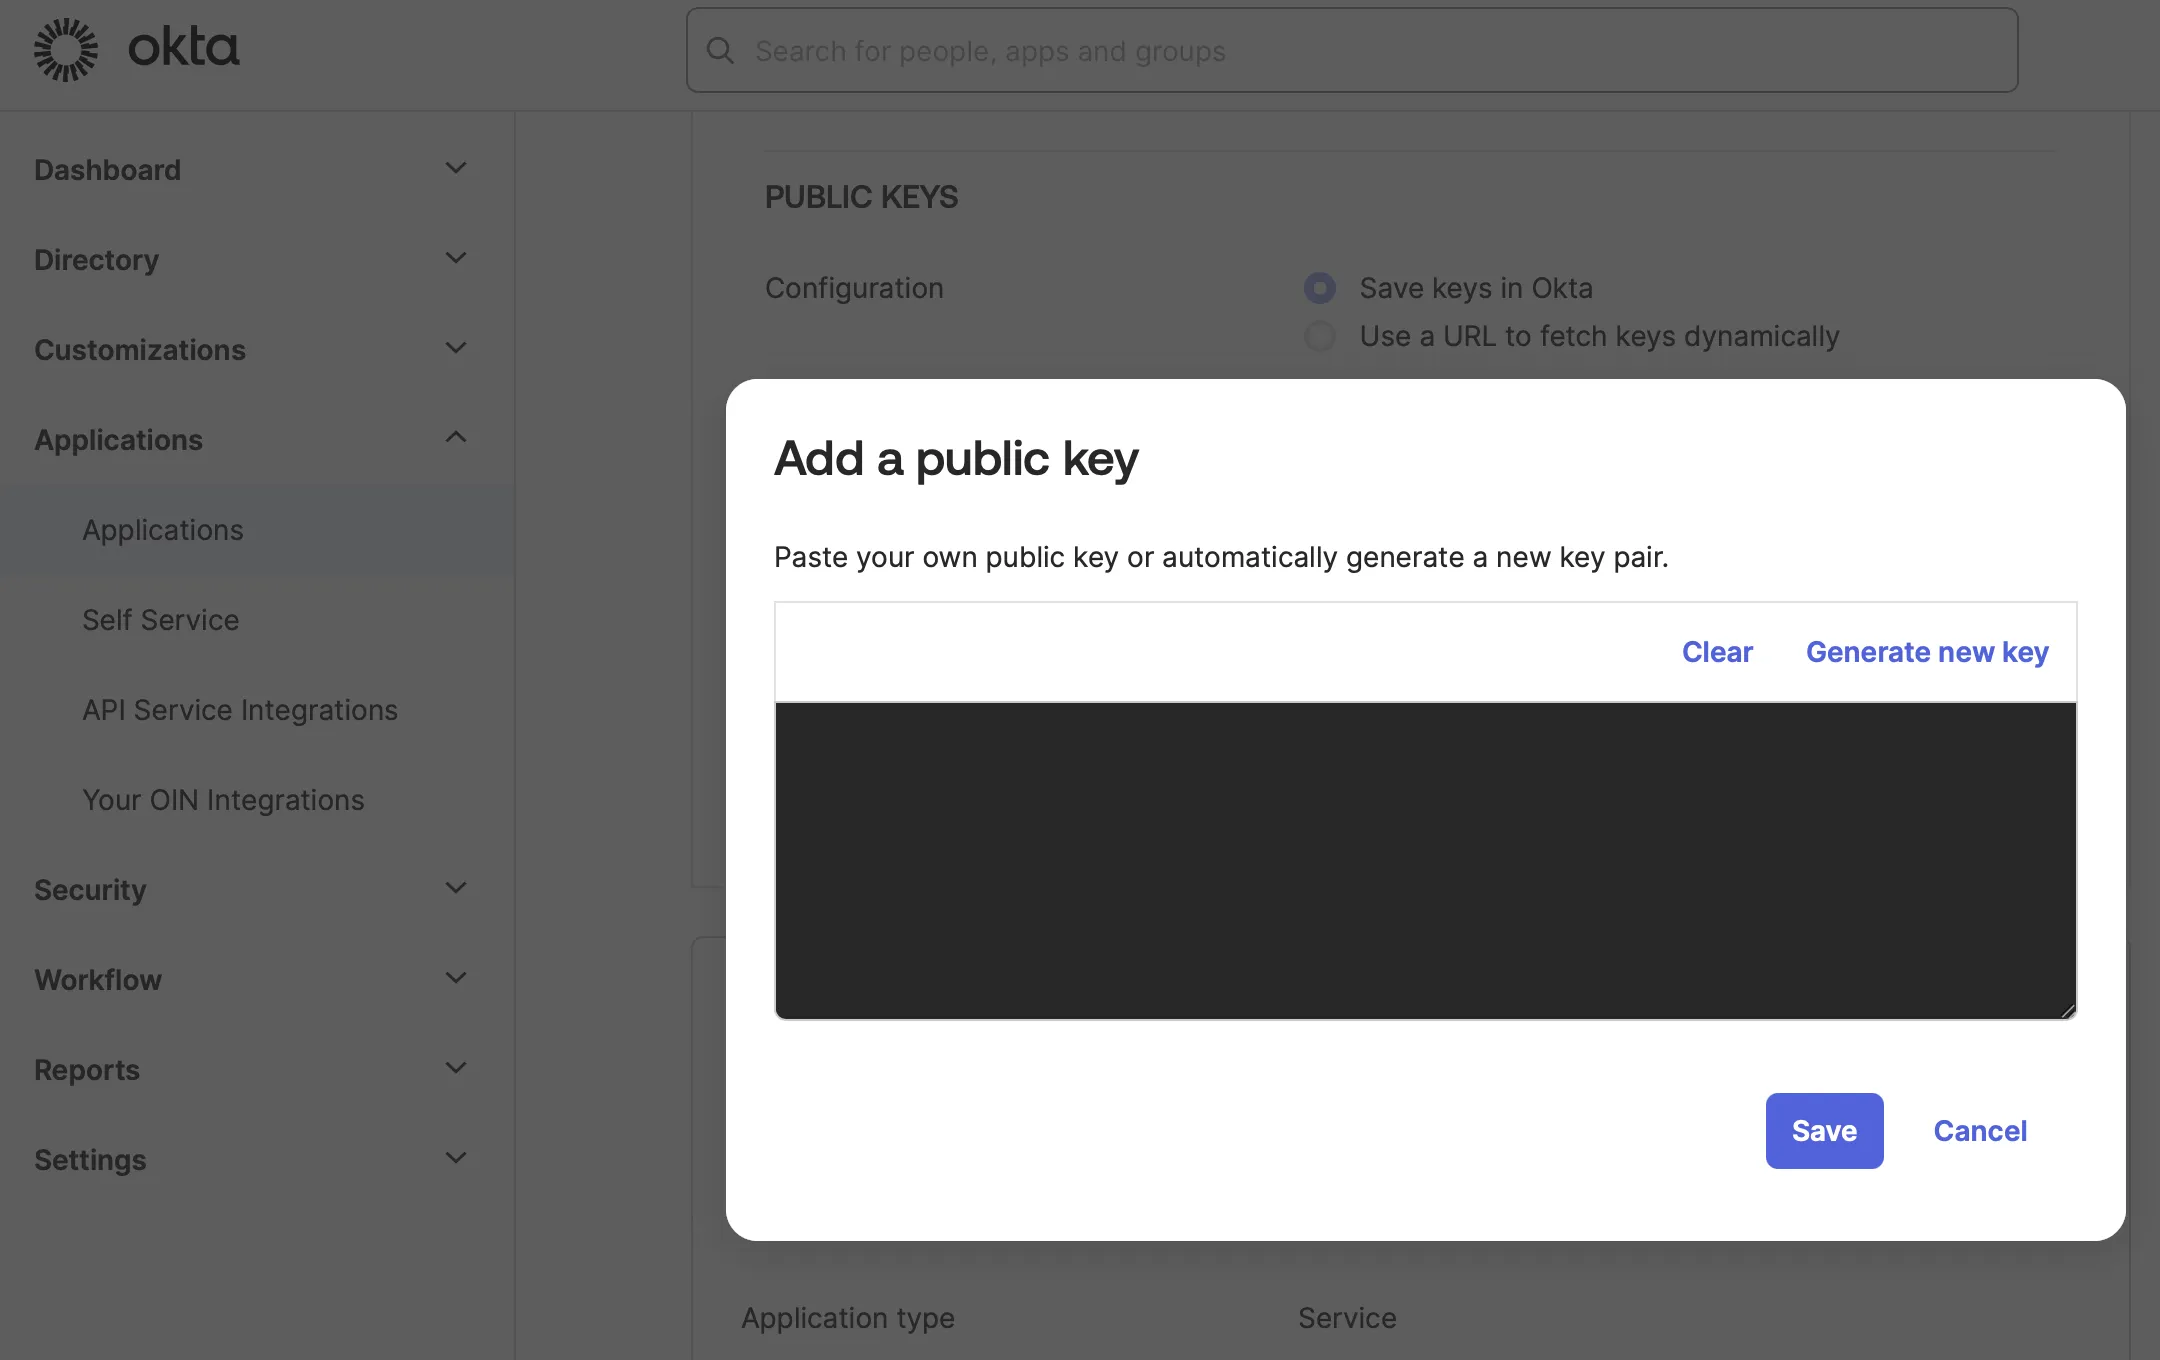
- Under the
Generaltab, go to the Client Credentials section and change the Client Authentication method toPublic key / Private key. - Click
Add Key, paste the public key from the Hire2Retire connection UI and click Save. - When prompted, confirm by clicking Save again to disable any existing client secrets.

Credentials
Credentials allow your application to authenticate on its own, so there's no need for user input during runtime. Since Hire2Retire is a confidential client, it will use these credentials to verify its identity and perform automated tasks.
Follow the steps below to add credentials:
- Copy the public key from the Hire2Retire connection UI.
- In your registered application, select
General>Public Keys>Add - Paste the public key and click Save.
Public key/Private key are the preferred credential type due to their enhanced security compared to client secrets.
You can now use this registered application as a service account for automation. To set up your Okta Directory connection, just click on "Link Account."
Application Permission
Configure application permissions for any app that needs to authenticate on its own, without user involvement. To grant a registered application access to the Okta Directory API, go to Okta API Scopes. There, you’ll find a list of all permissions assigned to your application.
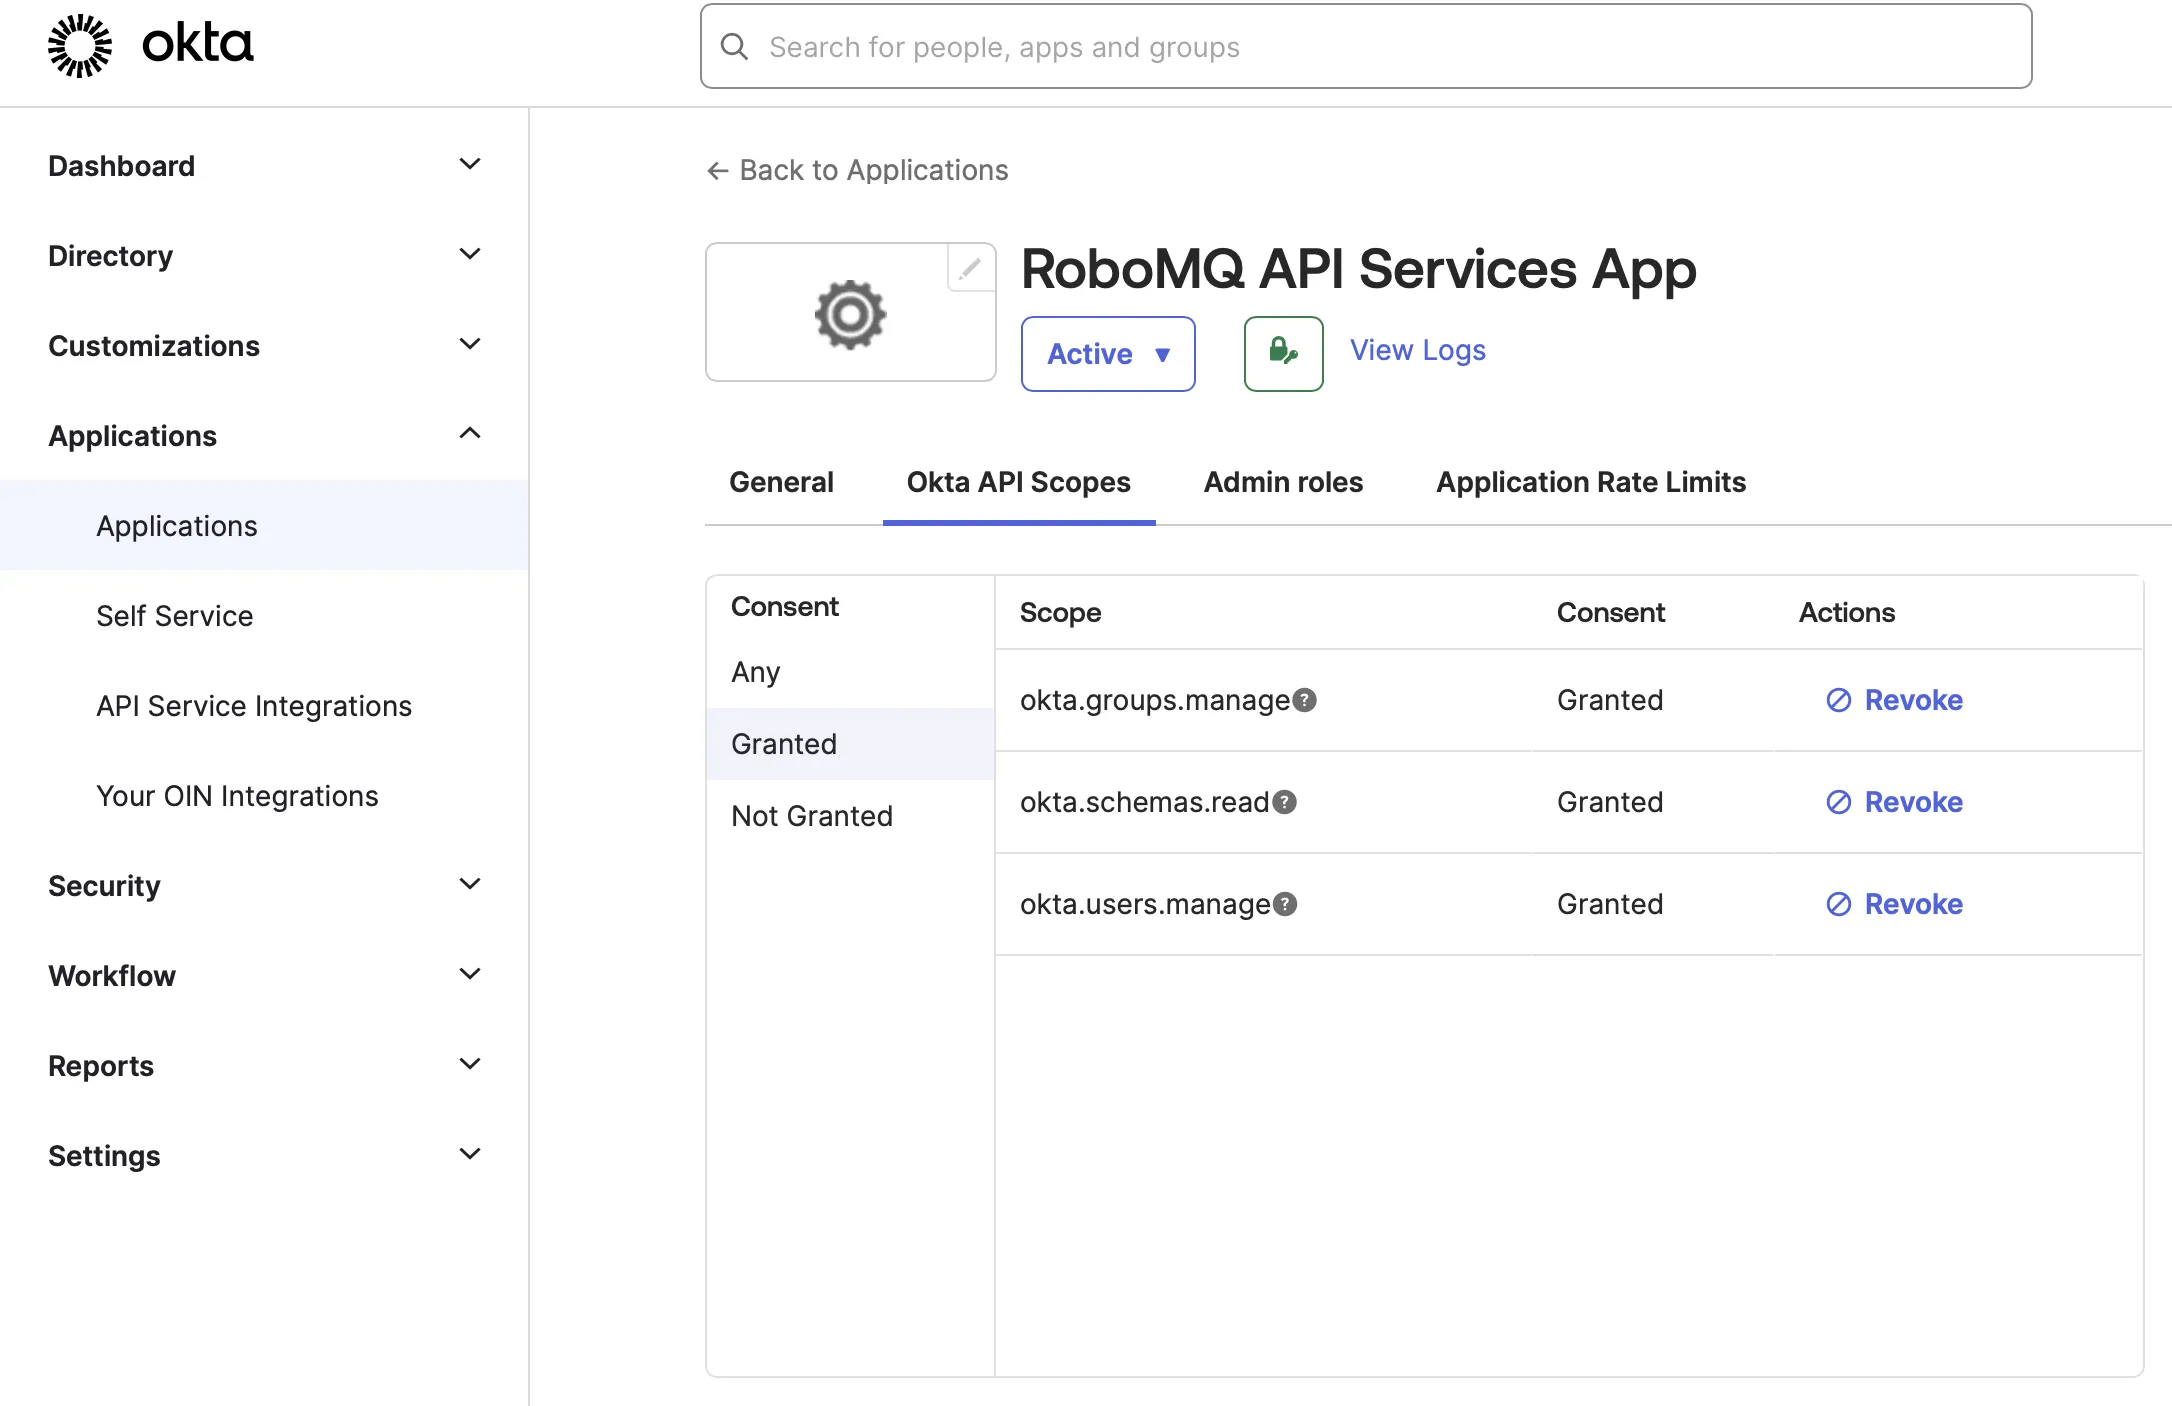
To ensure smooth integration, RoboMQ requires specific permissions on your registered application:
| Scopes | Explanation |
|---|---|
| okta.schemas.read | Allows the app to read information about Schemas in your Okta organization. |
| okta.groups.manage | Allows the app to manage existing groups in your Okta organization. |
| okta.users.manage | Allows the app to create new users and to manage all users' profile and credentials information. |
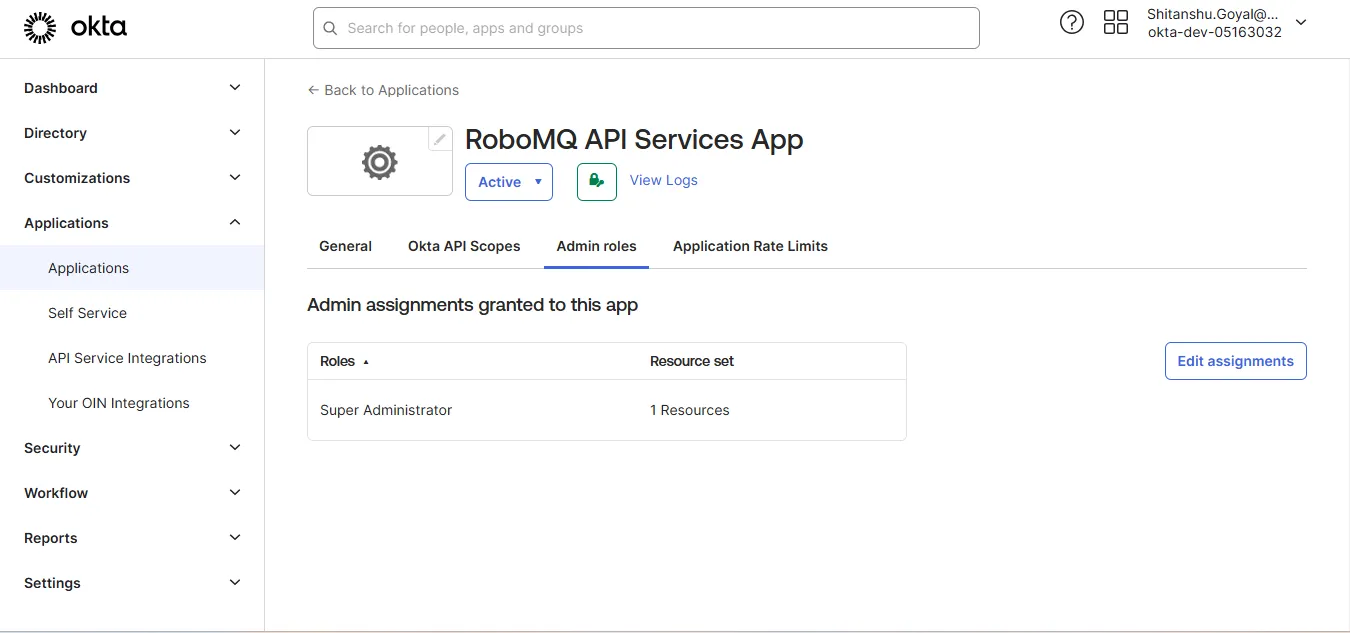
You need to make this app as an administrator. For that, you need to follow these steps:
- In your registered application go to
Admin rolesand click on Edit assignments. - Select Role as
Super Administratorand click on Save changes.