Get Started
Introduction
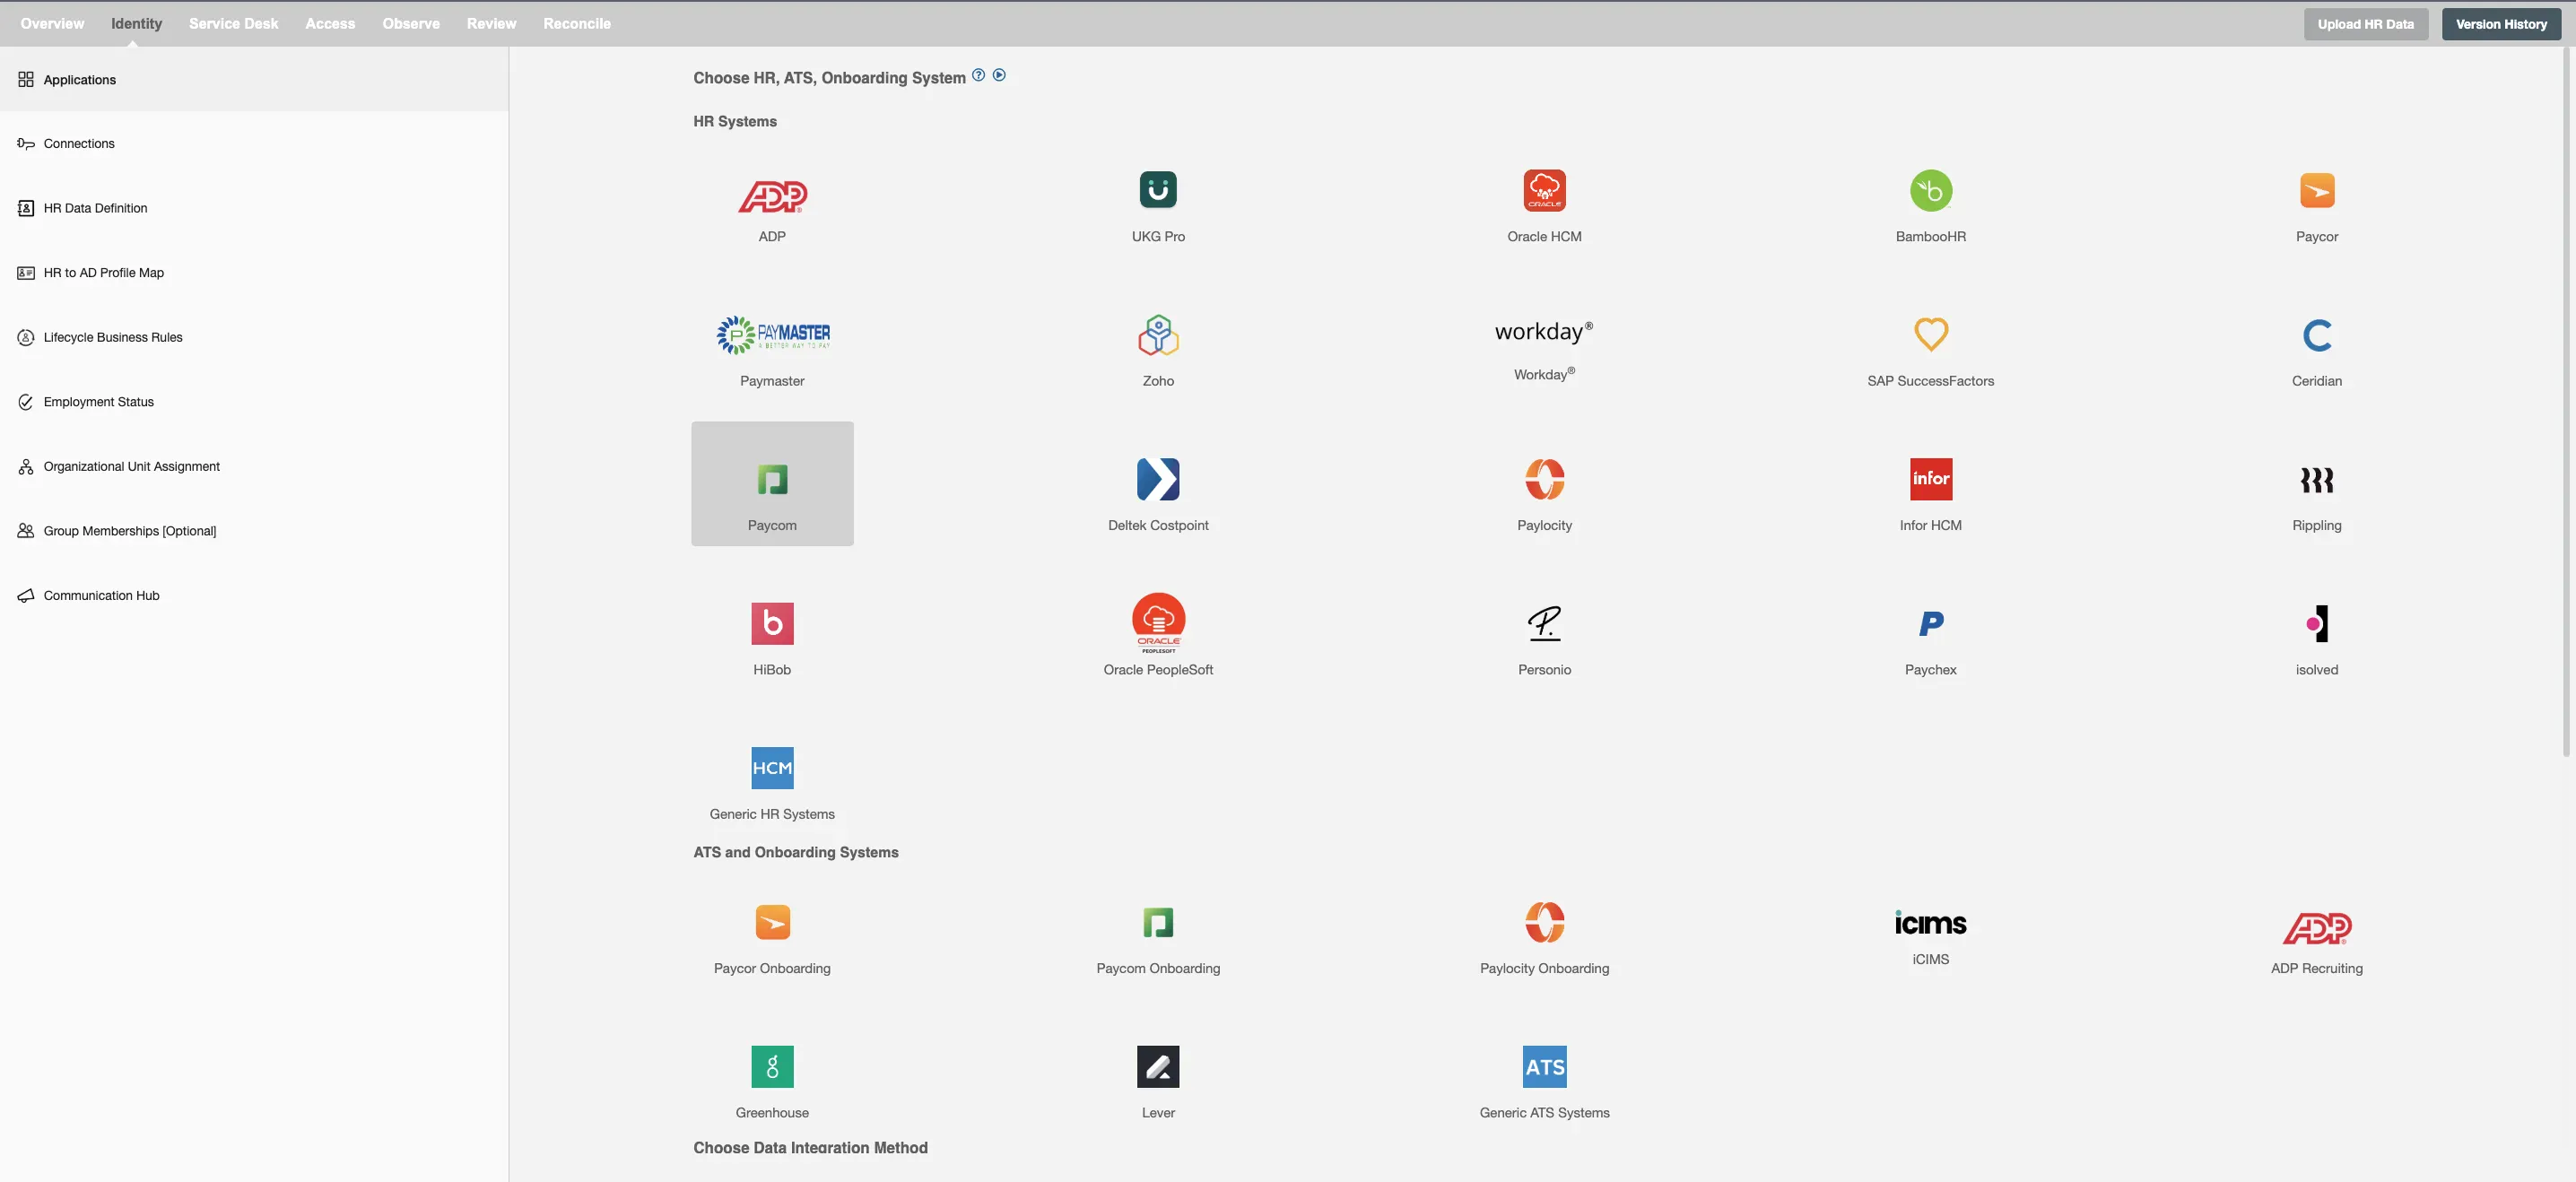
When you start designing your Hire2Retire workflow, you can select your HRIS and Identity Management System from the Application Page.
HR Systems
Hire2Retire supports the following HR Systems. By configuring the connection, you will enable RoboMQ to fetch your HR data using either SFTP or REST API.
- ADP (Report or Extract)
- ADP (API Integration)
- ADP Vantage HCM (API Integration)
- ADP Lyric (API Integration)
- UKG Pro (Data Extract)
- UKG Pro (API Integration)
- Oracle HCM (Report or Extract)
- Oracle HCM (API Integration)
- BambooHR
- Paycor
- Paymaster
- Zoho (Report or Extract)
- Zoho (API Integration)
- Workday® (Report or Extract)
- Workday® (API Integration)
- SAP Successfactors (Data Extract)
- SAP Successfactors (API Integration)
- Ceridian (Report or Extract)
- Ceridian (API-Integration)
- Paycom (Report or Extract)
- Paycom (API Integration)
- Deltek Costpoint
- Paylocity (Data Extract)
- Paylocity (API Integration)
- Infor HCM
- Rippling
- HiBob (Report or Extract)
- HiBob (API Integration)
- Generic HR System (RoboMQ SFTP Extract)
- Generic HR System (External SFTP Extract)
- Oracle PeopleSoft (Data Extract)
- Paychex (API Integration)
- Personio
- iSolved (API Integration)
Onboarding Systems
Hire2Retire supports the following Onboarding Systems. By configuring the connection, you will enable RoboMQ to fetch your Onboarding data using either SFTP or REST API.
ATS Systems
Hire2Retire supports the following ATS Systems. By configuring the connection, you will enable RoboMQ to fetch your ATS data using REST API.
- iCIMS
- Greenhouse
- Lever
- ADP Recruiting (API)
- ADP Recruiting (File Extract)
- Generic ATS System (RoboMQ SFTP Extract)
- Generic ATS System (External SFTP Extract)
- BambooHR ATS
Identity Management
Hire2Retire supports the following options for Identity Management. Based on the HR data, Hire2Retire will make changes to the target Identity Management System to provide a seamless sync between HR System and the Identity Management System.
Lifecycle Events
Hire2Retire supports the Hire, Rehire and Termination feature based on start date and last day worked of an employee present in HR data. To process the events immediately based on employment status, disable the feature.
It also supports multi-domain controller setup to add user data into the respective domain controllers based on the conditions defined in the HR definition data. And you can enable this feature by selecting the Enable Multi-Domain Controller checkbox.
Click on the Configure Connection button to configure your connections to the HRIS and Identity Management System.
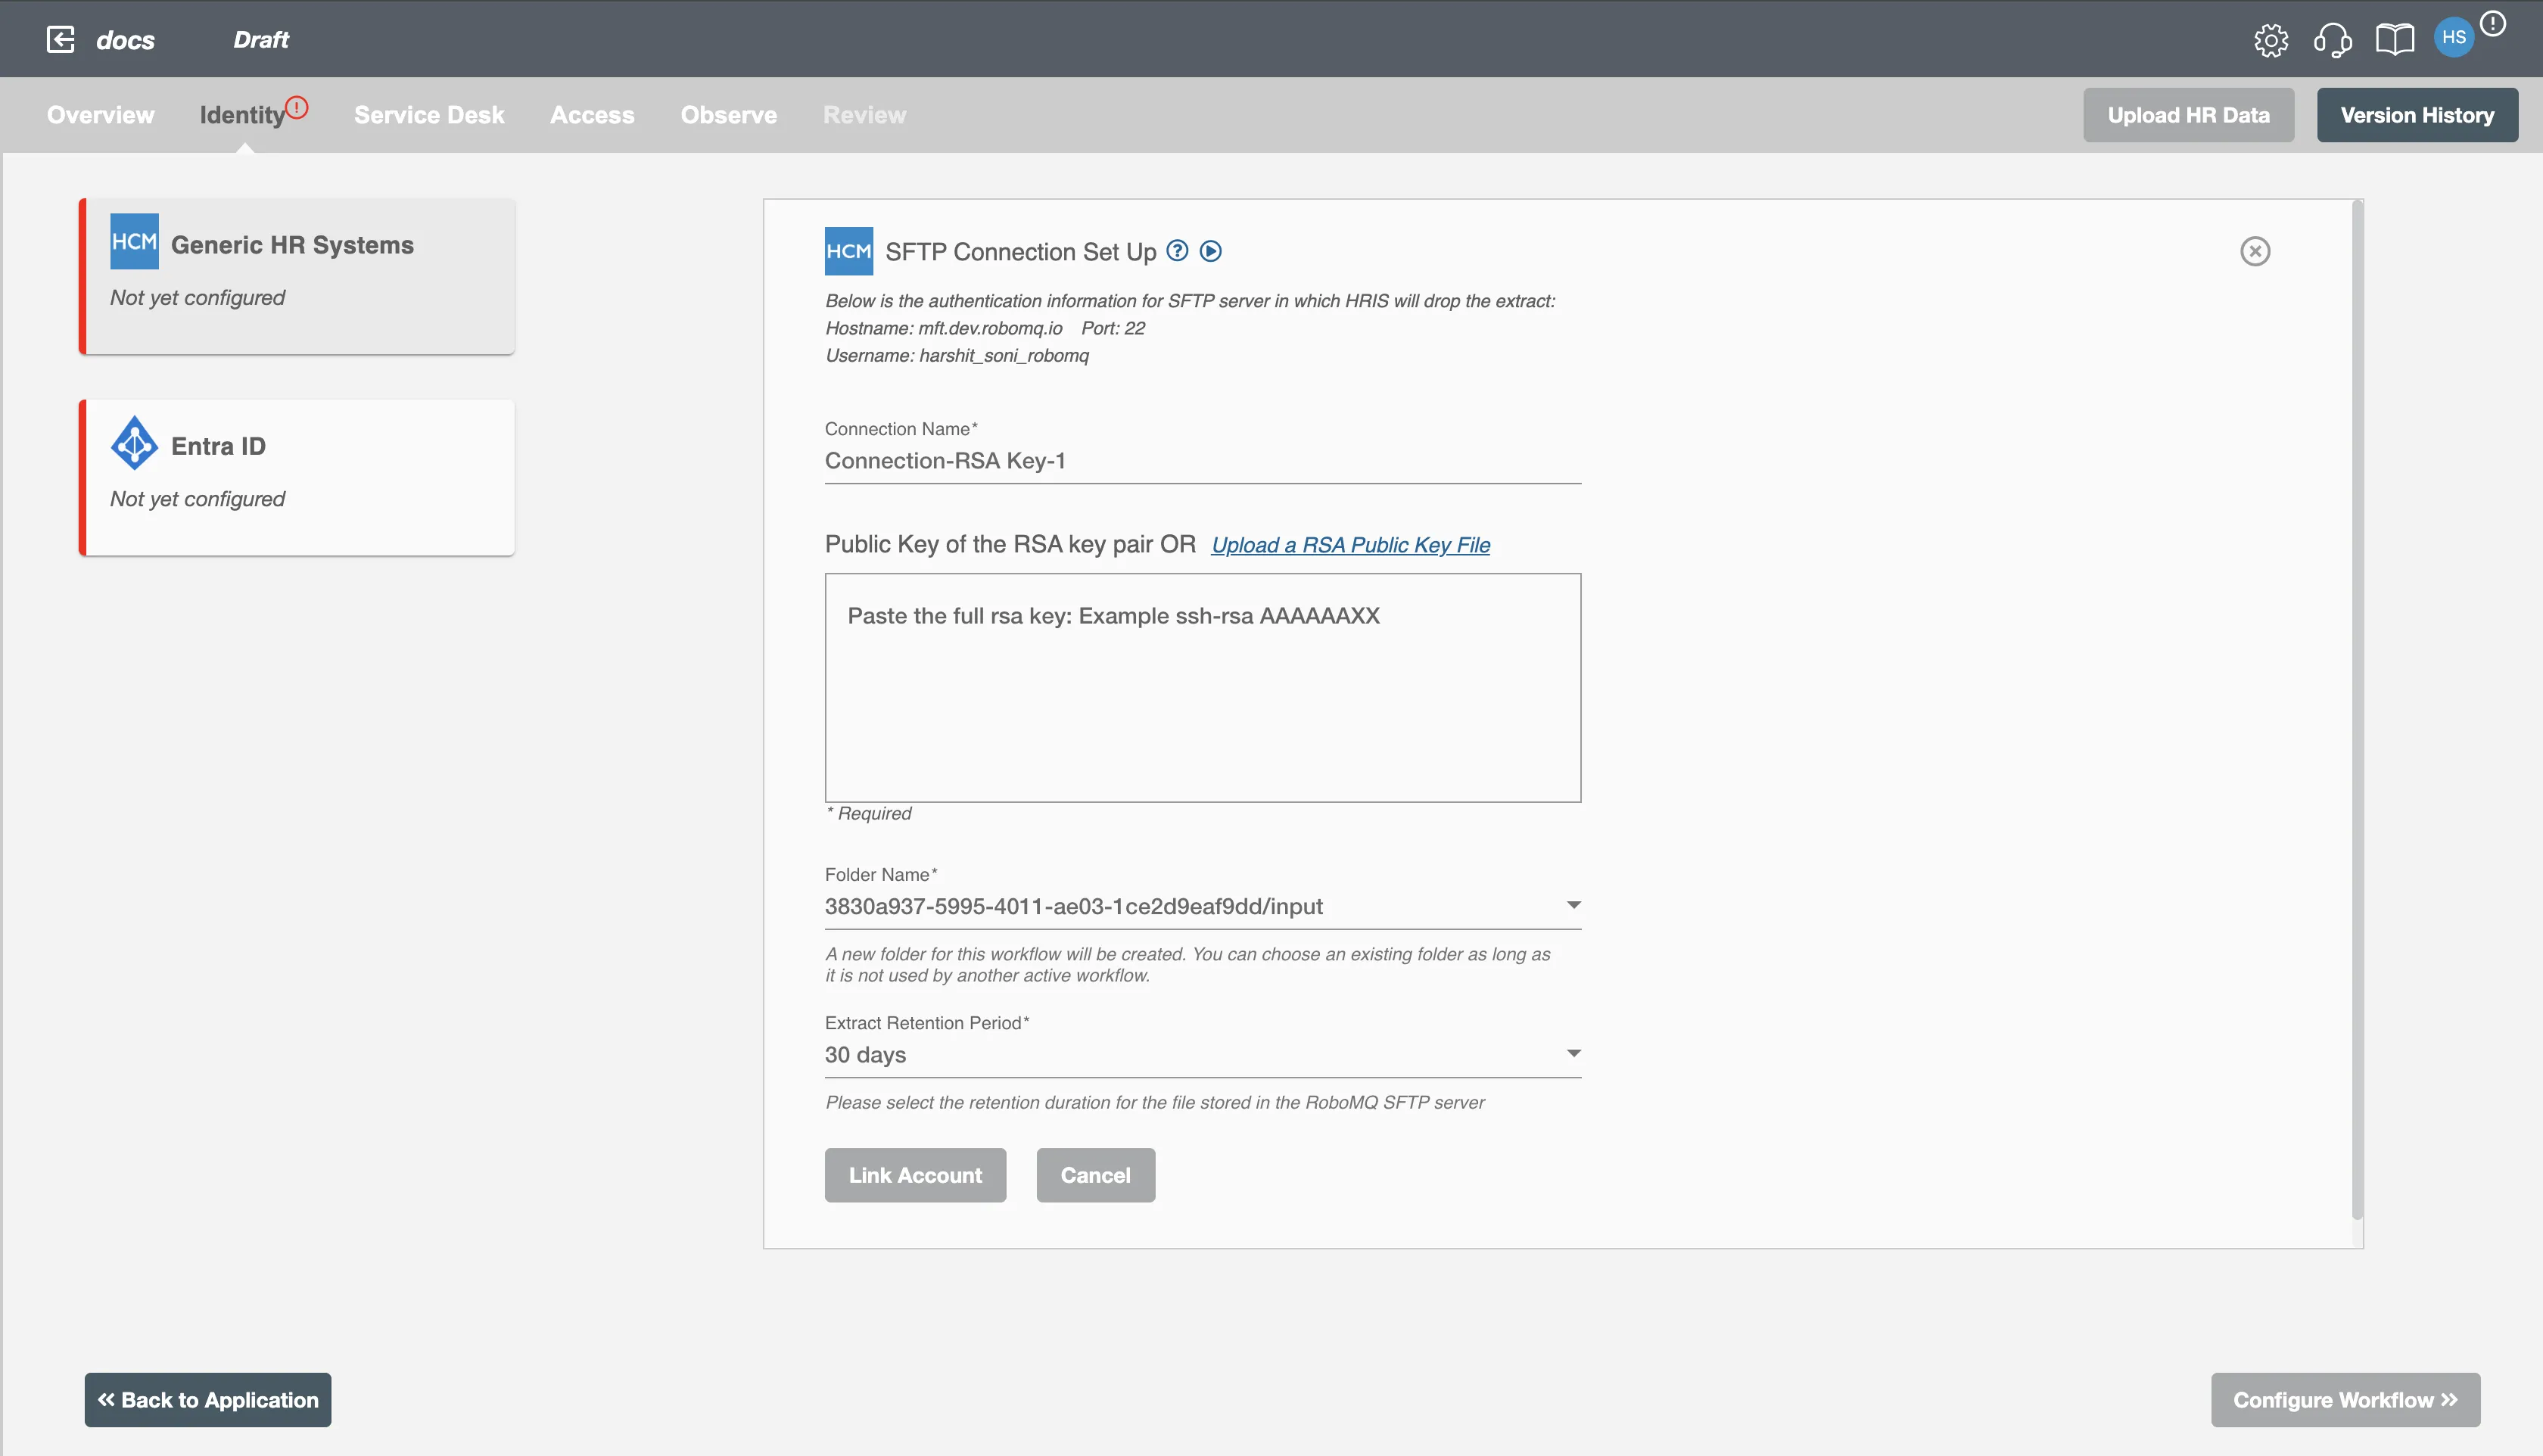
Connections Overview
To allow Hire2Retire to get data from your HR System and to perform sync operations to your on-premise or Entra ID, you will need to grant permissions to Hire2Retire for access to each system.
There are two connection tabs, one for the HR system and other for the Identity Manager system.
The top connection tab is for pulling employee data from your HR System. Hire2Retire supports either REST API or SFTP connection options depending on the HR system.
The bottom connection tab is to access one of these types of Identity Manager systems:
- On-Premise Active Directory: LDAP connection
- On-Premise / Entra ID Hybrid Active Directory: LDAP connection
- Entra ID: OAuth to Microsoft API
- Okta Directory: OAuth to Okta Directory API
Upon clicking the connection tab, you will see a page open to add a connection. If you already have connections, then it will be shown in the available connection list. If a particular connection is selected from the available connection list or a new connection is added, then that connection will become the selected connection. To know the details of your selected and available connection you can click on the arrow provided to the left of your connection. Once you have successfully configured both the connections you can continue with the Design section to configure the rest of the workflow.
Connections for Different Applications
Find the instructions to set up connections for various applications