Sending Mail through Outlook
Hire2Retire supports sending emails through your Outlook account using an OAuth-based authentication mechanism.
Service Provider Application
Outlook application on Hire2retire uses OAuth authorization. By linking your Outlook account with Hire2Retire, you authorize the RoboMQ application to send emails on your behalf. During setup, a consent window is displayed where you grant the required permissions. RoboMQ needs the following permissions on your account to provide a seamless integration experience
| Scopes | Explanation |
|---|---|
| Mail.Send | To send emails on your behalf |
| offline_access | With the offline_access scope, the app can receive refresh tokens from the Microsoft identity platform token endpoint |
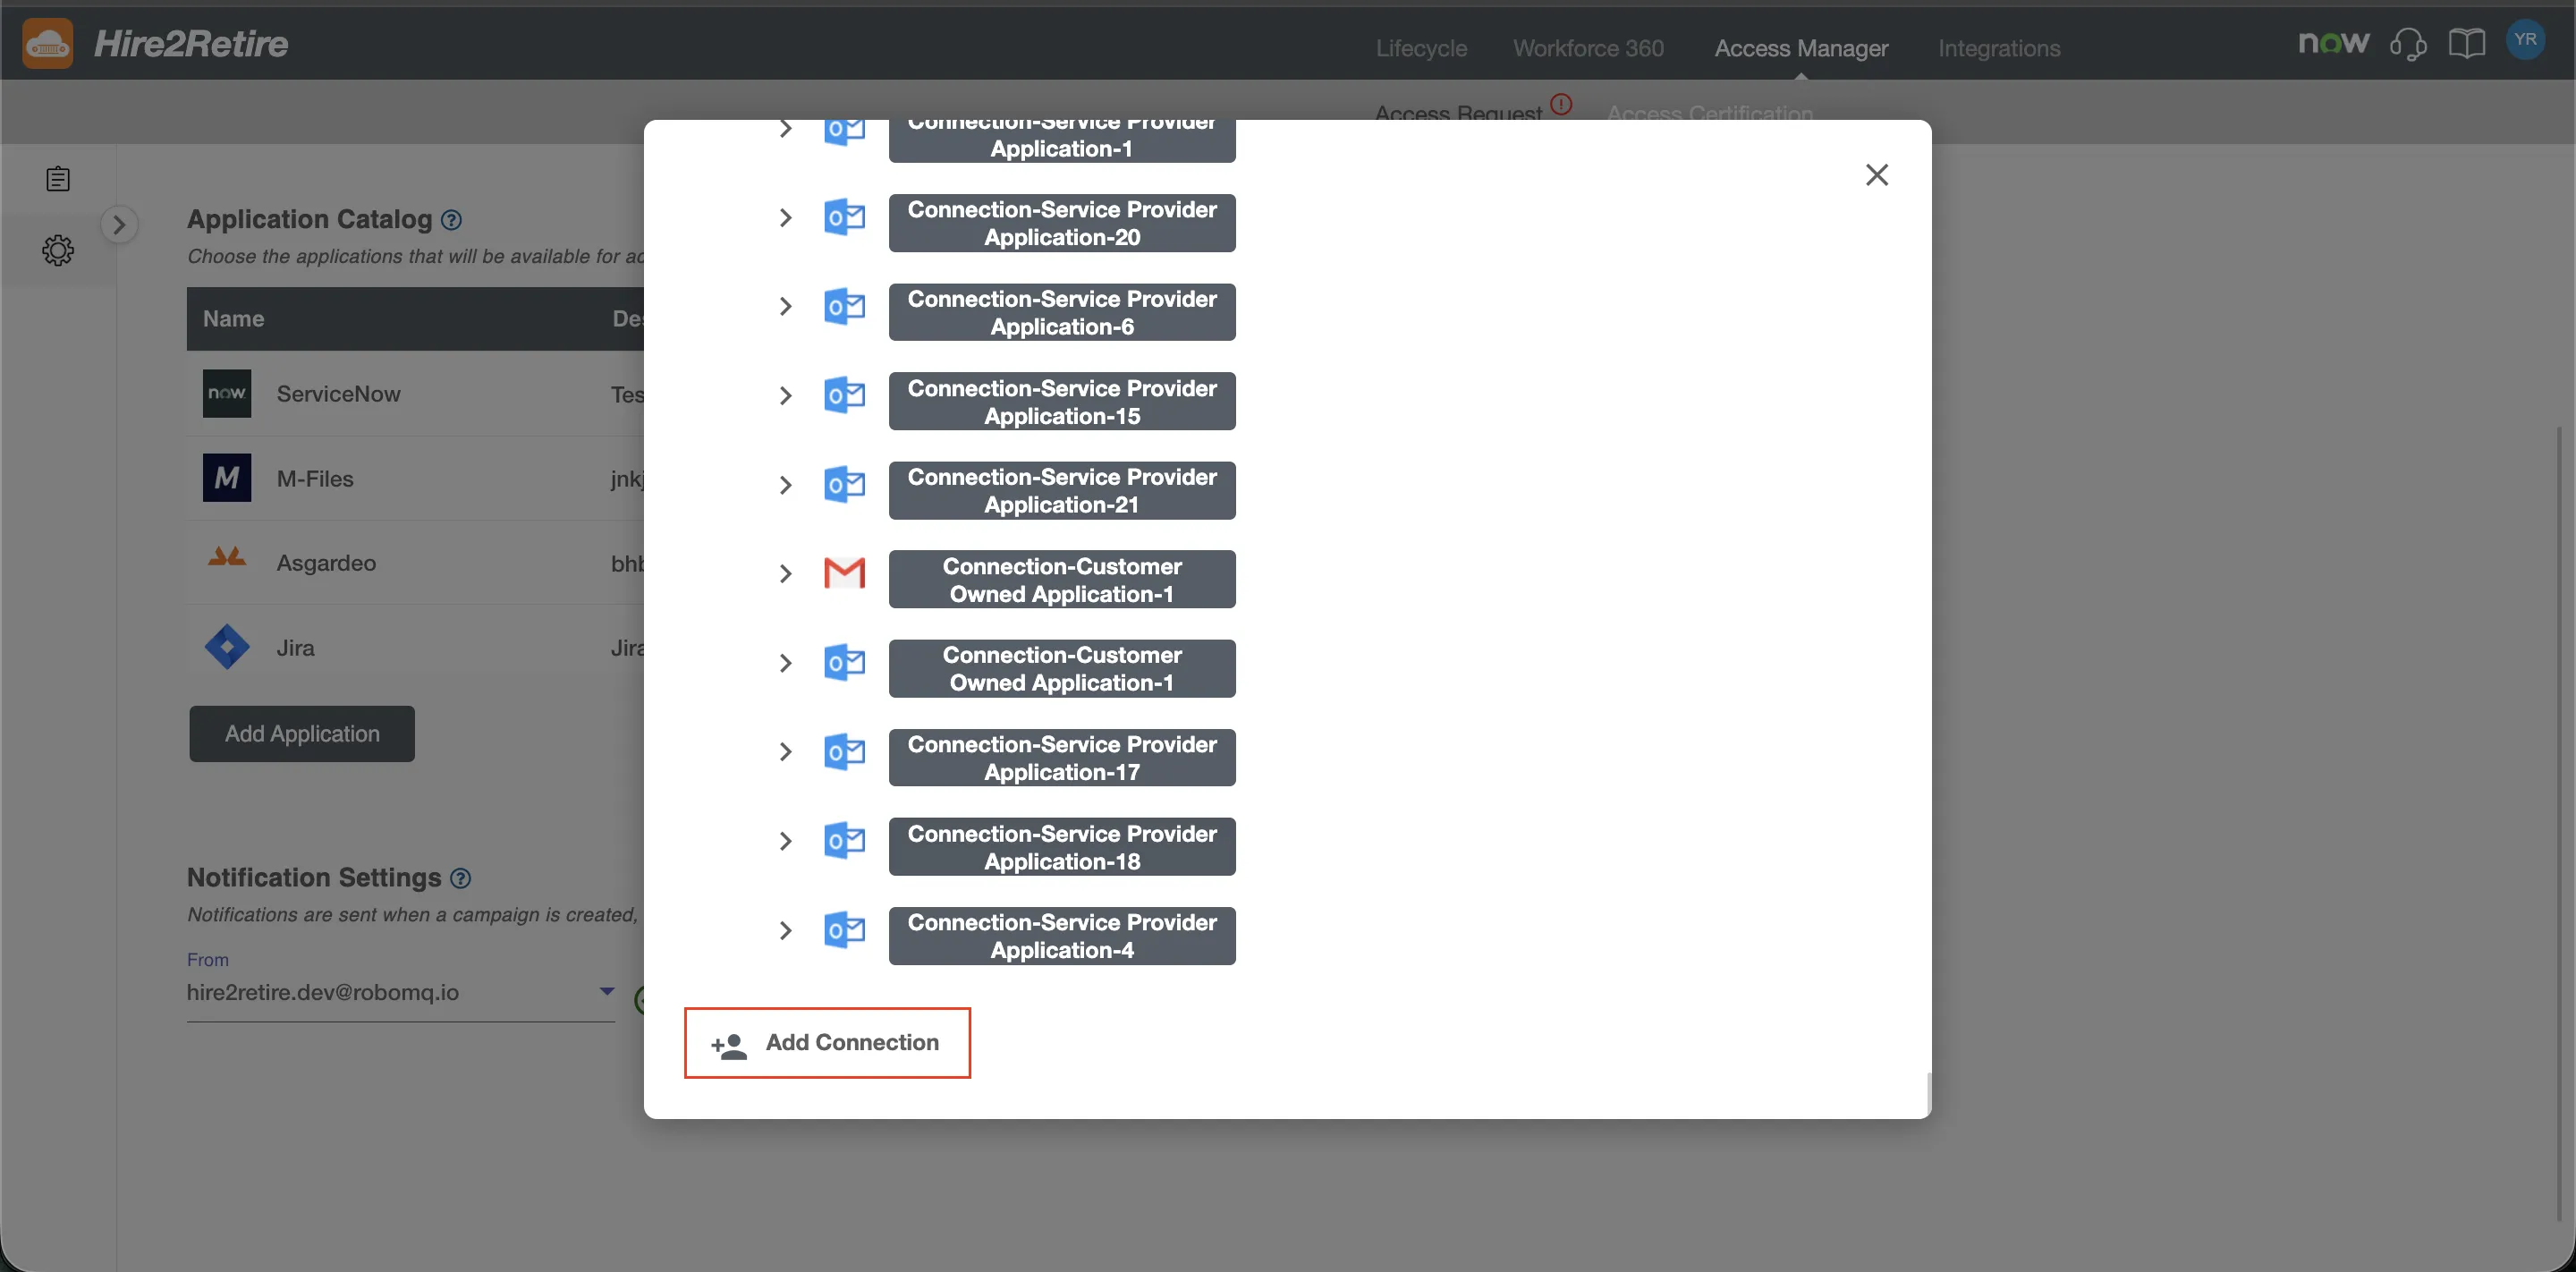
Create a Connection
Before using Outlook services on Hire2retire, ensure you have an Outlook account with an active mailbox.
-
Click the Link account to begin authentication. You will be redirected to the Outlook sign-in page.
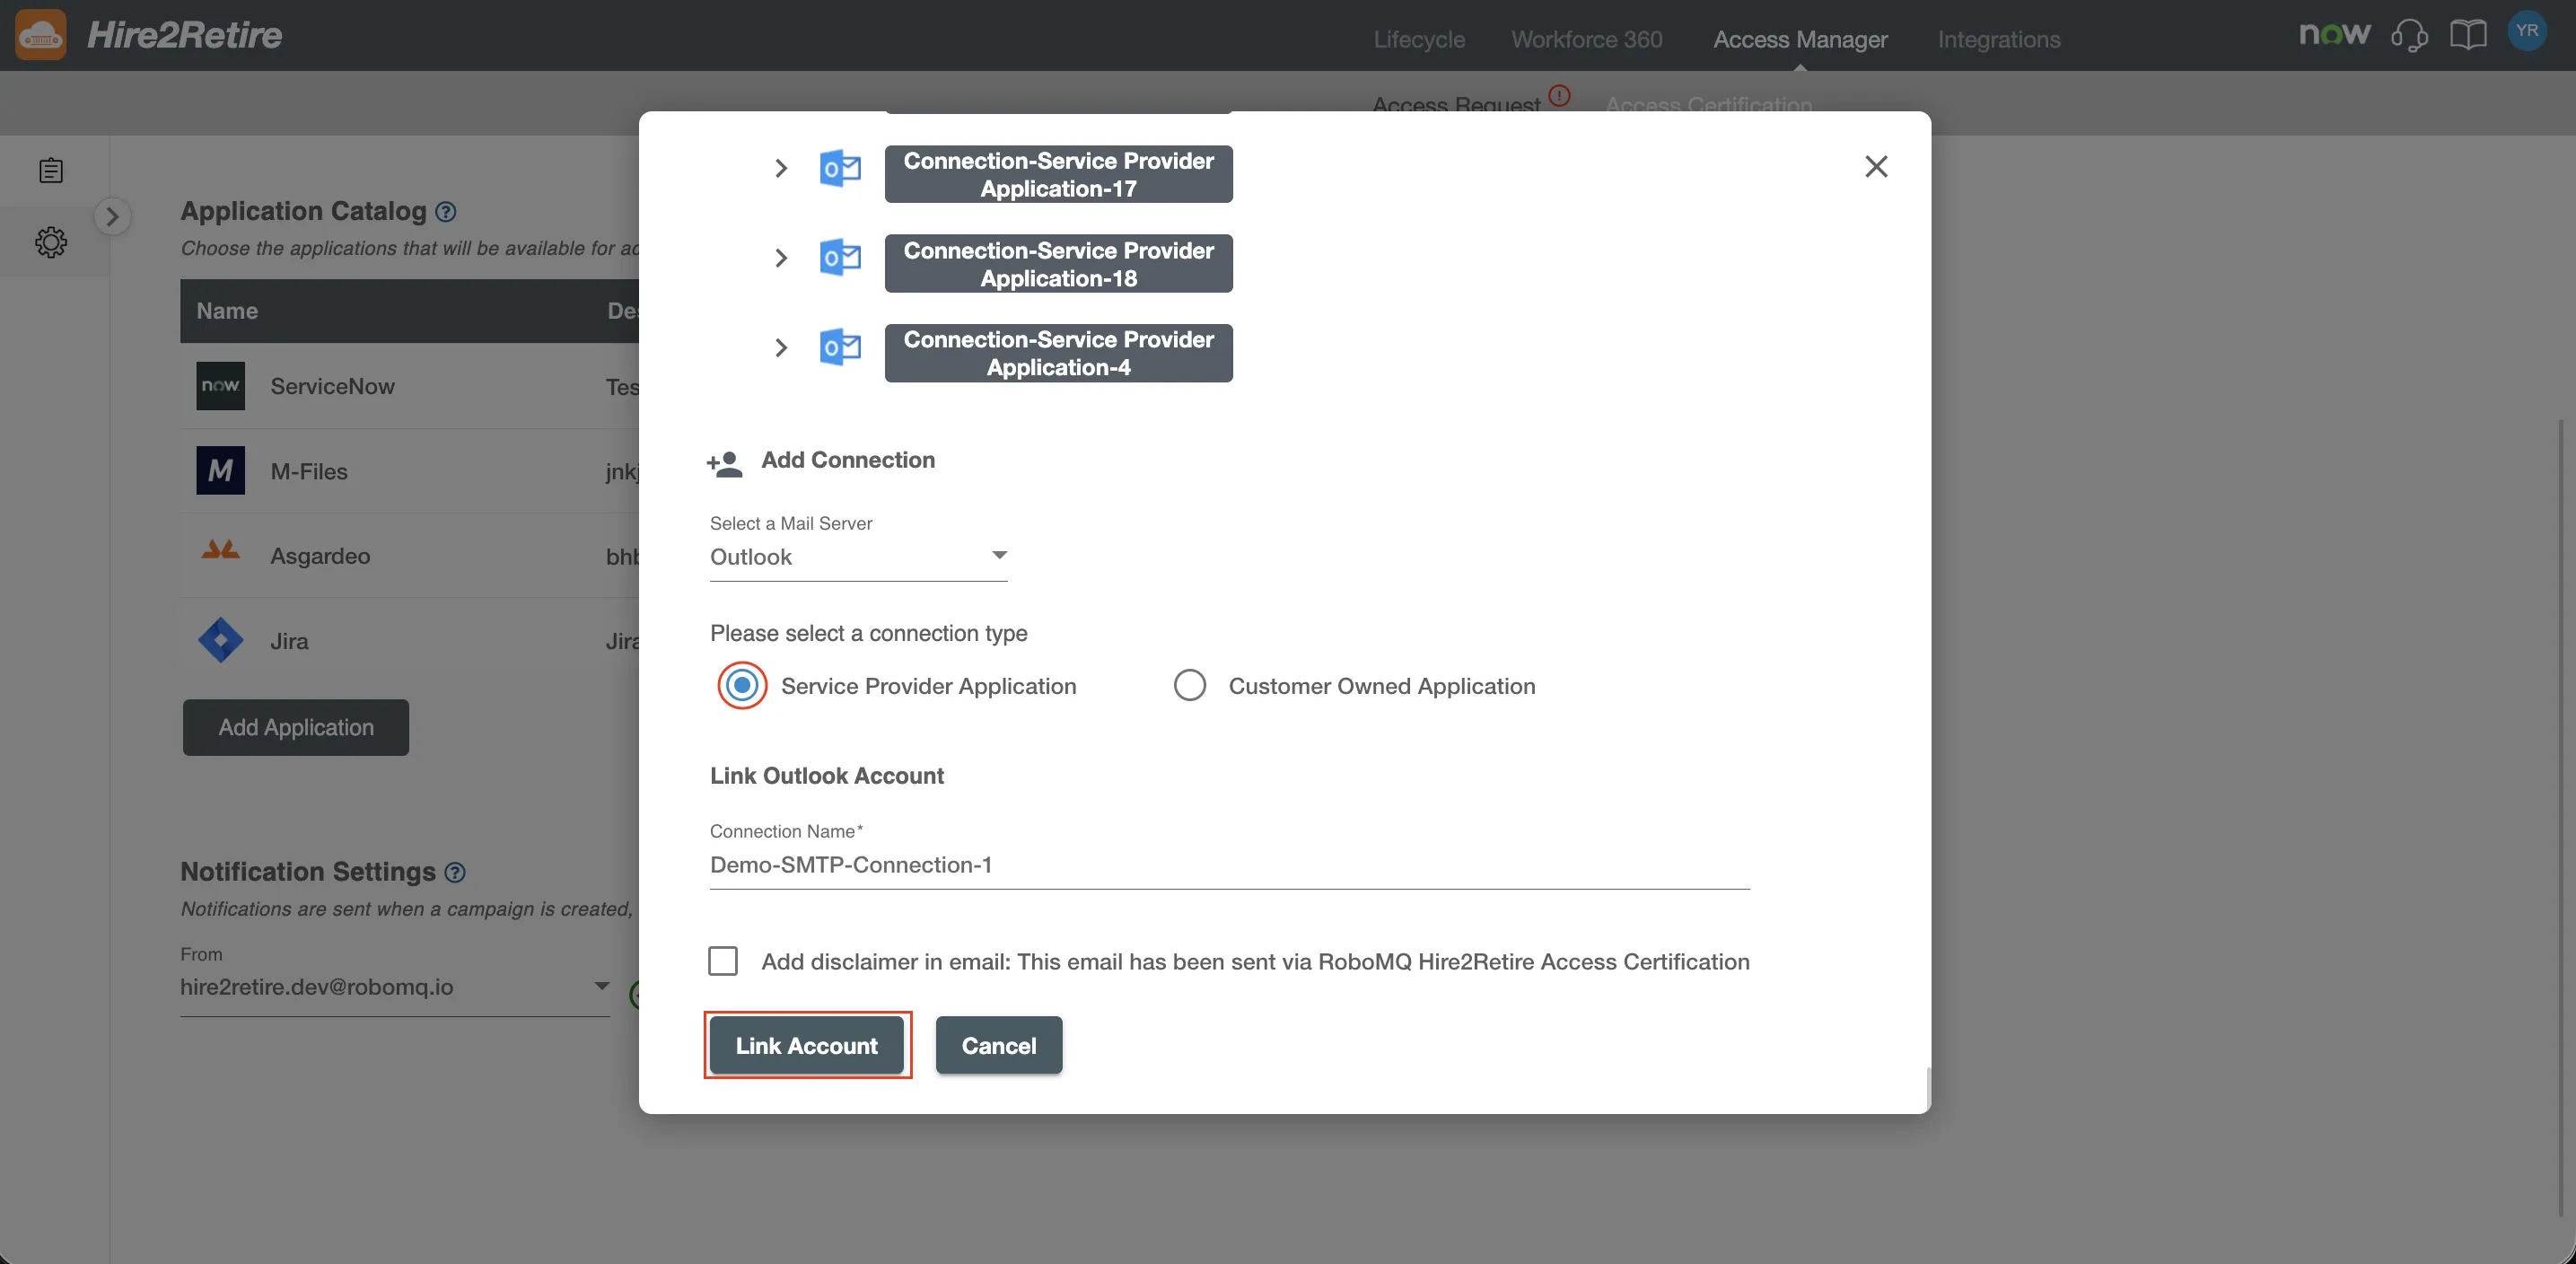 Fig.2 Service Provider Connection
-
After signing in, Outlook displays a permissions consent page. Review and approve the permissions required by Hire2Retire to send emails on your behalf.
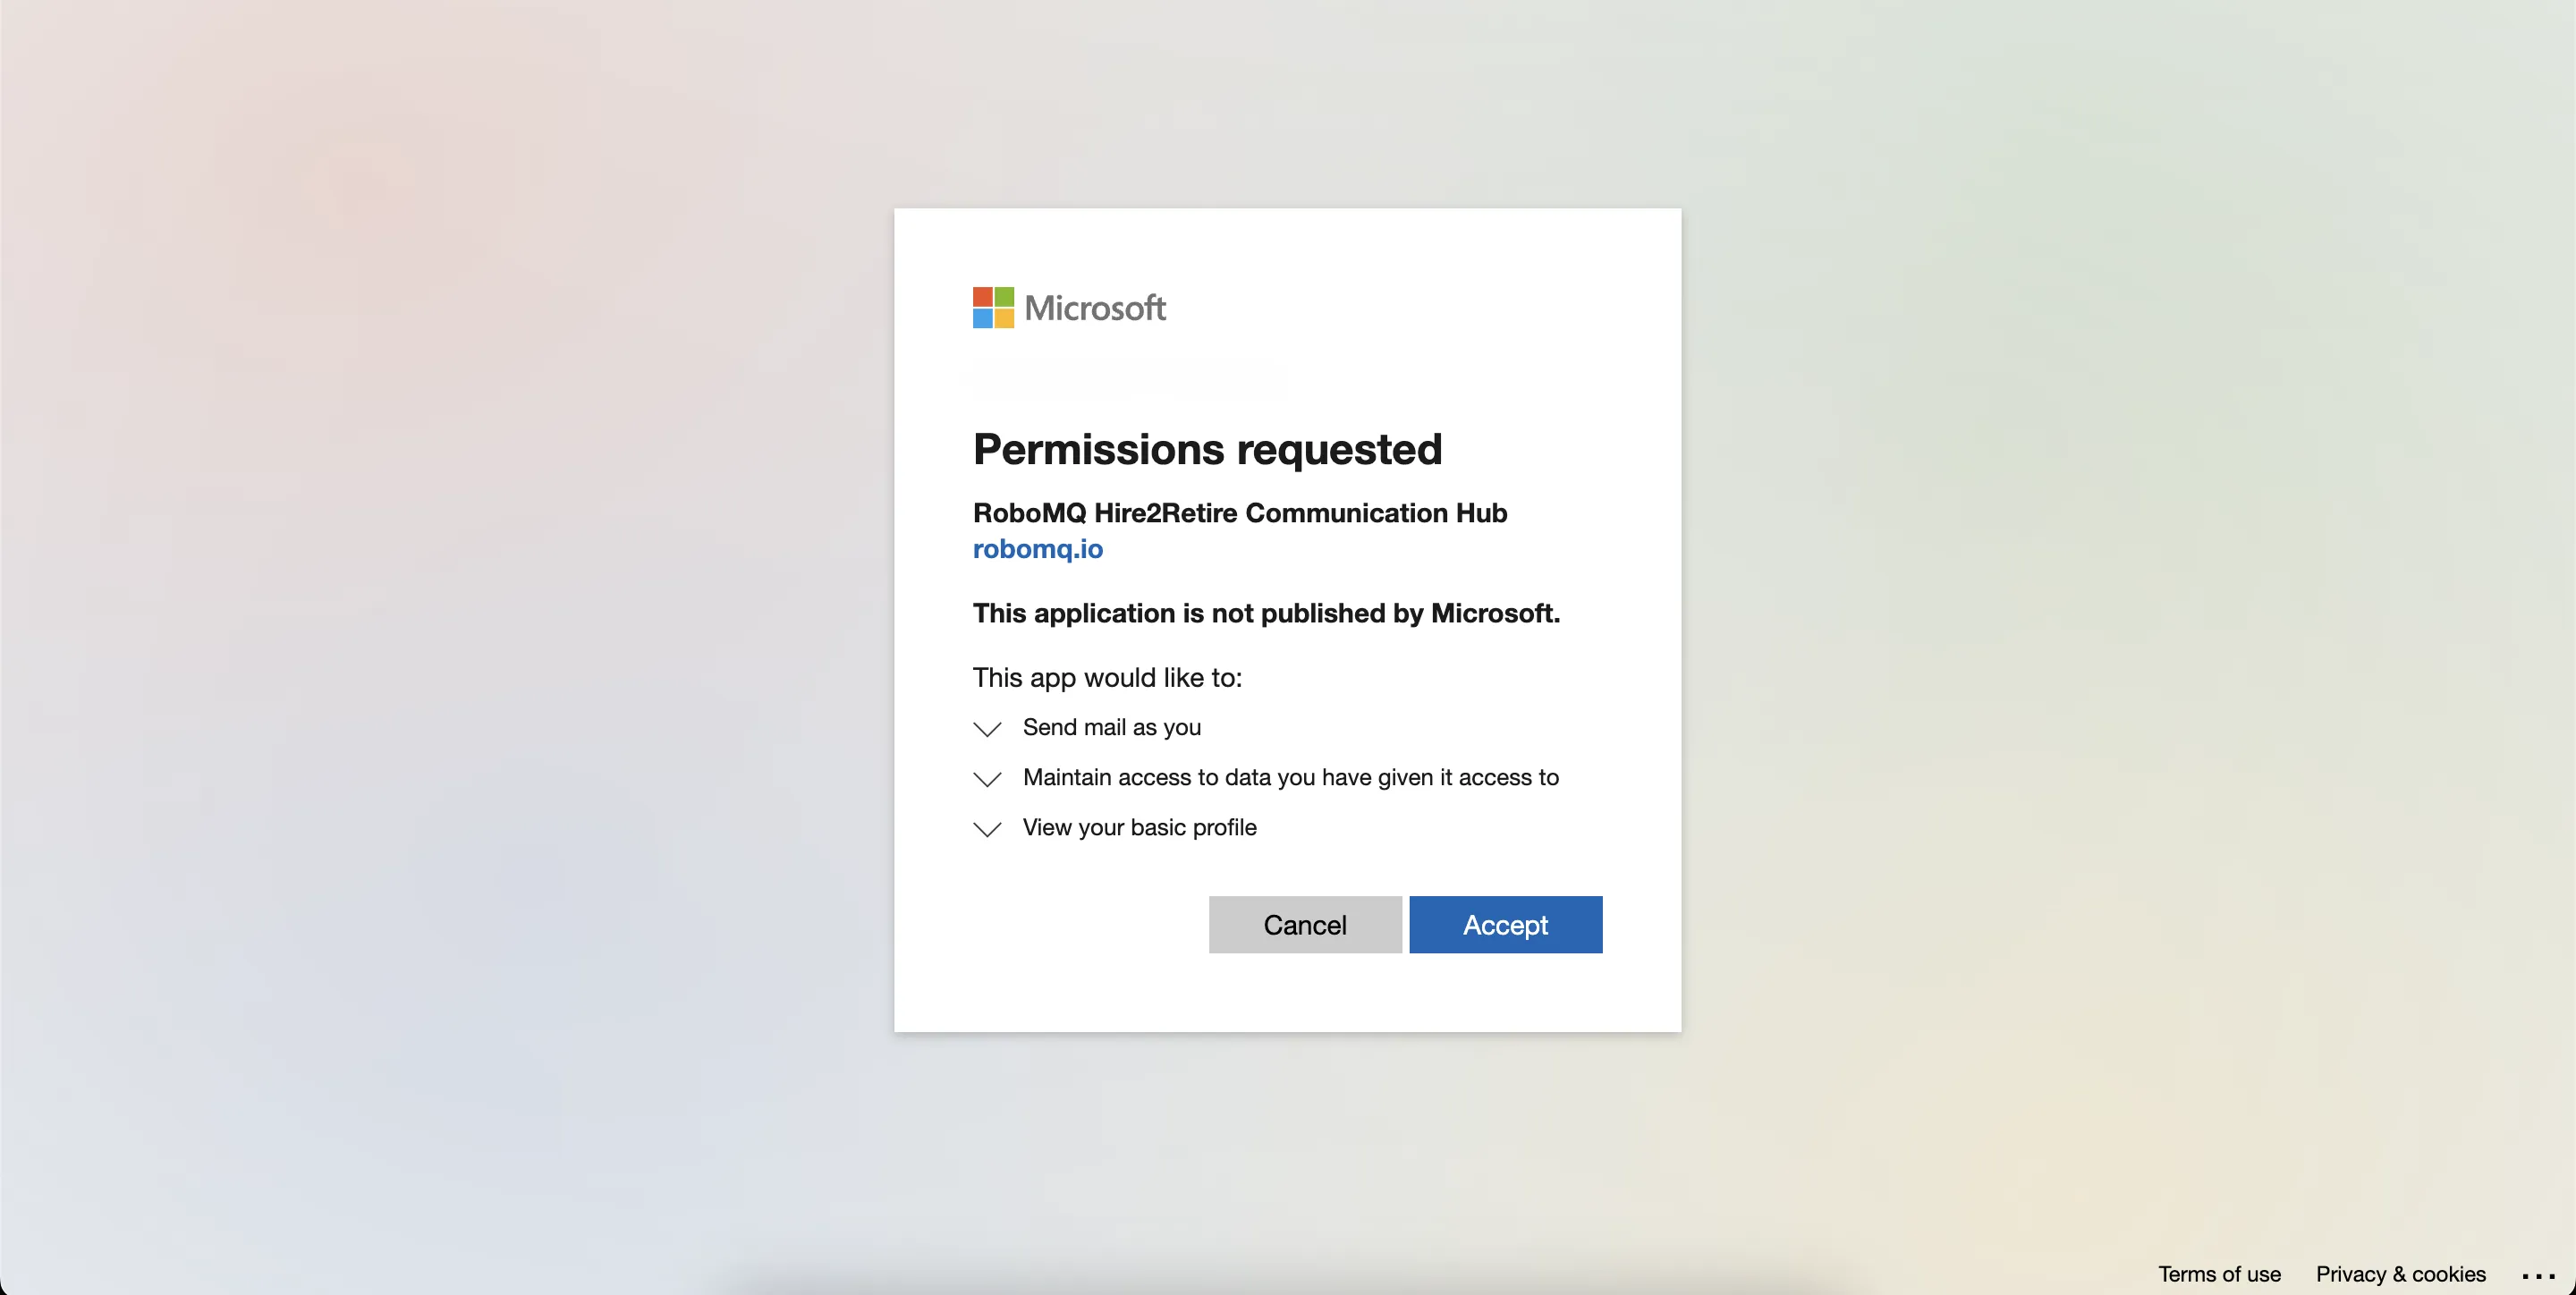 Fig.3 Consent Screen
-
After granting consent, you are redirected back to Hire2Retire. The redirection confirms that the connection has been successfully established.
Customer Owned Application
Hire2Retire requires users to sign in when configuring this connection. You must register an application in your Entra ID tenant and grant the permissions required by Hire2Retire. Hire2Retire requires the following details to create a connection.
Application Registration
Ensure you have an O365 subscription or access to the Entra ID portal.
-
Sign in to the Entra ID portal
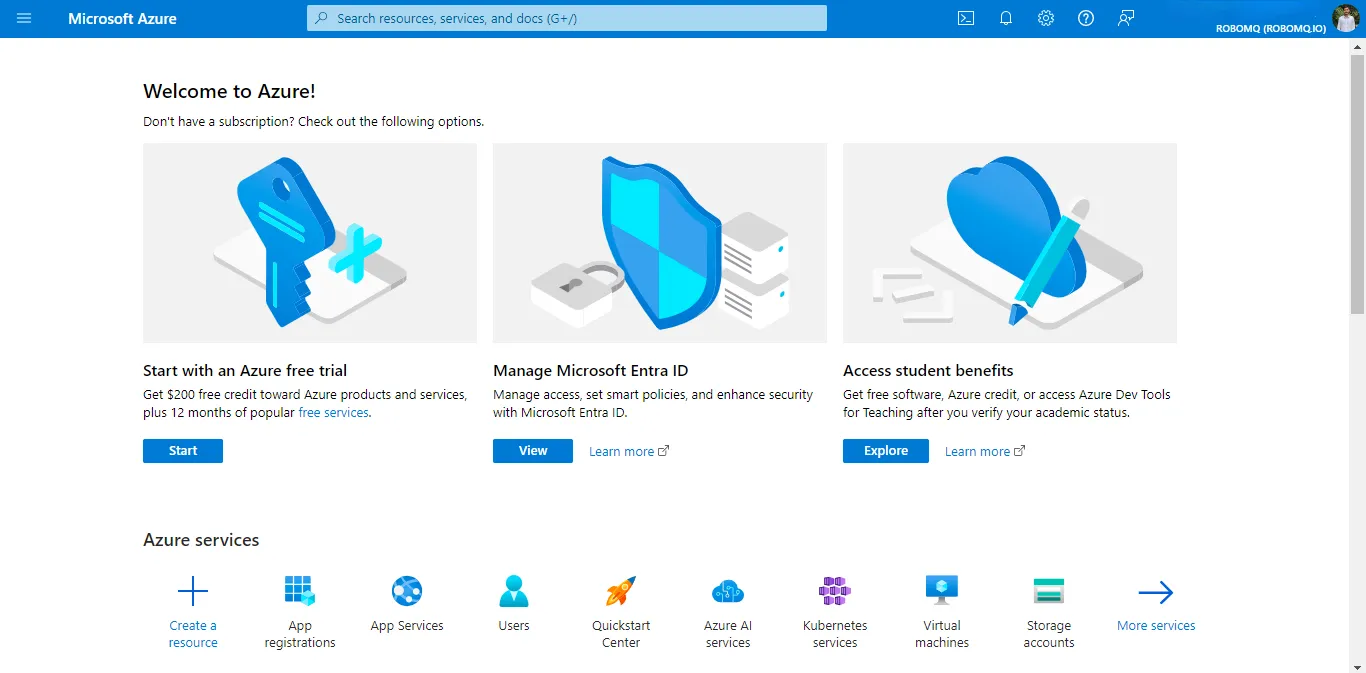 Fig.4 Entra ID Portal
-
Navigate to
App registrationsand selectNew registration. -
Enter a display name for your application. In the redirect URI field, enter
https://hire2retire.robomq.io/api/auth/callback/Outlook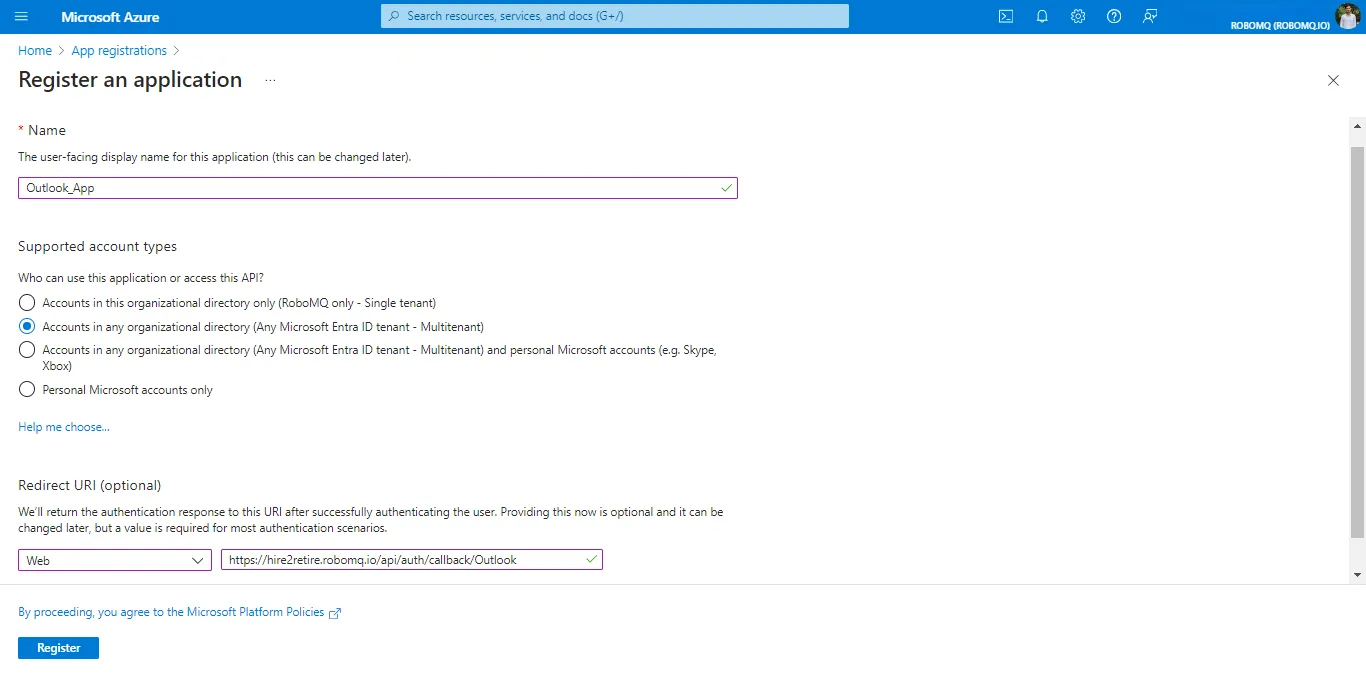 Fig.5 App Registration
-
Specify who can use the application in supported account types.
-
Click Register to complete the initial app registration.
Credentials
Credentials allow your application to authenticate securely using a client secret. With it, the application will authenticate itself at runtime.
- Tenant ID - Tenant ID
- Client ID - Application ID
- Client Secret - A string value your app can use in place of a certificate to authenticate itself.
To get the credentials for your application, follow these steps:
-
To get the client id and tenant id of your application, click on the
Overviewtab, and you will find details in theEssentialssection.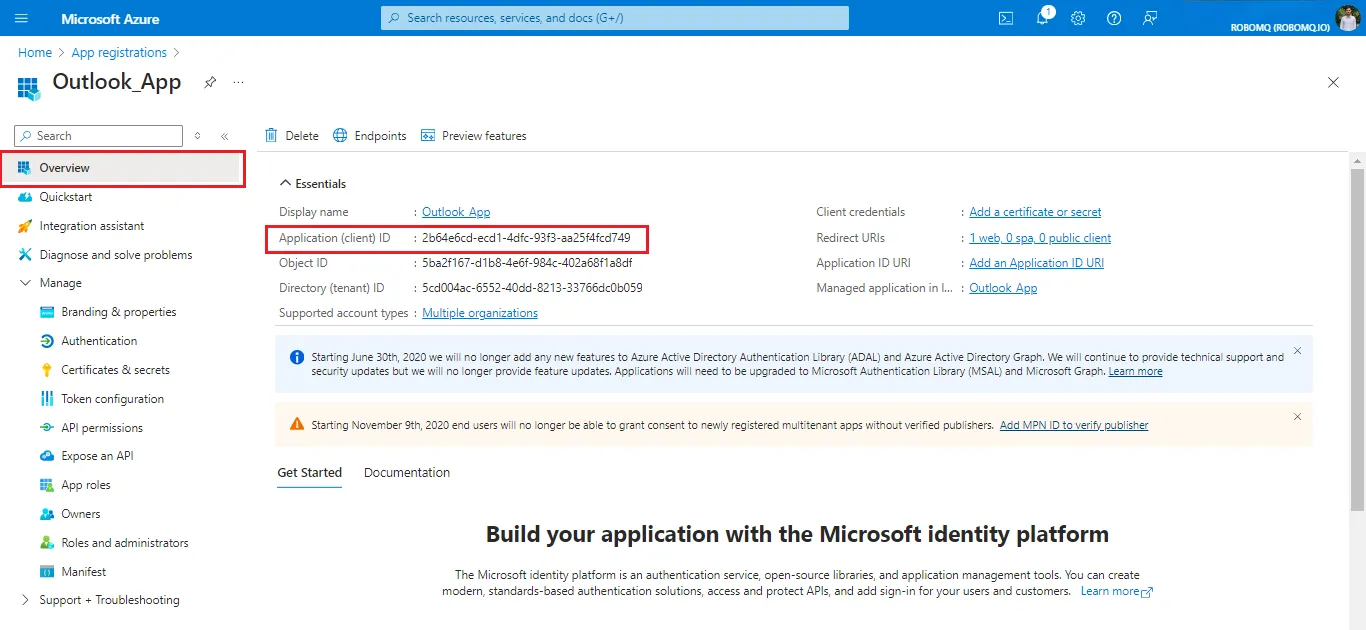 Fig.6 Geting Client ID and Tenant ID
-
To create a client secret, go to the
Managesection in the navigation panel. Click onCertificates & Secrets.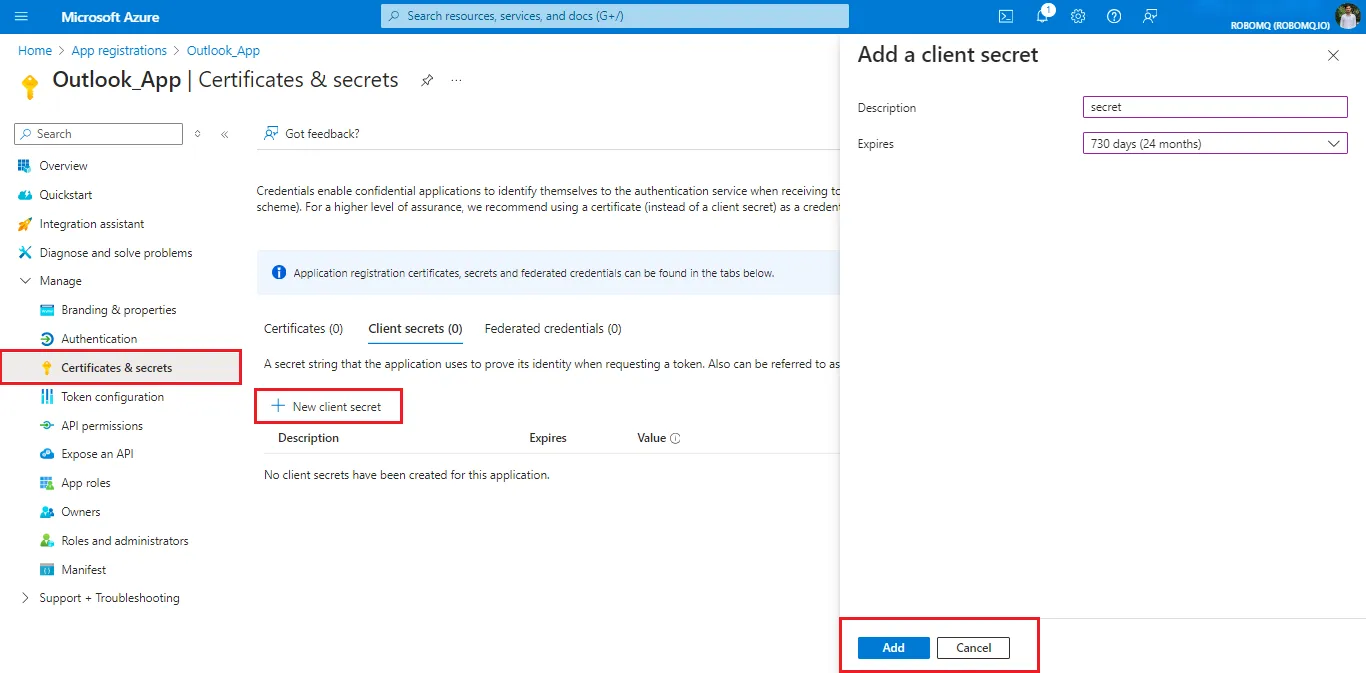 Fig.7 Geting Client Secret
-
After creating the secret, copy and store the value securely. The secret value is shown only once and will be masked after leaving or refreshing the page, so save this value somewhere safe.
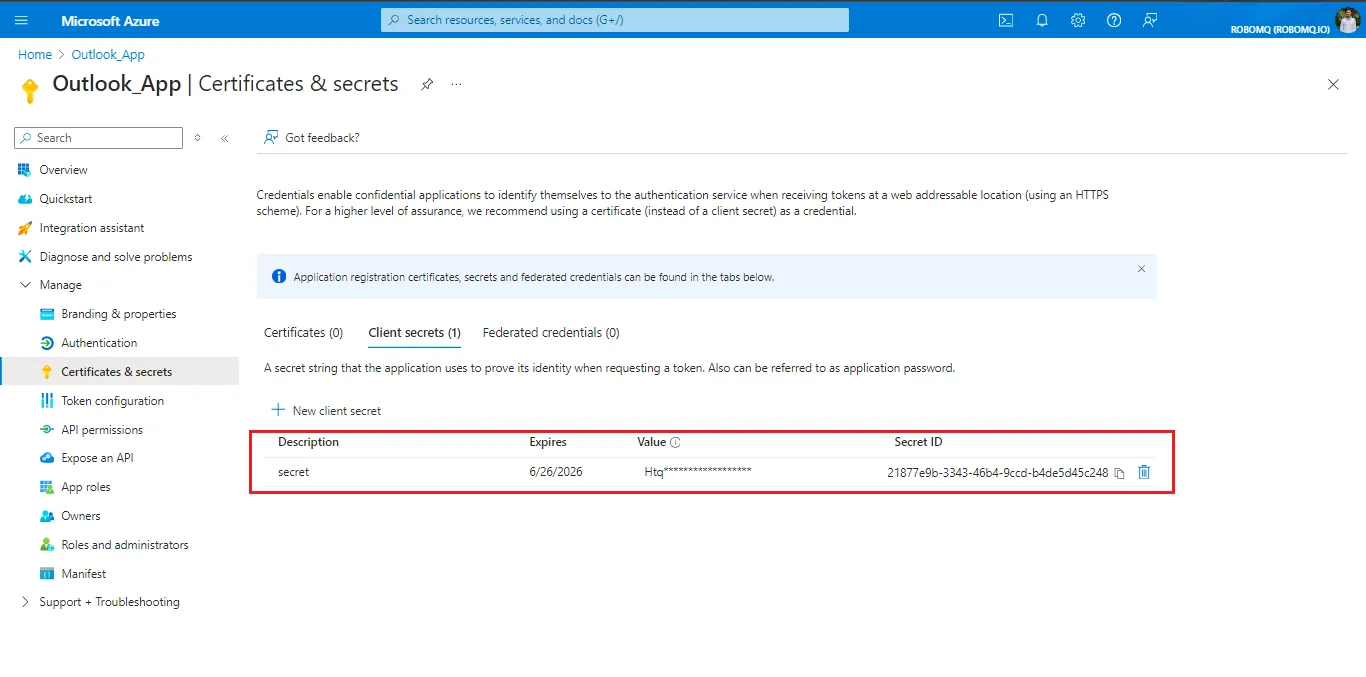 Fig.8 Client Secret Value
It is recommended to set the client secret expiration time to 730 days(24 months).
Application Permissions
Set up application permissions for any application that needs to authenticate itself after the user's consent. To authorize a registered application to access the Microsoft Graph API, navigate to API permissions > Add a permission > Microsoft APIs > Microsoft Graph > Delegated permissions.
RoboMQ needs the following permissions on your registered application to provide a seamless connection experience:
| Scopes | Explanation |
|---|---|
| Mail.Send | To send emails on your behalf |
| offline_access | With the offline_access scope, the app can receive refresh tokens from the Microsoft identity platform token endpoint |
-
To set permissions, go to the manage blade, then
API permissions>Add a permission>Microsoft APIs, and then click on Microsoft Graph, then select delegated permissions.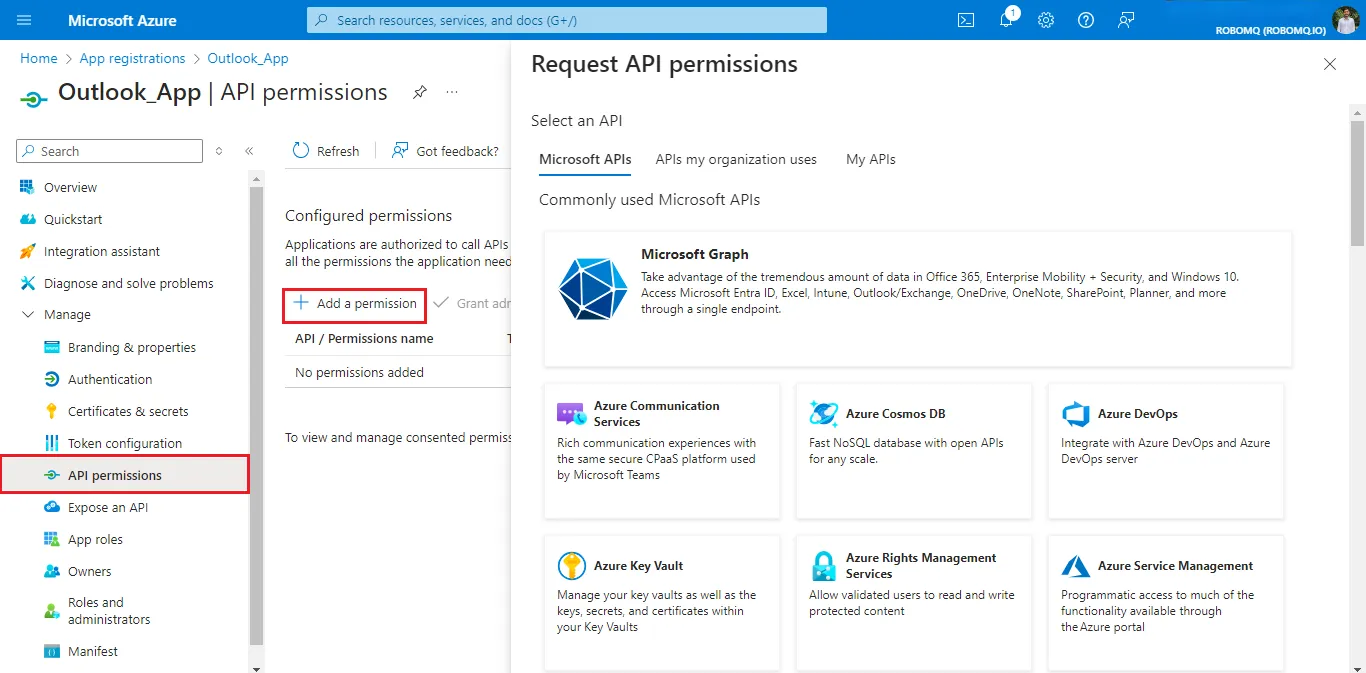 Fig.9 API Permissions
In the search bar, input
Mail.Sendand select the scope under the Mail section.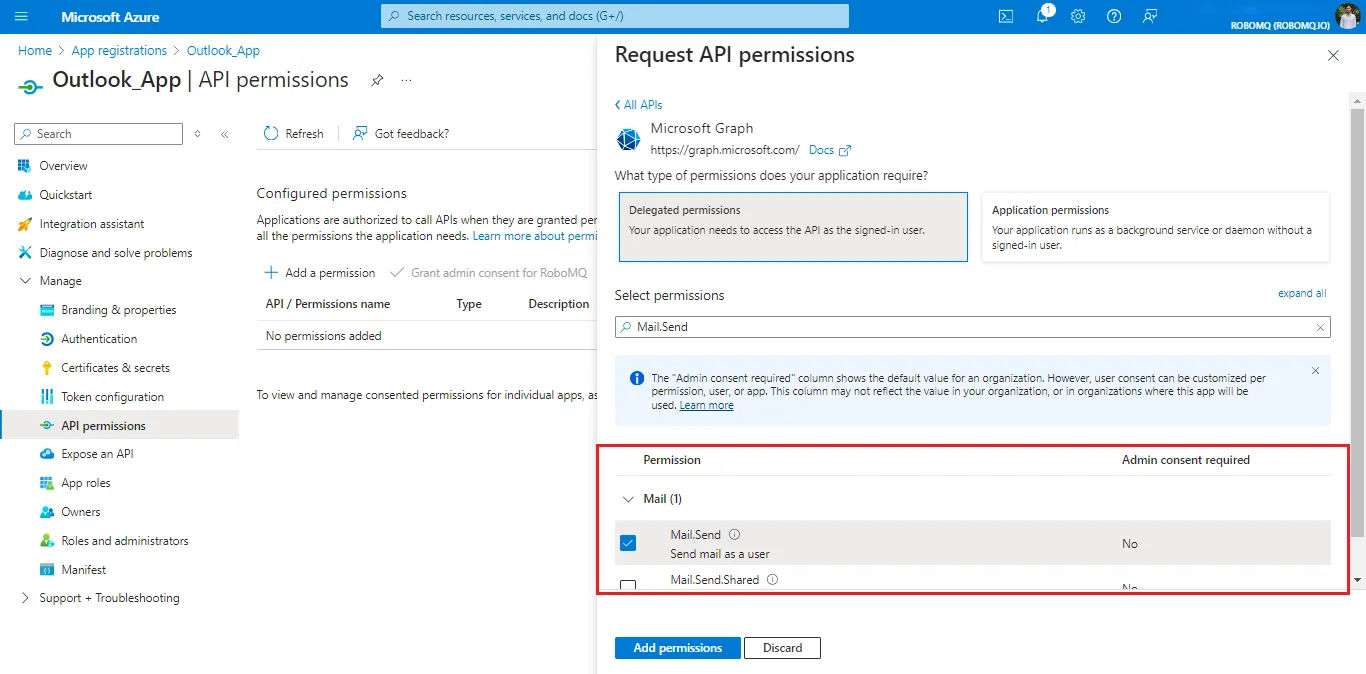 Fig.10 Mail.Send scope
Search for offline in the search bar and select the
offline_accessunder the OpenId section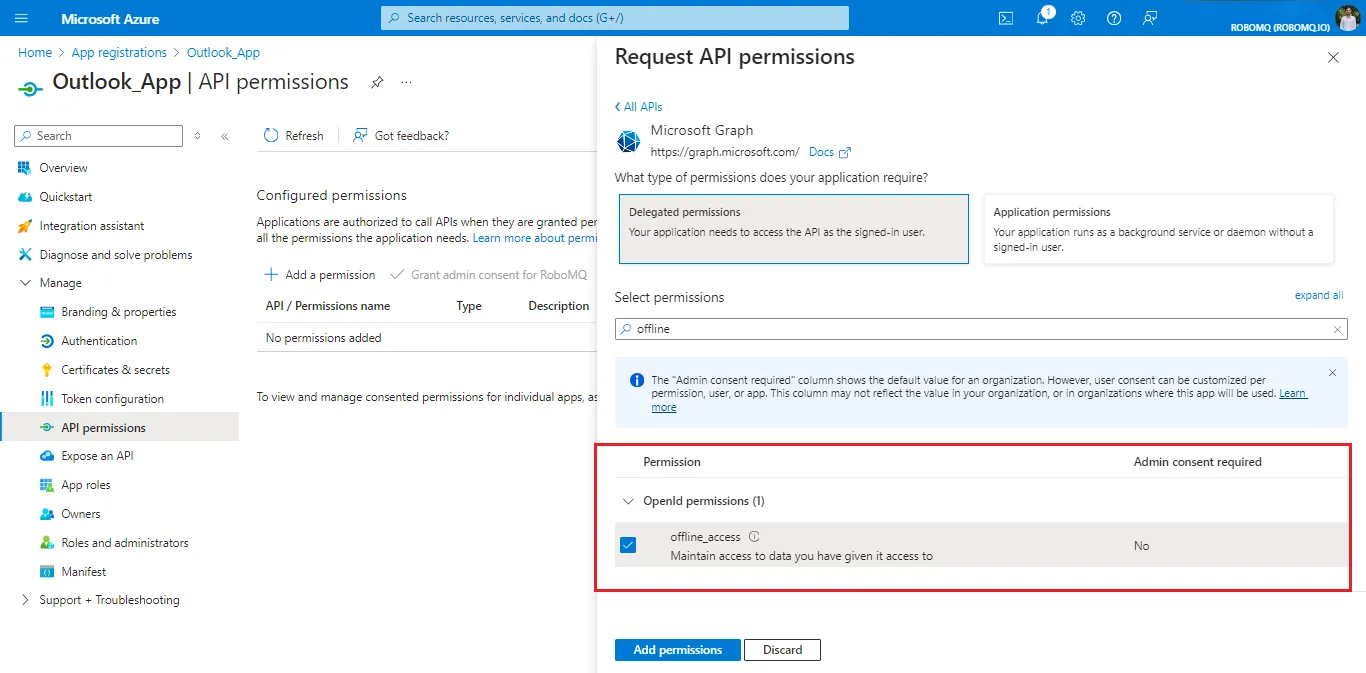 Fig.11 offline_access scope
Granting these permissions allows the application to authenticate users and send emails through Outlook on their behalf.
Create a Connection
To create a connection with your own instance of the Entra ID application, select the customer-owned application option.
-
To authenticate your account, select Entra ID Cloud Instance. Enter your tenant id, client id and client secret, and then click the
Link accountbutton, which will redirect you to the Outlook sign-in page.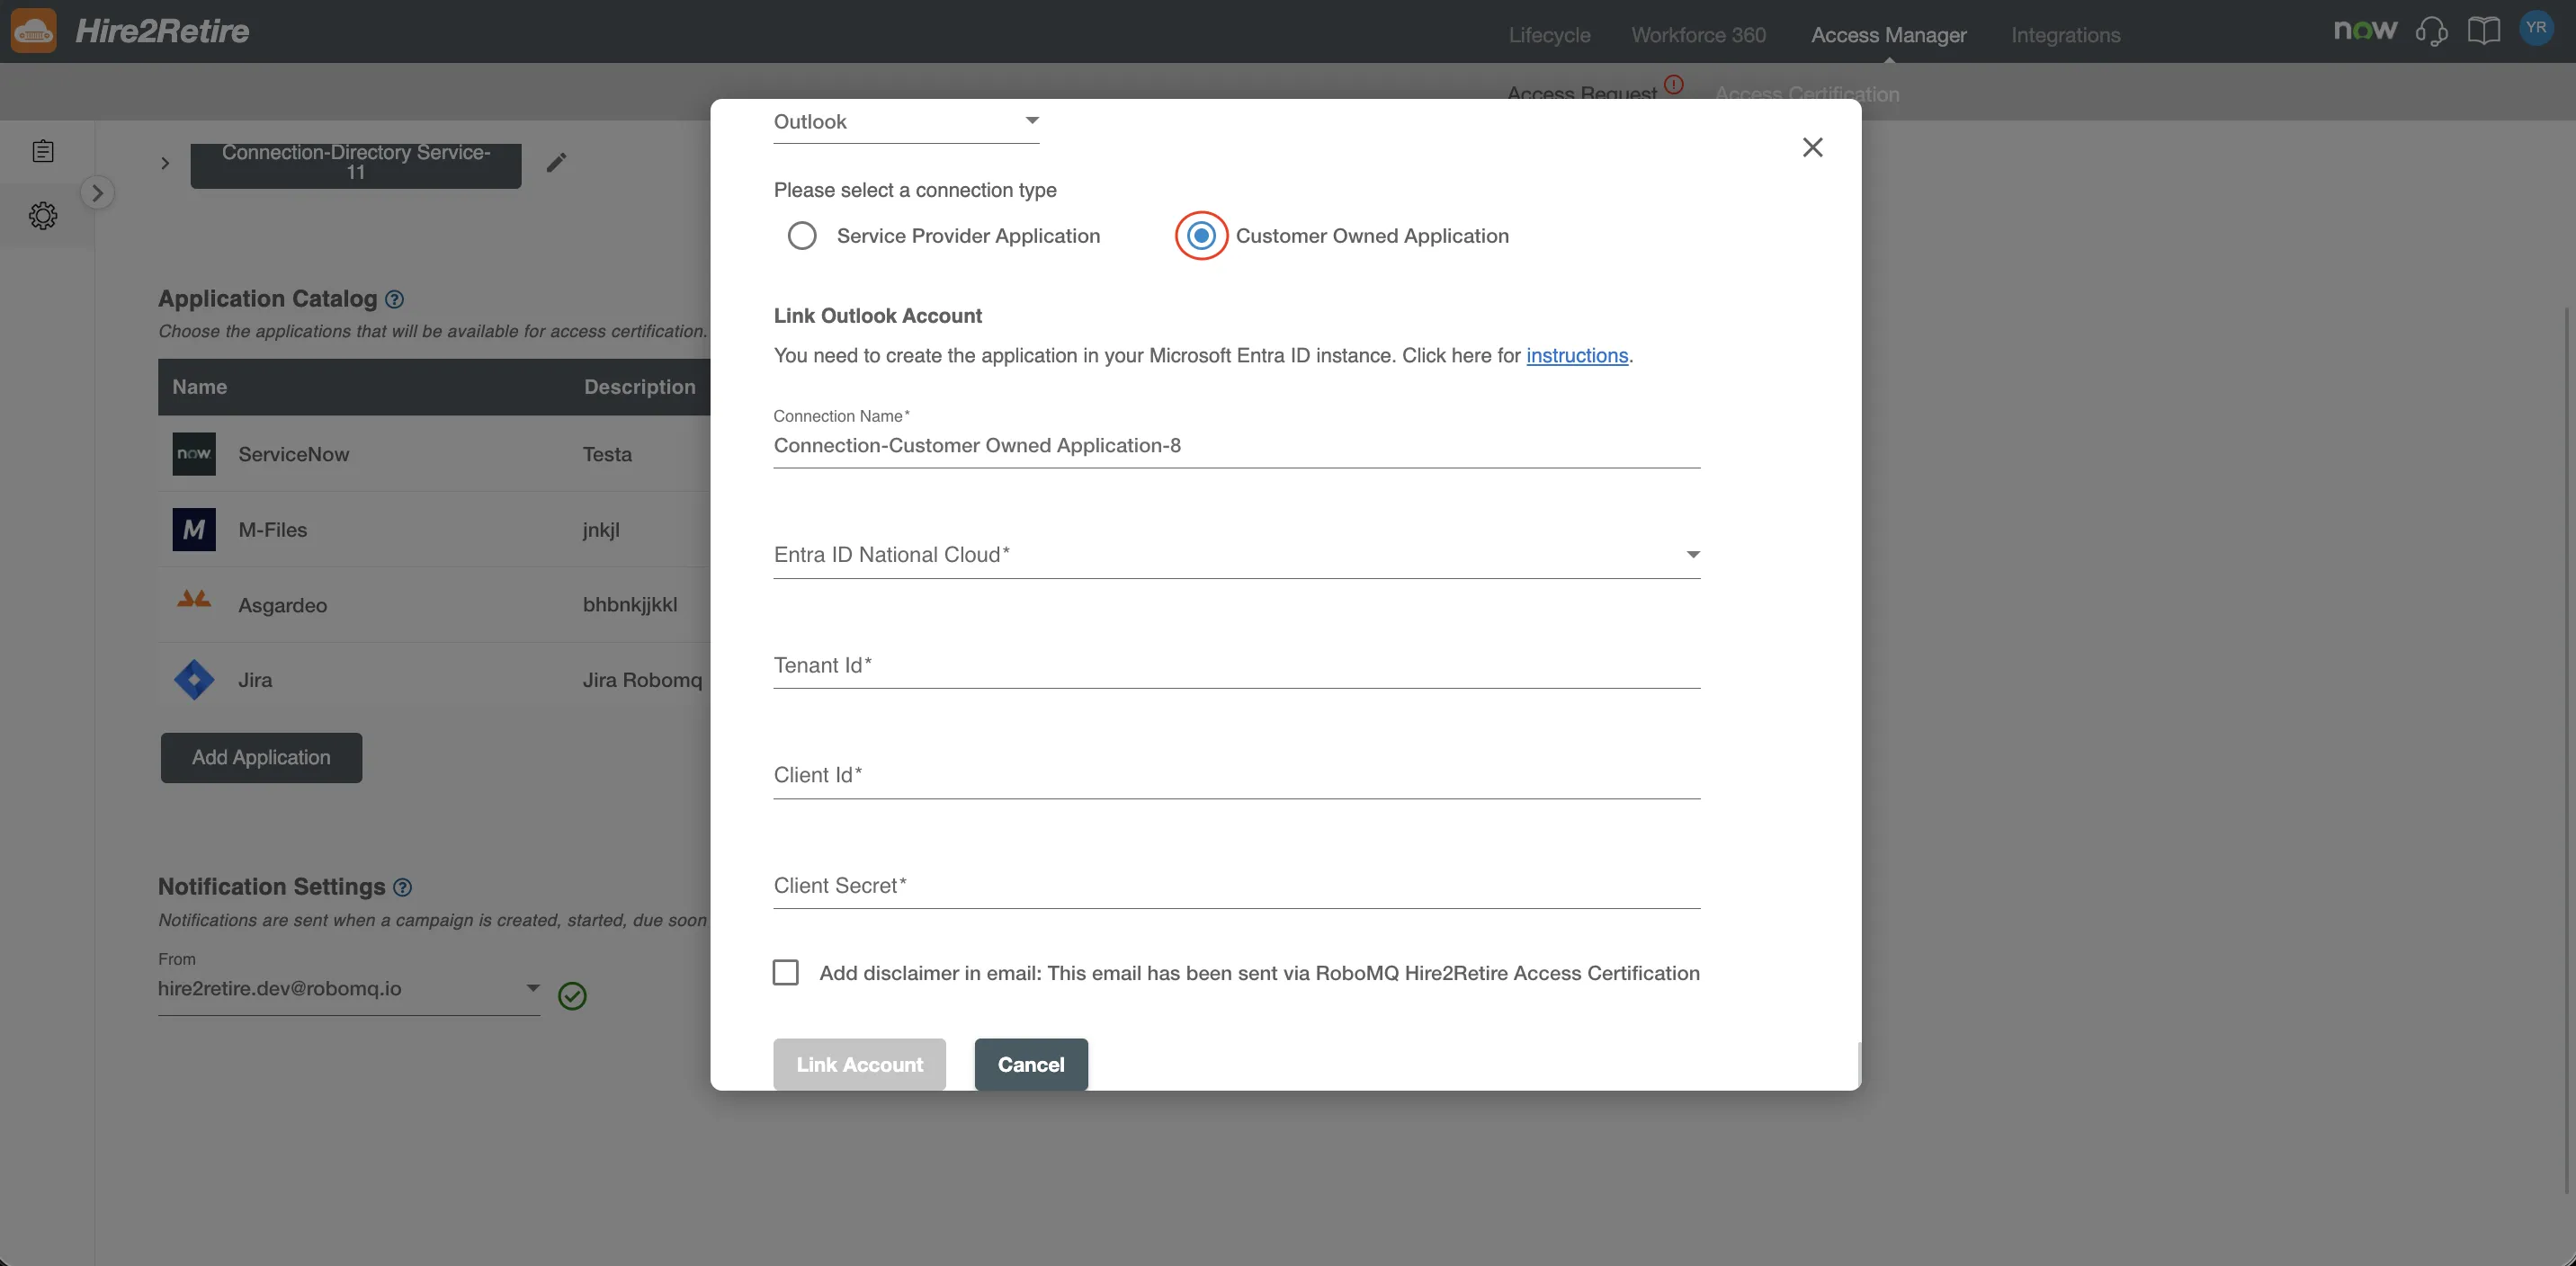 Fig.12 Customer Owned Application Connection
-
After successful sign-in into your customer-owned app and accepting the permissions required in the consent form, the connection will be secured, and the user will be redirected back to Hire2retire.