Install SSL Certificate in Active Directory
Hire2Retire communicates with Active Directory to execute Lifecycle events such as Hire, Rehire, Change of Role, Termination, and various Leaves. To ensure these lifecycle events are executed over a secure and encrypted channel, the AD connection must use LDAPS instead of standard LDAP.
This guide outlines how to:
- Set up a Certificate Authority (CA) on the AD server.
- Create and issue a custom certificate template for LDAPS communication.
- Generate, export, and convert the certificate to the required format.
- Install and configure the certificate on the Hire2Retire connector server to enable LDAPS.
Step 1: Install Certificate Authority, Create and Export the Certificate
1.1 Install "Active Directory Certificate Services" Role
-
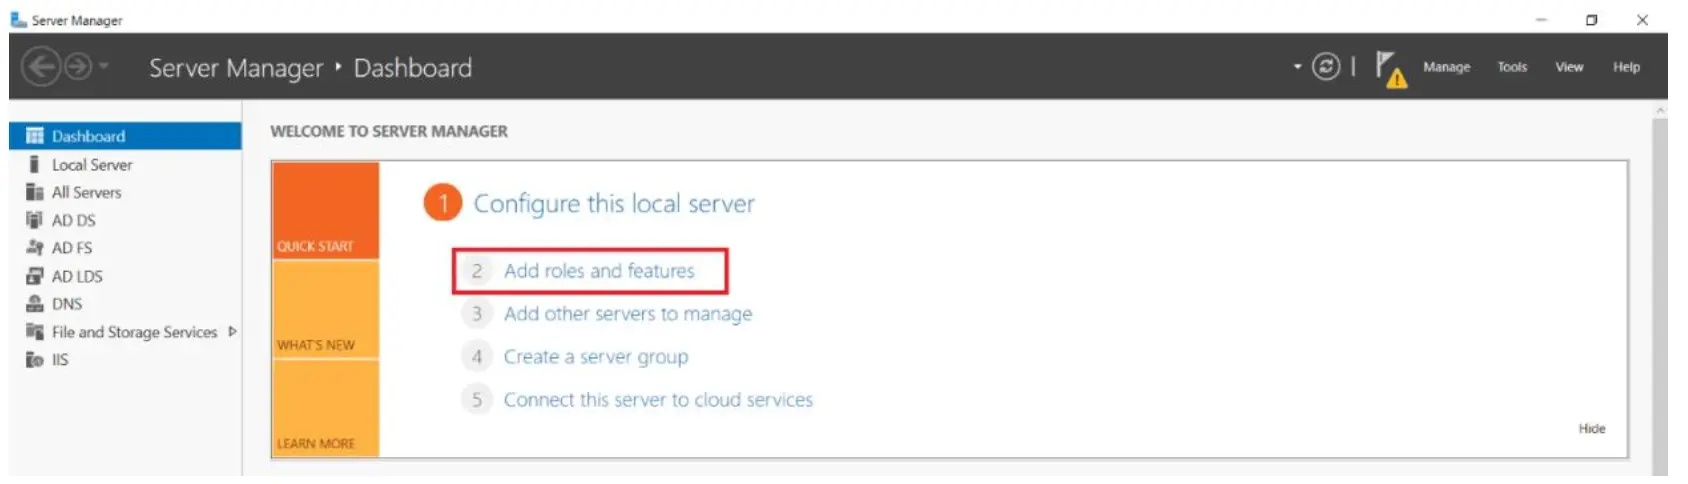
On your Windows Server machine, open: Start → Server Manager → Add Roles and Features
-
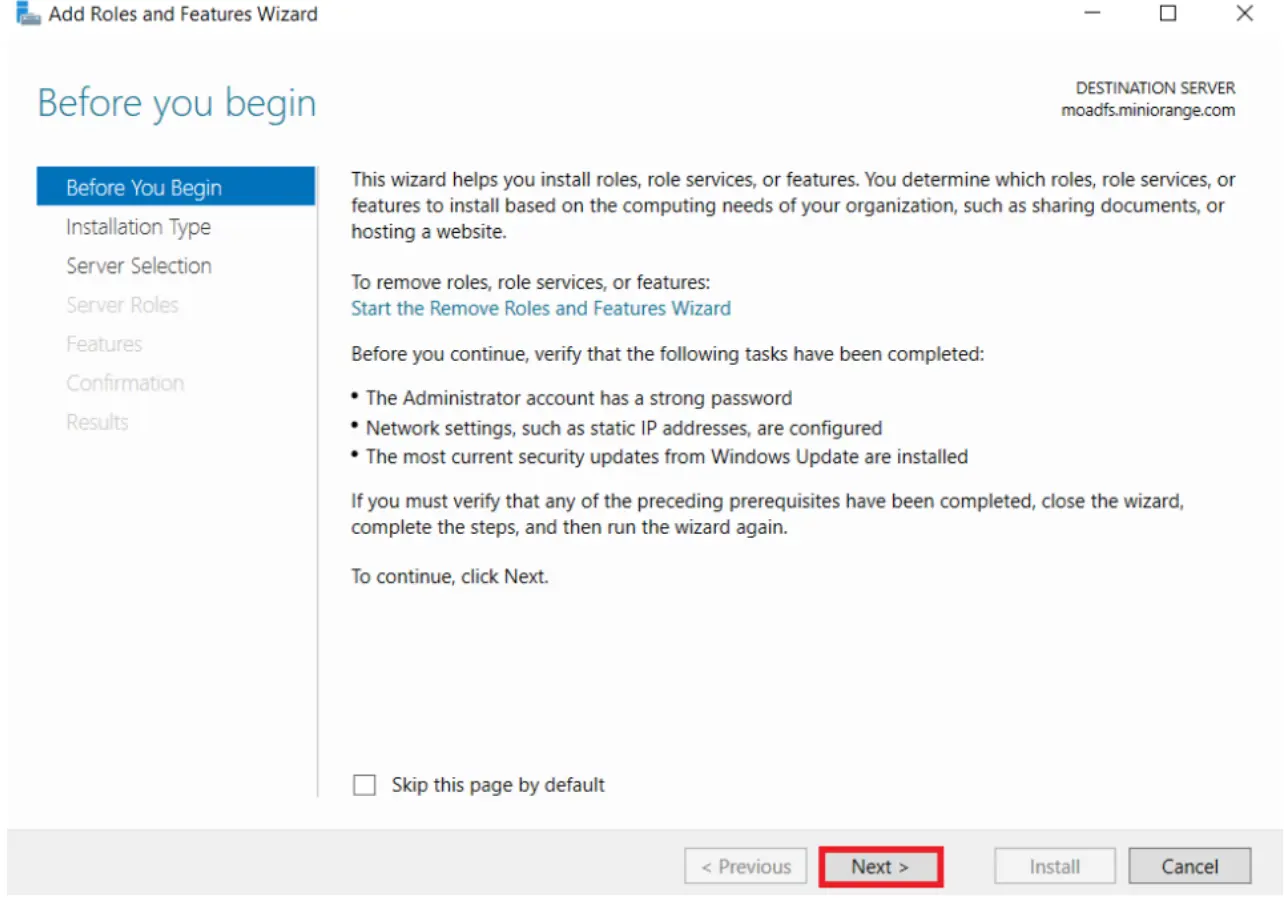
Click Next.
-
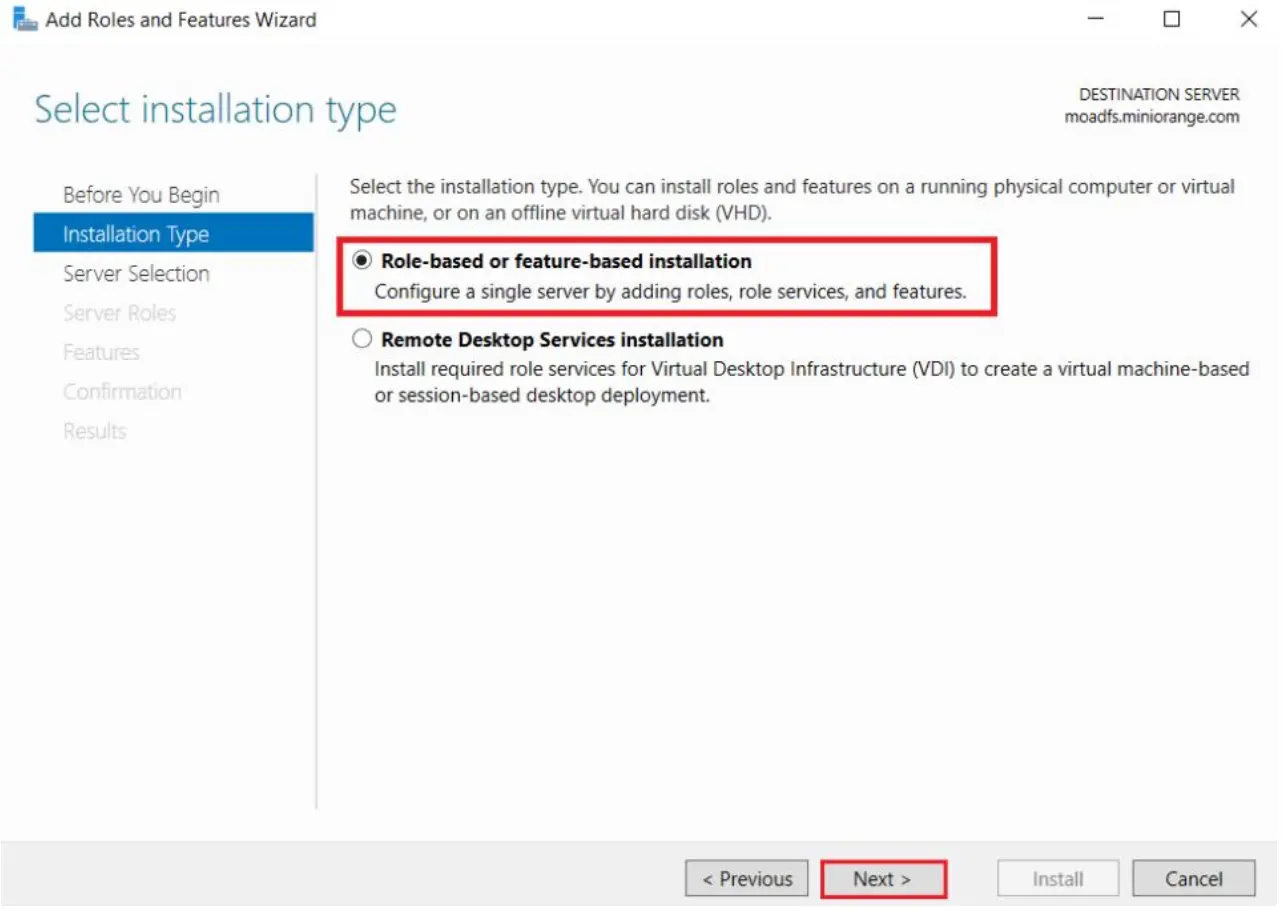
Choose Role-based or feature-based installation, then click Next.
-
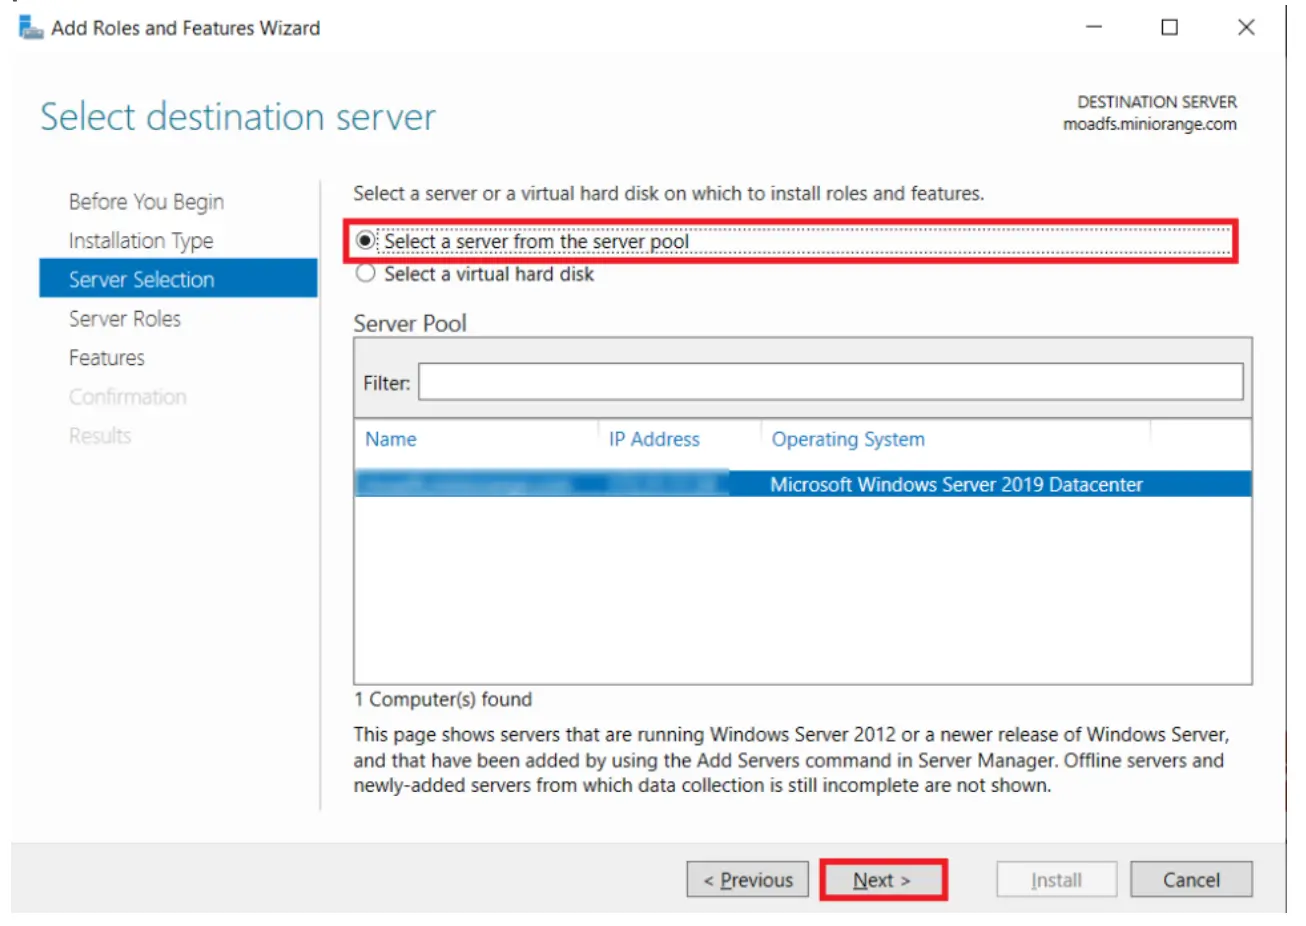
Select a server from the server pool, choose your LDAP server, then click Next.
-
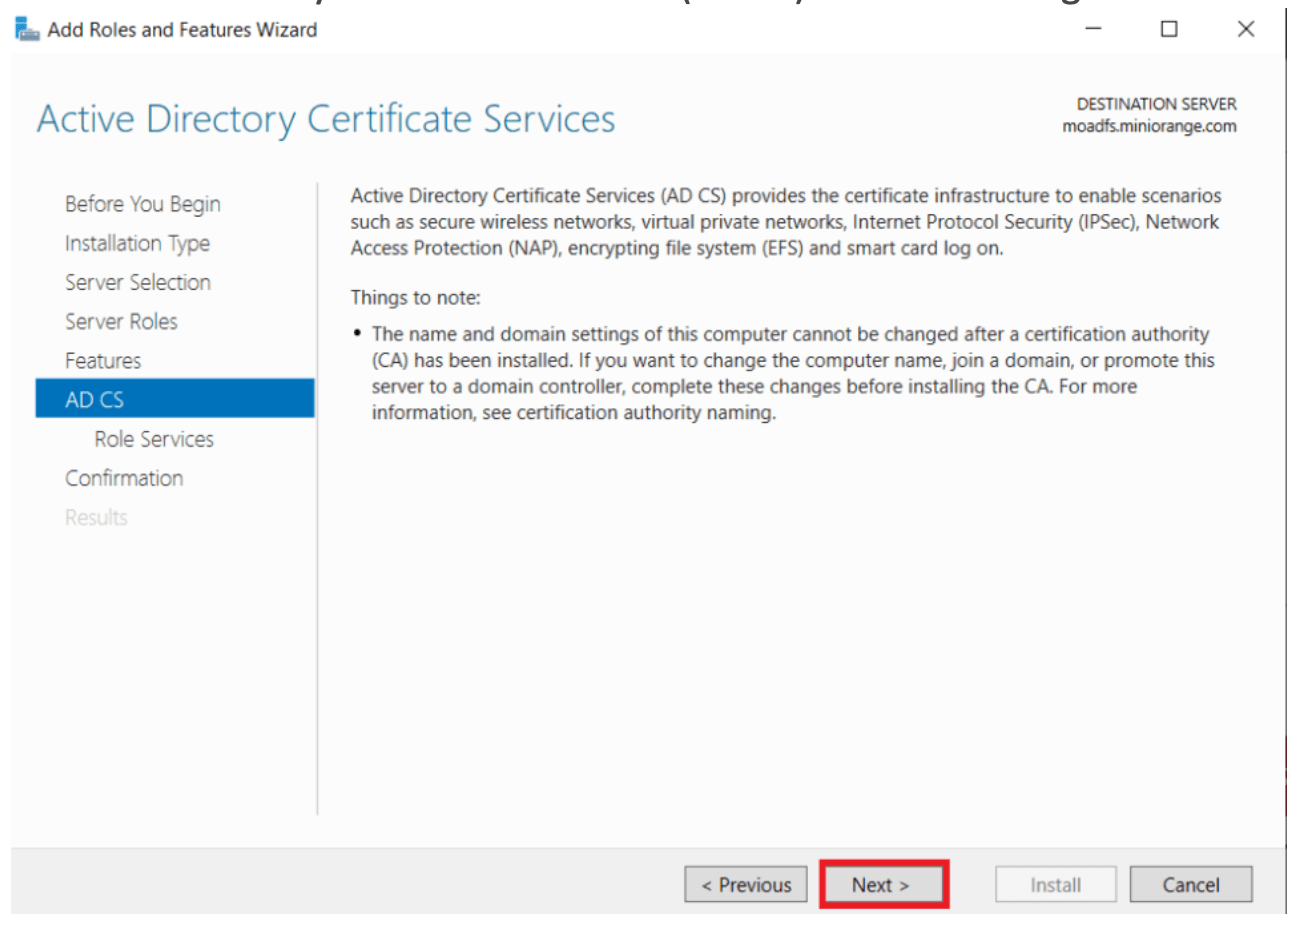
From the list of roles, check Active Directory Certificate Services (AD CS) and click Next.

-
Skip features selection, click Next.
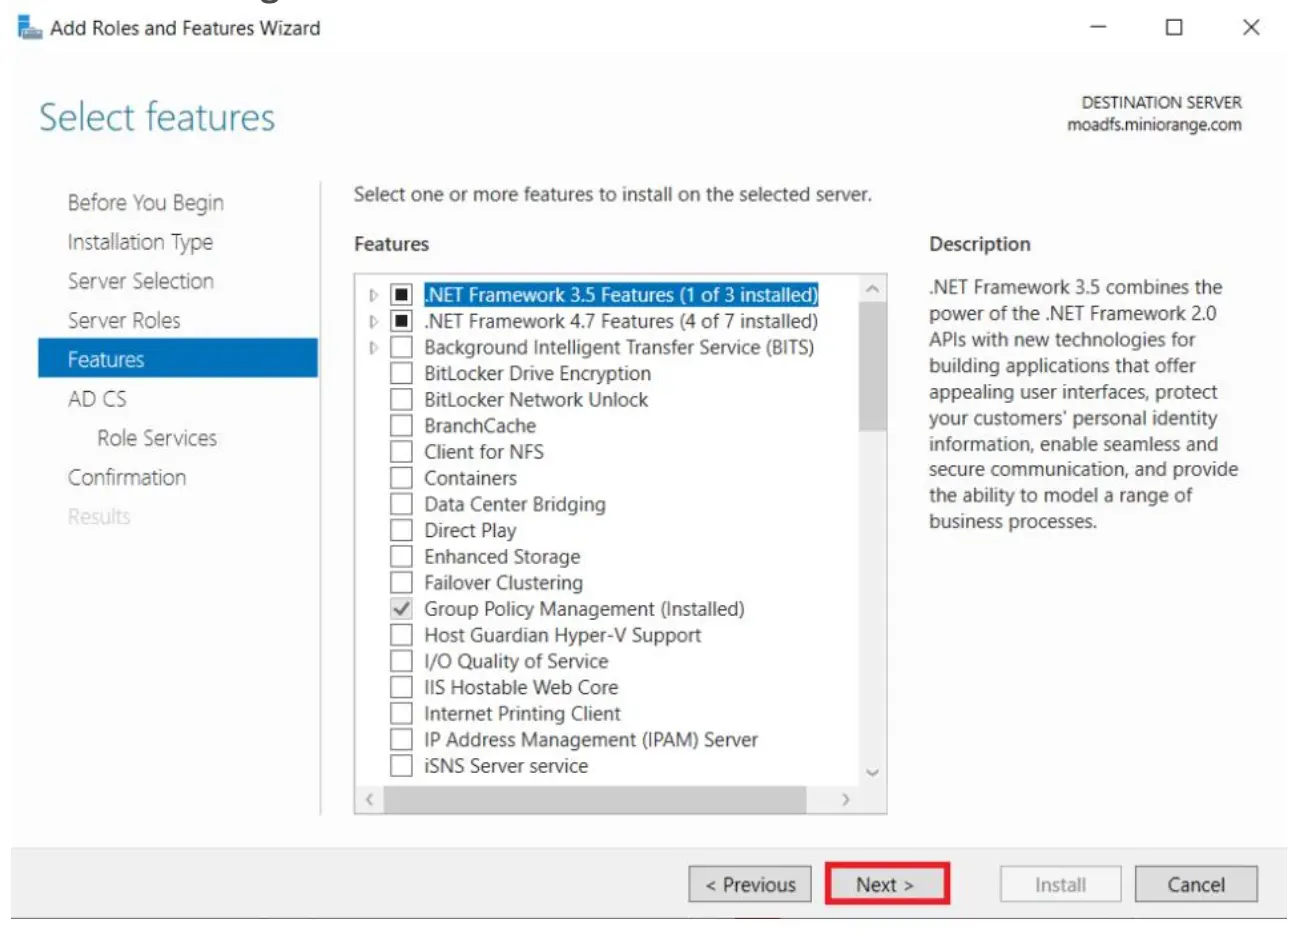
-
In the AD CS section, select nothing and click Next.
-
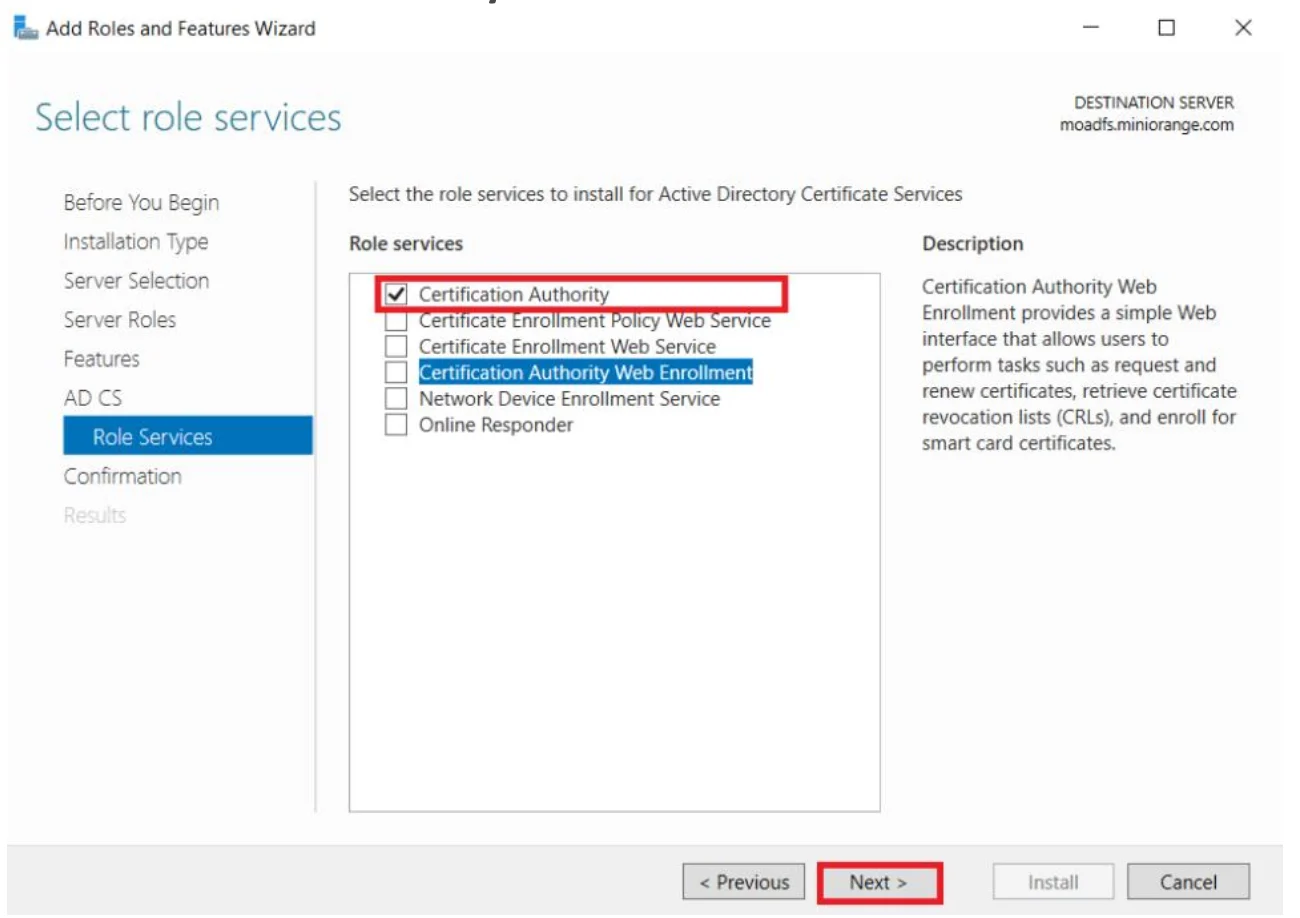
Mark Certification Authority and click Next.
-
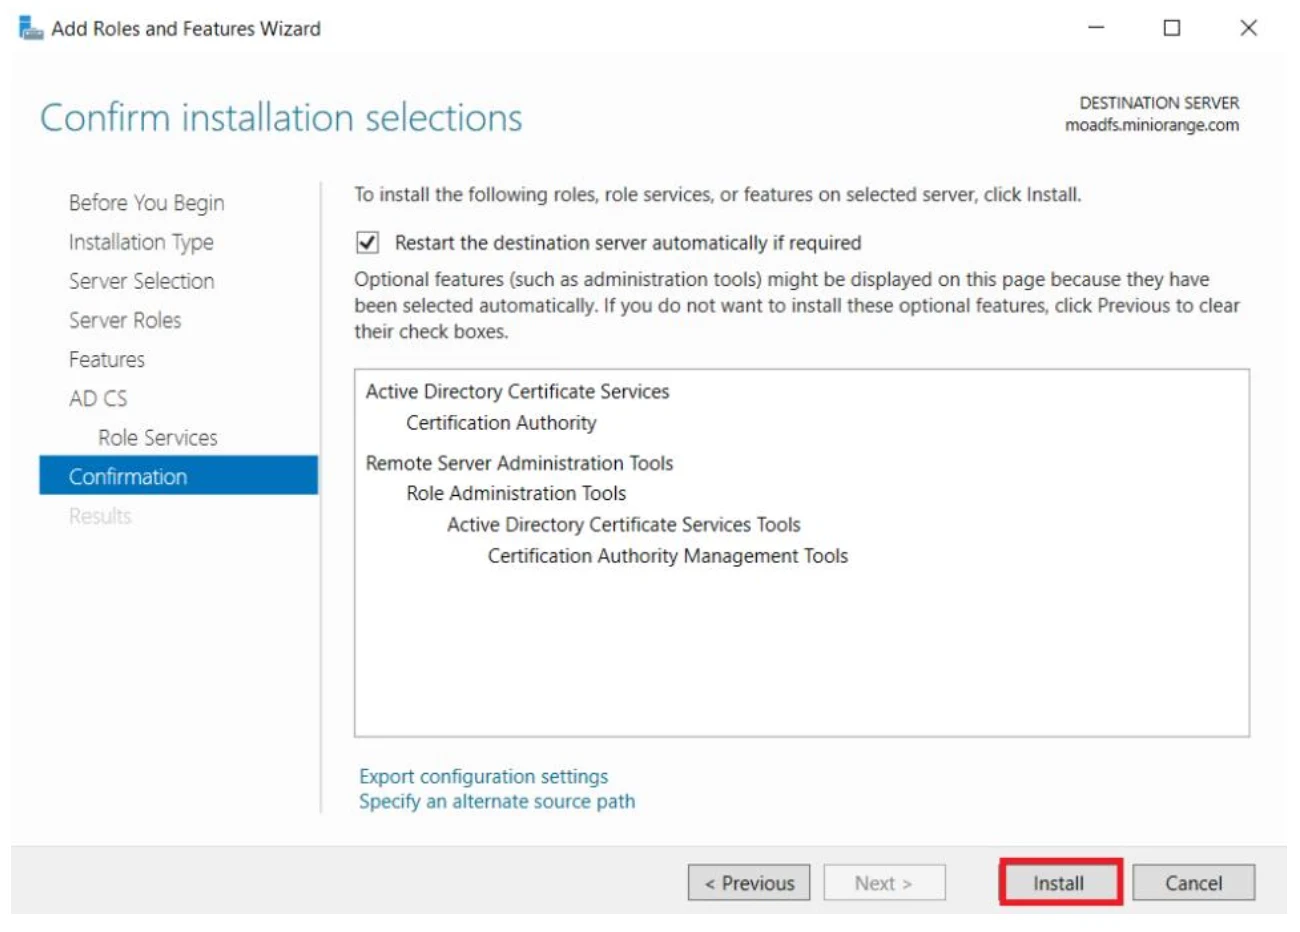
Click Install to begin installation.
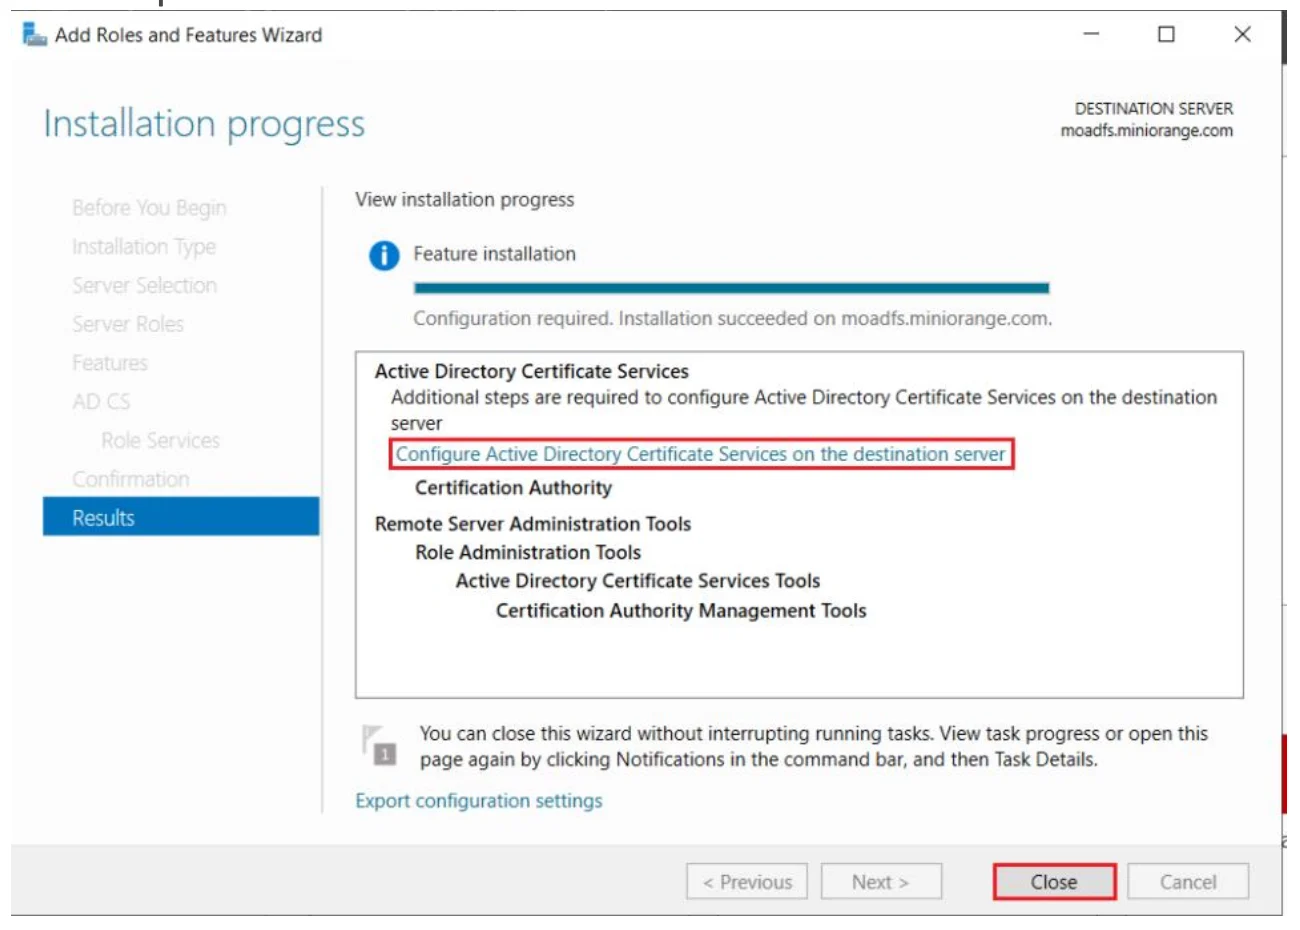
-
Once complete, click Configure Active Directory Certificate Services on Destination Server, then Close.
-
Use the currently logged-on admin user for configuration and click Next.

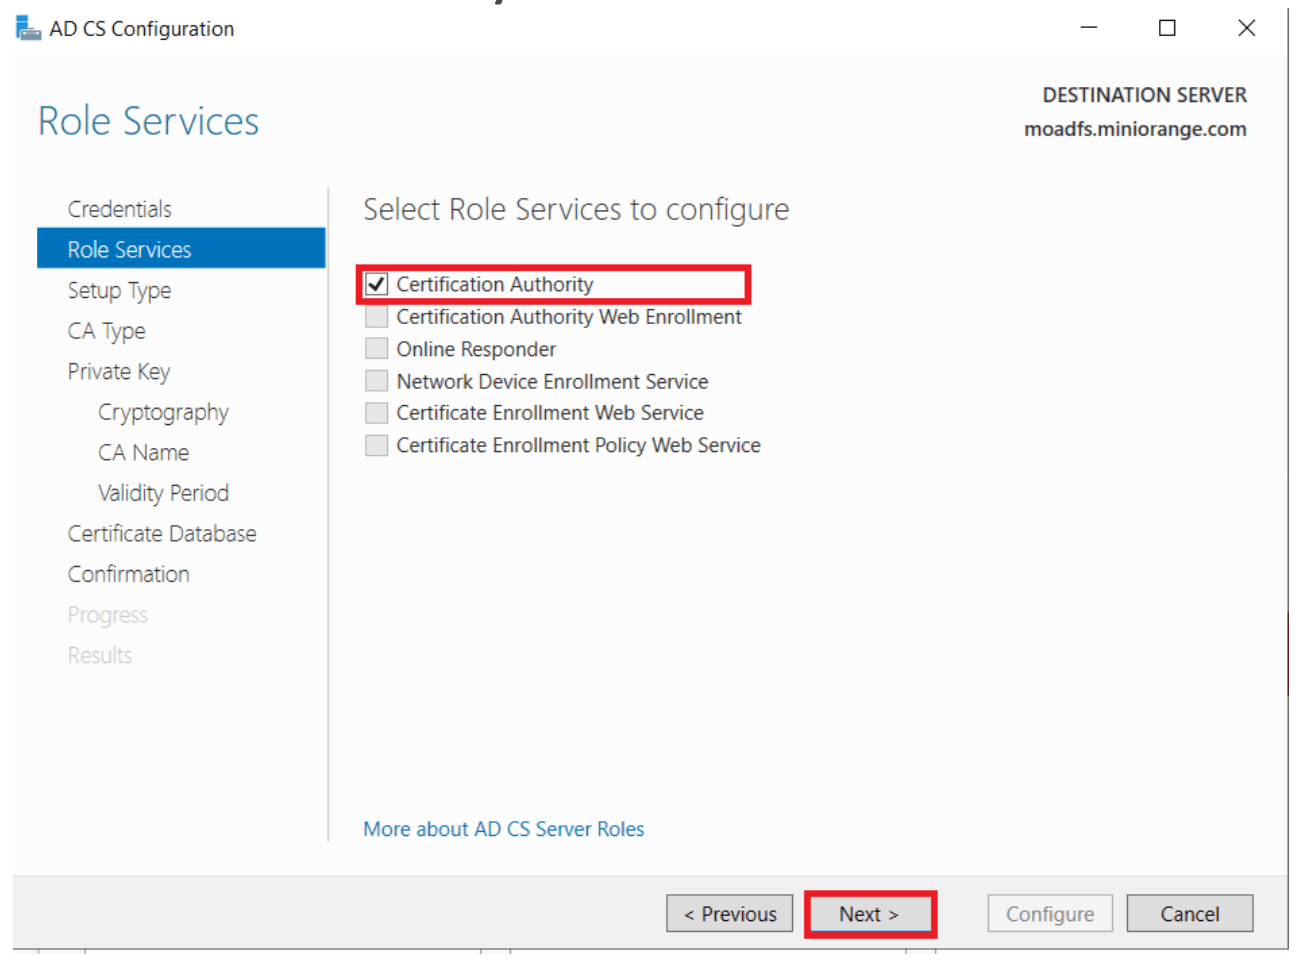
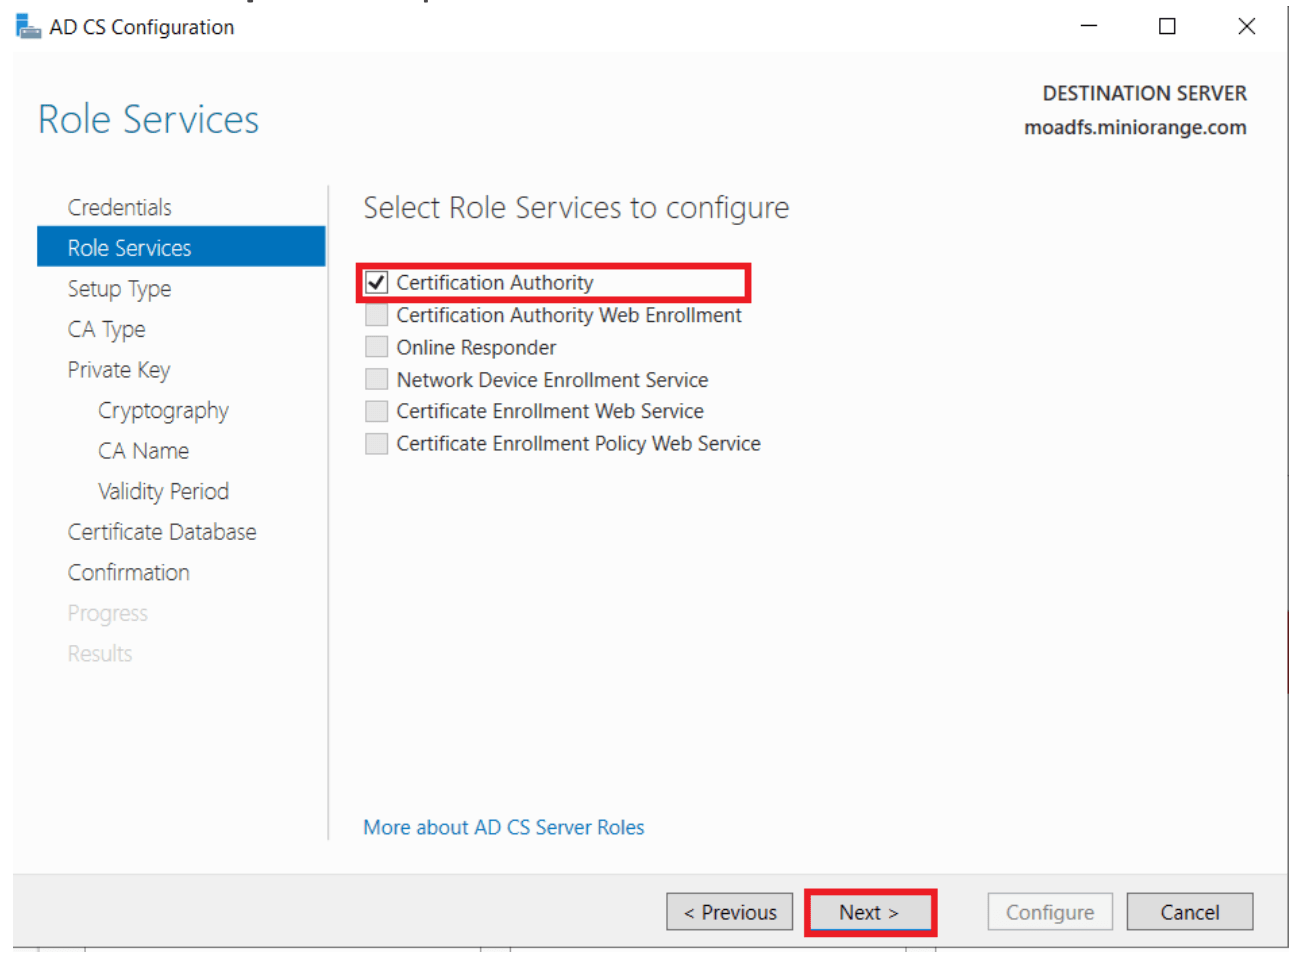
-
Mark Certification Authority again and click Next.
-
Choose Enterprise CA, then click Next.
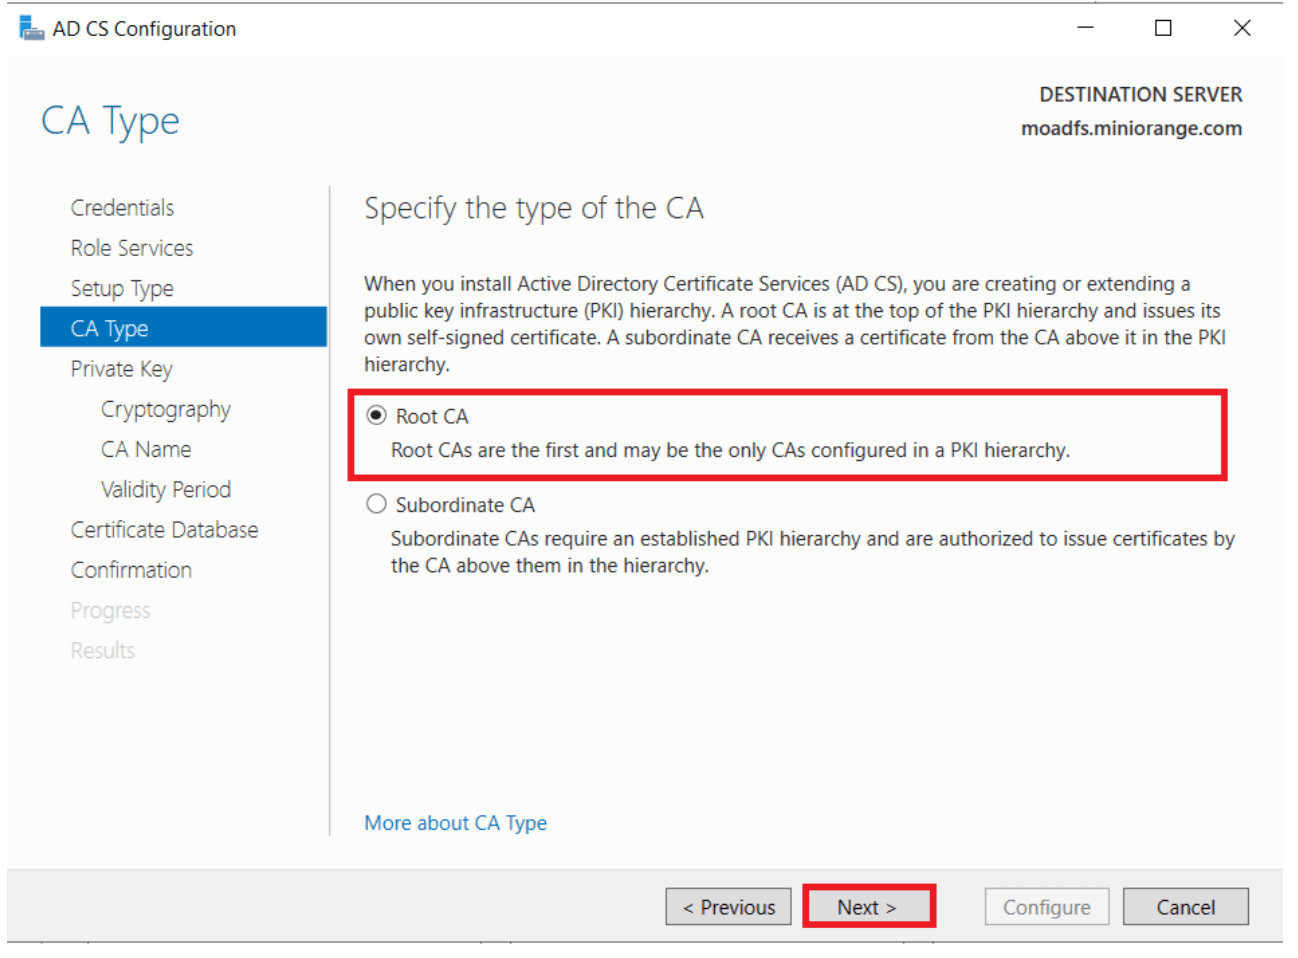
-
Select Root CA, then Next.
-
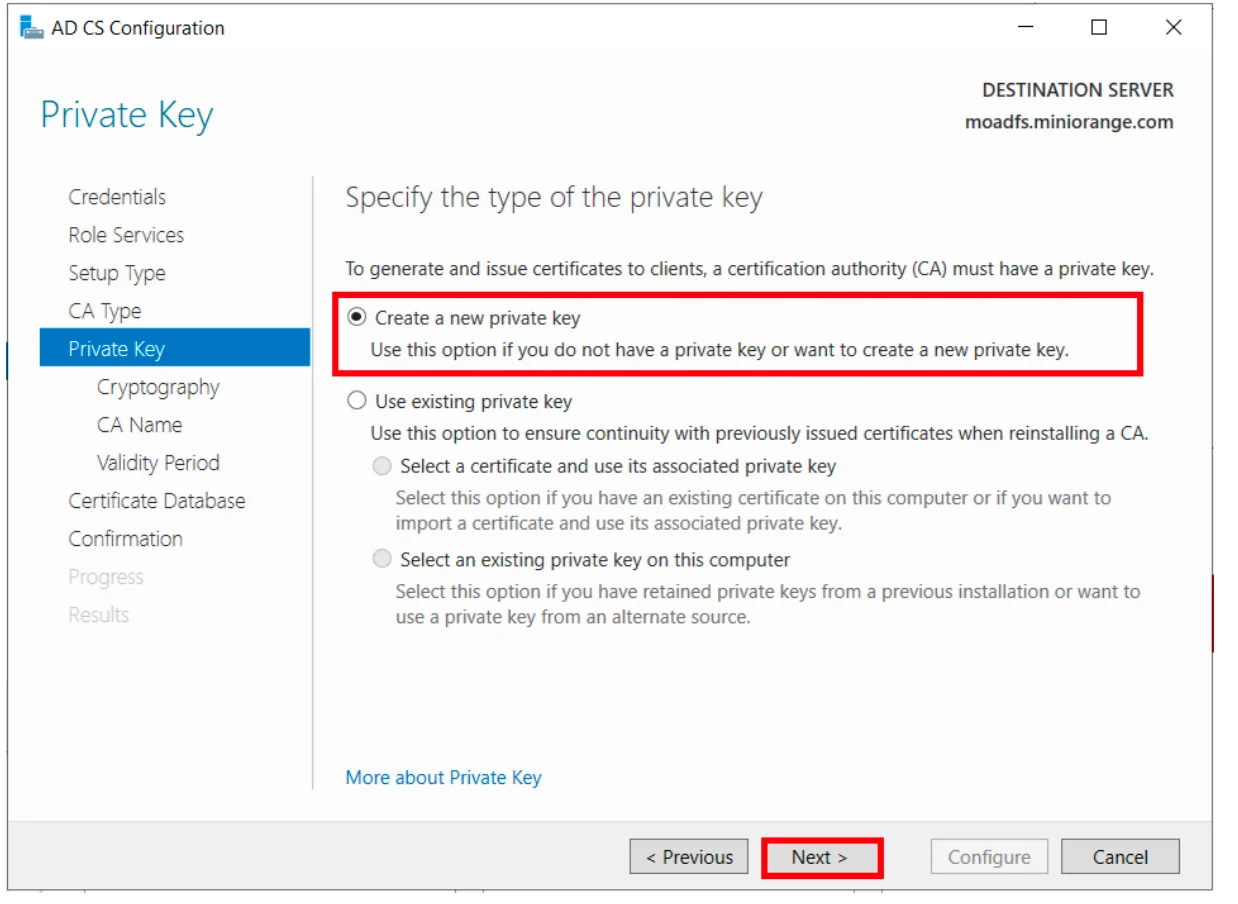
Choose Create a new private key, then click Next.

-
Select SHA256 as the hash algorithm (recommended to use the latest available), then click Next.

-
Click Next again.
-
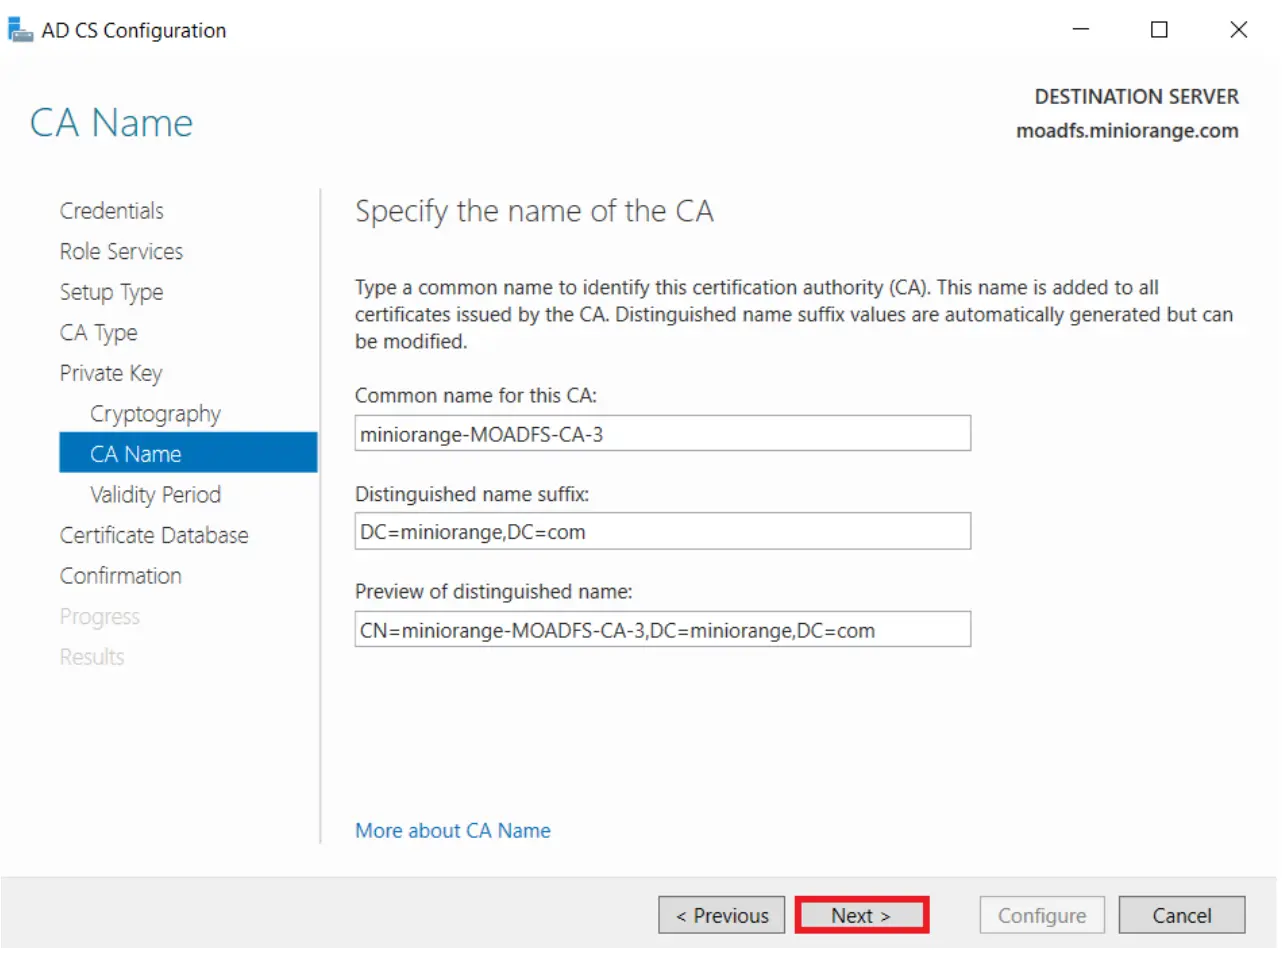
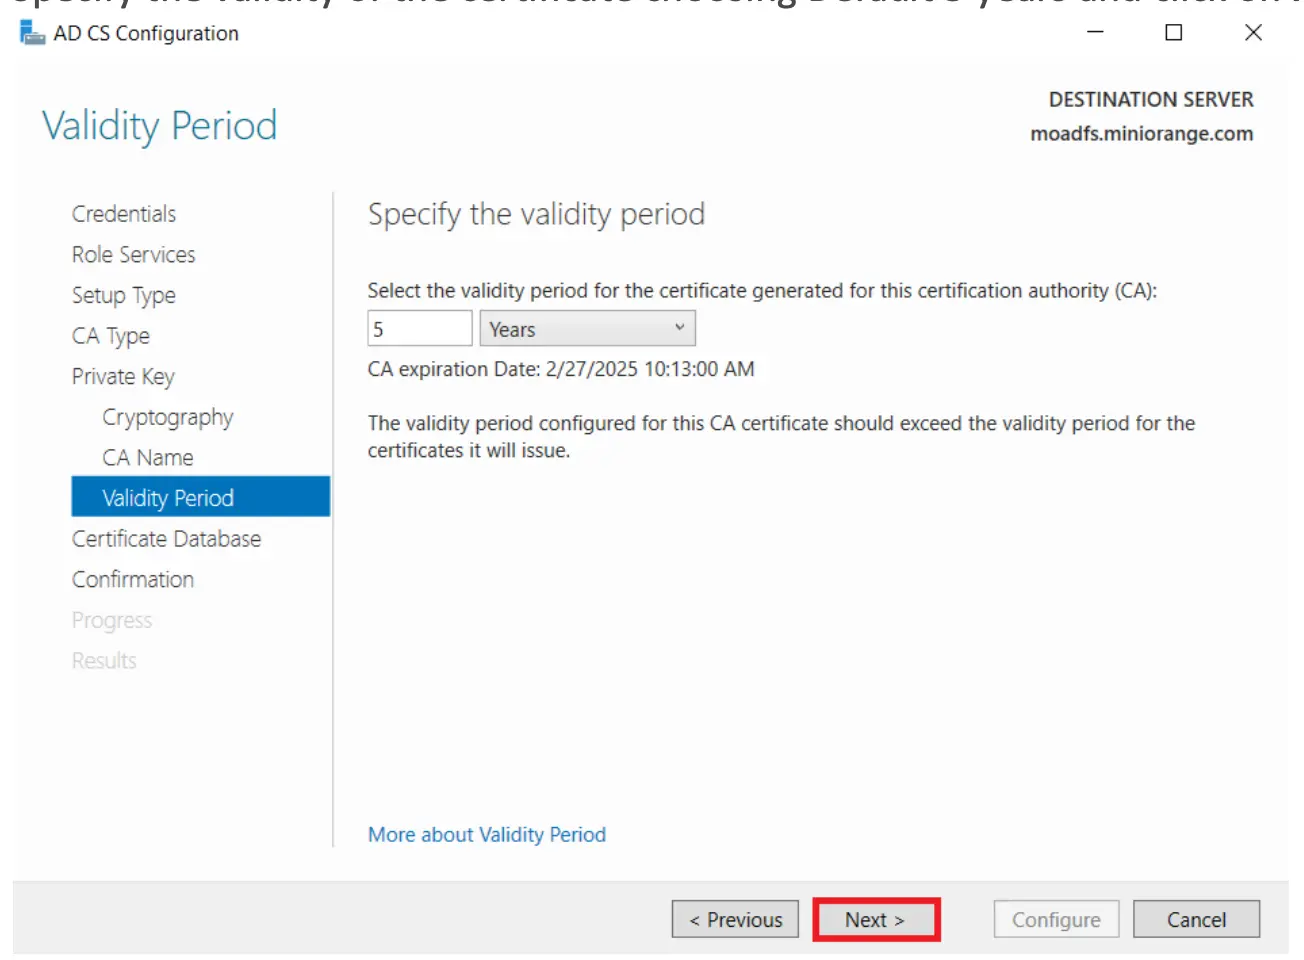
Set certificate validity (default: 5 years), then click Next.
-
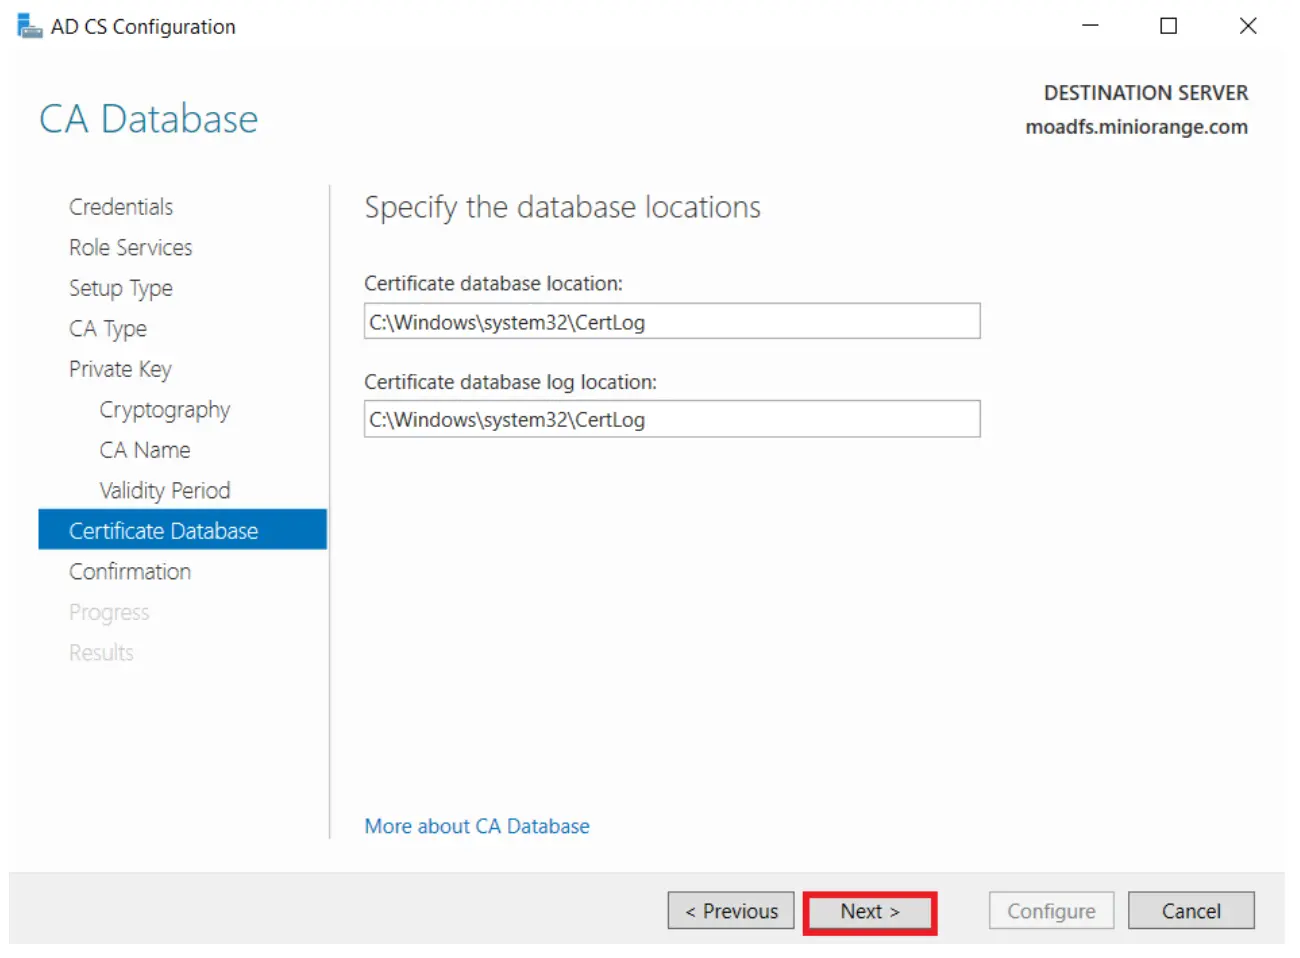
Accept the default database location and click Next.
-
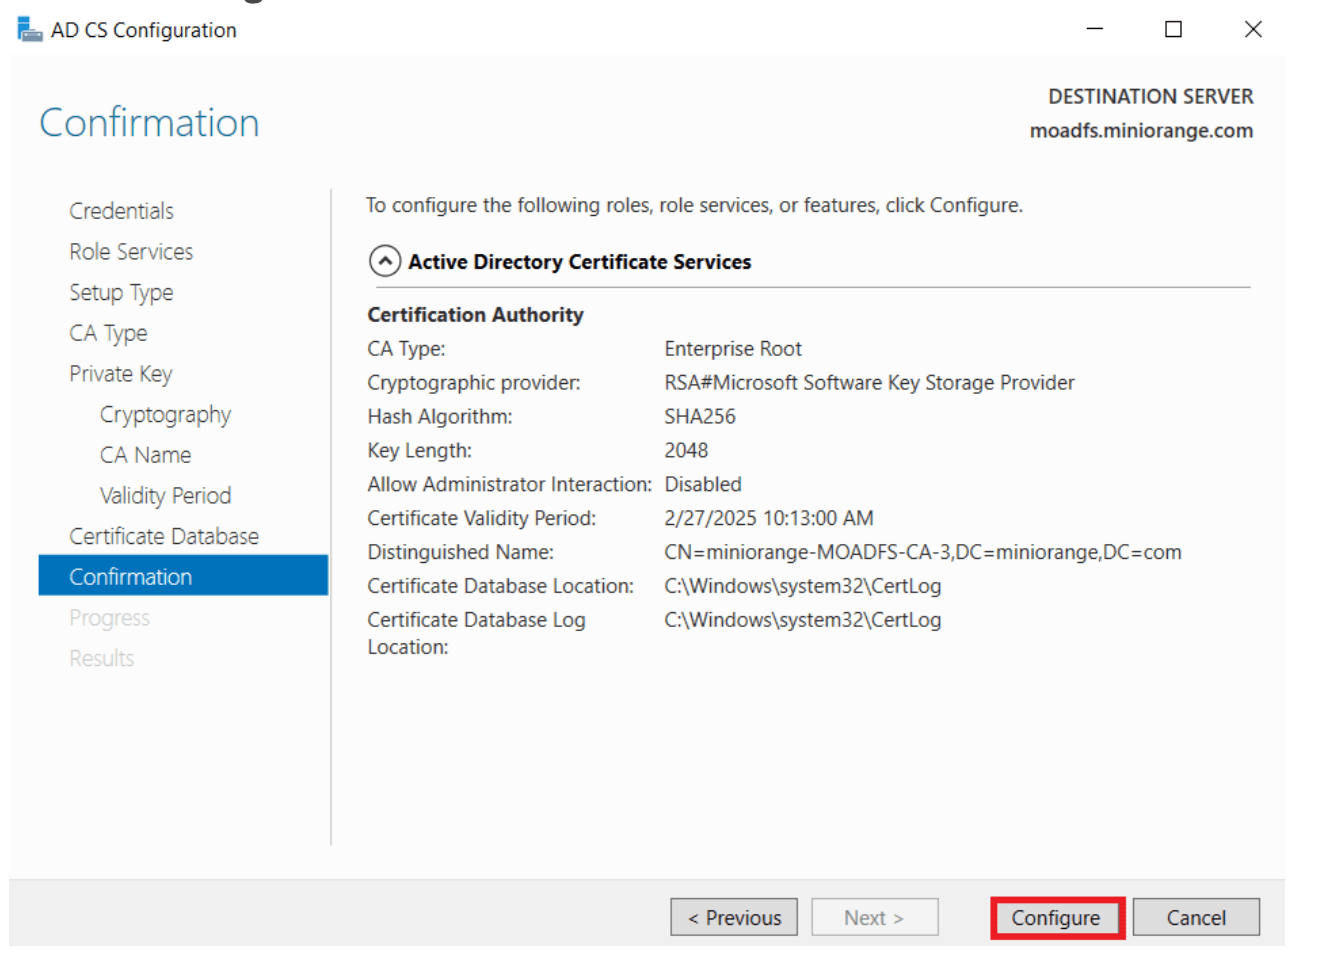
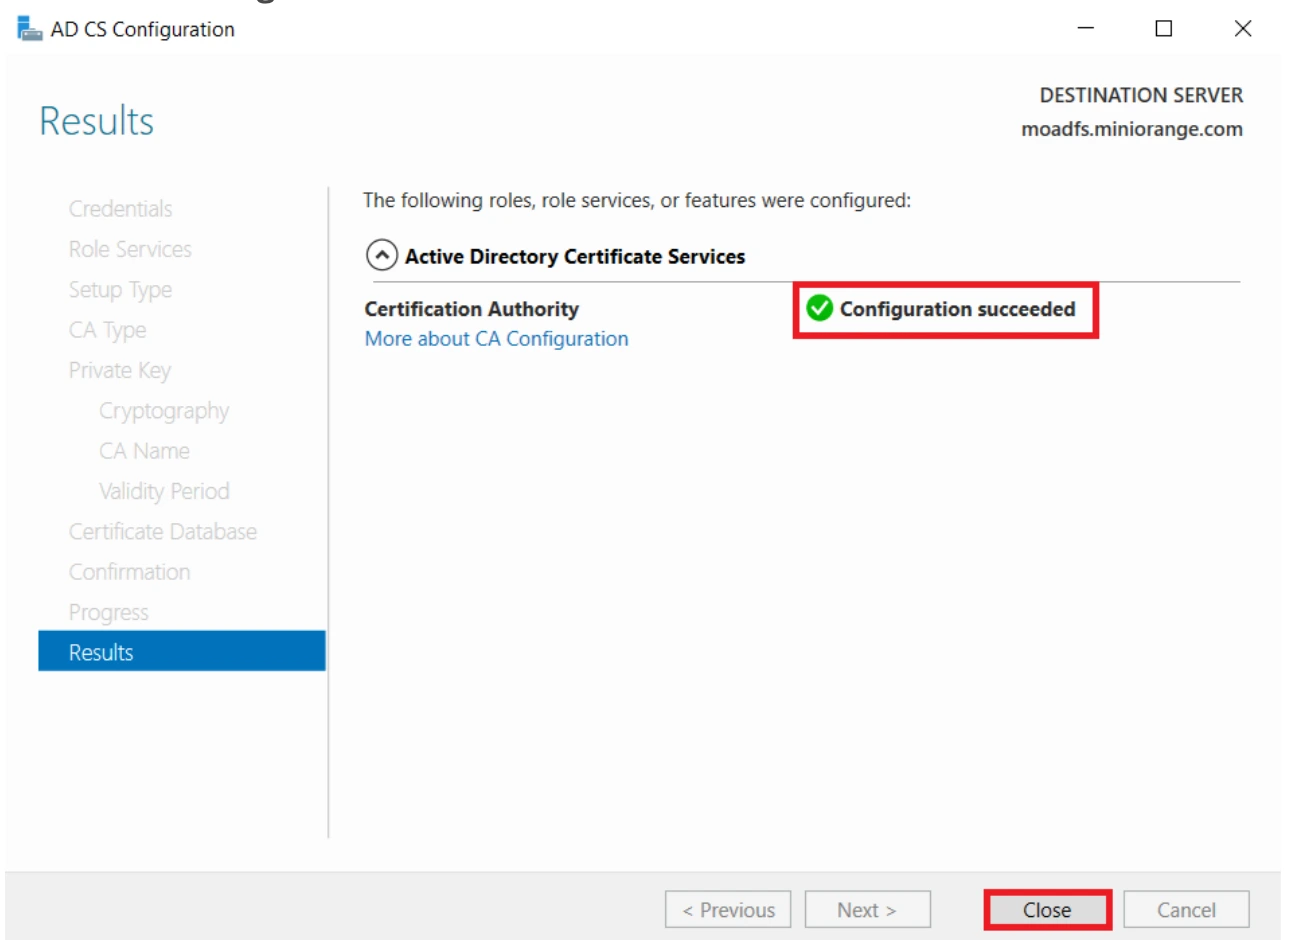
Click Configure to finalize setup.
-
Once successful, click Close.
1.2 Create Certificate Template
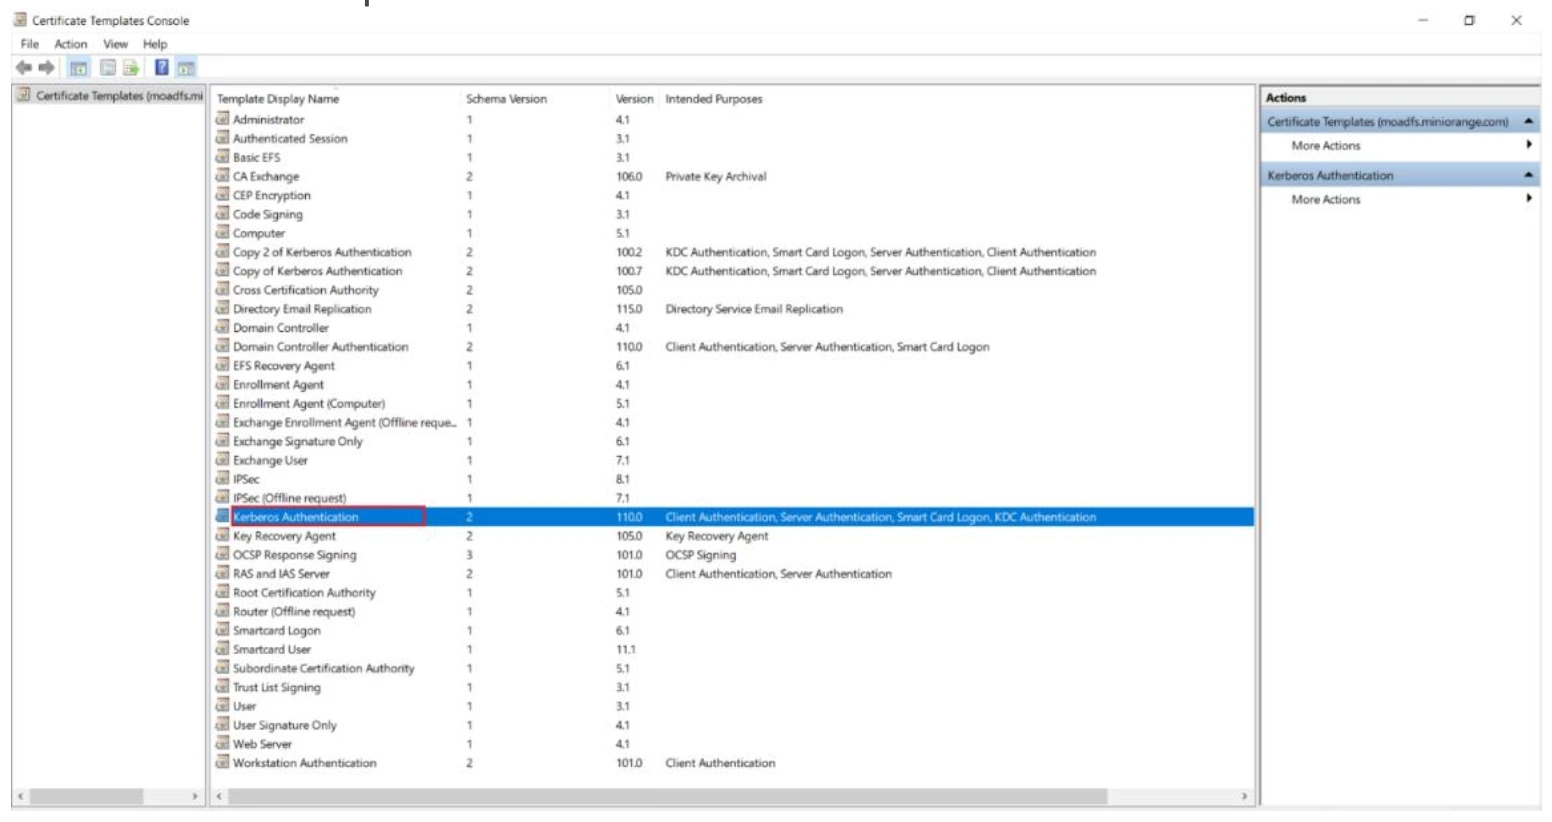
- Press Windows + R, type
certtmpl.msc, and press Enter. -
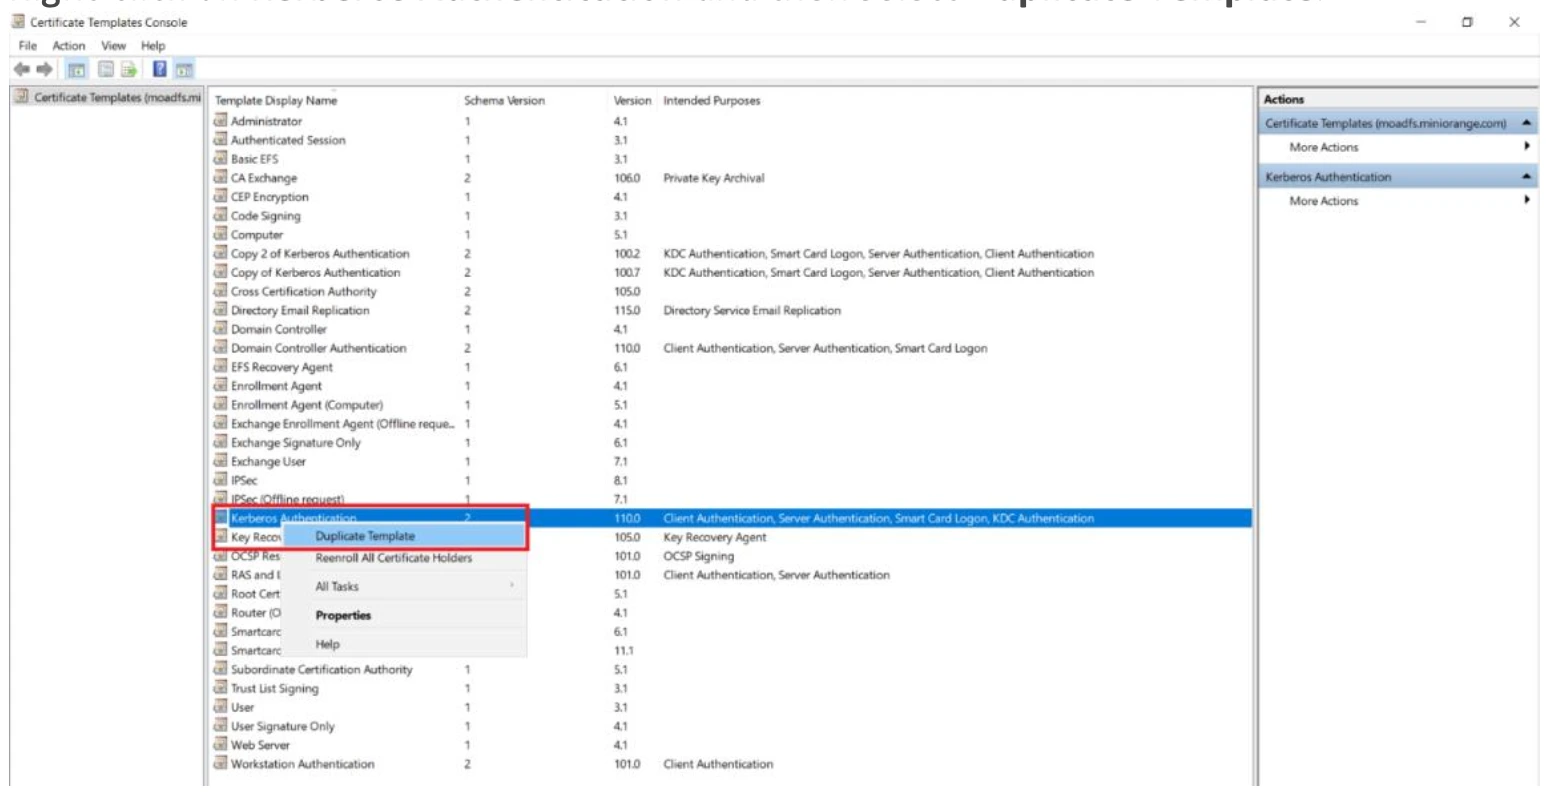
Locate Kerberos Authentication Template.
-
Right-click the template and select Duplicate Template.
-
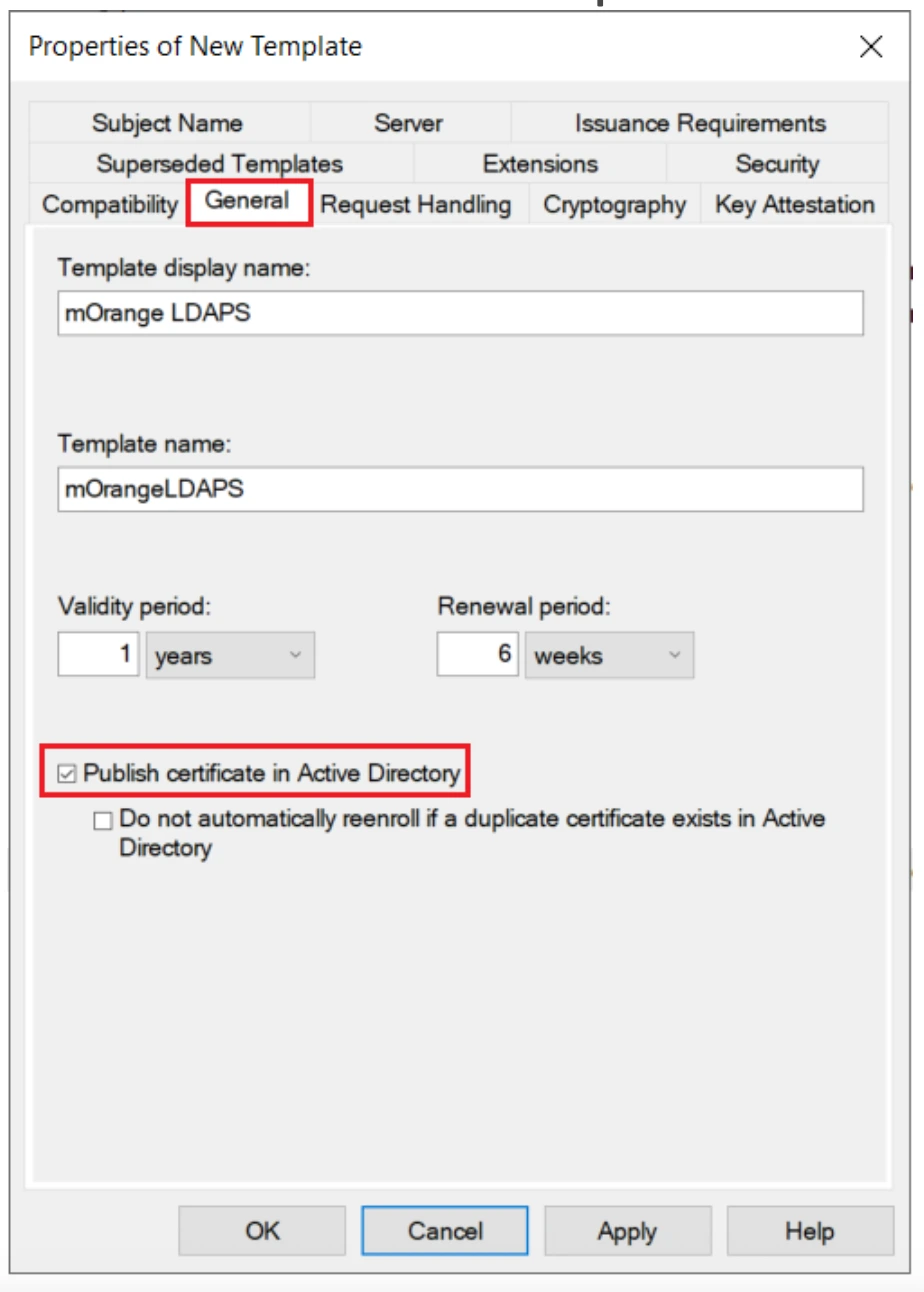
In Properties of New Template, under General Tab, enable Publish certificate in Active Directory.
-
Go to Request Handling Tab, enable Allow private key to be exported.
-
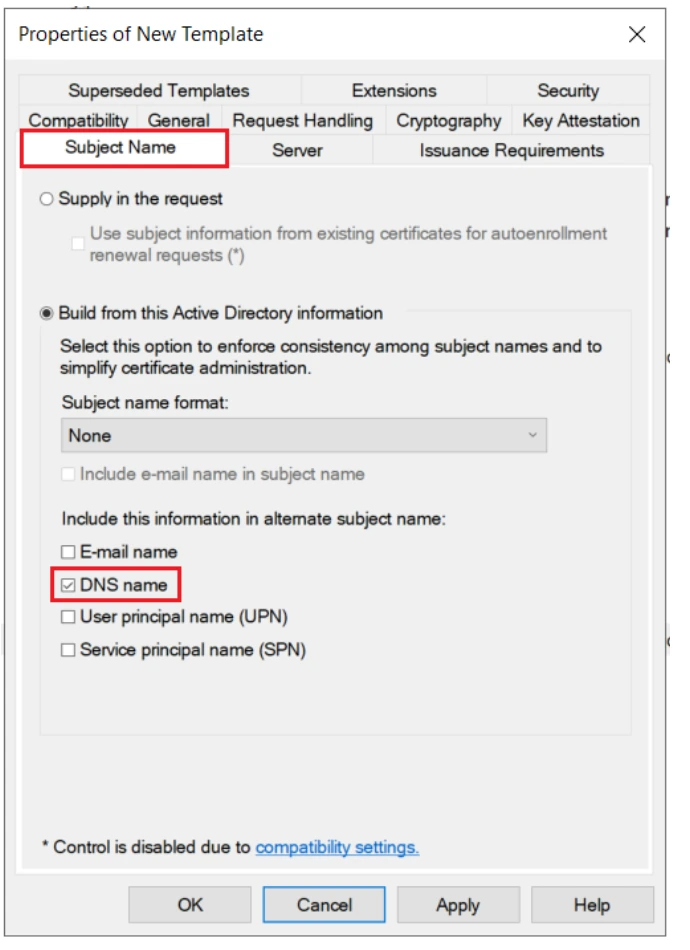
Go to Subject Name Tab, set Subject name format to DNS Name, click Apply → OK.
1.3 Issue Certificate Template
- Open Certification Authority.
-
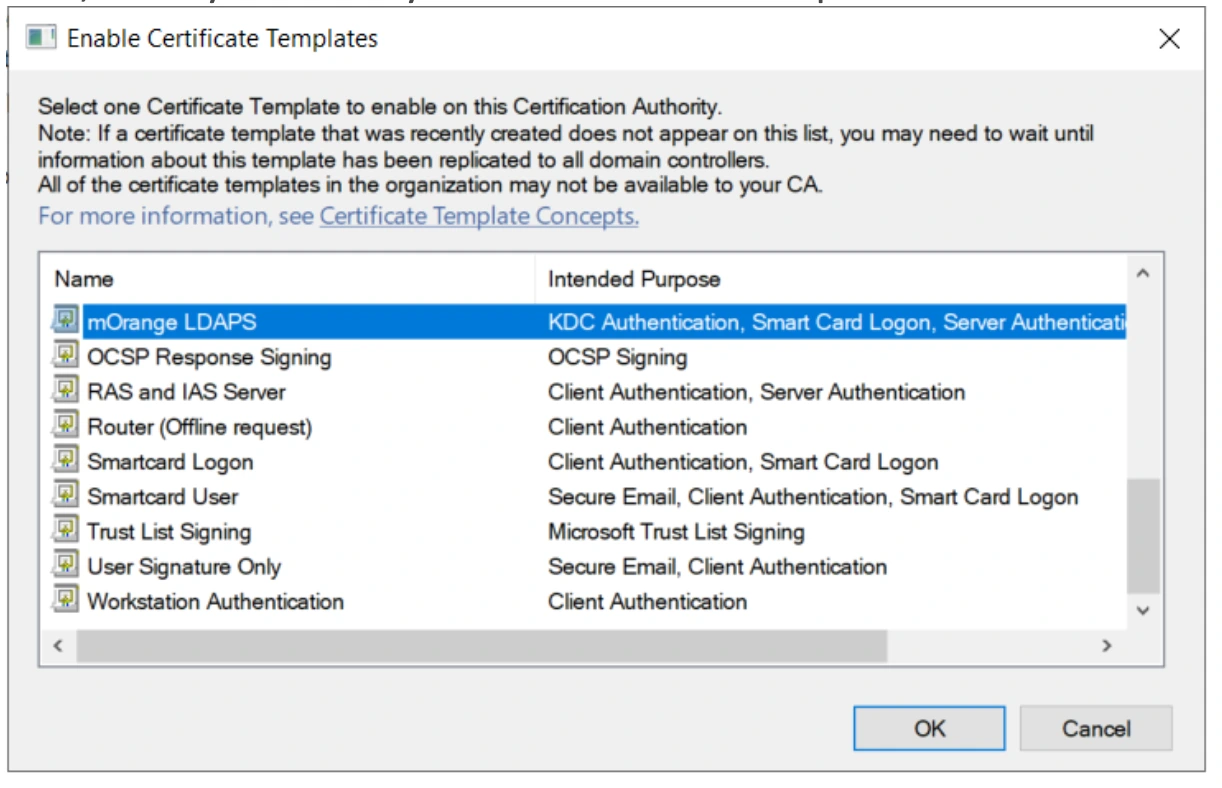
Right-click Certificate Templates → New → Certificate Template to Issue.

-
Select your newly created certificate template and click OK.
1.4 Request New Certificate
- Press Windows + R, type
mmc, and press Enter. - Go to File → Add/Remove Snap-in.
-
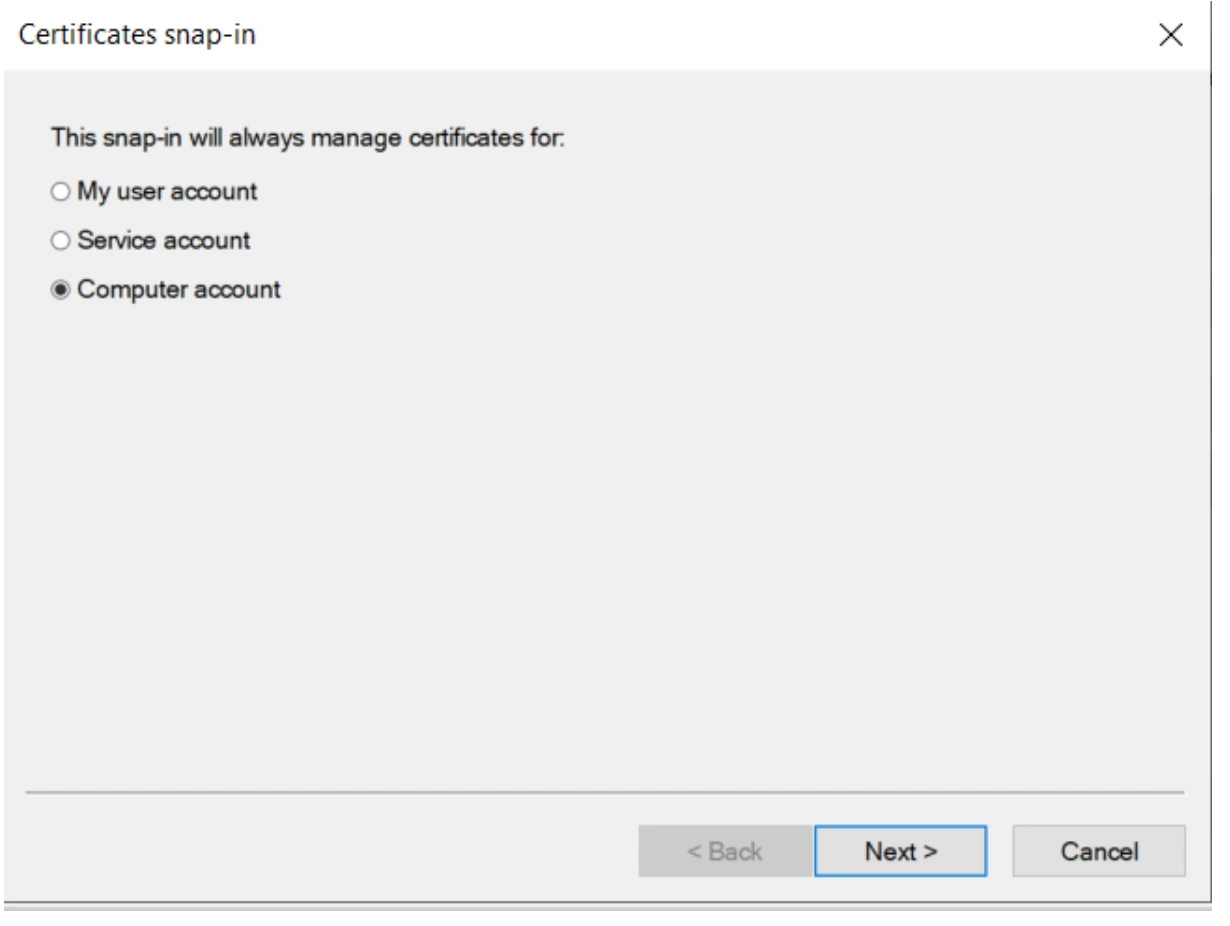
Select Certificates, click Add → OK.

-
Choose Computer account, then Next.
-
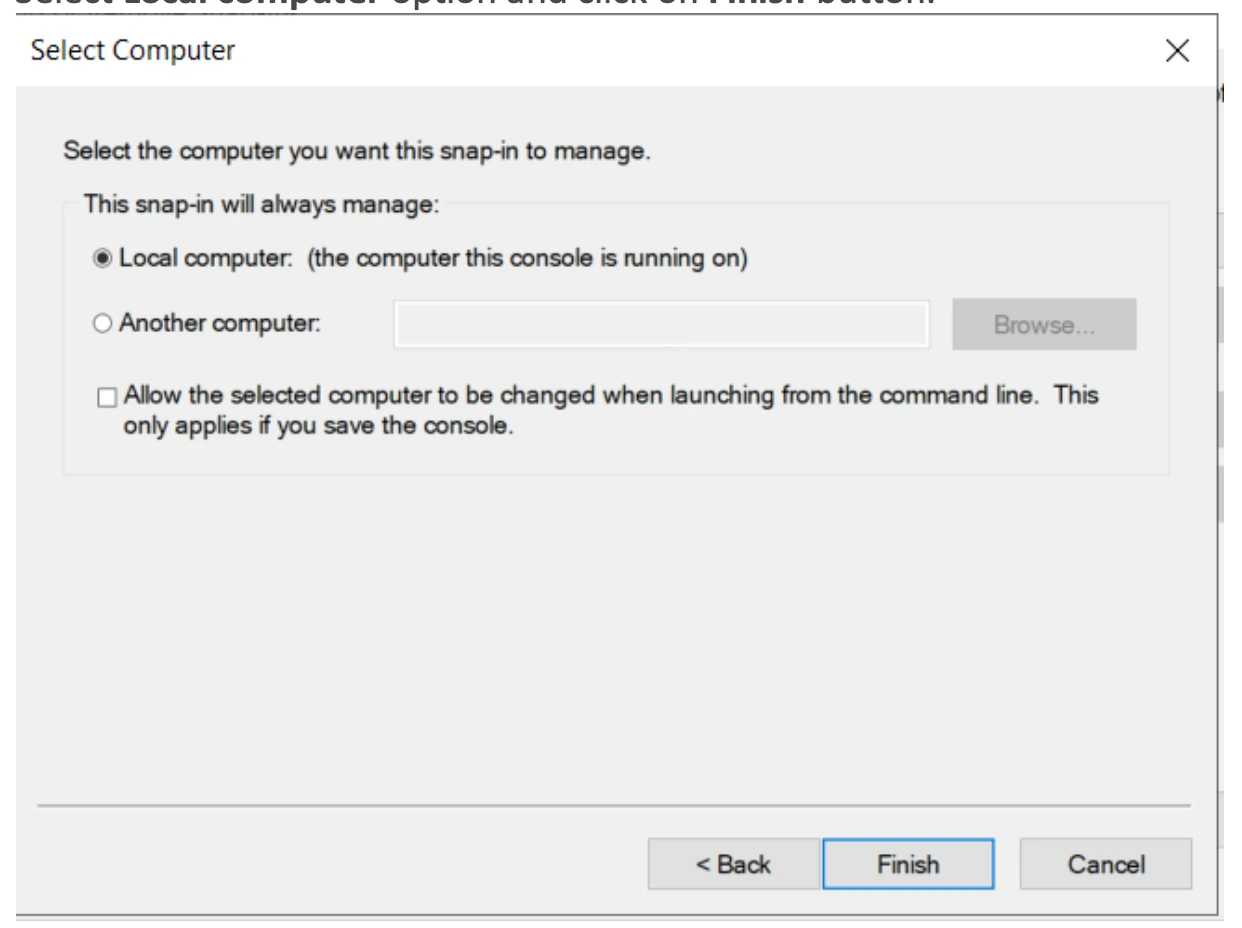
Select Local computer, then Finish.
-
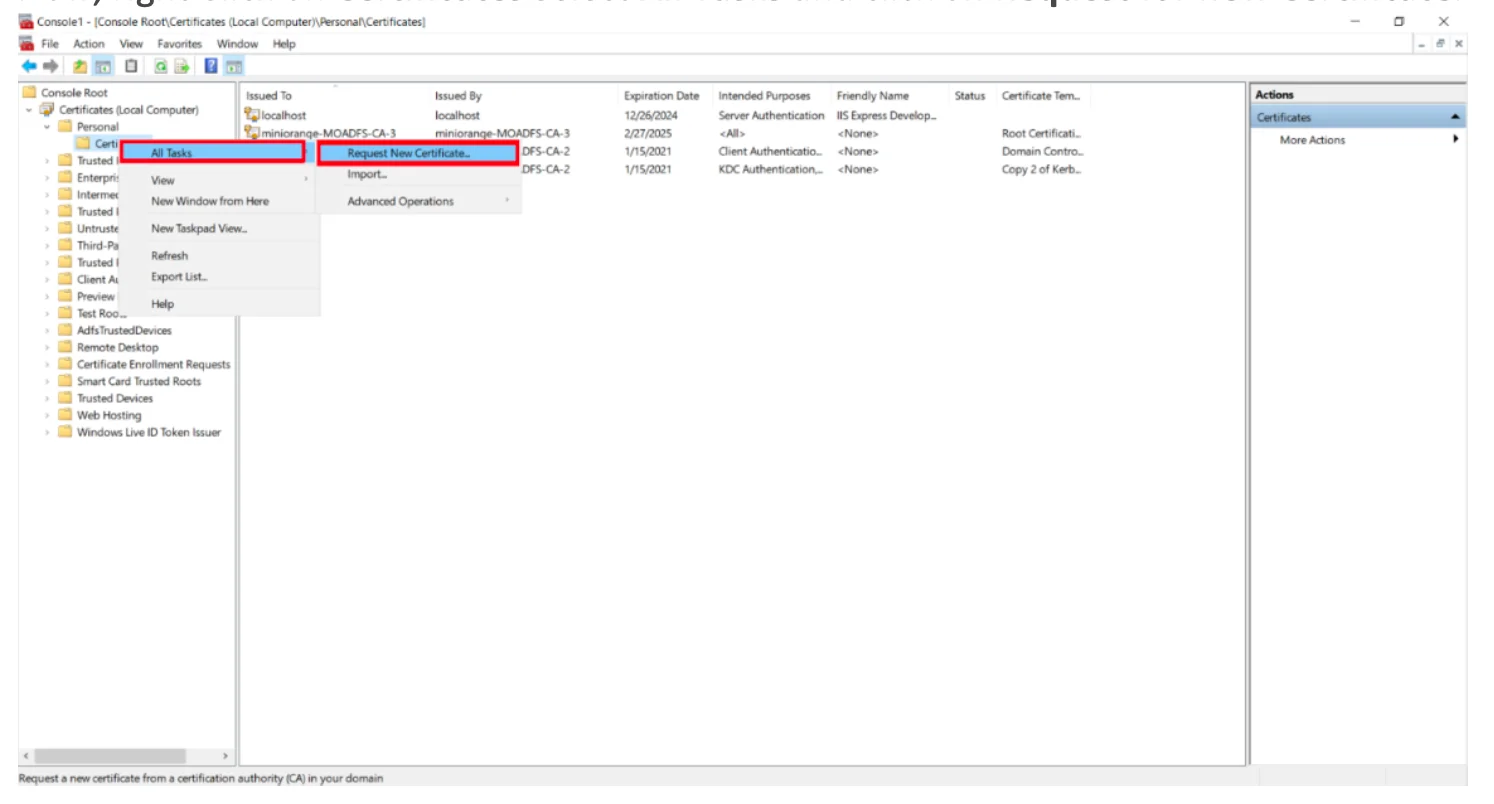
Right-click Certificates → All Tasks → Request New Certificate.
-
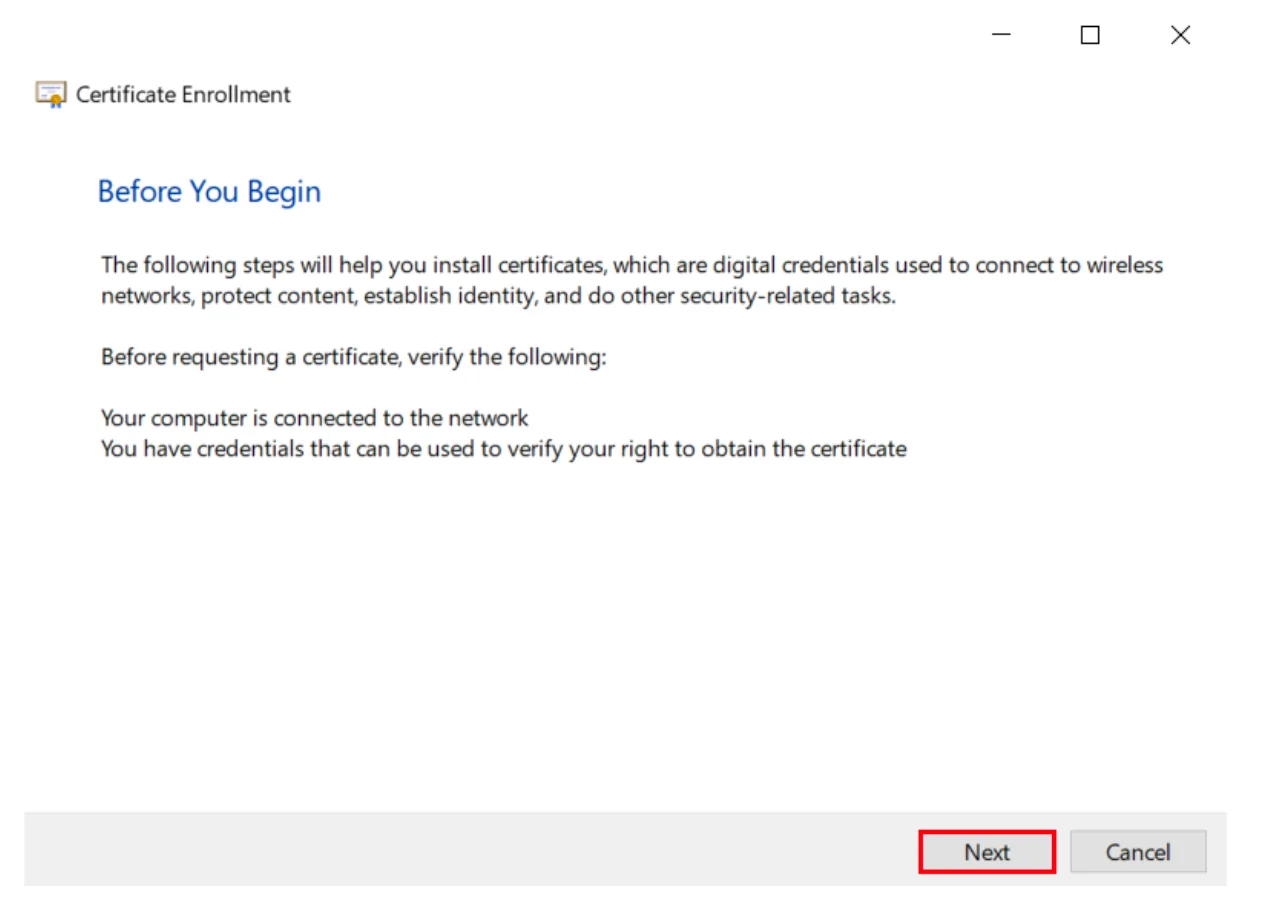
Click Next
-
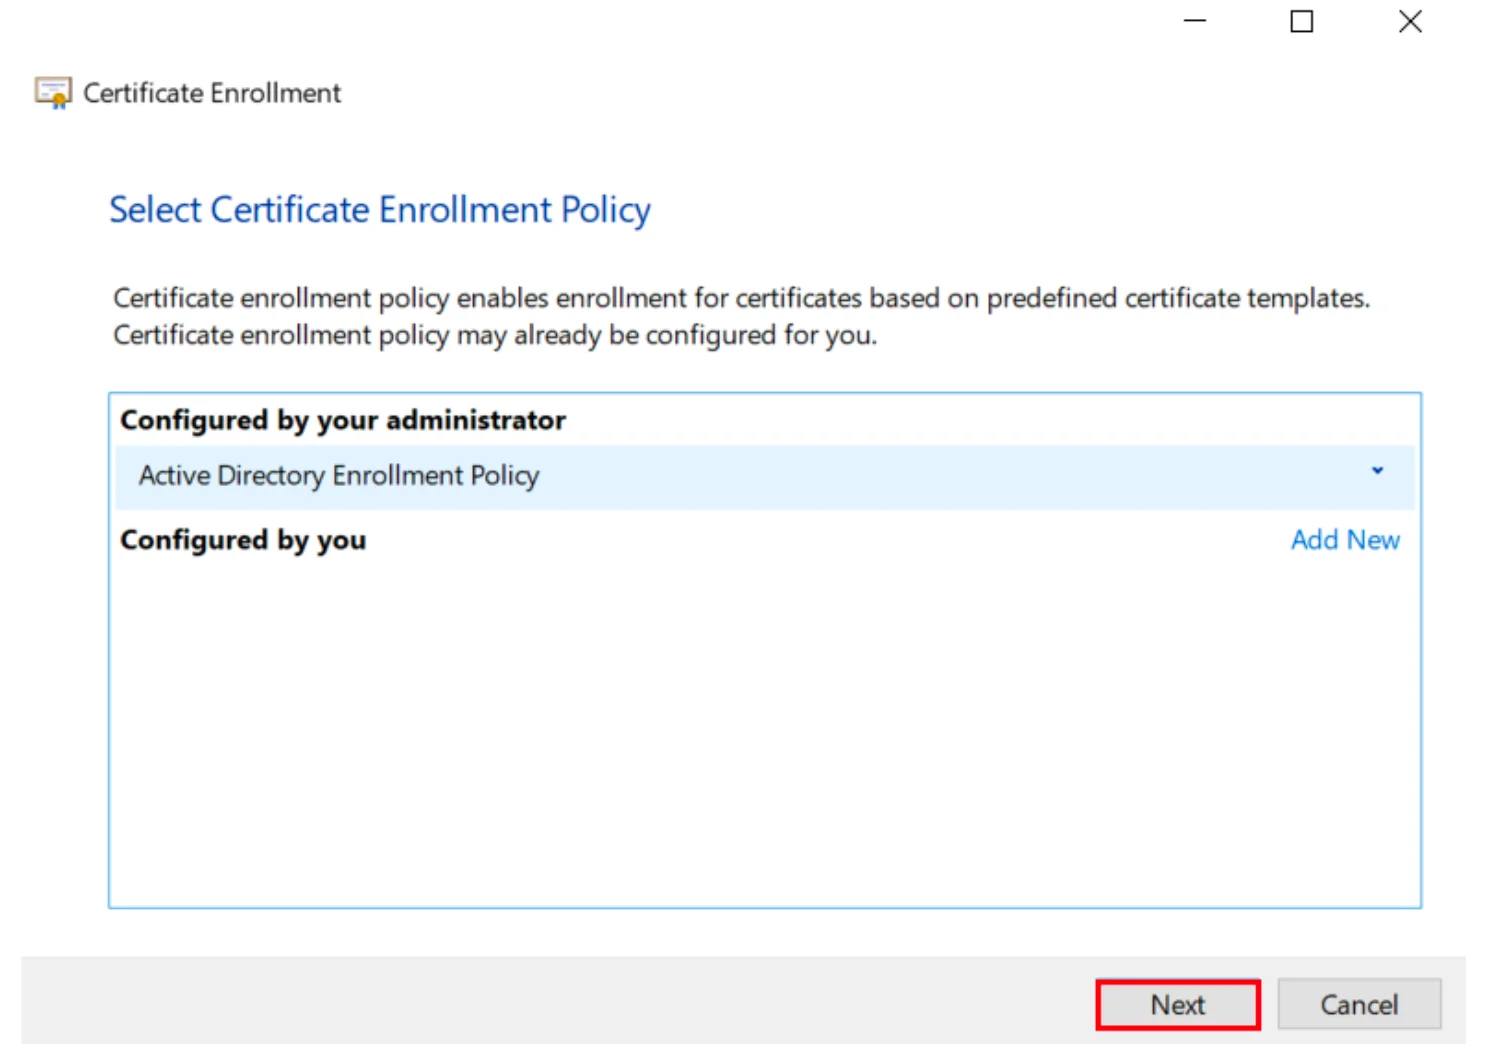
Next again.
-
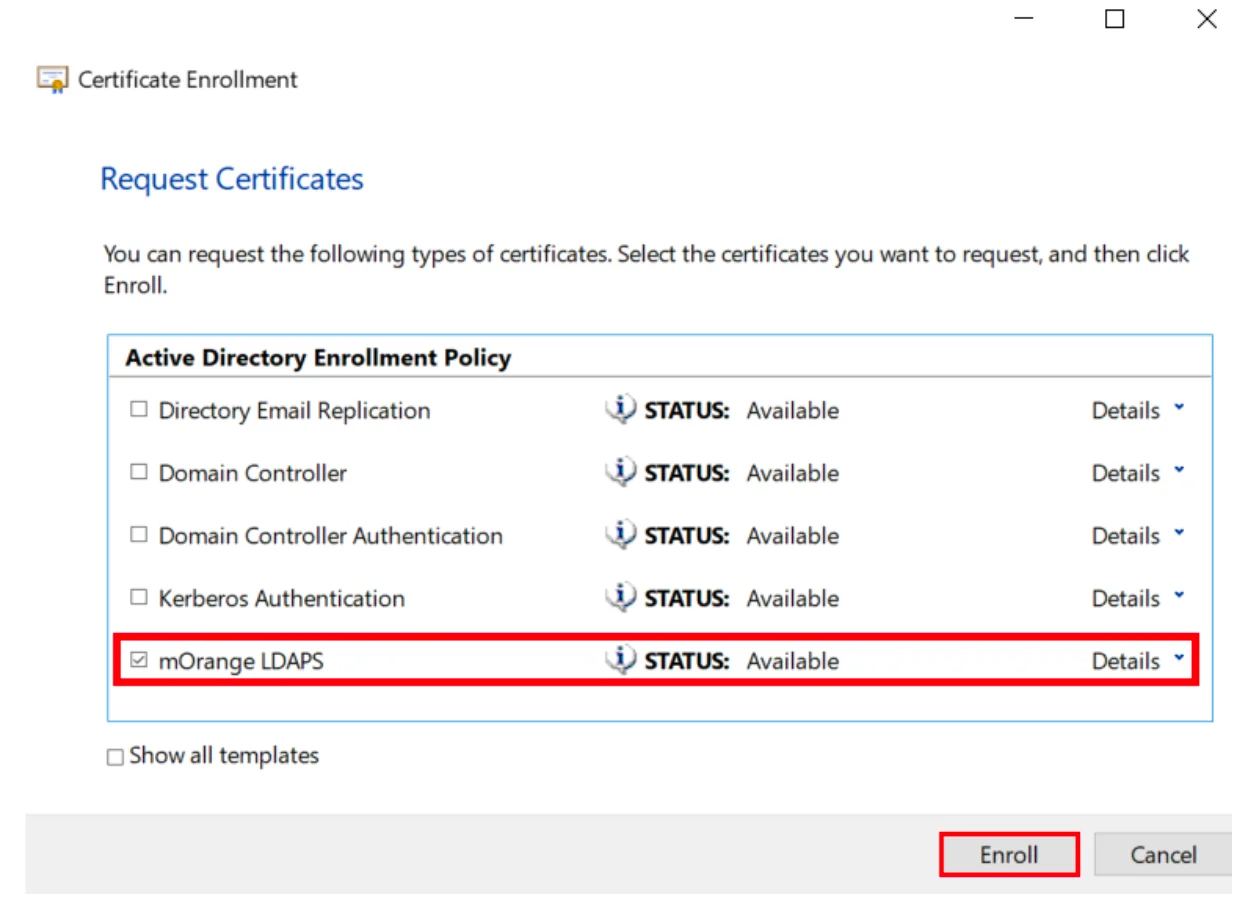
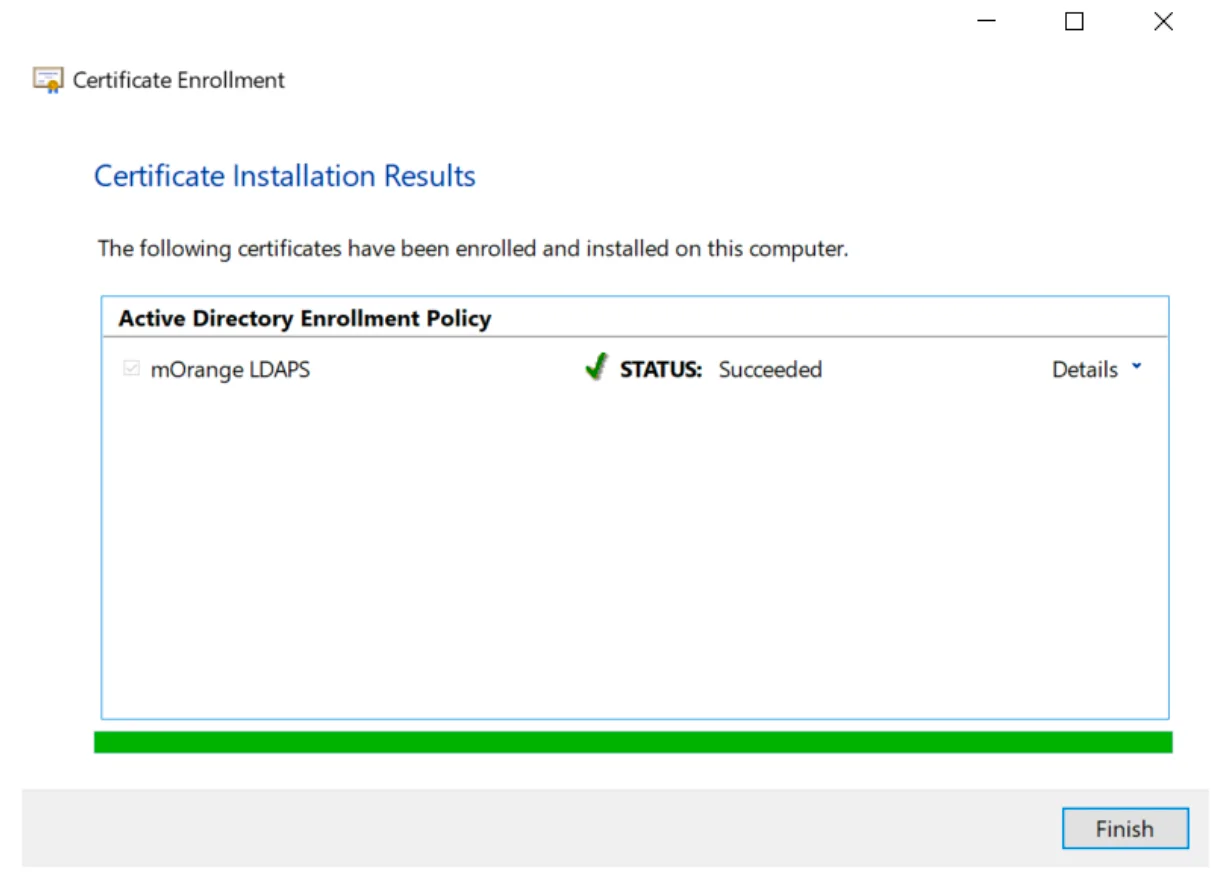
Select your certificate, click Enroll. Click Finish to complete.
-
Click Finish to complete.
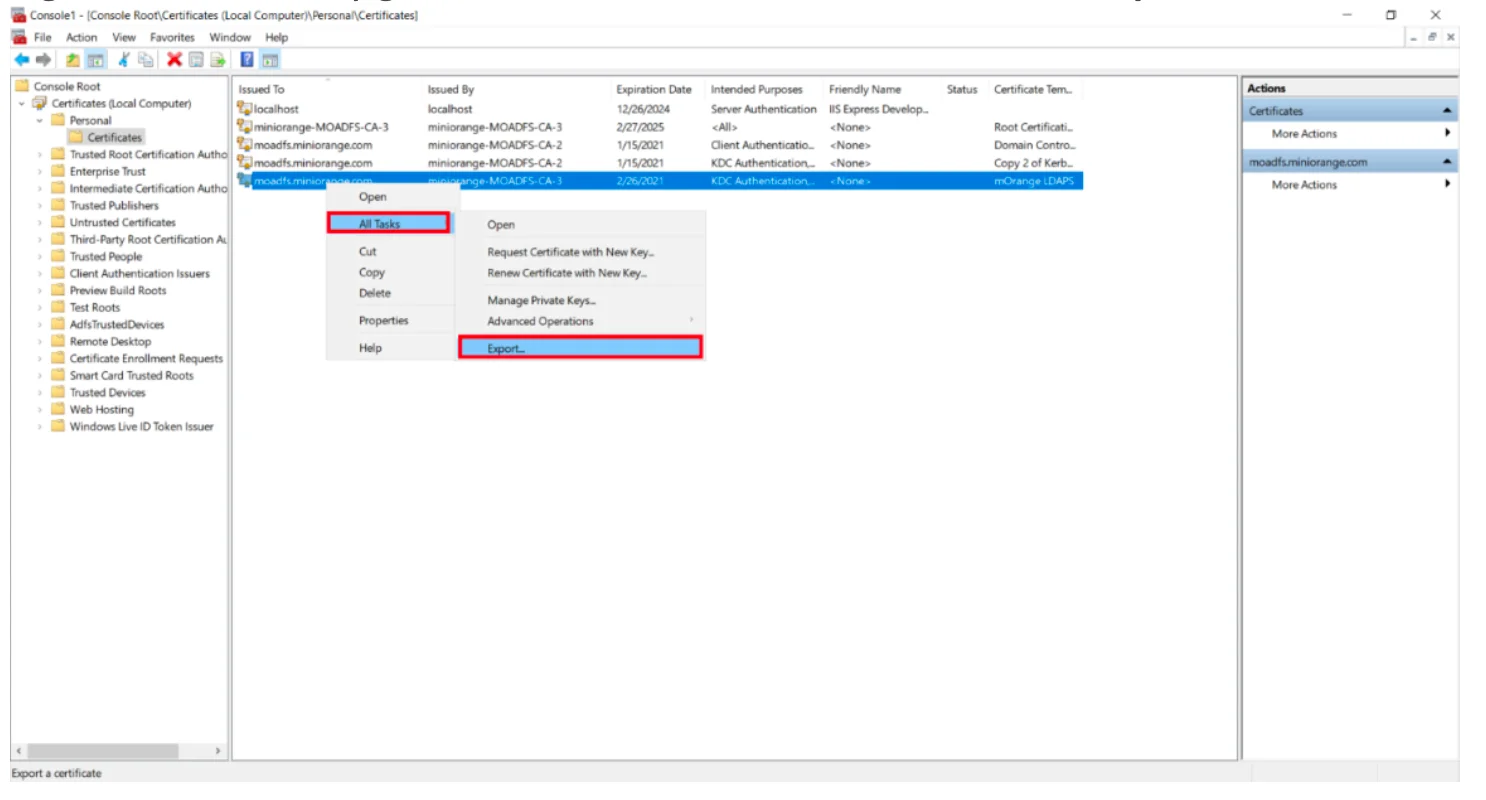
1.5 Export the Created Certificate
-
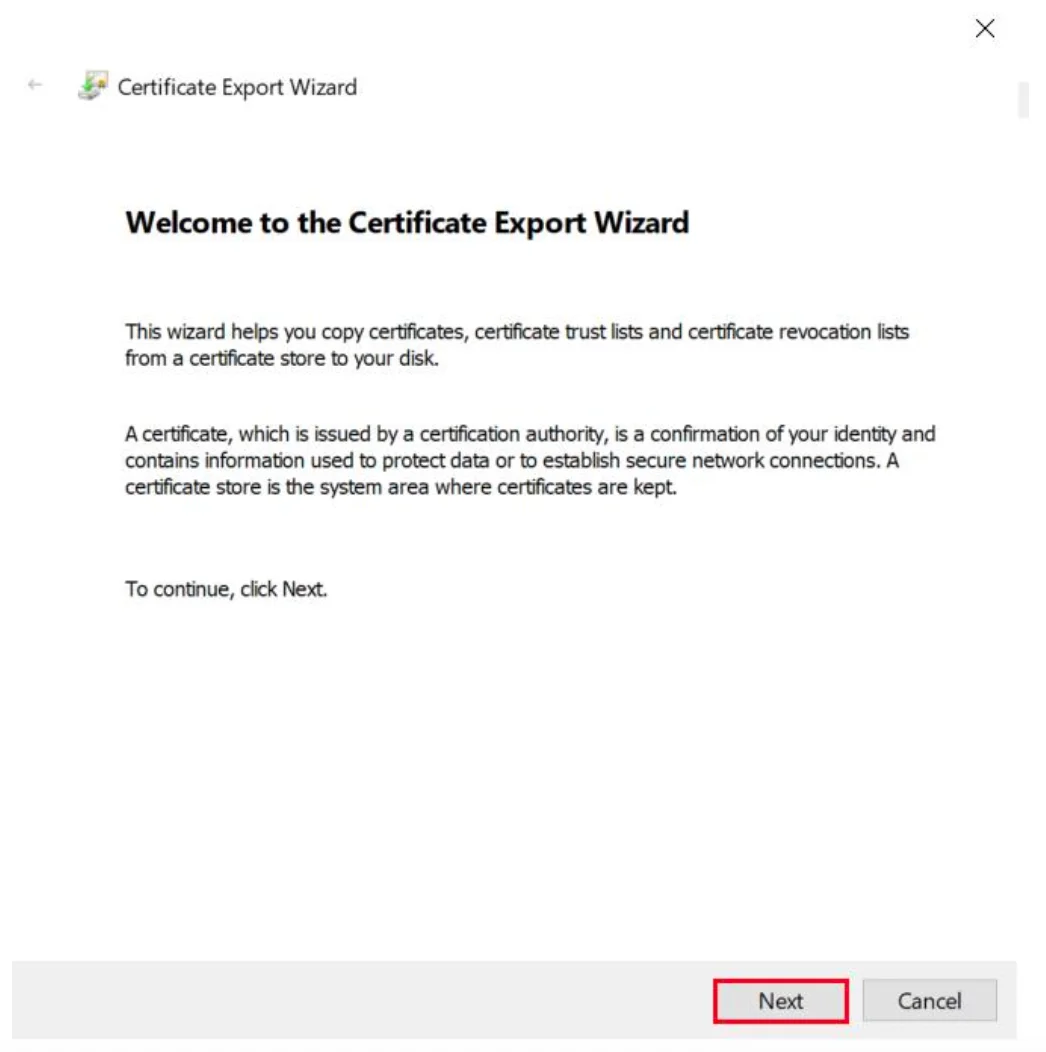
Right-click your newly generated certificate → All Tasks → Export.
-
Click Next.
-
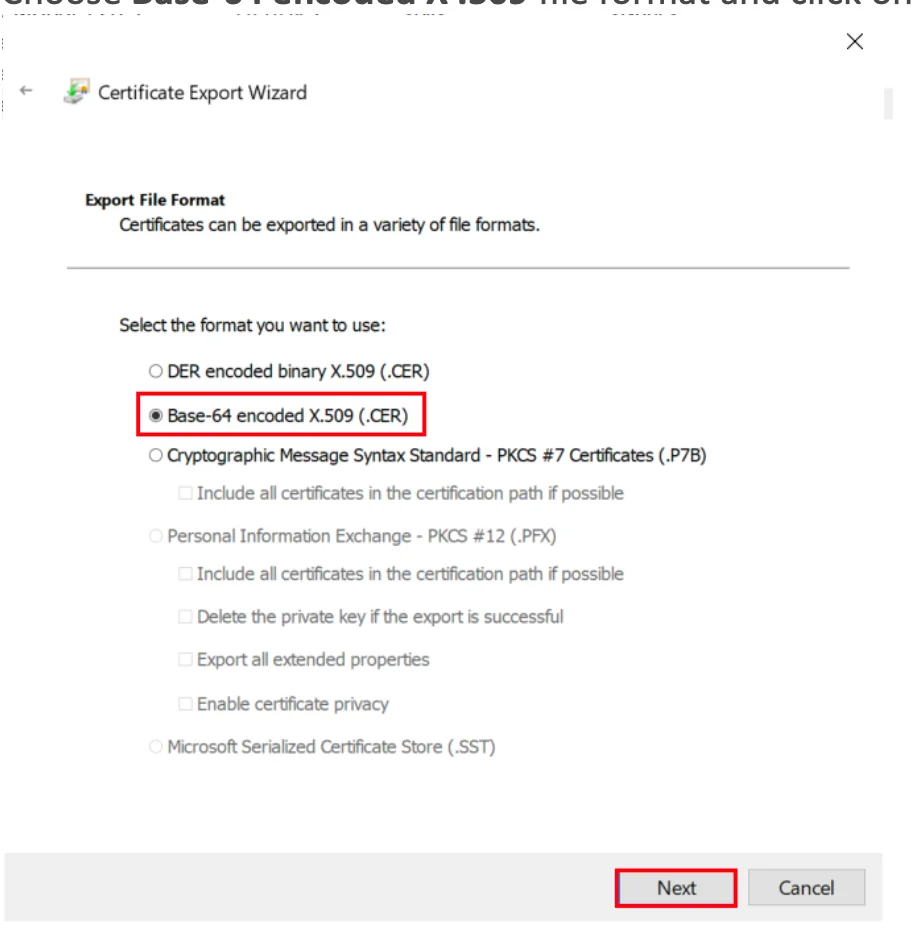
Select Do not export the private key, click Next.
-
Choose Base-64 encoded X.509 (.CER) format, click Next.
-
Choose export location (e.g.,
C:\certs\AD_LDAPS.cer), click Next.
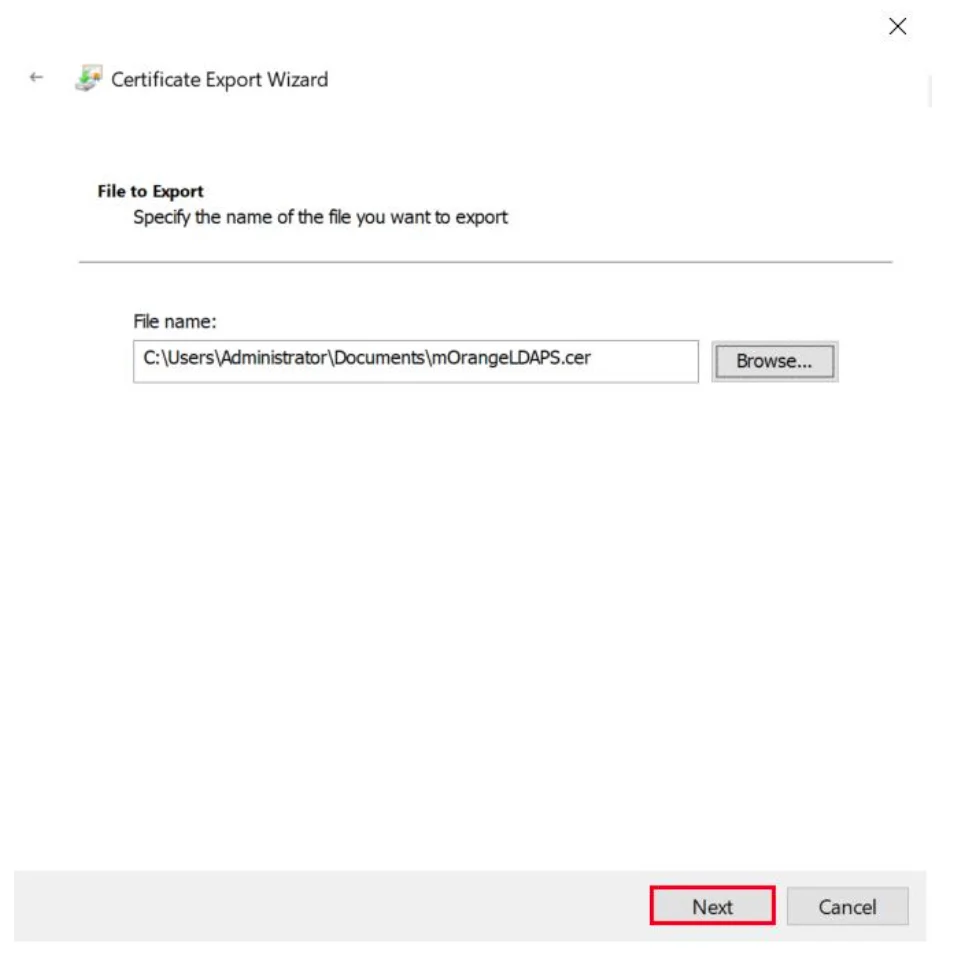
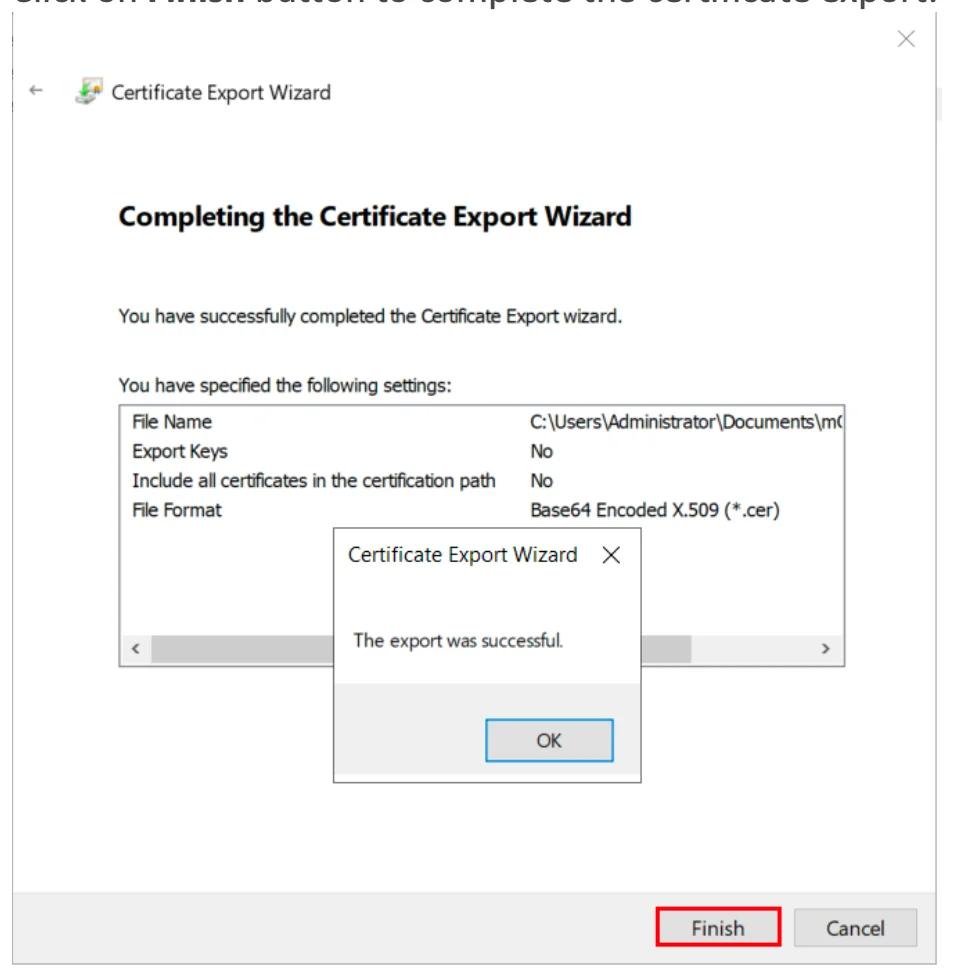
- Click Finish to complete the export.
Step 2: Configure LDAPS on the Client Side Server
Convert and Install the Certificate using OpenSSL
Windows
- If OpenSSL is not installed, download it from:
http://gnuwin32.sourceforge.net/packages/openssl.htm - Copy the certificate file you generated in the previous step to the machine on which PHP is running. Run the following command:
C:\openssl\openssl x509 -in mOrangeLDAPS.cer -out mOrangeLDAPS.pem
- This creates the certificate file in a form that OpenLDAP Client Library can use.
- Place the .pem file generated in a directory of your choice (C:\openldap\sysconf may be a good choice since that directory already exists.)
- Add the following line to your ldap.conf file:
TLS_CACERT C:\openldap\sysconf\mOrangeLDAPS.pem
- This directive tells the OpenLDAP Client Library about the location of the certificate, so that it can be picked up during initial connection.
Linux
- Run the following command to install the Openssl in Ubuntu
sudo apt-get install openssl
- Run the following command to install the Openssl in RHEL/CentOS
yum install openssl
- Copy the certificate file you generated in the previous step to the machine on which PHP is running. Run the following command:
/openssl x509 -in mOrangeLDAPS.cer -out mOrangeLDAPS.pem