UKG Ready Connection
UKG Ready is a cloud-based HCM platform for small to midsize businesses that unifies HR, payroll, talent, and workforce management in a single system of record, ensuring accurate data and streamlined operations.
Create UKG Ready Connection on Hire2Retire
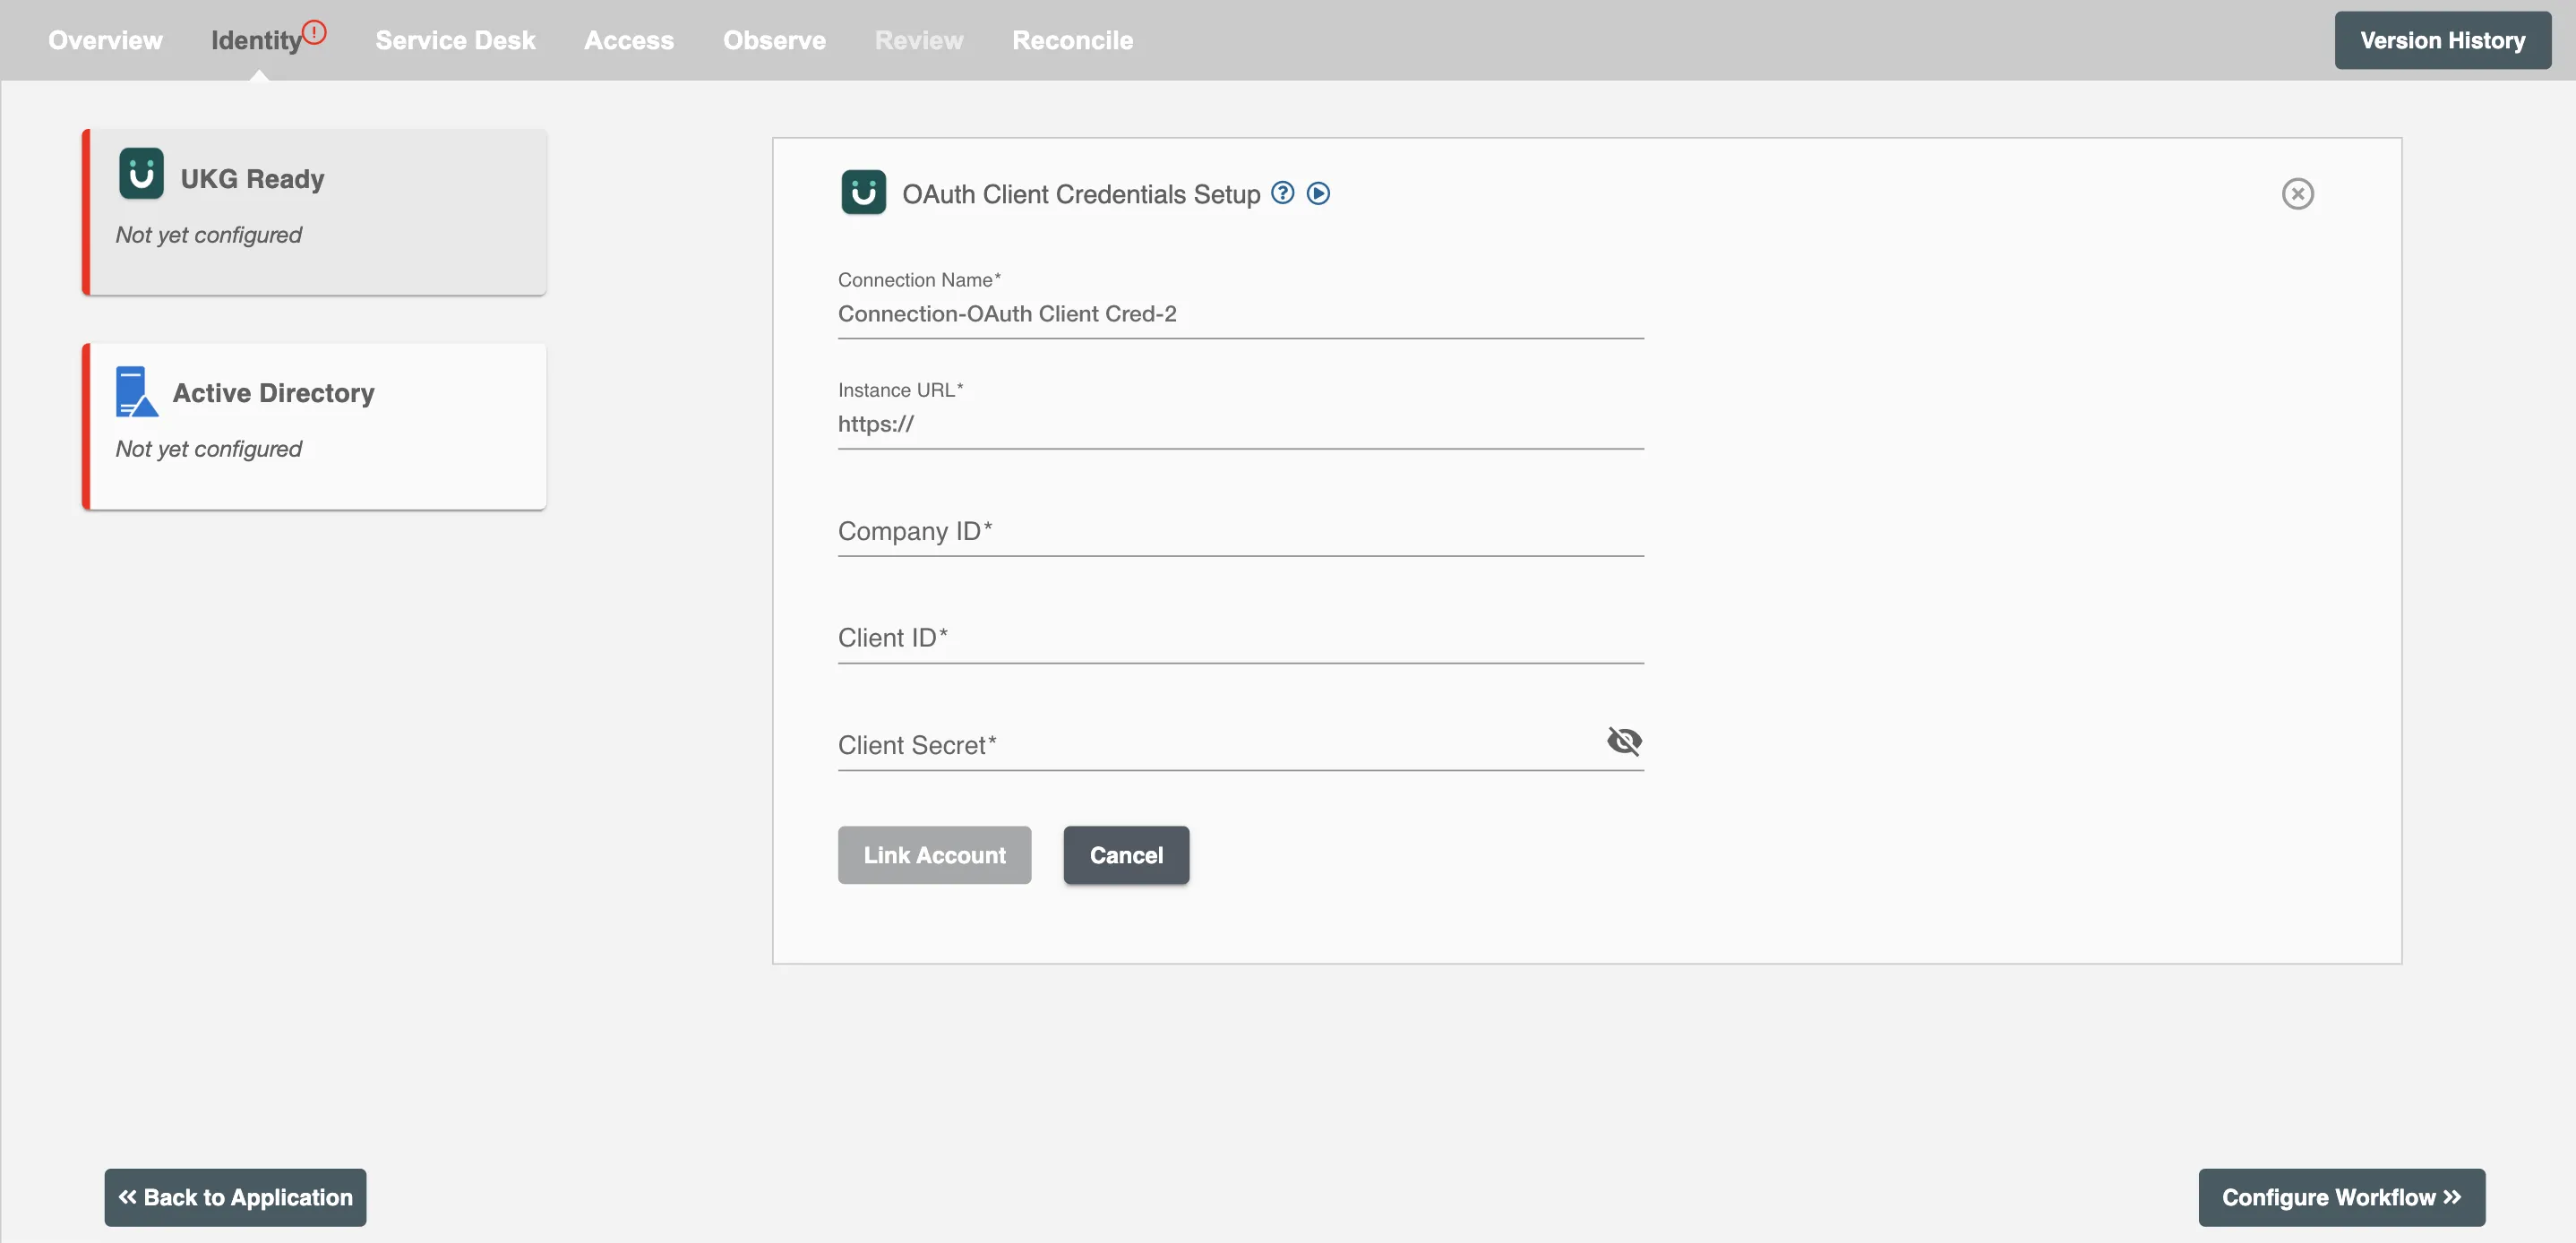
Hire2Retire requires the following details to create a connection with your UKG Ready server:
-
Connection Name - A user-defined nomenclature for your connection. By default, the connection name is "Connection-OAuth Client Cred-1", you can change the name as per your preference.
-
Identity URL - The REST Server URL of your UKG Ready Cloud service.
-
Company ID - An identifier for the company using the UKG Ready system. It is used to specify which company's data to access.
-
Client Id - The client ID is a unique identifier assigned to your application when you register it as a client with the UKG Ready platform.
-
Client Secret - The client secret is a confidential and unique identifier associated with your application when you register it as a client with the UKG Ready platform.
Set Up Security Profile Permissions
-
Sign in to your UKG Ready account.
-
Click the Menu (☰) icon in the top-left corner.

Figure 1. UKG Dashboard -
Navigate to Settings > Profiles/Policies > Security.
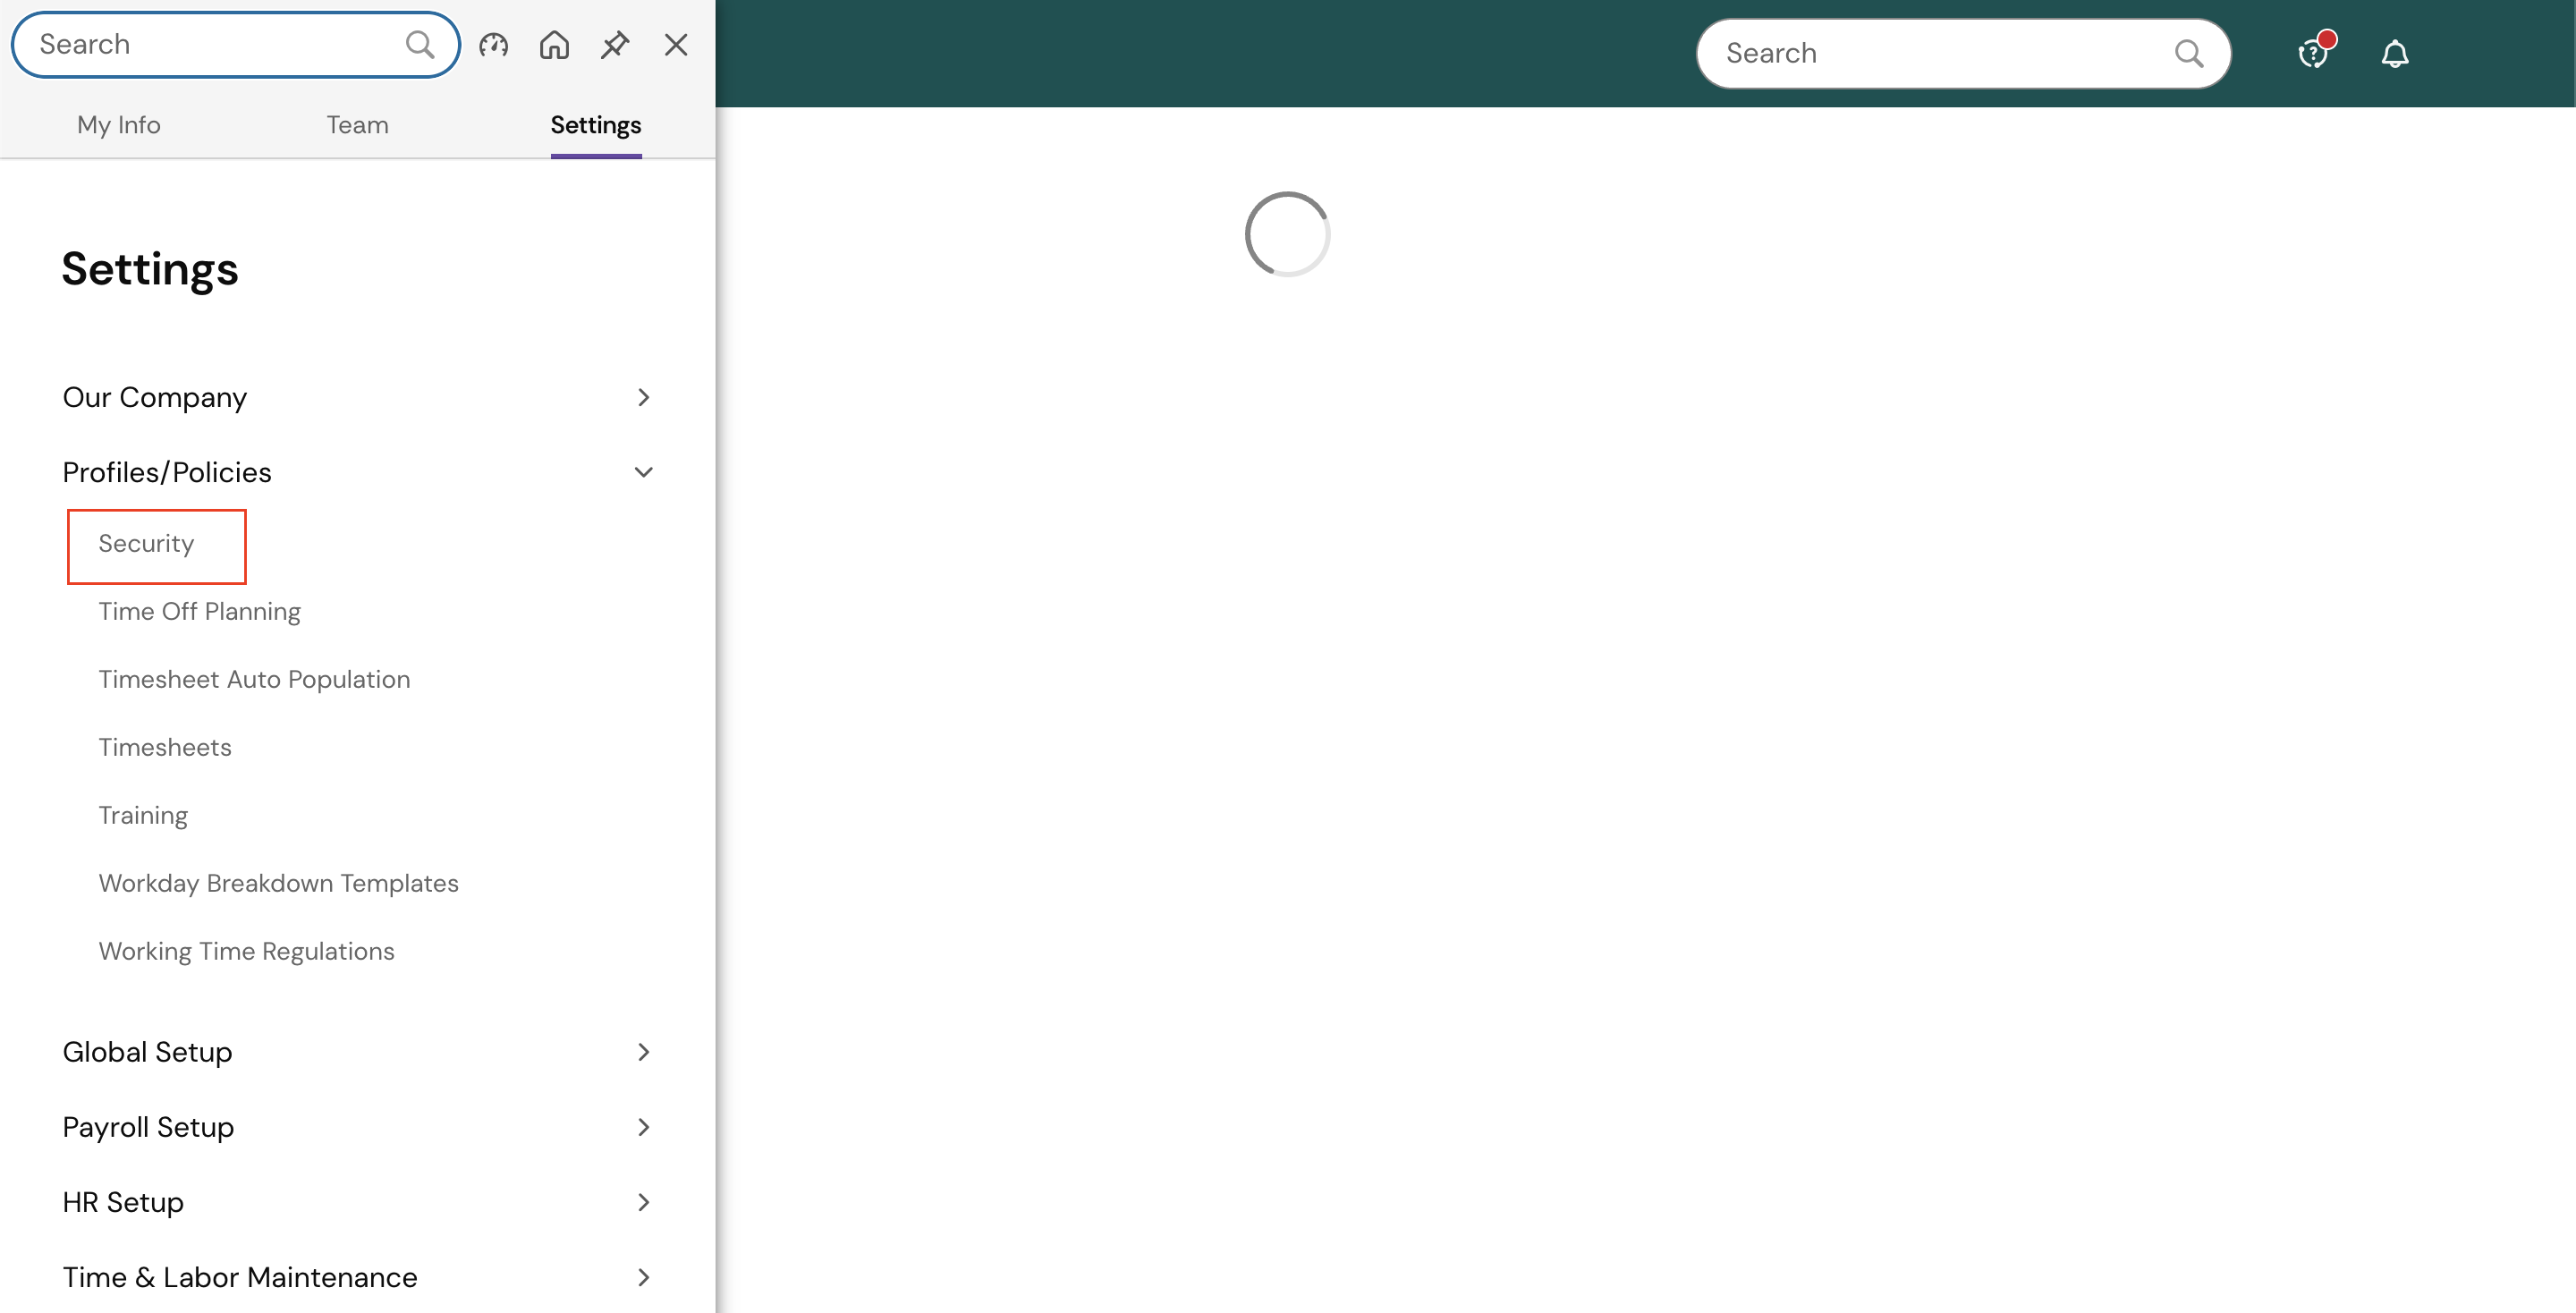
Figure 2. Security Tab -
Click on the New Security Profile button.

Figure 3. New Security Profile -
Enter a Name, optionally add a Description, and set the profile to Active.
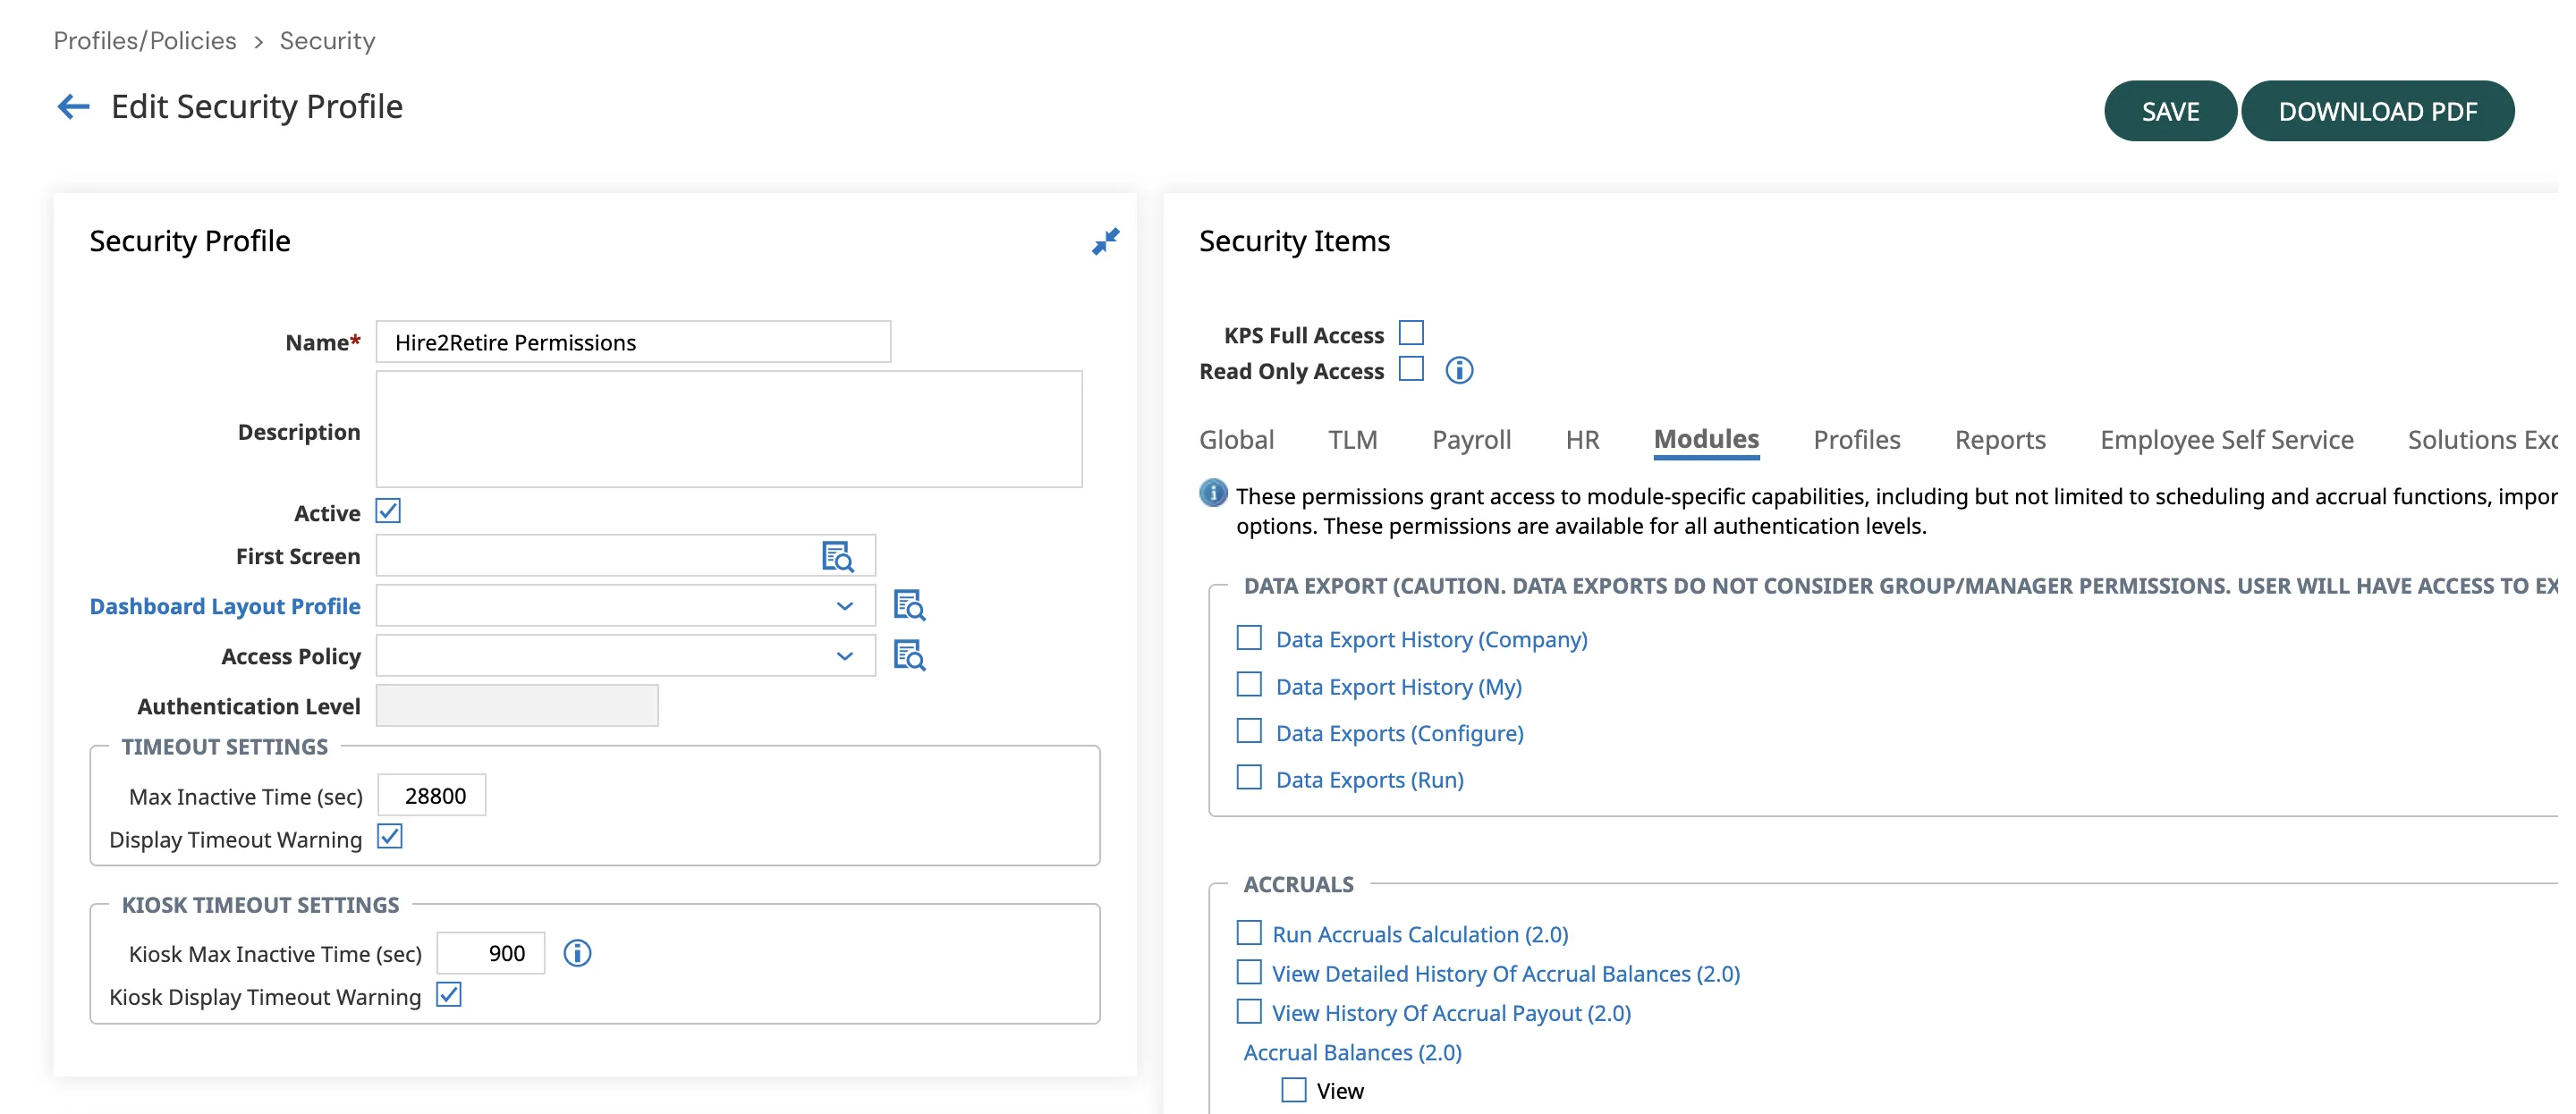
Figure 4. Configure Security Profile -
In the Security Items section, Navigate to Modules > REST API Resources
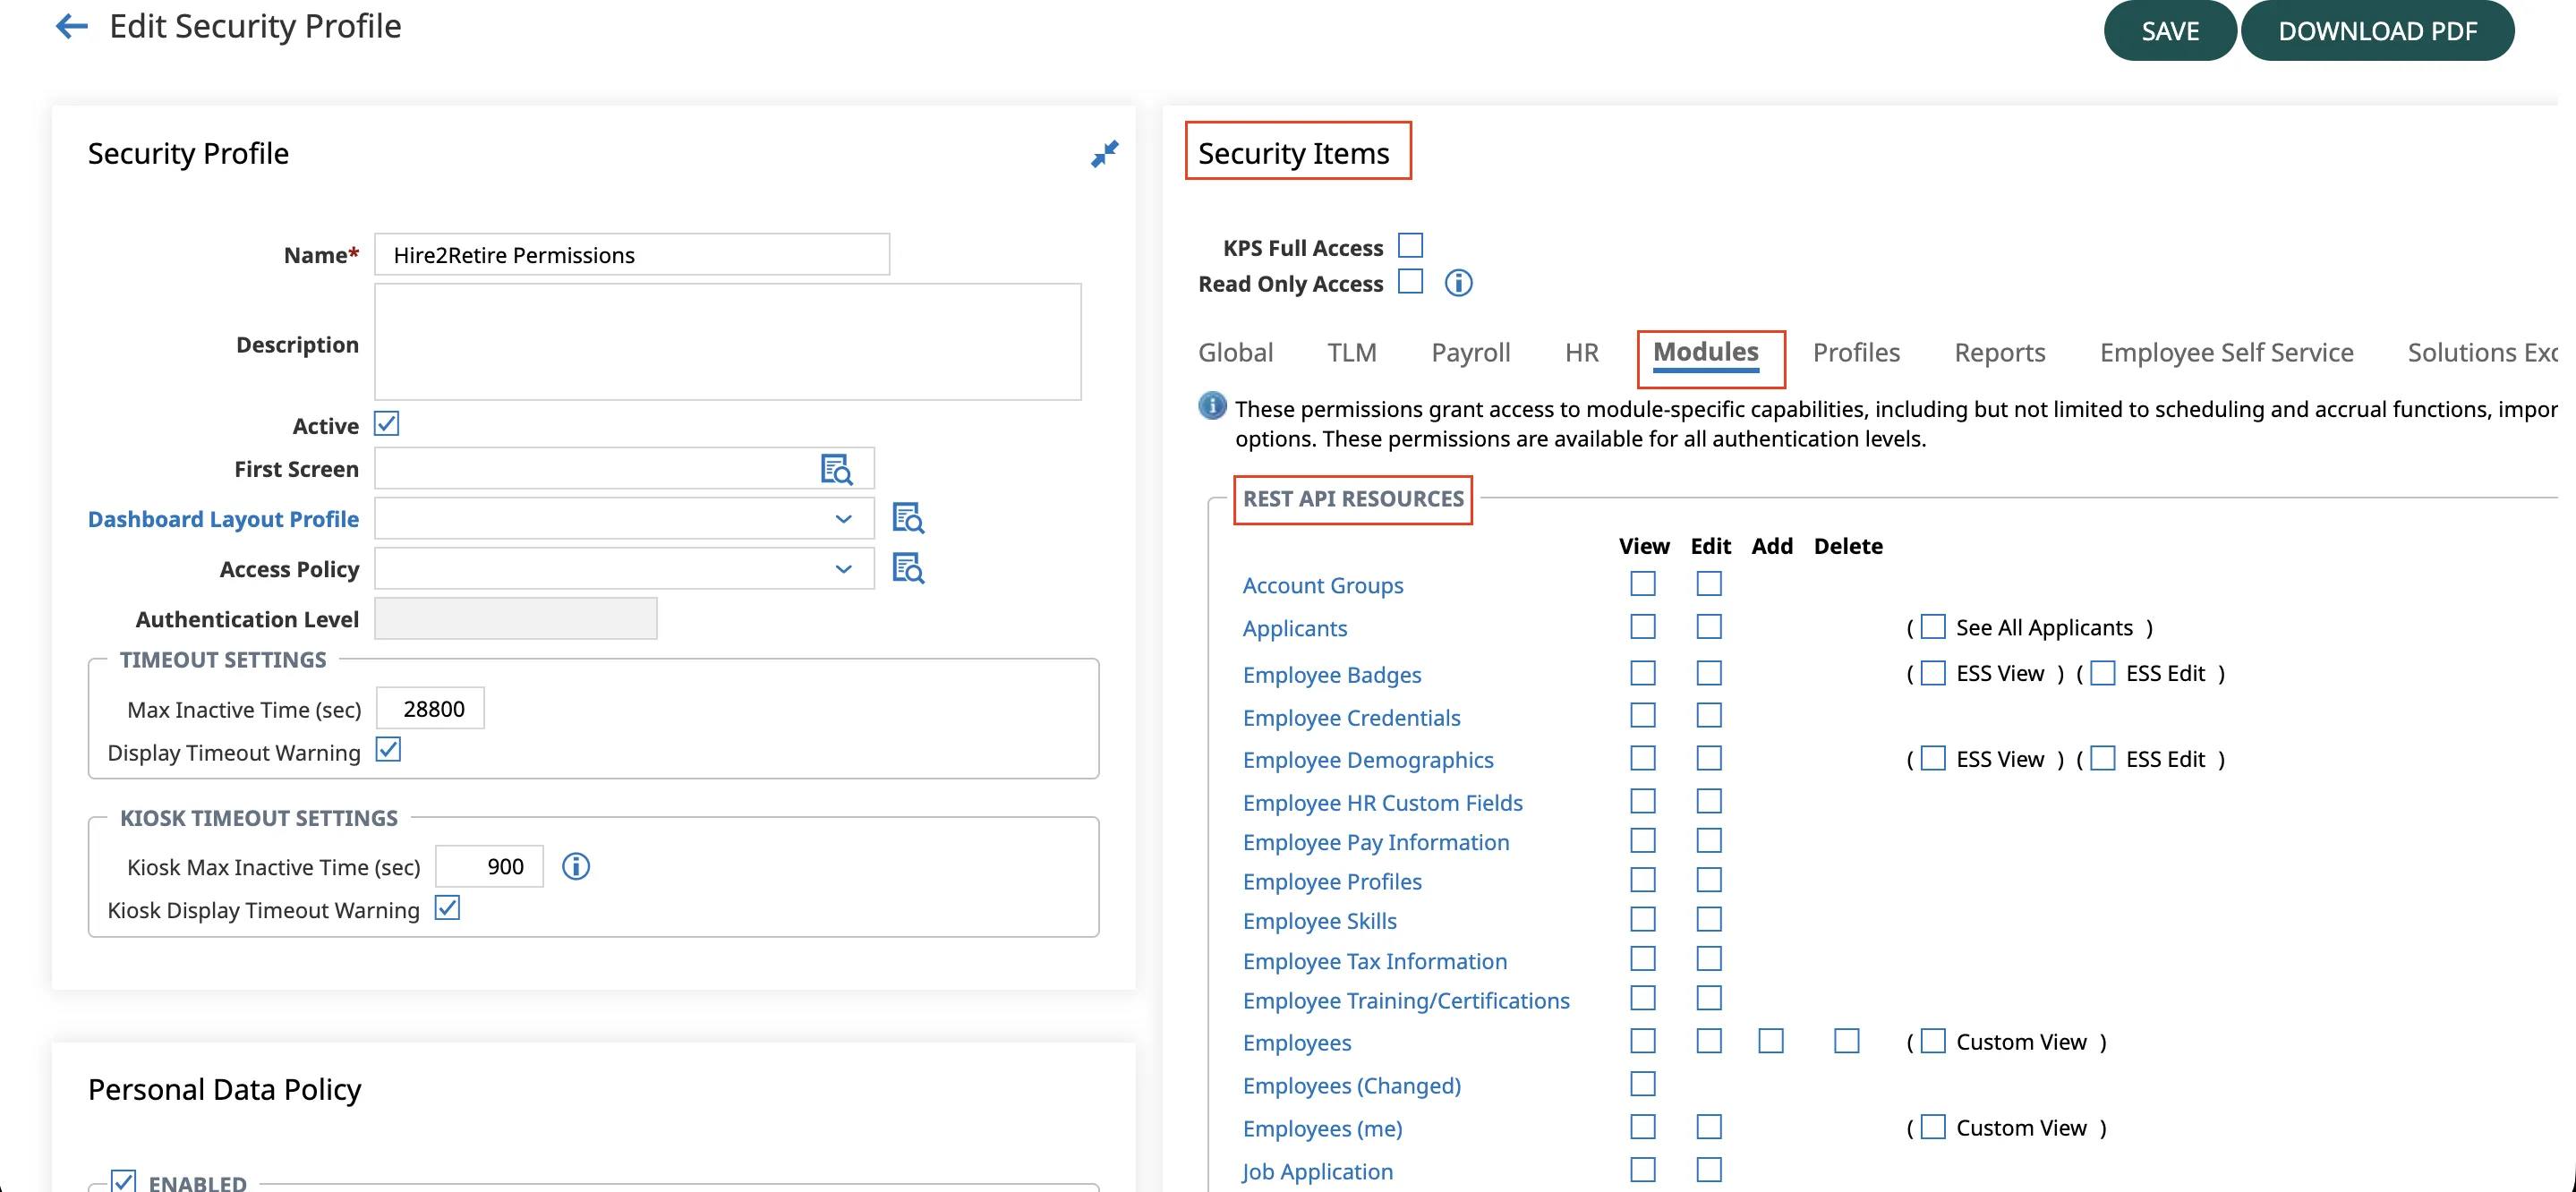
Figure 5. New Security Profile -
Add the following Permissions
- Employees -> View
- Employee Demographics -> View
- Employee Pay Information -> View
- Employees -> Changed View
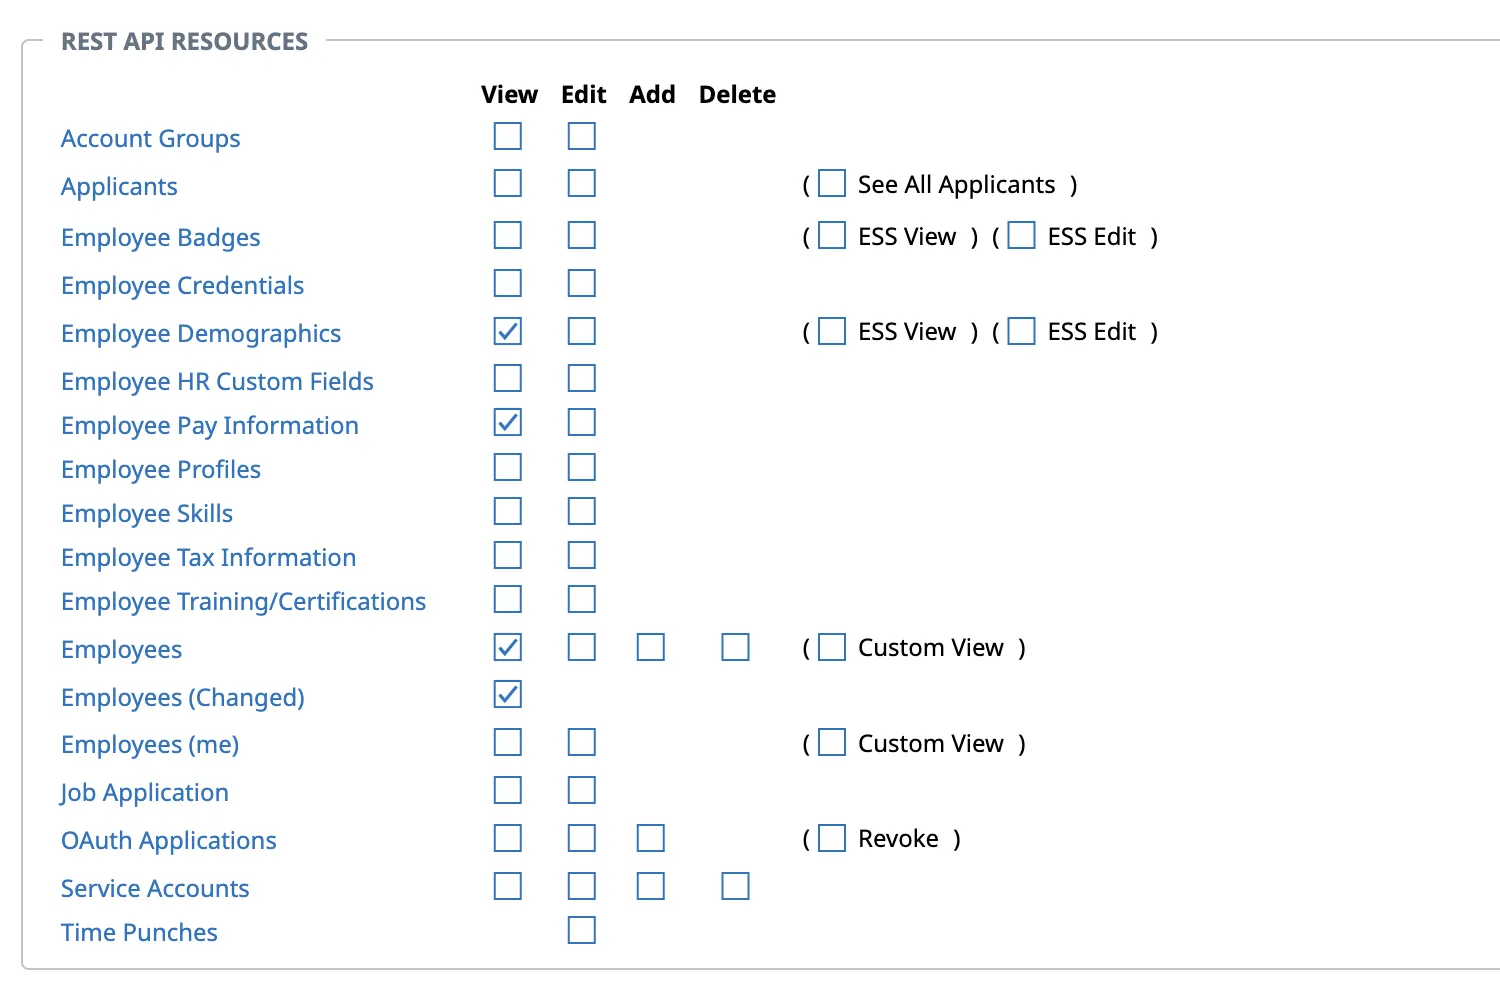
Figure 6. Required Permissions -
Click Save to apply the security profile changes.
Generating your Client Credentials
-
Click the Menu (☰) icon in the top-left corner.
Figure 7. UKG Dashboard -
Go to: Settings → Global Setup → Company Setup
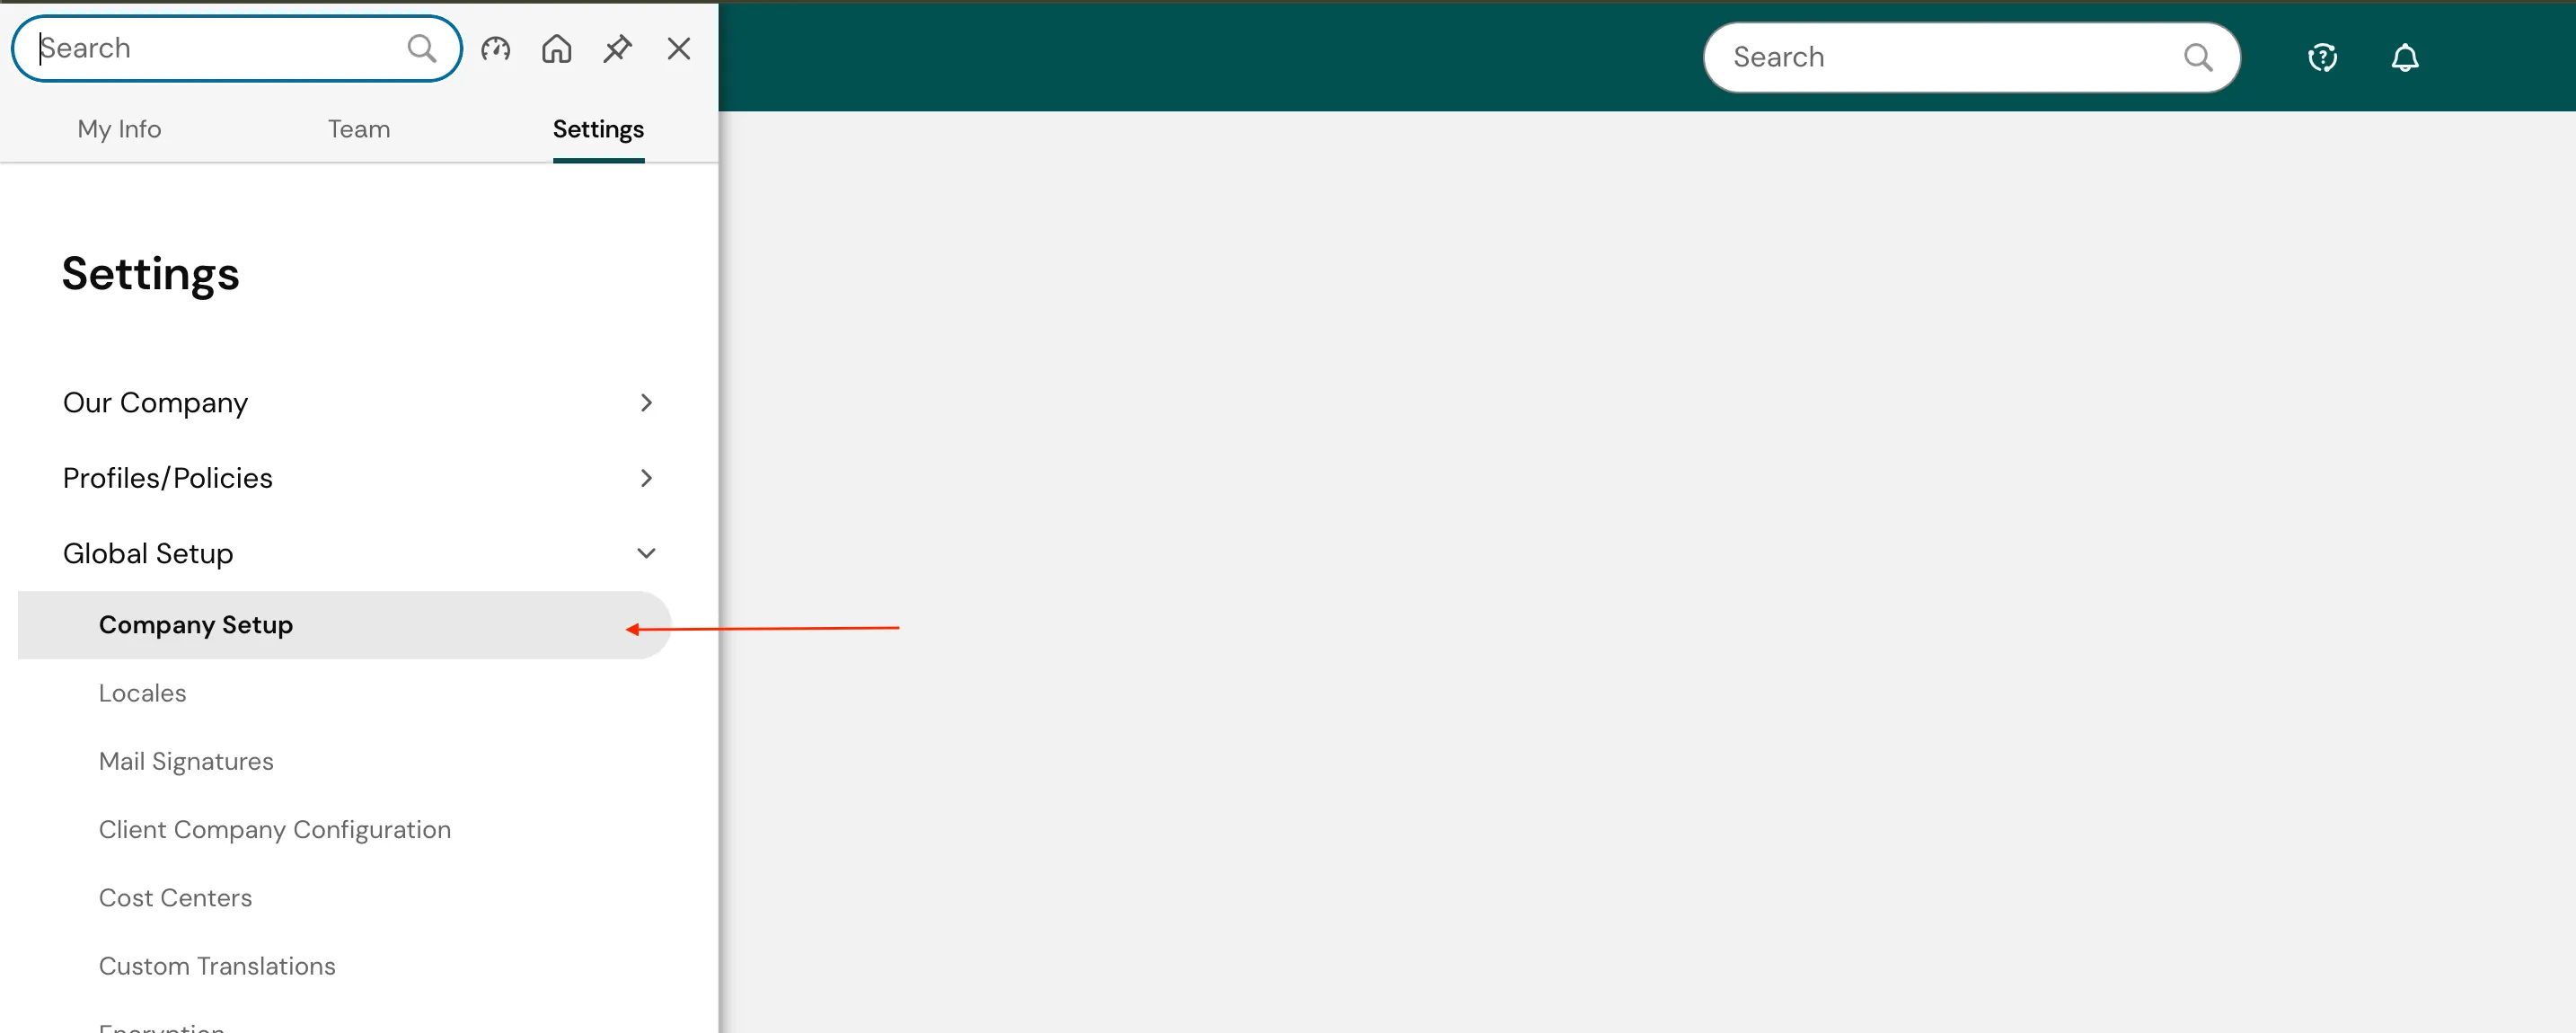
Figure 8. Company Setup -
If you do not see an OAuth Application tab, you must first add it.
-
On the Company Setup page, click Edit Tabs.
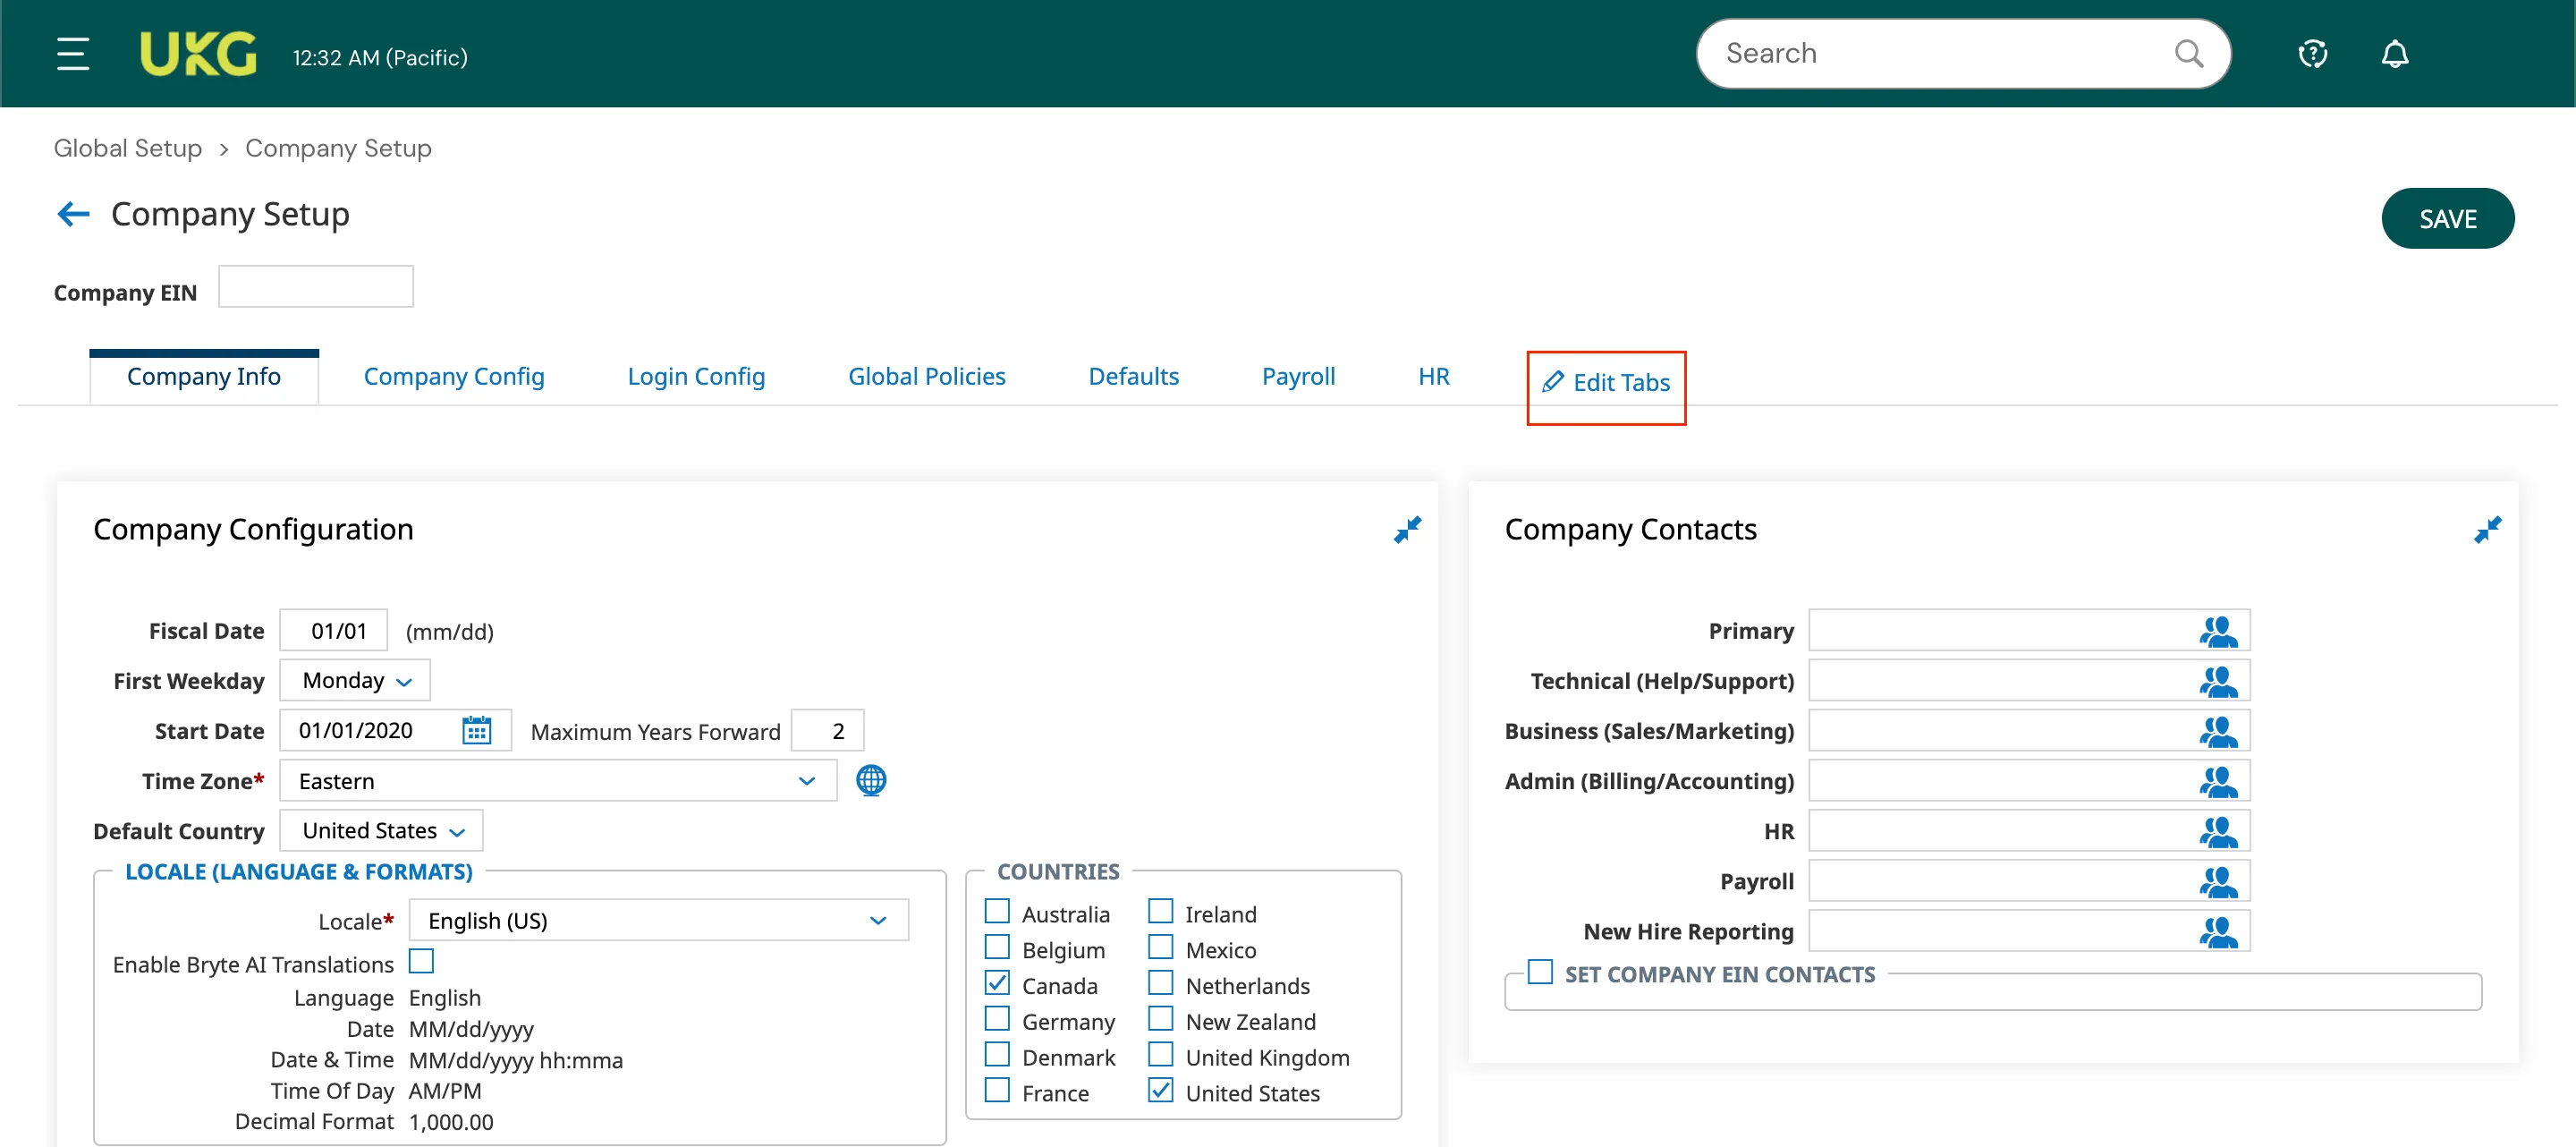
Figure 9. Edit Tabs -
Click the ➕ (Add Tab) button on the left panel.

Figure 10. Add Tab in Company Setup -
In the Tab Name field, enter: OAuth Application.
-
From the Available Windows panel on the right, locate OAuth Applications and drag it into the top field.
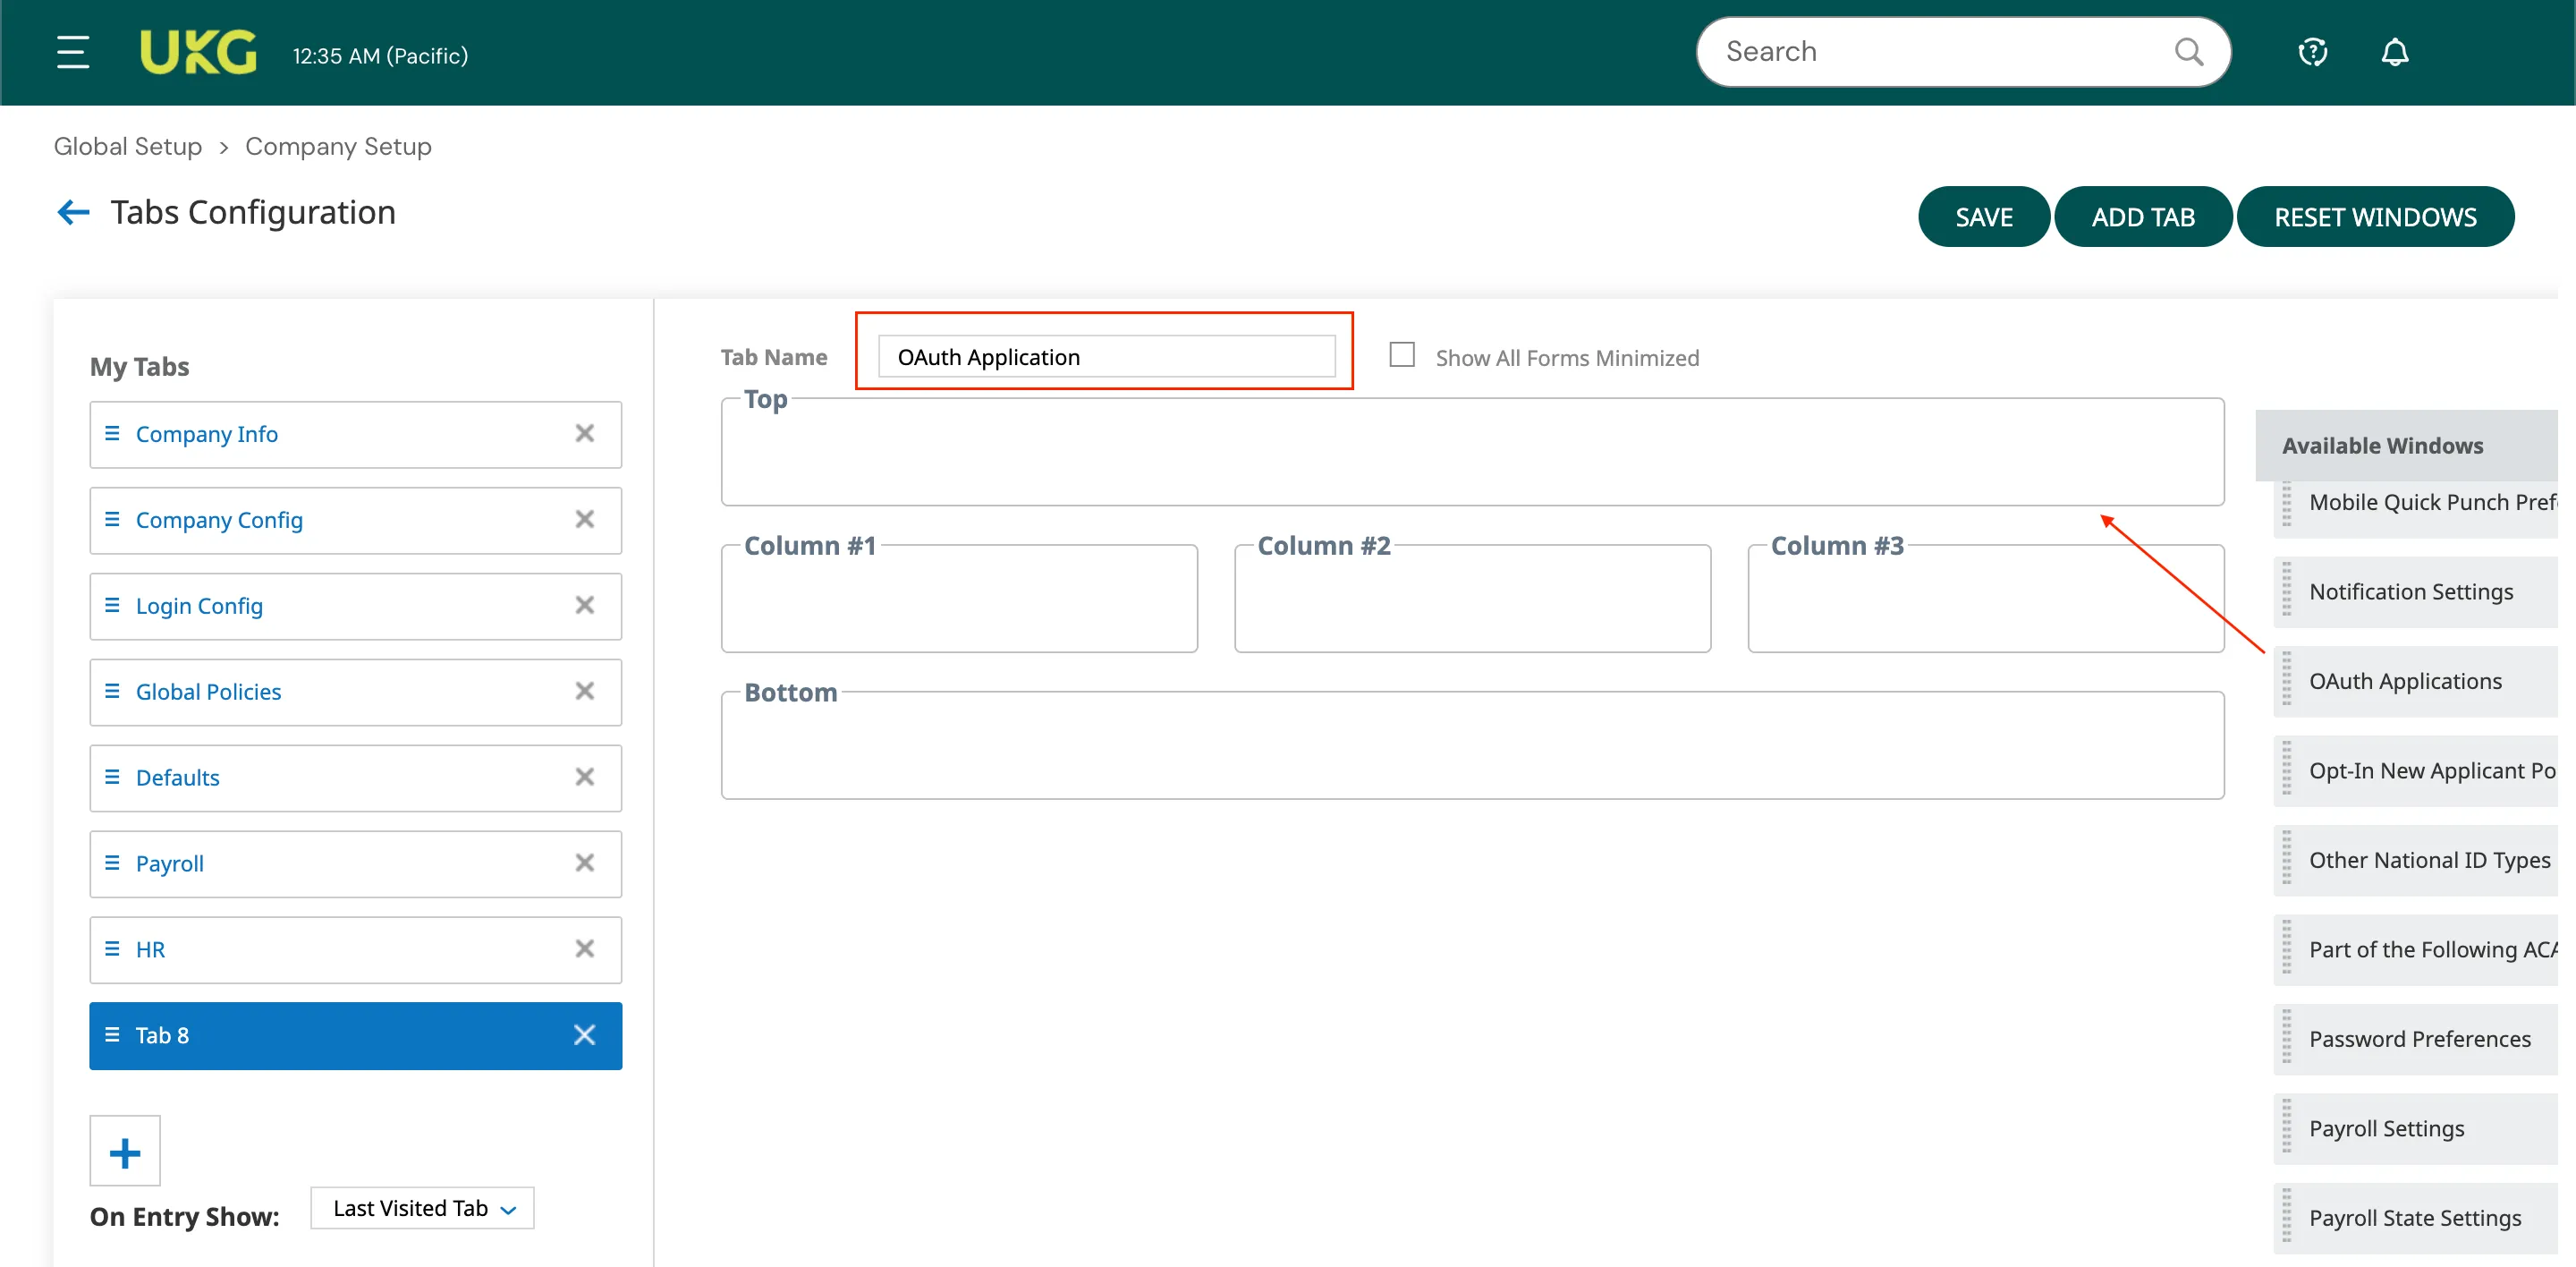
Figure 11. Add OAuth Application -
Fill in the rest of the fields and click Save to return to Company Setup.
-
Click the newly created OAuth Application tab.
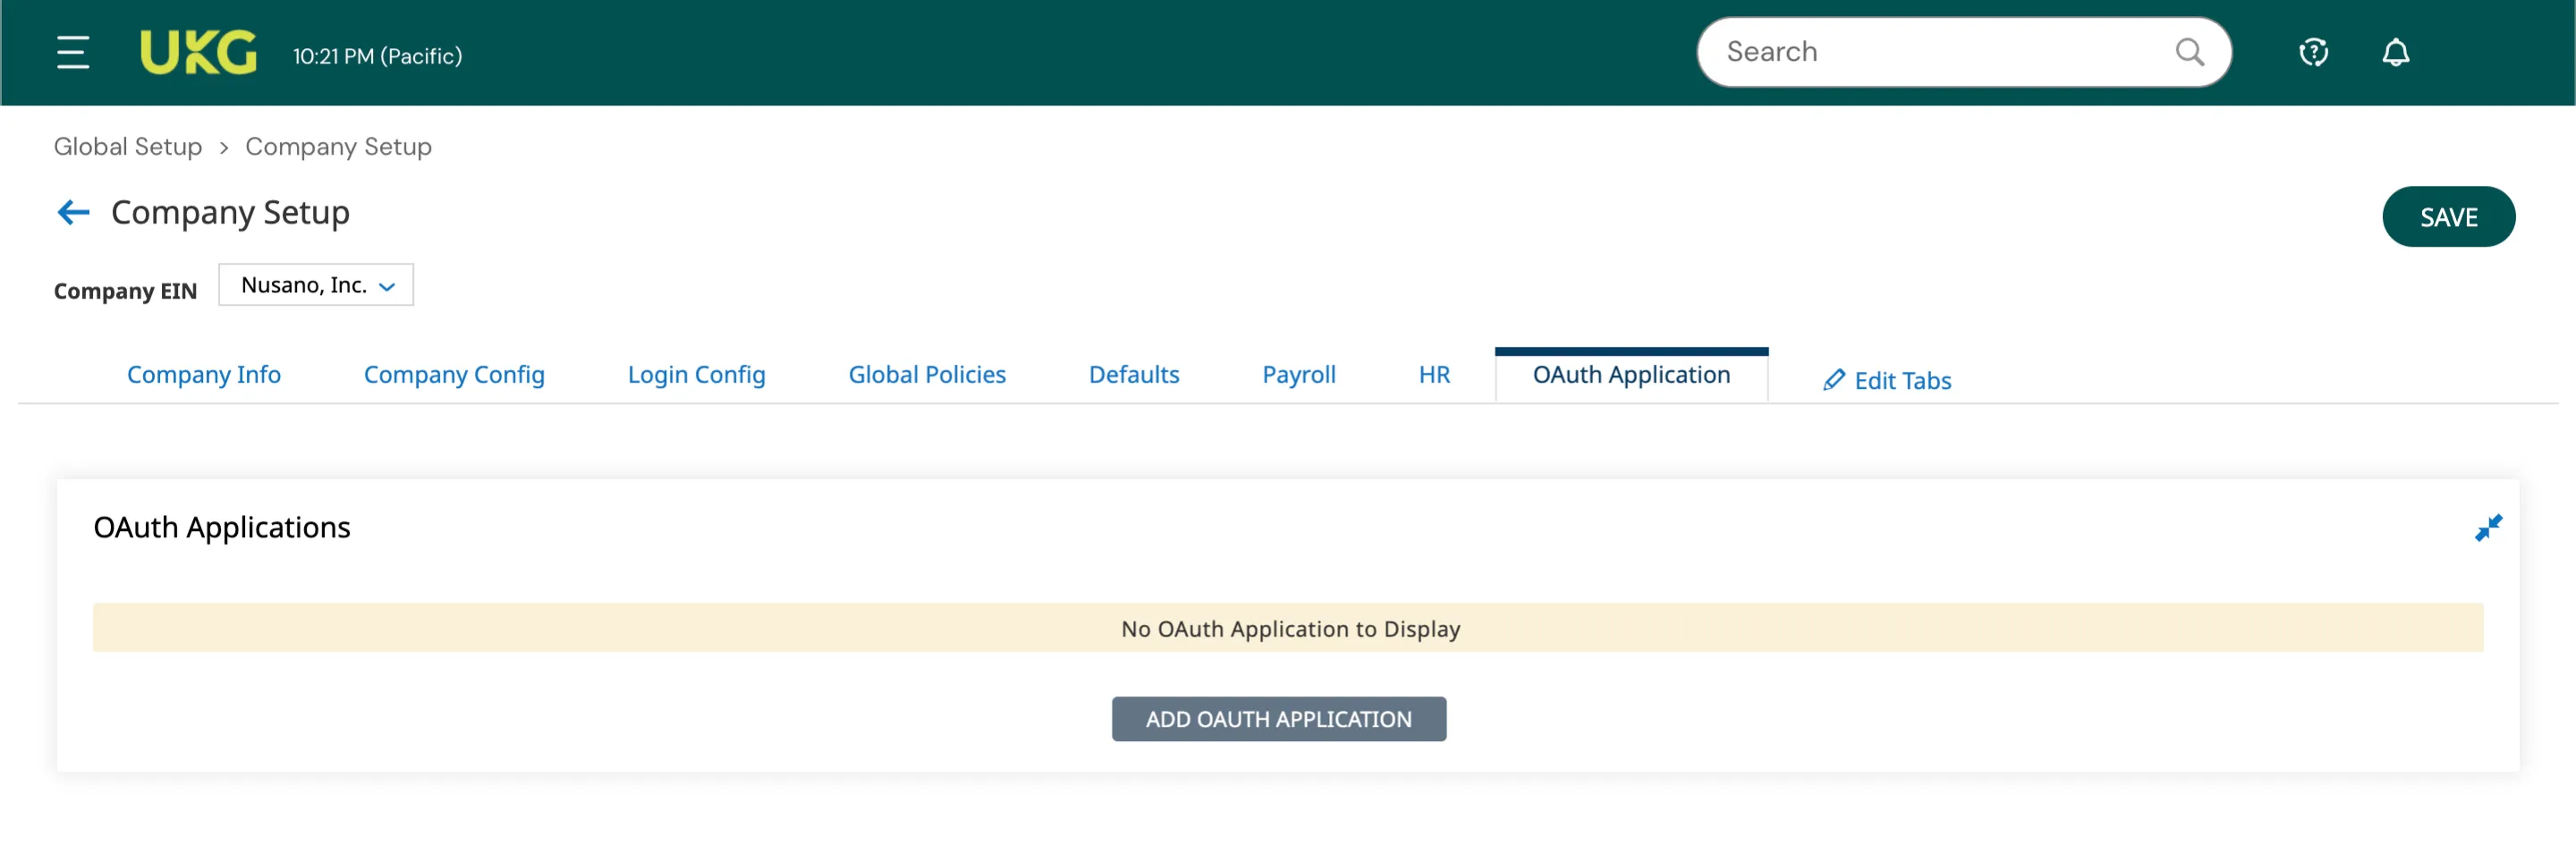
Figure 12. OAuth Application Tab -
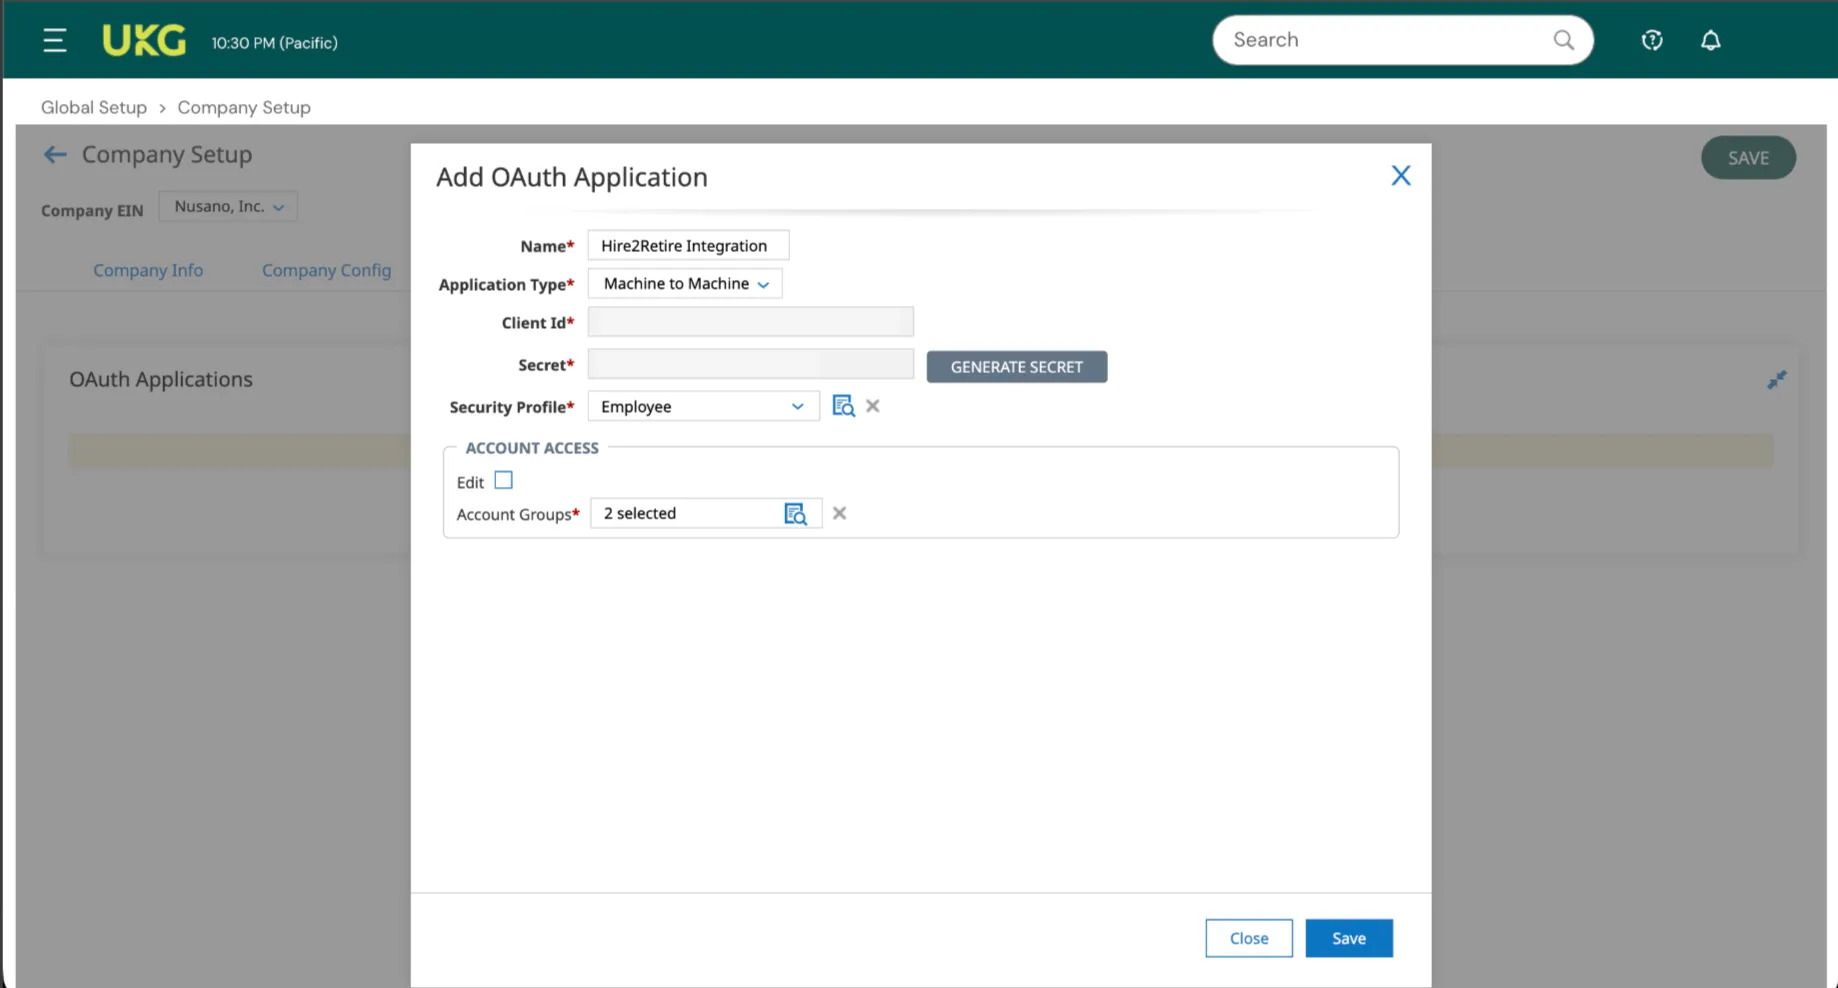
In the OAuth Applications section, click Add OAuth Application.
-
On the Add OAuth Application screen, complete the following fields:
- Name: Enter a recognizable name.
- Application Type: Select Machine to Machine.
- Client ID: Pre Generated.
- Secret: Click Generate Secret to create a secure client secret.
- Security Profile: Select the security profile created above
- Account Access: Under Account Groups*, select the account groups that this integration should have access to.
Finding your Company ID
-
Click the Menu (☰) icon in the top-left corner.
Figure 13. UKG Dashboard -
Navigate to My Team > My Employees > Employee Info.
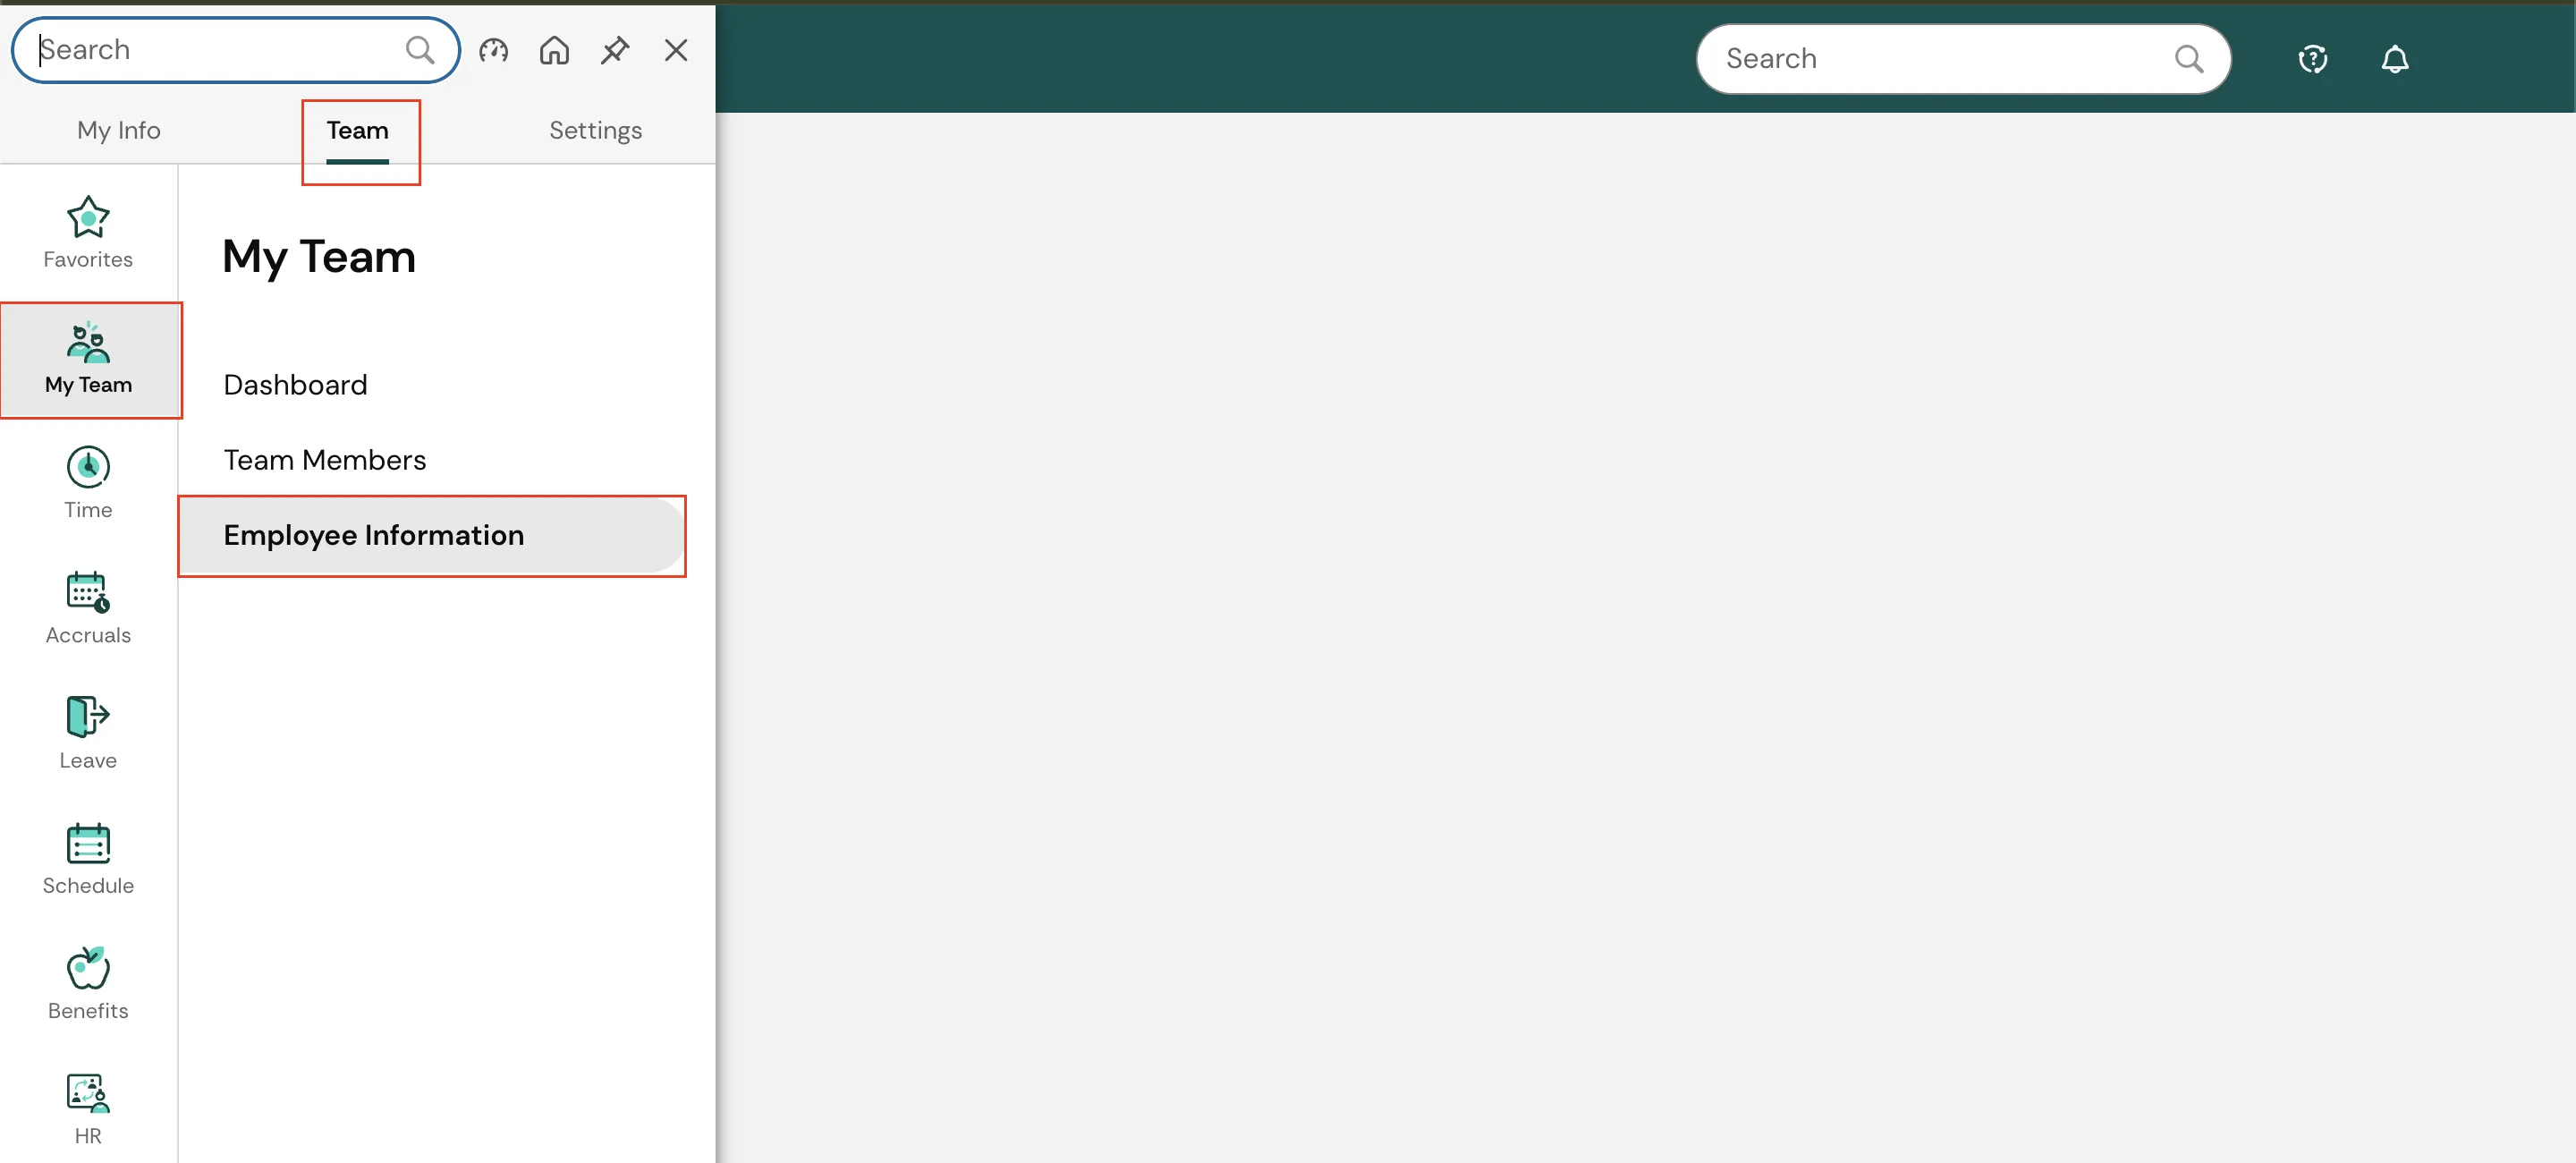
Figure 14. Employee Info -
Click Select Columns, then choose Add/Remove Columns.
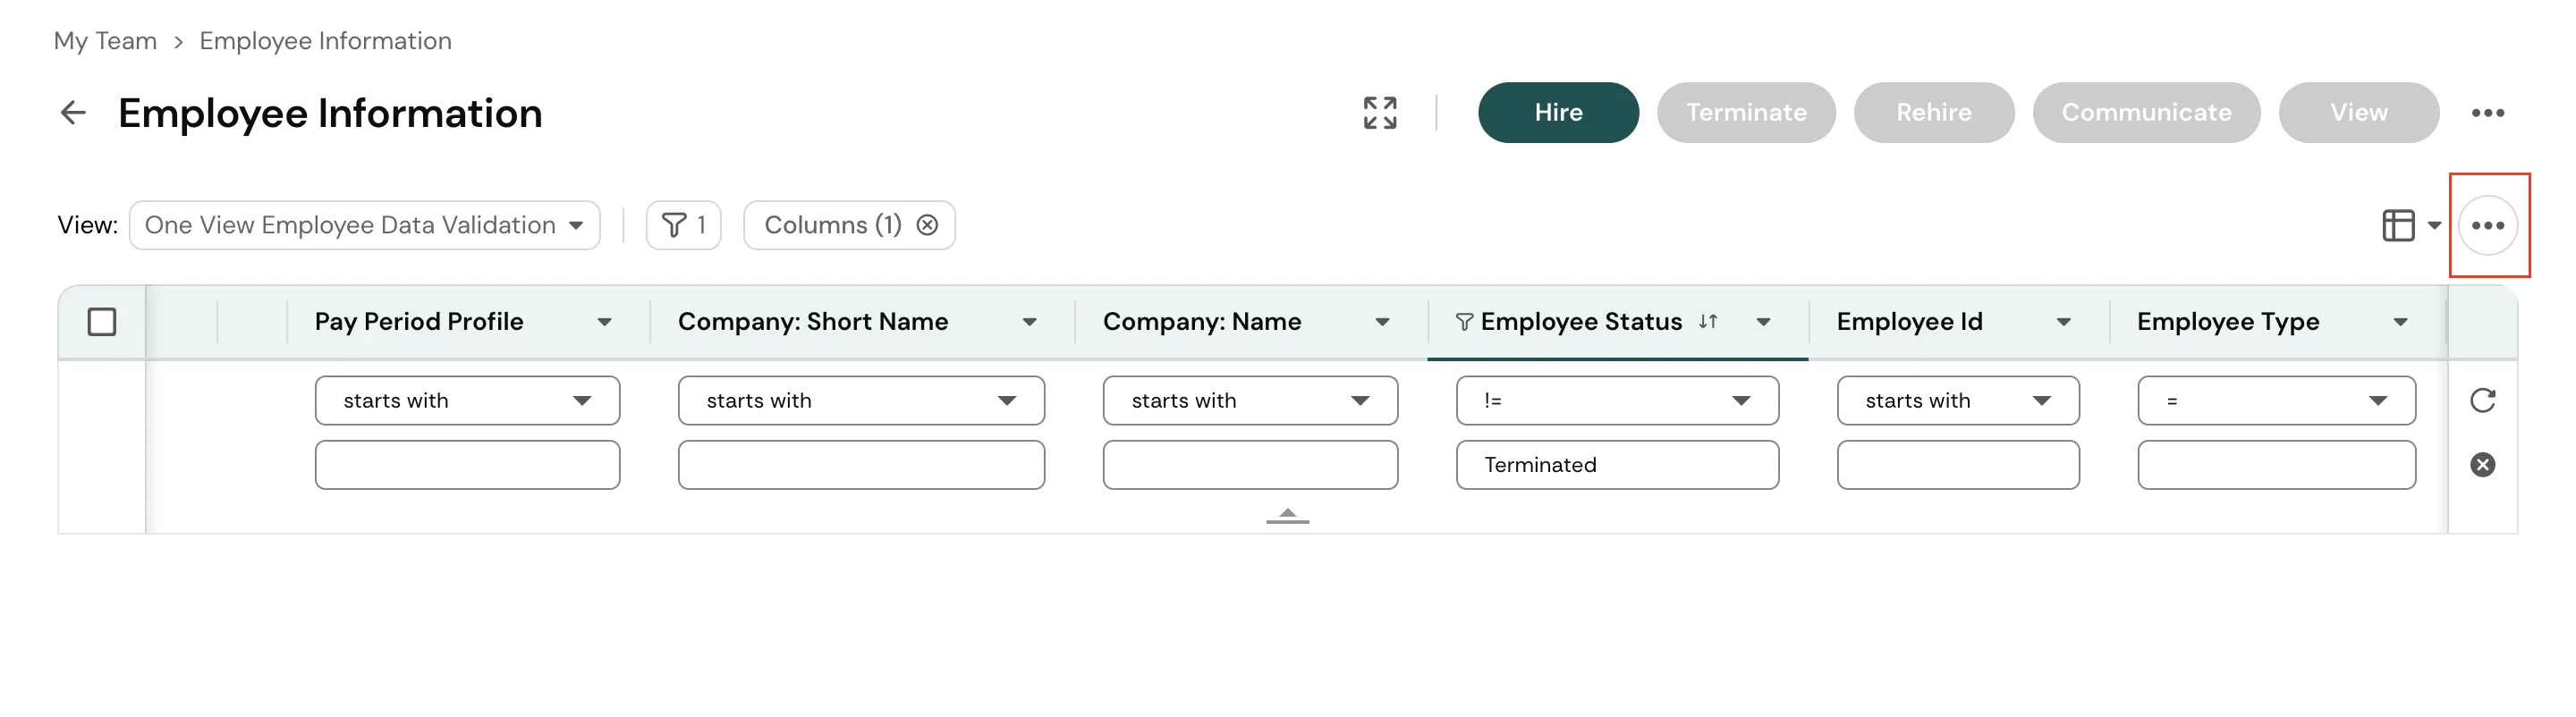
Figure 15. Select Columns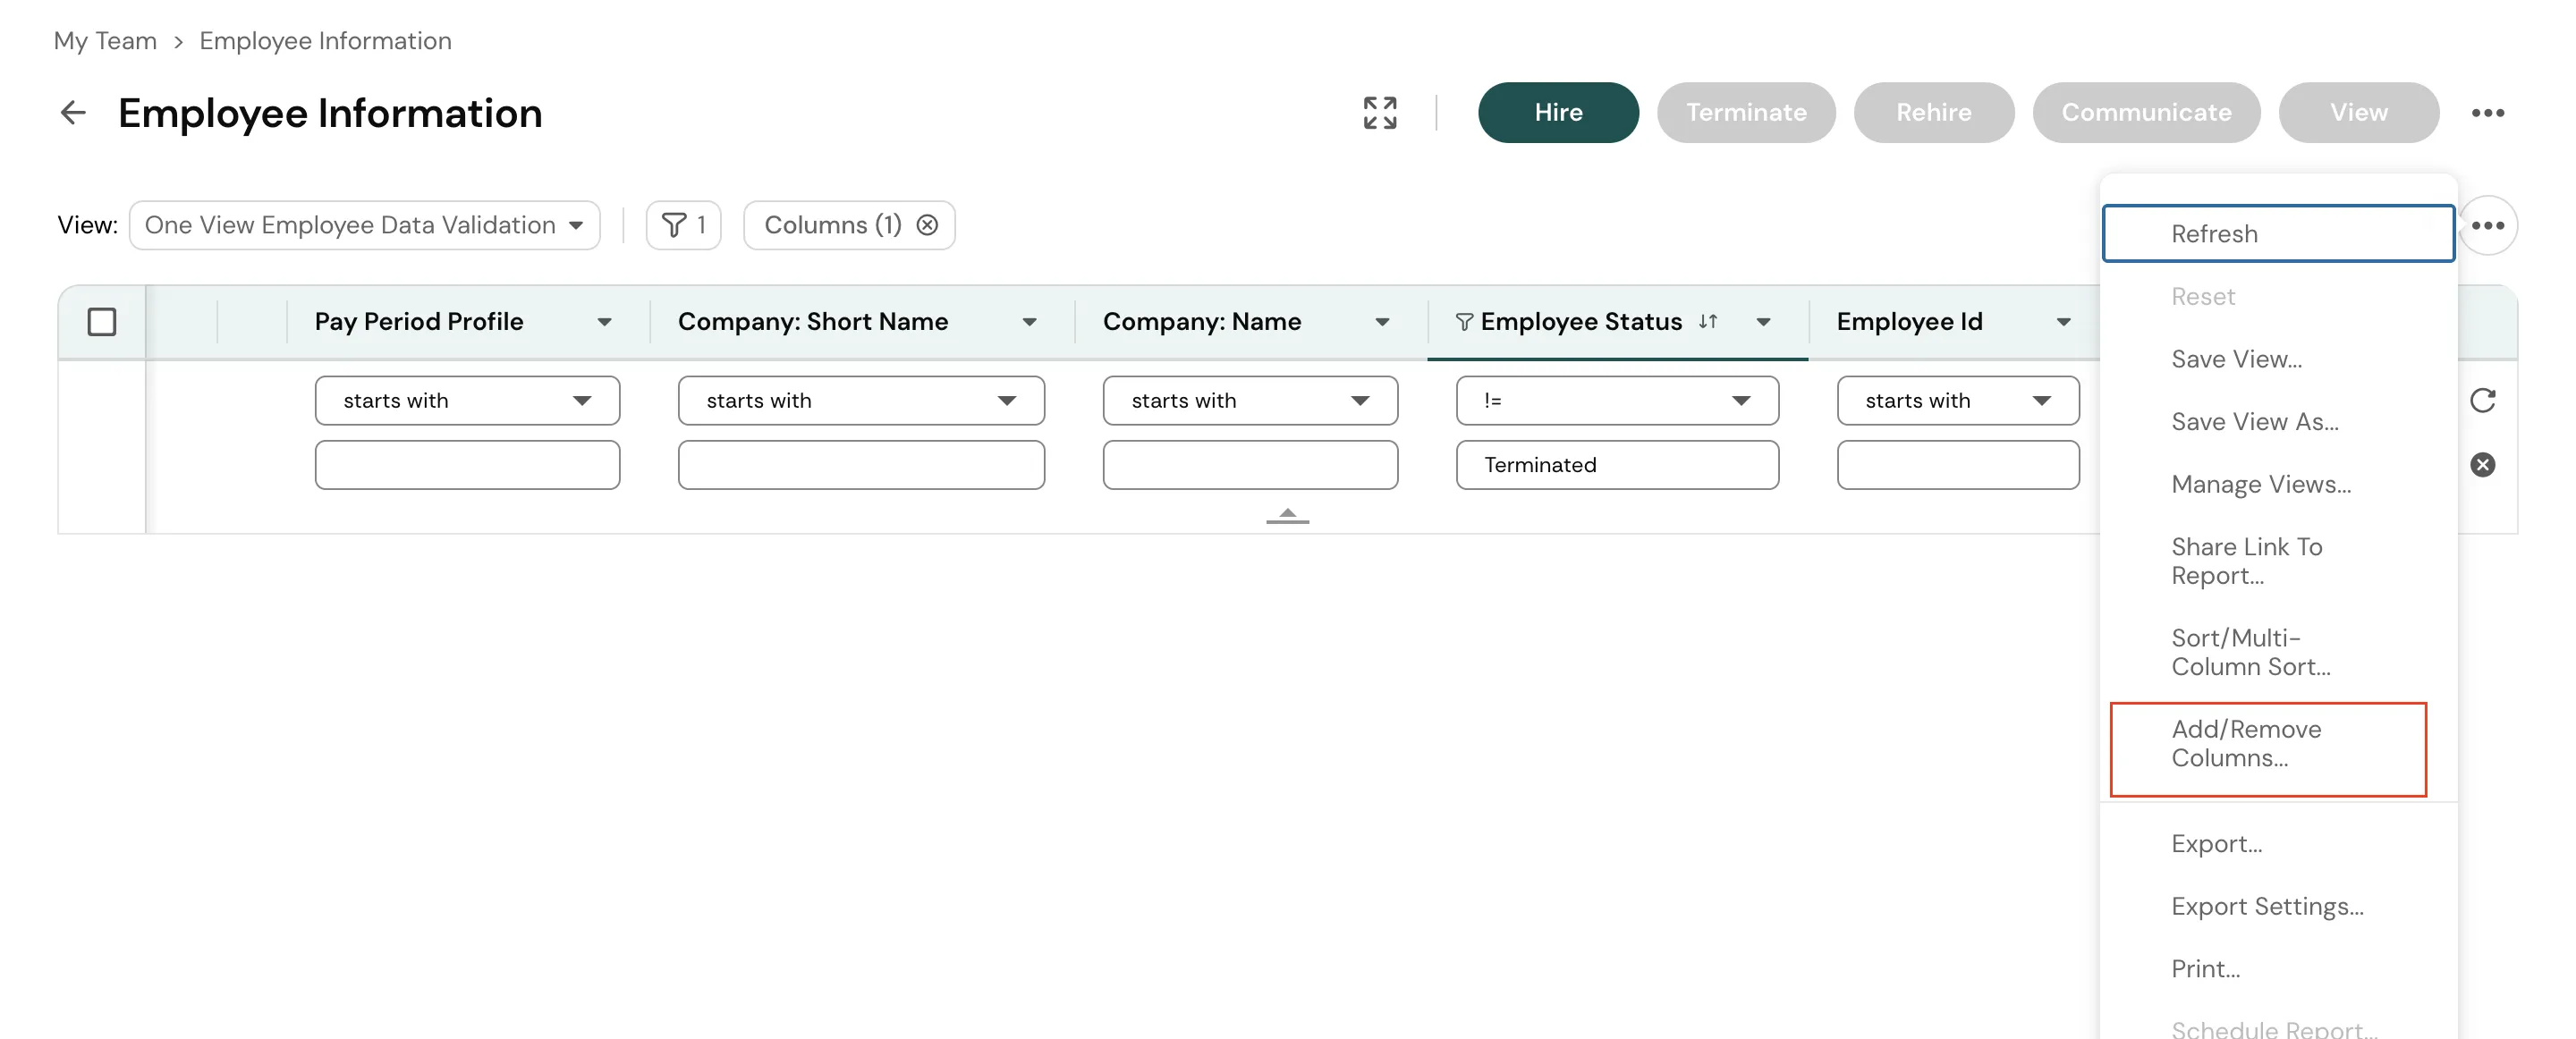
Figure 16. Add and Remove Columns -
In the left panel, locate Company ID / Company System ID, click the arrow next to it, select Add, and then click Apply.
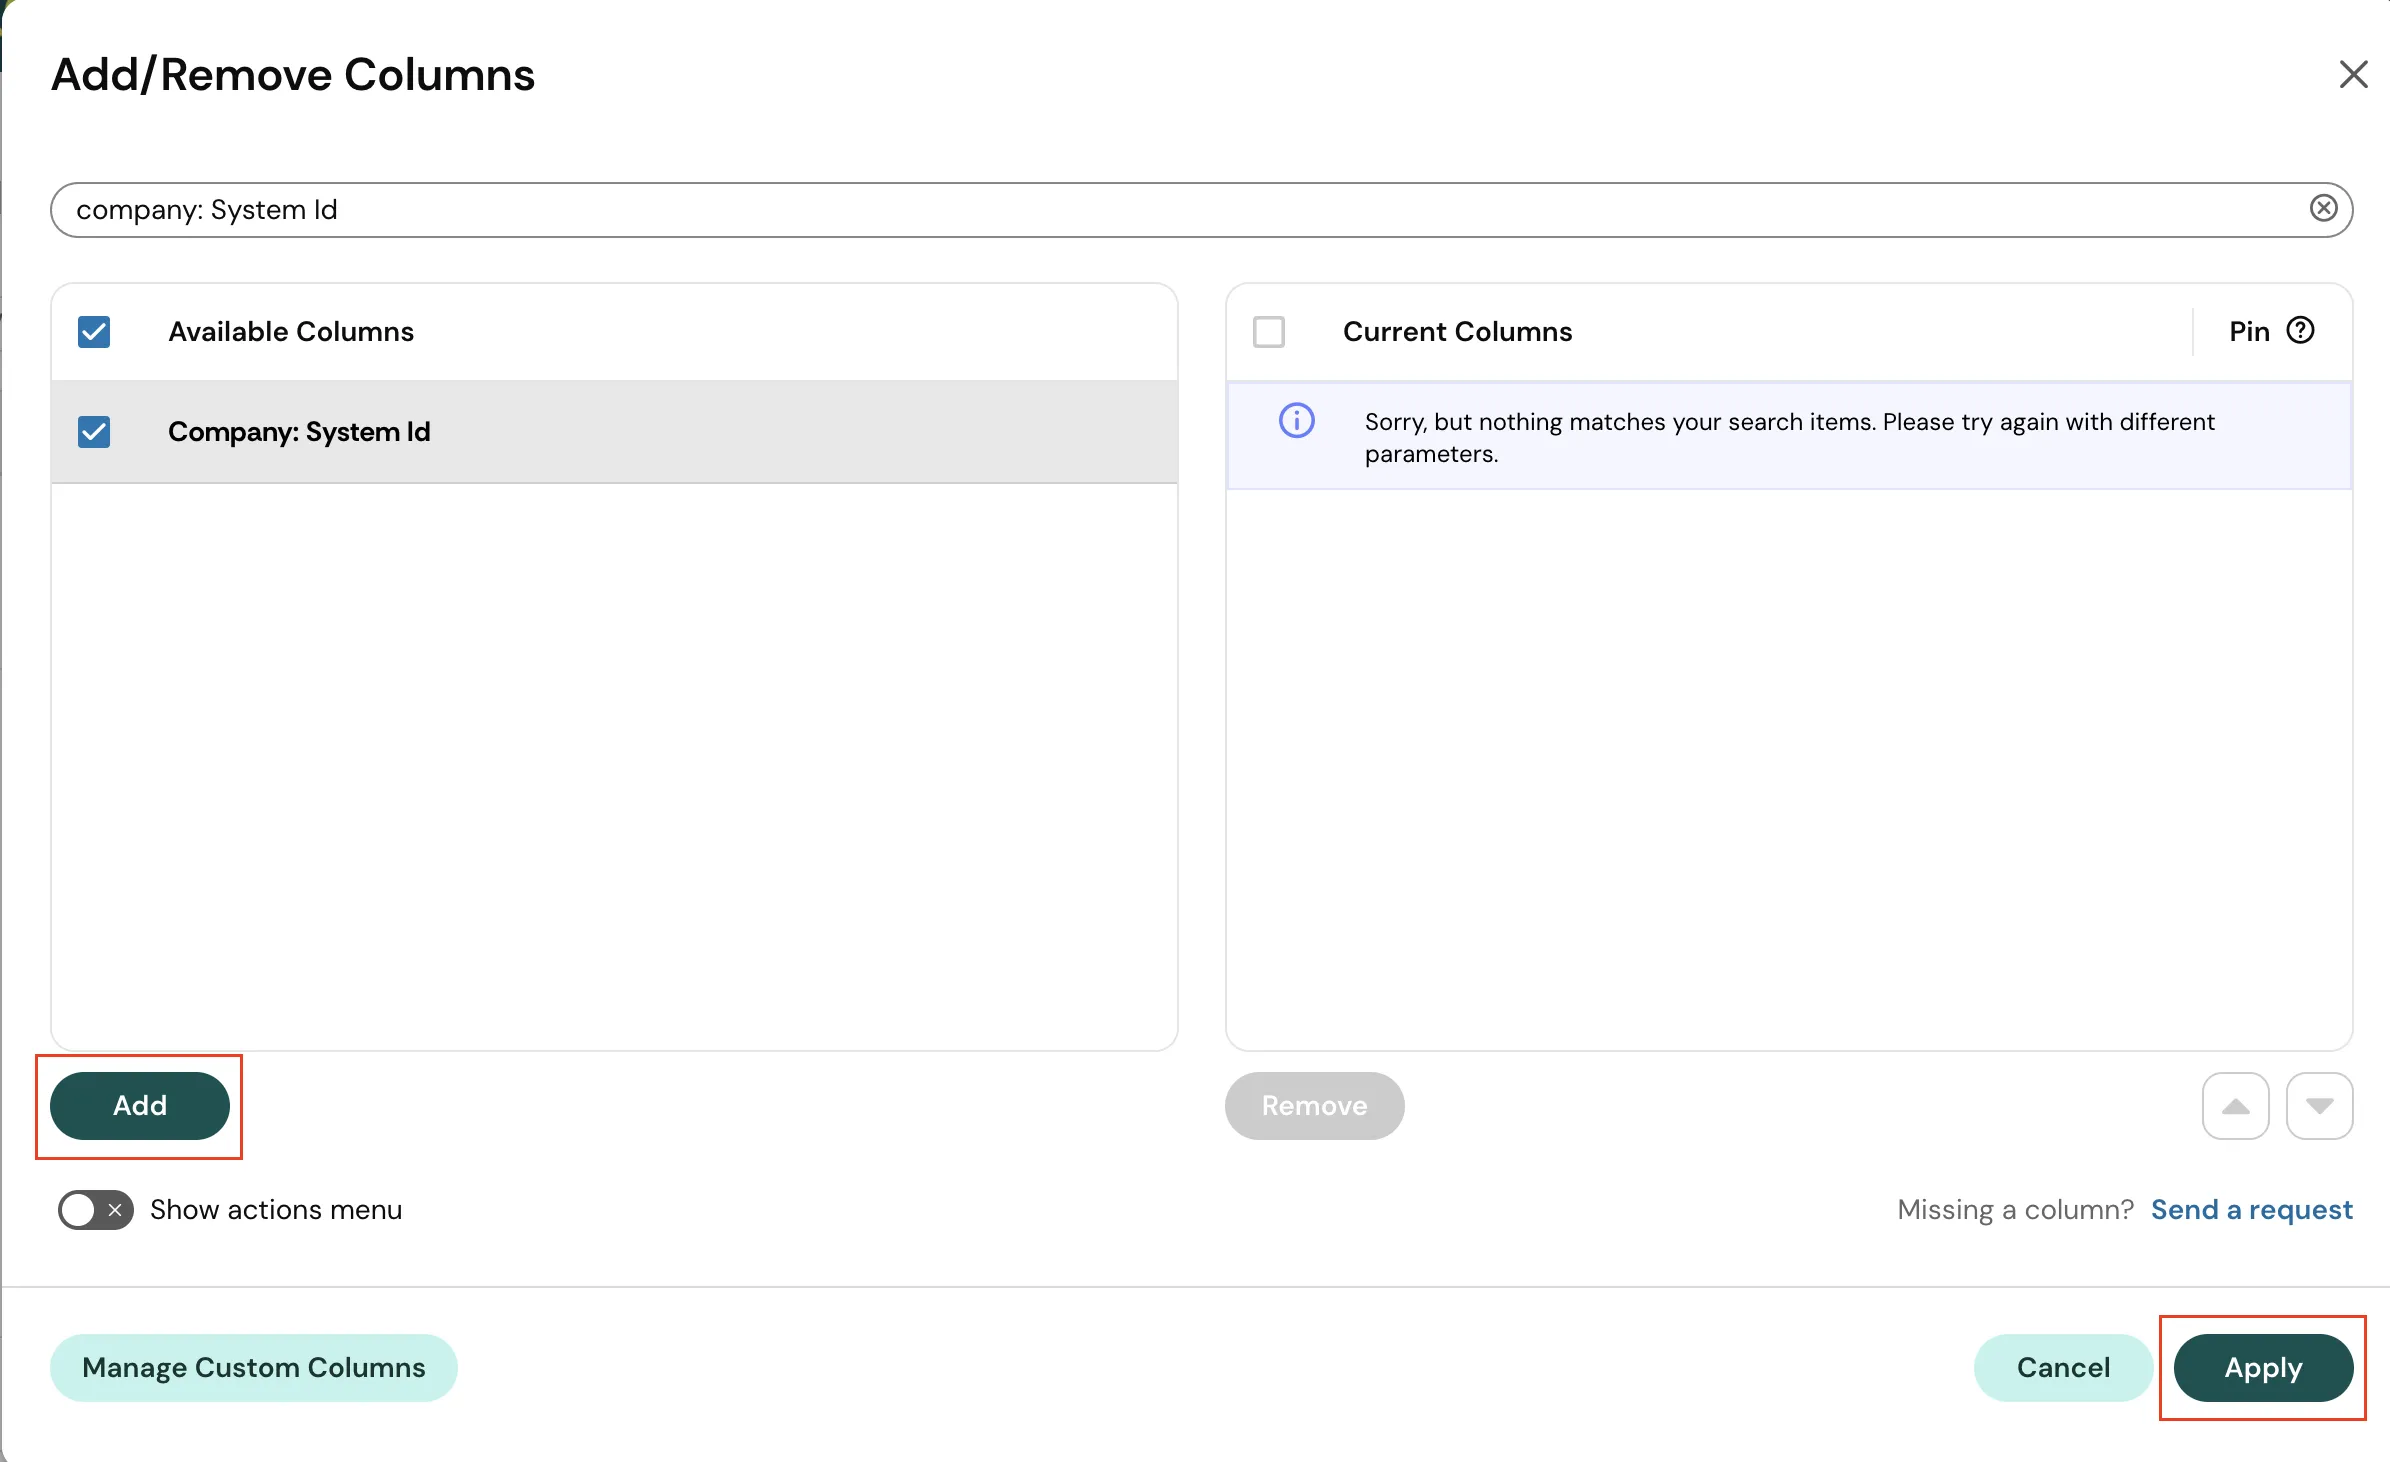
Figure 17. Locate Company ID -
The Company ID will now be visible in the Employee Information view.
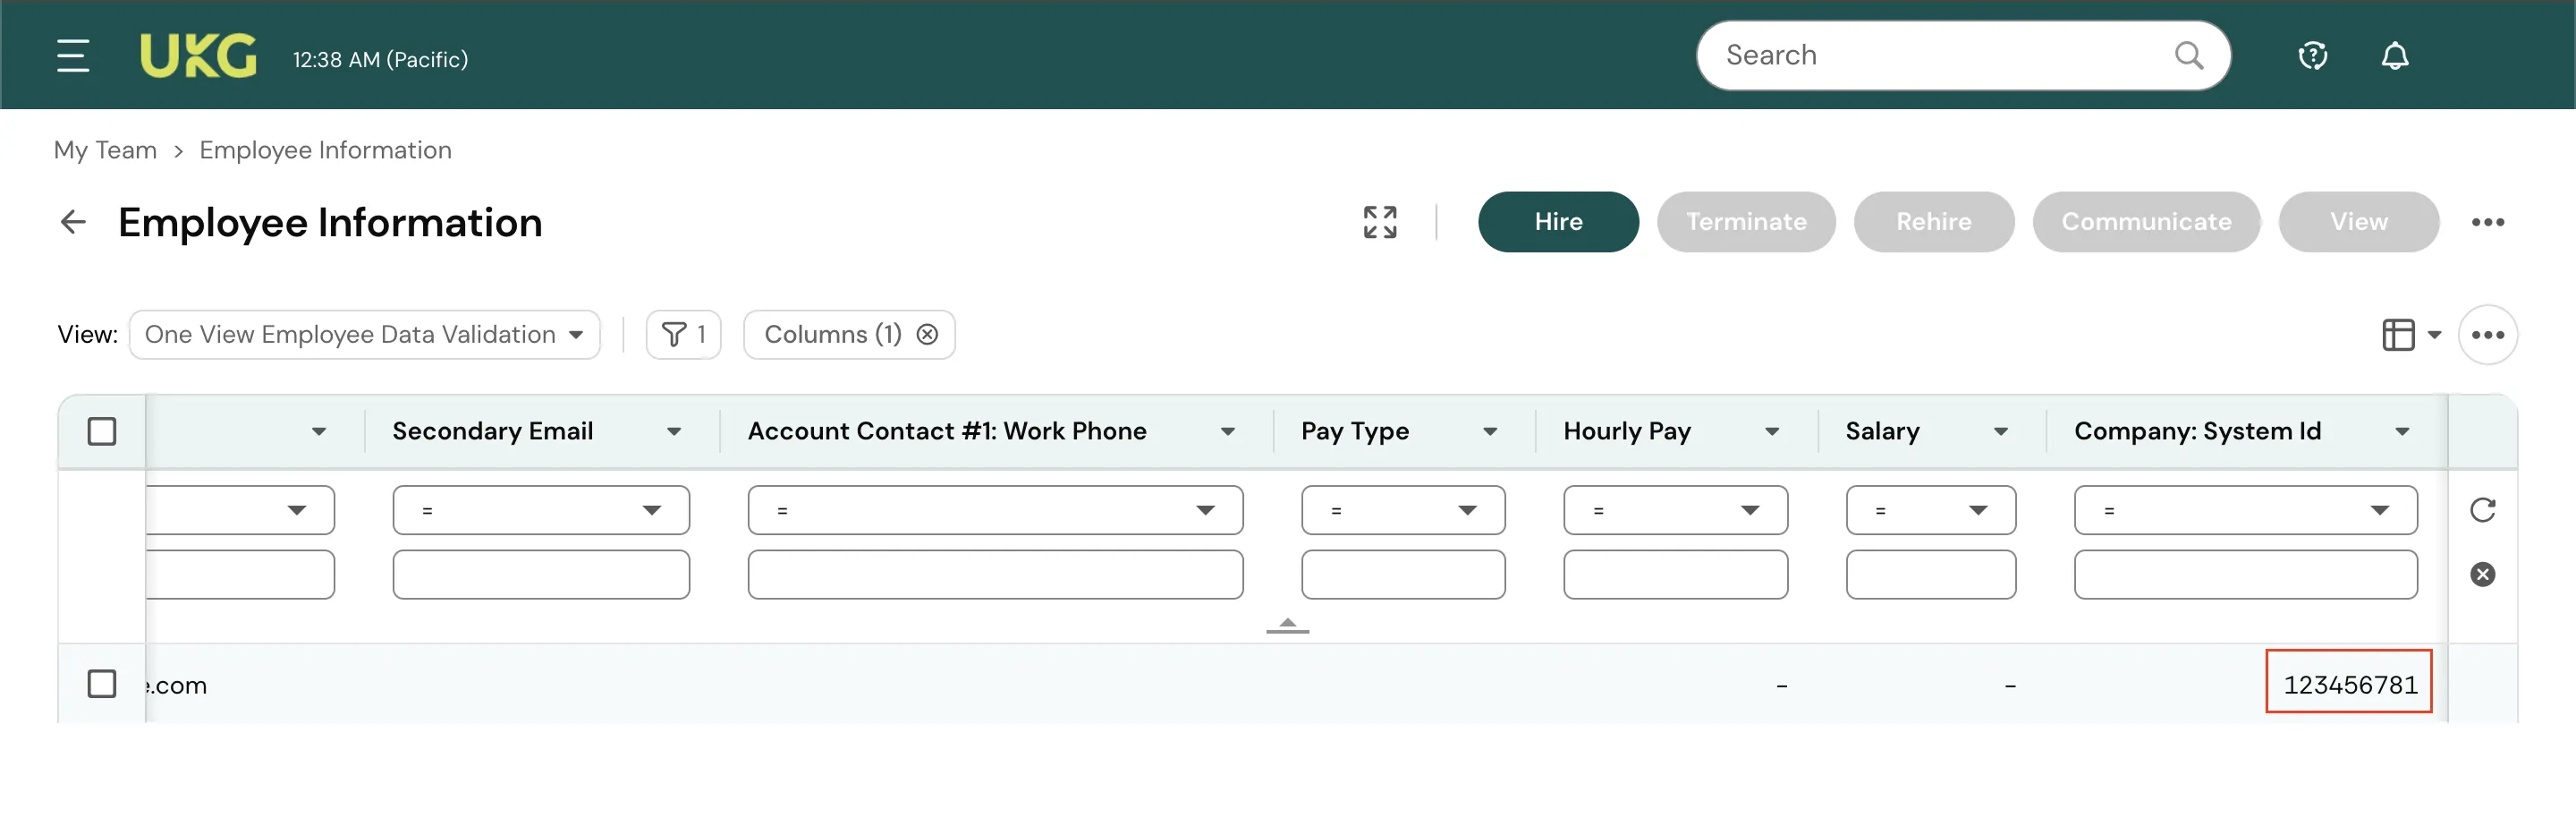
Figure 18. Company ID
Configuration
Once you have successfully configured the connections, you can continue with the Design section to configure the rest of the workflow following these steps in order.
- HR Data Definition
- HR to AD Profile Map
- Lifecycle Business Rules
- Employment Status
- Organizational Unit Assignment - Only defined in on-premise Active Directory
- Group Memberships
- Security Group Memberships
- Distribution List Memberships
- Microsoft 365 Groups Memberships Only defined in Hybrid (with Exchange Online Services) and Entra ID
- Entra ID Distribution List Memberships Only defined in Entra ID and Hybrid, when Exchange Online Services is configured
- Entra ID Security Groups Only defined in Hybrid (with Enable Entra ID Security Groups) and Entra ID
- Mail Enabled Security Group Memberships Only defined in Entra ID and Hybrid, when Exchange Online Services is configured
- Mailing List Assignment Provided in Google Workspace
- Communication Hub
Deployment
Once your workflow has been setup, you can optionally setup notifications and archival for your workflow.
- Compliance and Audit Trail
- Run Mode
- Error Notifications
- Monitor Receipt of Scheduled HR Extract
- Environment
Otherwise, you can proceed to deploy and test it on the Hire2Retire platform, see Deploy and Test Flow