Automate Entra ID Group Memberships with Hire2Retire
Essential for simplifying email communications, Microsoft Entra ID Distribution Lists enables users to easily send messages to predefined group of recipients. Having fixed set of numbers, these distribution lists are considered read-only in Entra ID and only Exchange Admin Centre can manage them.
In this design step of Hire2Retire, you can create rulesets and define filters to assign your workforce to their correct Entra ID Distribution Groups.
You can also define a default Entra ID Distribution list in this step. All employees of organization including employees who do not match any filter criteria will be added to this default Distribution list.
Note- Defining Group Memberships is an optional step. In case you do not wish to assign any Entra ID Distribution List Memberships, you can skip this step by clicking on the Save & Nextß button.
How to create a Rule for assigning the Entra ID Distribution List Memberships to users?
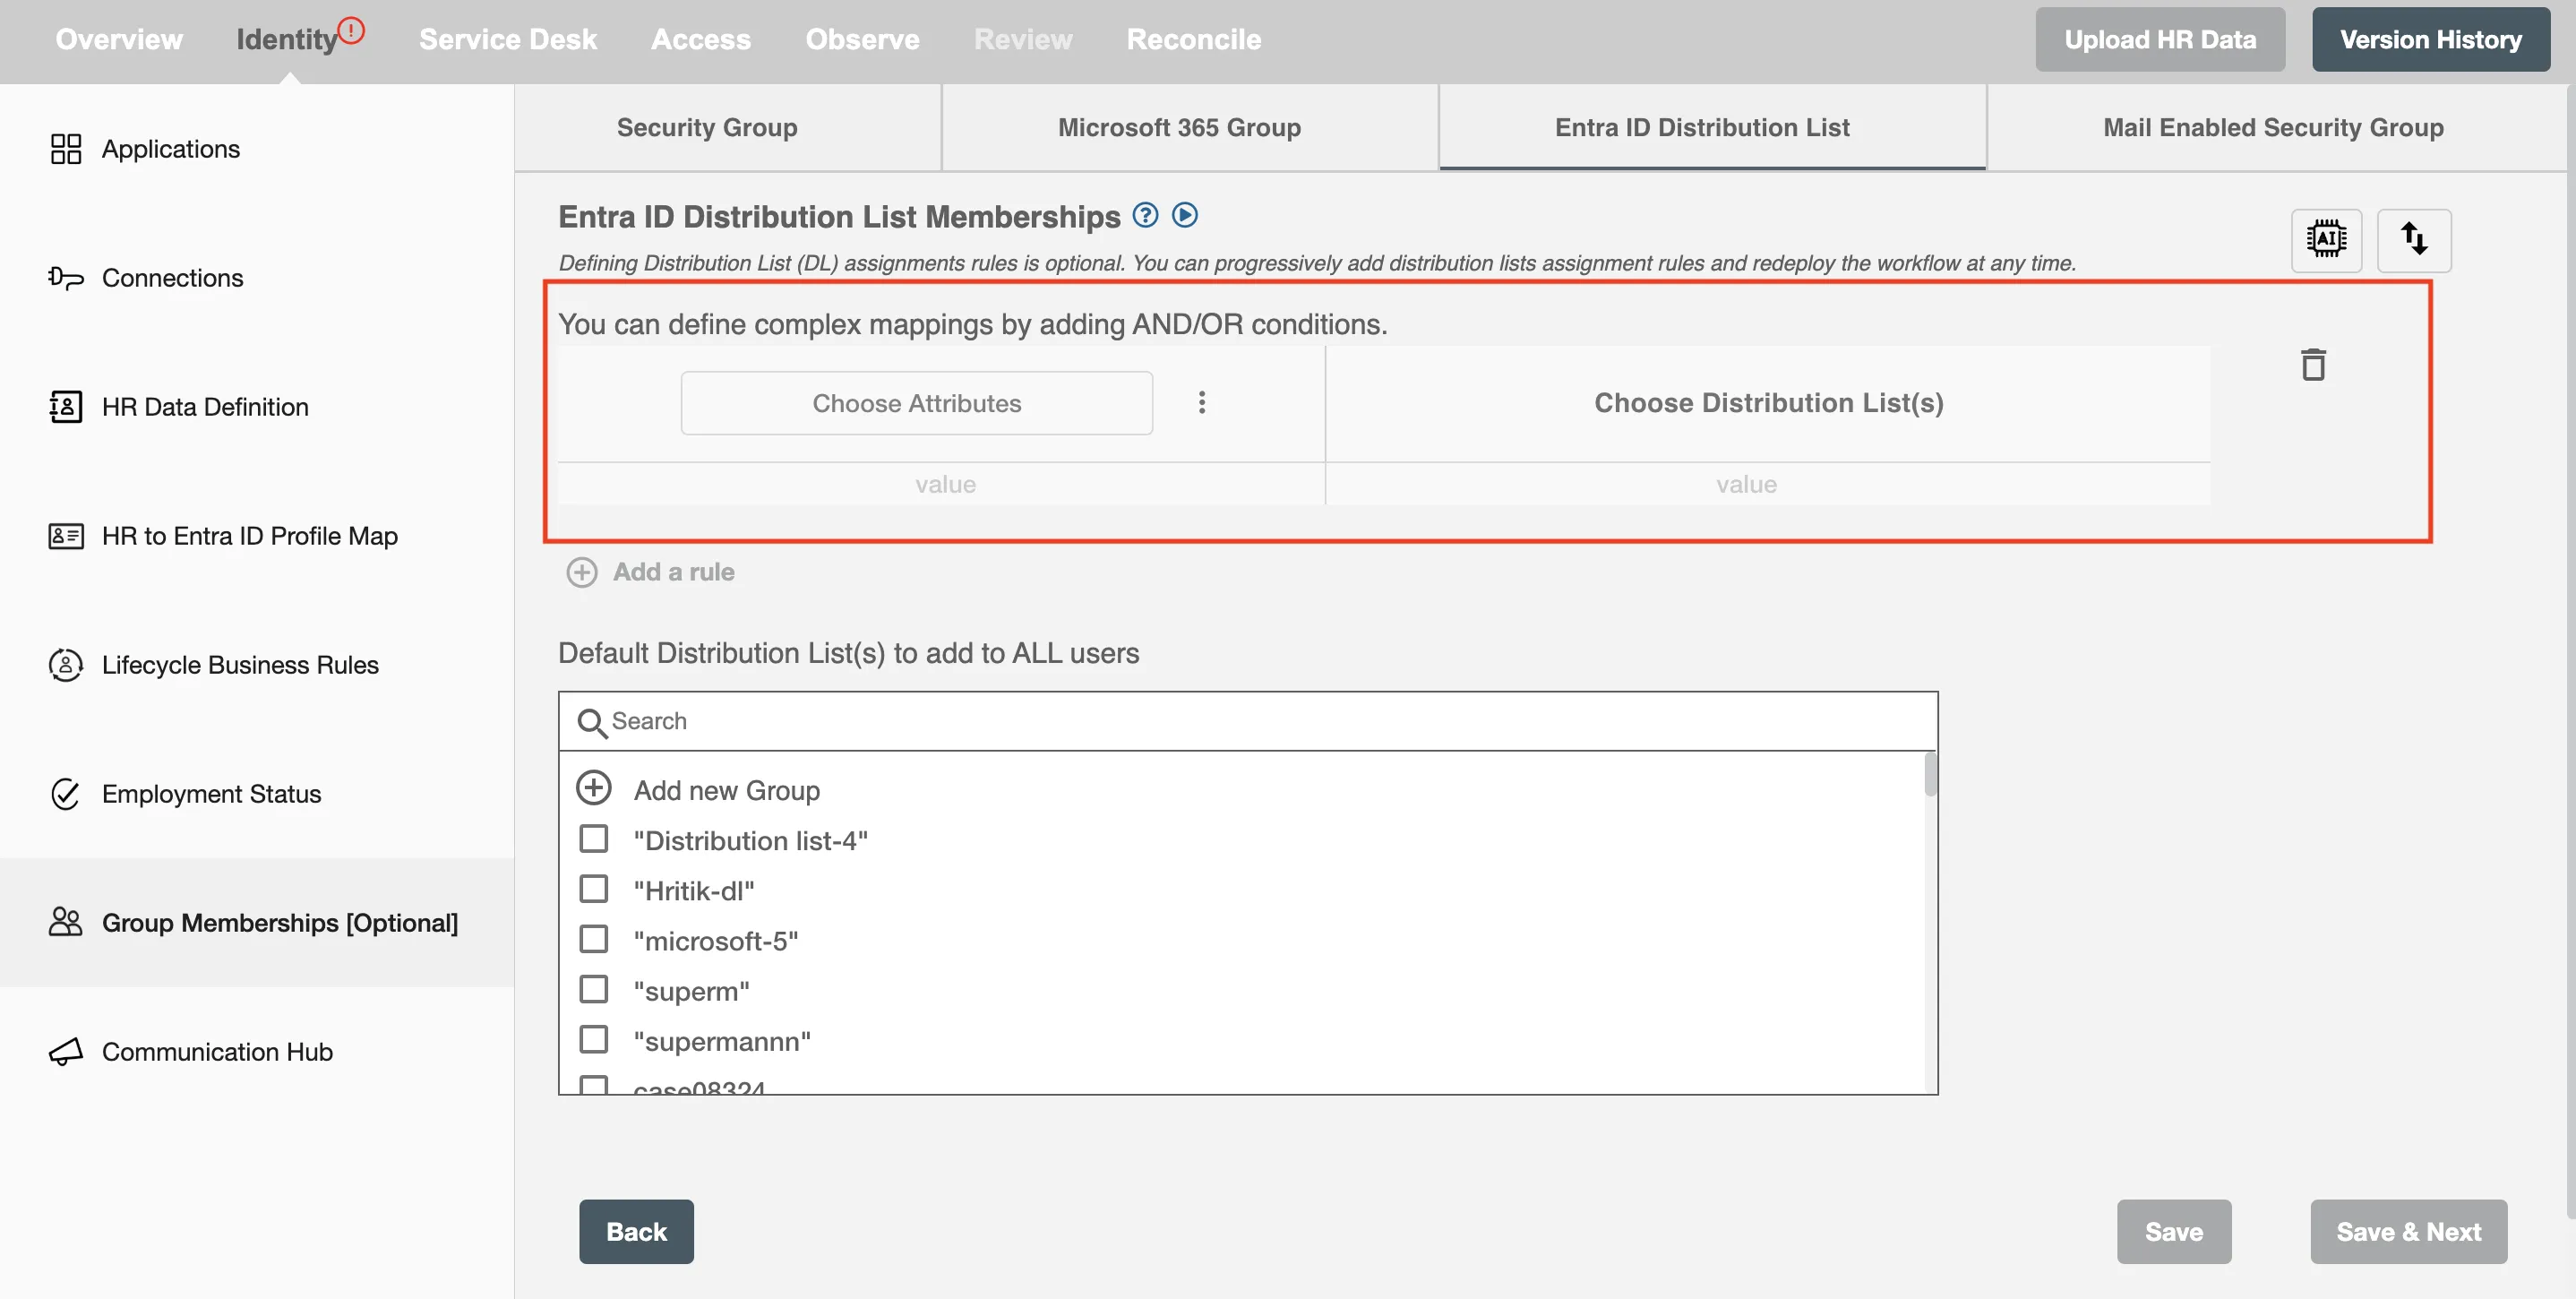
When you are in Entra ID Distribution List Memberships step, you will see a table with headers: Choose Attributes and Choose Distribution List(s). In this section, you can define rules using employee attributes like Associate ID, Location, Supervisor ID etc. and can assign a specific distribution list to the users selected. Multiple rulesets can be defined in this step.
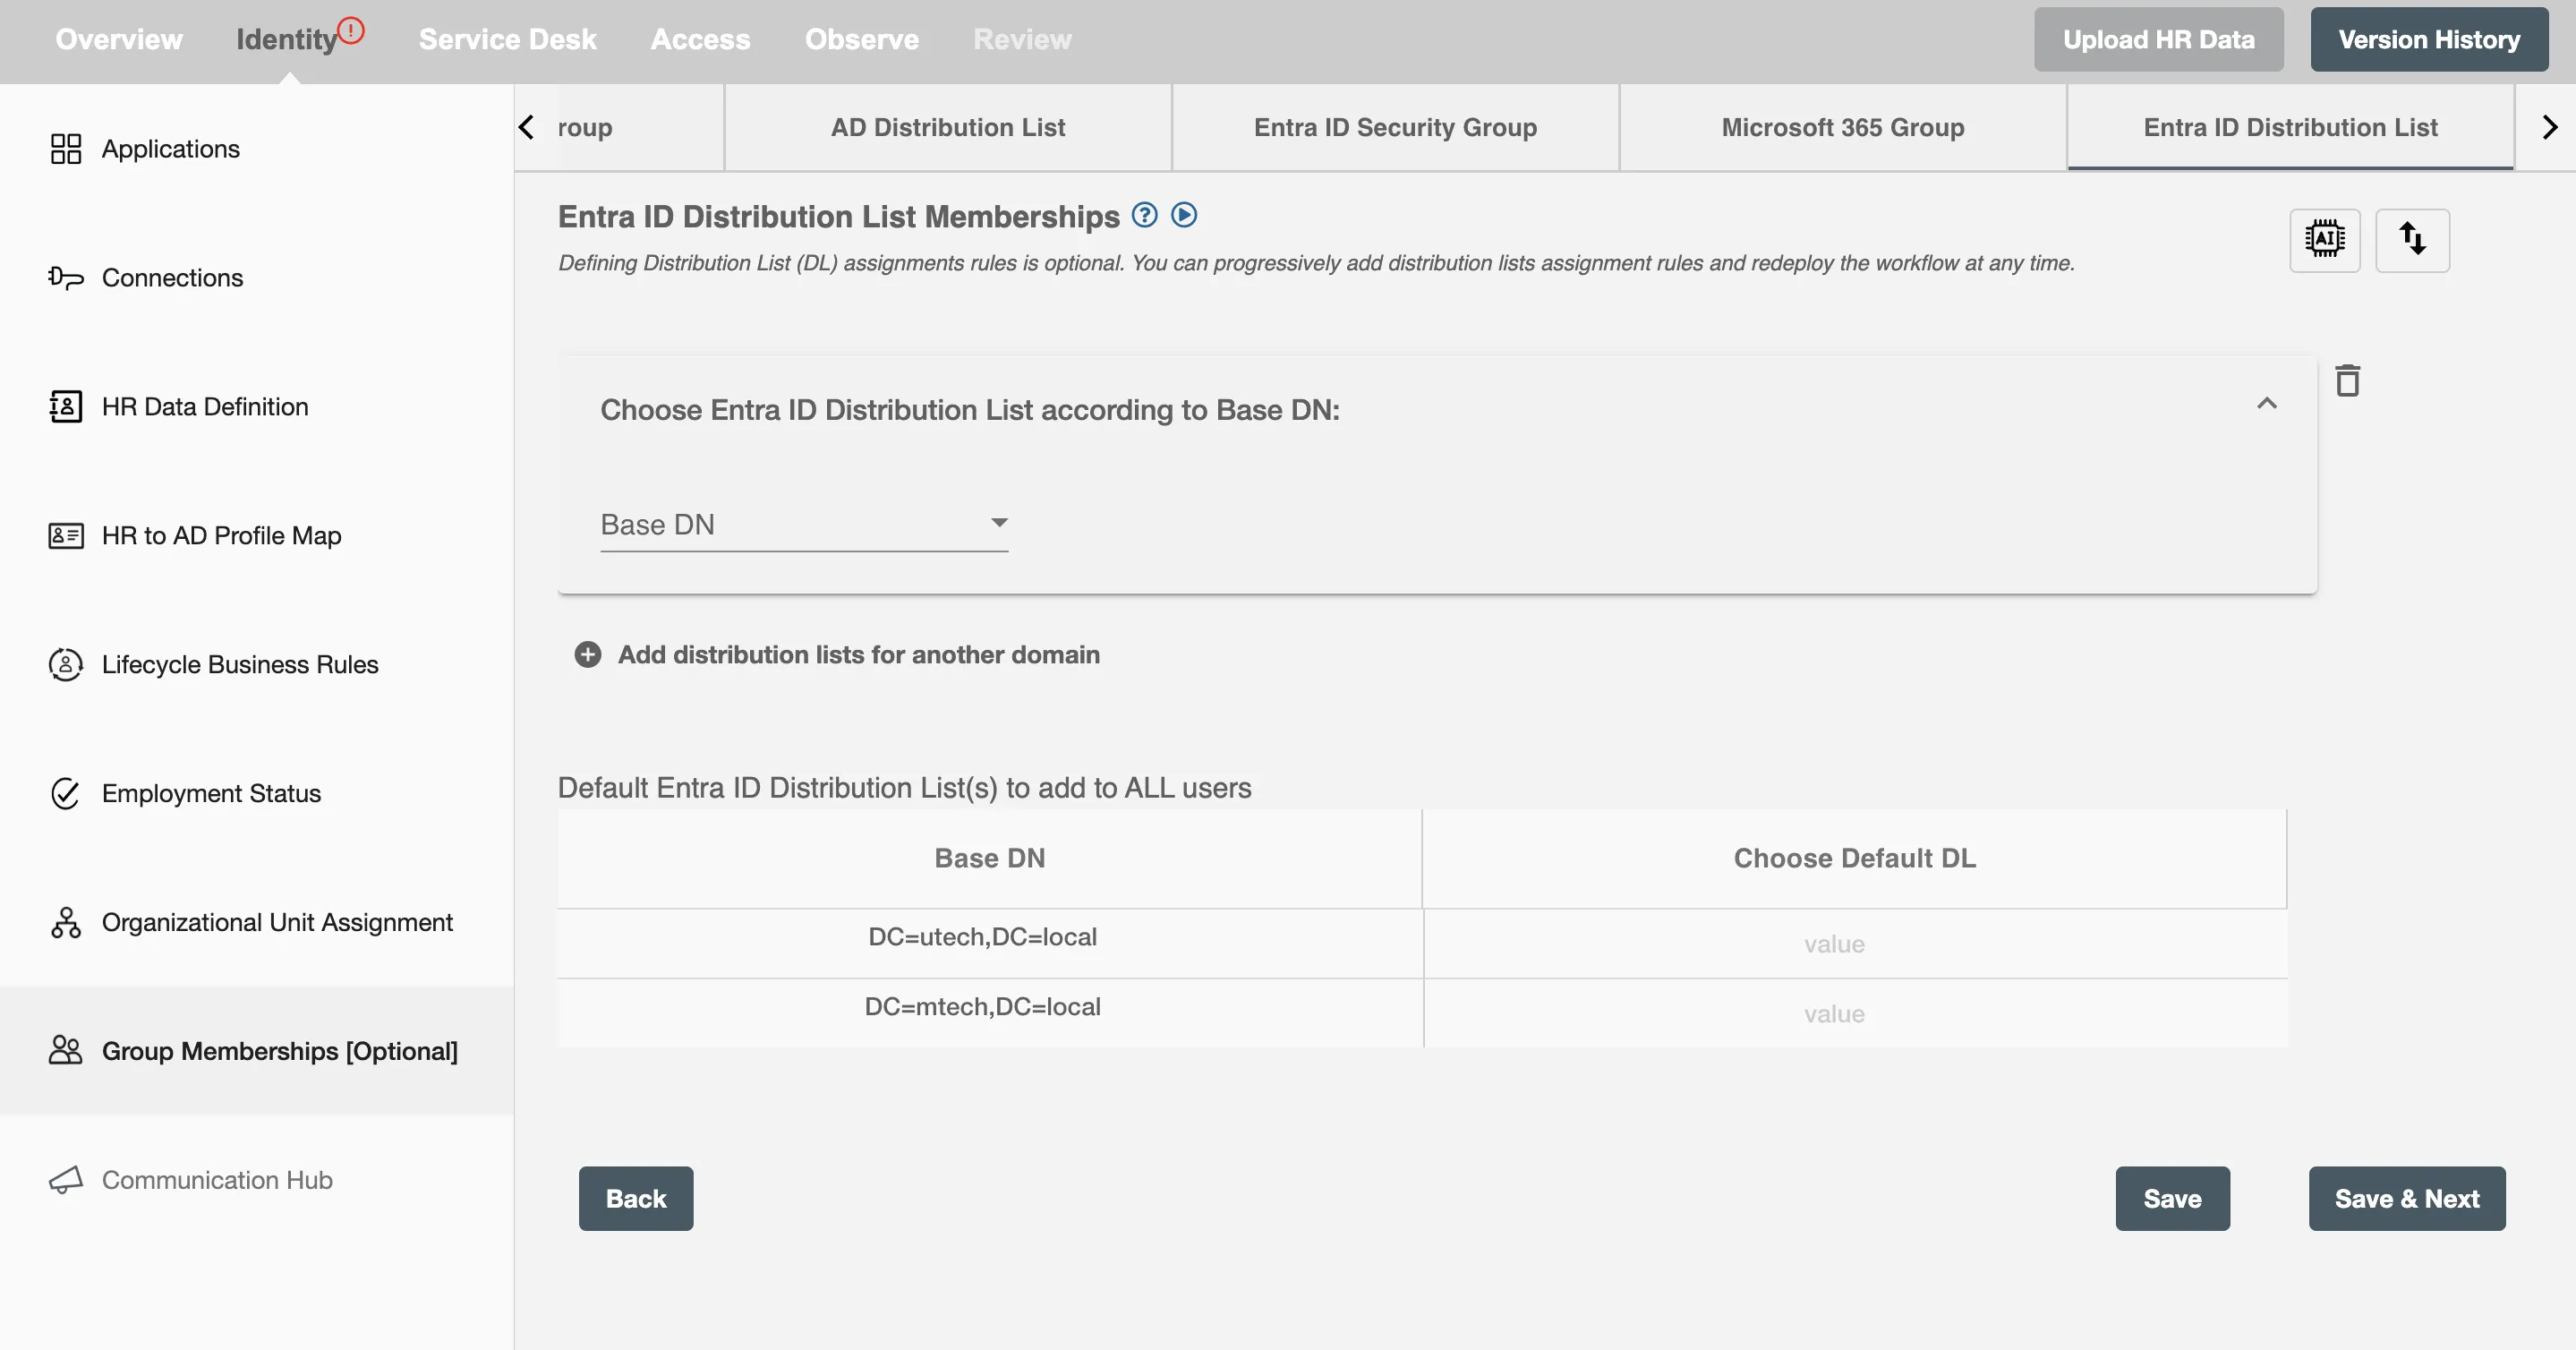
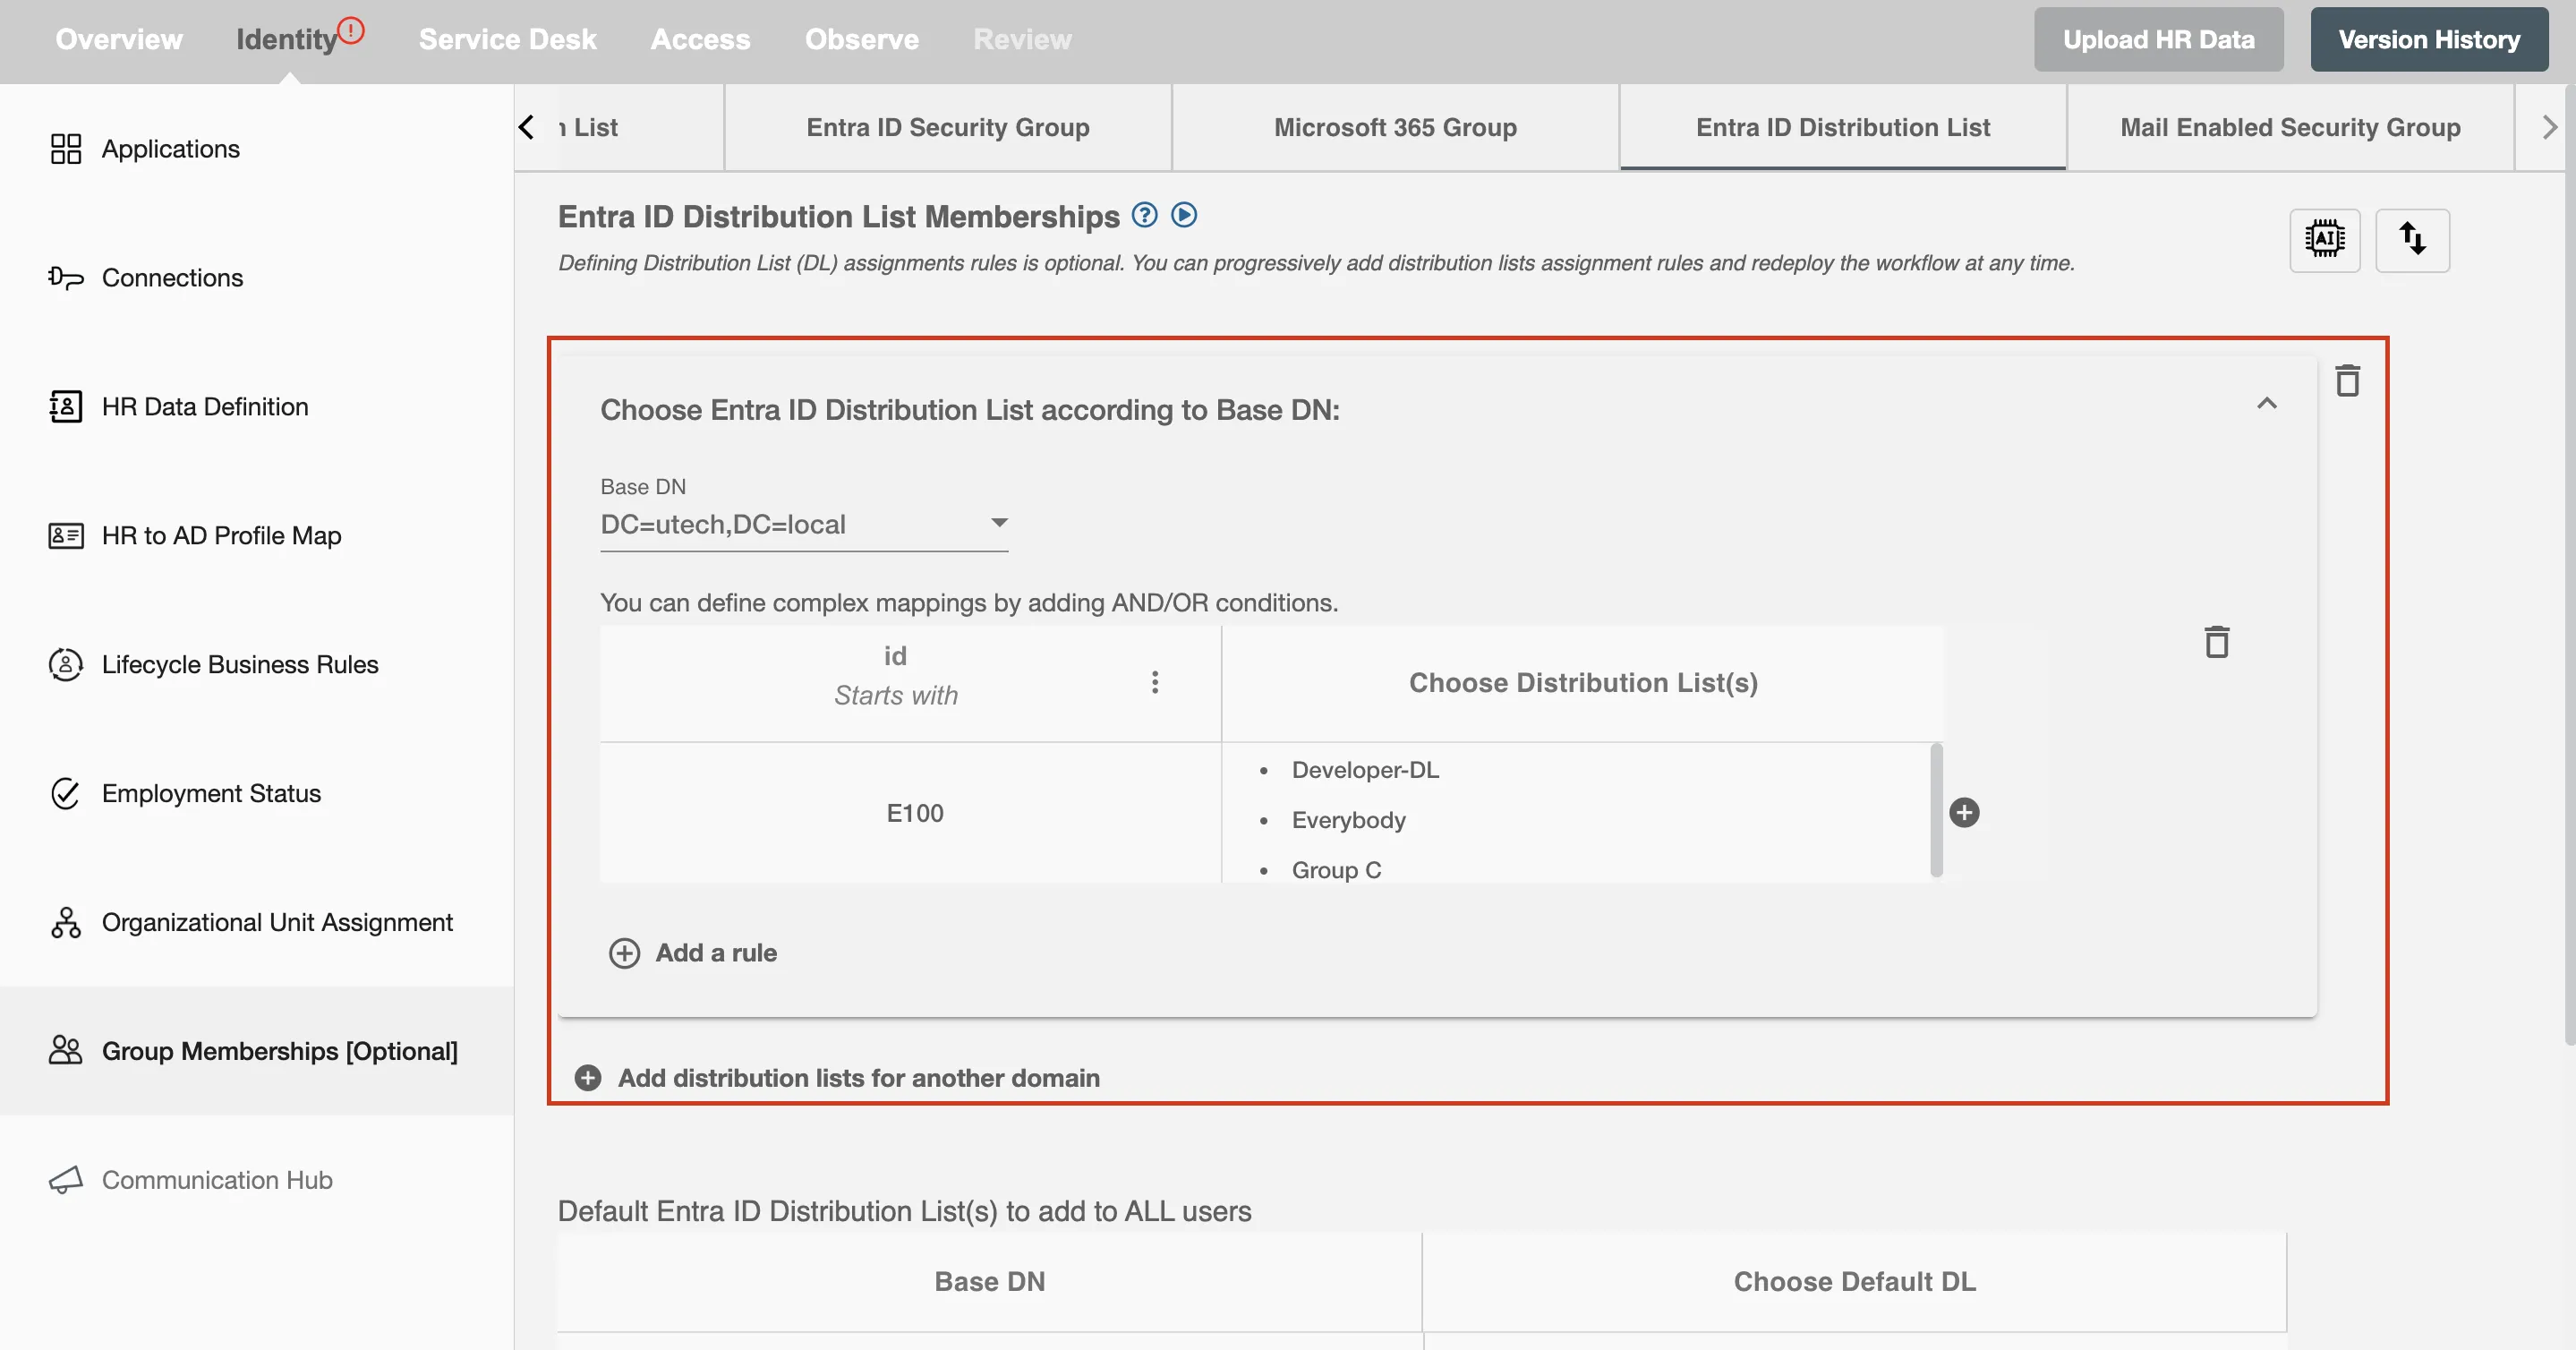
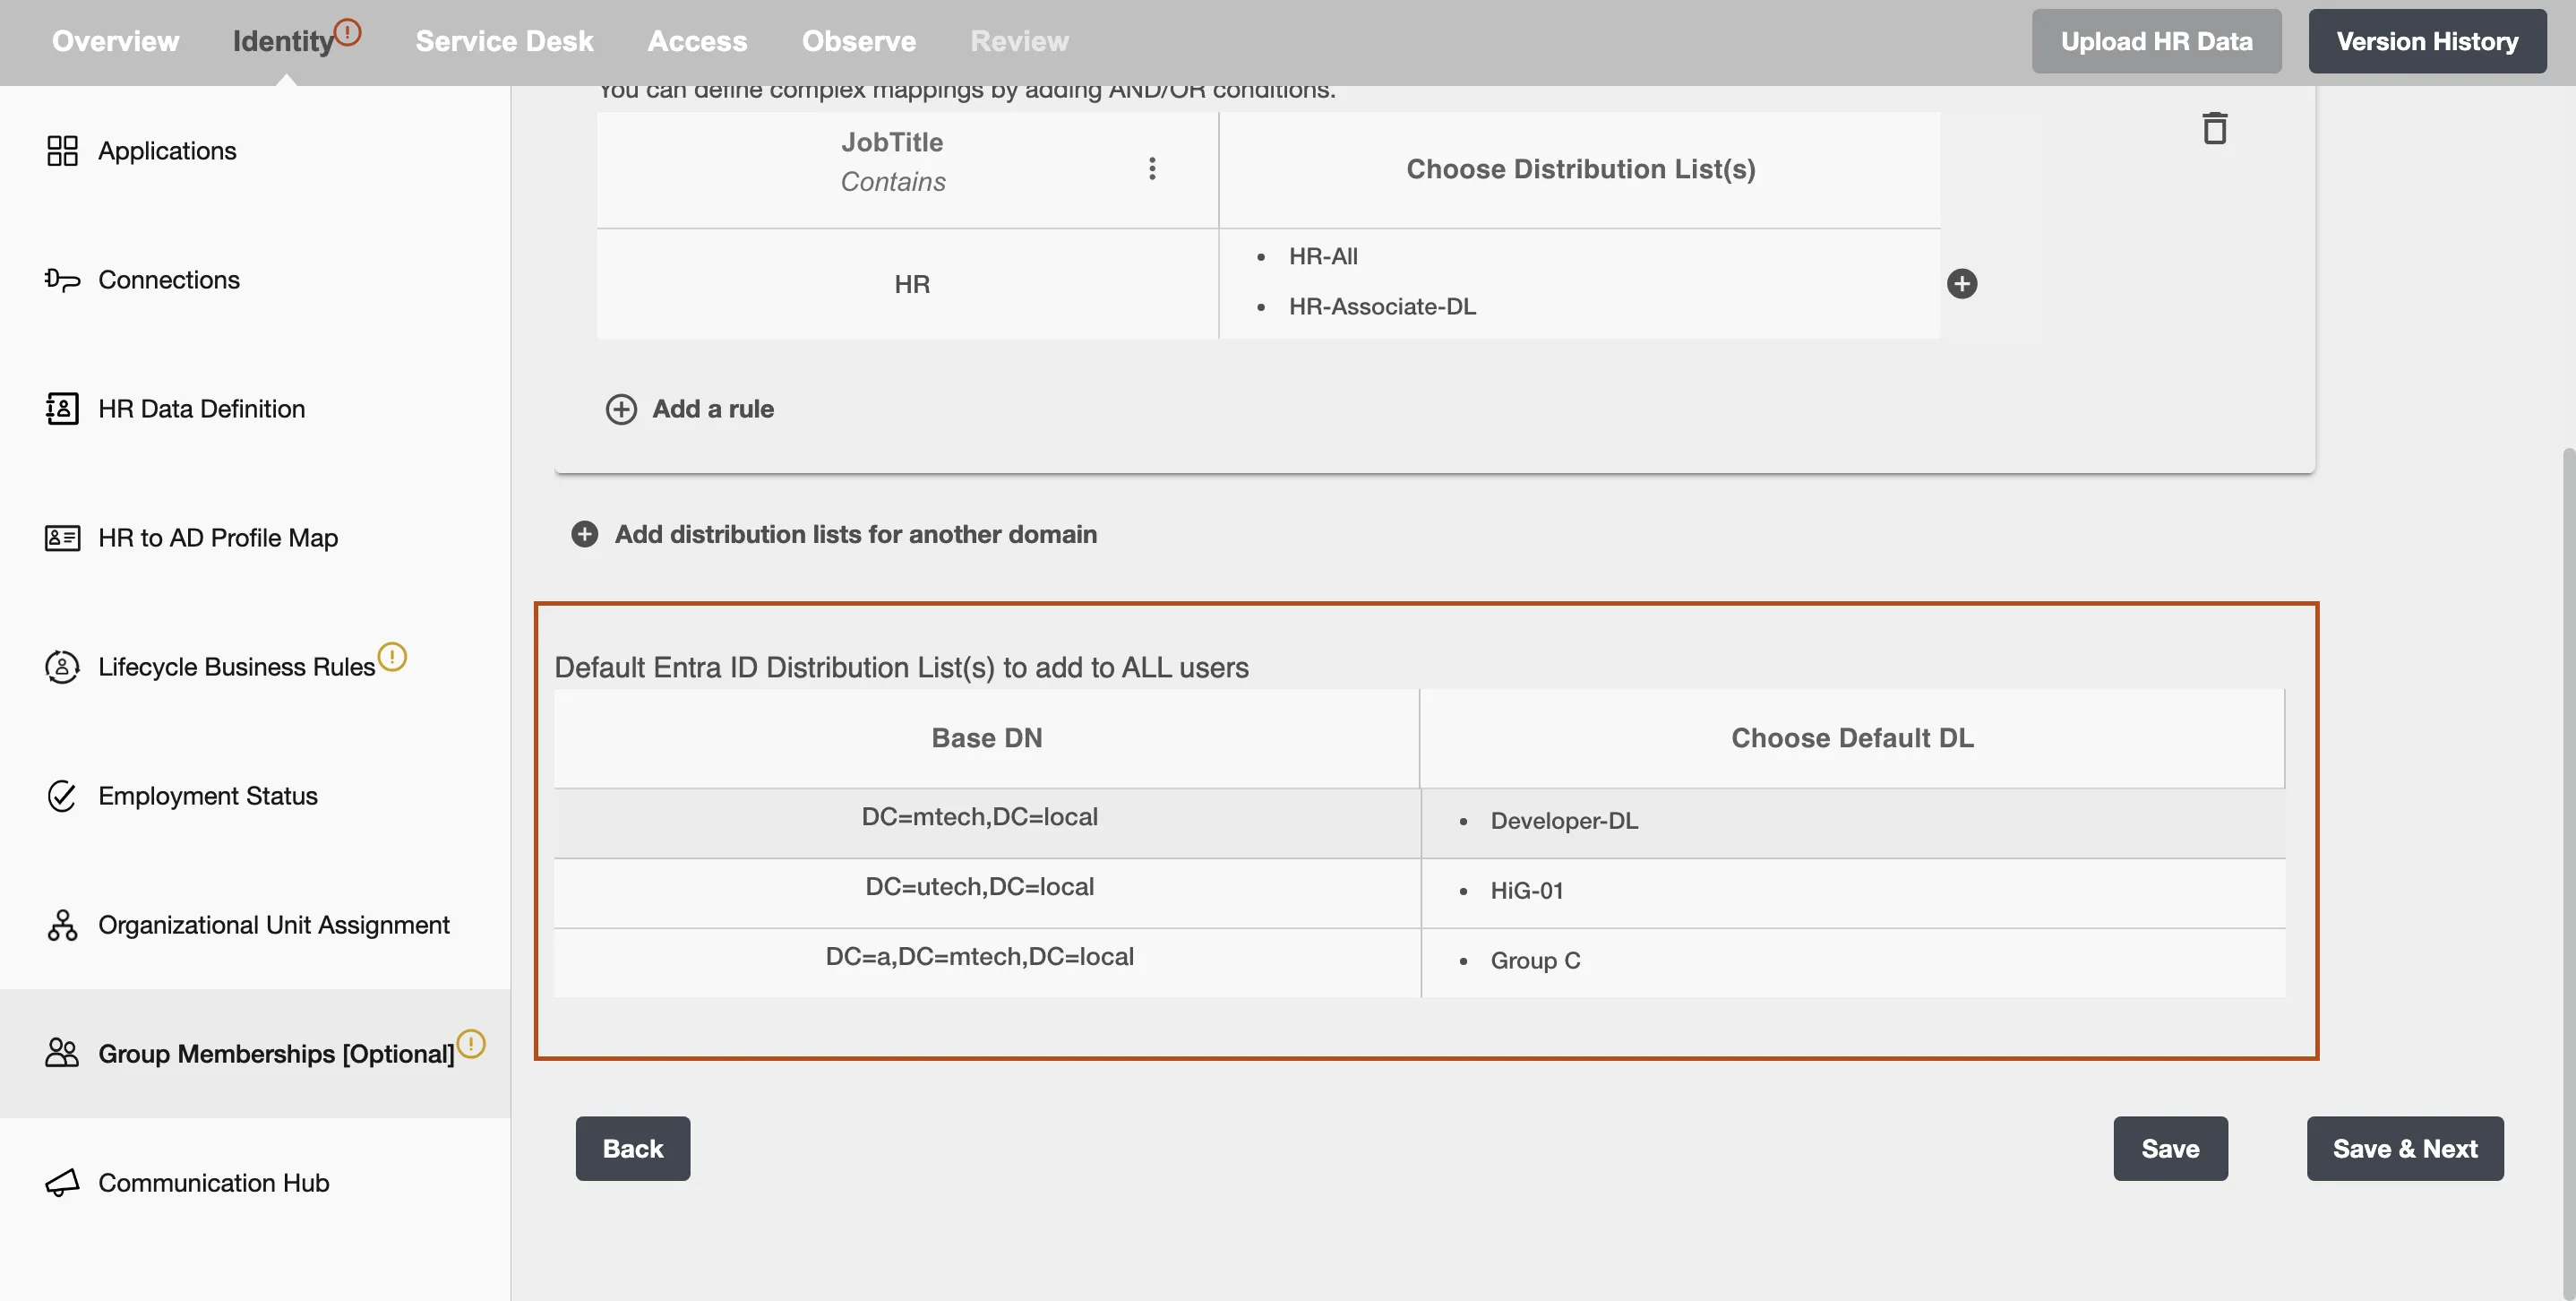
If your organization has a multi-domain controller setup, you can also choose Entra ID Distribution List according to base DN. In the section depicted in below screenshot, you can define rulesets to assign distribution lists to the user from any of the base DN.
To create a rule, follow below steps -
-
Start with setting up the filters for assigning Entra ID Distribution lists to selected users. Now -
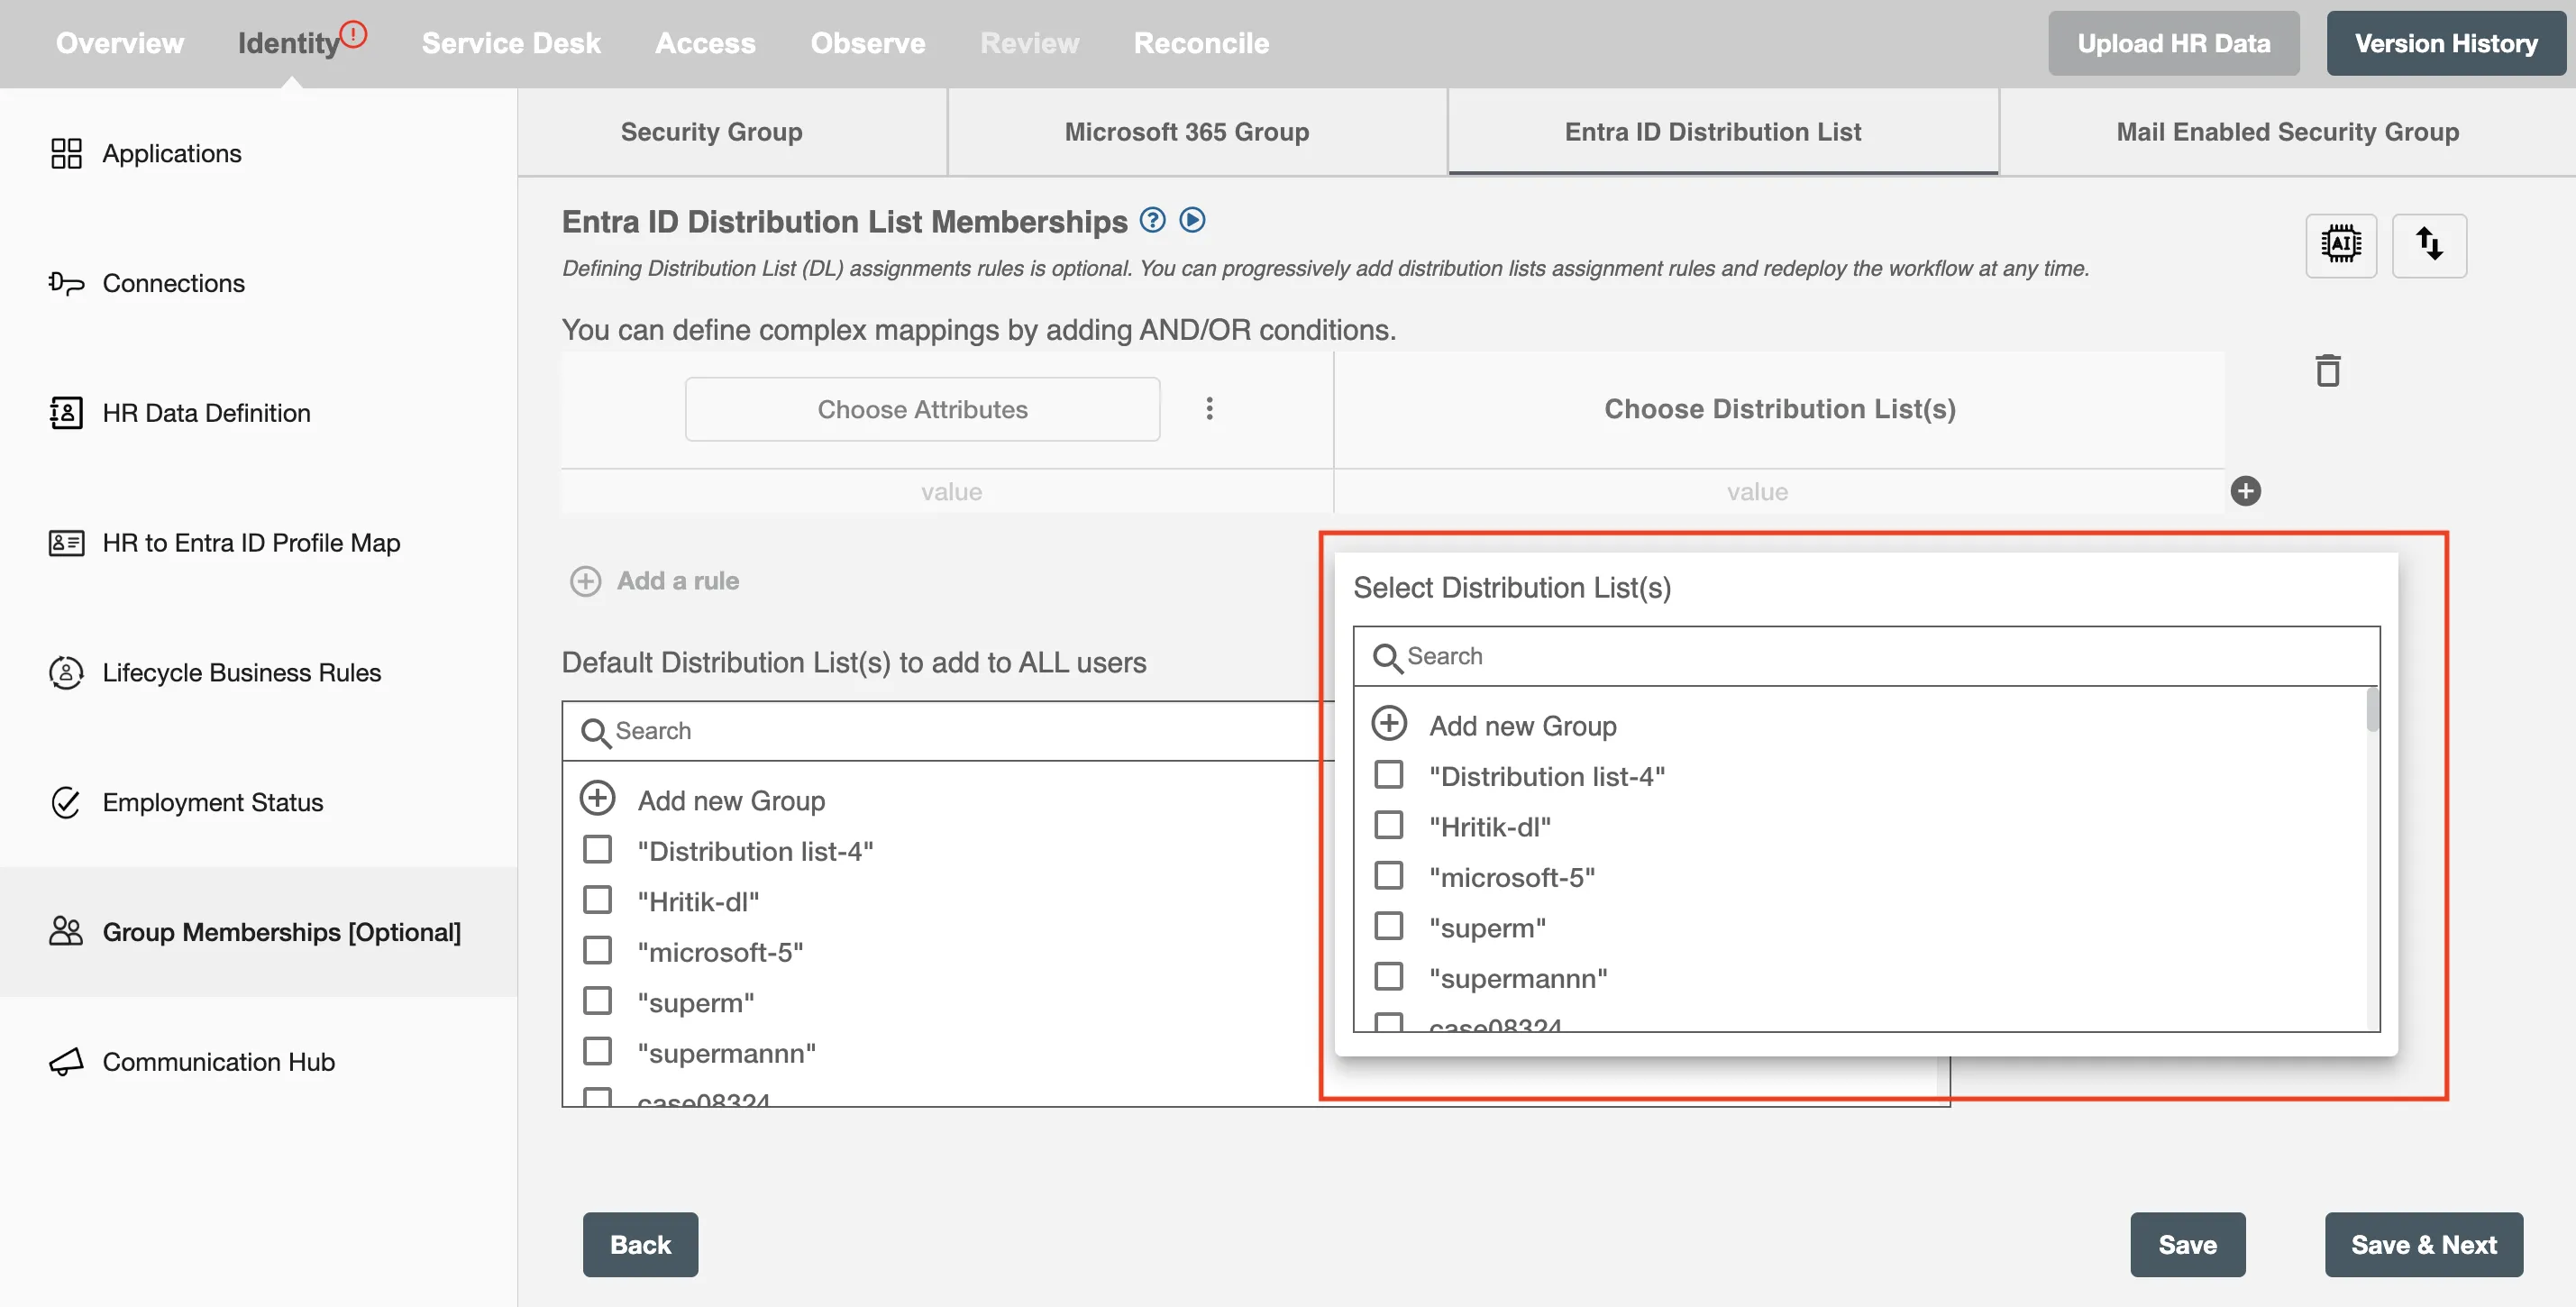
- On the left side, there is a Choose Attributes option. Click on it to select employee attribute followed by operation to match that attribute and then define a value for filter
- On the right side, define the Distribution field you want to assign which matches the filter.
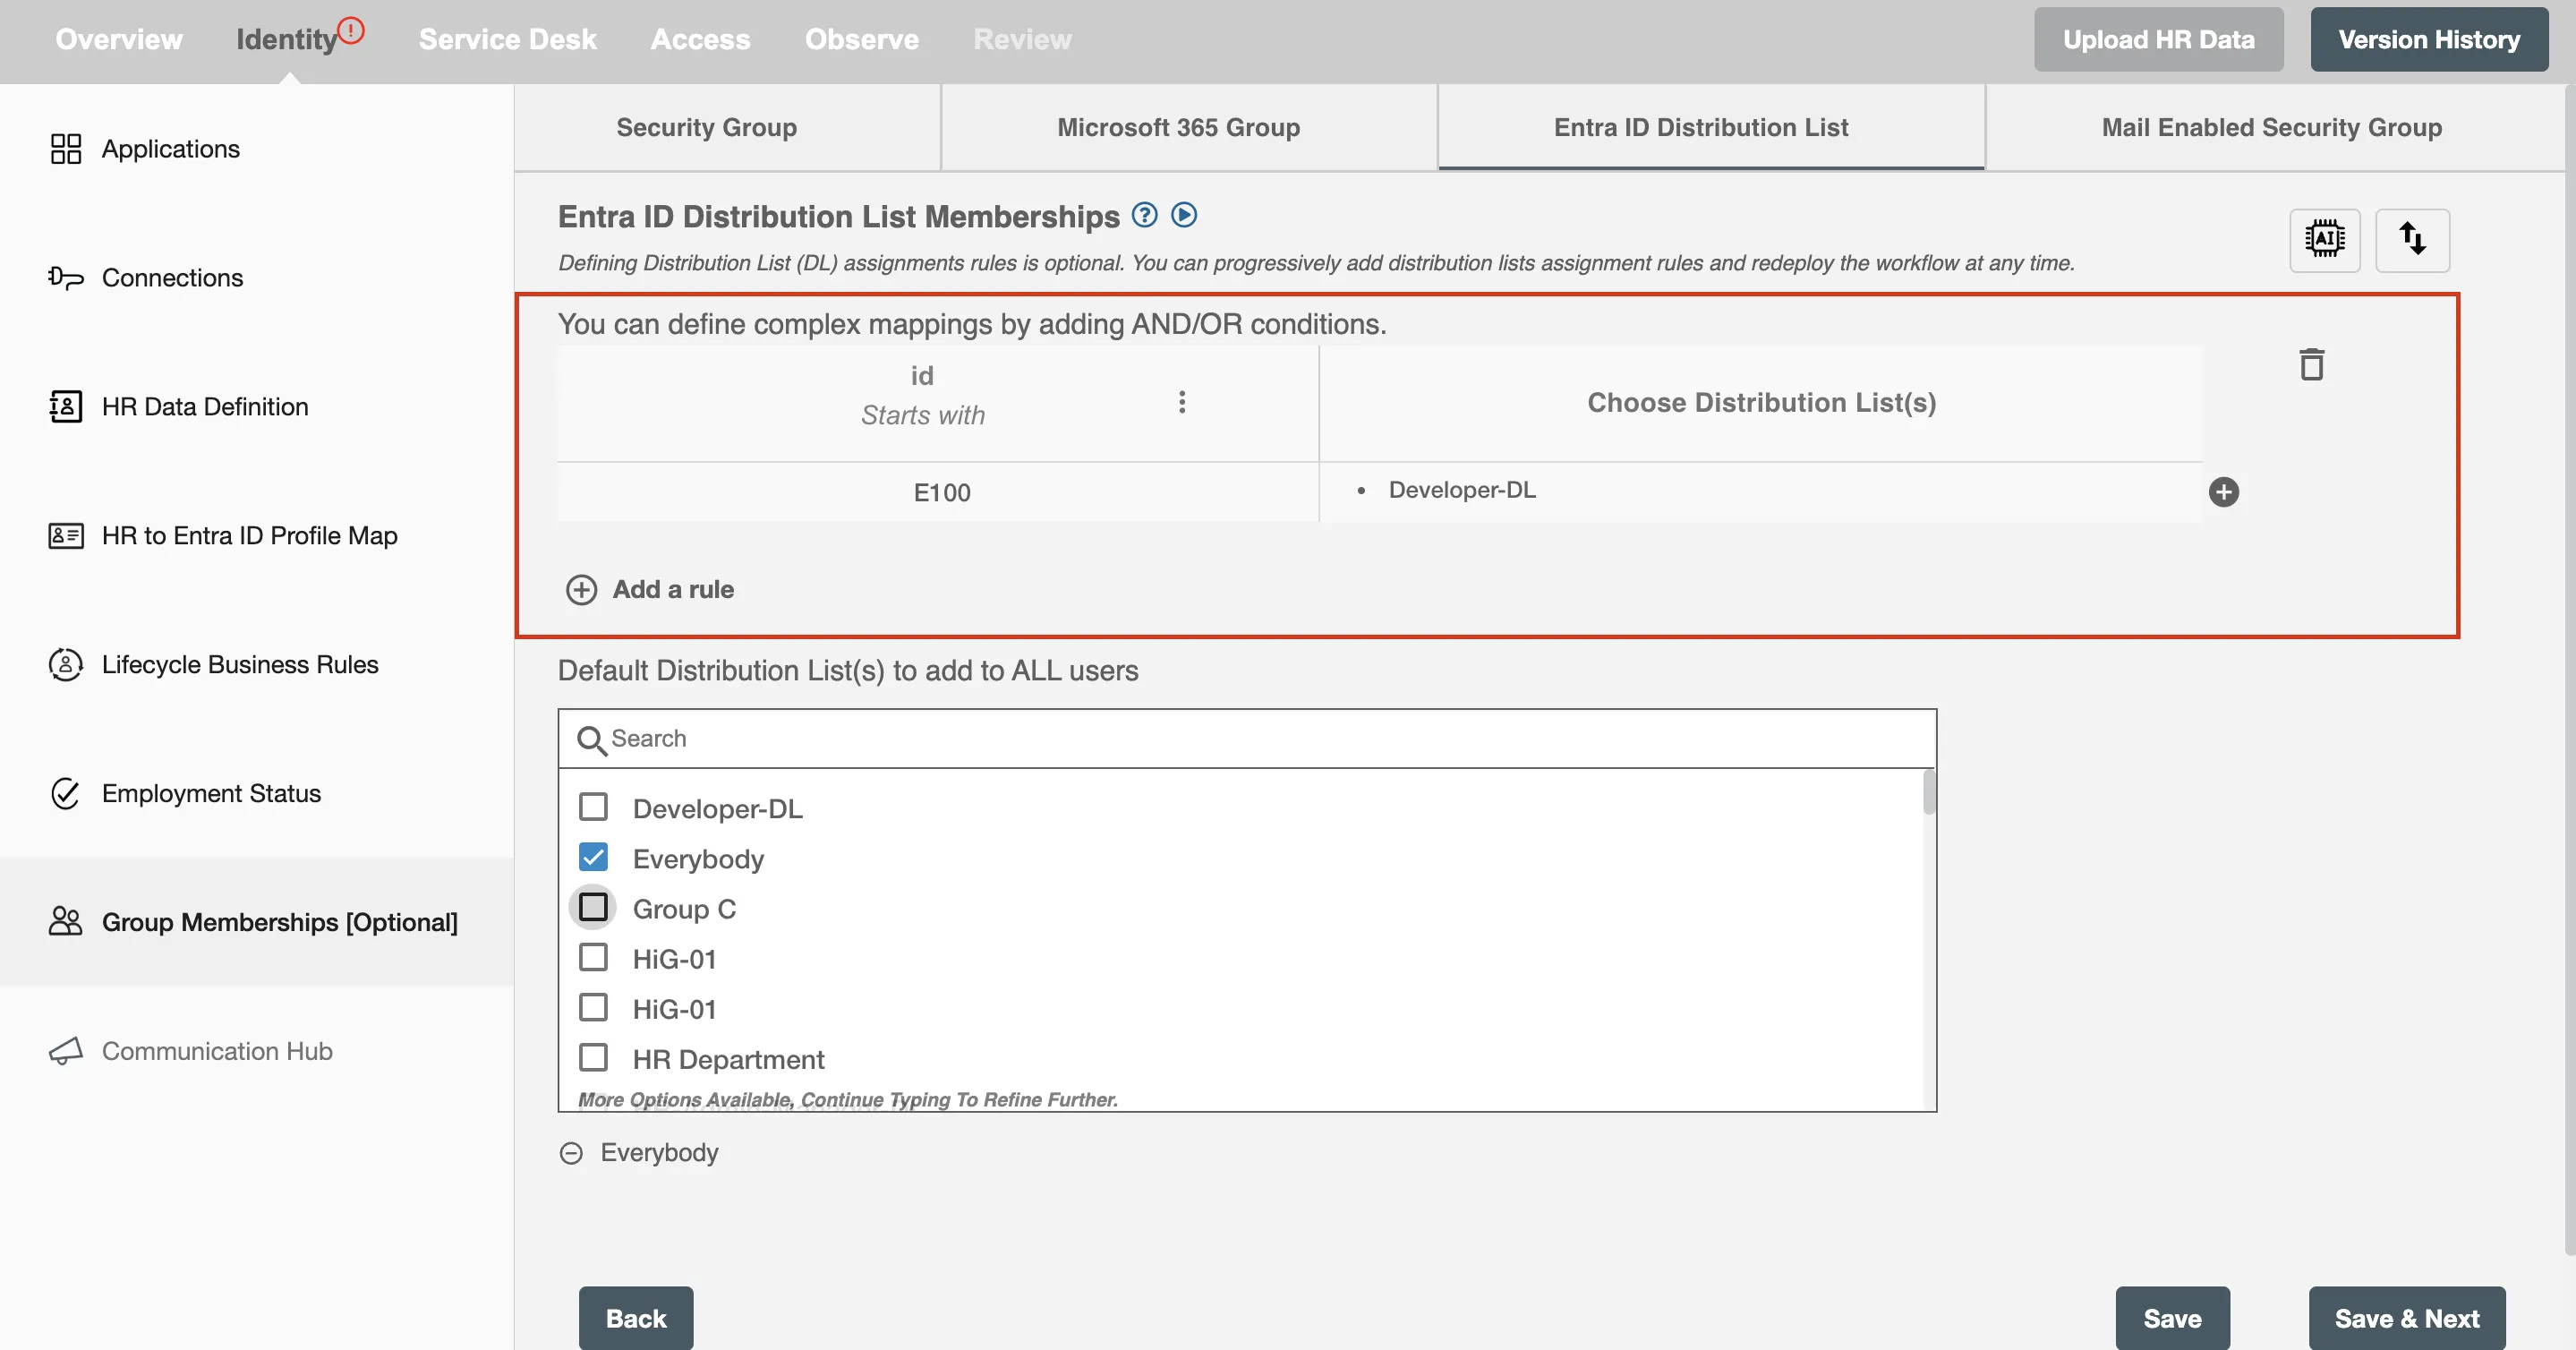 Figure 5. An example of a filter
 Figure 6. An example of a filter with Multi-Domain Controller
 -
You can also define complex filters using the AND/OR logic. Click on the three dots button on the right of Choose Attributes label to add these logics.
-
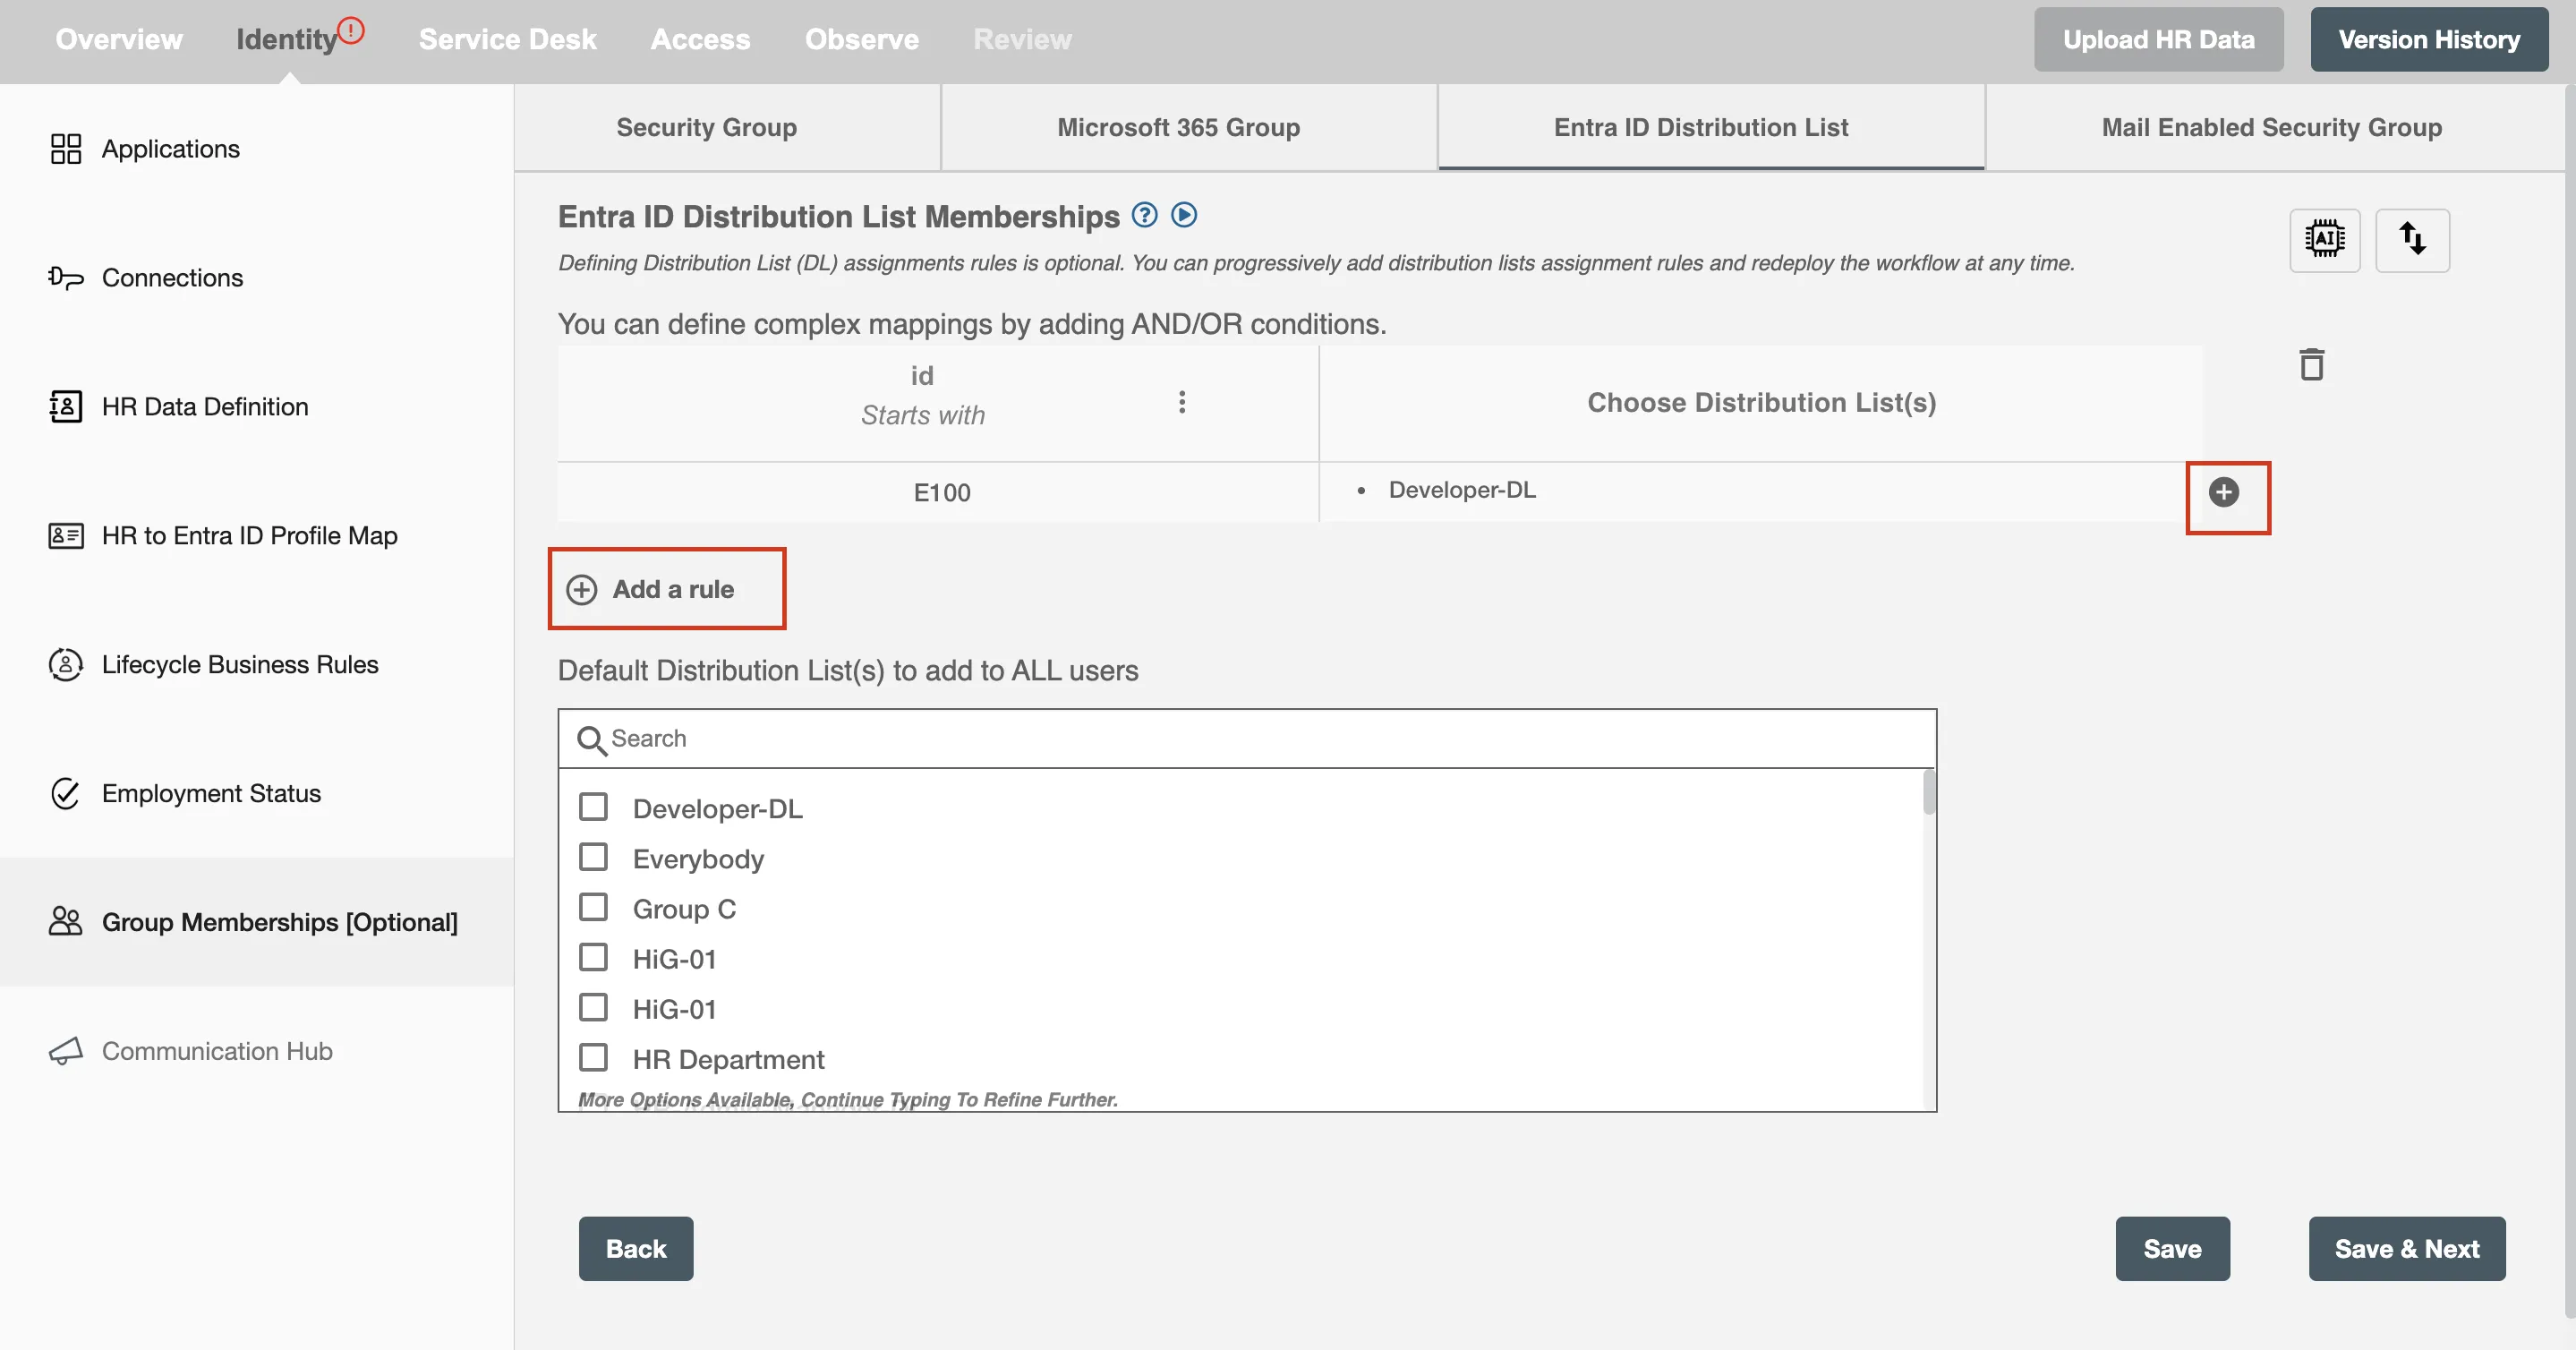
Click on the
+button to add multiple values to the defined filters.
You can also choose more attributes or add more rules by clicking on Add a rule button. To remove a rule, click on delete button.
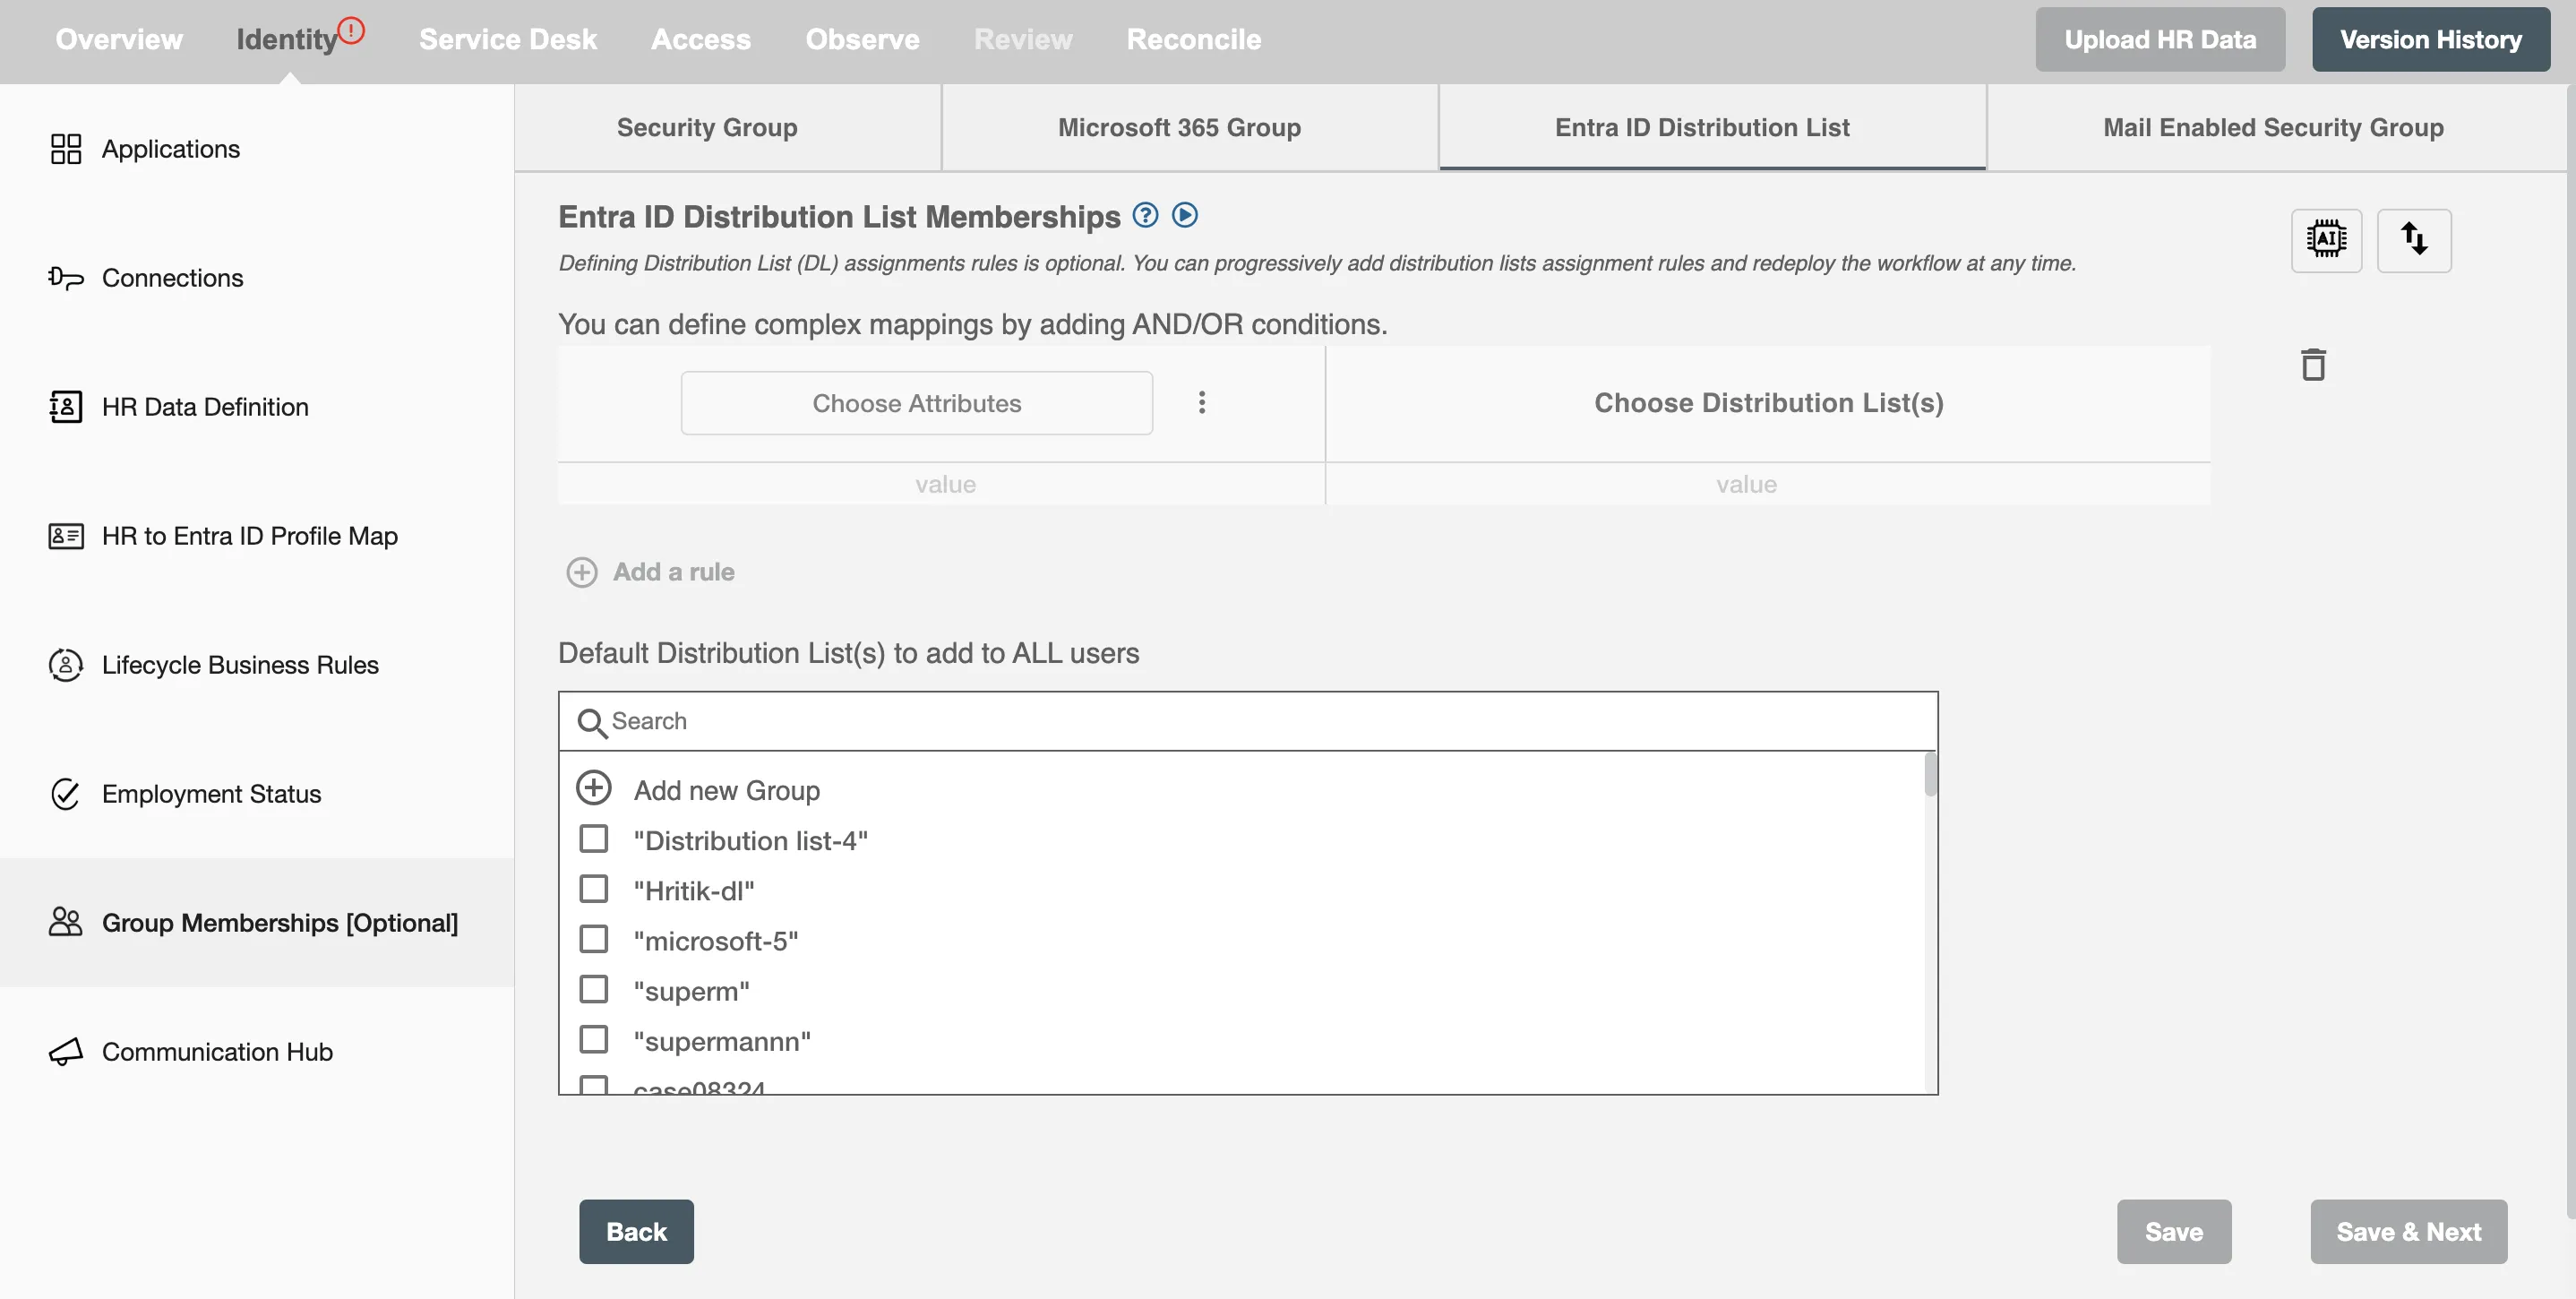
Adding the default Entra ID distribution List
You have to also define a Default Distribution List to add all employees in organization. Employees who are assigned with any rule-based distribution list will also be assigned with this default list. You can define it by simply searching and selecting from the list in section shown in screenshot below.

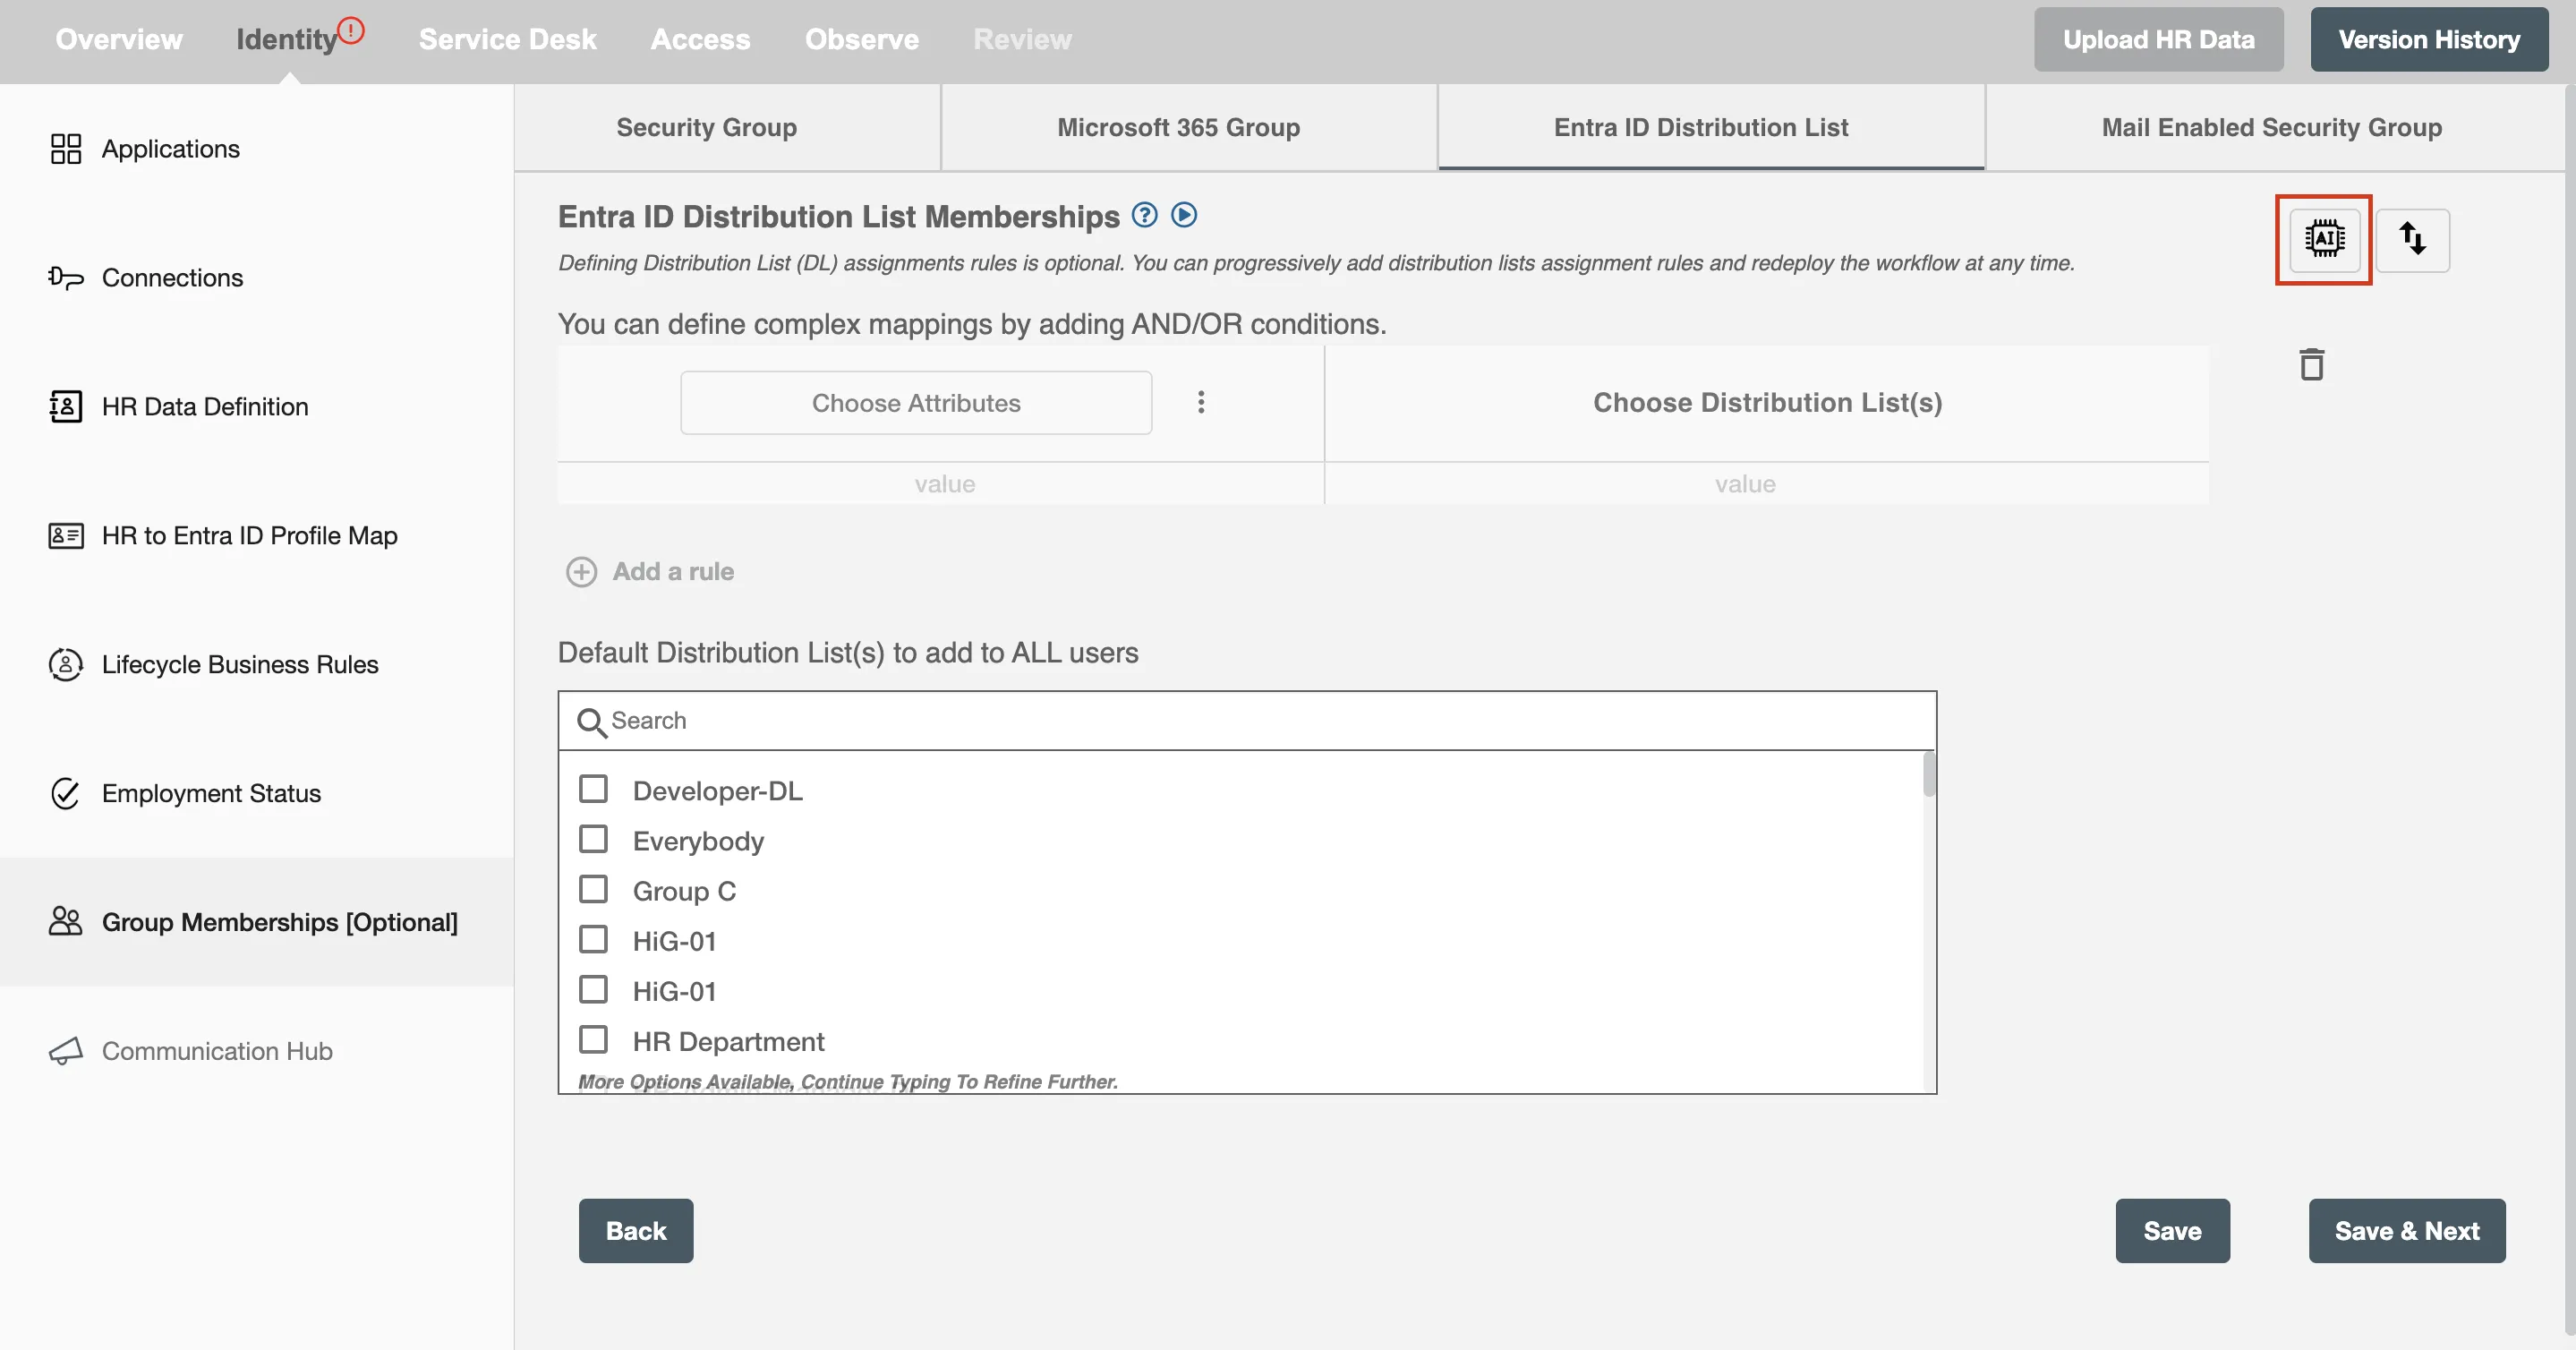
Import And Export Mapping Rules
Users have the option to import all mapping rules by uploading a .xlsx or .csv file. Similarly, for exporting all the rules through .xlsx or .csv file, click two arrows icon shown in screenshot below.
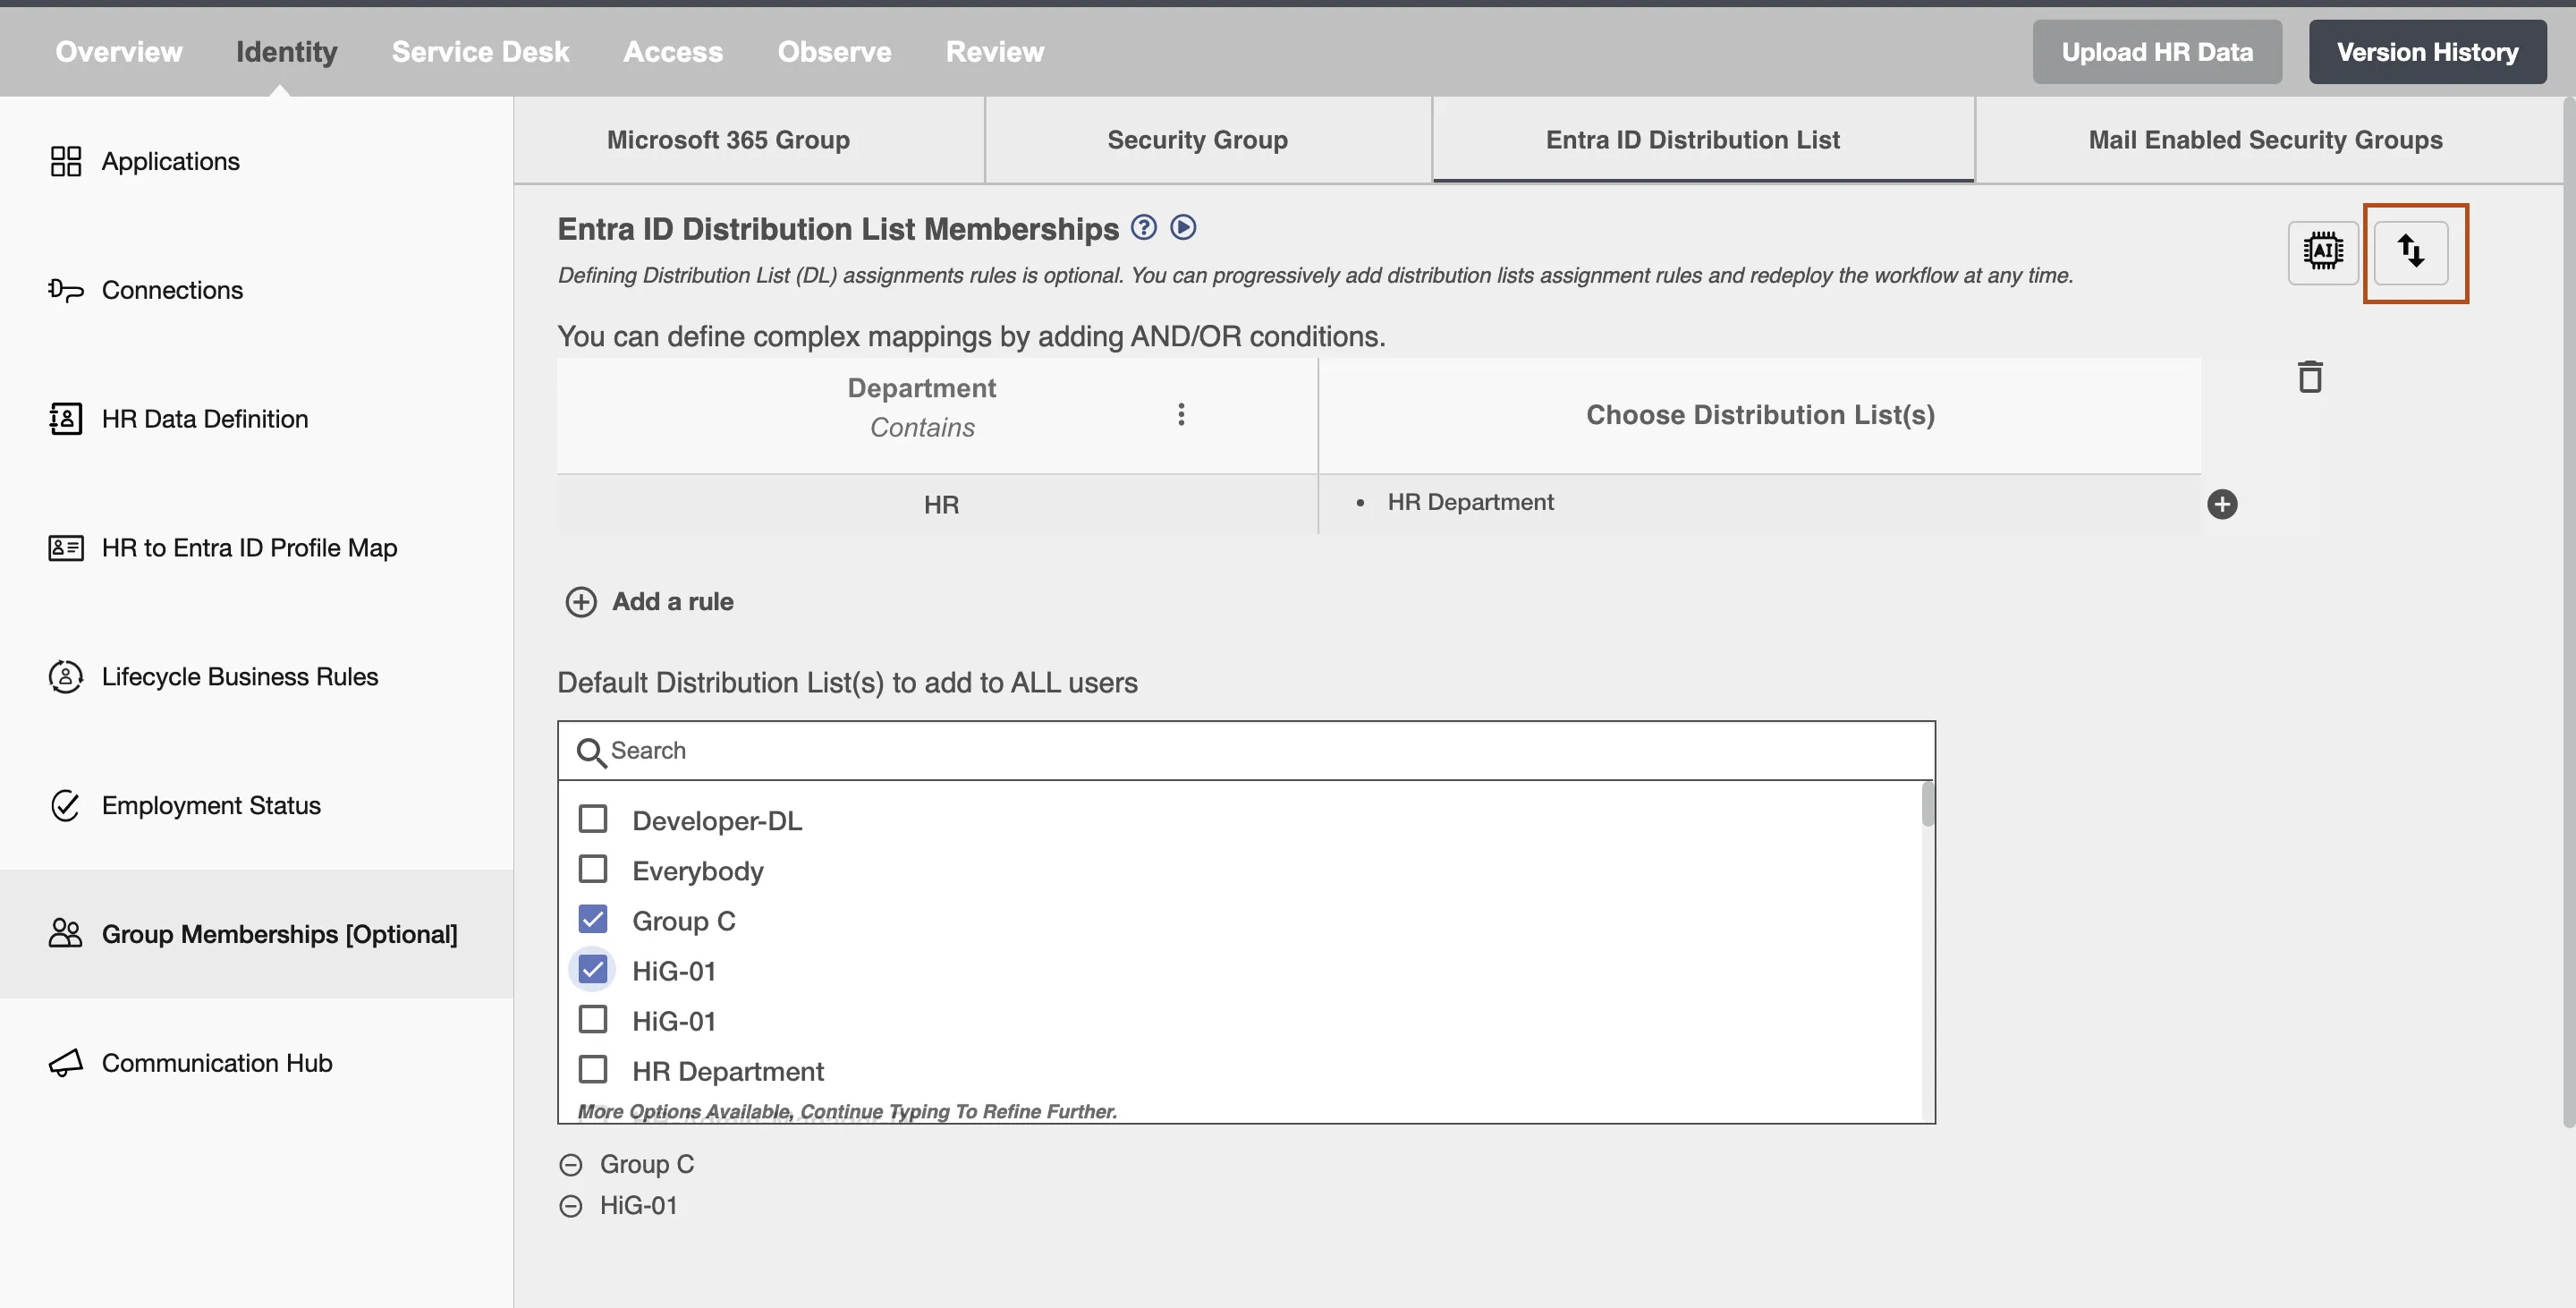
To Import or export Mapping rules, first click on the two arrows button. It will open a dialogue box with two tabs; one tab is for importing rules and the other is for exporting rules. You will be redirected to Export tab, if the form is valid, otherwise to Import tab and Export tab will remain disabled.
Importing mapping rules
Mapping rules can be imported by following below steps:
-
From dialogue box, chose Import tab.
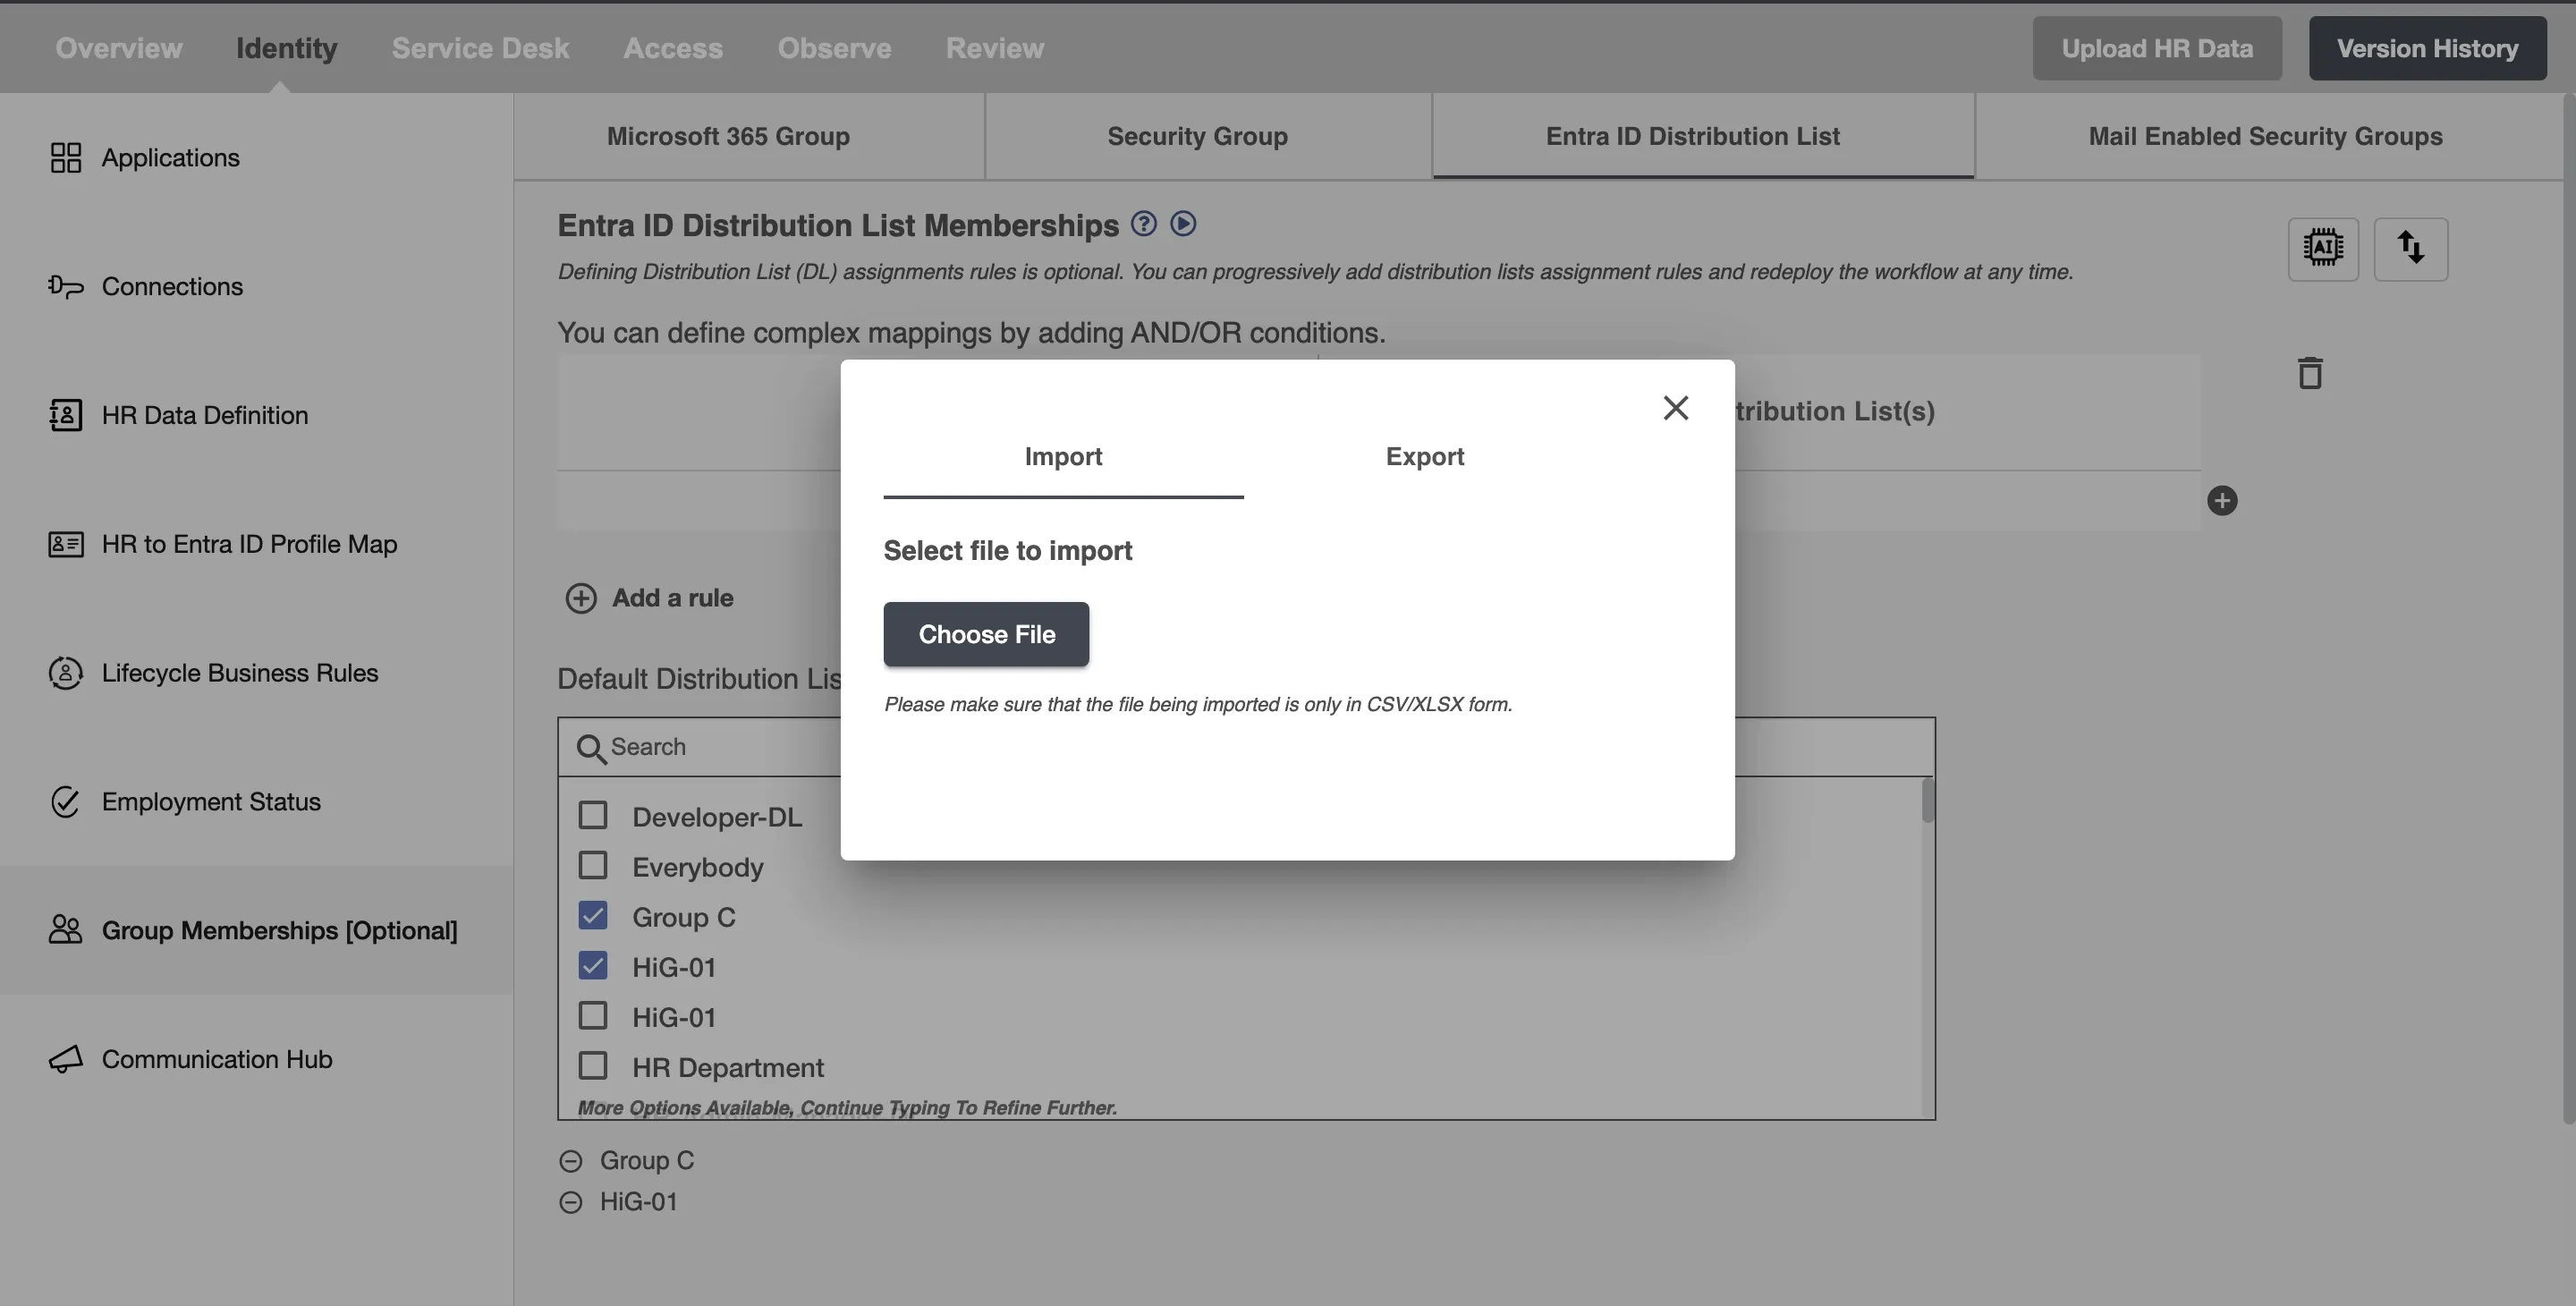 Figure 12. Dialog Box for Importing .xlsx or .csv File
 -
Click on Choose File button below ‘Select file to import’ label. It will open file directory from which you can choose a .csv or .xlsx file.
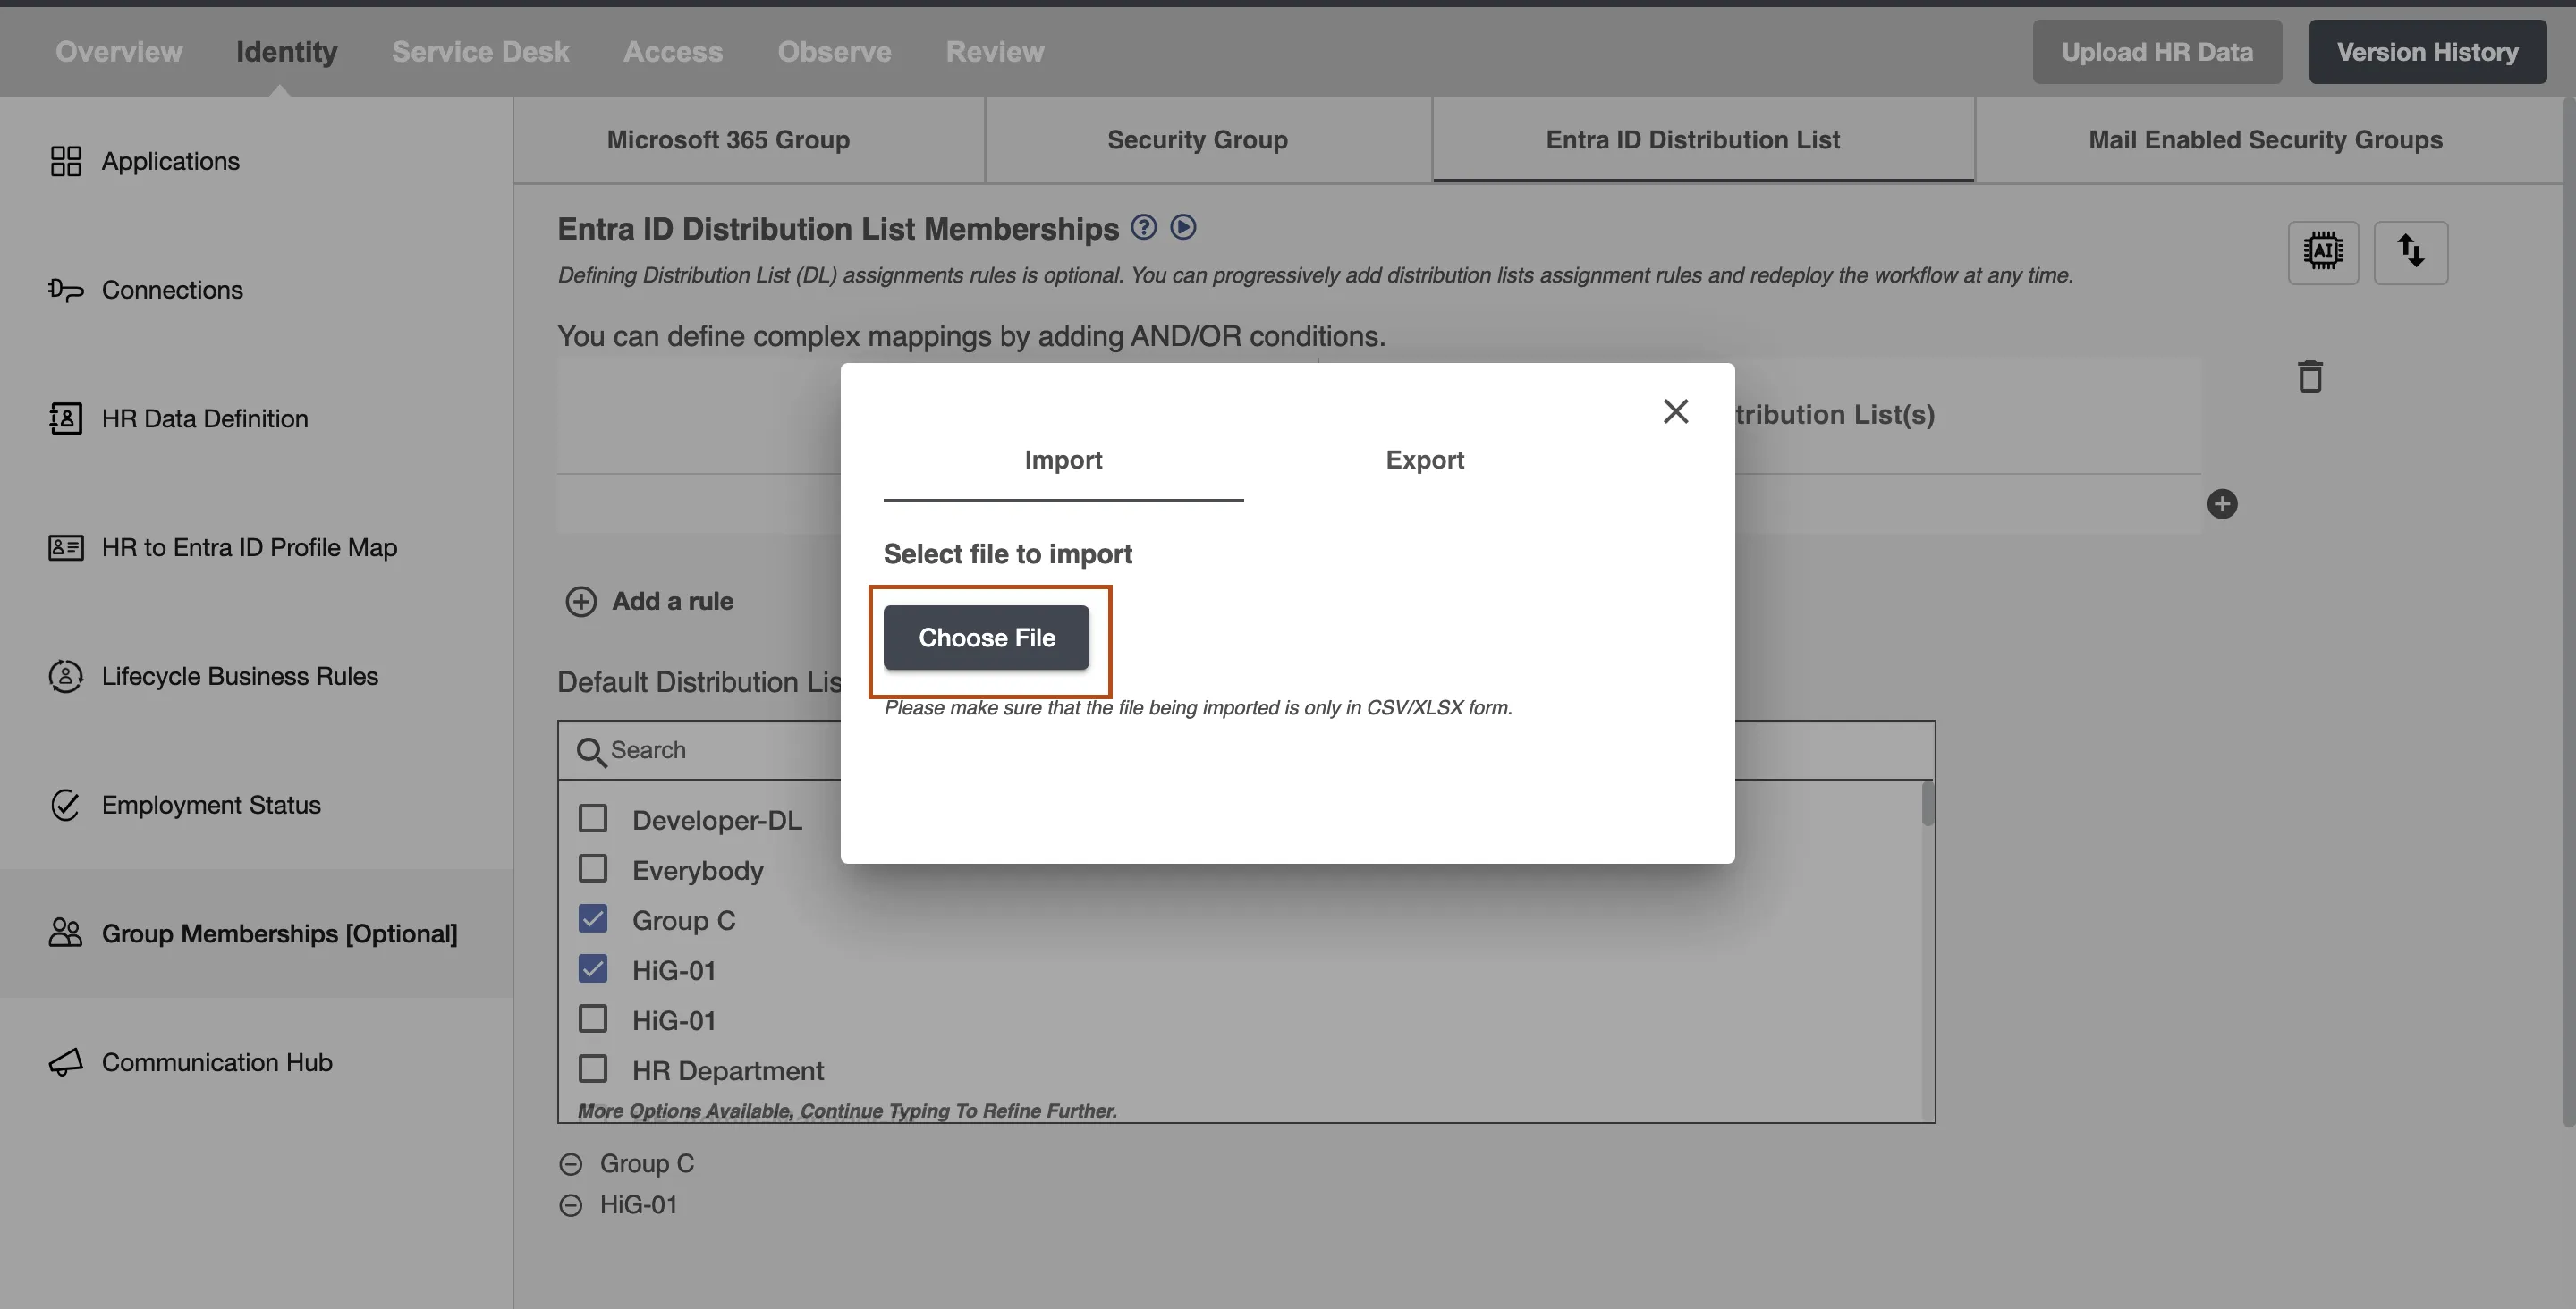 Figure 13. "Choose File" button for choosing the file to be imported.
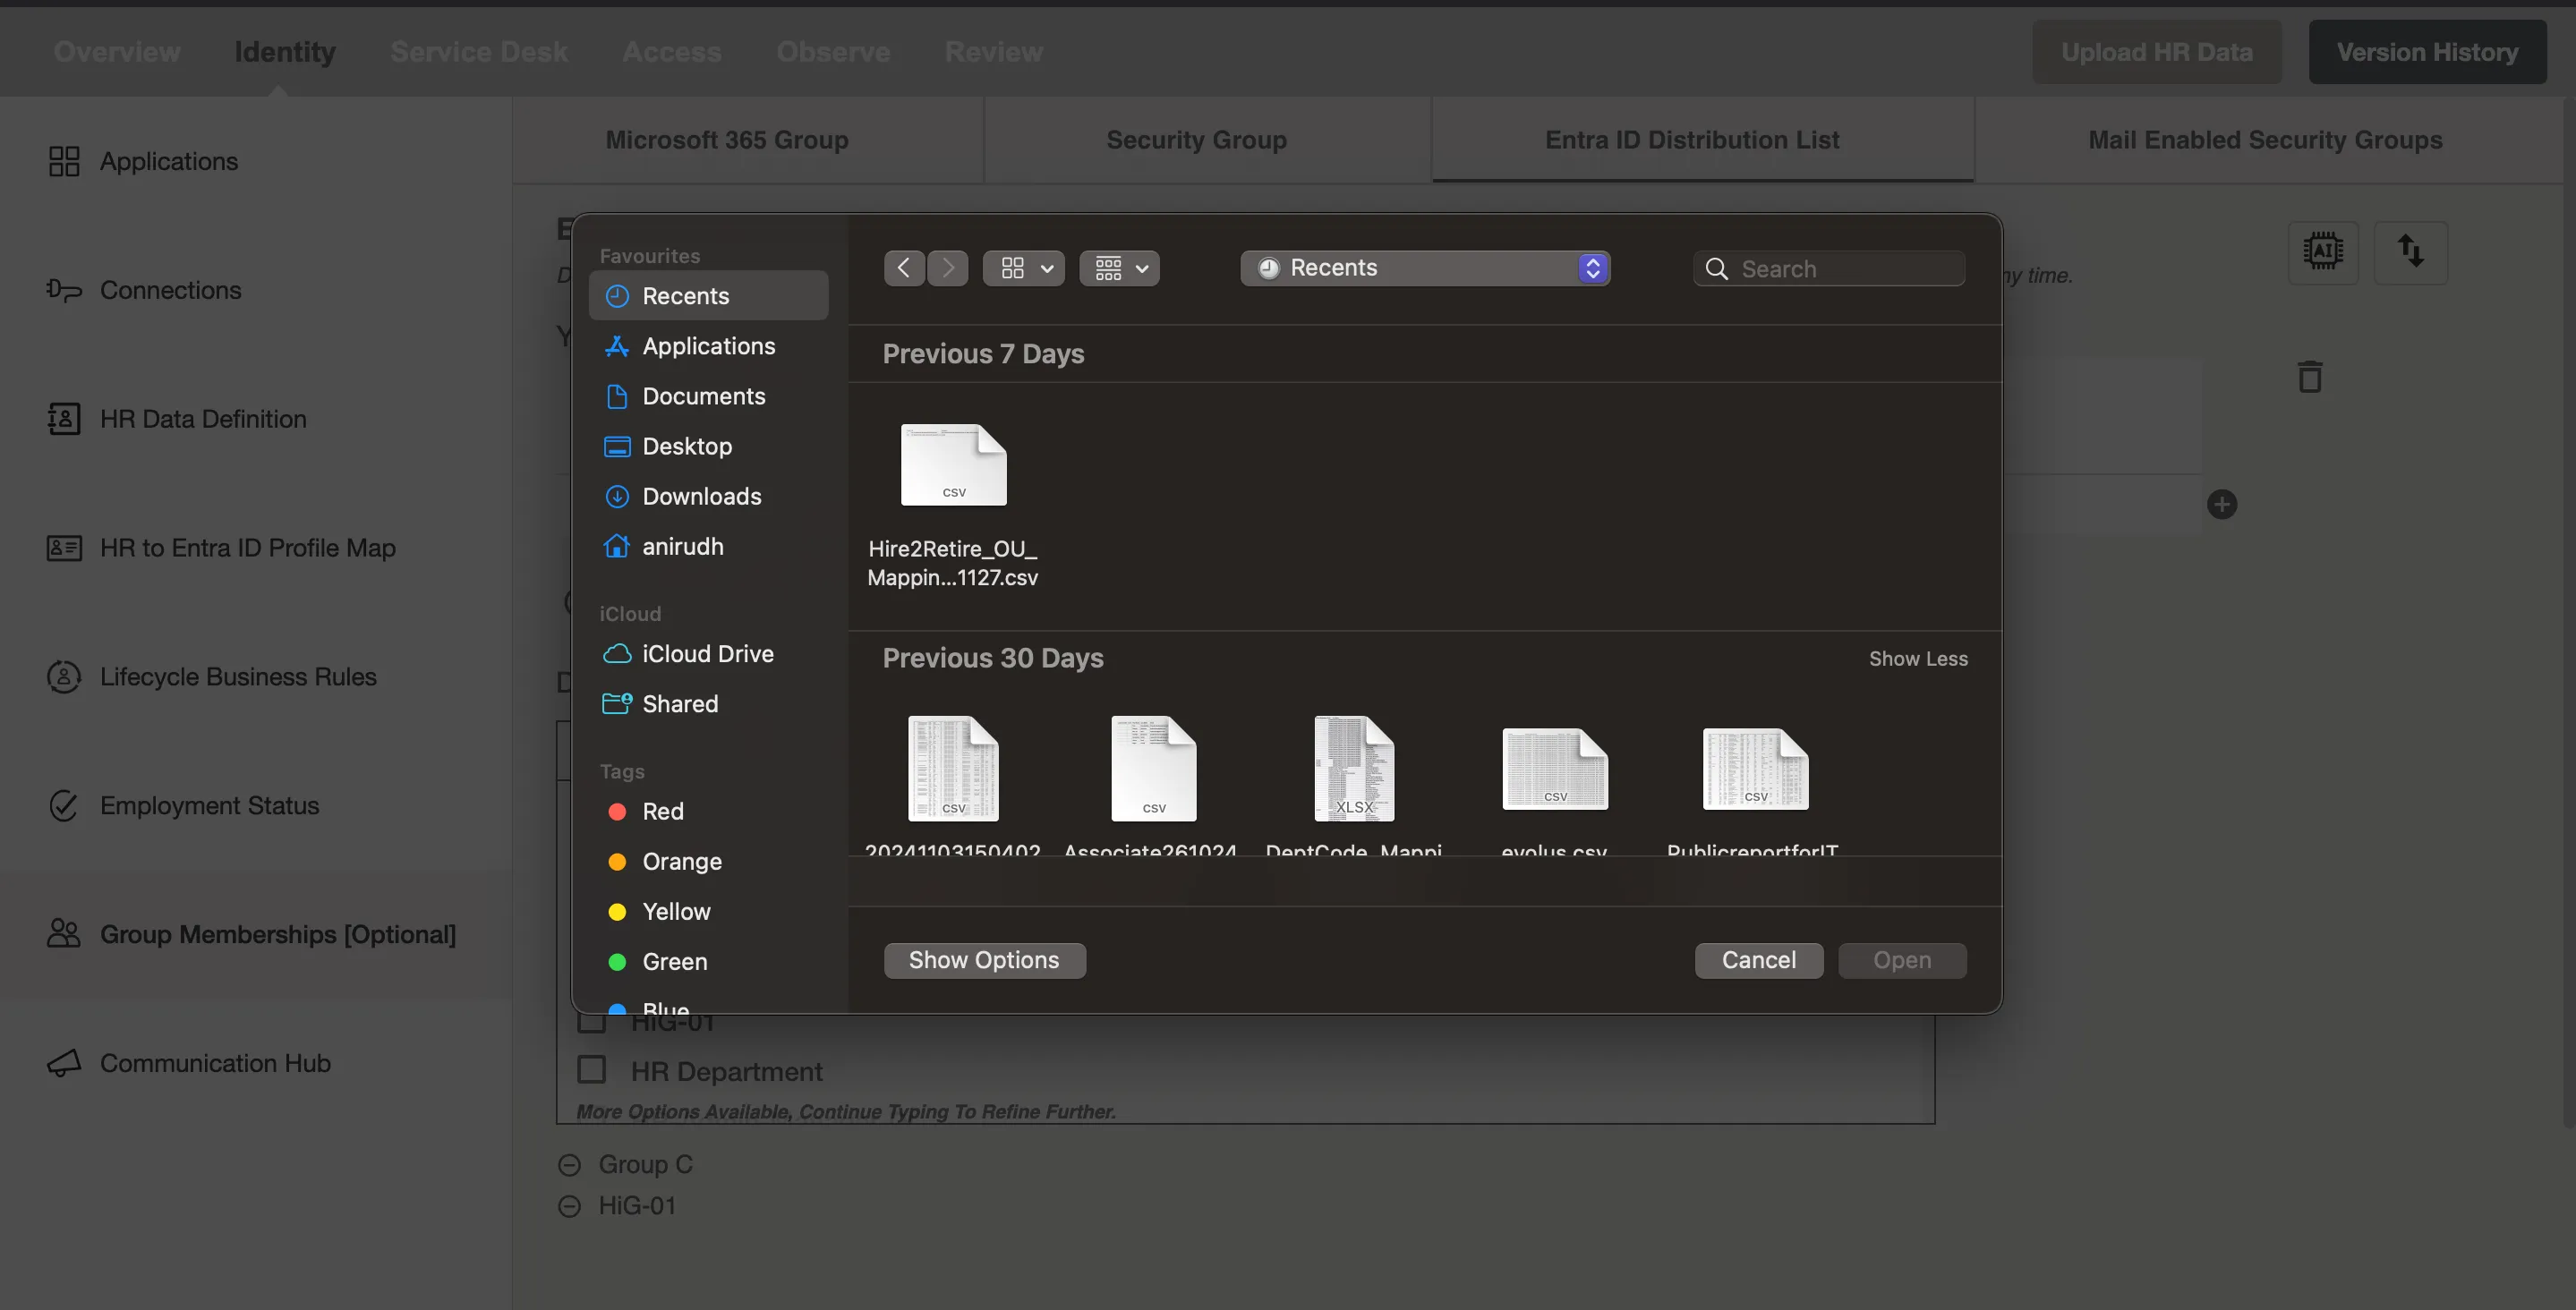 Figure 14. Windows Tab for choosing .xlsx or .csv File.
 -
It may take some time to import file and create rules, please do not refresh the screen. .
Exporting mapping rules
Steps for exporting file:
-
From the dialogue box, choose the tab which has label Export.
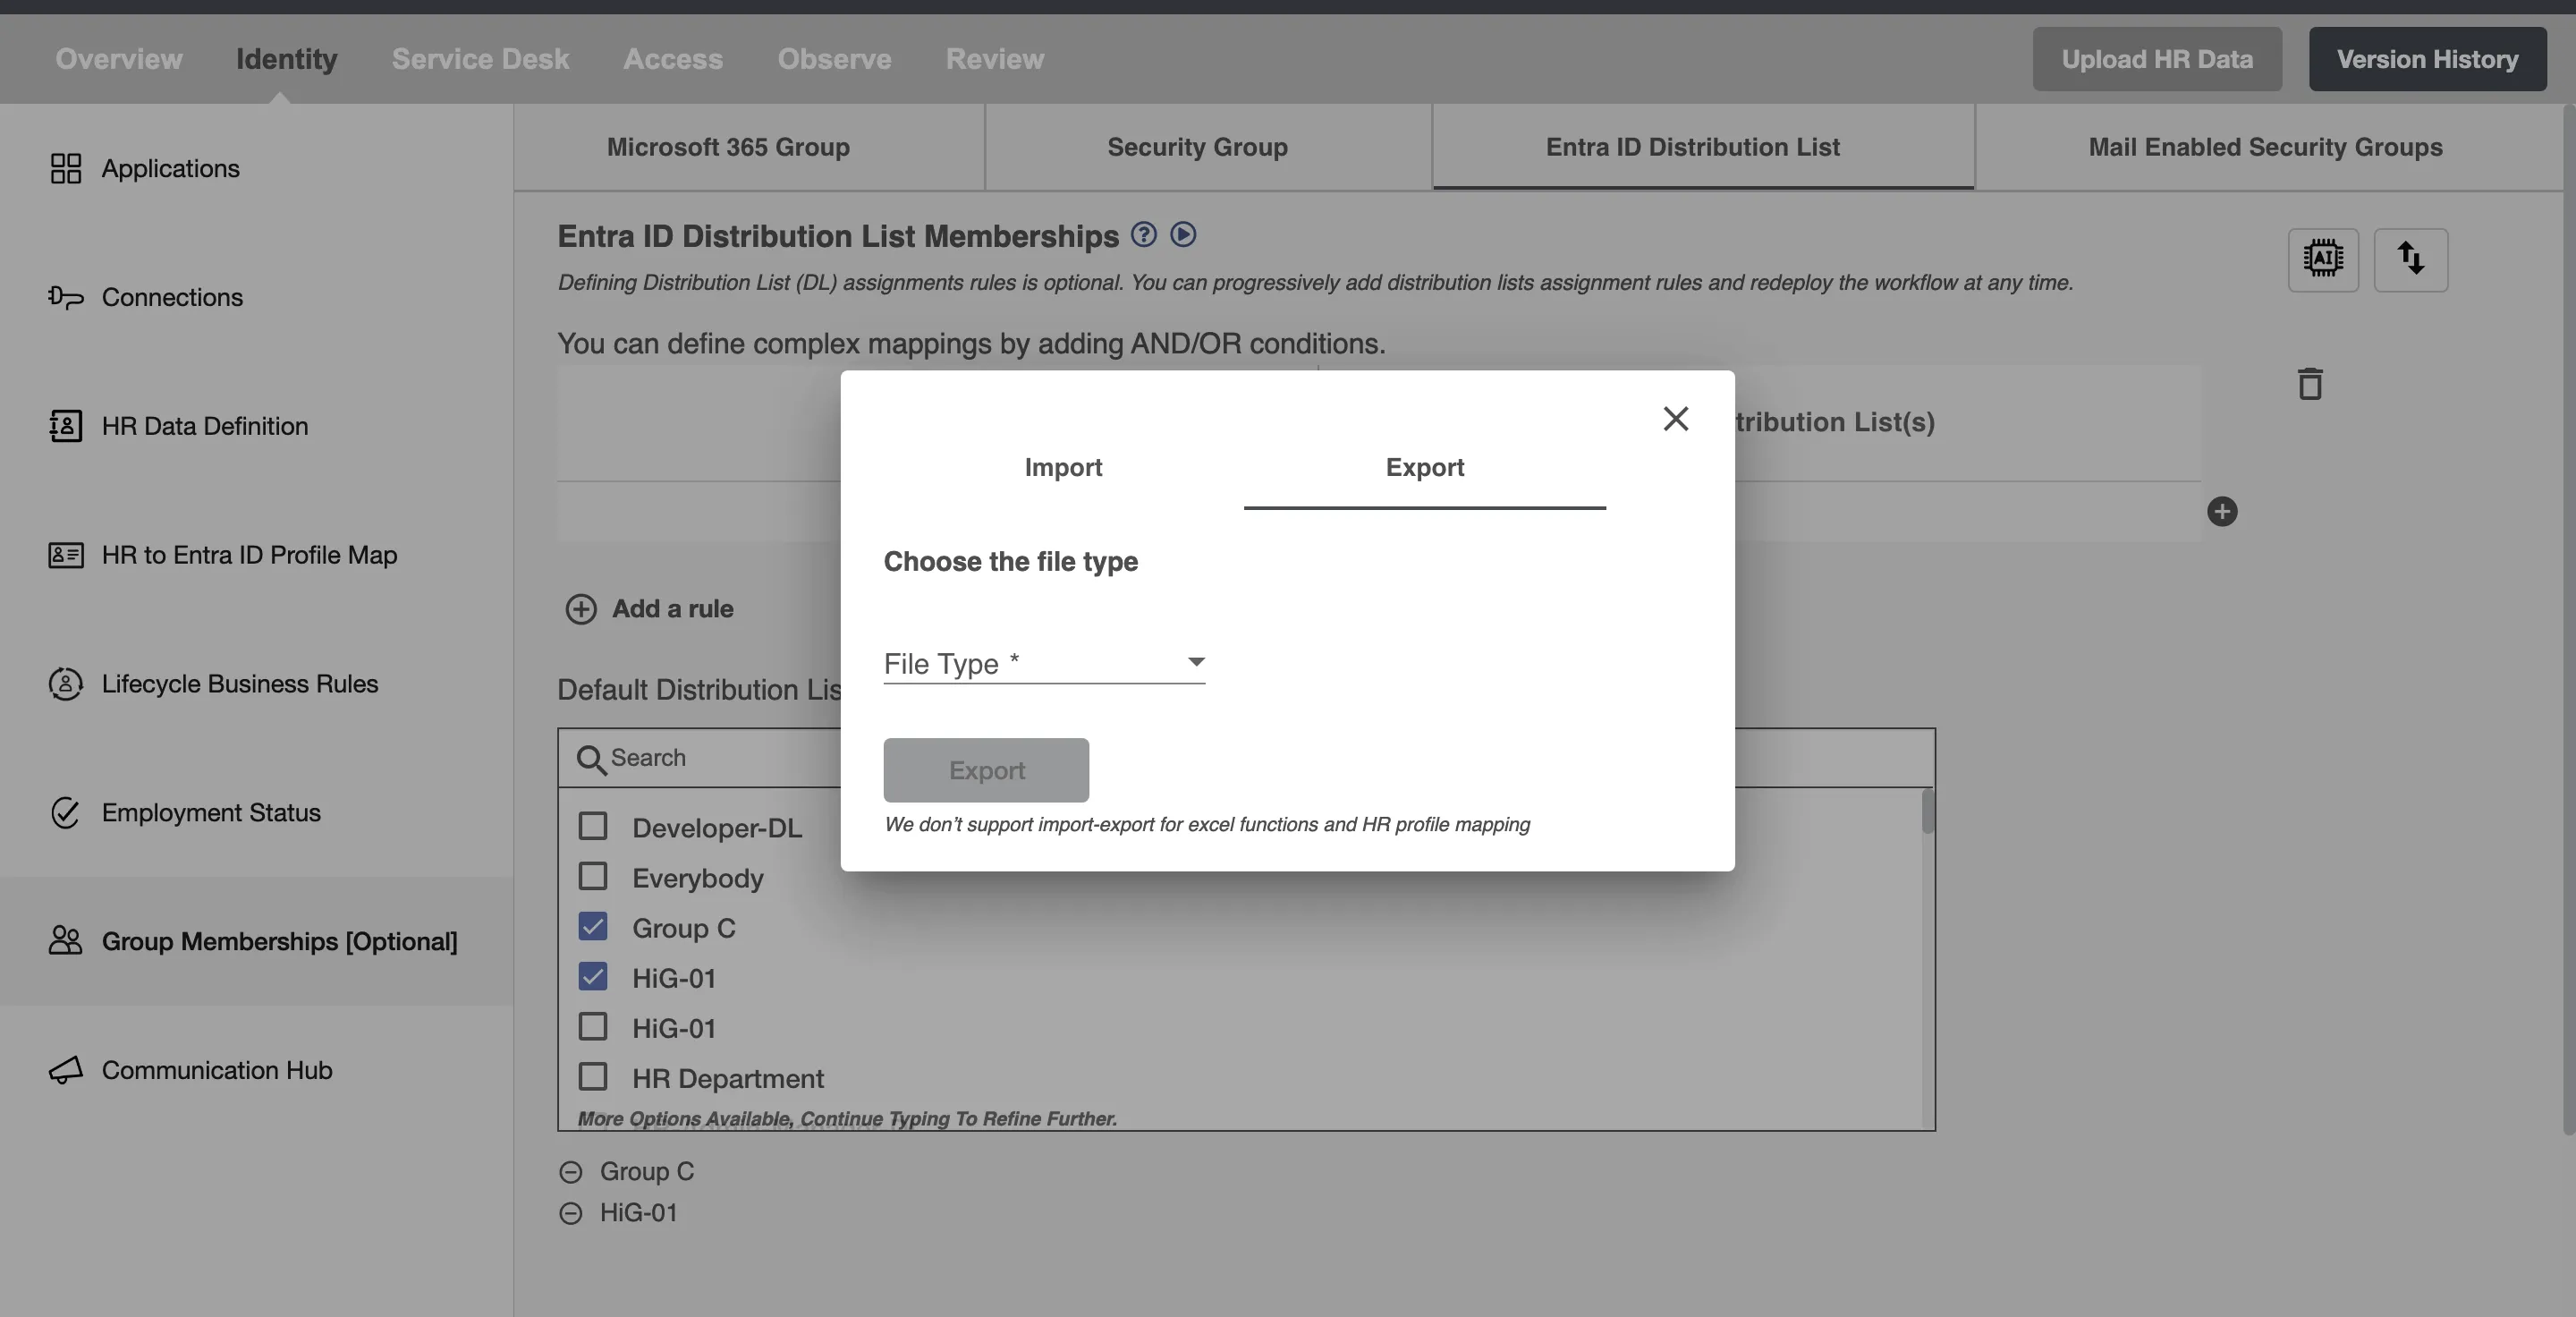 Figure 15. Dialog Box for Exporting File.
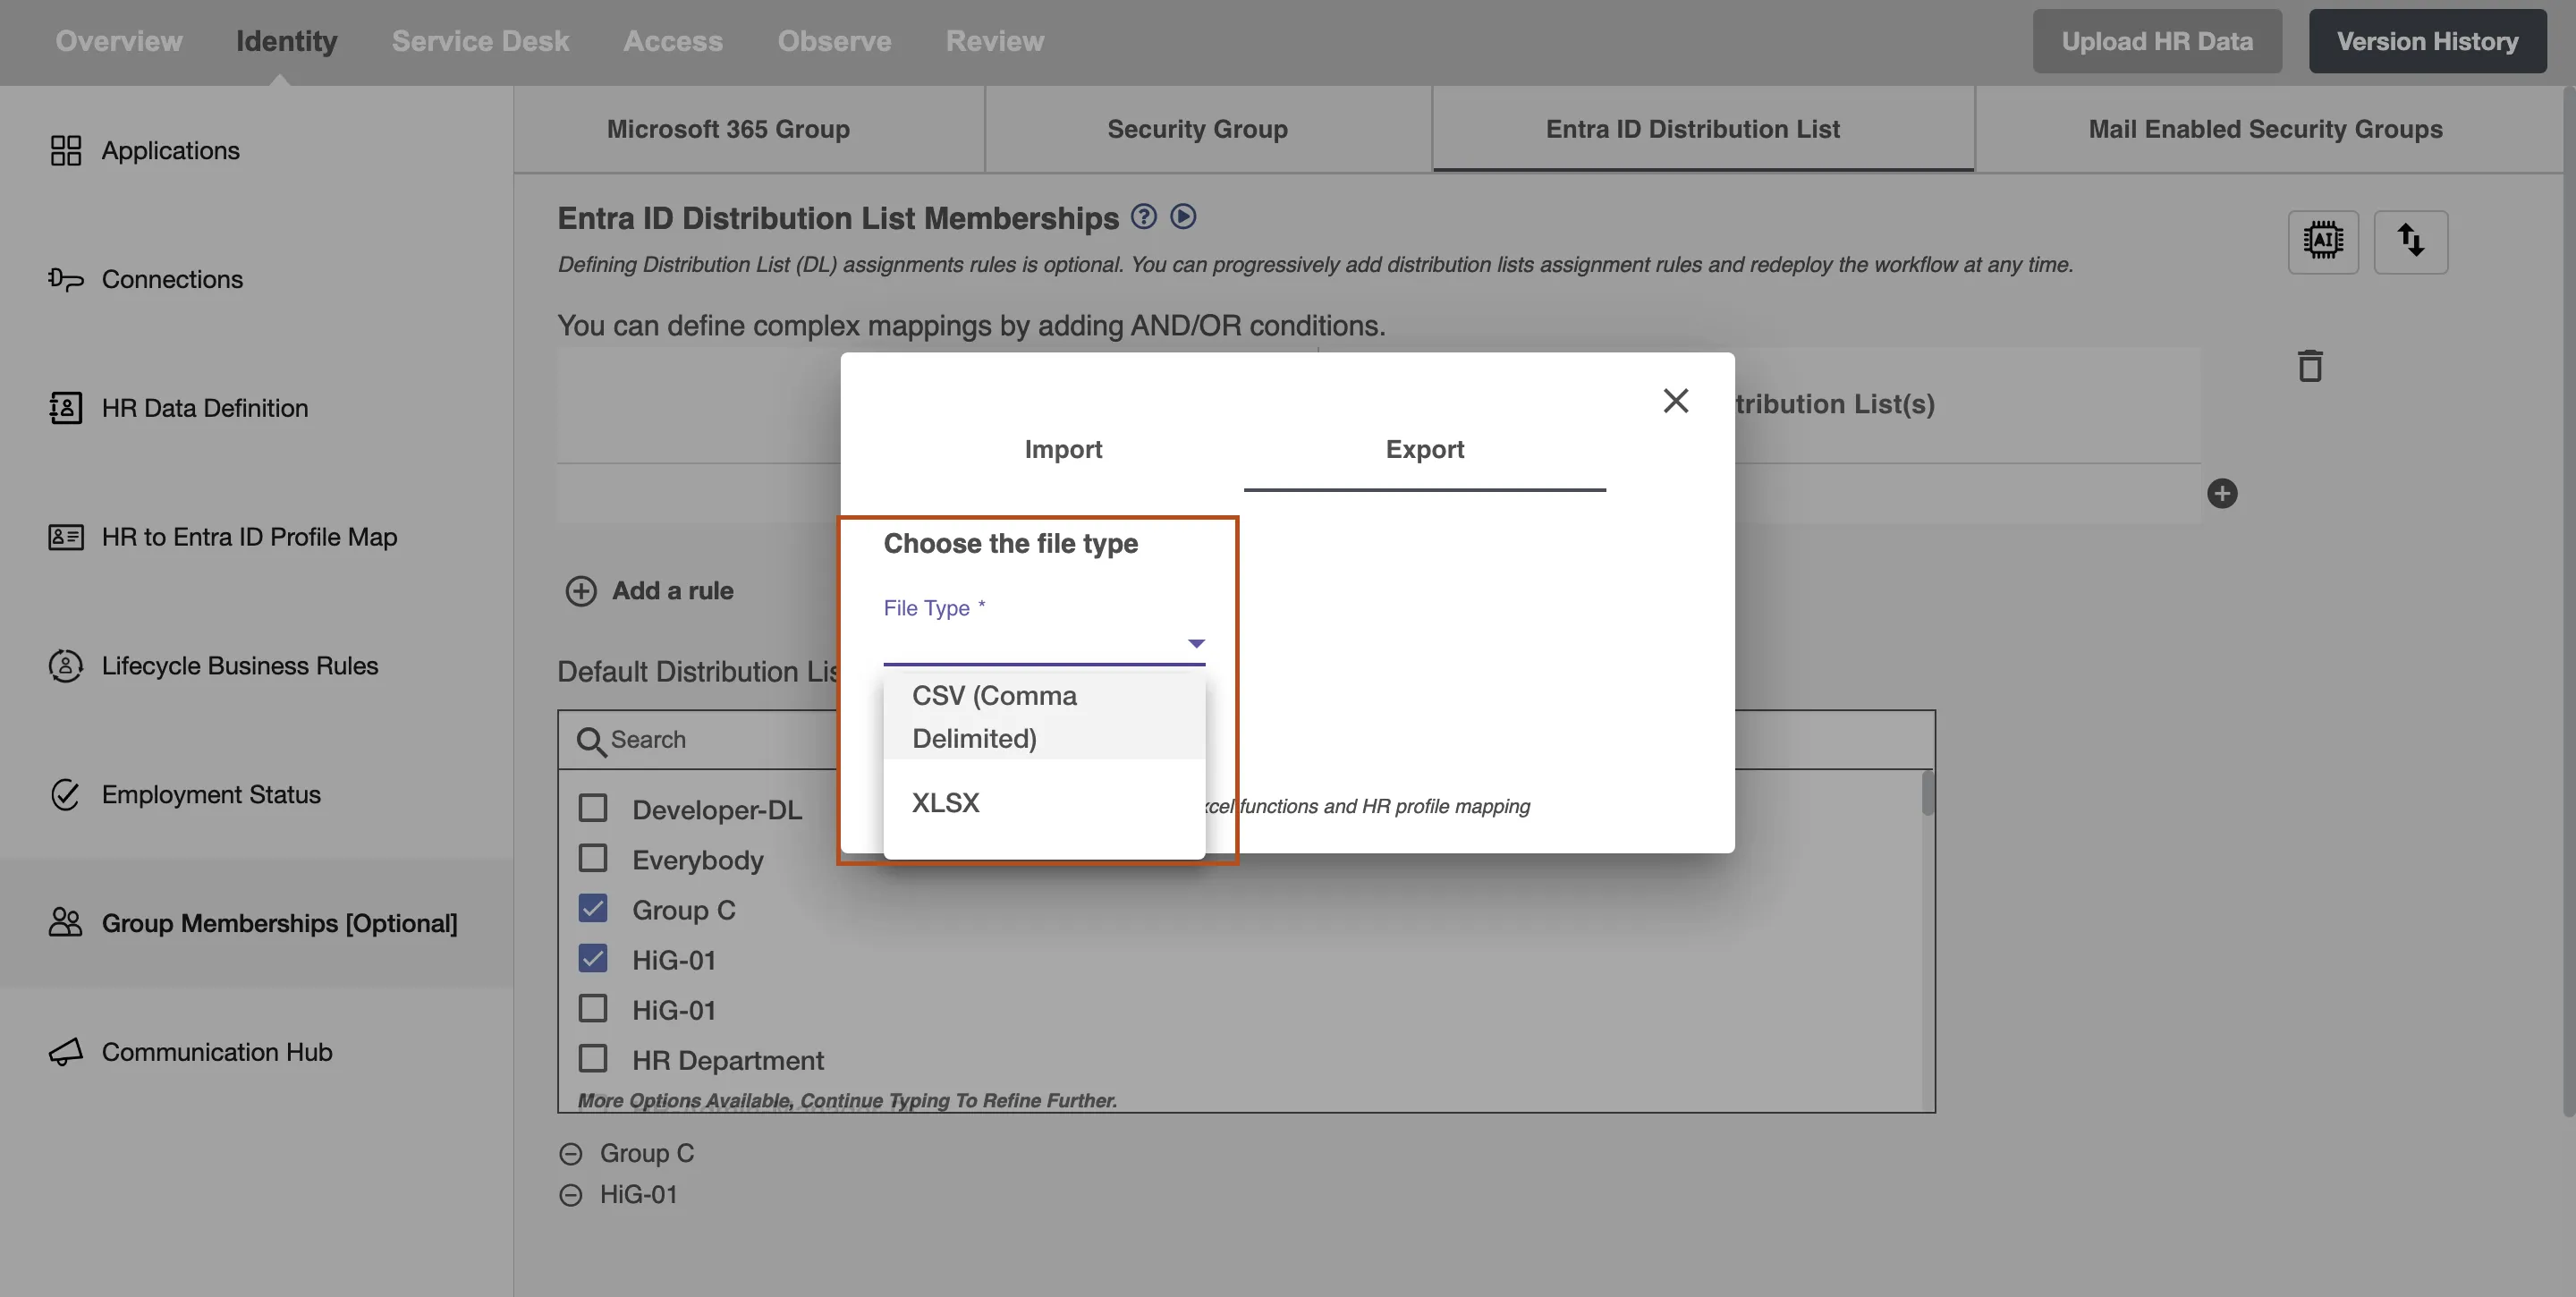 Figure 16. File Formats to Export.
 -
Define File type in the field and click Export. The file will then be downloaded and by default the name of the file will be Hire2Retire_DL_Mapping_(TimeStamp).
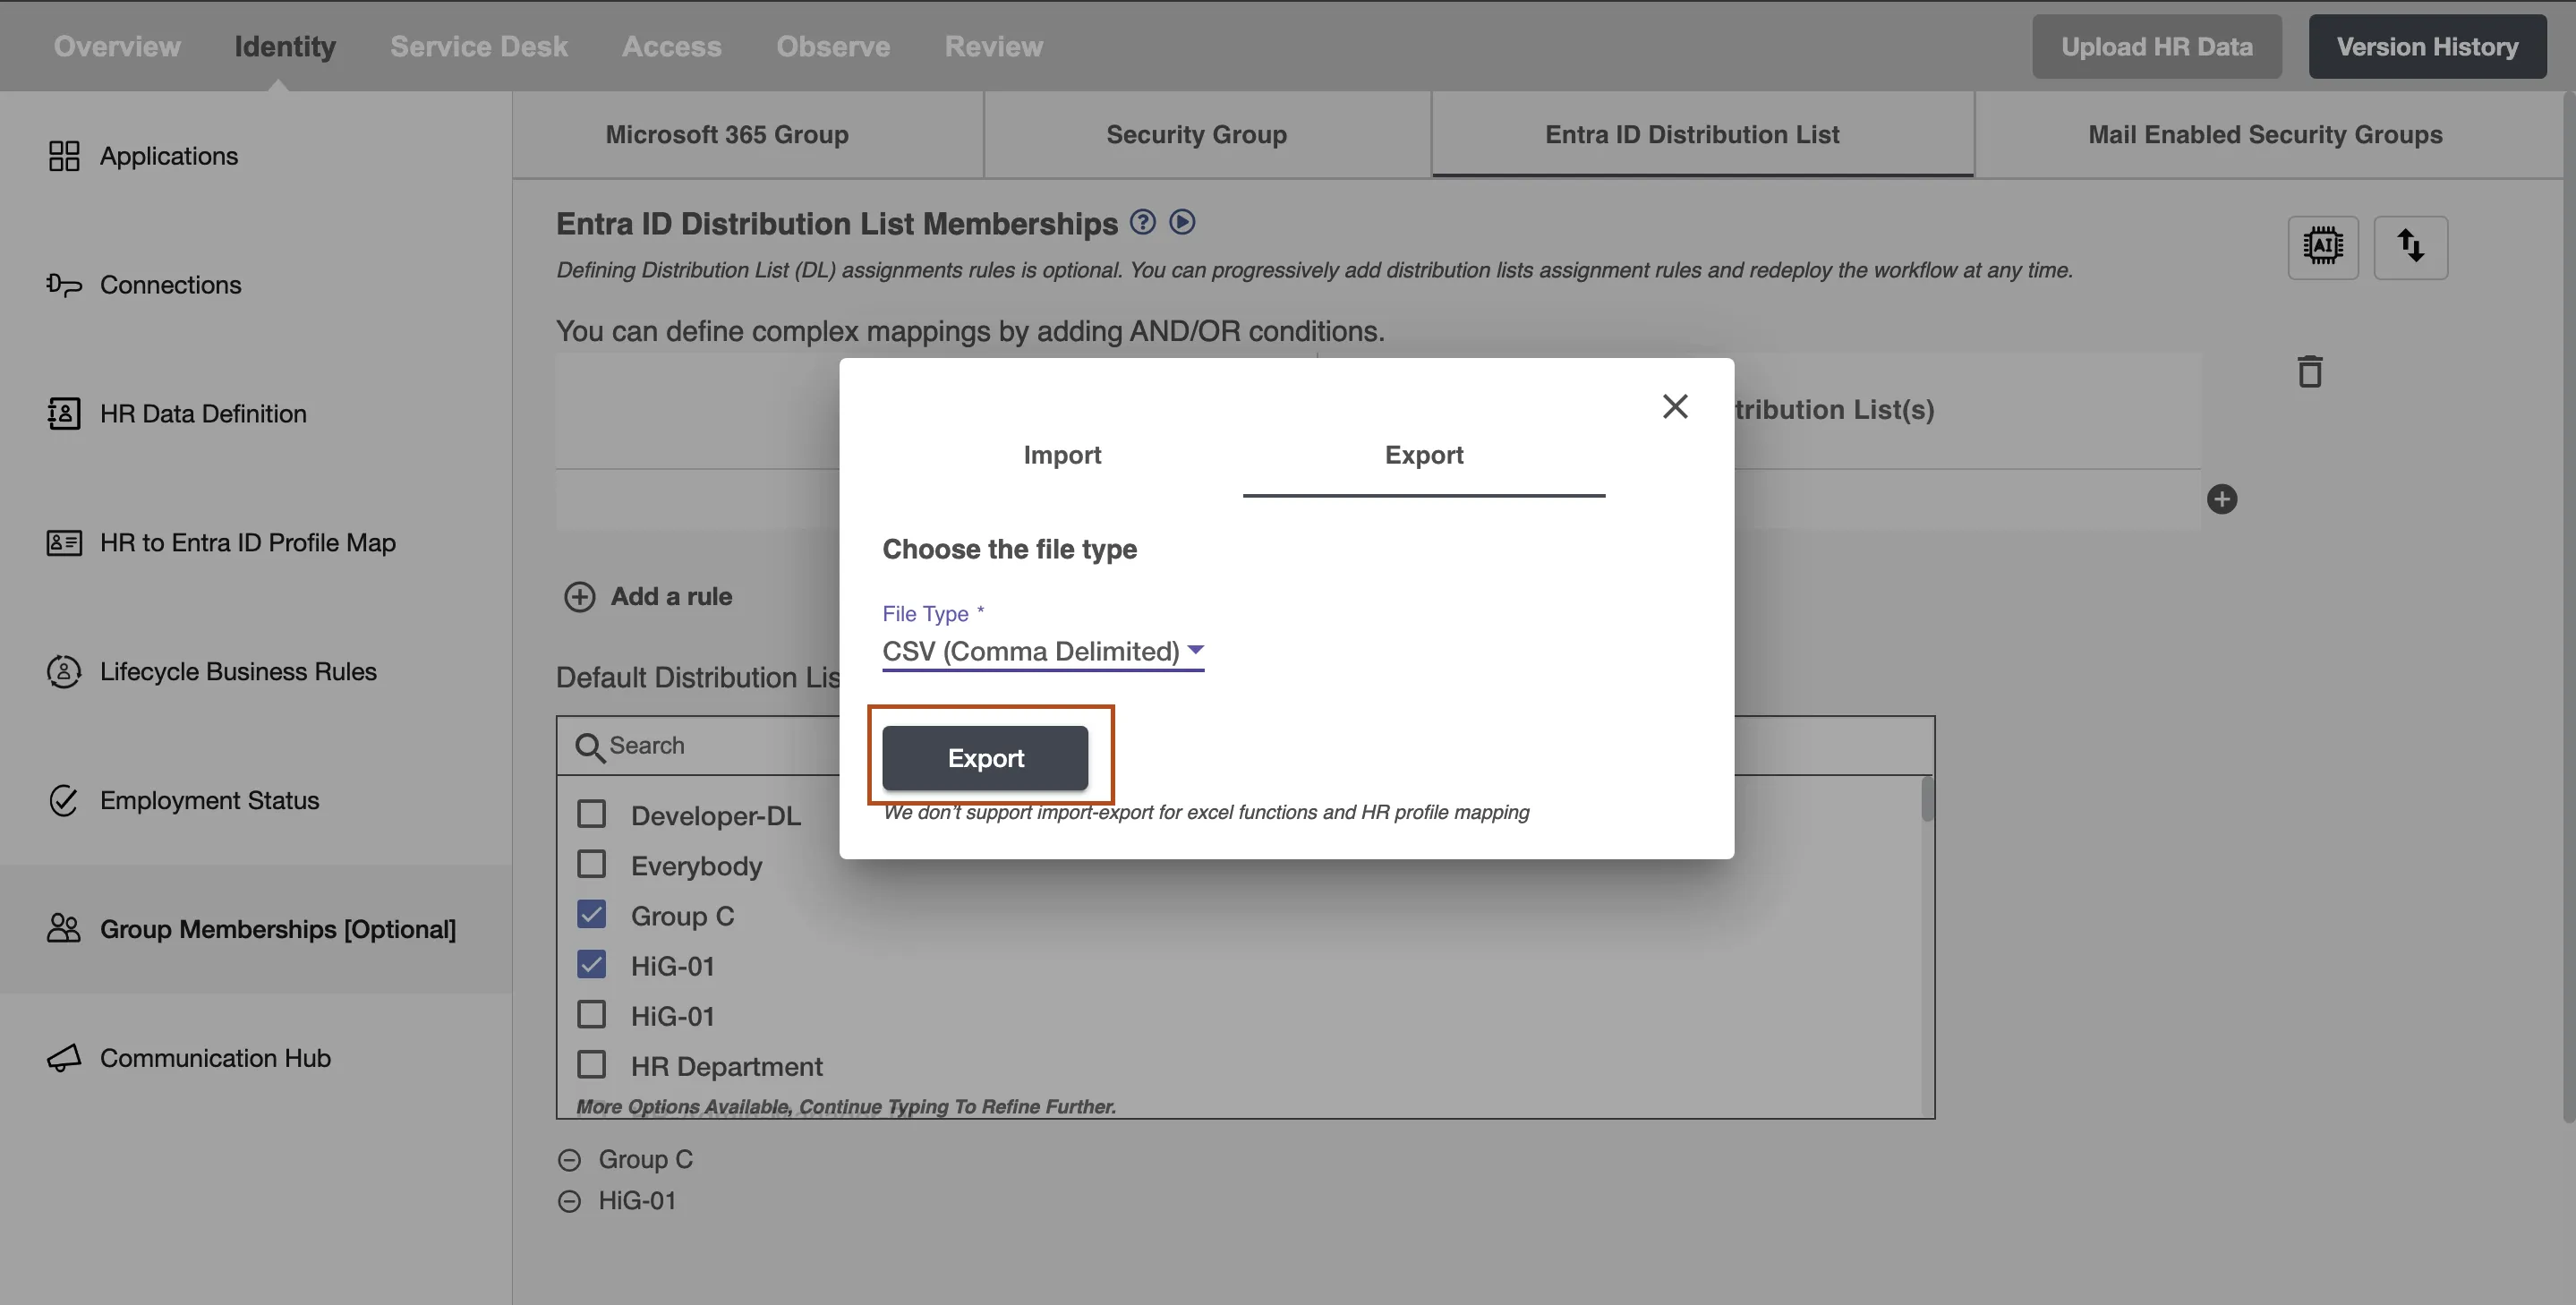 Figure 17. "Export" button.
AI Insights for Entra ID Distribution List
You can also generate rulesets in a more effortless process with Hire2Retire’s new AI model. In the top right corner, you will see an AI button. Click this button and fill basic details like your username and flow id to receive more details. Upon submitting this form, Hire2Retire’s AI Research team will contact you to craft rulesets and deliver a CSV file.