Greenhouse
Greenhouse is a popular applicant tracking system (ATS) and recruiting software used to manage hiring processes. It offers a range of features designed to streamline recruiting workflows, improve collaboration among hiring teams, and provide insights into recruitment metrics. Hire2Retire enables organizations to create identities for hired candidates directly from Greenhouse ahead of the start date, allowing internal service teams to prepare for onboarding and ensuring employees have a great first-day experience.
Authentication
Hire2Retire supports OAuth for authenticating with the Greenhouse API. OAuth provides a more robust and scalable approach to authorization, eliminating the need to share raw API credentials and enabling fine-grained access control. Starting with Greenhouse Harvest API v3, OAuth is the only supported connection method.
Older API versions of Greenhouse Harvest API (v1) supported Basic Auth (API Key-based) authentication mechanism. However, as part of Greenhouse's evolving security standards, Basic Auth has been deprecated in favor of more secure authentication mechanisms.
If your Greenhouse integration is currently configured using Basic Authentication (API key–based), refer to the Greenhouse Basic Auth documentation for details on the required permissions and setup considerations. Also note that the Basic Auth Connection mechanism will be deprecated by Greenhouse in Aug 2026. Deprecation notice.
Generating OAuth Credentials to Set Up Greenhouse Connection
-
Log in to your Greenhouse account as an administrator.
-
Navigate to the
Configuretab.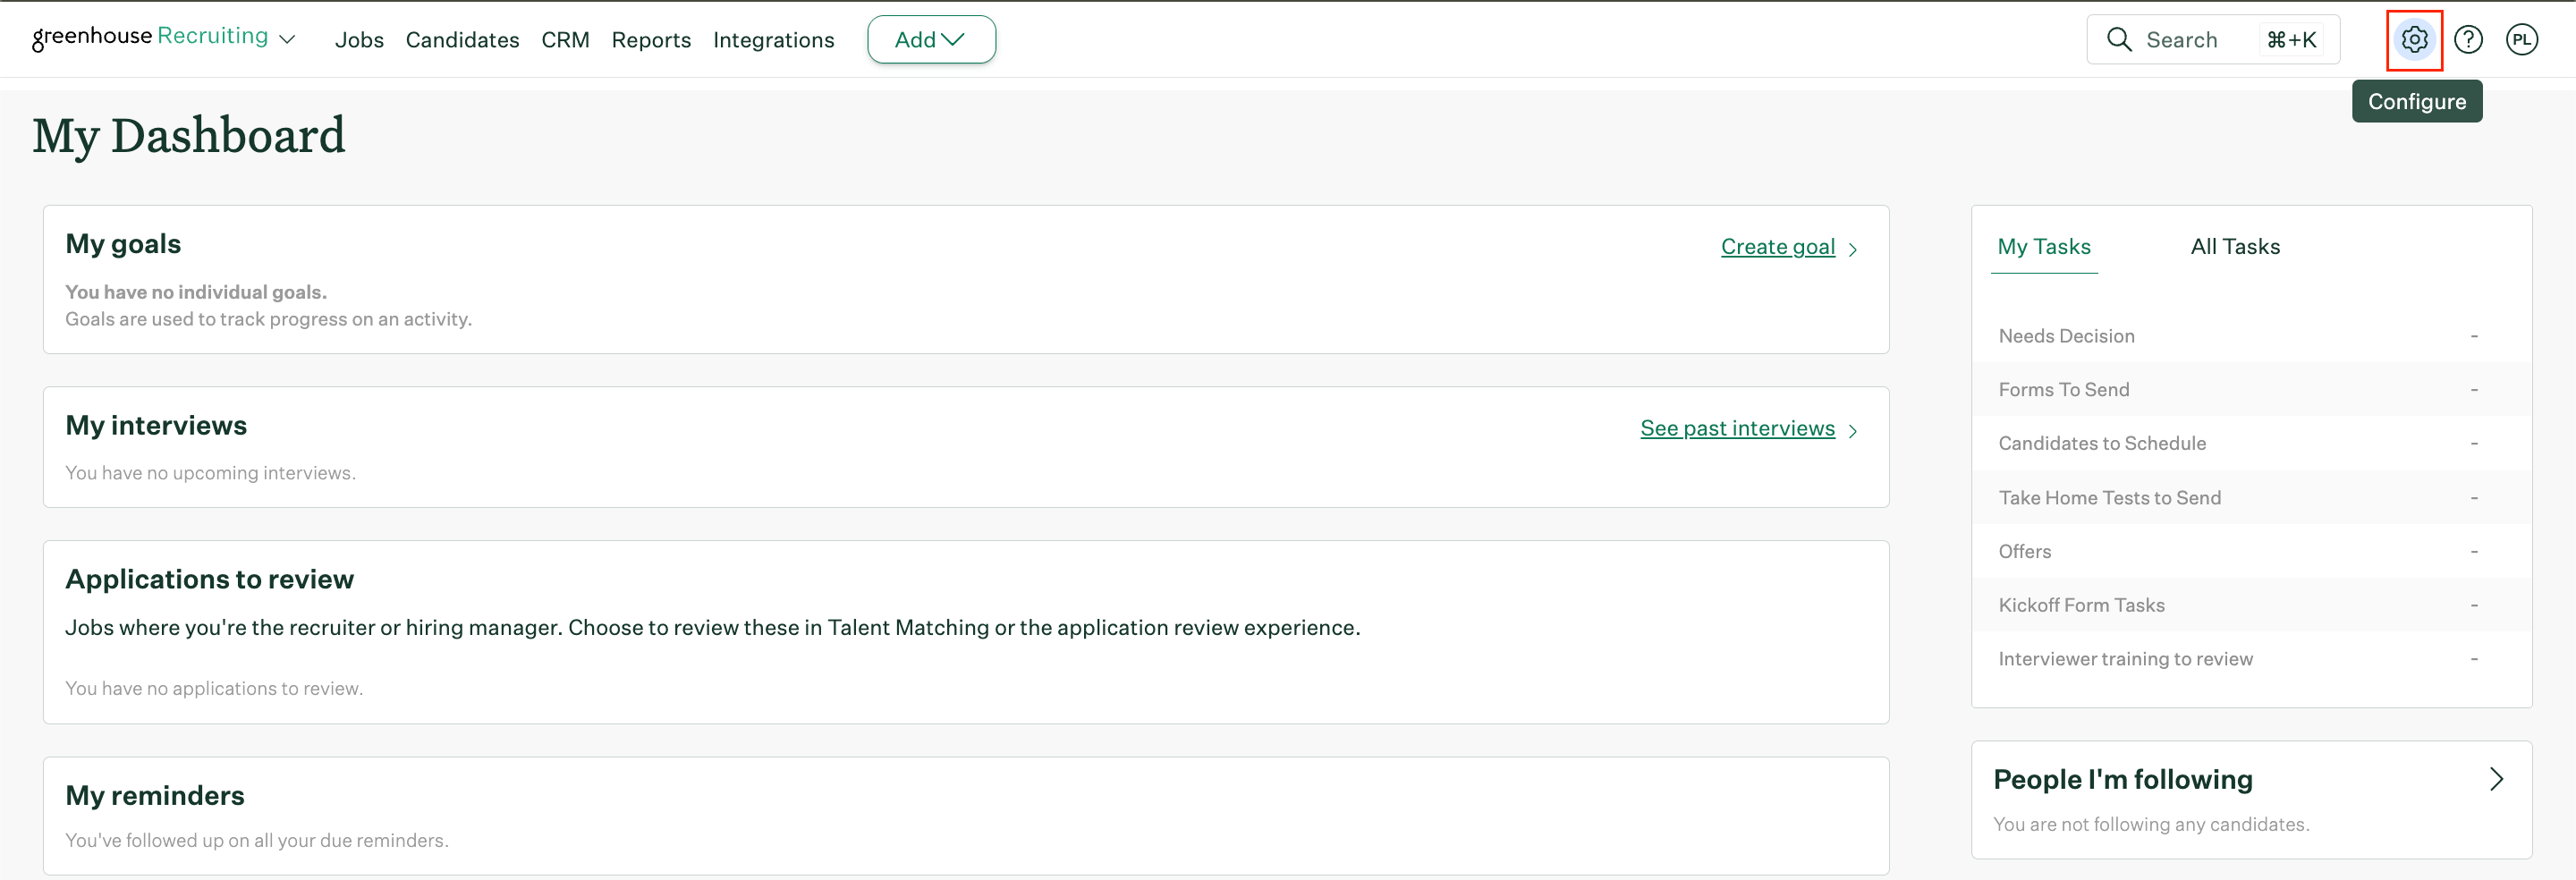 Figure 1. Greenhouse Configure
 -
Select
Dev Centerfrom the dropdown menu.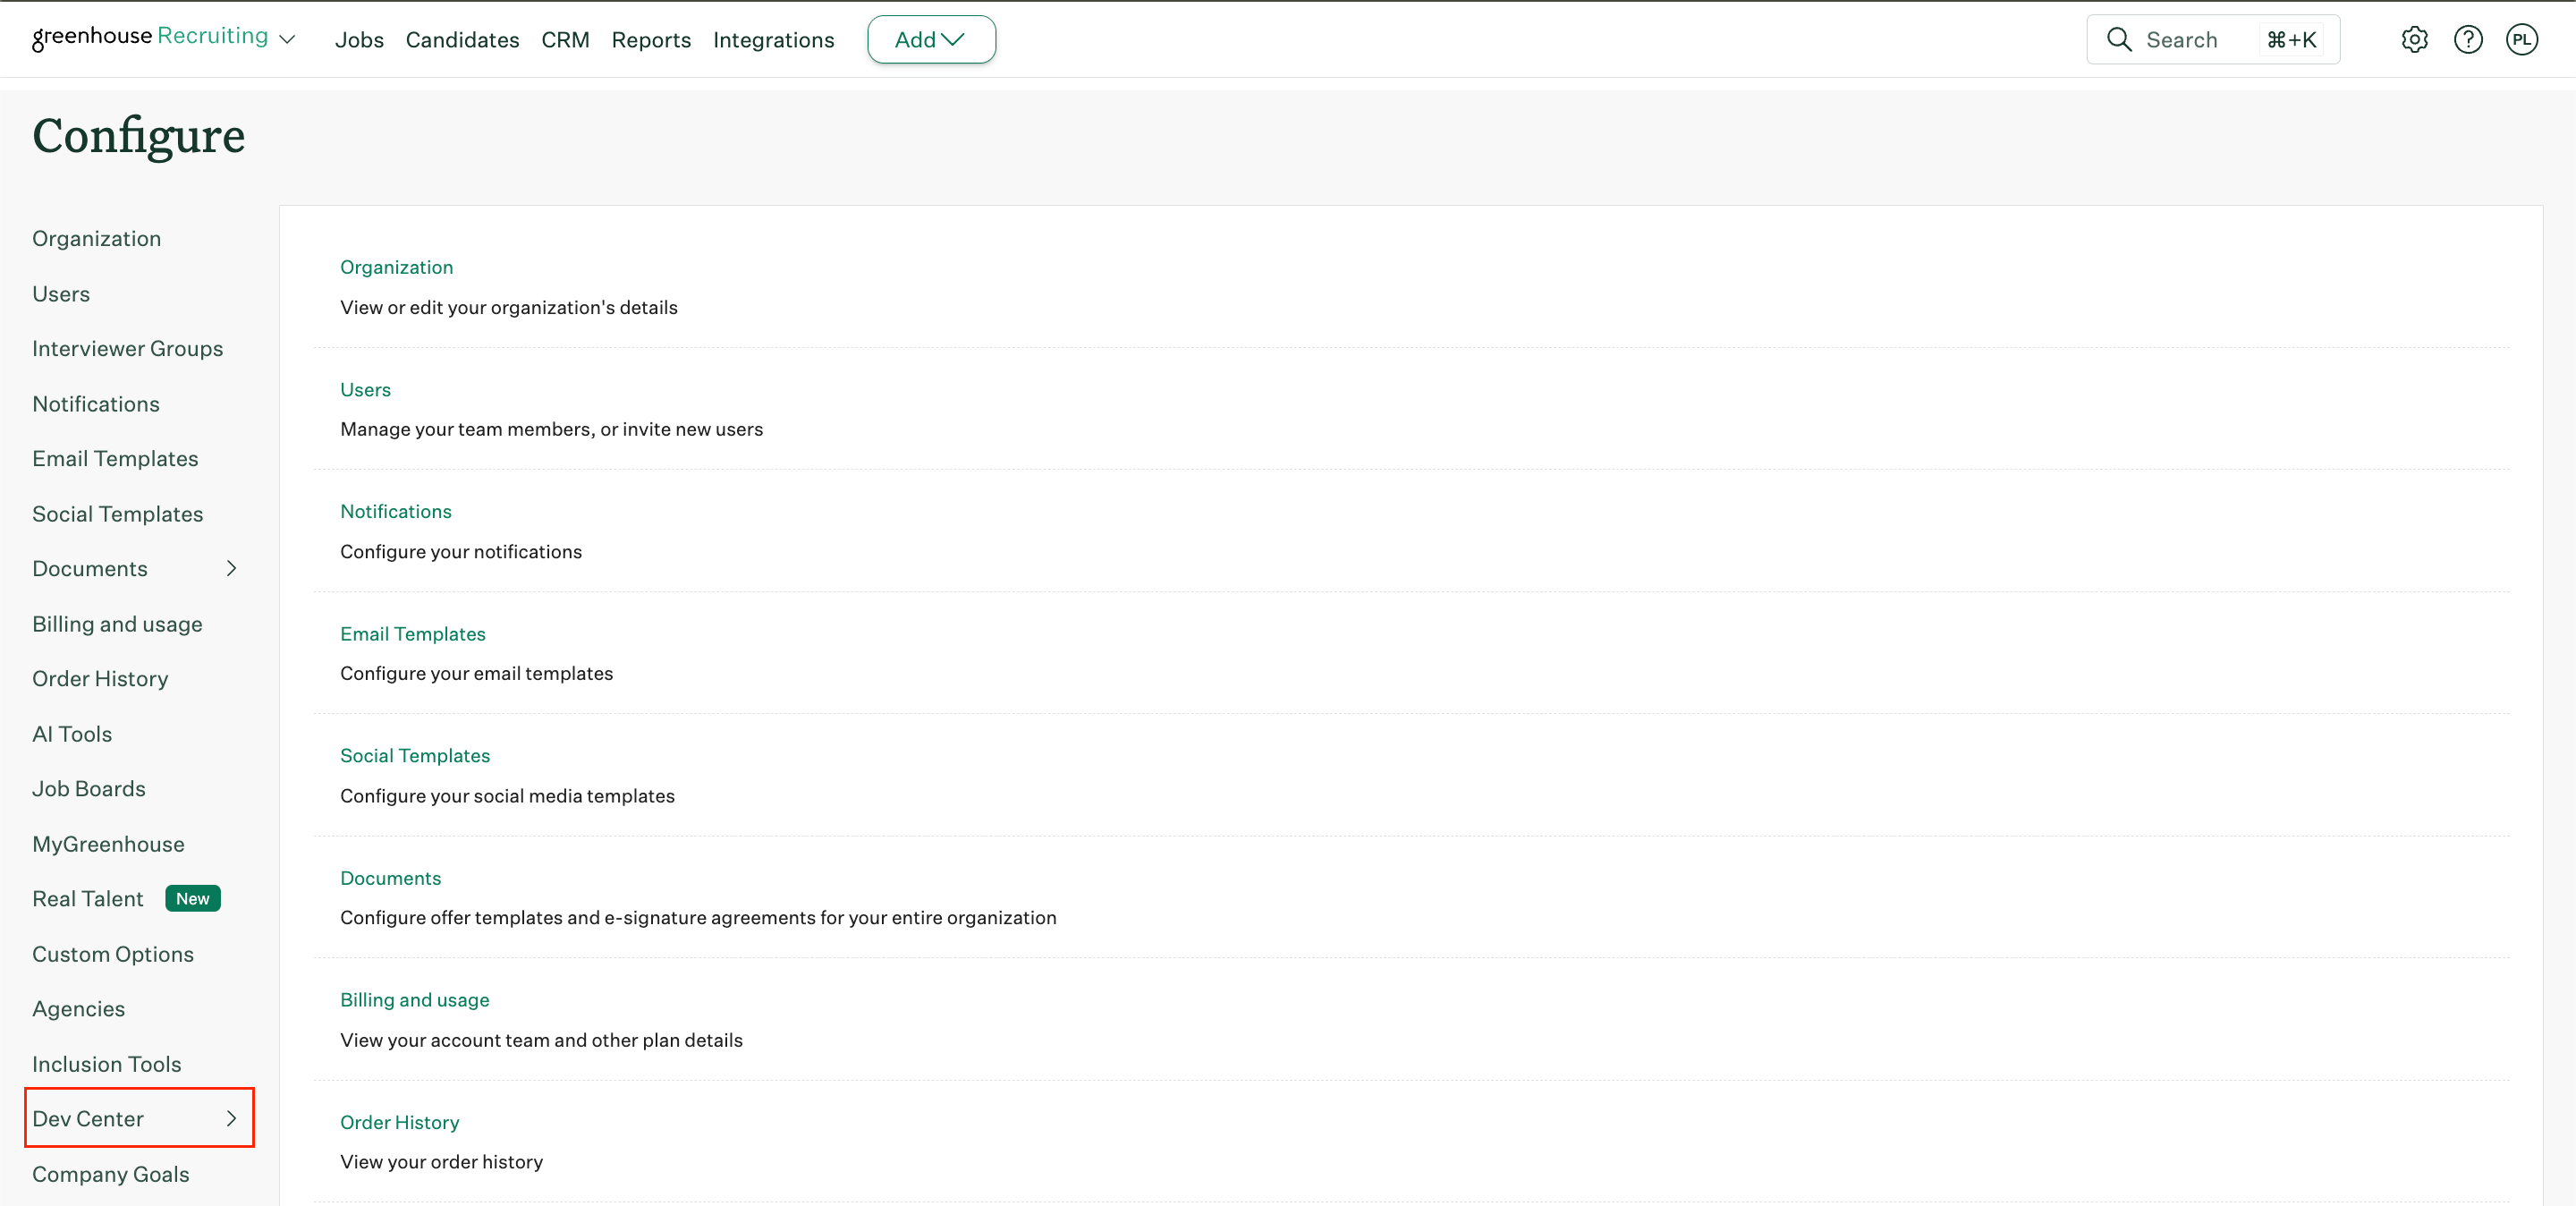 Figure 2. Greenhouse Dev Center
 -
In the Dev Center, click on
API Credential Management.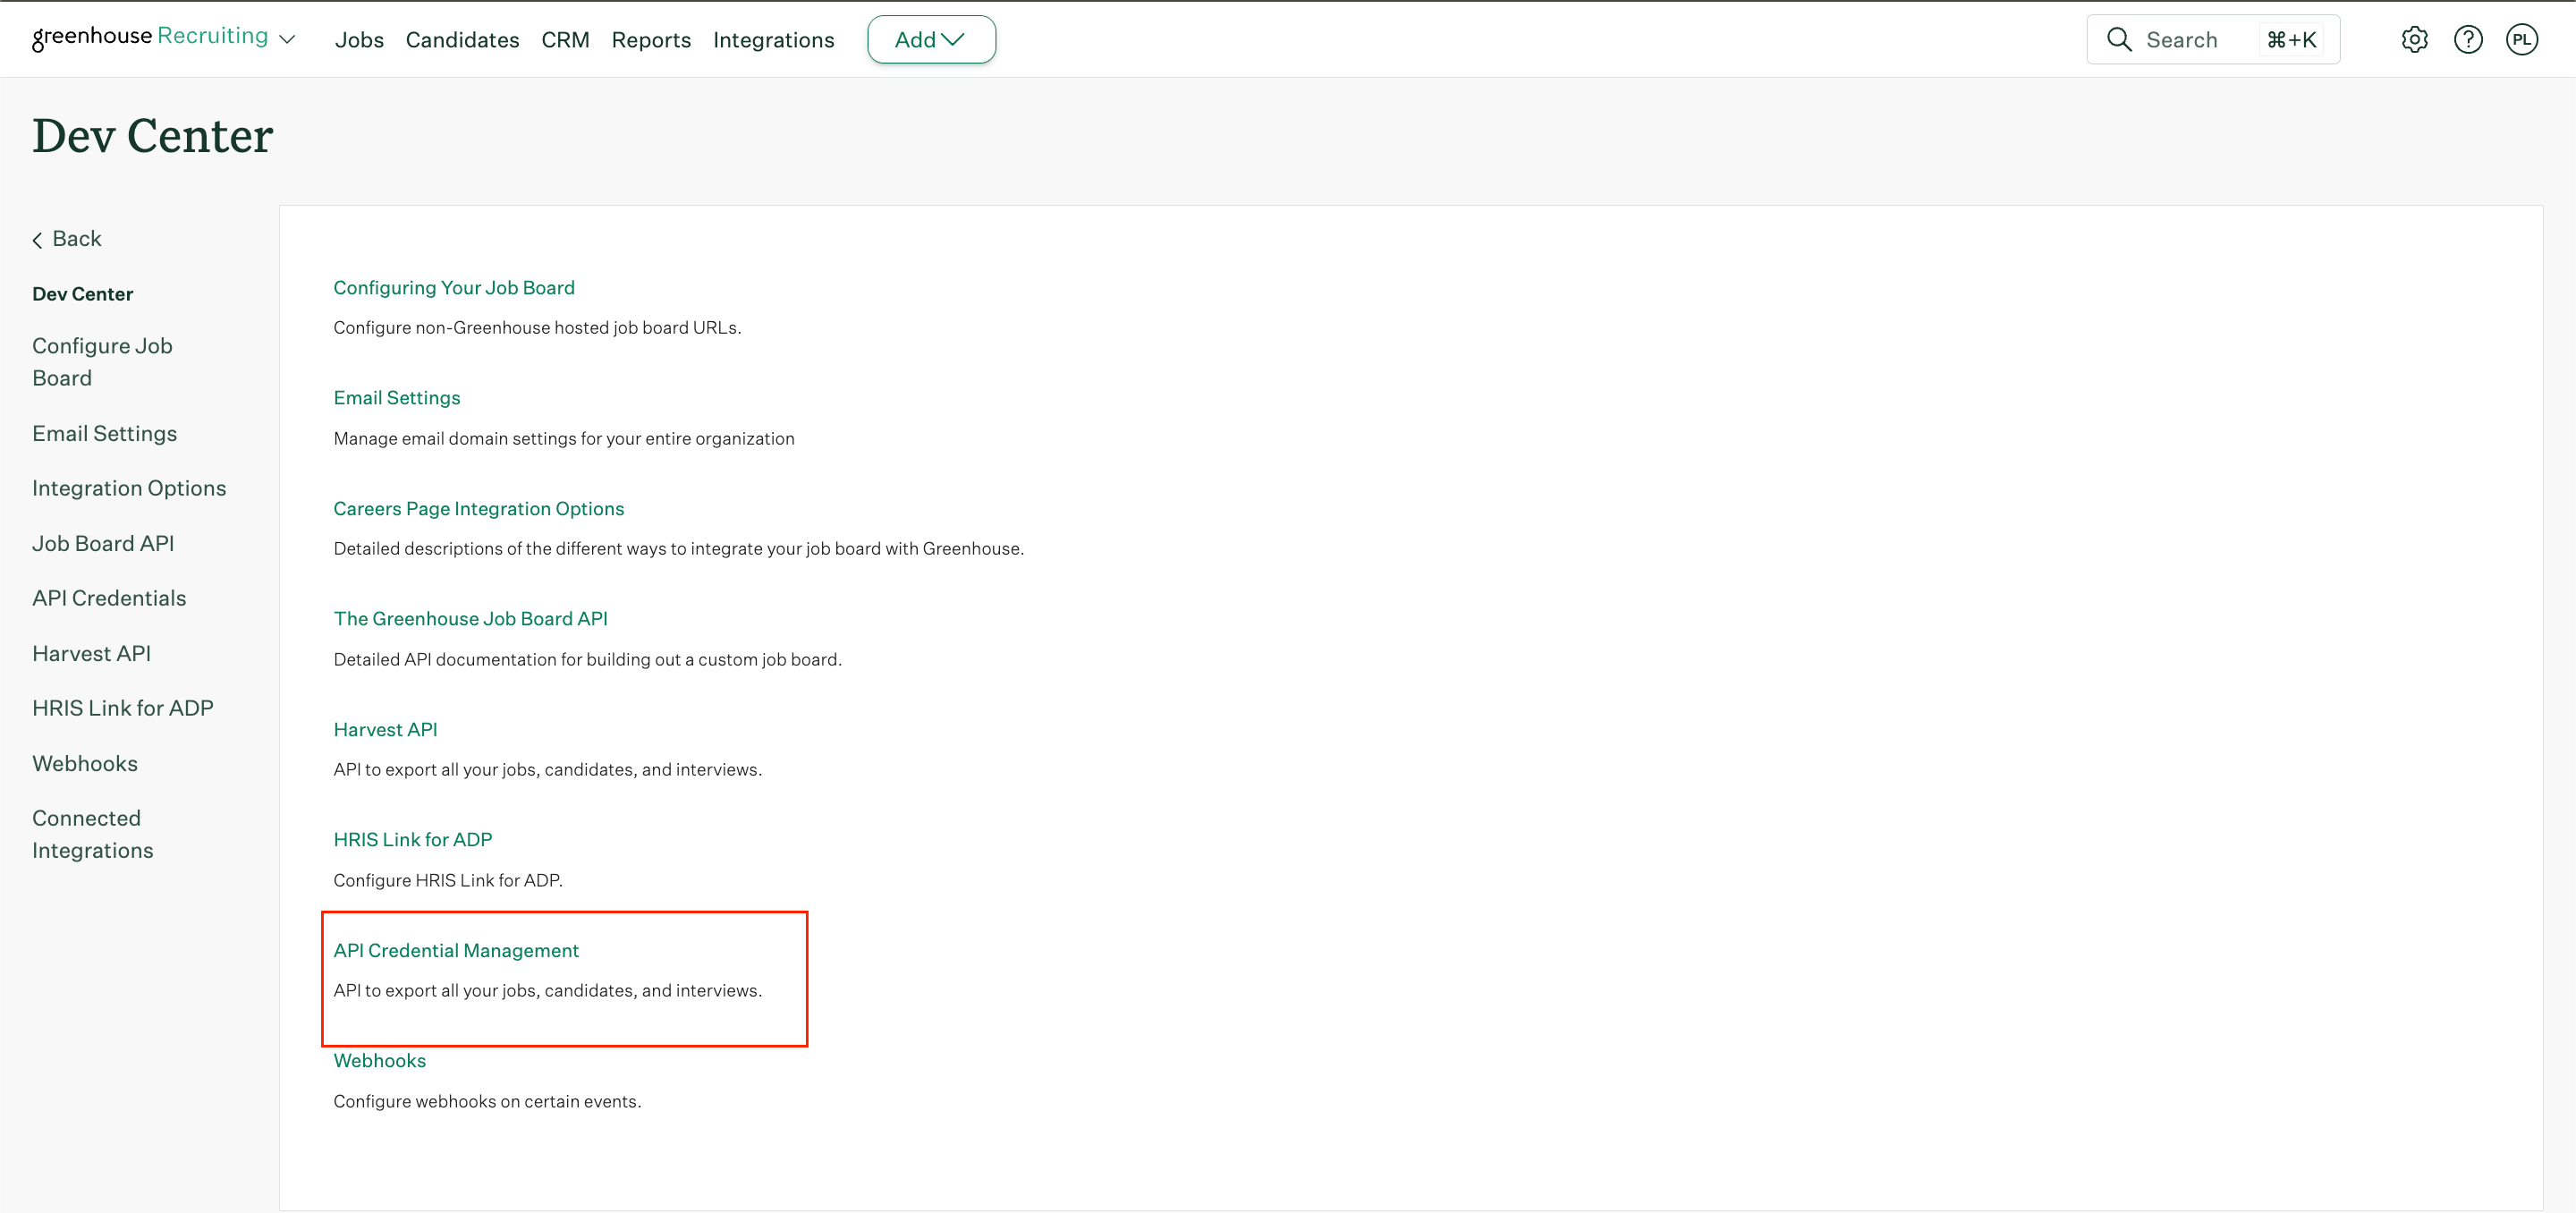 Figure 3. Greenhouse API Credential Management
 -
Click on
Create New Credentials.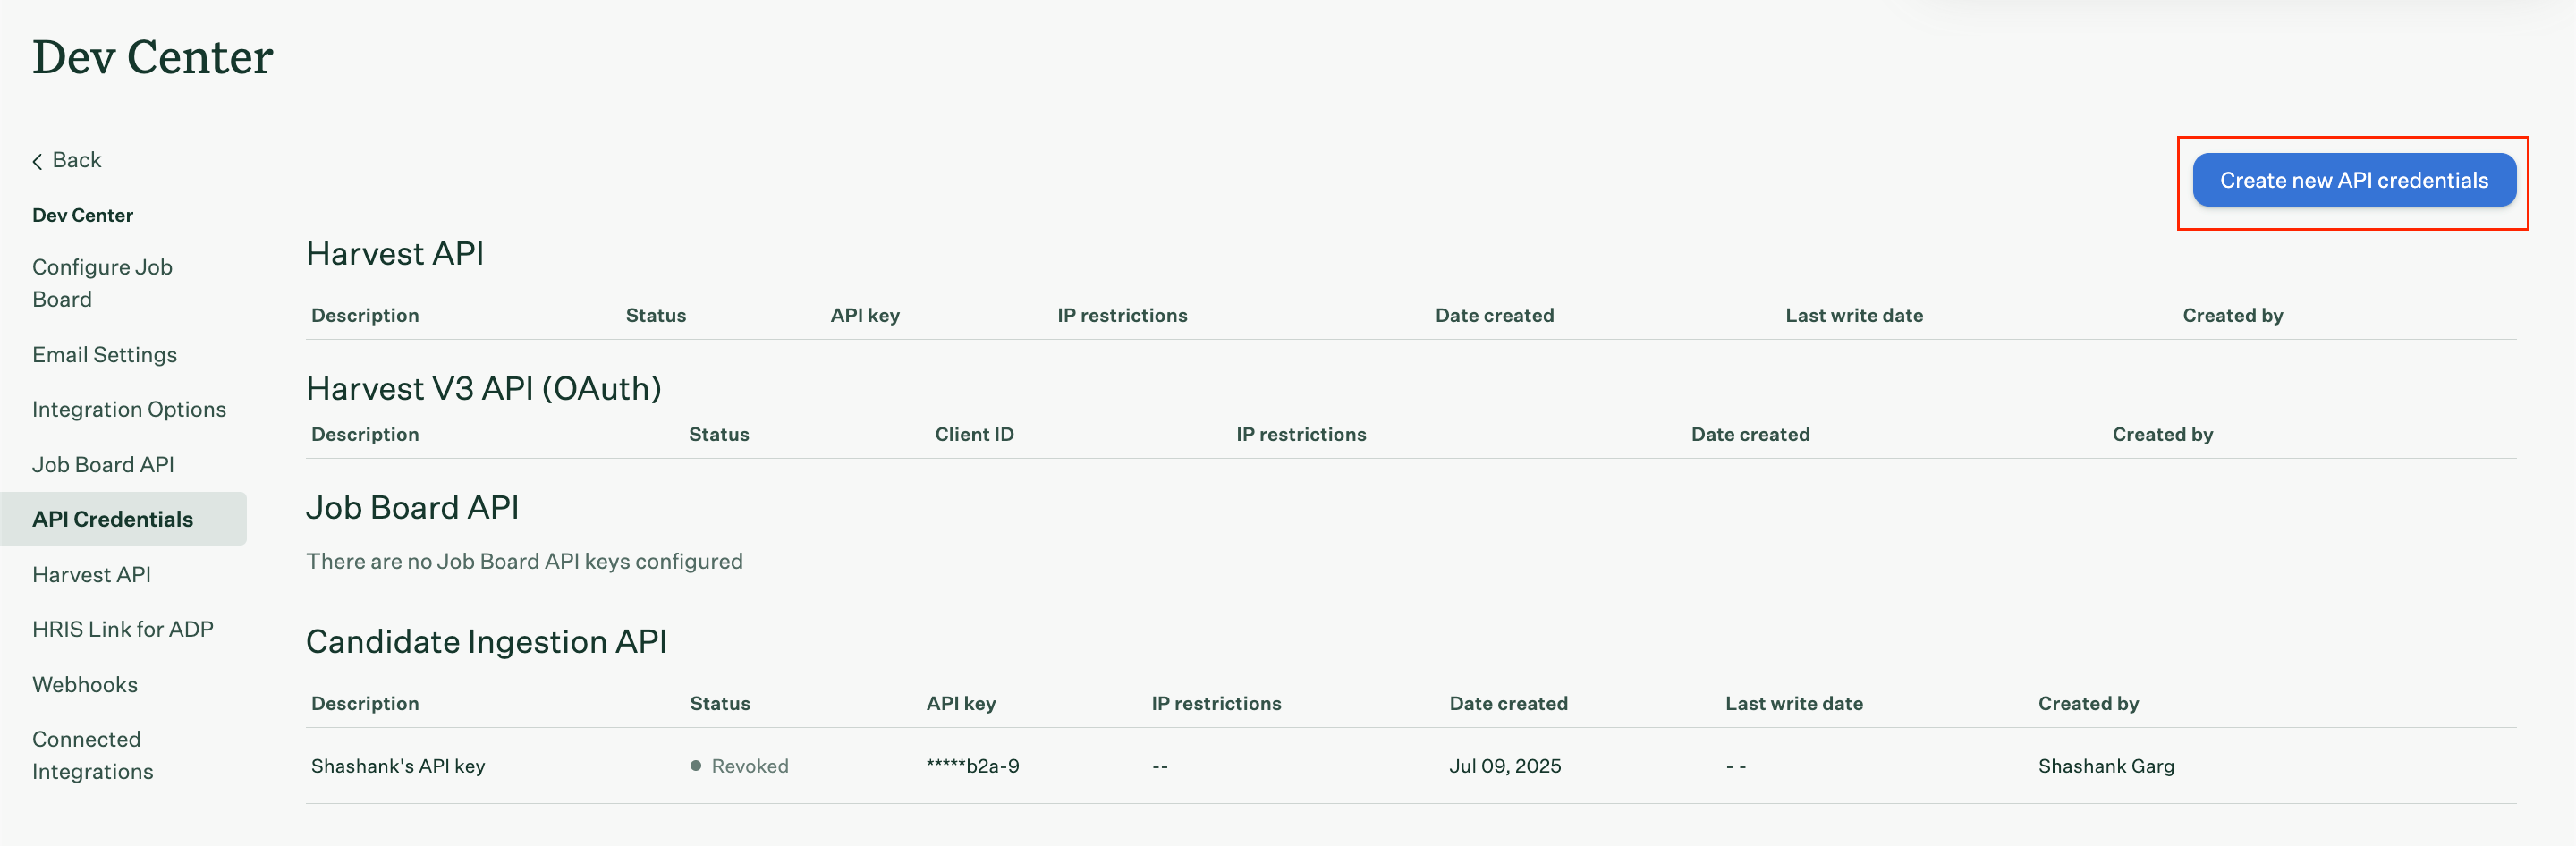 Figure 4. Greenhouse Create New Credentials
 -
In the credentials configuration screen, make the following selections:
- API Type: Select
Harvest V3 (OAuth)from the dropdown. - Description: Enter a descriptive name for the credentials, such as "Hire2Retire OAuth Integration".
- API Type: Select
-
After entering the required details, click
View and Store Credentials. -
Once the credentials are generated, make sure to copy and securely store the generated credentials since you won't be able to retrieve it again.
Add the following API permissions to the OAuth credentials created in the above steps:
-
Select List Offers permission under Offers:
 Figure 5. Offers API
 -
Select List Applications permission under Applications:
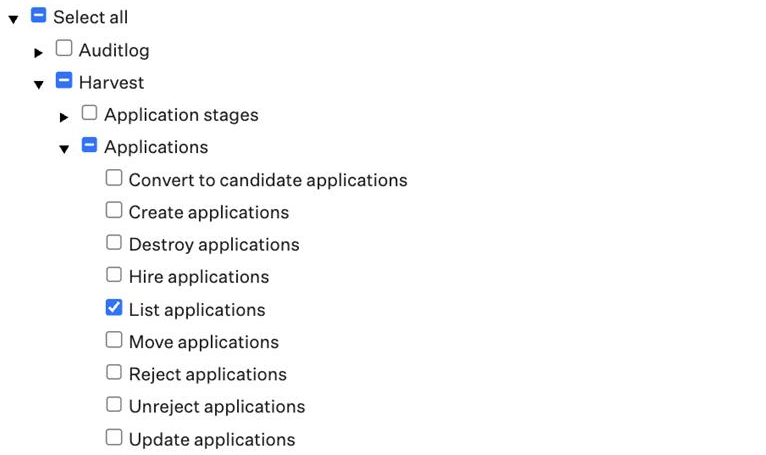 Figure 6. Applications API
 -
Select List Candidates permission under Candidates
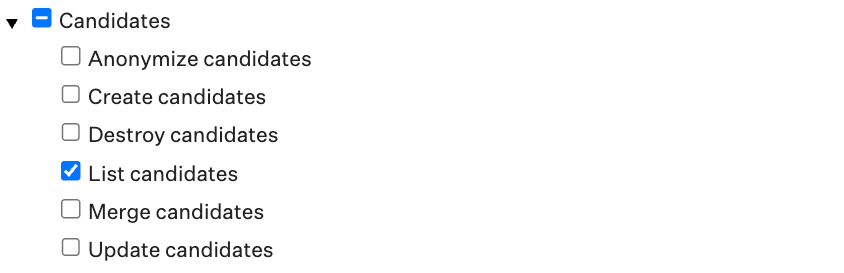 Figure 7. Candidates API
 -
Select List Jobs permission under Jobs:
 Figure 8. Jobs API
 -
Select List Candidate Tags under Candidates tags:
 Figure 9. Candidate Tags API
 -
Select List Custom Fields under Custom Fields:
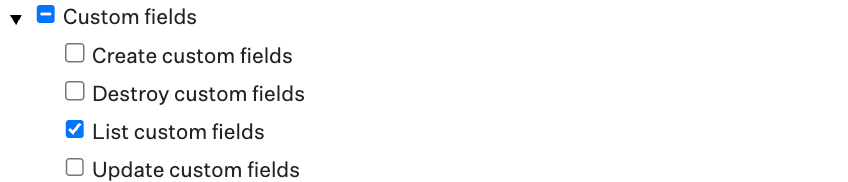 Figure 10. Custom Fields API (OAuth)
 -
Select List Departments under Departments:
 Figure 11. Departments API
 -
Select List Offices under Offices to enable office-based mapping and location-driven workflow configuration.
 Figure 12. Offices API
It is recommended to grant all permissions to fully use the available features. If you prefer a more controlled setup, select only the required and relevant optional permissions based on your workflow and field mapping needs.
| Permission | Required | Used for |
|---|---|---|
| List Applications | Yes | To fetch all Applications |
| List Candidates | Yes | To fetch all Candidates |
| List Jobs | Yes | To fetch all Jobs |
| List Offers | No |
|
| List Candidate Tags | No | To retrieve candidate tags used for workflow mapping or conditional logic |
| List Custom Fields | No | To provide access to Application, Candidate, Job, and Offer custom field mappings |
| List Departments | No | To enable department-based mapping and organizational logic |
| List Offices | No | To enable office-based mapping and location-driven workflow configuration |
Create a Connection
Hire2Retire requires the following details to create a connection with your Greenhouse server using OAuth authentication:
-
Client ID – The Client ID generated when creating Harvest V3 (OAuth) credentials in Greenhouse.
-
Client Secret – The Client Secret generated along with the OAuth credentials in Greenhouse. This is used to securely authenticate API requests between Greenhouse and Hire2Retire.
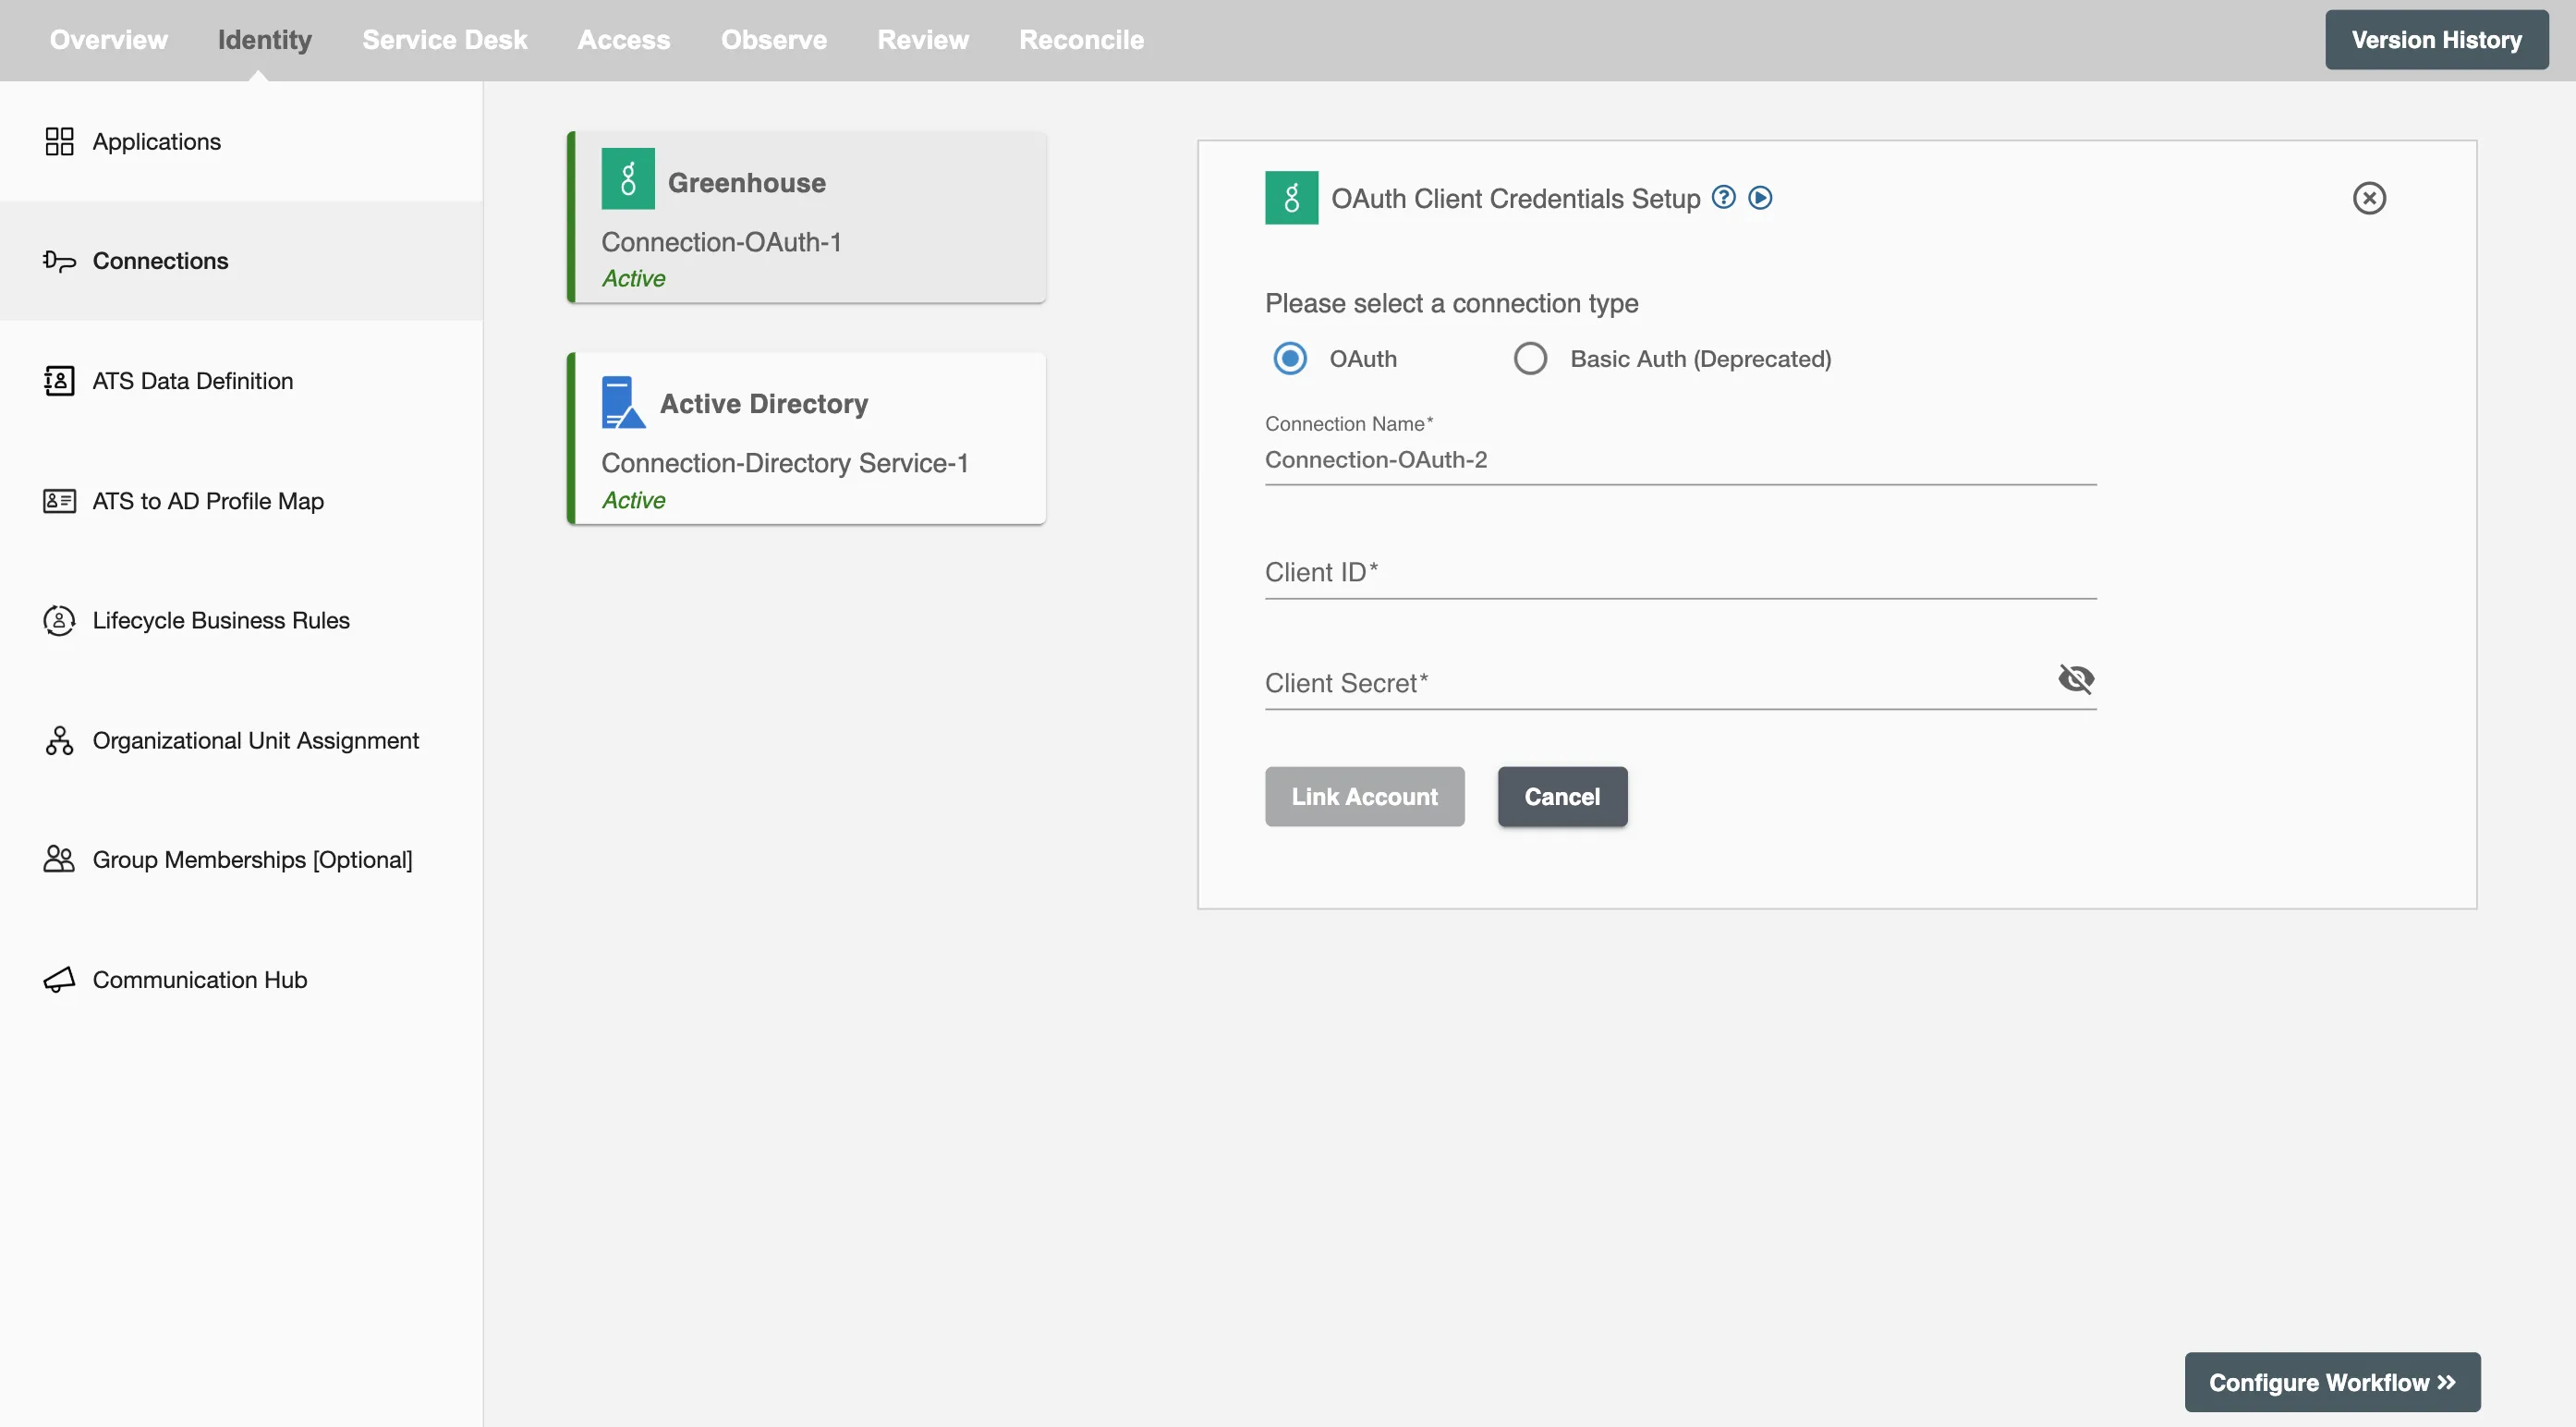 Figure 13. Greenhouse Connection Set Up page - Create Connection
For workflows that use the Offer Start Date for onboarding, Hire2Retire retrieves:
- Offers with an Accepted status, and an Offer Start Date that is within the past 6 months of the run date to process Onboarding and Profile Update Lifecycle.
- Offers with a Rejected status to process Rescind Lifecycle.
For Greenhouse integrations, the following employment status values are supported:
- active
- hired
- rejected
- converted
Configuration
Once you have successfully configured the connections, you can continue with the Design section to configure the rest of the workflow following these steps in order.
- ATS Data Definition
- ATS to AD Profile Map
- Lifecycle Business Rules
- Employment Status
- Organizational Unit Assignment - Only defined in on-premise Active Directory
- Group Memberships
- Security Group Memberships
- Distribution List Memberships
- Microsoft 365 Groups Memberships Only defined in Hybrid (with Exchange Online Services) and Entra ID
- Entra ID Distribution List Memberships Only defined in Entra ID and Hybrid, when Exchange Online Services is configured
- Entra ID Security Groups Only defined in Hybrid (with Enable Entra ID Security Groups) and Entra ID
- Mail Enabled Security Group Memberships Only defined in Entra ID and Hybrid, when Exchange Online Services is configured
- Mailing List Assignment Provided in Google Workspace
- Communication Hub
Deployment
Once your workflow has been set up, you can optionally set up notifications and archival for your workflow.
- Compliance and Audit Trail
- Run Mode
- Error Notifications
- Monitor Receipt of Scheduled HR Extract
- Environment
Otherwise, you can proceed to deploy and test it on the Hire2Retire platform, see Deploy and Test Flow