How to Integrate HR to AD OR Entra ID
Hire2Retire design page allows you to define rules for integrating employee data between the HR system and AD. Whenever a new employee report is received, the Hire2Retire workflow will apply the rules to each employee record and create or update profile in your Active Directory.
Hire2Retire design page contains steps which help you to manage Employee Lifecycle smoothly:
Steps for Active Directory
- HR Data Definition
- Lifecycle Business Rules
- Employment Status
- HR to AD Profile Map
- Organizational Unit Assignment
- Security Group Assignment
- Distribution List Assignment
Steps for Entra ID
- HR Data Definition
- Lifecycle Business Rules
- Employment Status
- HR to Entra ID Profile Map
- Microsoft 365 Group Assignment - Optional
- Security Group Assignment - Optional
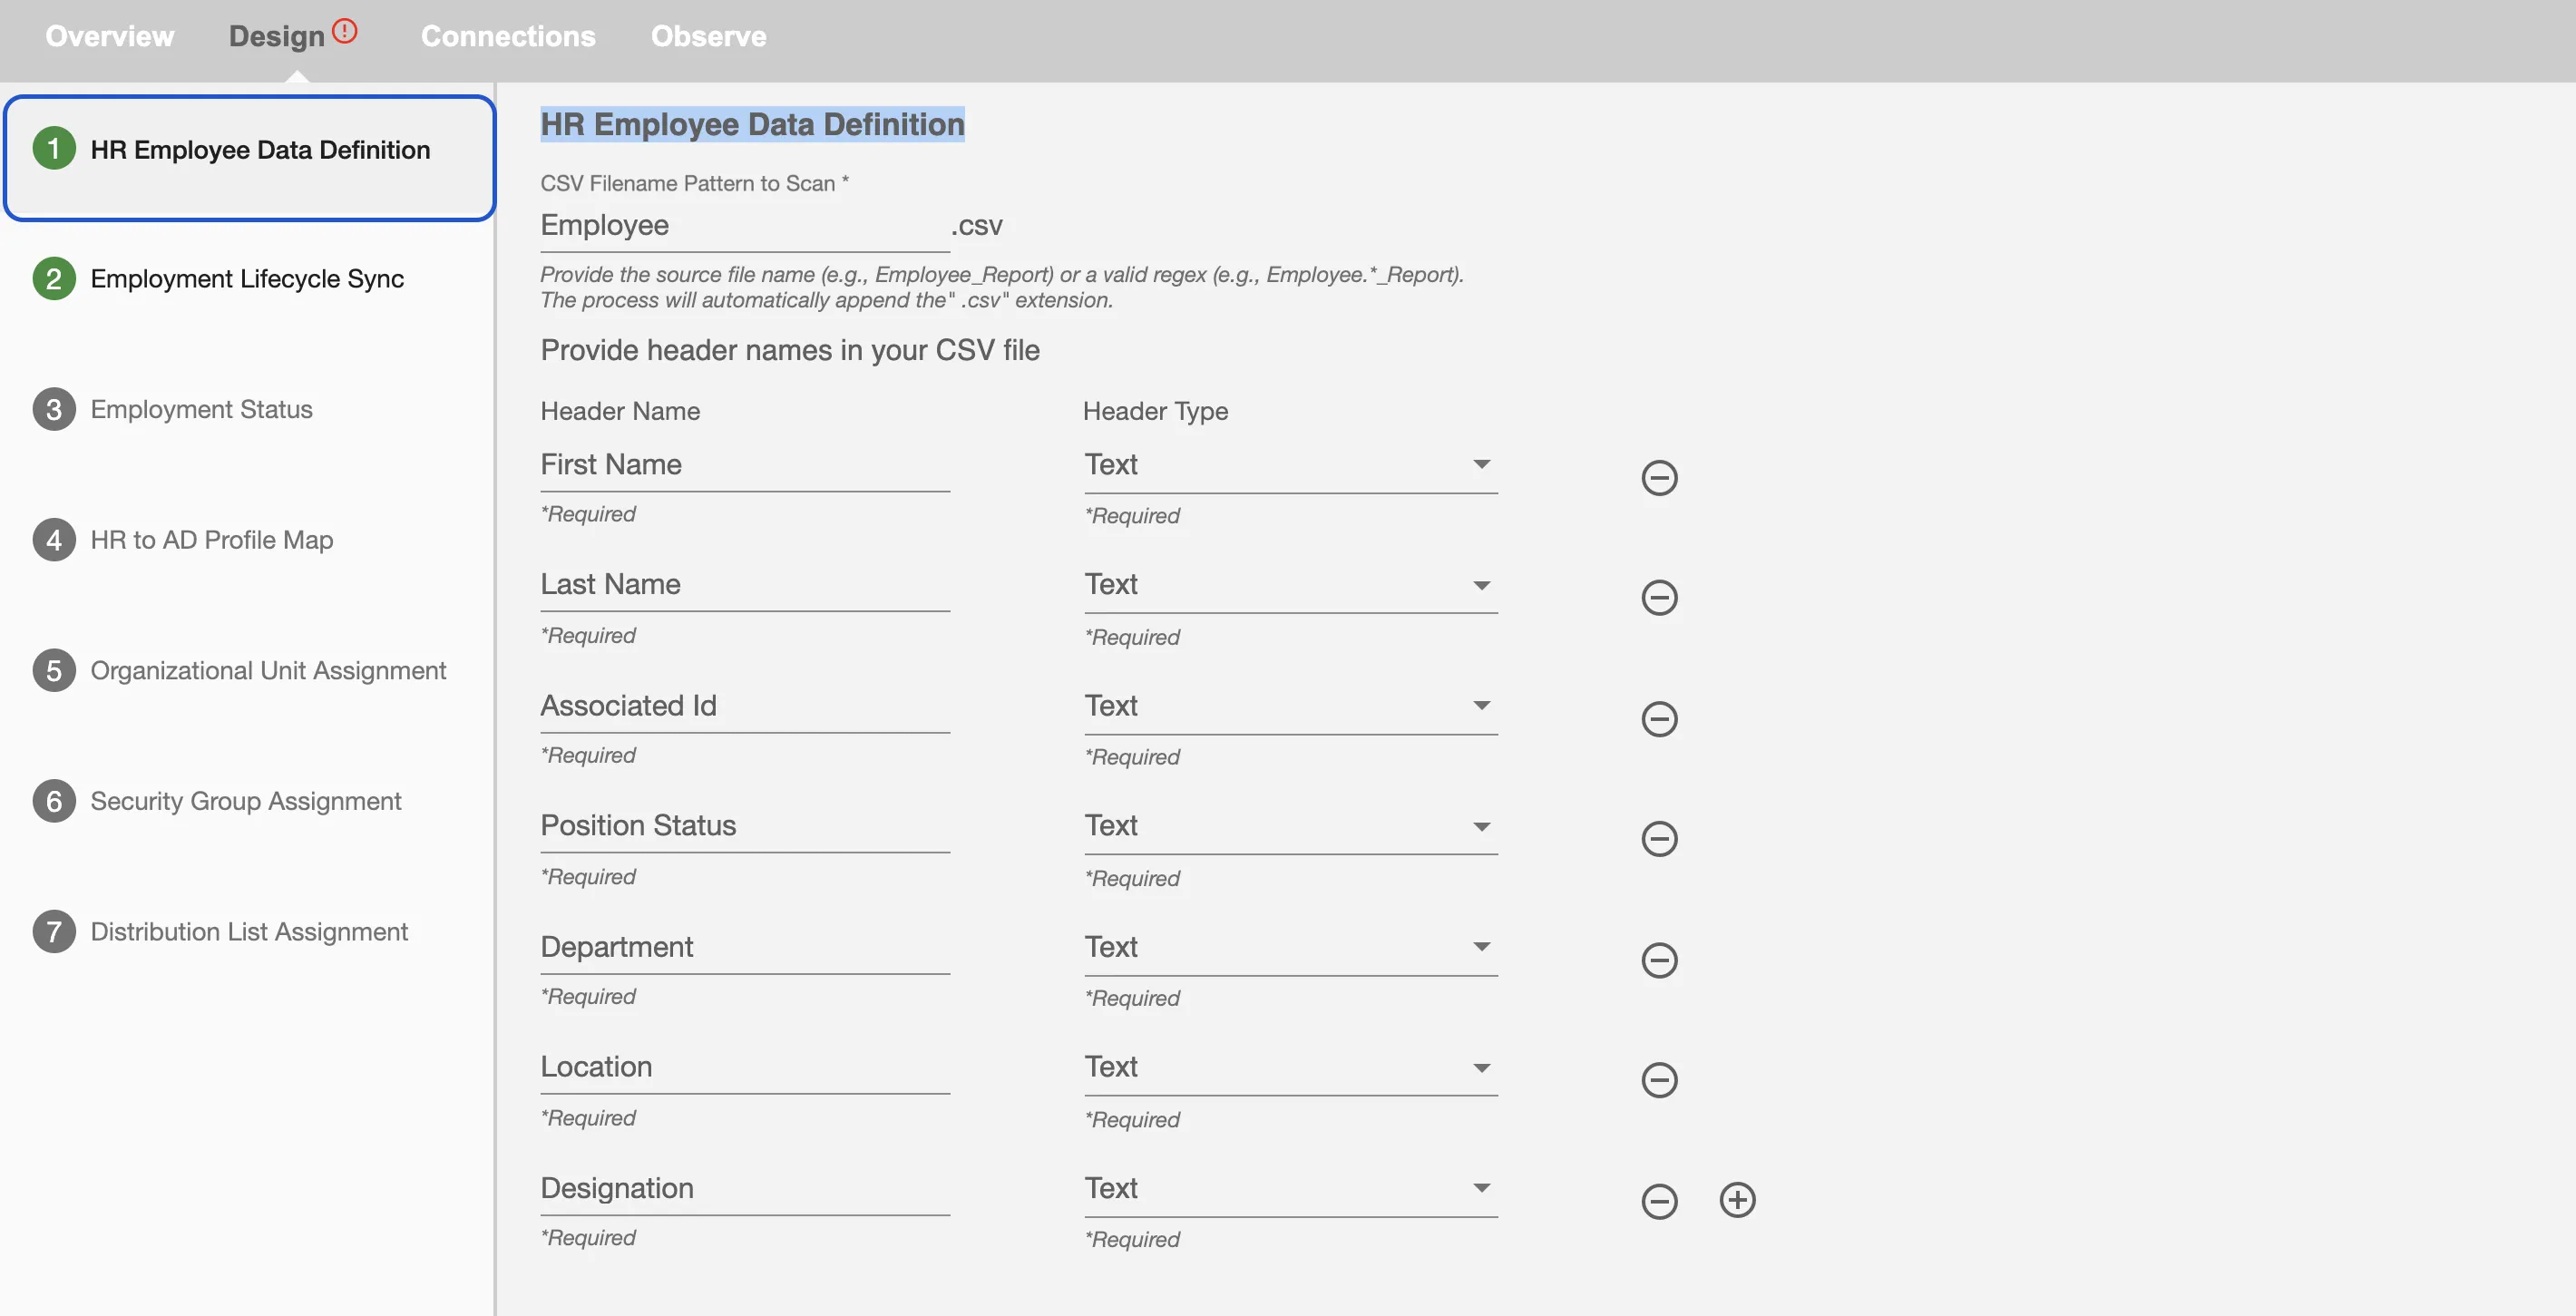
1. HR Data Definition
In this step, you will define the file structure of the employee extract that HR platform will send to Hire2Retire workflow. At runtime, the workflow will validate the file structure before further processing individual employee records.
For further details, you can refer to HR Data Definition.
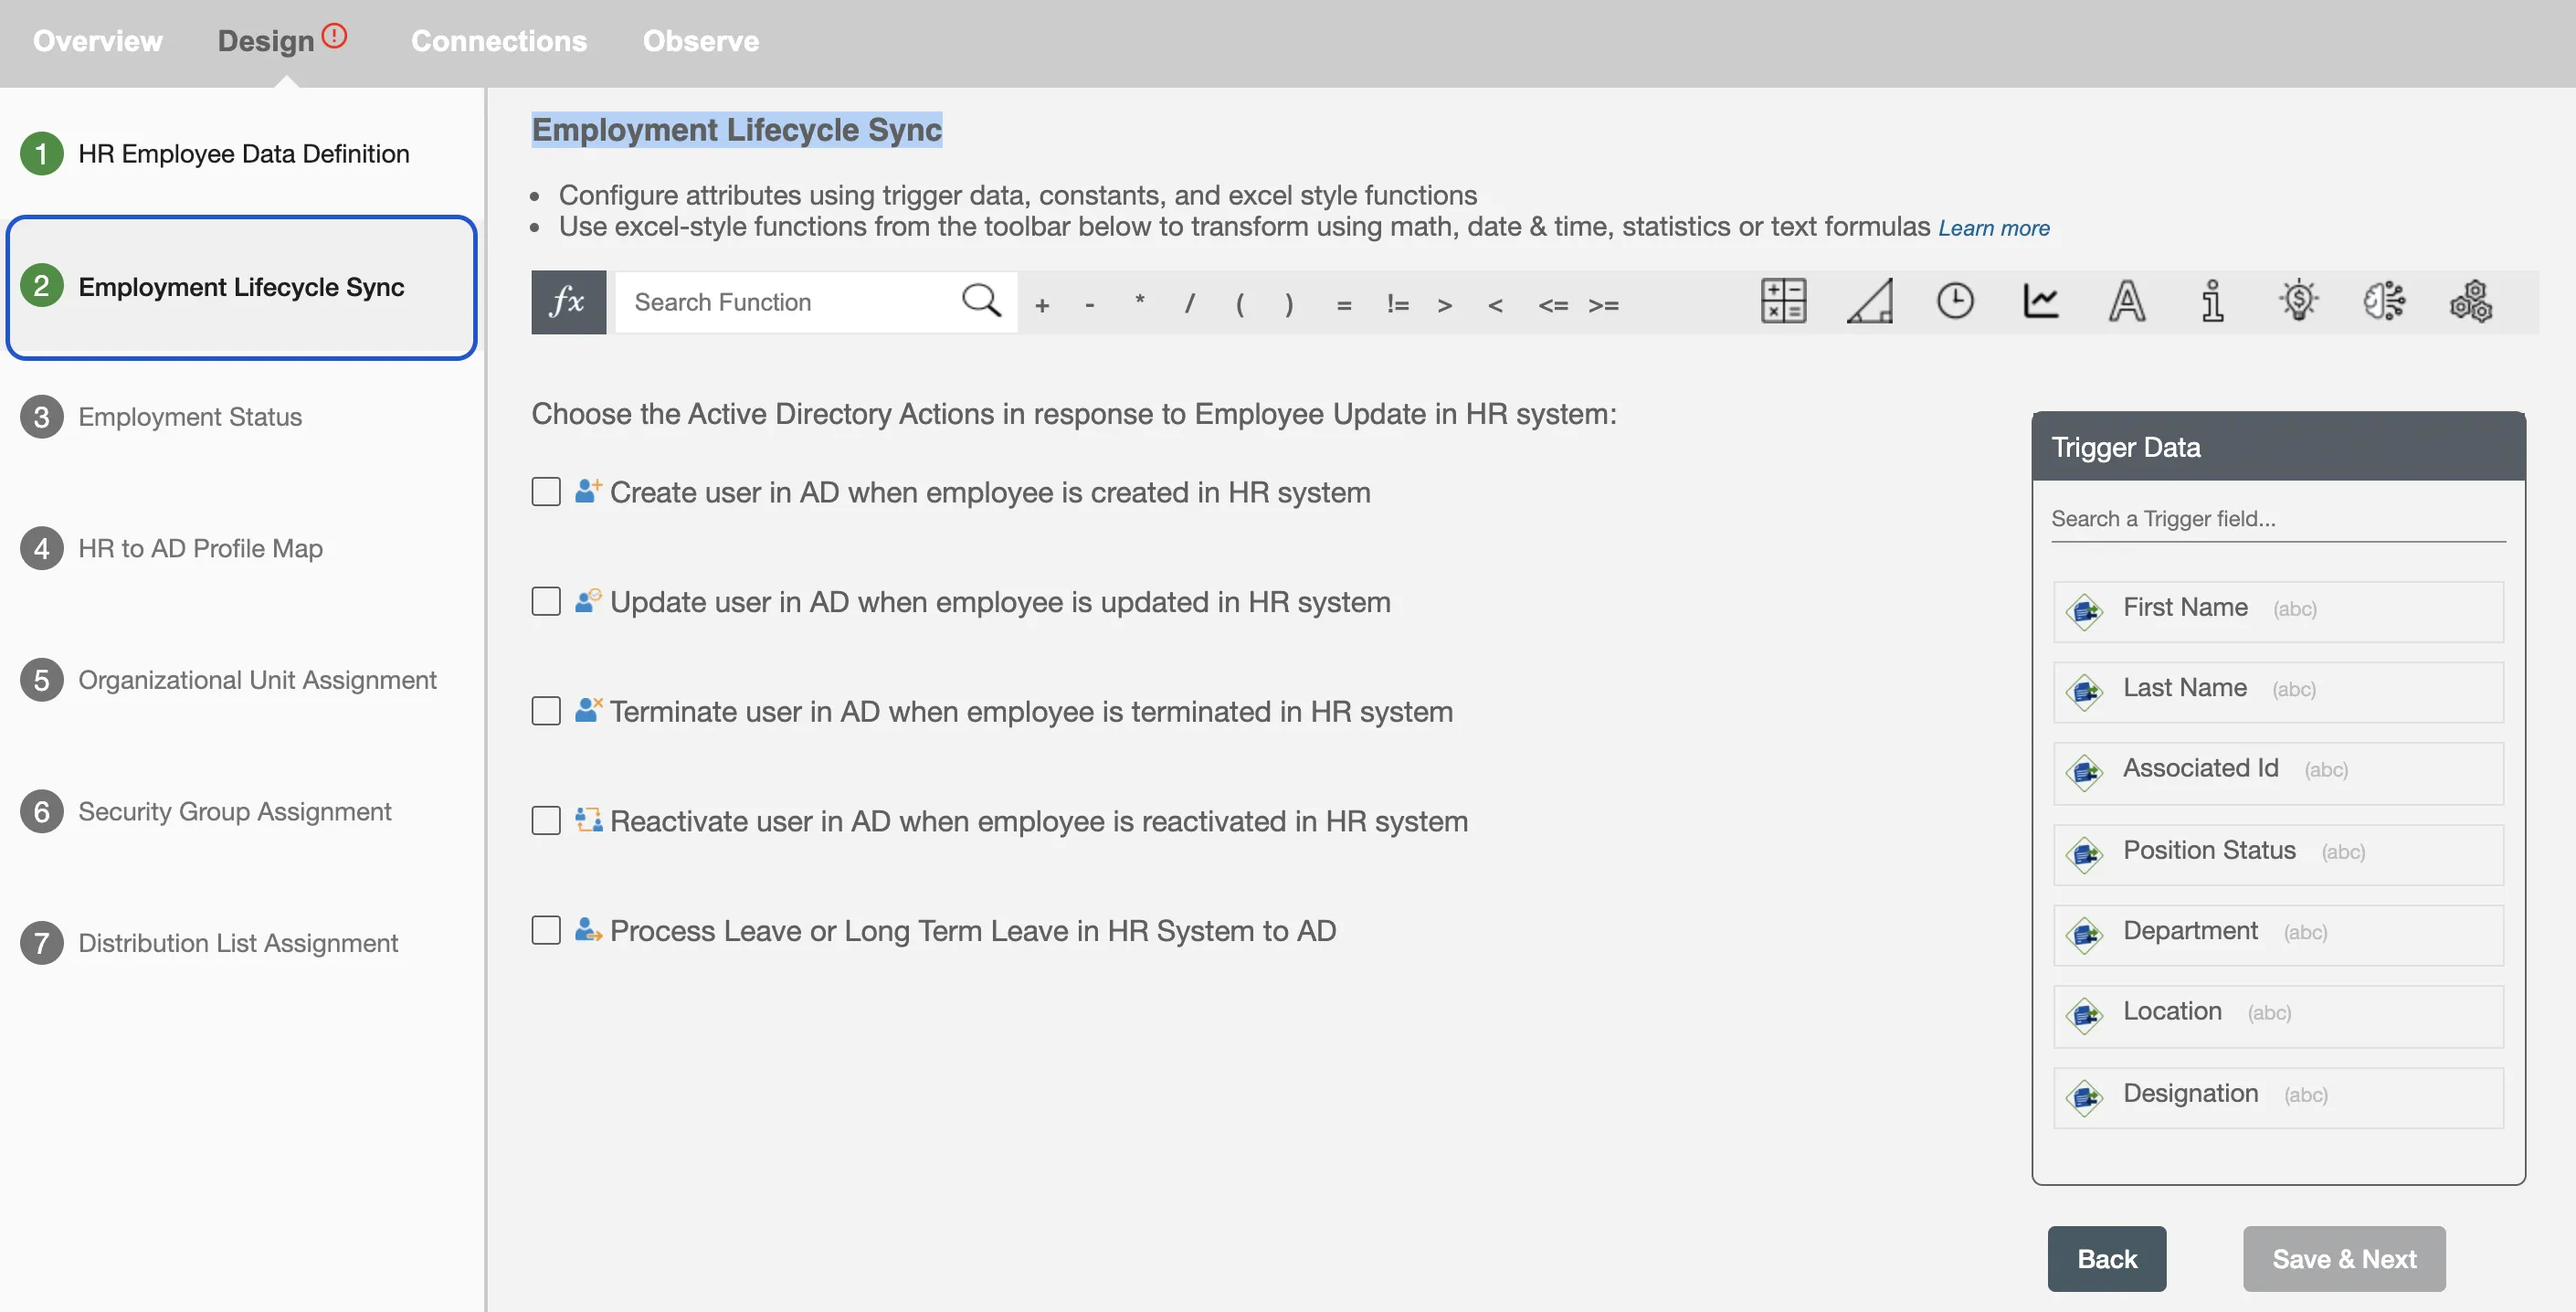
2. Lifecycle Business Rules
In this step, you can pick the Employee Lifecycle required for your business use cases. Hire2Retire product provides 5 stages:
- Create User / Onboarding
- Update User
- Terminate User
- Retire
- Leave / Long Term Leave
At the runtime, the workflow will only process employee which match the selected stages.
For further details, you can refer to Lifecycle Business Rules.
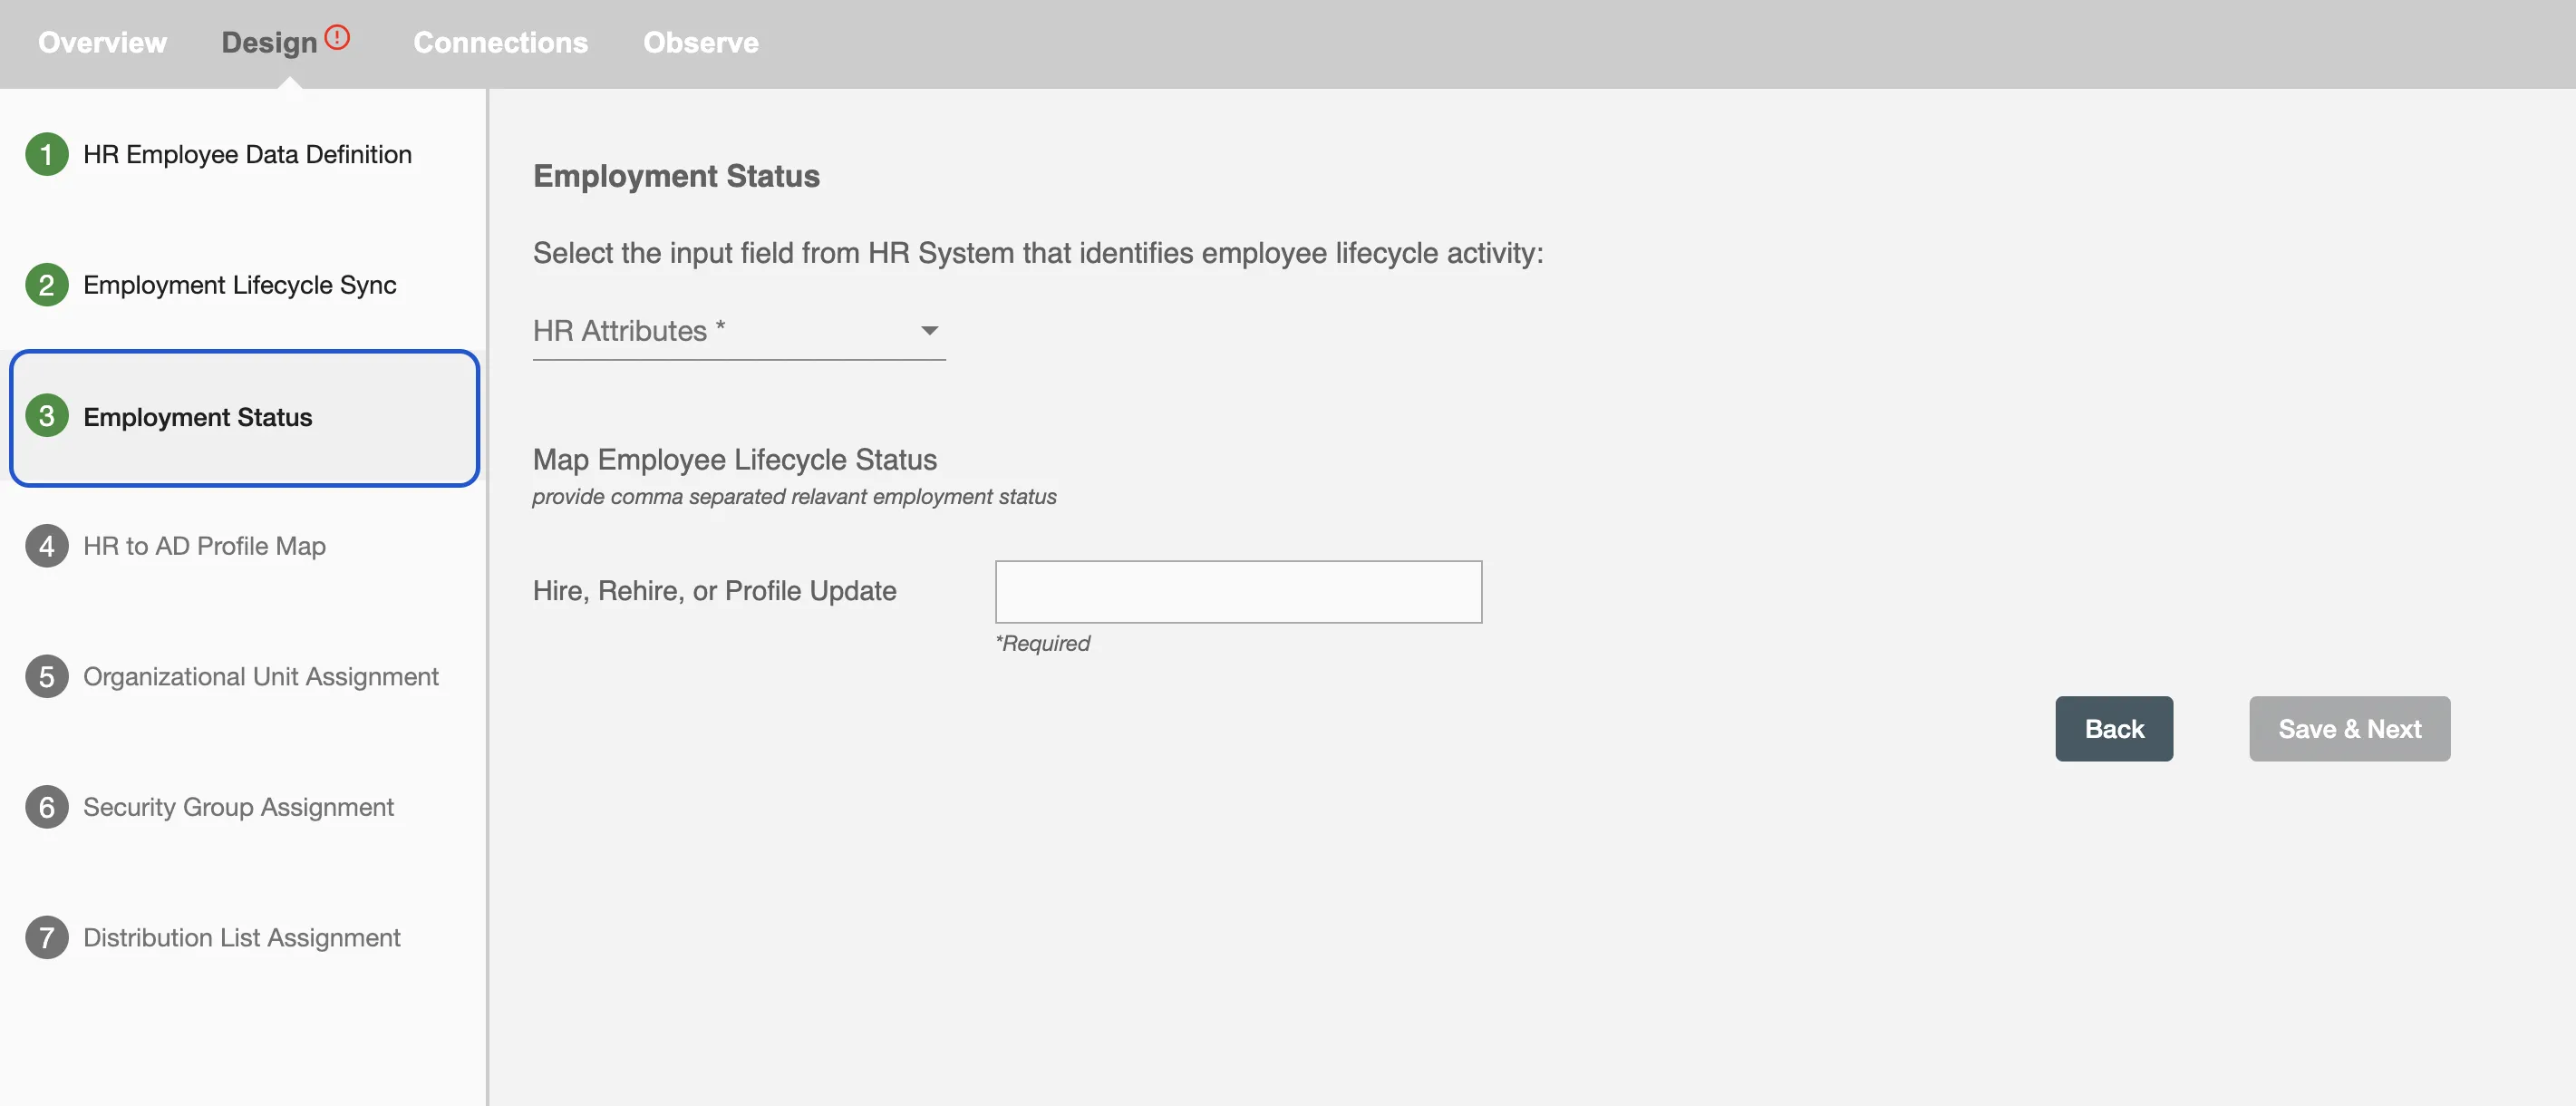
3. Employment Status
In this step, you will provide employee attribute that will be used to define the lifecycle business. Depending upon the field selected you will map values to the specific lifecycle stages.
For example, when employee position status is terminated, then terminate user account in Active Directory.
For further details, you can refer to Employment Status.
Steps Specific to AD or Hybrid
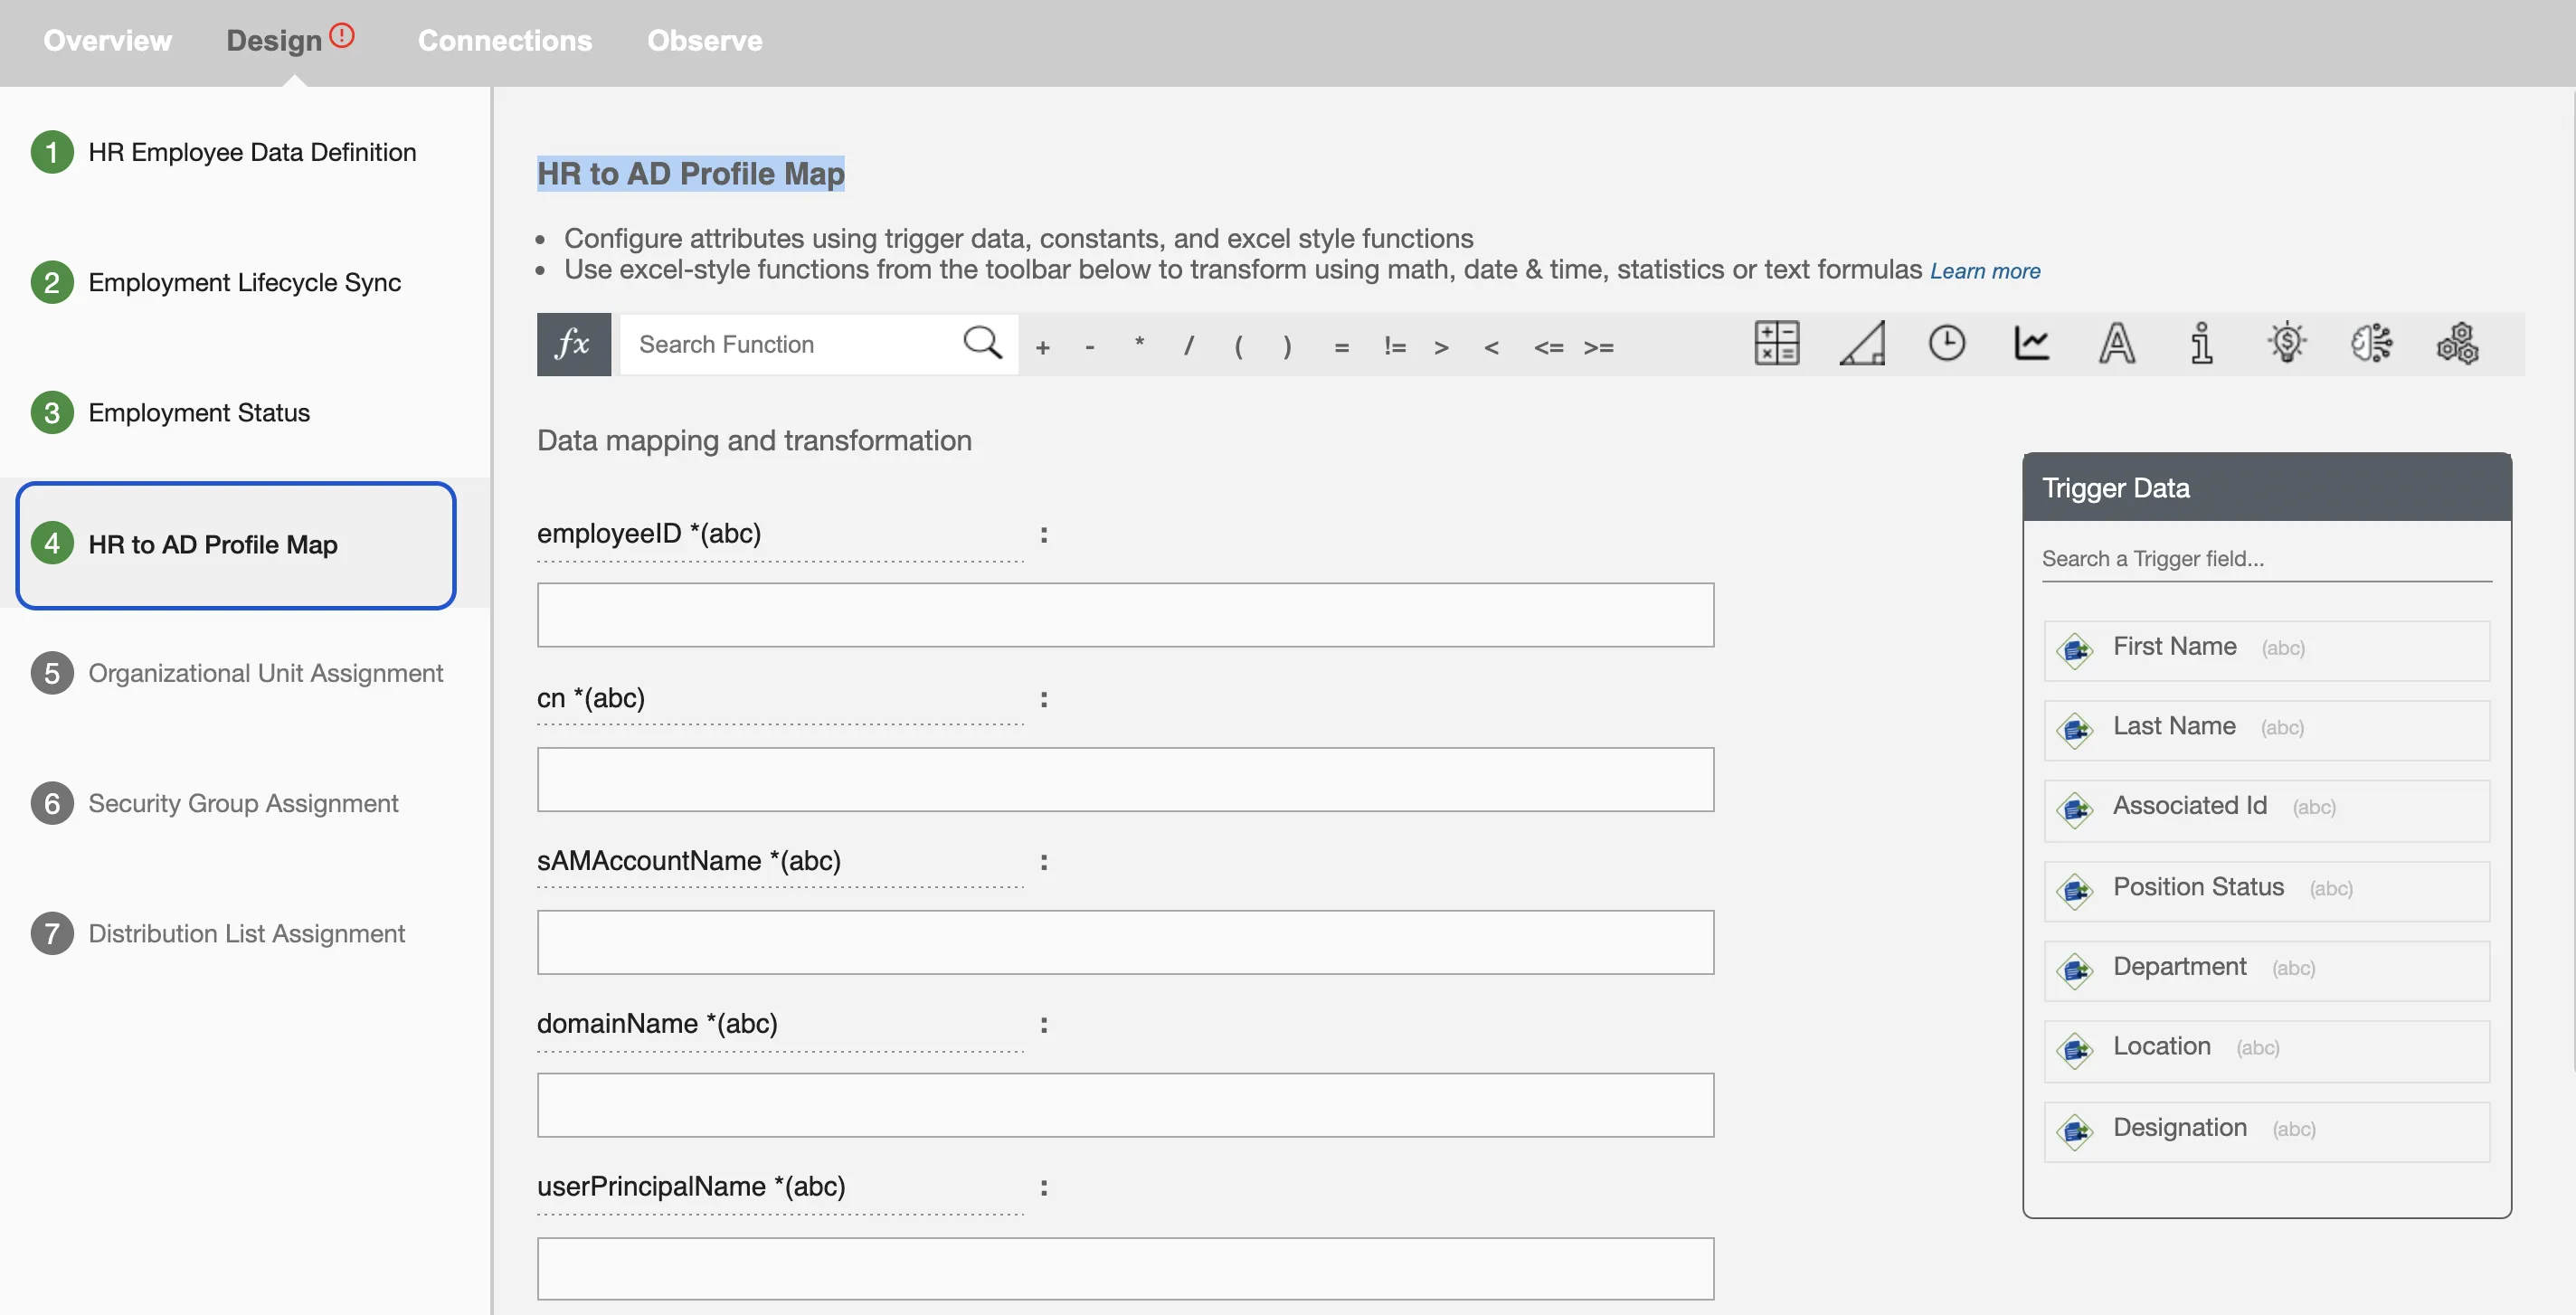
4. HR to AD Profile Map
This step is used to map the Employee data from HR platform into AD attributes. You can set up AD attributes by typing static value or dragging HR attributes
For further details, you can refer to HR to AD Profile Map.
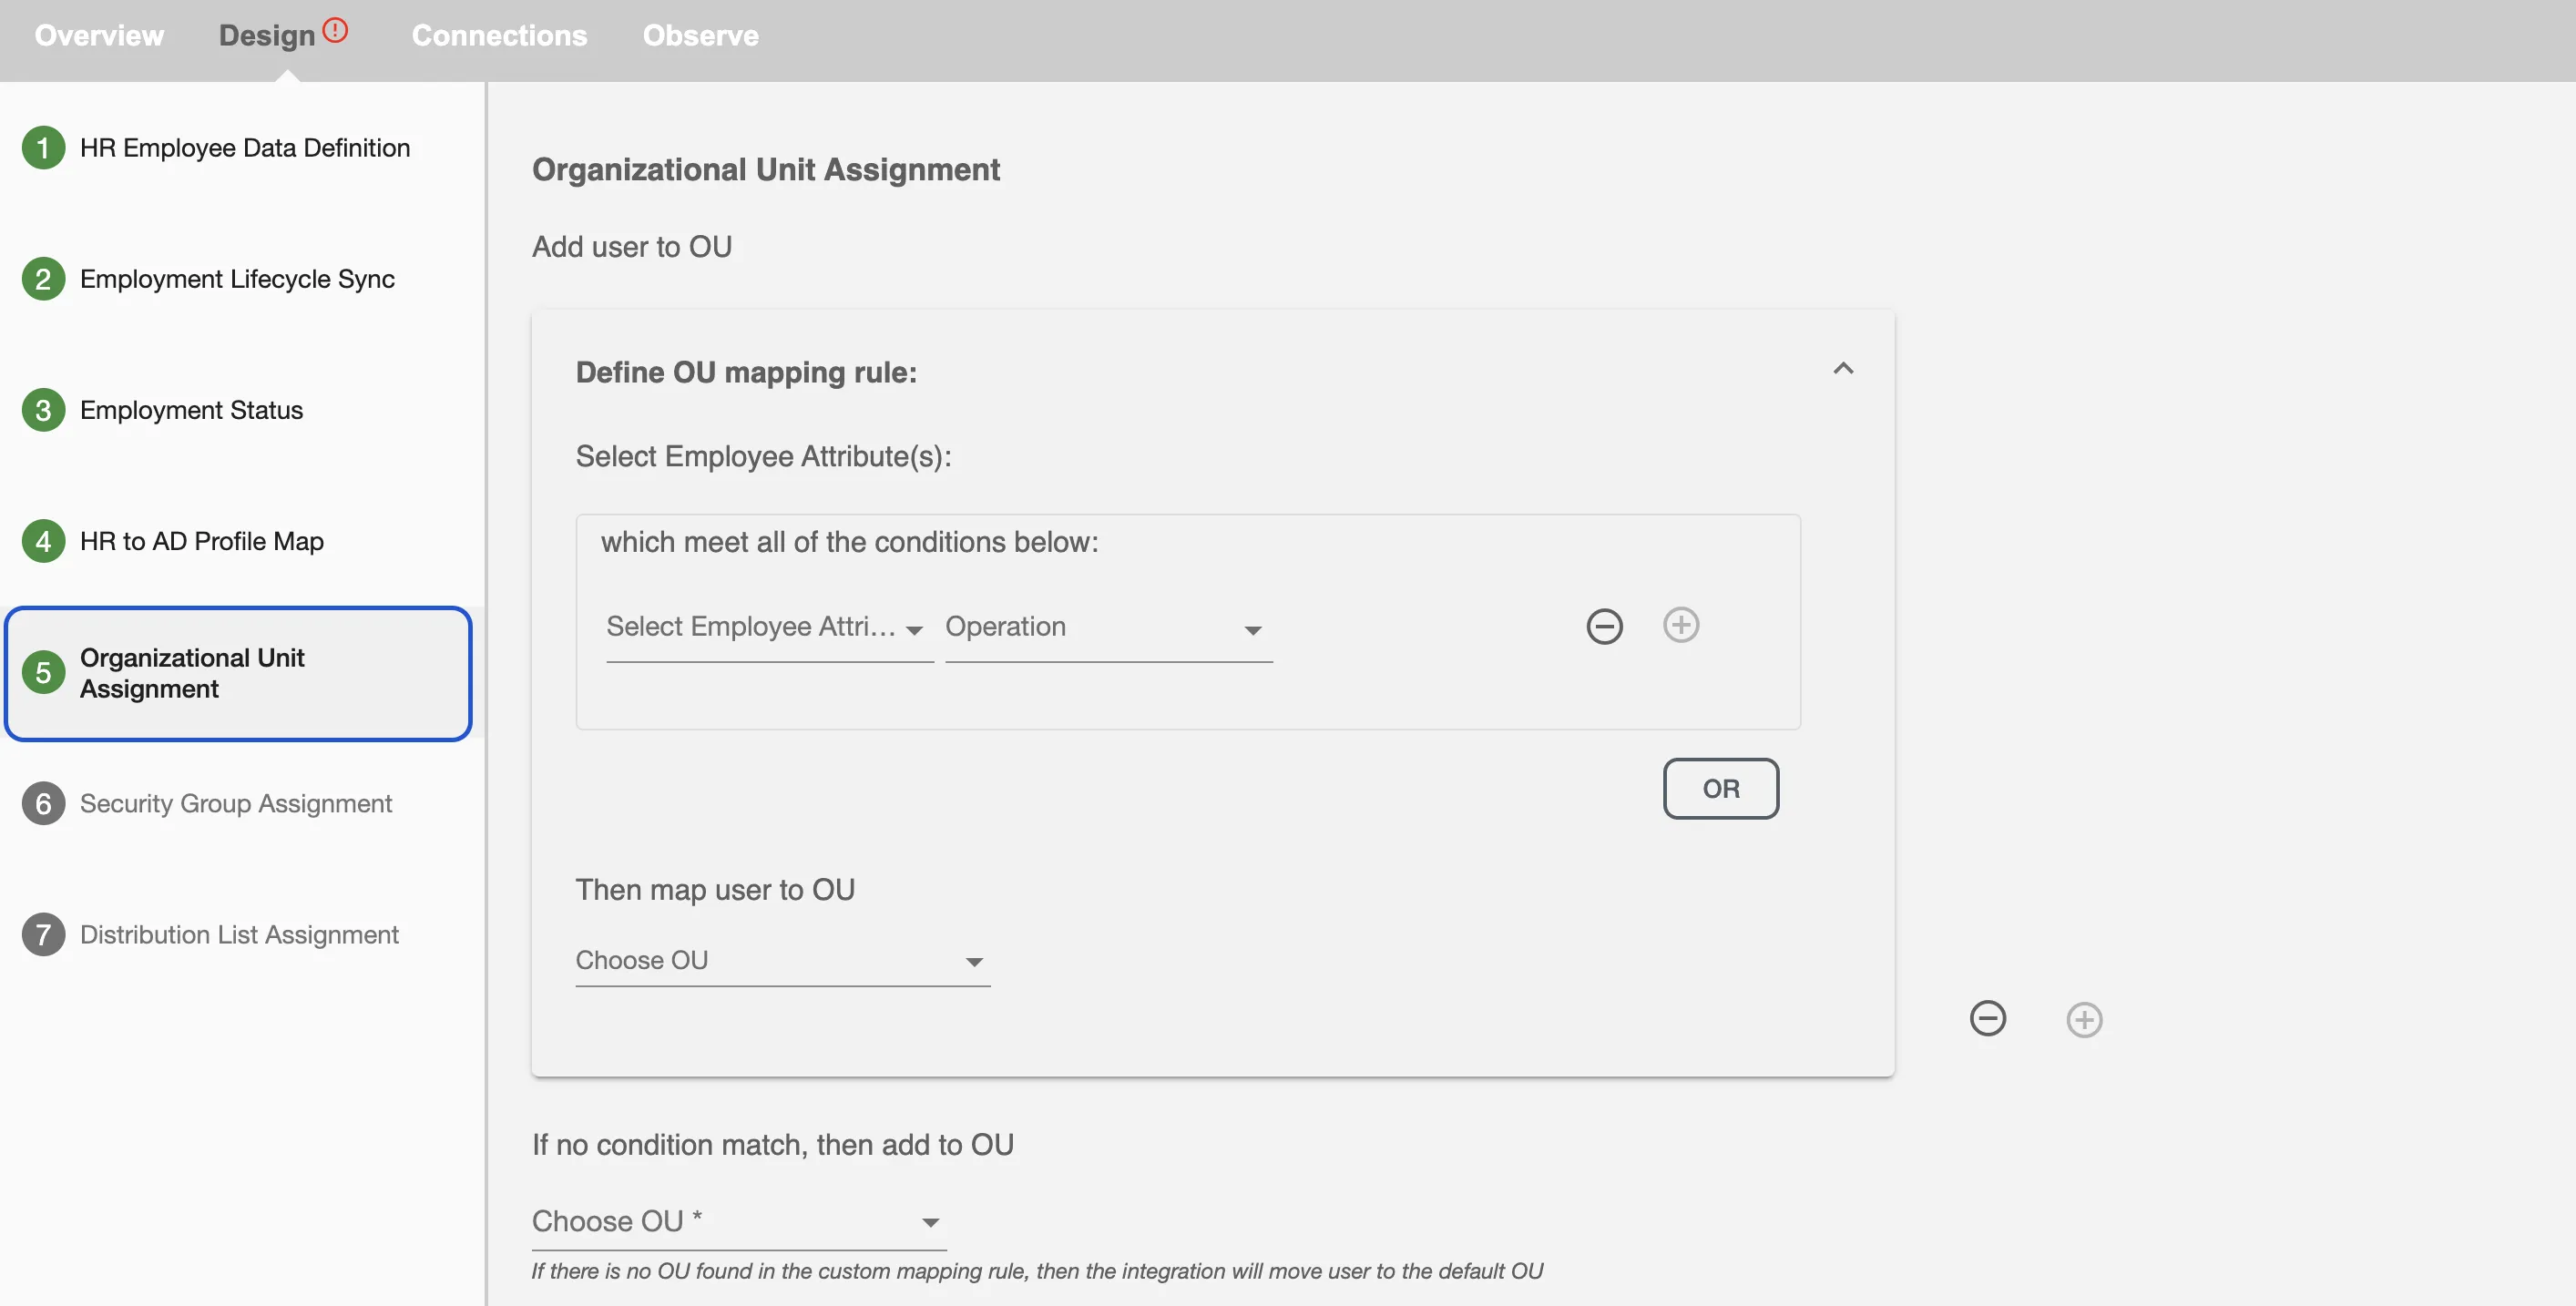
5. Organizational Unit Assignment
In this step, you will create rules to assign specific users into the desired organizational unit. If OU mapping rule is not provided or not satisfied, the integration will move user to the default OU.
For further details, you can refer to Organizational Unit Assignment.
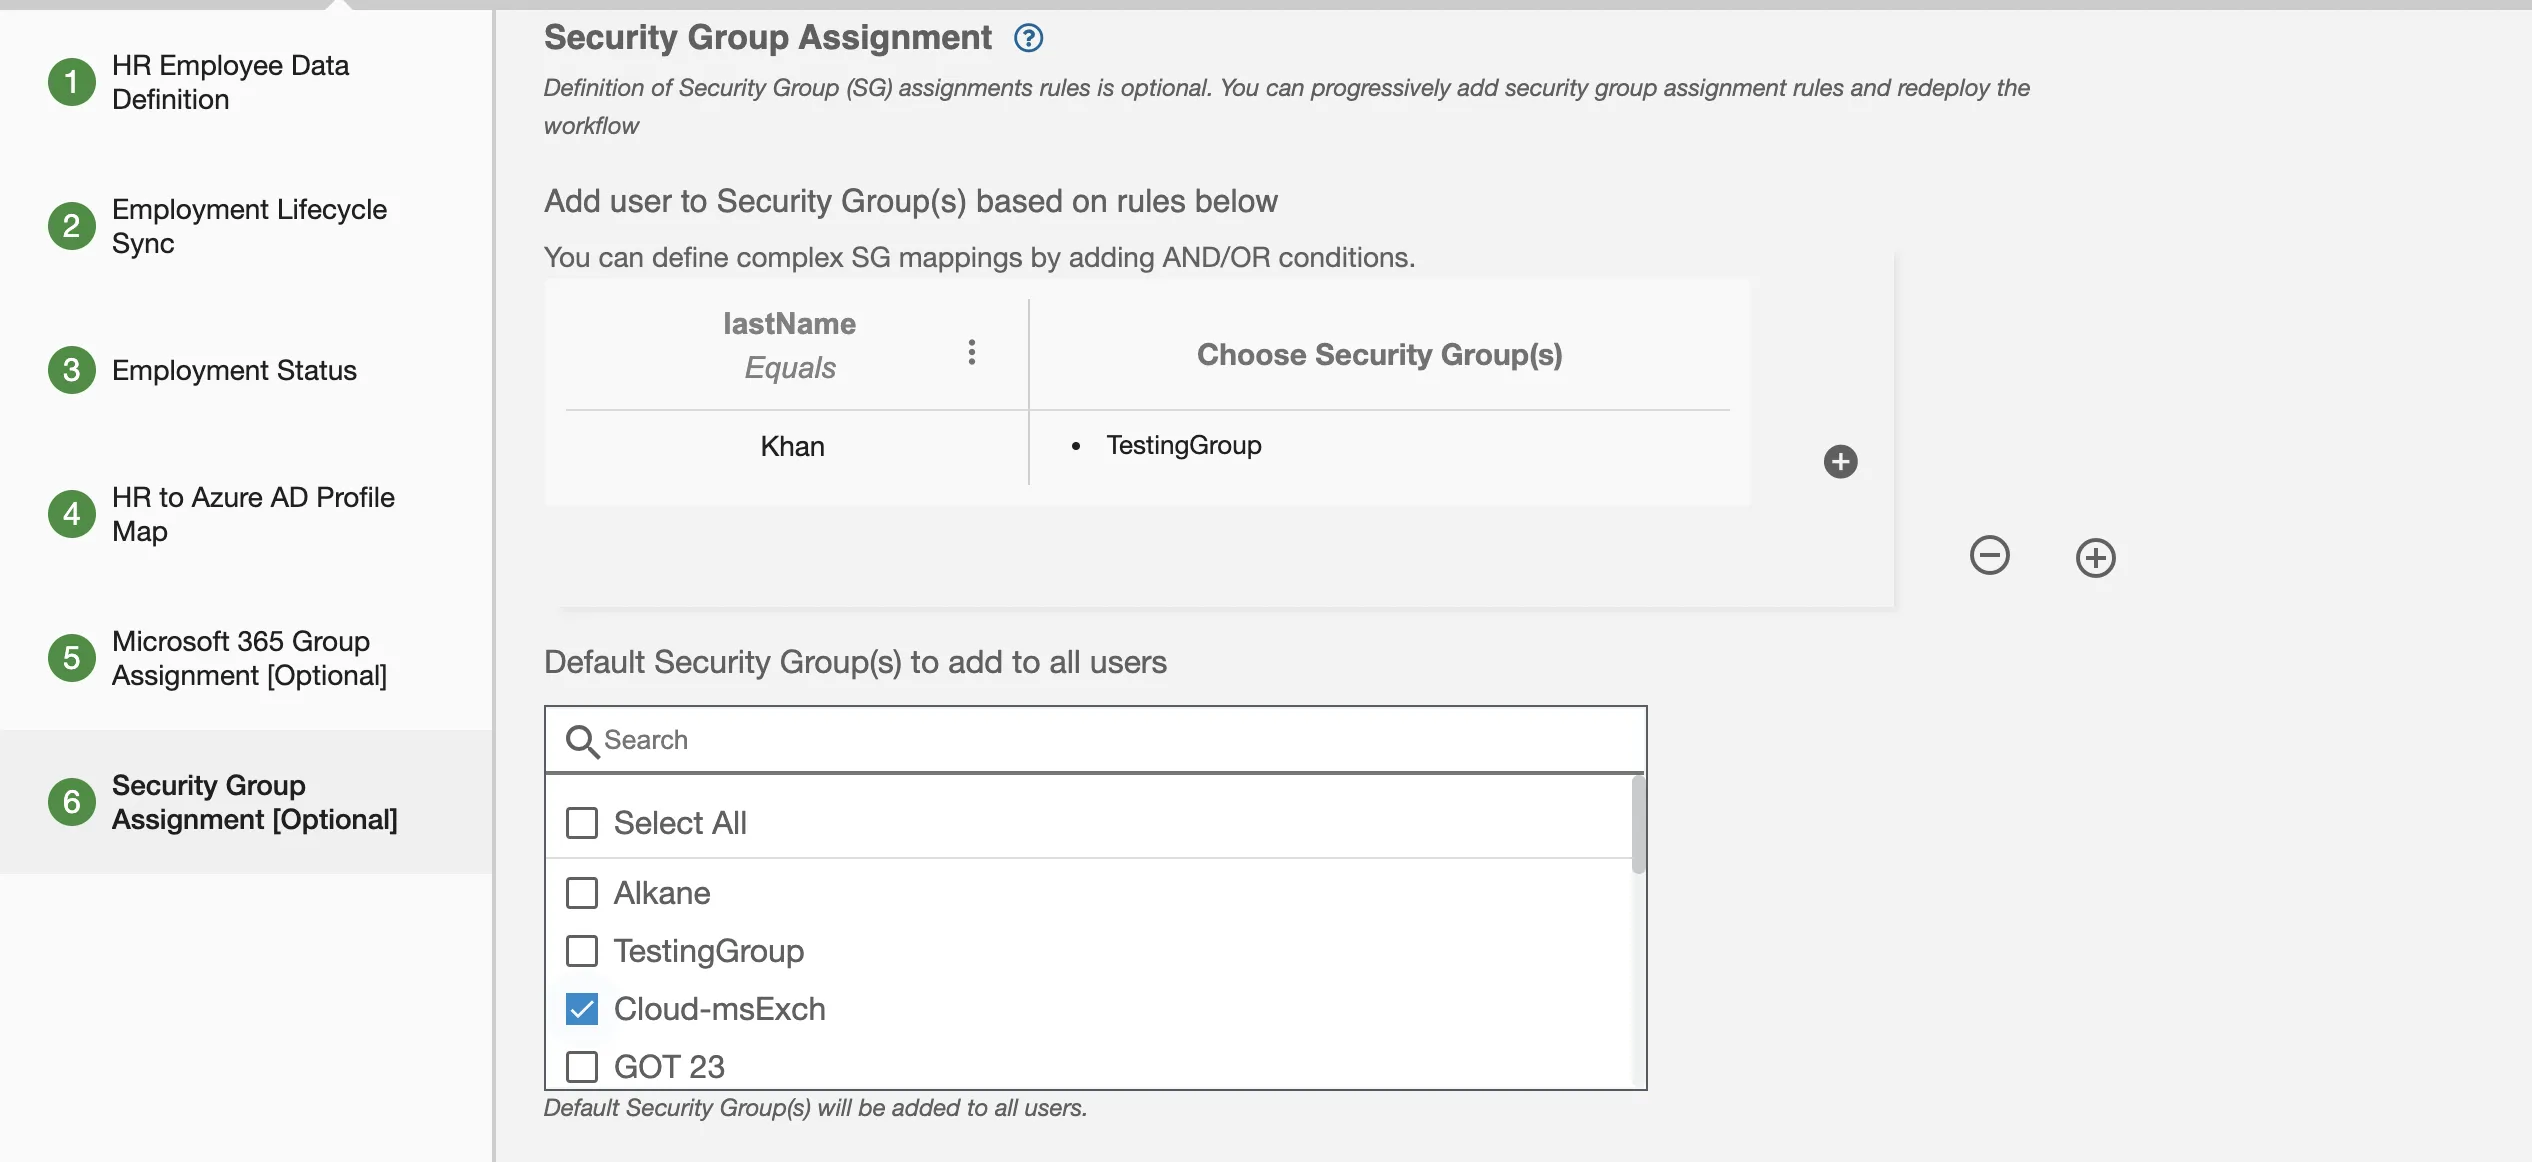
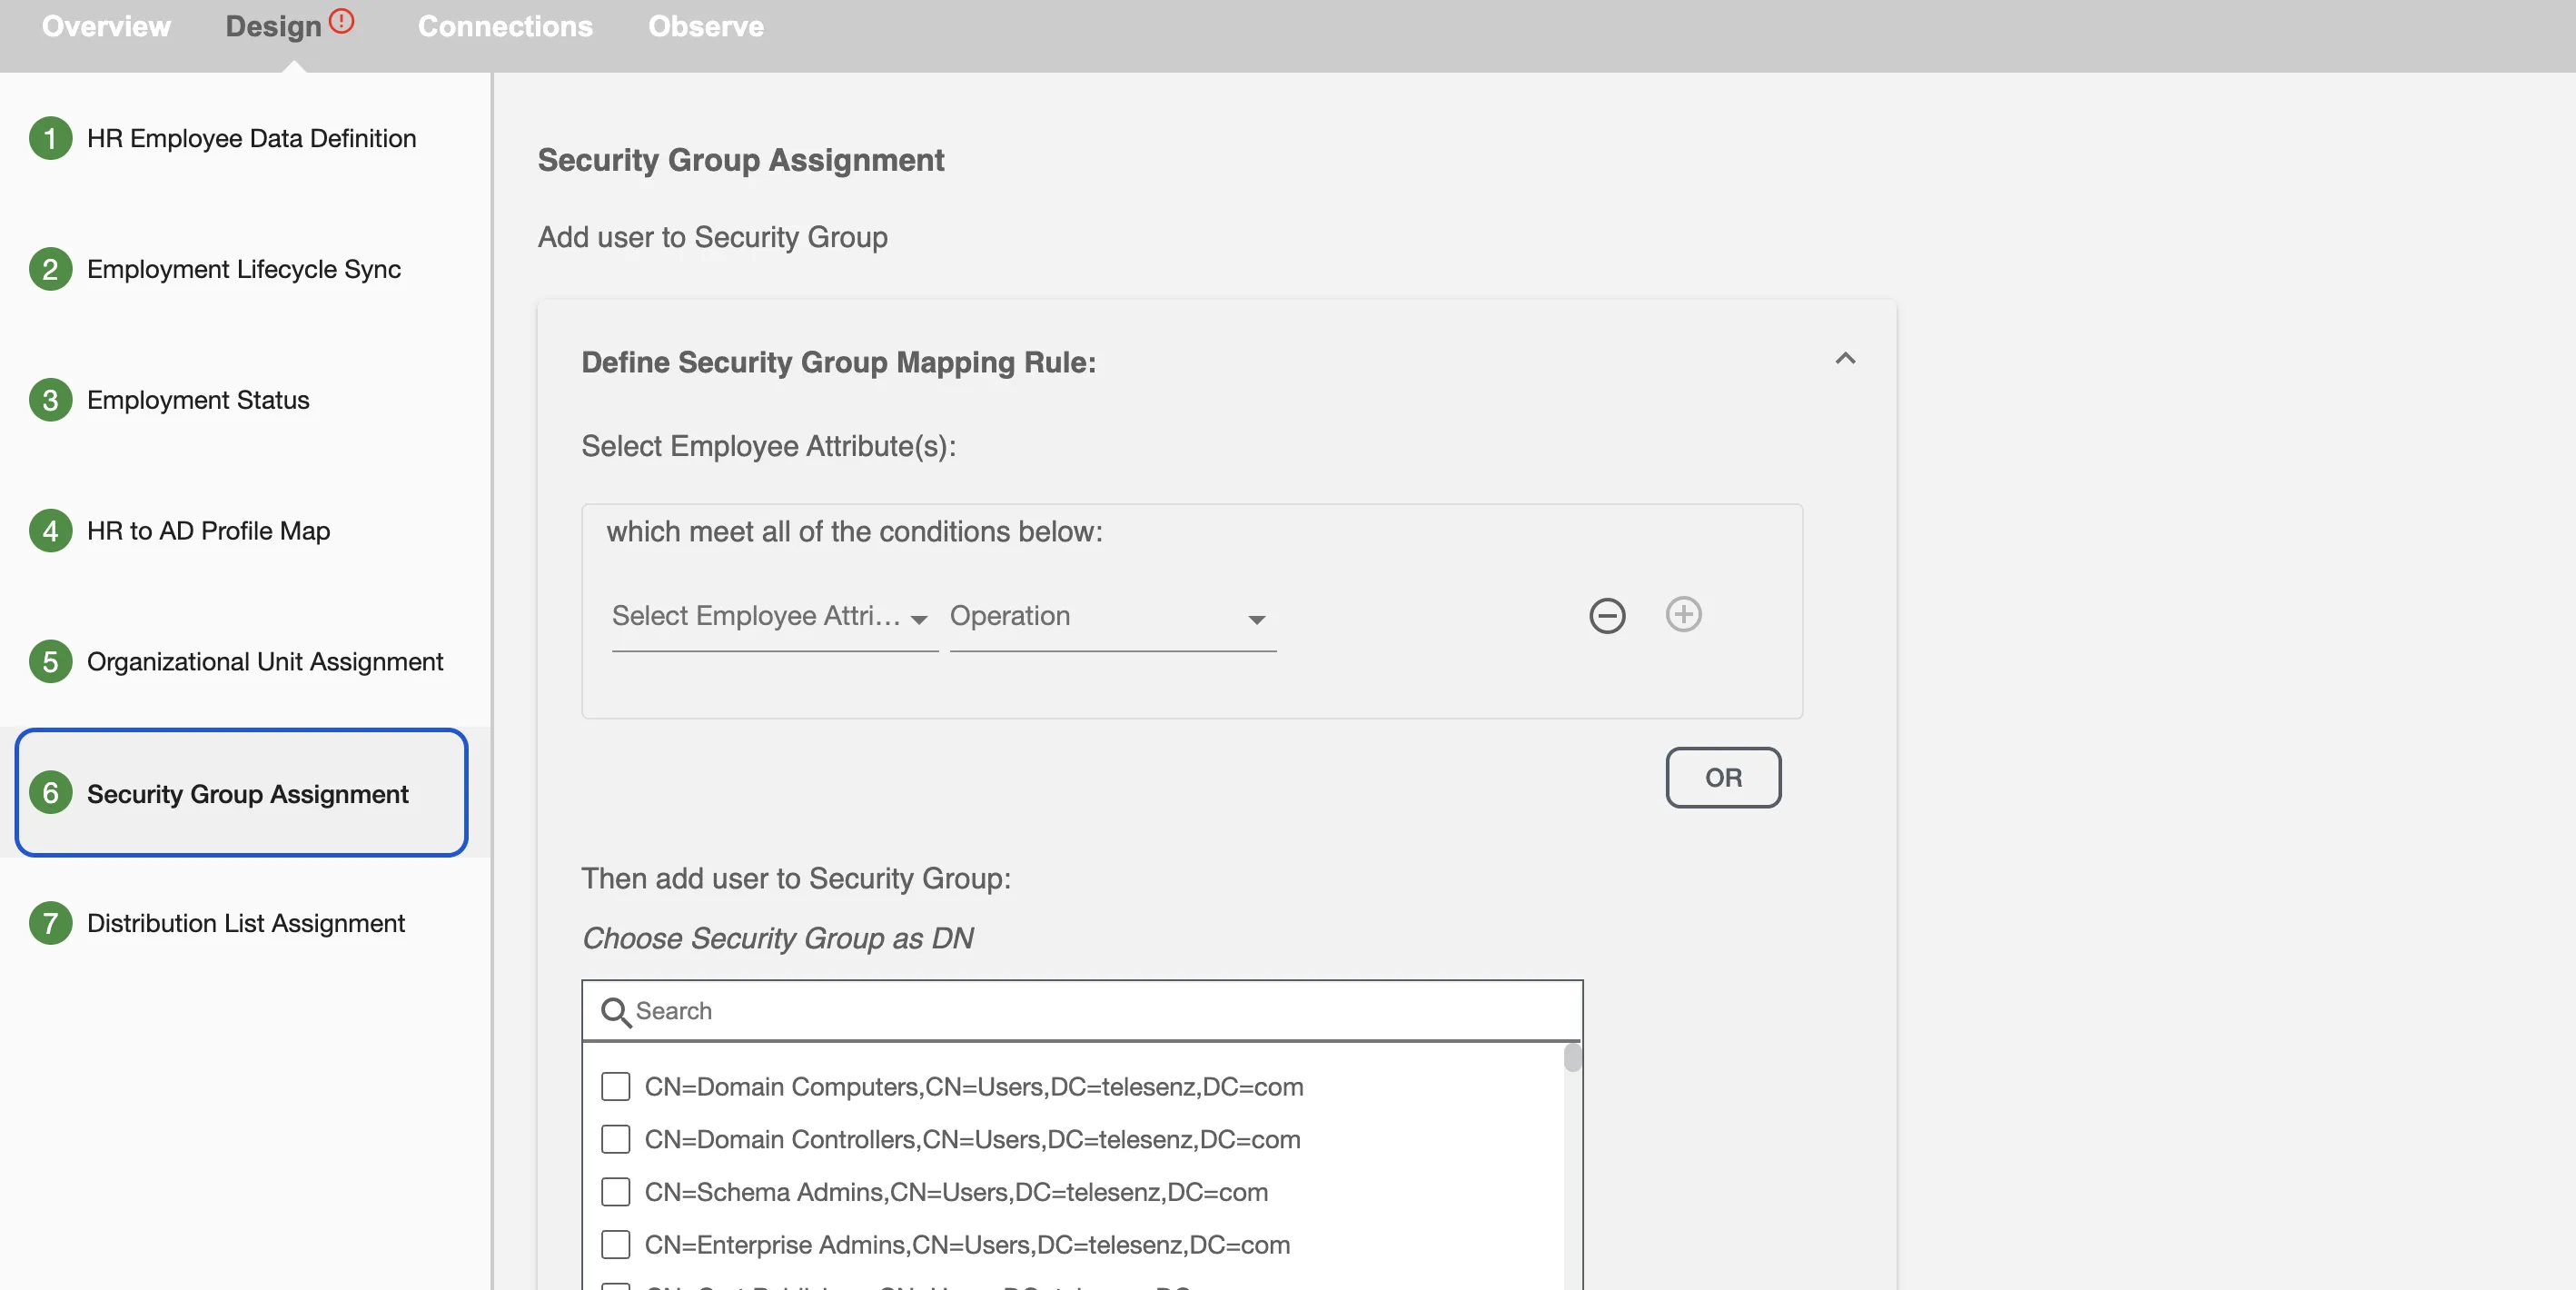
6. Security Group Assignment
Security groups are used to collect such groups into manageable units and assign them permissions for the shared resources. In this step, you can create rules to assign security groups to employees. You can also choose the default security groups which will be assigned to all employees in your company.
For further details, you can refer to Security Group Assignment.
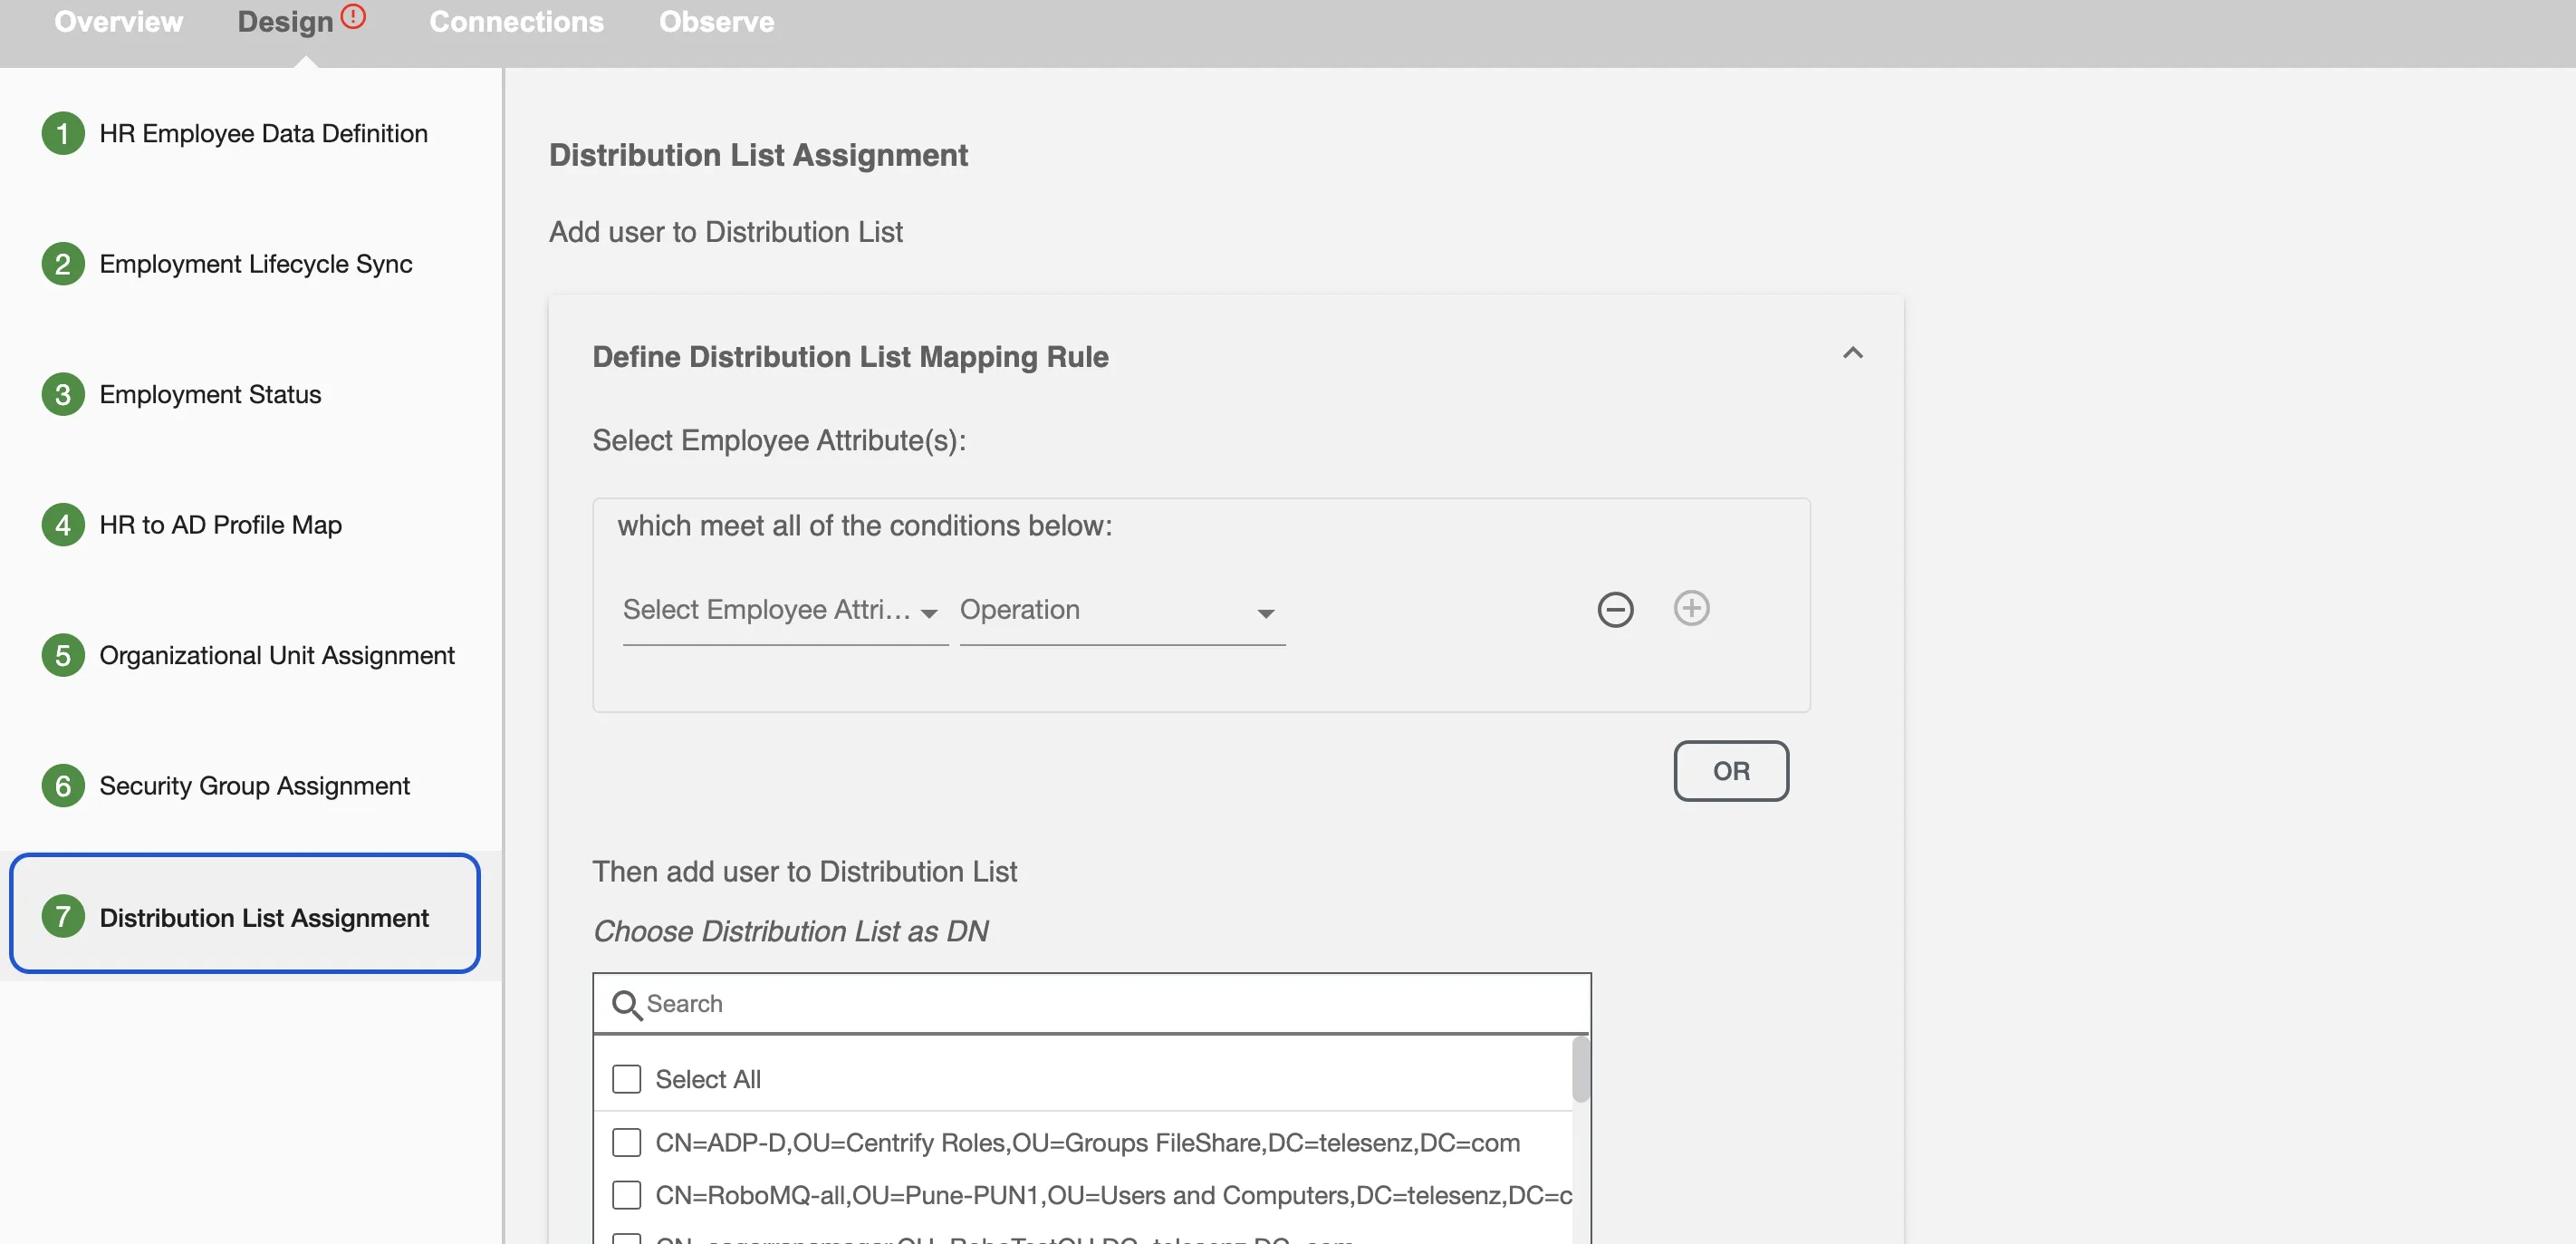
7. Distribution List Assignment
Distribution list is used for sending emails/notifications to a group of people. In this step, you can create rules to assign distribution lists to employees. You can also choose the default distribution lists which will be assigned to all employees in your company.
For further details, you can refer to Distribution List Assignment.
Steps specific to Entra ID
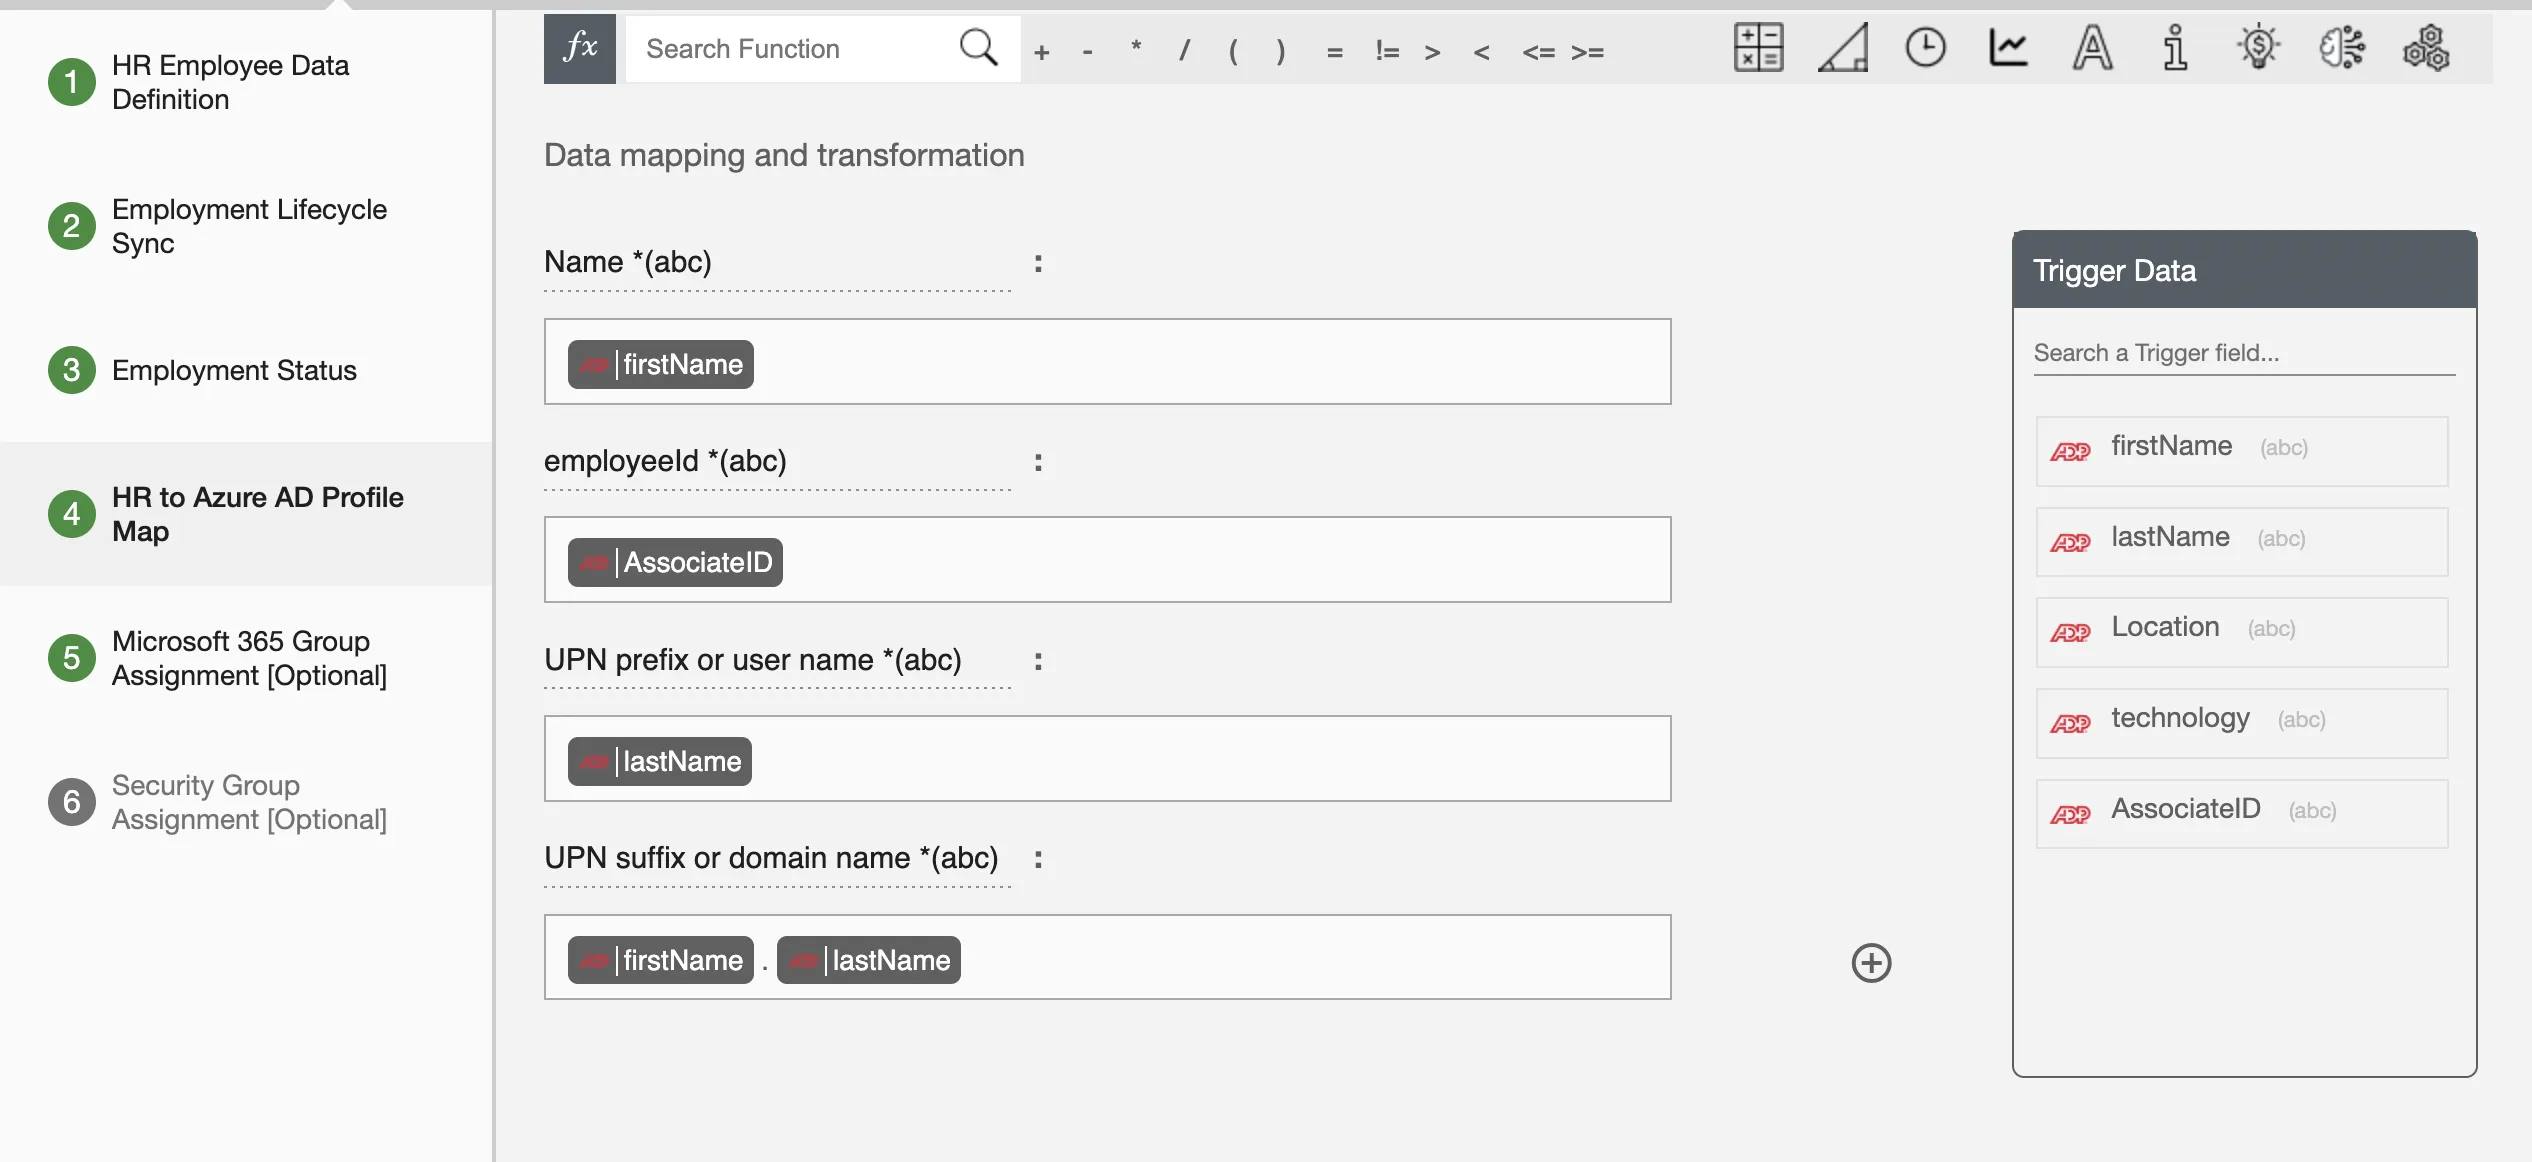
4. HR to Entra ID Profile Map
This step is used to map the Employee data from HR platform into Entra ID attributes. You can set up Entra ID attributes by typing static value or dragging HR attributes
For further details, you can refer to HR to Entra ID Profile Map.
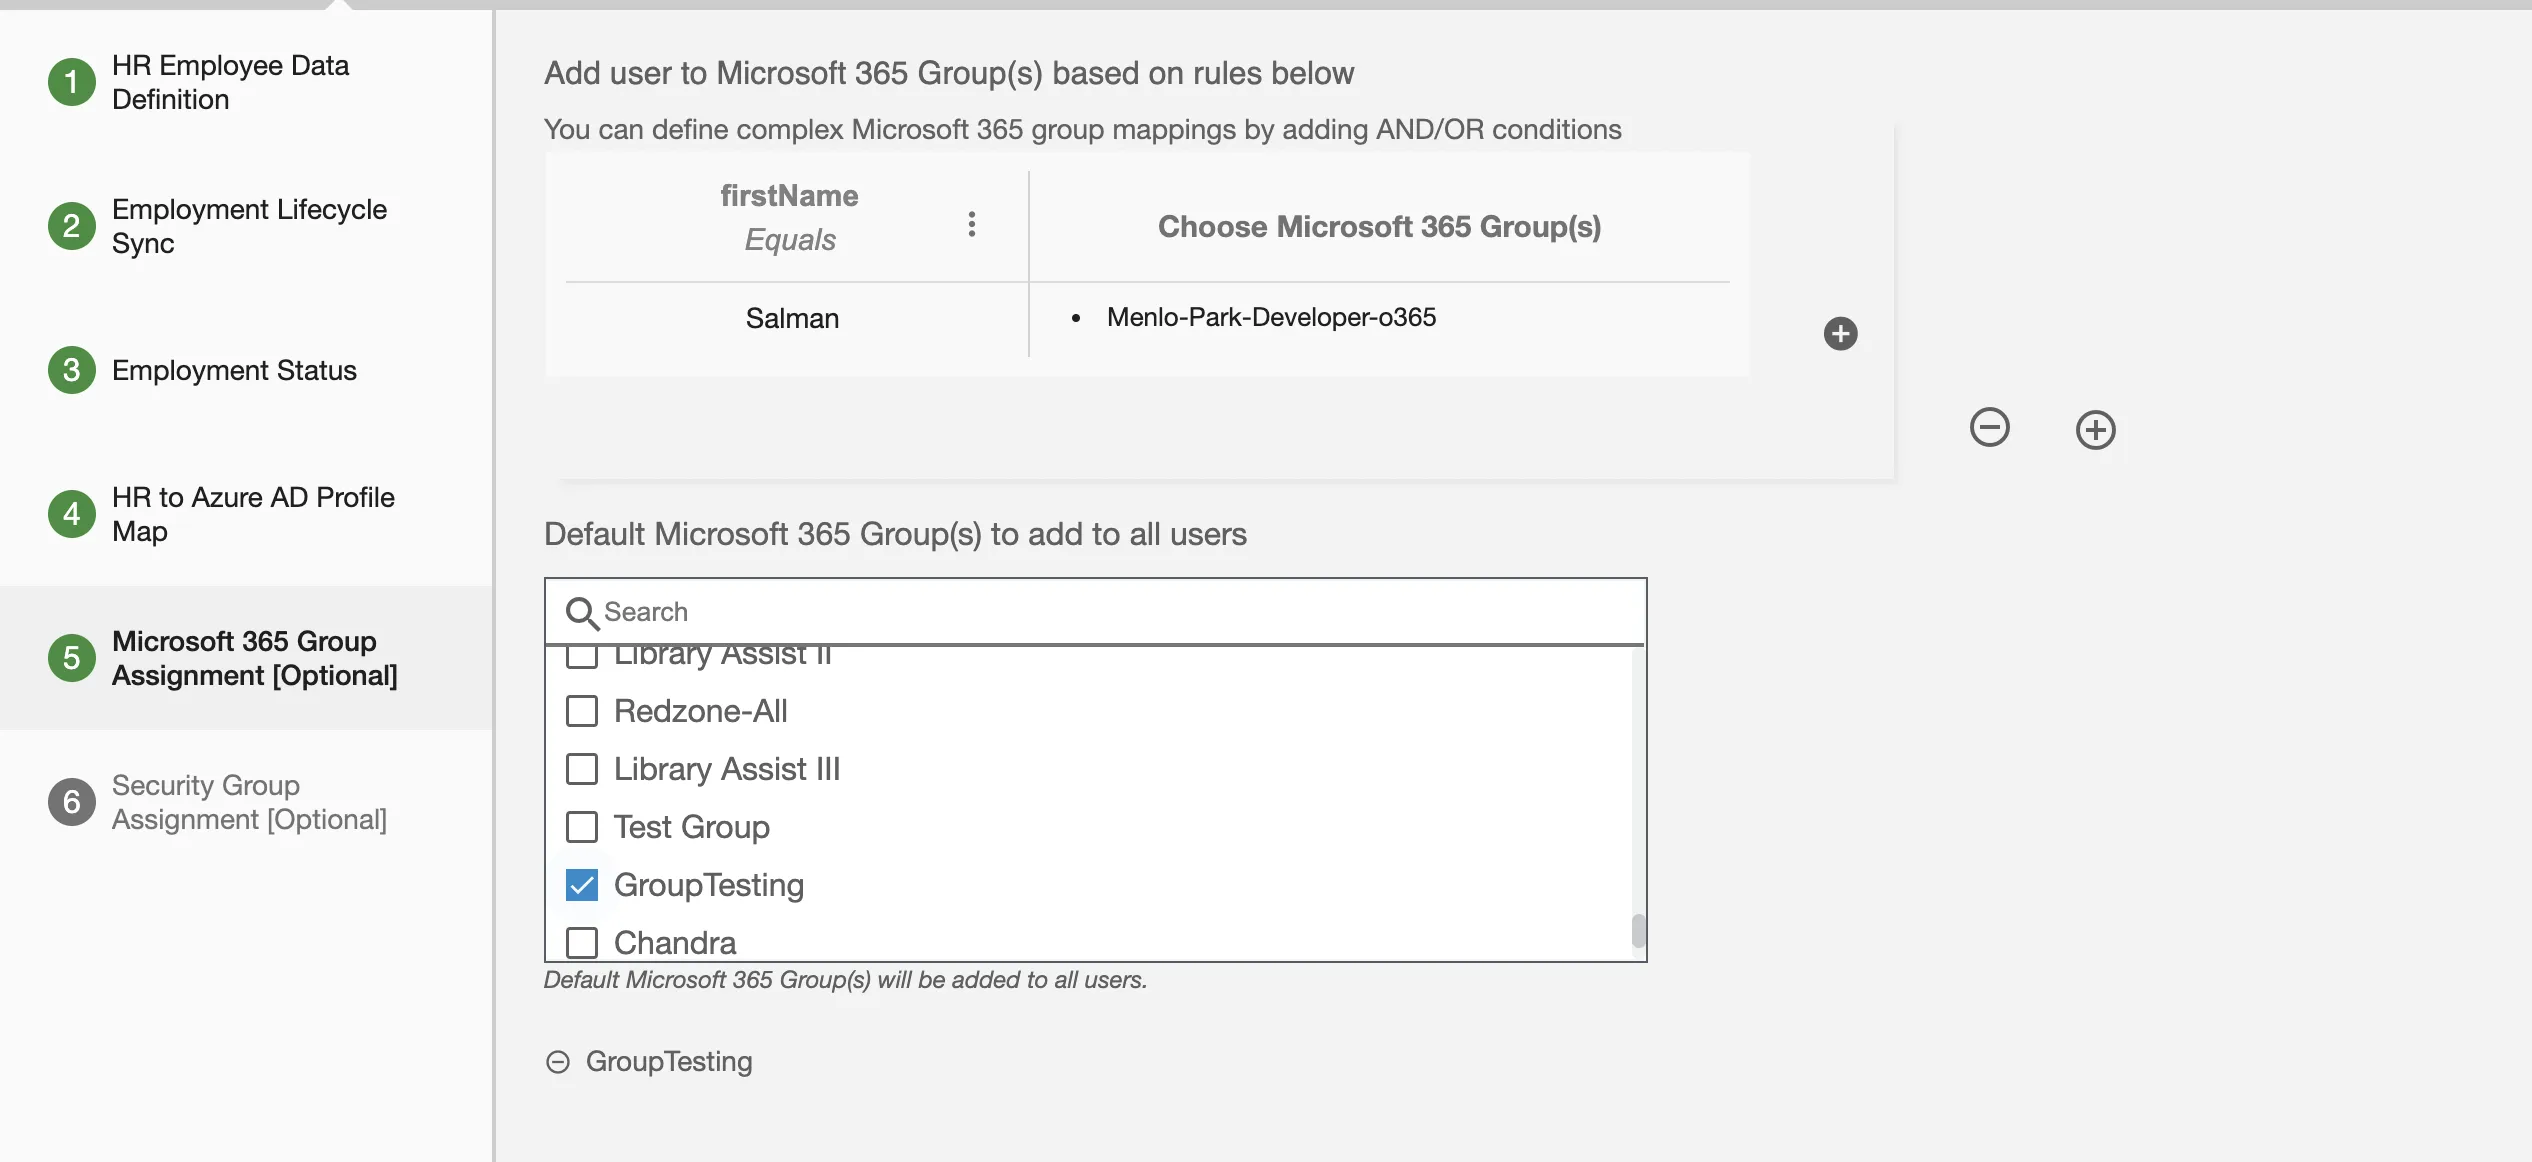
5. Microsoft 365 Group Assignment (Optional)
In this step, you will create rules to assign specific users into the desired Microsoft 365 Group. If OU mapping rule is not provided or not satisfied, the integration will move user to the default OU.
For further details, you can refer to Organizational Unit Assignment.
6. Security Group Assignment (Optional)
Security groups are used to collect users into manageable units and assign them permissions for the shared resources. In this step, you can create rules to assign security groups to employees. You can also choose the default security groups which will be assigned to all employees in your company.
For further details, you can refer to Security Group Assignment.