How to create a Role Group and Assign Permissions
Following are the steps to create Role Group and assign an User to the role group:-
-
Login to Exchange Admin Center, Click on Roles on the left hand pane and select Admin Roles from the drop down.
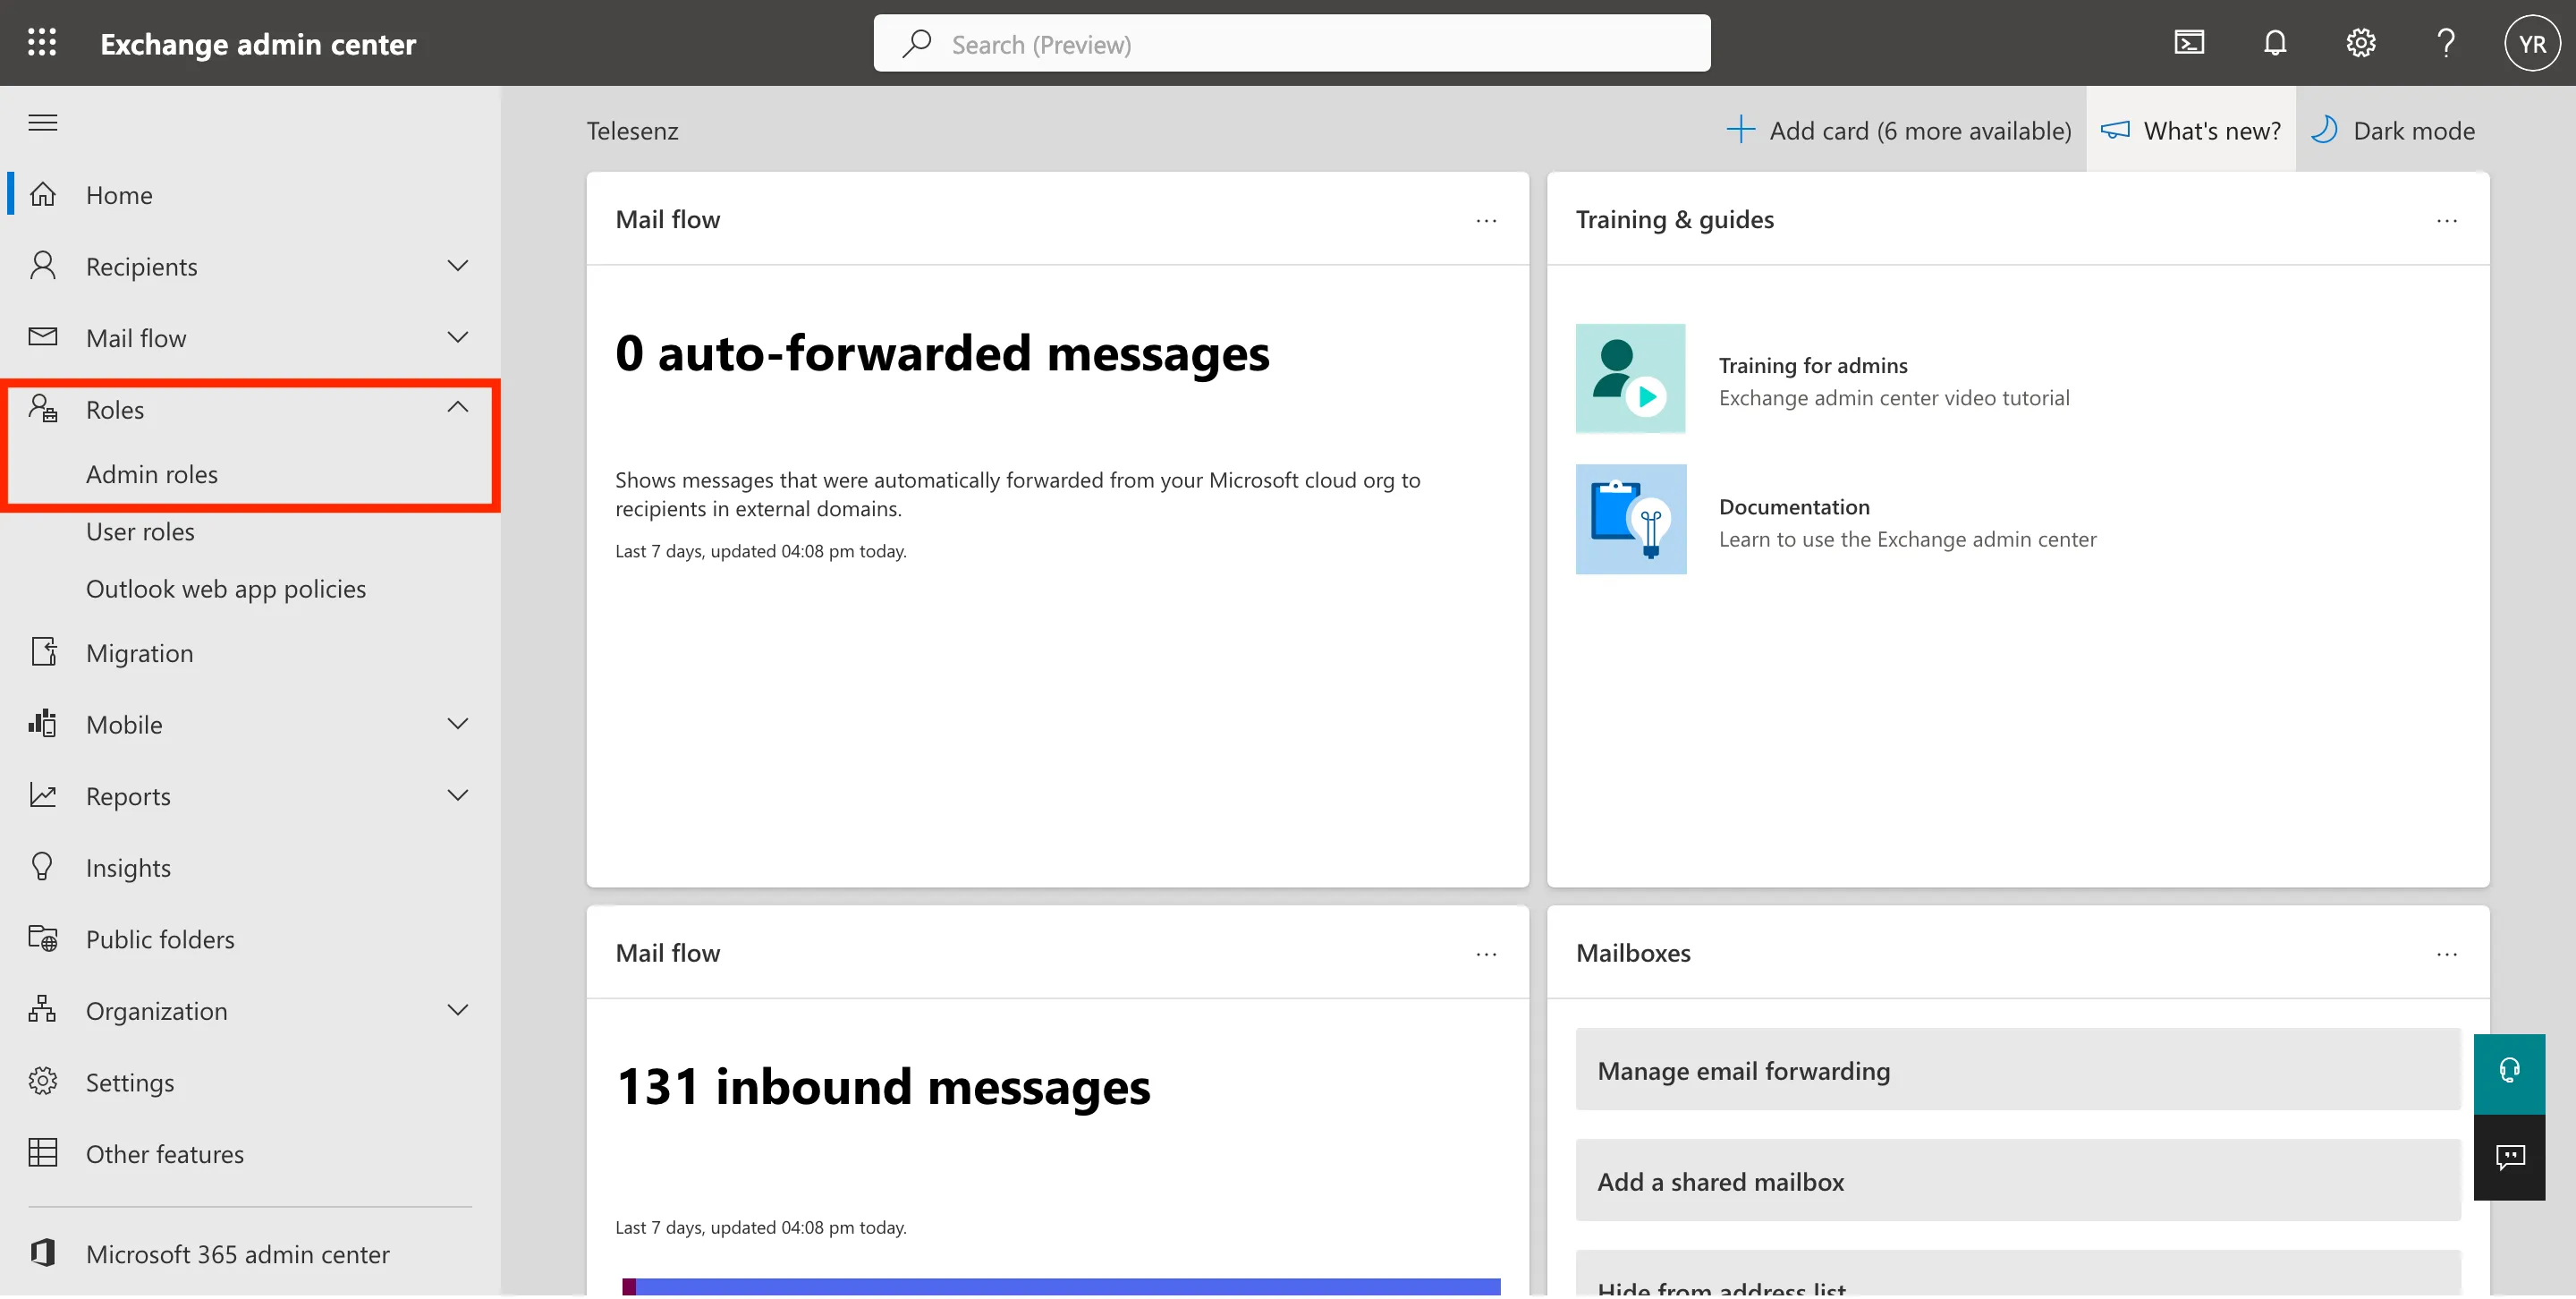 Figure 1. Shows assign admin role option on Exchange Online Center.
-
Click on Add role group.
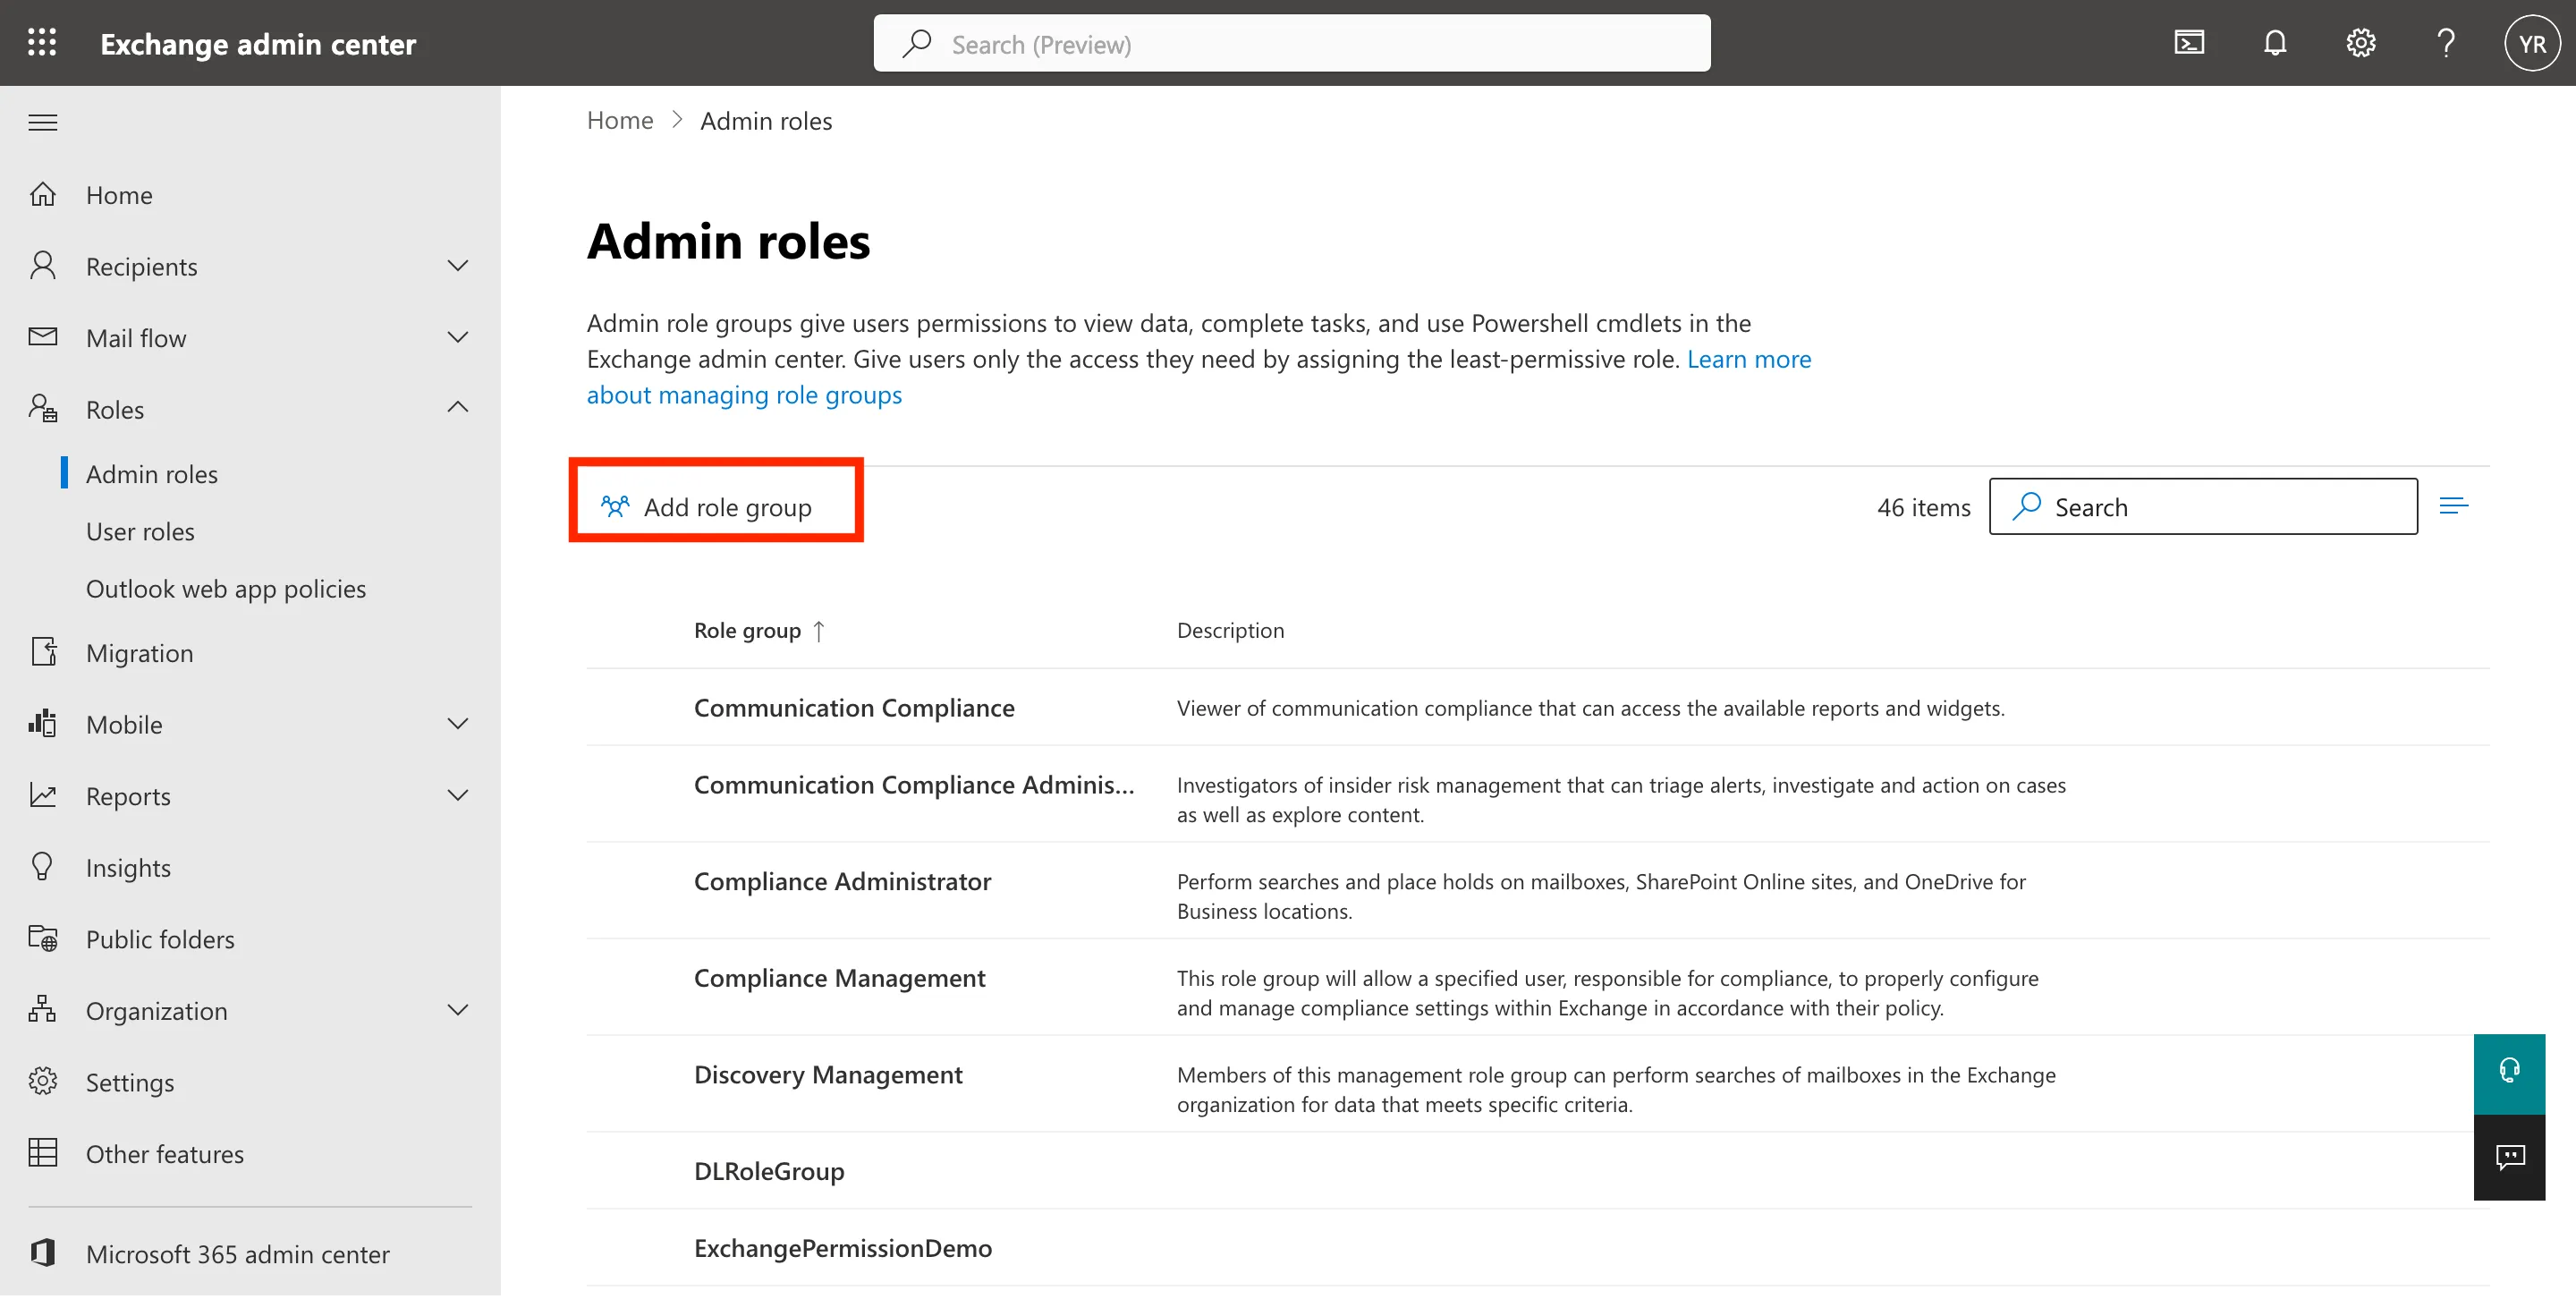 Figure 2. Instructs to create a role group.
-
Fill out the required information and click on the Next button.
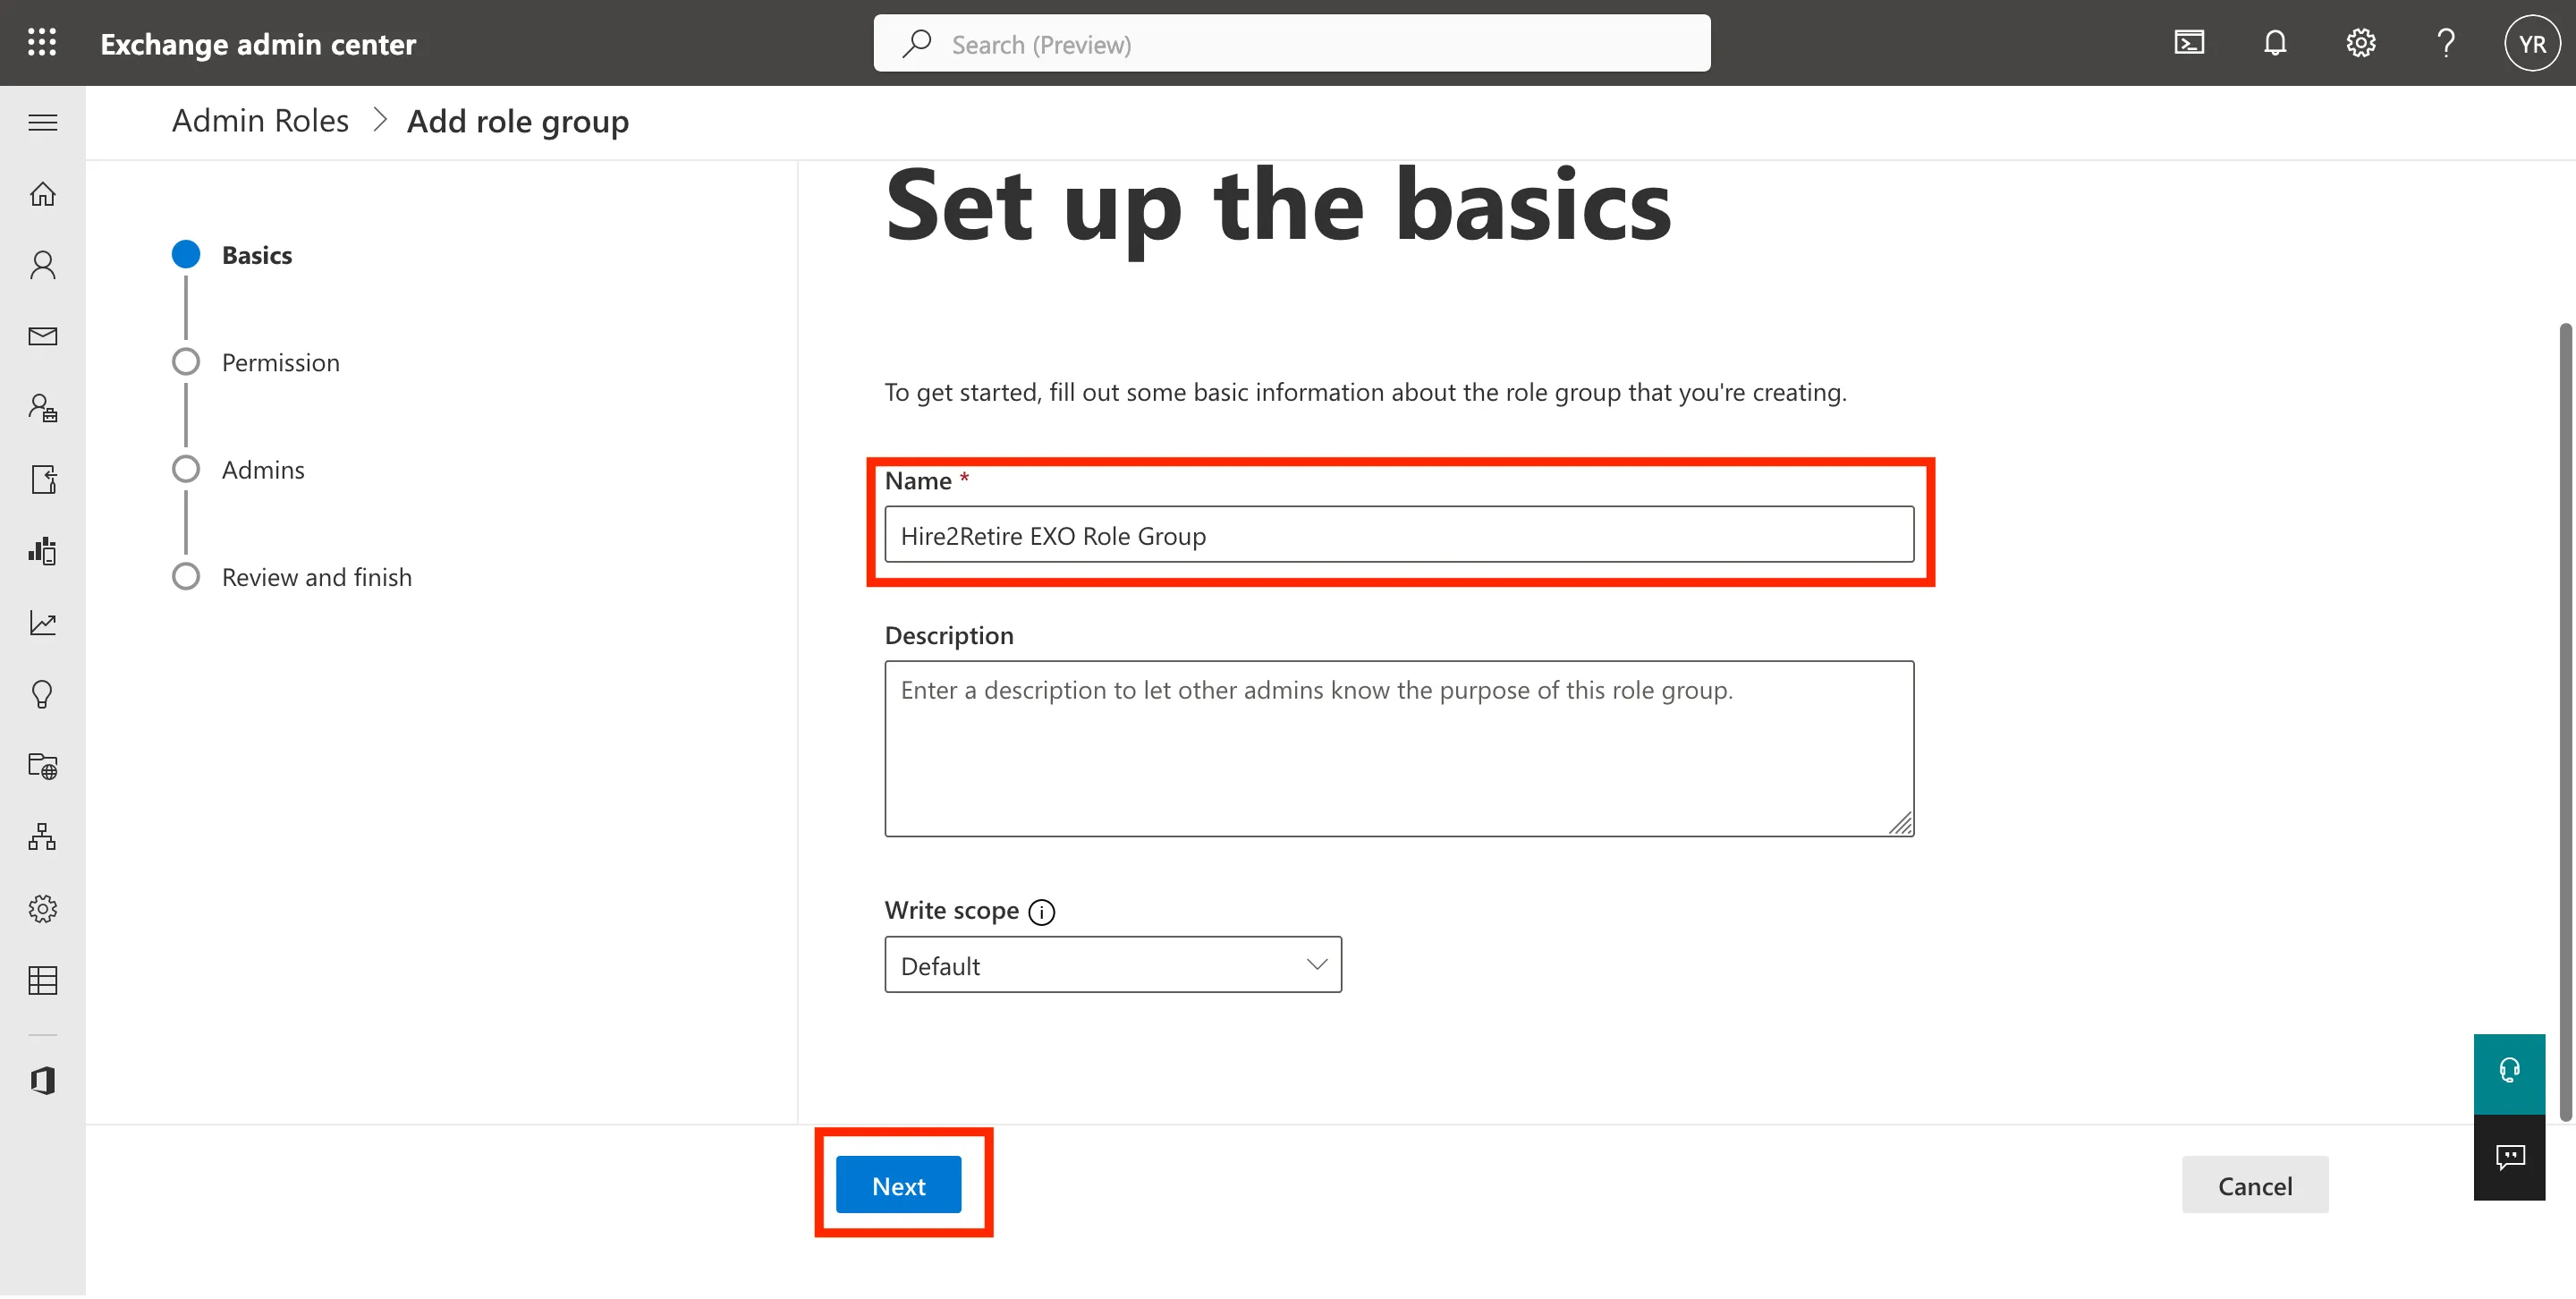 Figure 3. Provide name to the newly created role group.
-
Add required permissions respective to your Identity Management (Entra ID/ Hybrid AD/ Hybrid On-Premise AD).
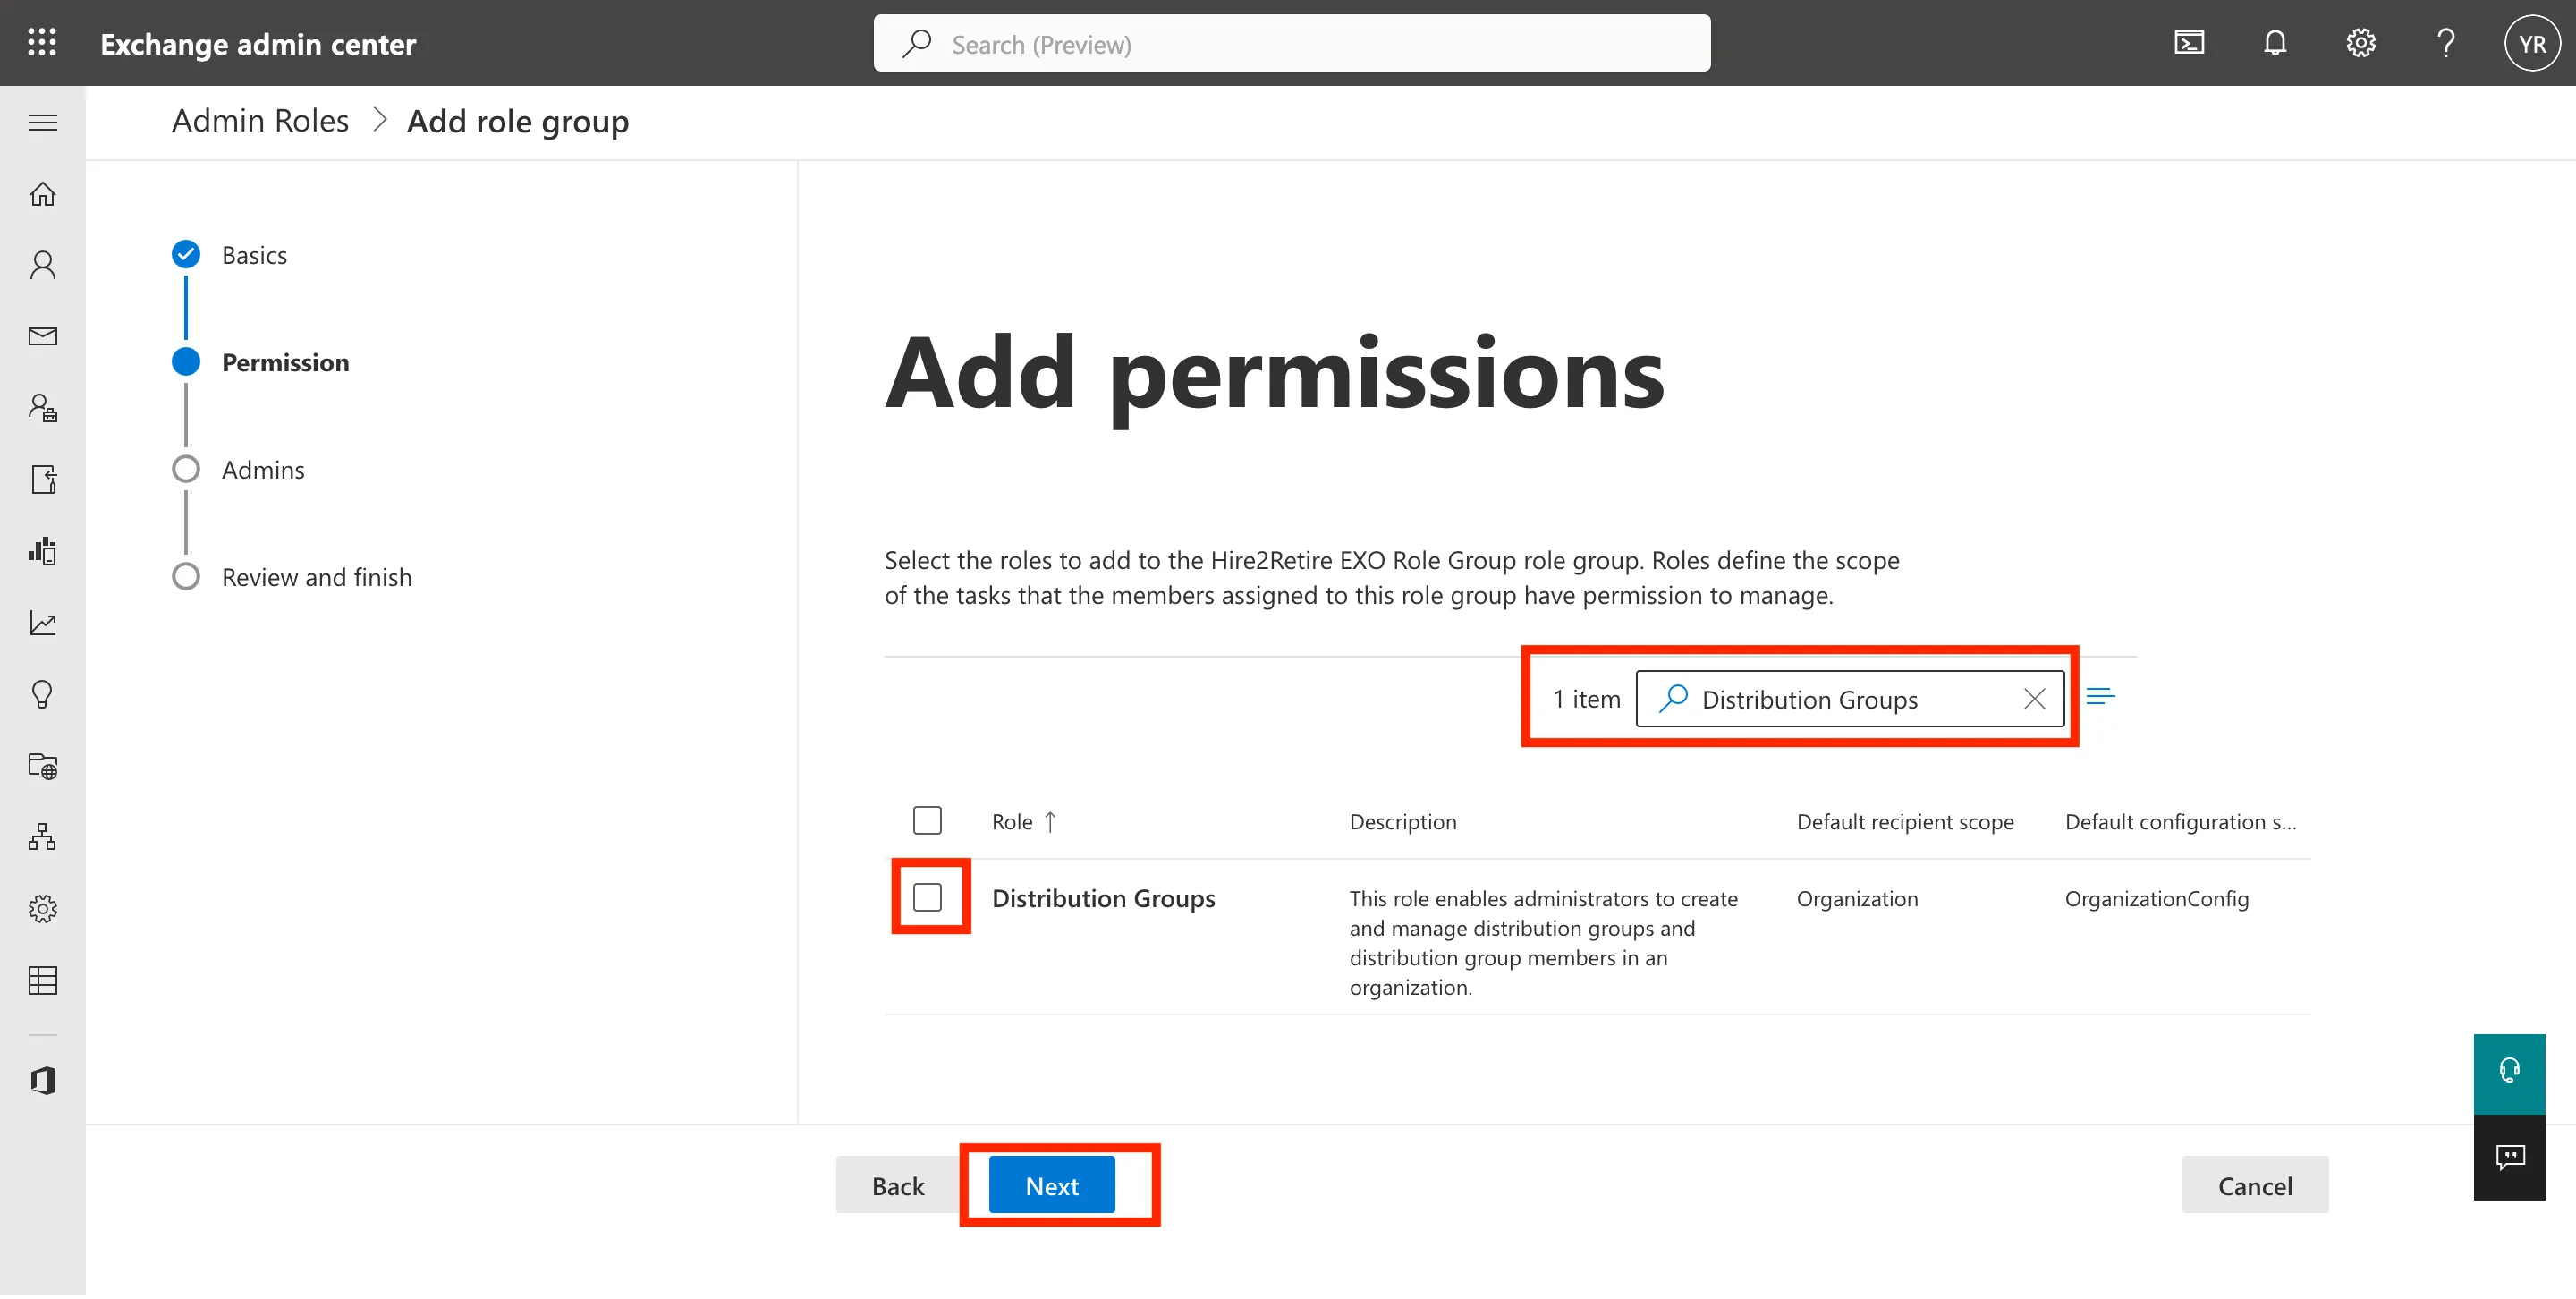 Figure 4. Addition of permissions to the role group.
-
After adding all the neccessary permissions, assign user to the role group and click on Next button.
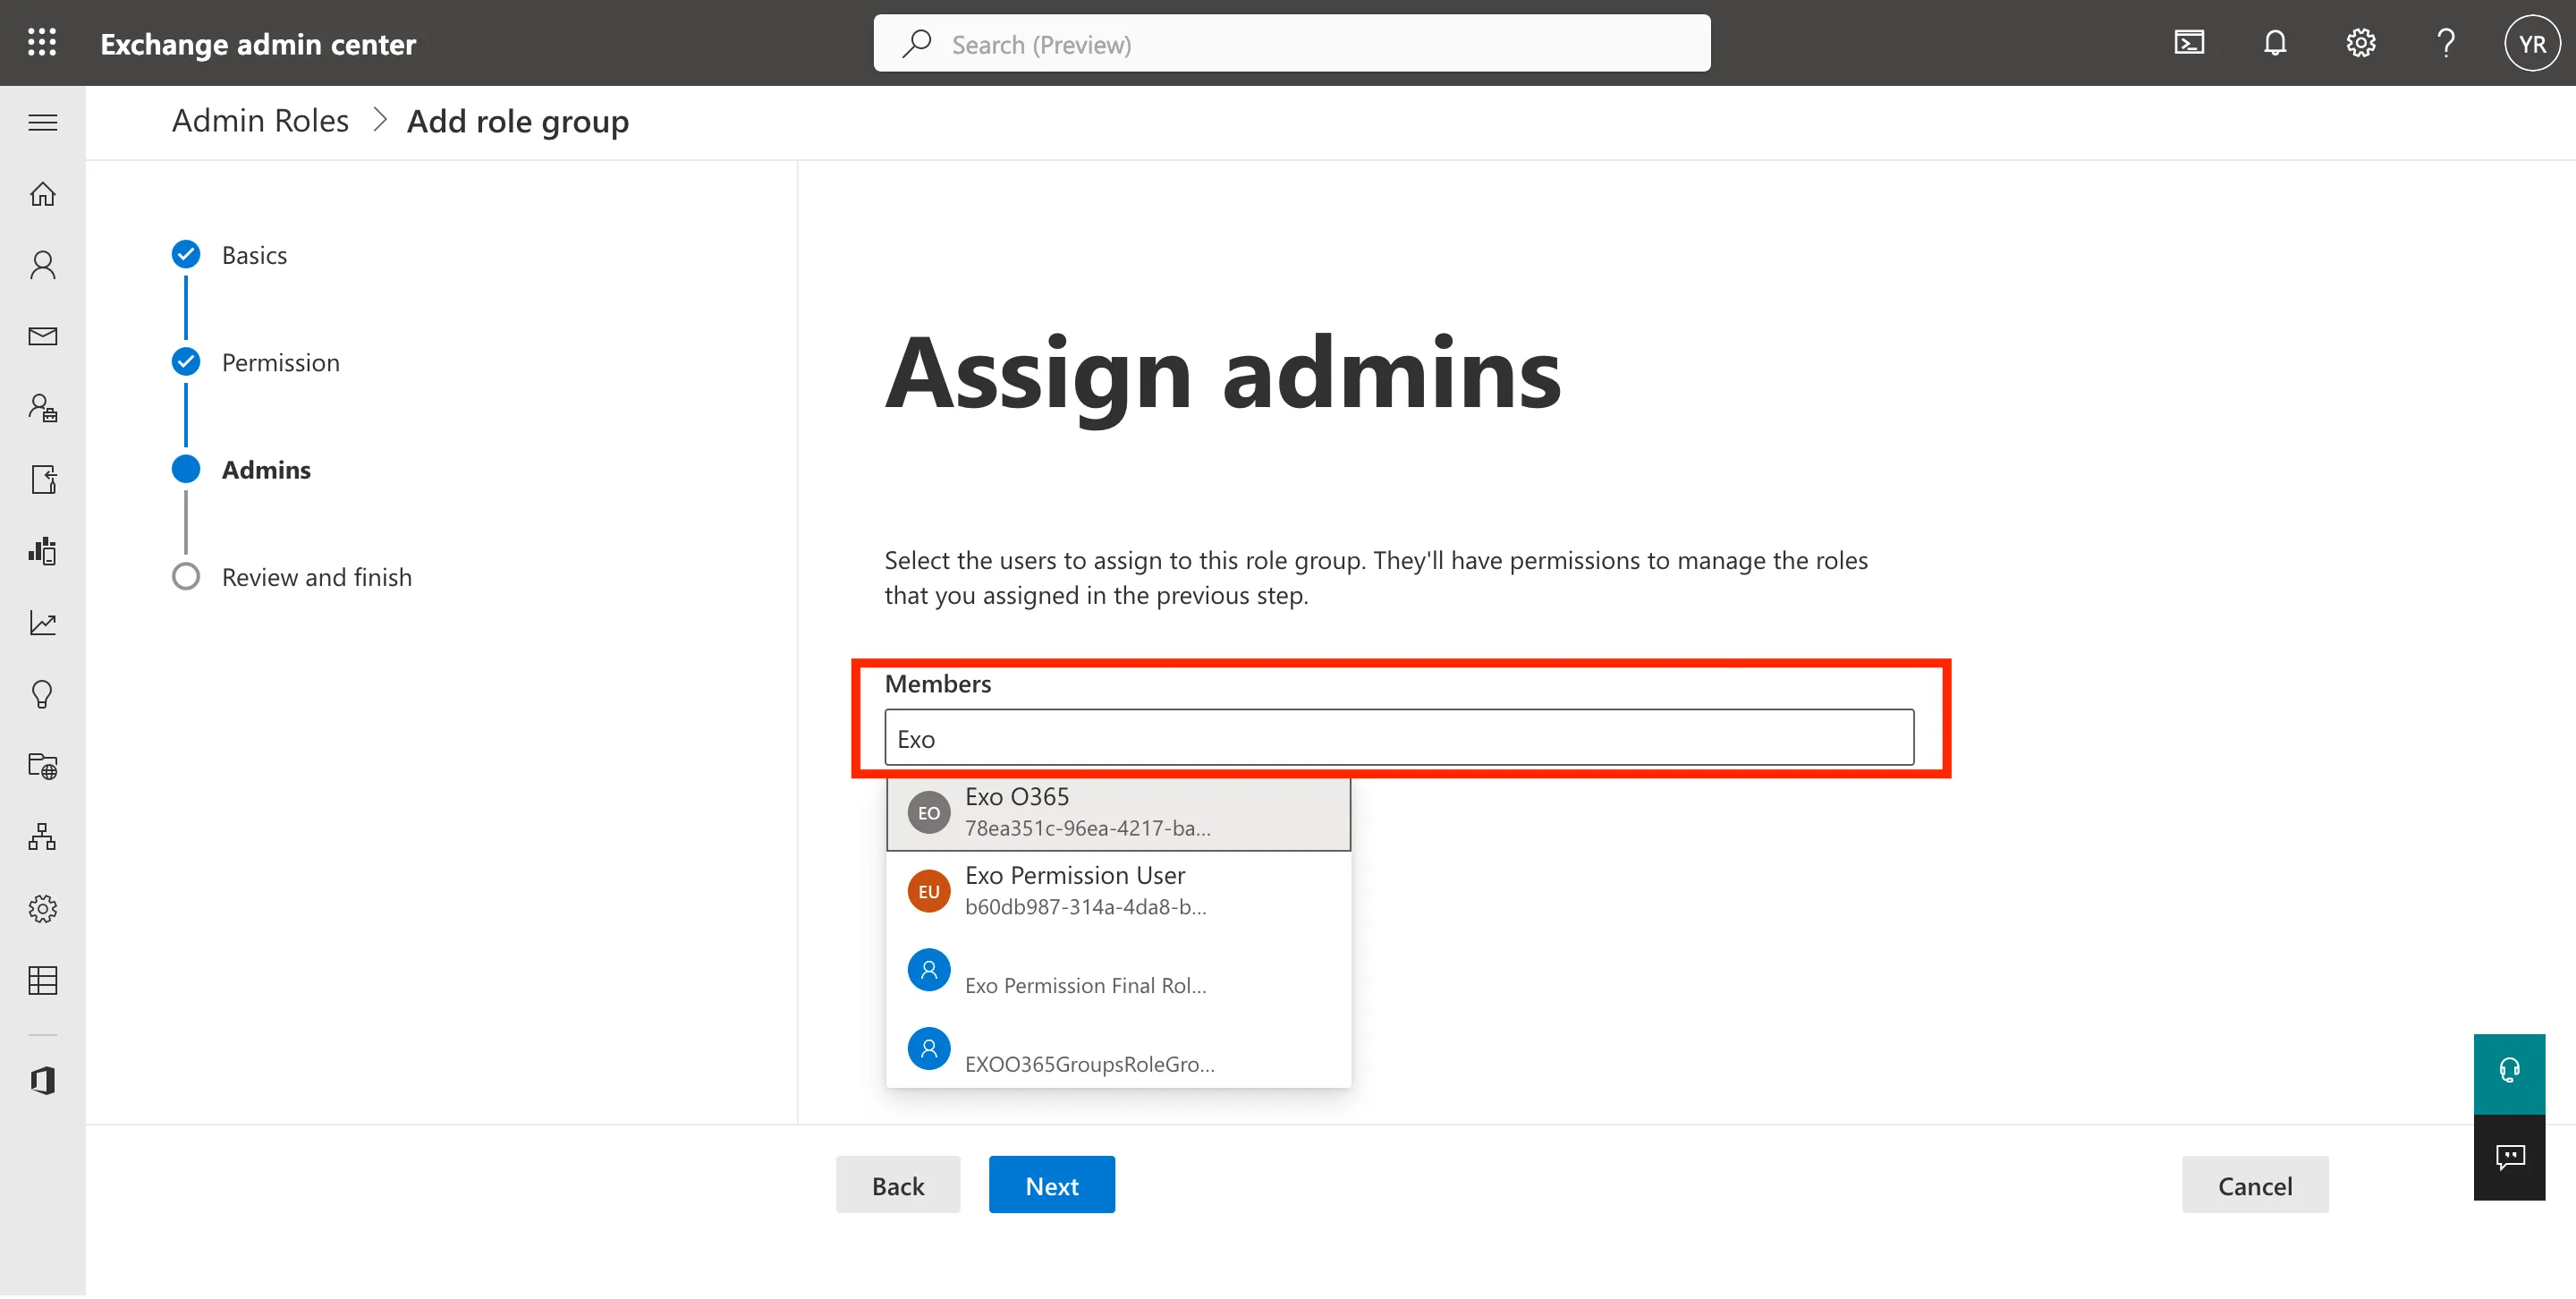 Figure 5. Assign User to the role group.
-
Review the role group and click on Add Role Group button.
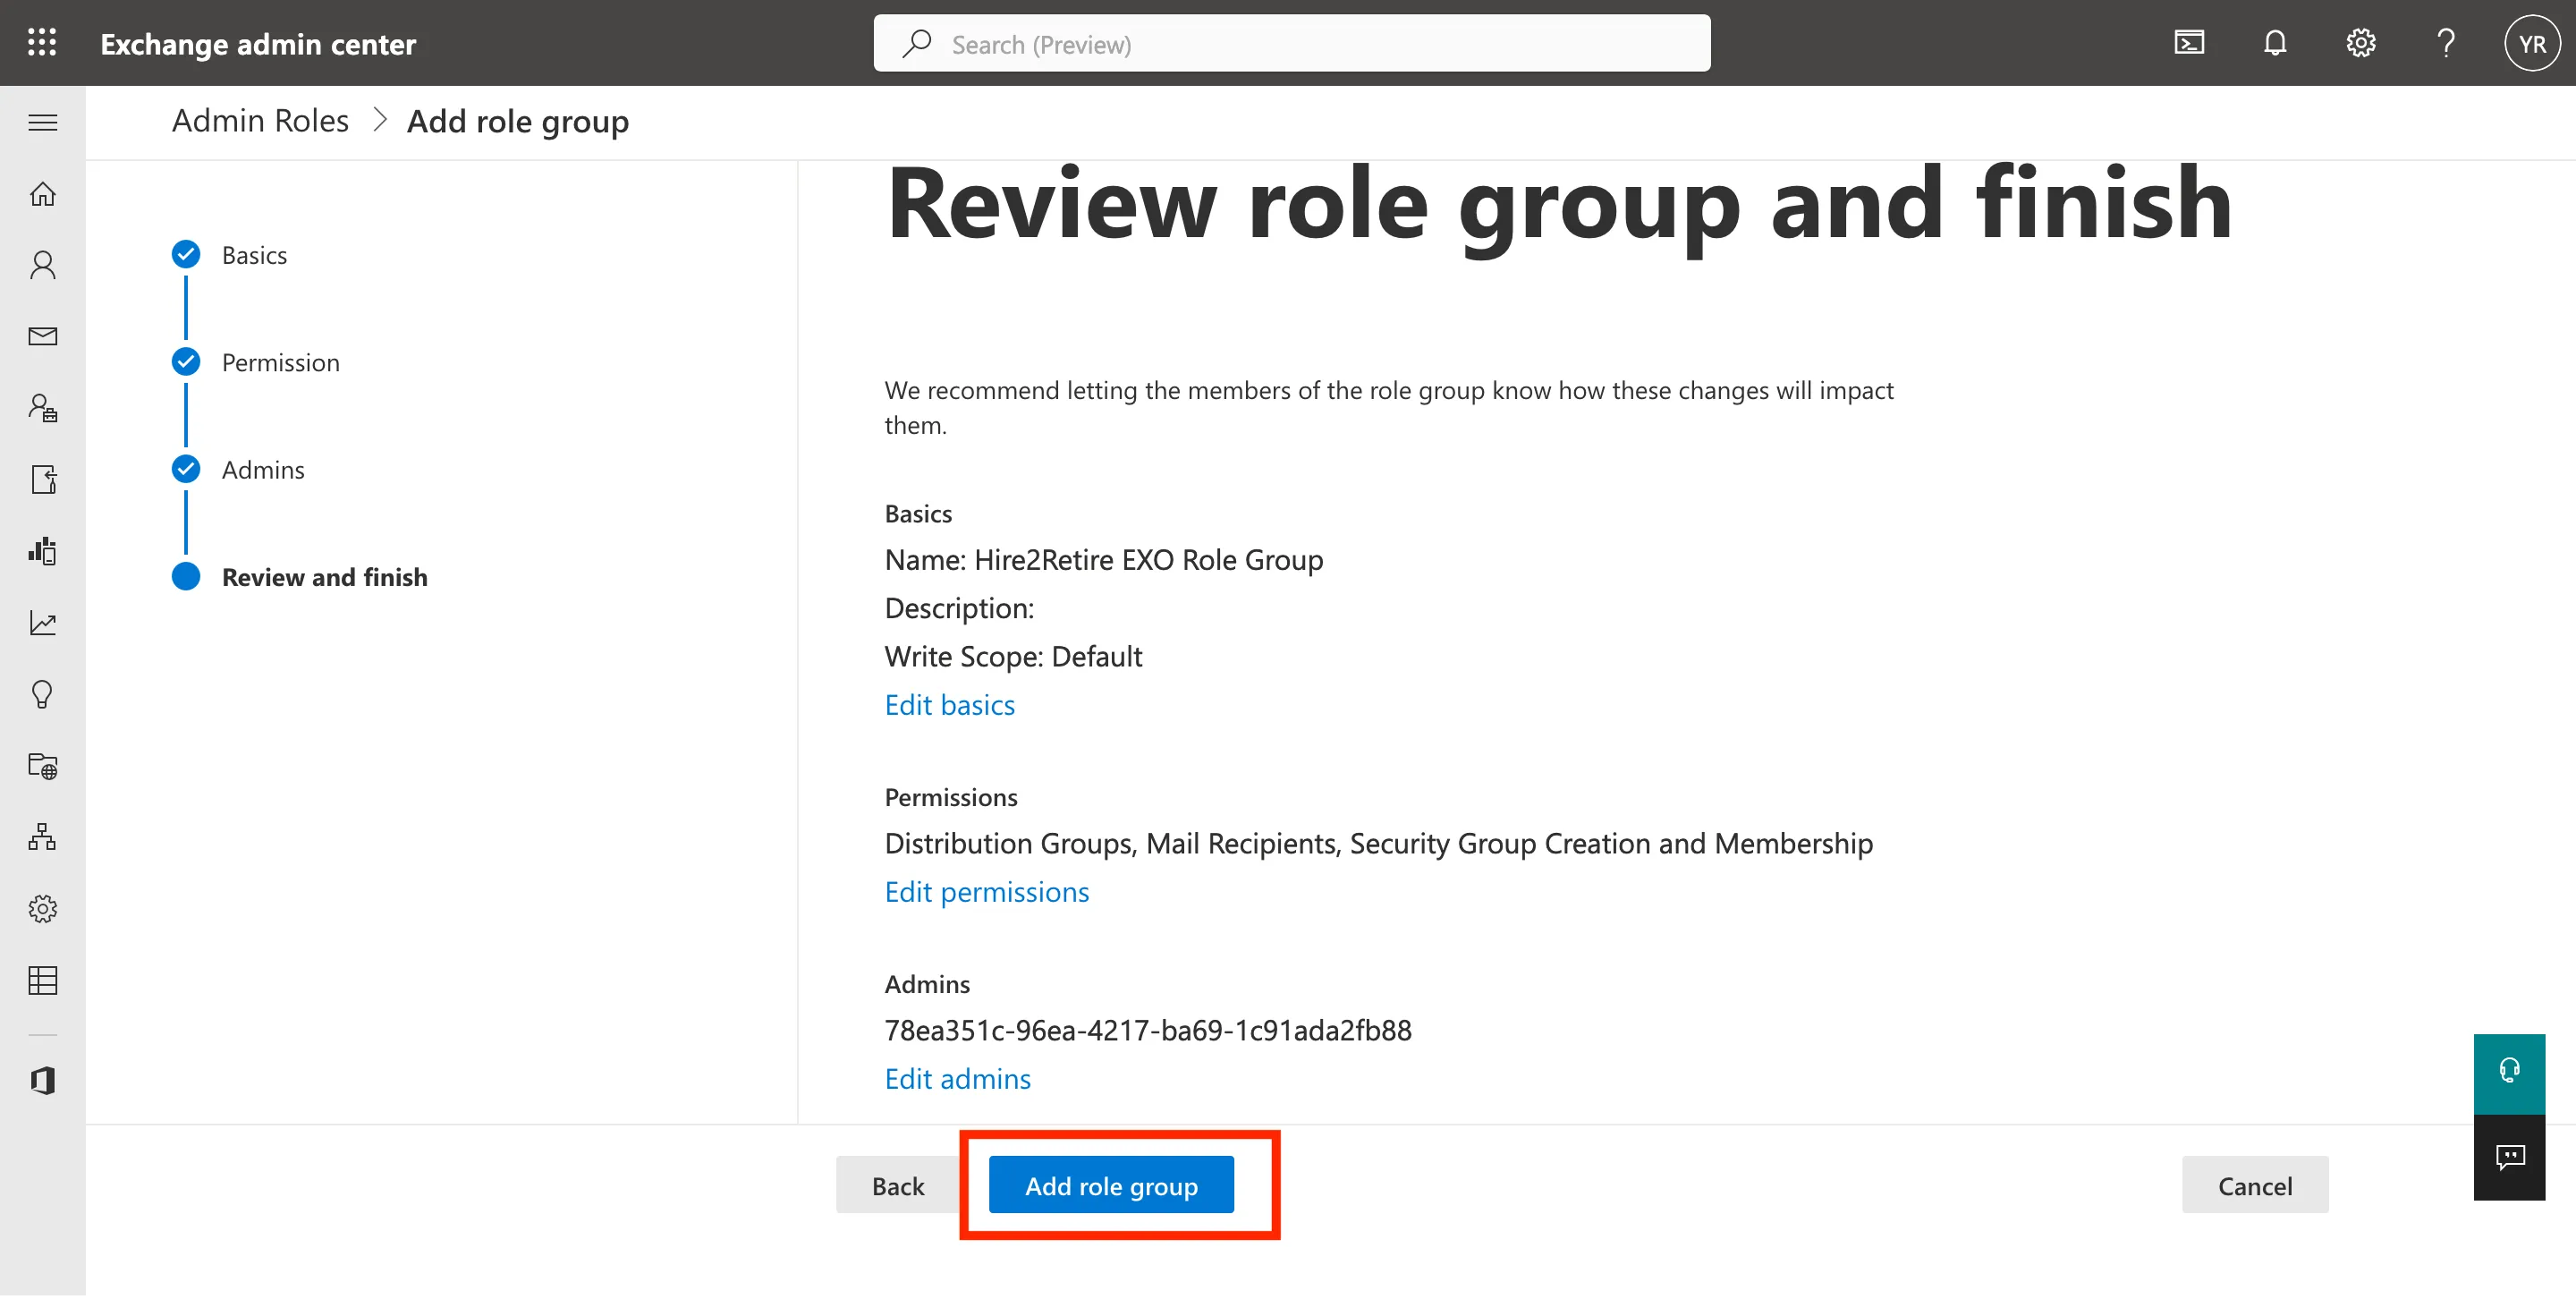 Figure 6. Review the Role Group to be created.