Connection
Zendesk on Hire2Retire uses OAuth Authentication. Please refer to the document Zendesk API documentation to know more about OAuth Authentication in Zendesk.
We at RoboMQ pay atmost attention to keep your account secure. See our Security and Privacy Policies to learn more about how RoboMQ handles your account access.
Link Zendesk account on Hire2Retire
Step 1. Register OAuth Client Application in your Zendesk.
How to Register OAuth Client Application?
-
Login to your Zendesk Admin Center
-
Click
Apps and Integrationsin the sidebar, then selectAPIs>OAuth clients.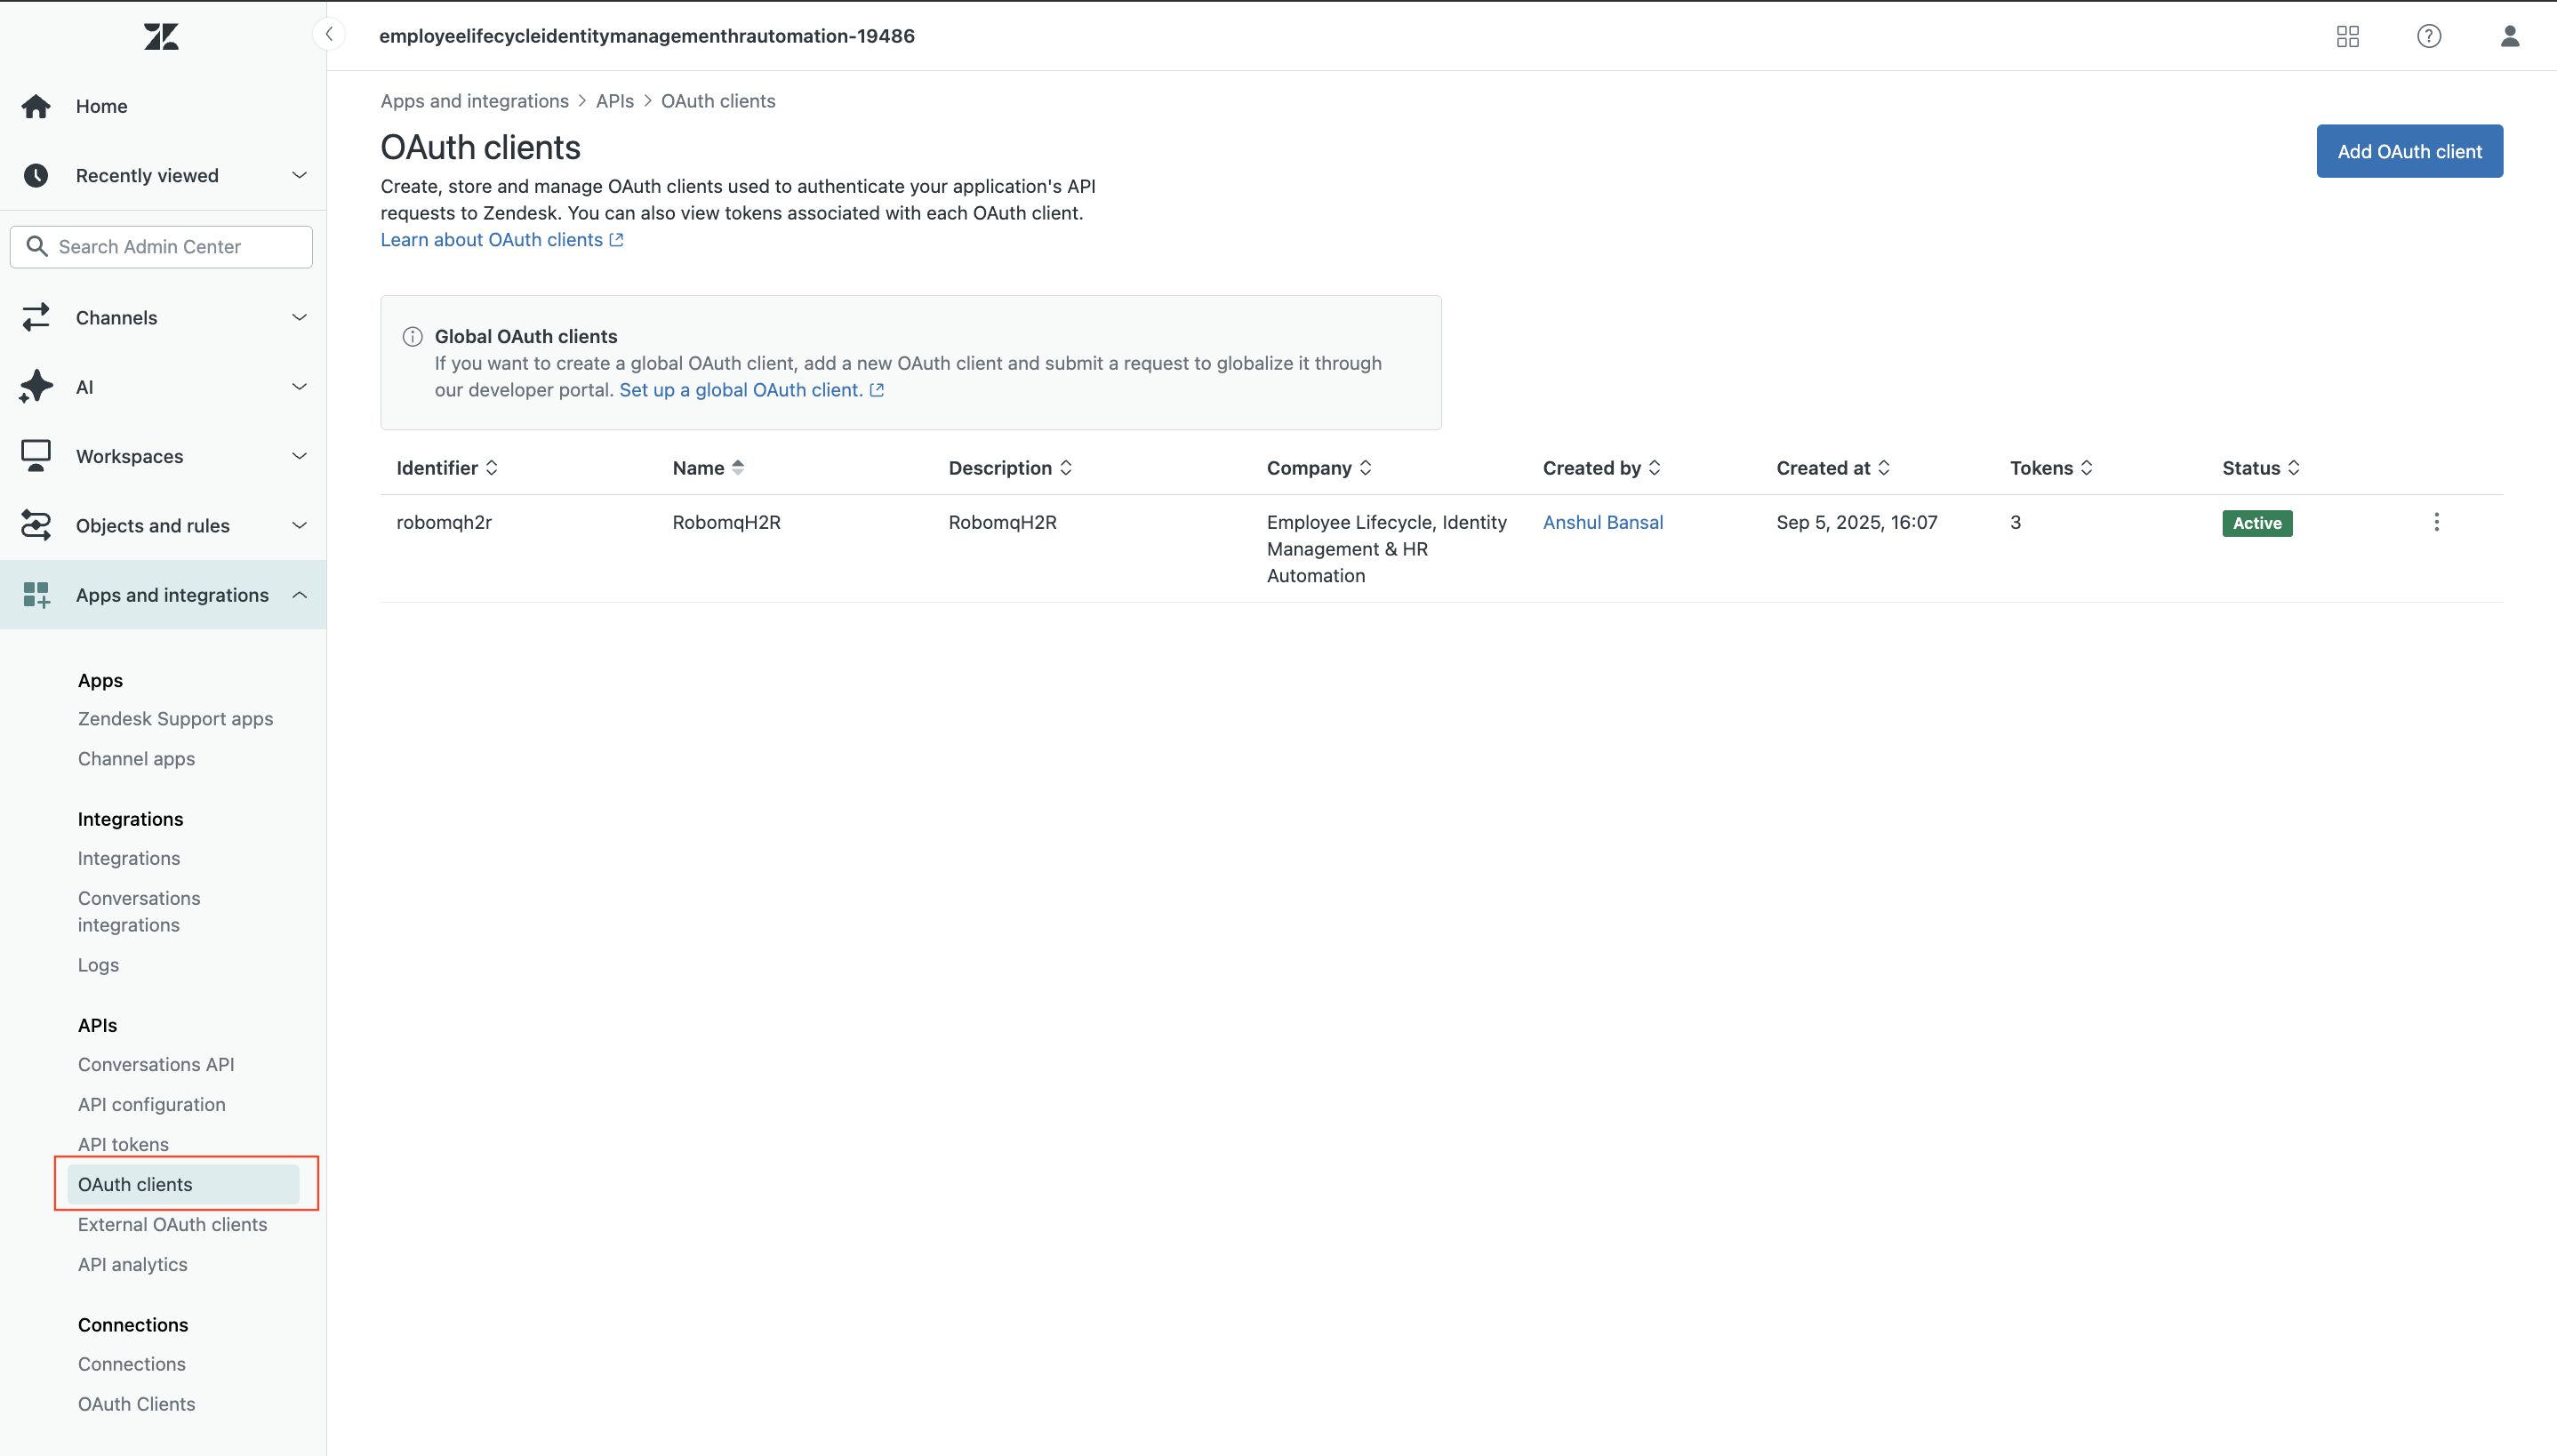 Figure 1. Apps and Integration on Zendesk
-
Click the
OAuth Clients, and then clickAdd OAuth clienton the right side of the page.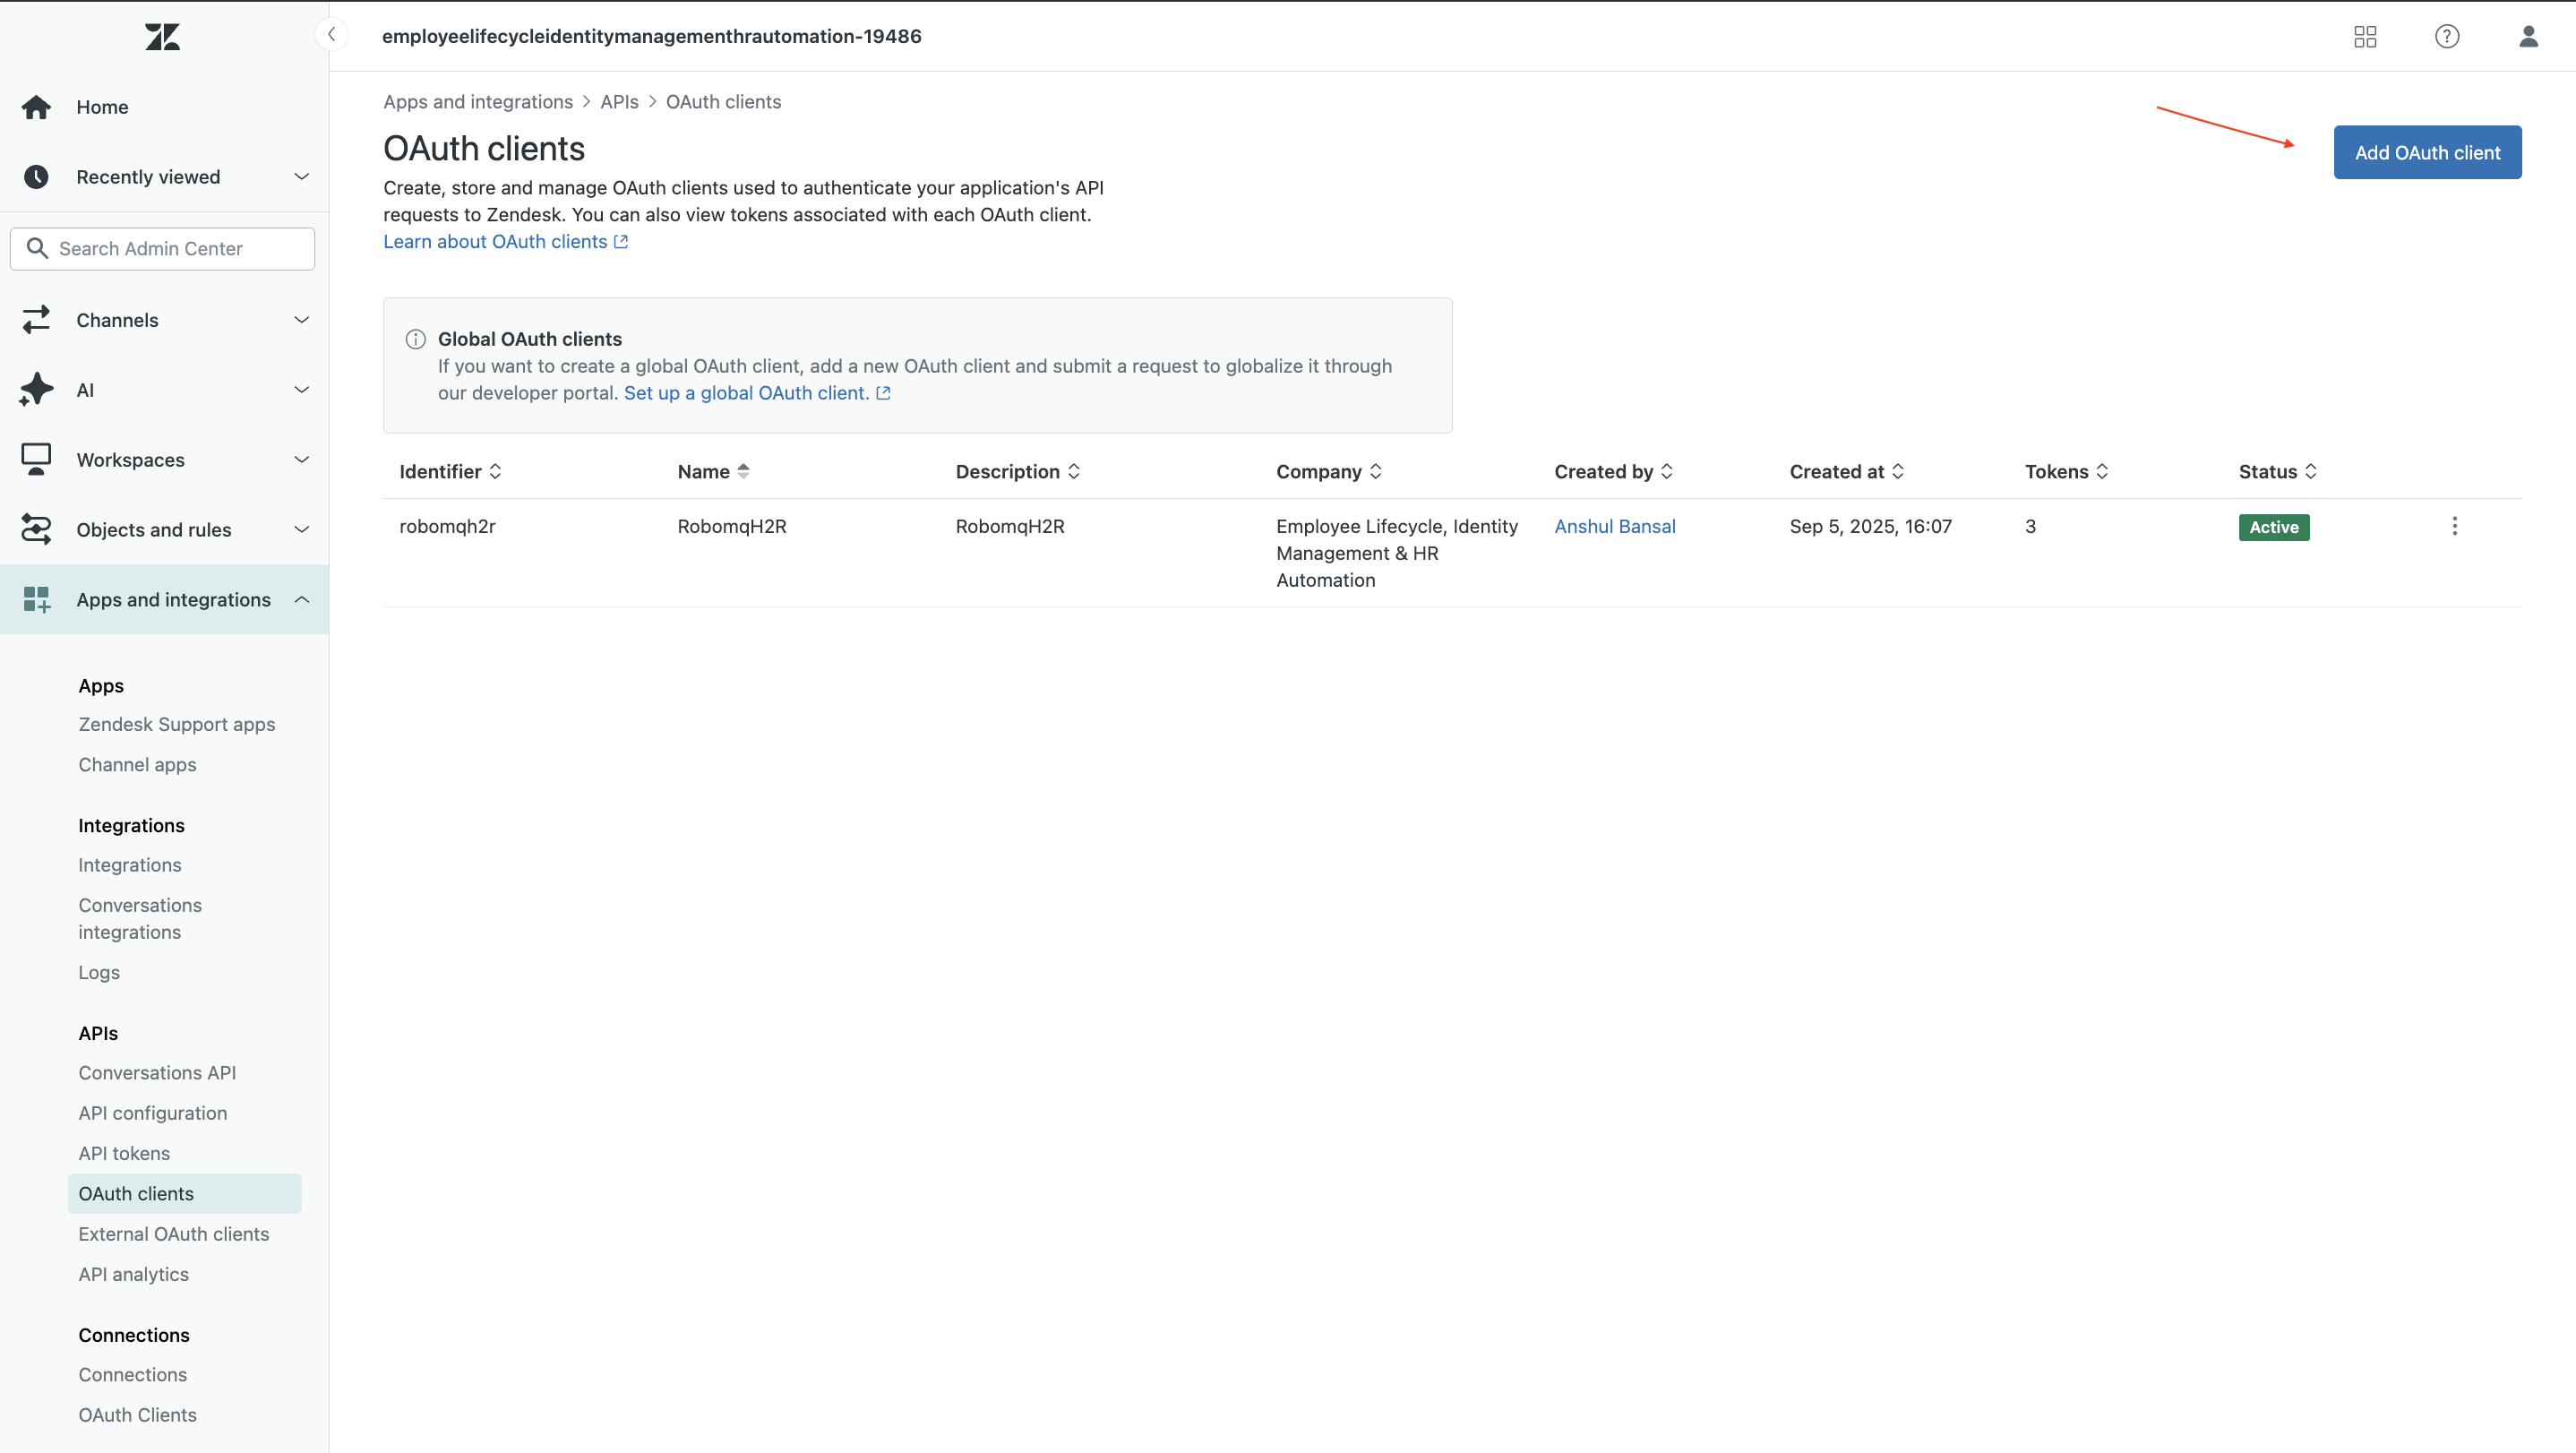 Figure 2. Add OAuth Client on Zendesk
-
Fill name, description, company, select logo, unique identifier (Client name acts as the client id), and redirect URL (Pod redirect URL i.e.,
https://hire2retire.robomq.io/api/auth/callback/Zendesk), and click on theSavebutton.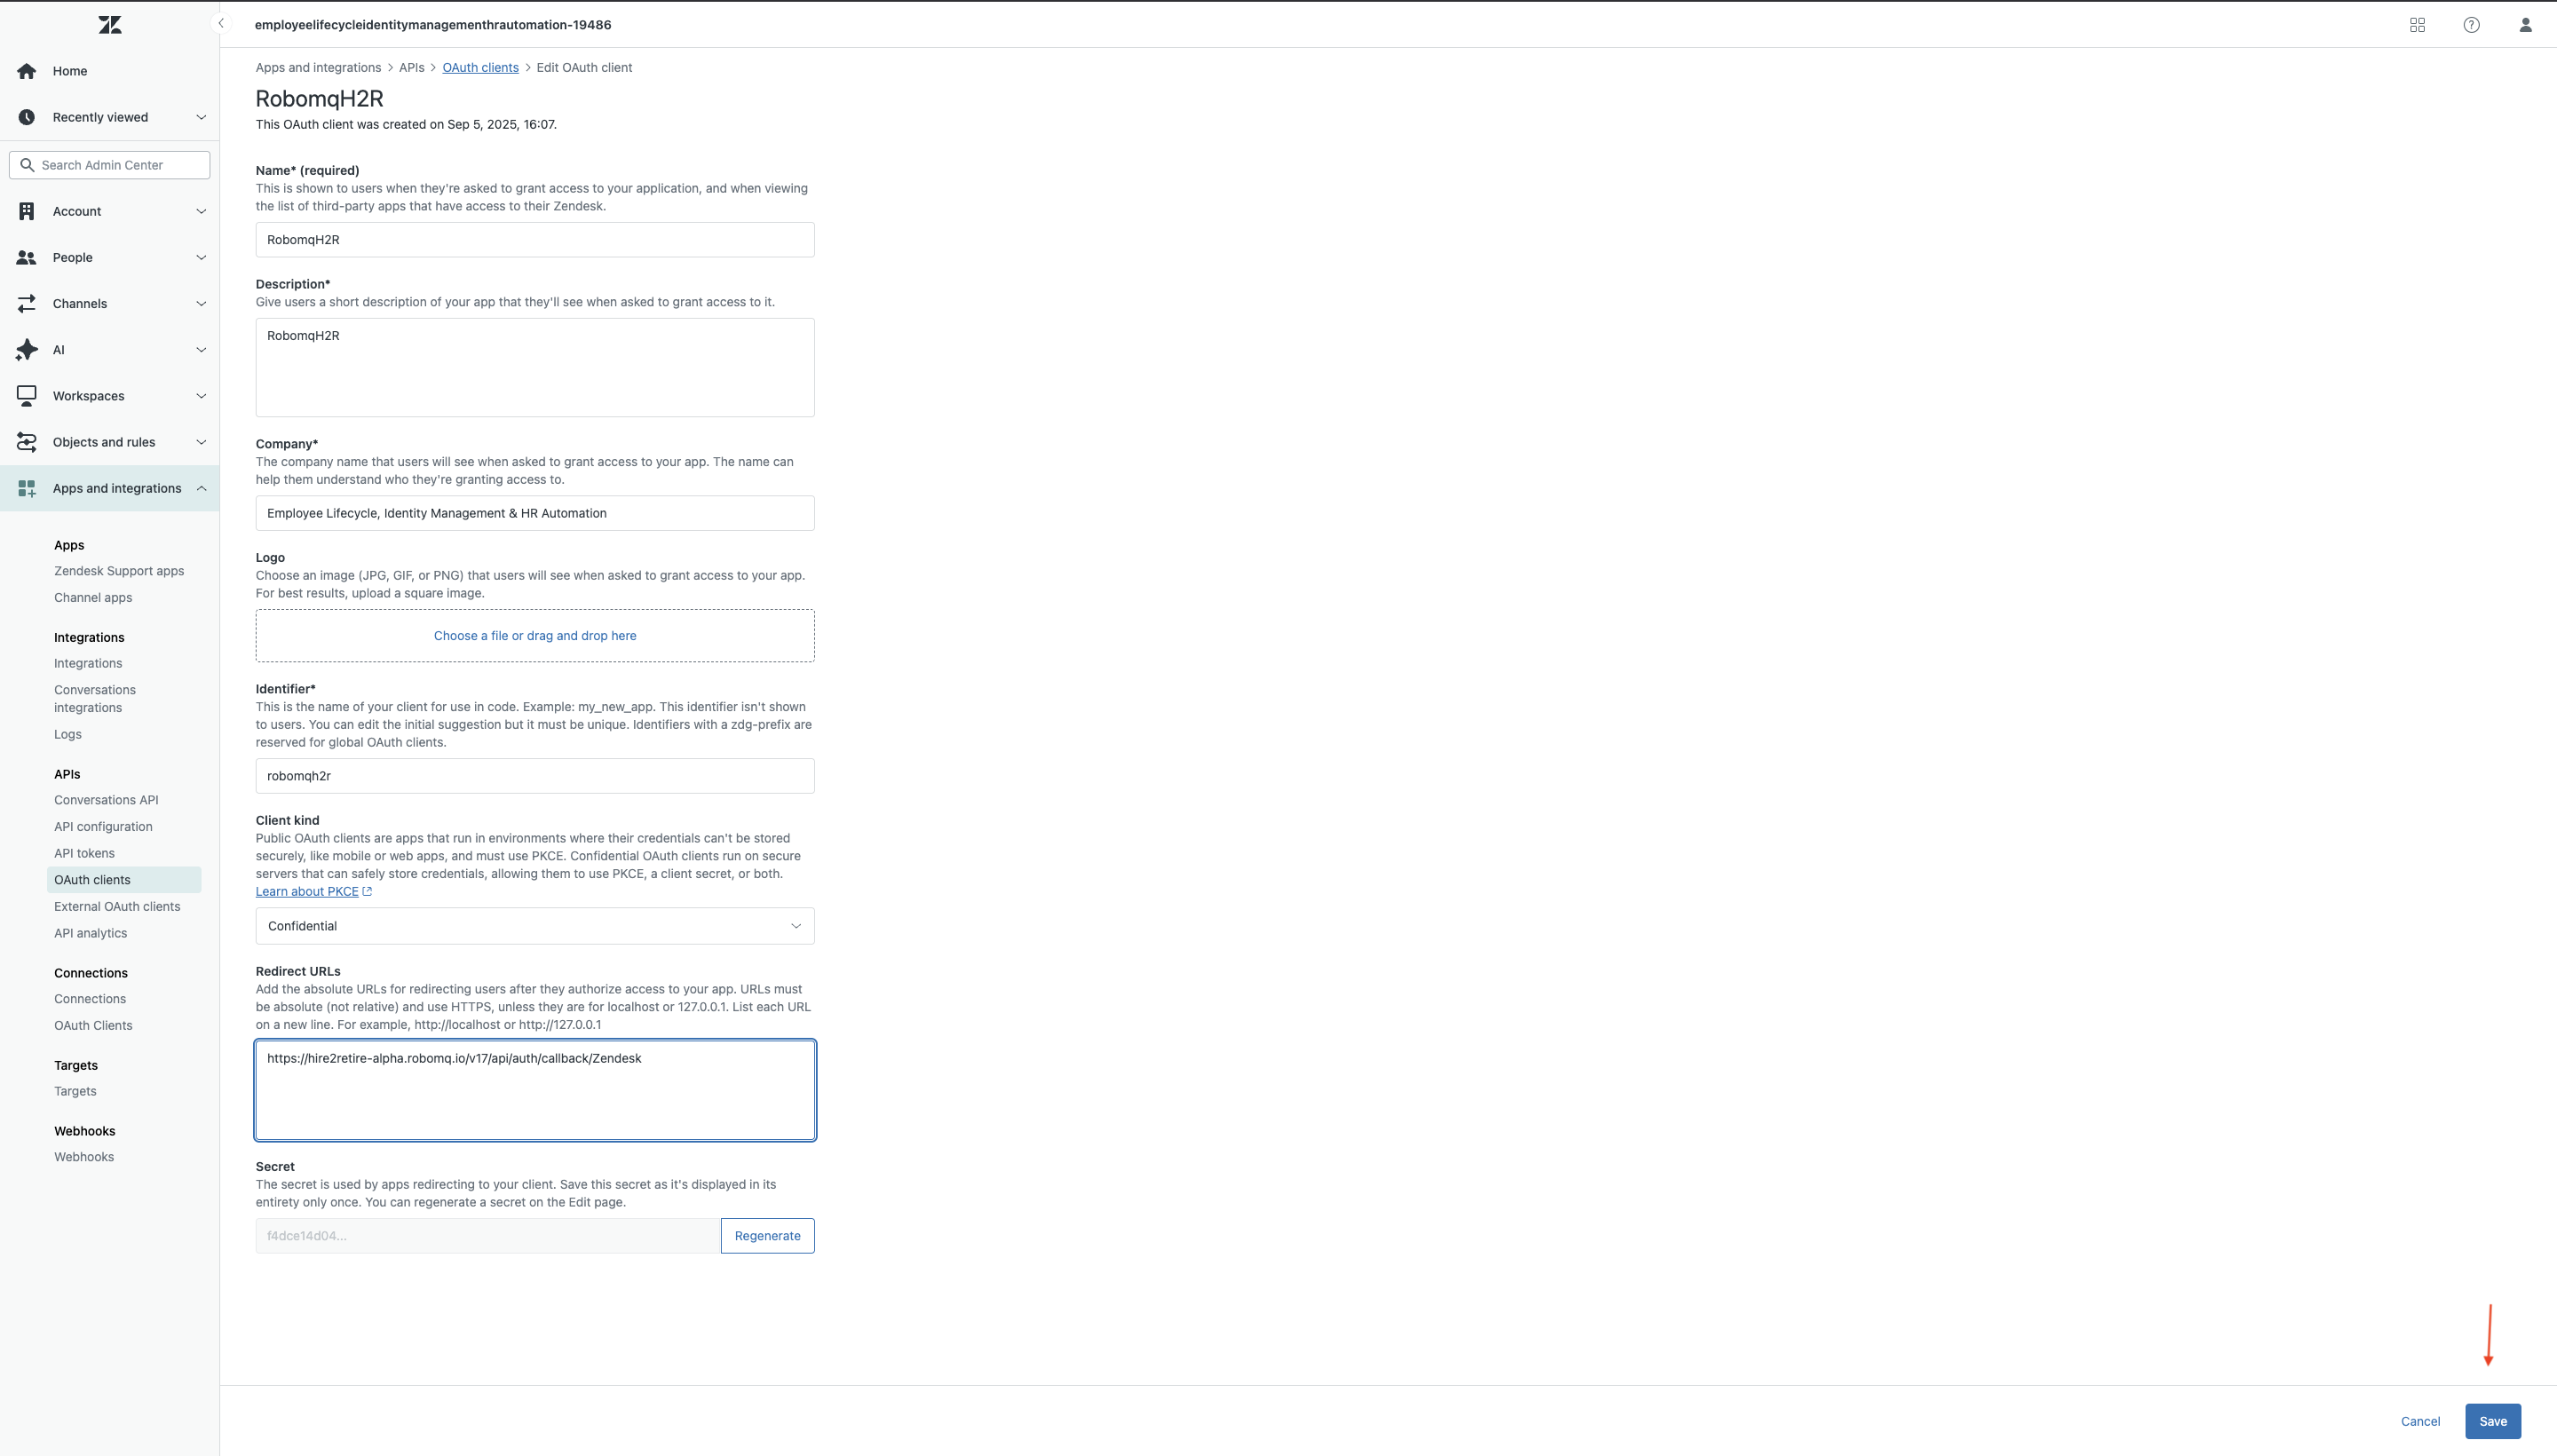 Figure 3. Provide necessary details on OAuth Client App
-
After Save, it will generate Client Secret.
Step 2 Specify your Zendesk Domain Name. When you open your Zendesk account on the browser, you can find the Zendesk Instance URL as https://my-domain.zendesk.com.
Step 3 Provide the Client Secret that is generated by OAuth Client App and Client ID (Unique Identifier of OAuth Client App)
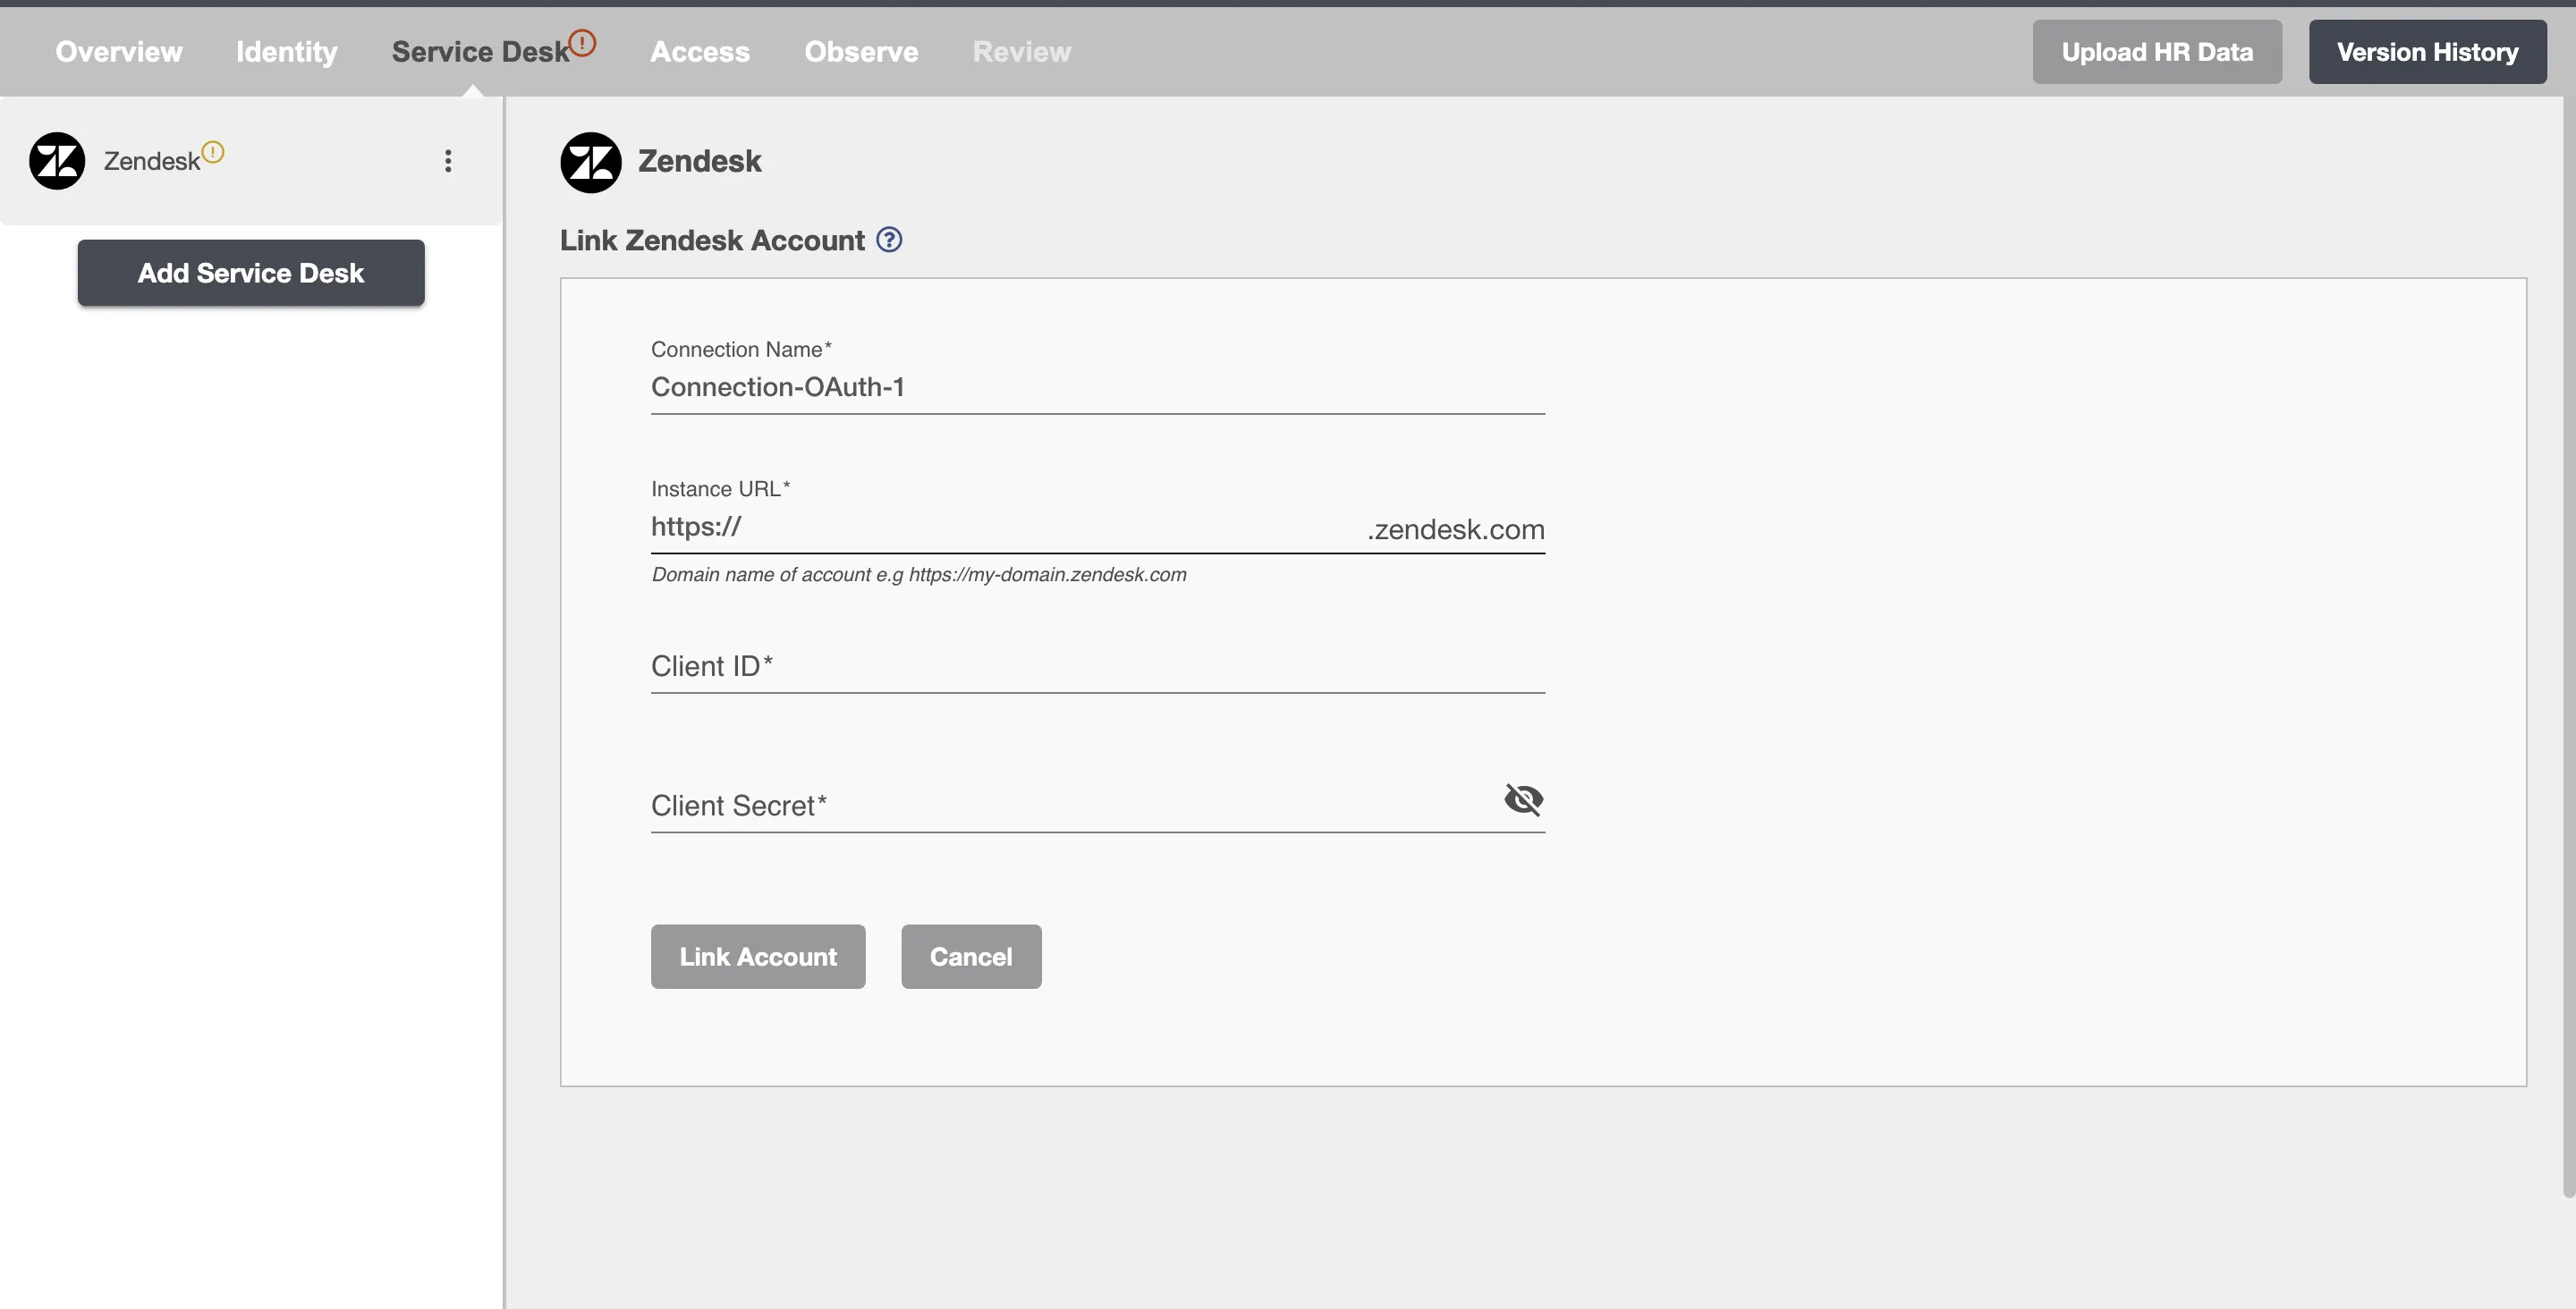
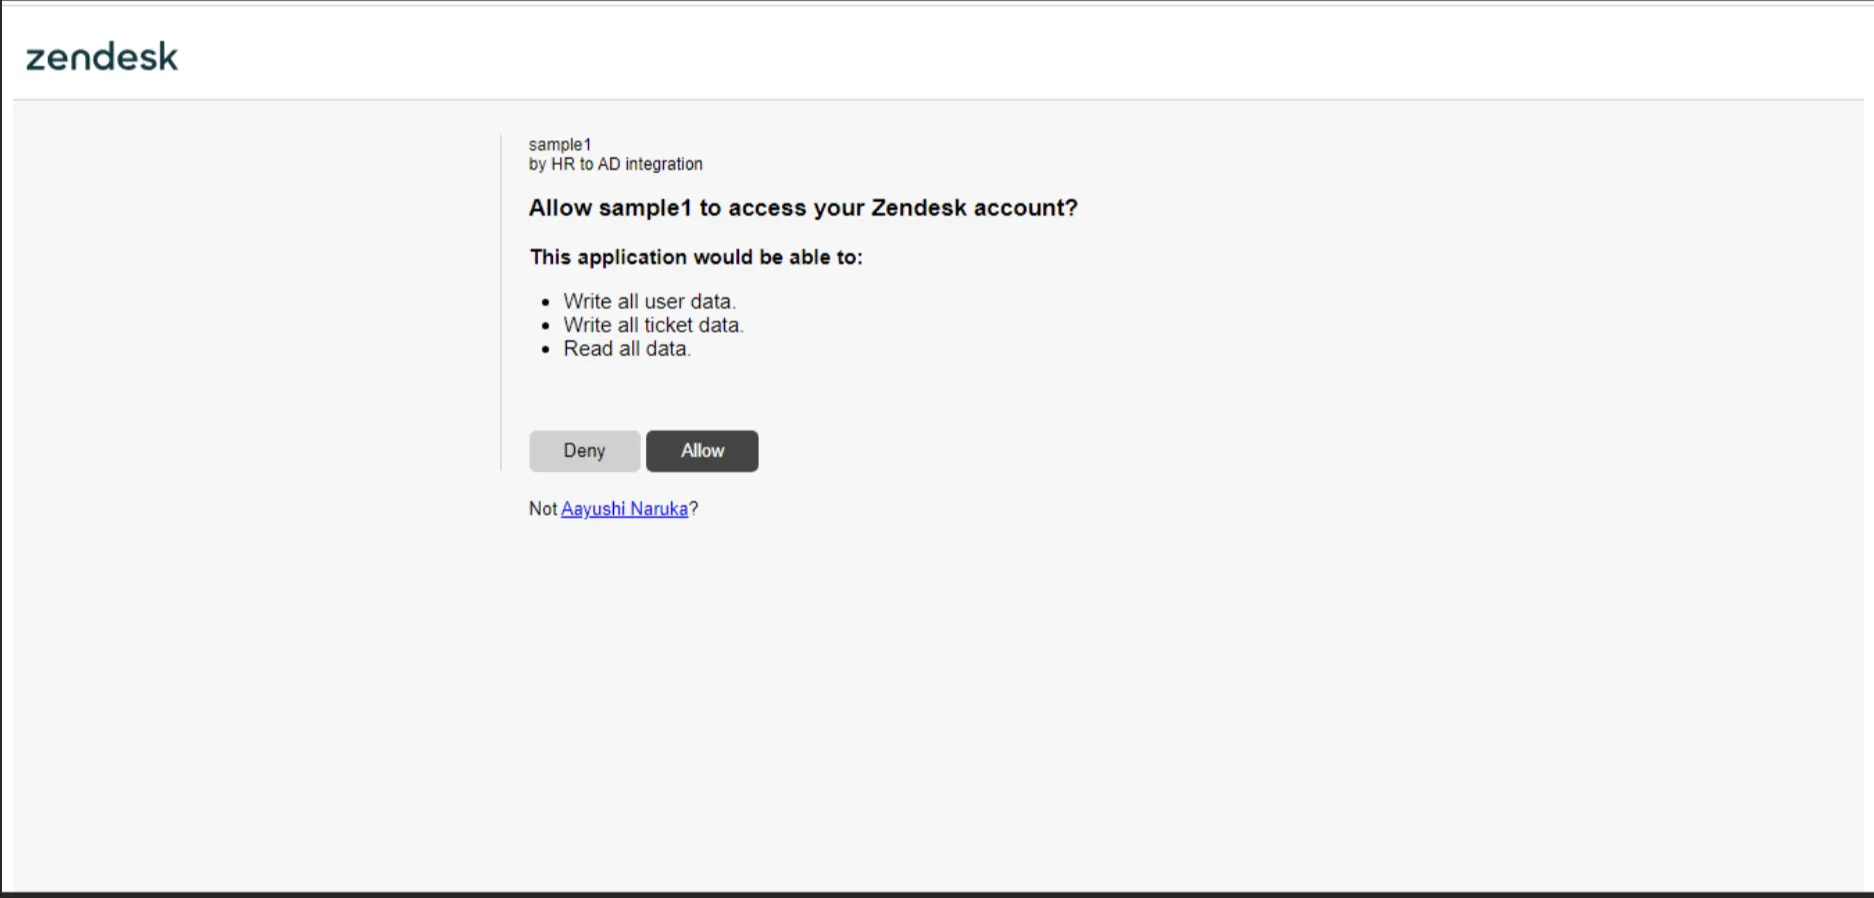
Step 4 Click on the Link Account button, it will redirected to consent screen for allowing scopes. This consent screen only shown first time for an OAuth Client App. Users need to allow scopes, then the connection will be created.