Connection
D365 on Hire2Retire uses OAuth 2.0 Client Credentials authentication.
Please refer to the link to set up OAuth client credentials on D365.
RoboMQ follows strict security and privacy standards. See our Security and Privacy Policies to learn more about how RoboMQ handles your account access.
Prerequisites for OAuth Client Credentials Setup
To configure OAuth Client Credentials authentication for D365, you need to:
Step 1: Register an App in Entra ID
-
Go to Entra ID > App registrations, and click New registration.
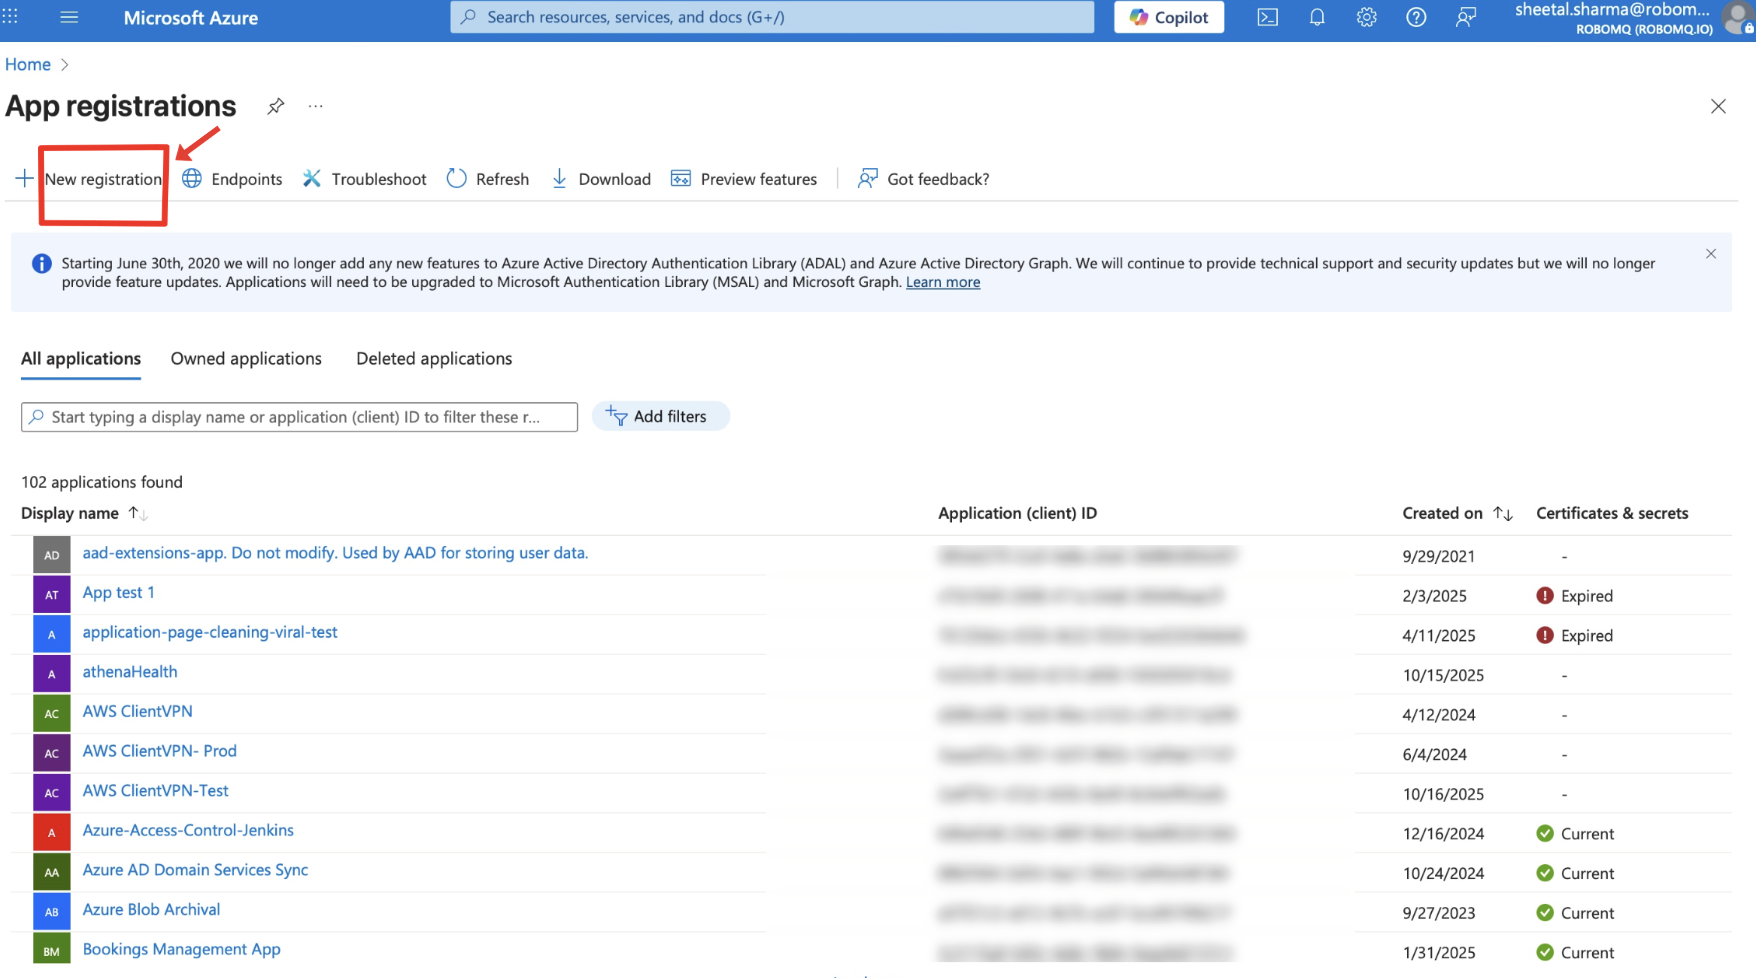 Figure 1. Navigate to App registrations in Entra ID
 -
Provide a name such as Hire2Retire-D365 Integration.
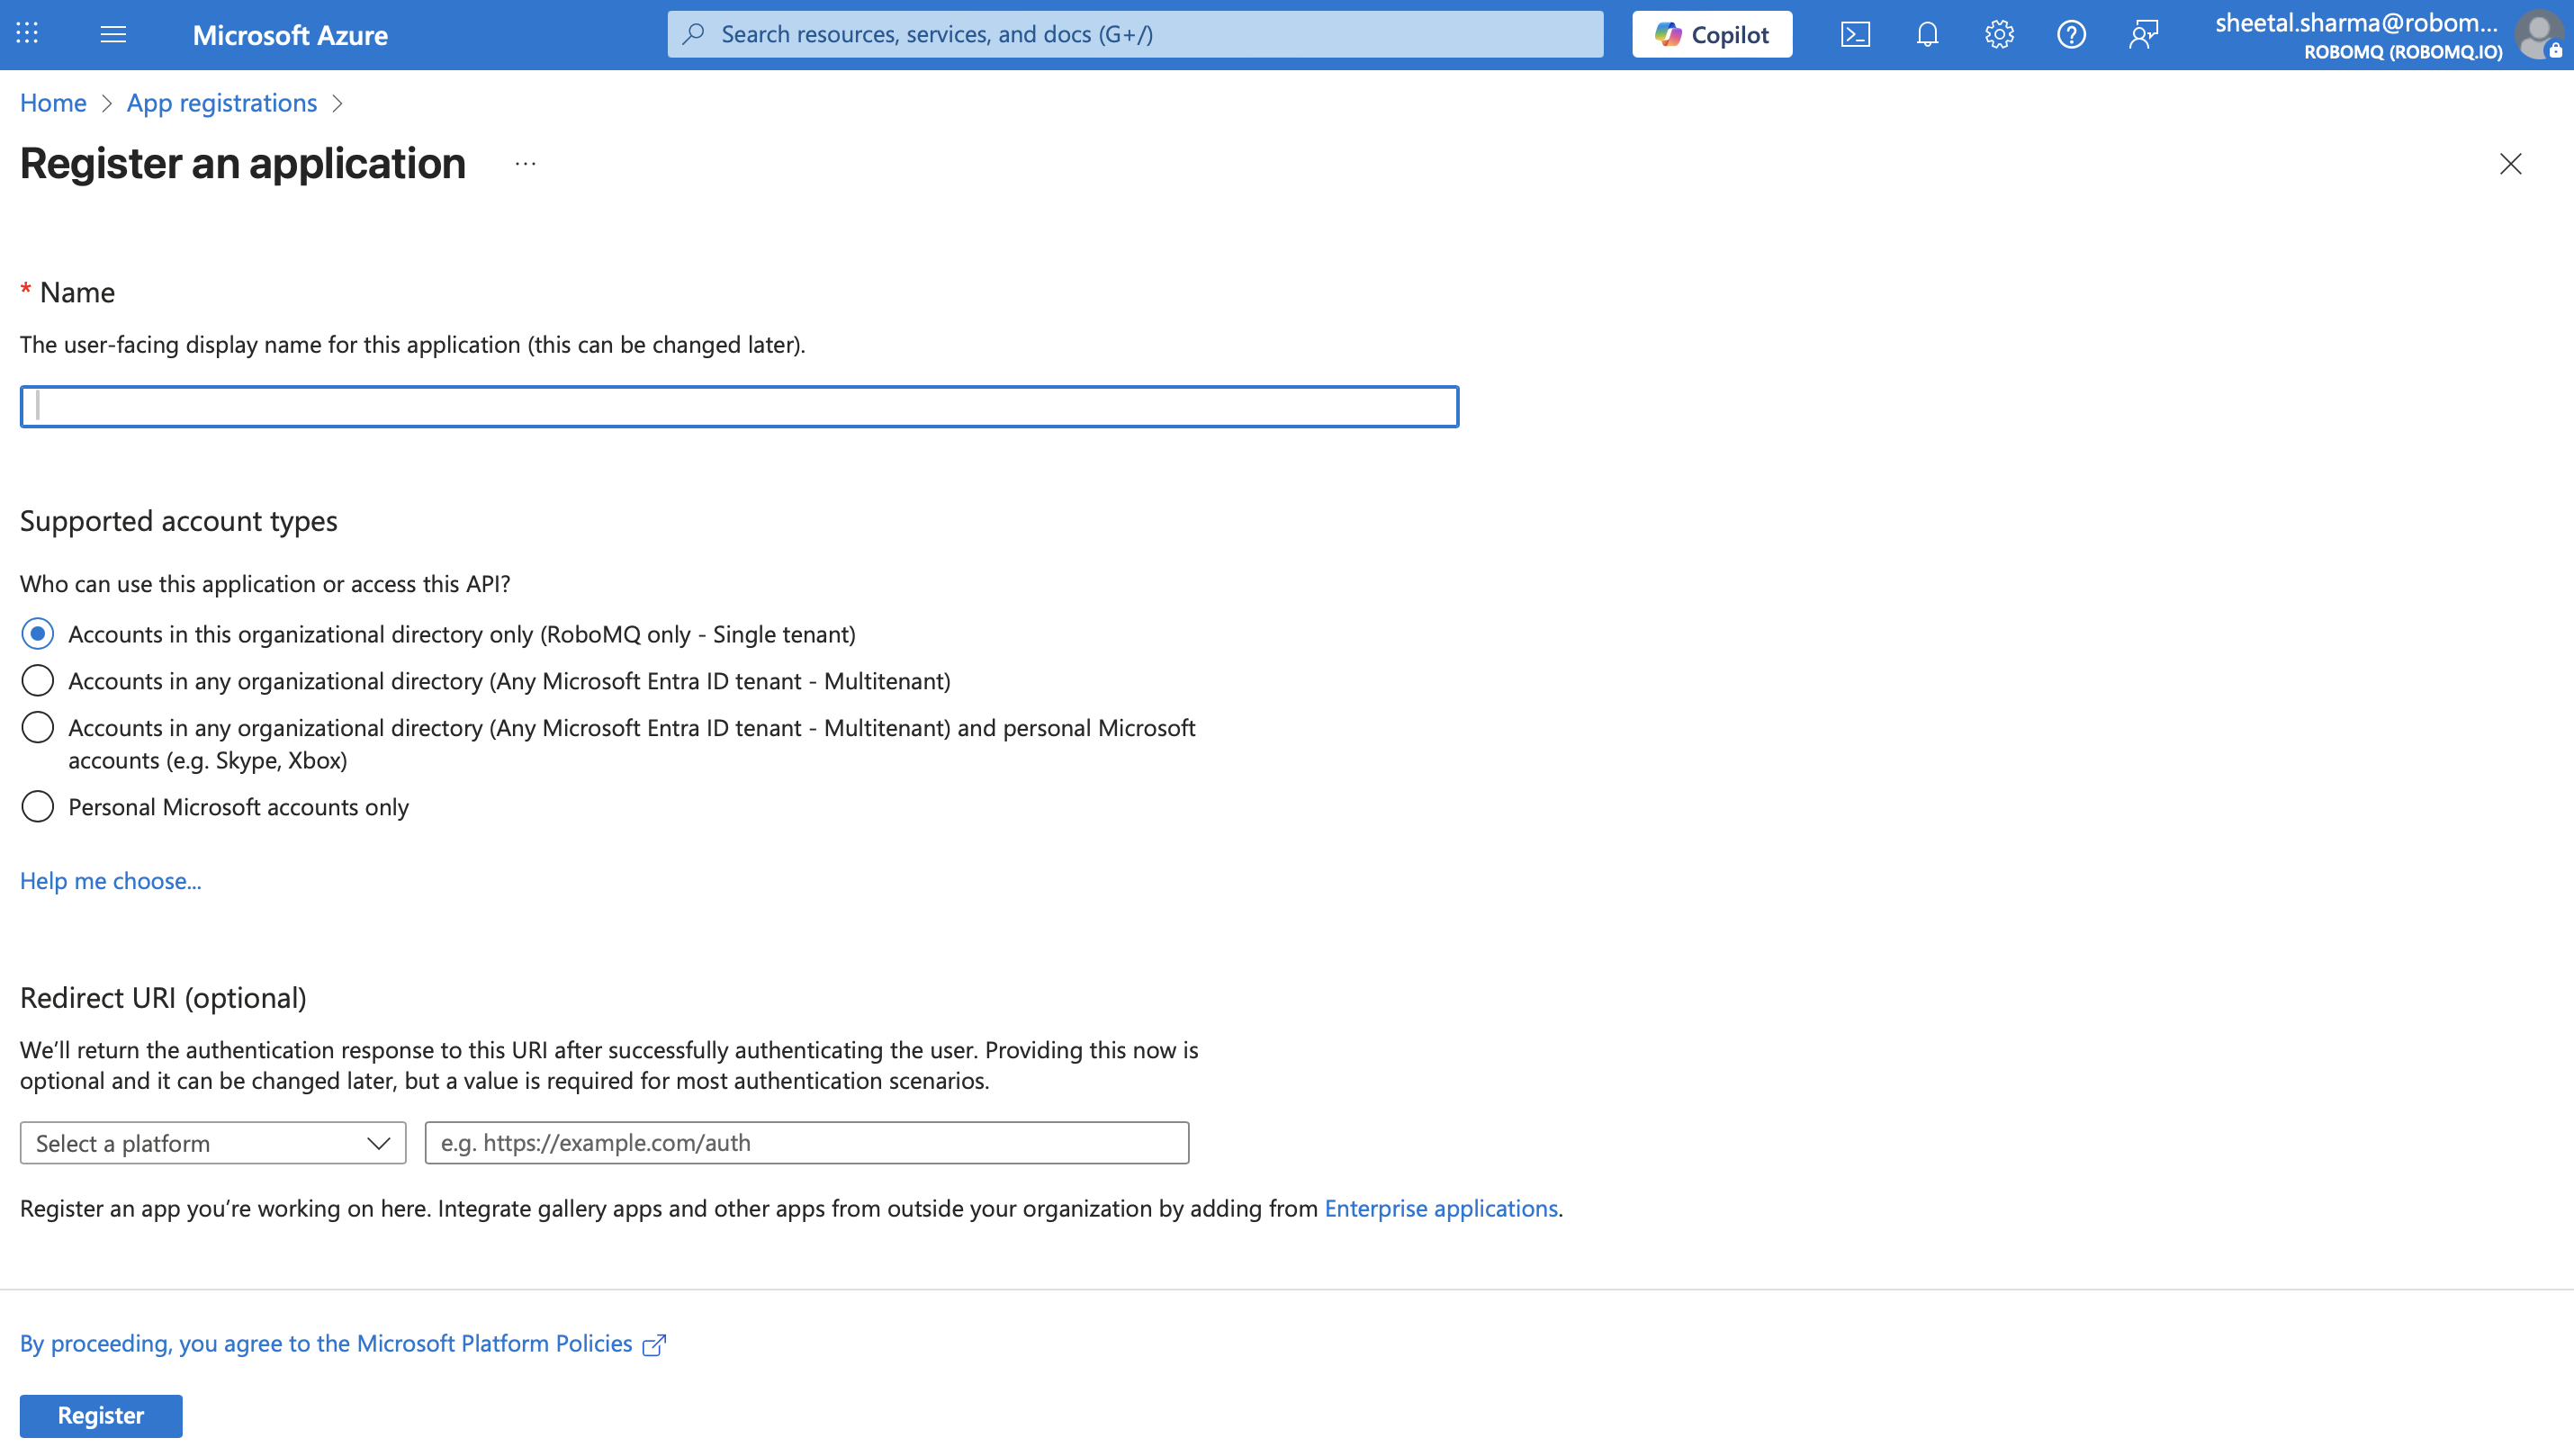 Figure 2. Register new application in Entra ID
 -
Under Supported account types, select Accounts in this organizational directory only.
-
Click Register.
-
Copy the Client ID of the app.
-
Under Manage, go to Certificates & secrets > Client secrets, and generate a new secret. Copy and store the Secret Value securely.
Step 2: Register the App in D365
-
In D365 Finance and Operations, navigate to: System administration > Setup > Microsoft Entra applications.
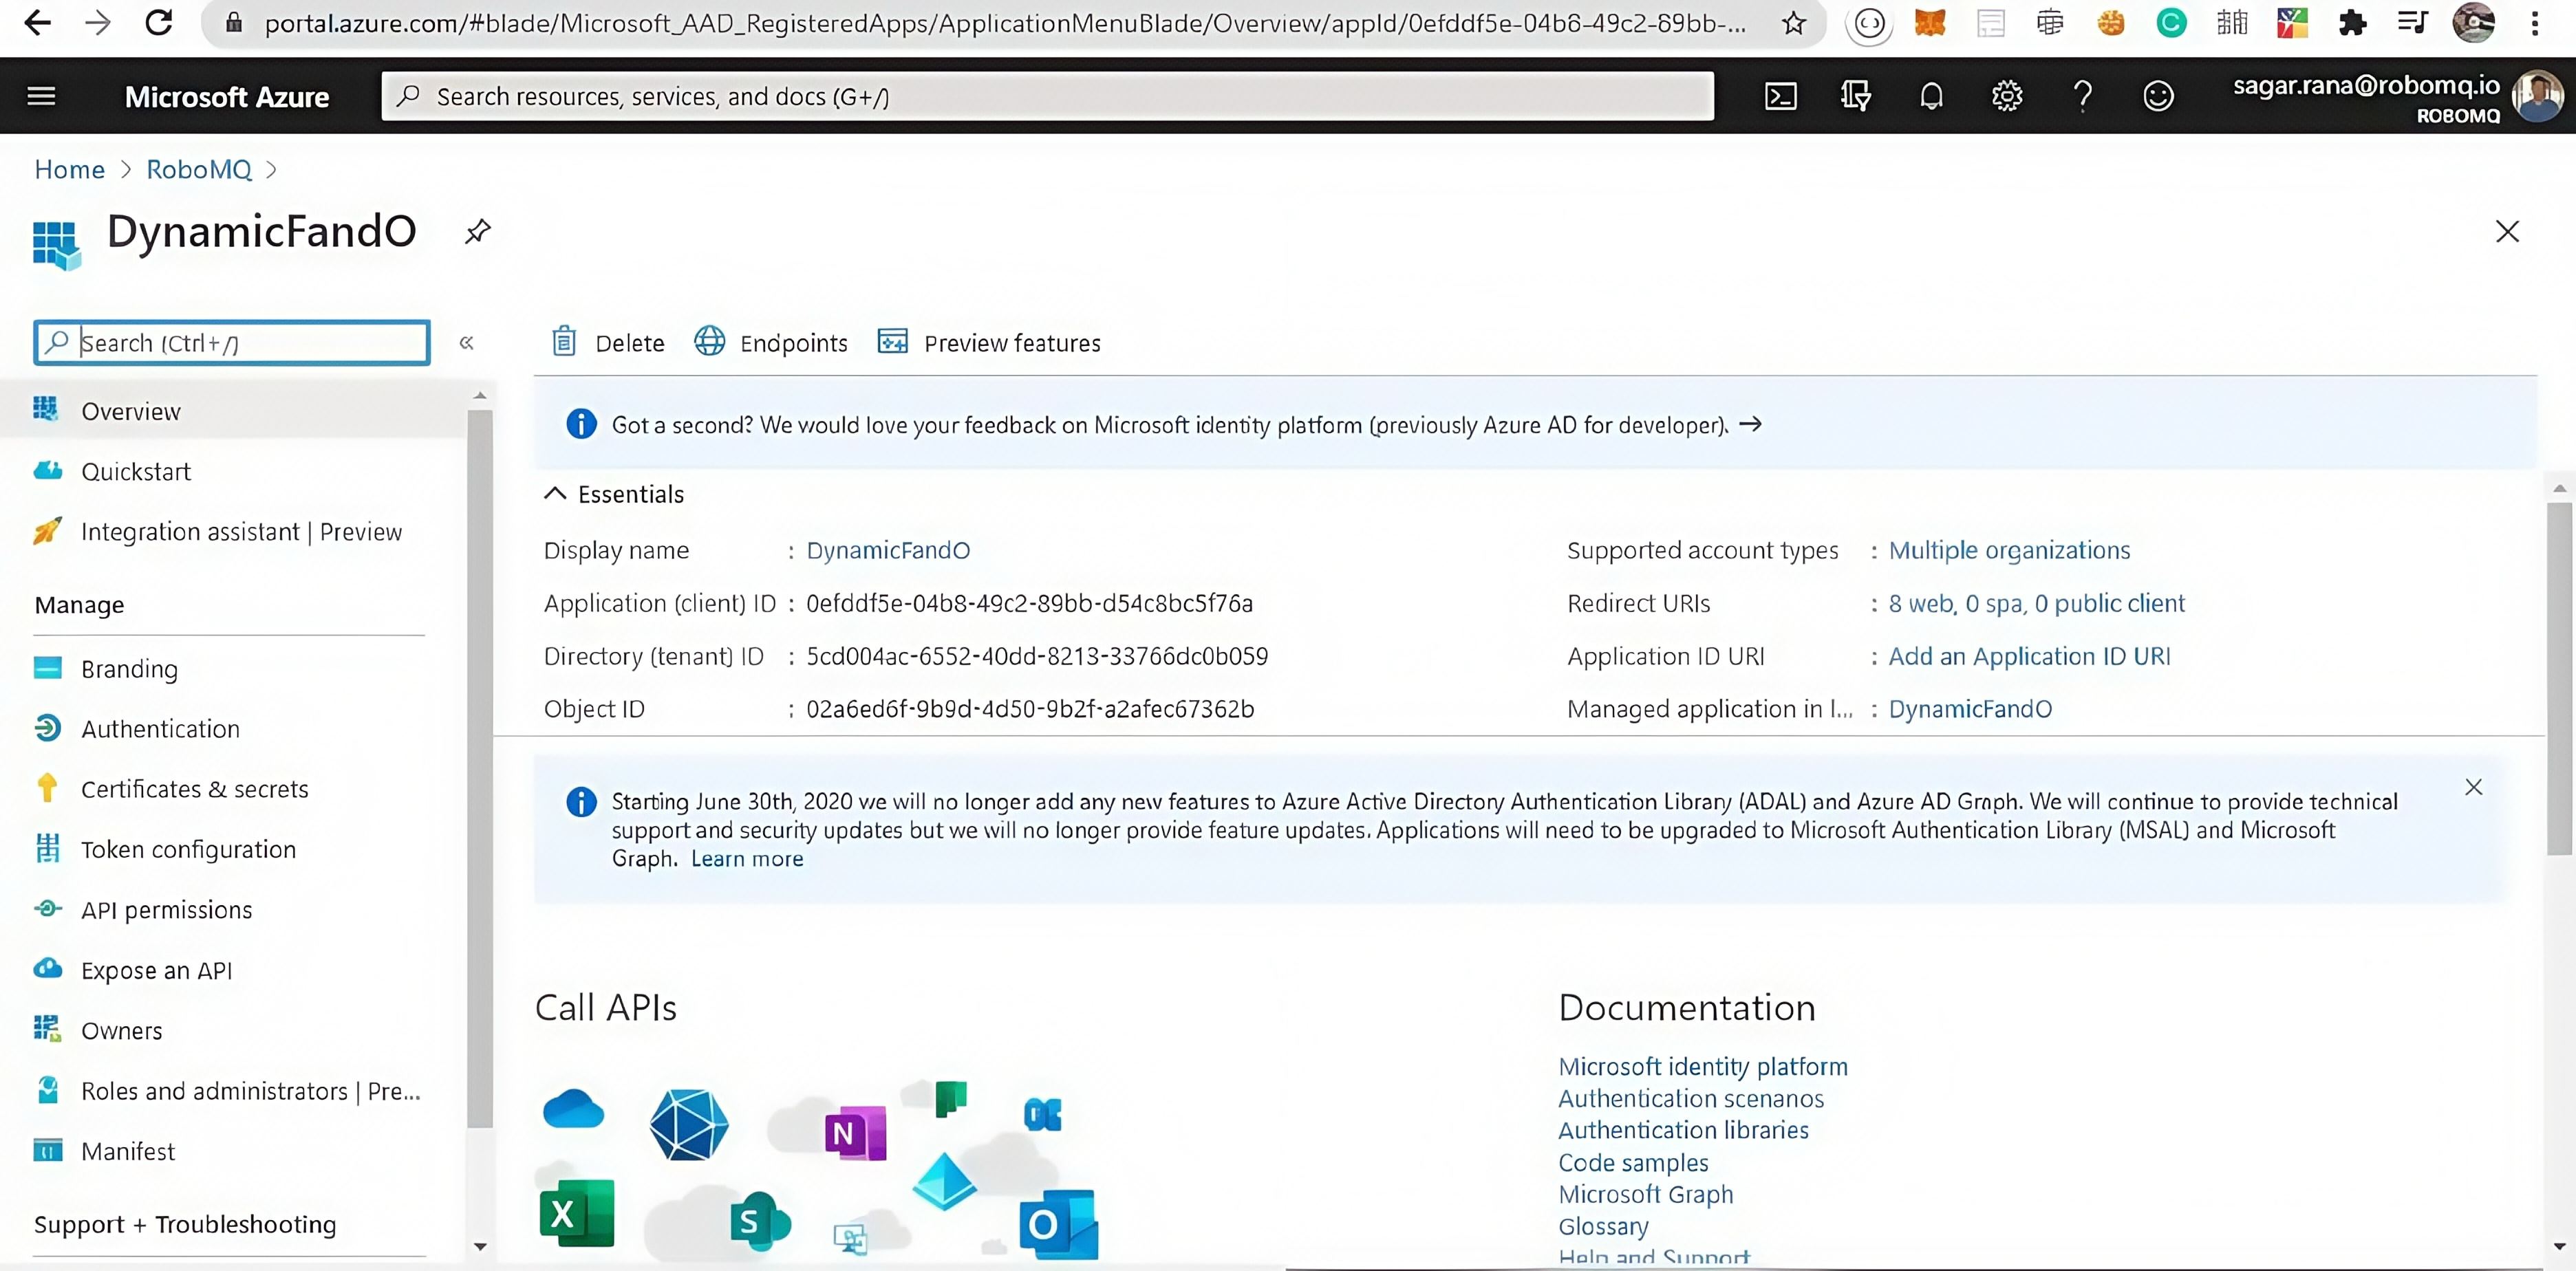 Figure 3. Navigate to Microsoft Entra applications in D365
 -
Click New and fill in the details:
- Client ID: The one you copied from Entra ID.
- Name: Any identifiable name.
- User ID: A service account that has Full OData permissions (preferably not an admin account).
-
Click Save.
 Figure 4. Save the application registration in D365
Link D365 account on Hire2Retire

To establish a connection to D365 on Hire2Retire Provisioning, follow these steps:
-
Instance URL: Enter your D365 organization URL
- Format:
https://yourorg.crm.dynamics.com
- Format:
-
Client ID: Enter the Application (Client) ID from your Azure AD app registration
-
Client Secret: Enter the client secret you created for the application
-
Tenant ID: Enter your Azure Active Directory tenant ID
Click the 'Link Account' button to establish the connection. The system will validate the credentials and establish a secure connection to your D365 environment.