HiBob API Integration
HiBob is a provider of cloud-based human capital management (HCM) solutions to employers. HiBob-API will use HiBob Rest API to fetch all the employees’ data.
Create a Connection
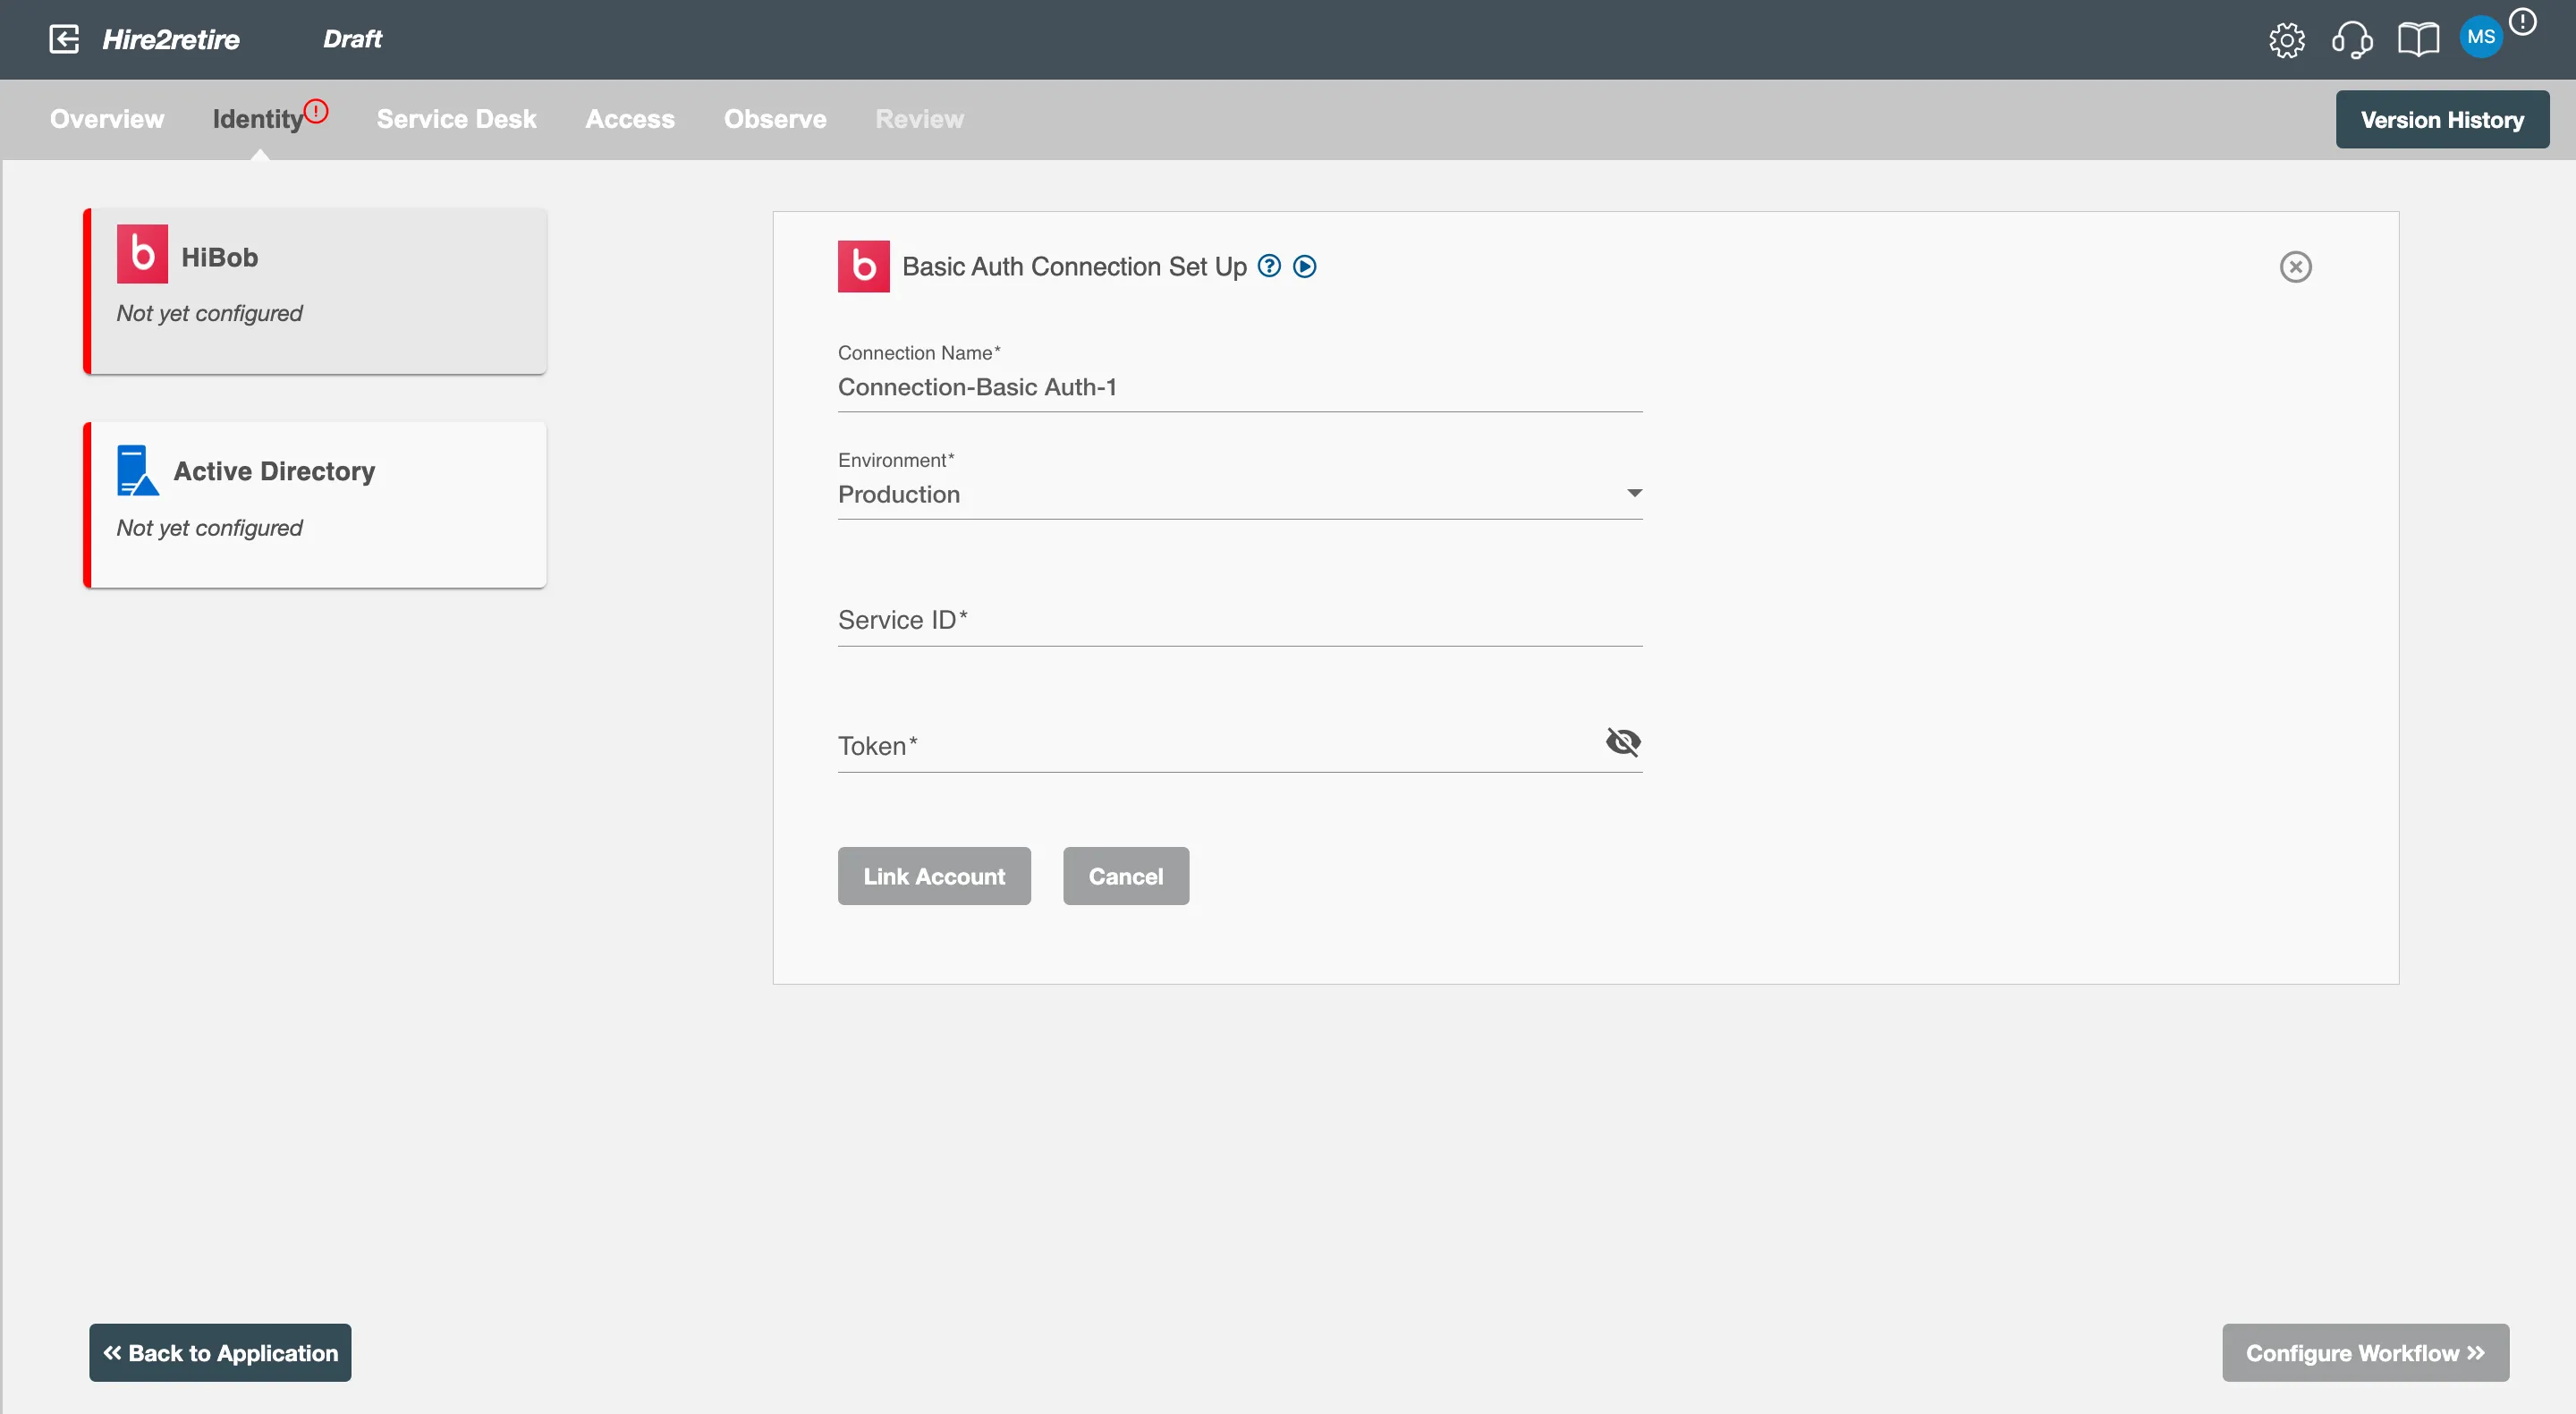
Hire2Retire requires the following details to create a connection with your HiBob server:
-
Connection Name - A user-defined nomenclature for your connection. By default, the connection name is "Connection-OAuth Client Cred", you can change the name as per your preference.
-
Environment - Select the desired Environment.
-
Service ID - This is the application service ID to interact with HiBob API. You will get the service ID created at the time of your registration on HiBob portal.
-
Token - This is the application token to interact with HiBob API. You will get the token created at the time of your registration on HiBob portal.
Create the Service User in your Hibob Account
1. In settings, go to integrations and click Manage Service Users.
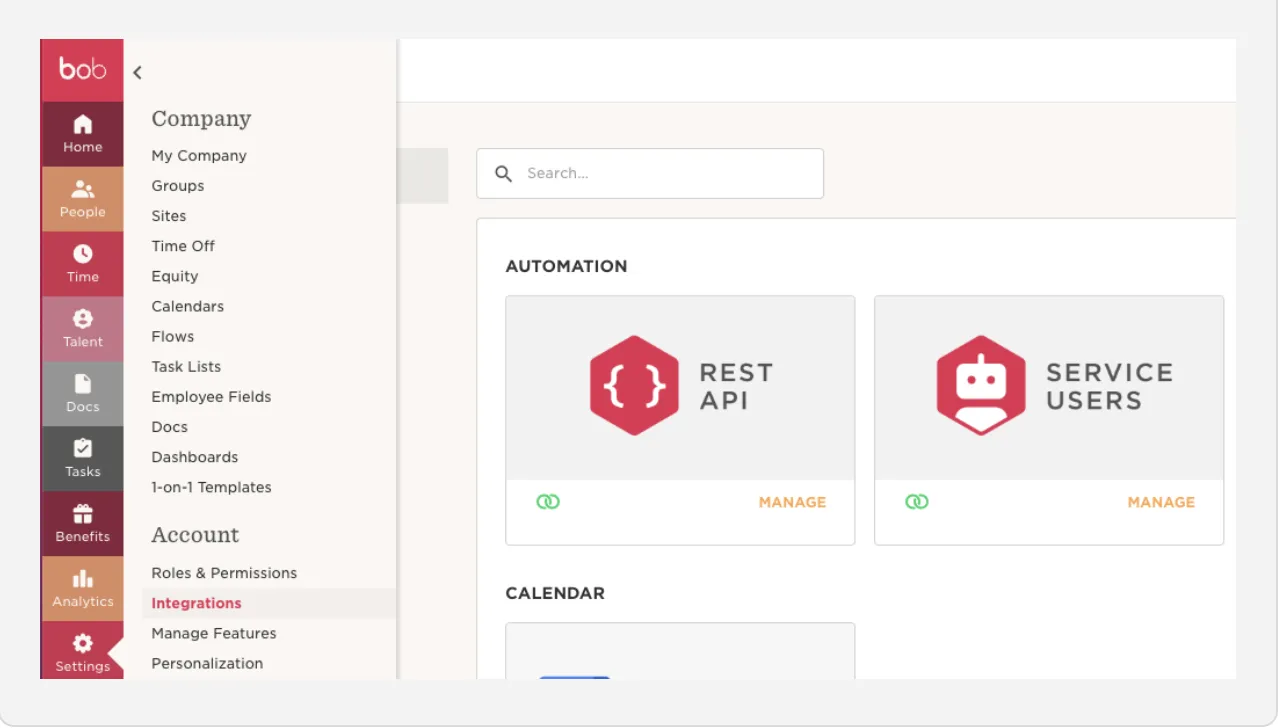
2. Create a new Service User and save the Service User ID and Token
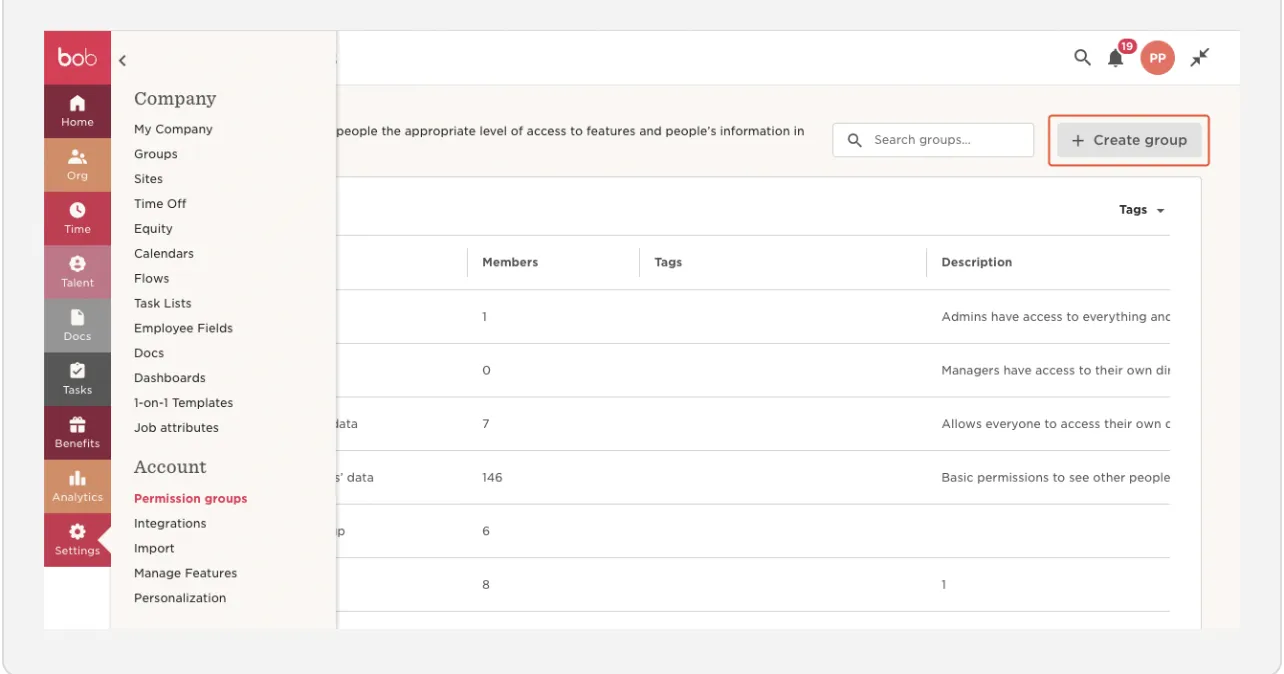
3. Back in your settings, go to Permission Groups and select Create Group.
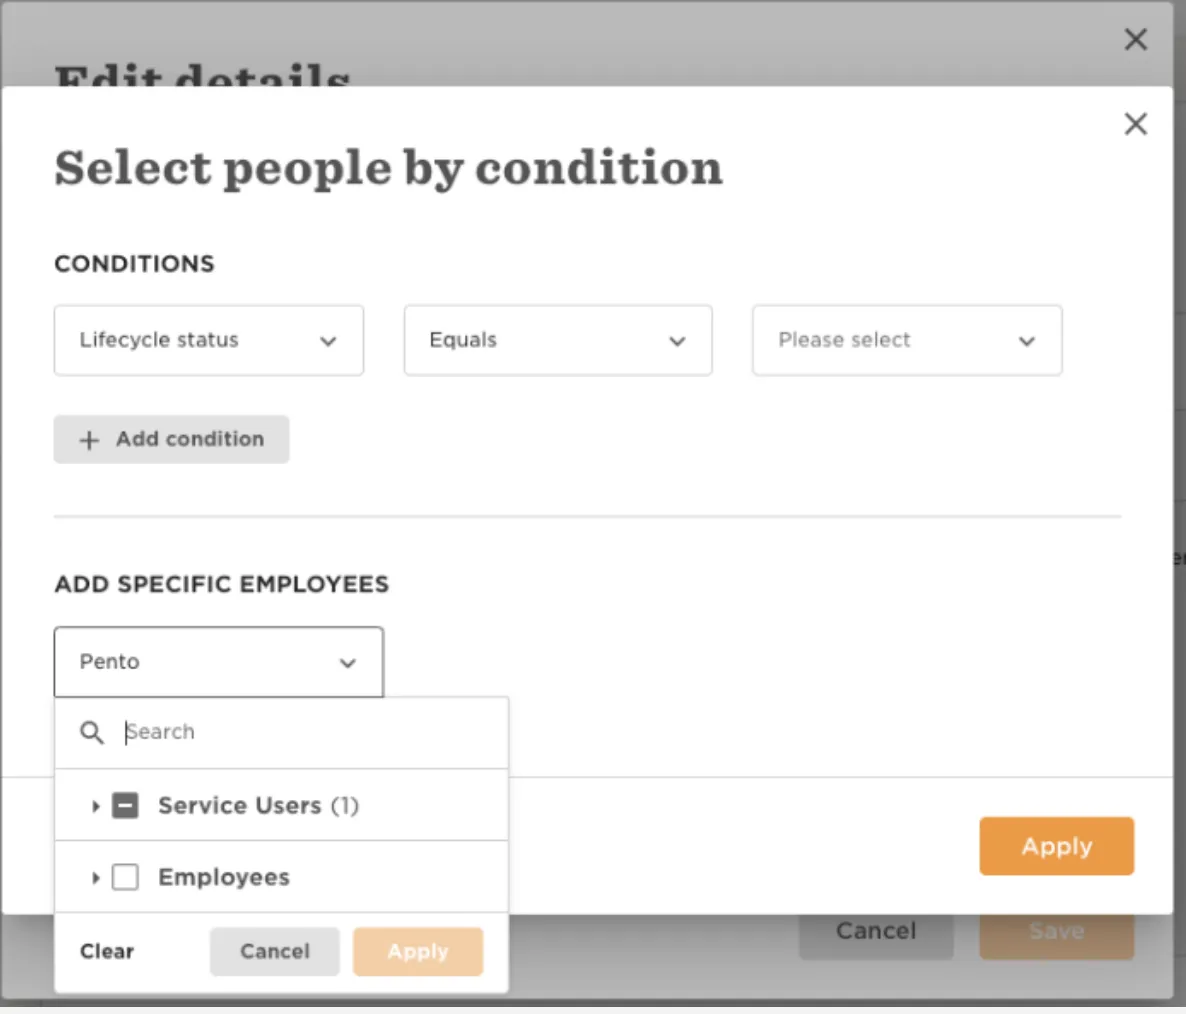
4. Name the group, then, in the Group members section, choose Select people by condition and select Edit.
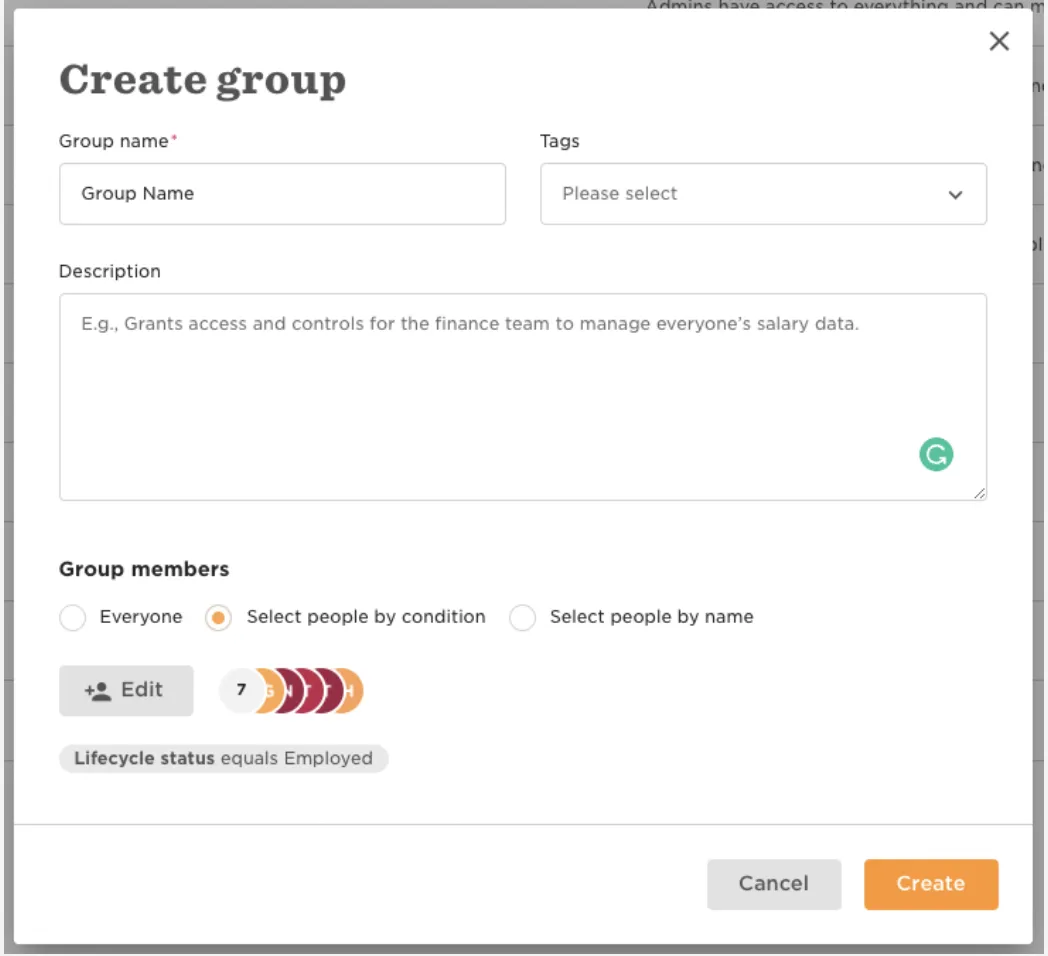
5. In the Select people by condition pop-up, delete the existing condition and add the Service User previously created in the dropdown menu for Add Specific Employees then click Apply.
6. Finish the initial creation of the Group by selecting Create. If a pop-up appears, Confirm the creation of the group.
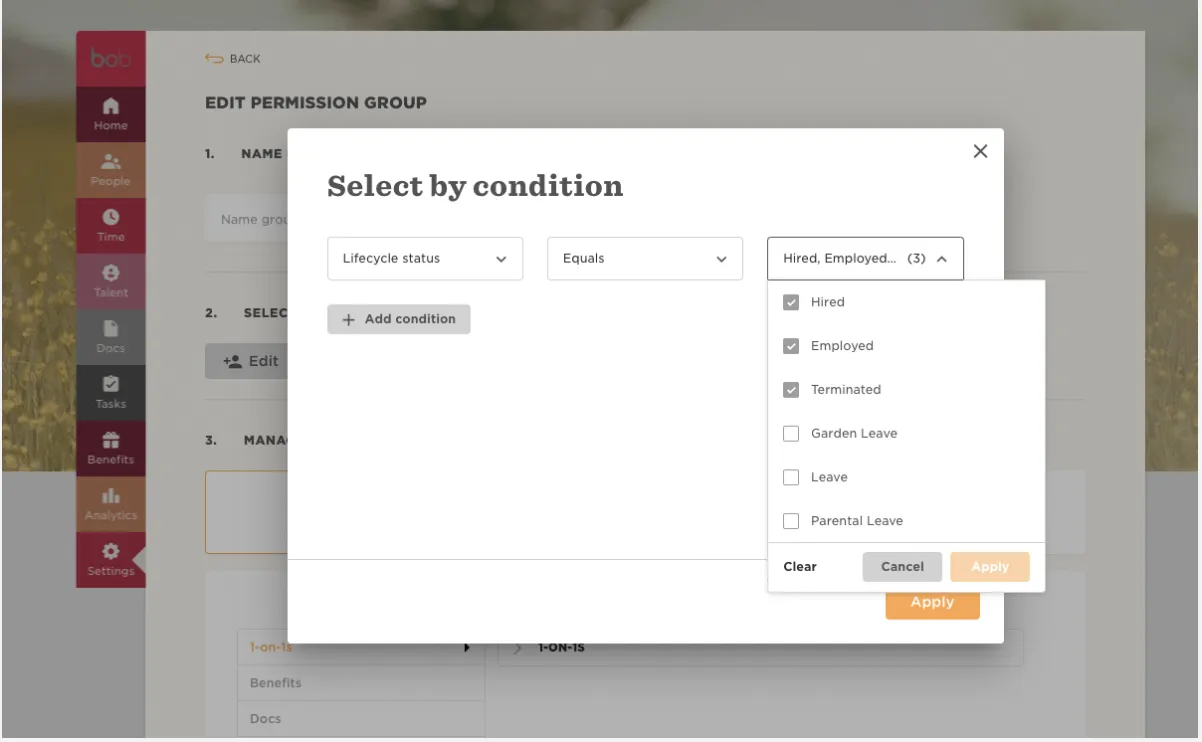
7. Under People's Data, edit the data that can be accessed by choosing Select people by condition and selecting Edit.
 a. Click Select by Condition

 b. Click Edit

 c. Lifecycle Status = Employed, Hired, Terminated
8. Under People's Data add the following permissions.
-
About > View selected employees' About sections
-
Basic Info > View selected employees' Basic info sections
-
Address > View selected employees' Address sections
-
Employment > View selected employees' Employment sections
-
Employment > View selected employees' Employment section histories
-
Home > View selected employees' home sections
-
Identification > View selected employees' Identification sections
-
Personal > View selected employees' Personal sections
-
Personal Contact Details > View selected employees' Personal contact details sections
-
User Data > View selected employees' User data sections
-
Work > View selected employees' Work sections
-
Work Contact Details > View selected employees' Work contact details section
Please note the permissions below are the required permissions for the full HRIS API. You only need to configure the permissions based on your use case.
Configuration
Once you have successfully configured the connections, you can continue with the Design section to configure the rest of the workflow following these steps in order.
- HR Employee Data Definition
- HR to AD Profile Map
- Lifecycle Business Rules
- Employment Status
- Organizational Unit Assignment - Only defined in on-premise Active Directory
- Group Memberships
- Security Group Memberships
- Distribution List Memberships
- Microsoft 365 Groups Memberships Only defined in Hybrid (with Exchange Online Services) and Entra ID
- Entra ID Distribution List Memberships Only defined in Entra ID and Hybrid, when Exchange Online Services is configured
- Entra ID Security Groups Only defined in Hybrid (with Enable Entra ID Security Groups) and Entra ID
- Mail Enabled Security Group Memberships Only defined in Entra ID and Hybrid, when Exchange Online Services is configured
- Mailing List Assignment Provided in Google Workspace
- Communication Hub
Deployment
Once your workflow has been setup, you can optionally setup notifications and archival for your workflow.
- Compliance and Audit Trail
- Run Mode
- Error Notifications
- Monitor Receipt of Scheduled HR Extract
- Environment
Otherwise, you can proceed to deploy and test it on the Hire2Retire platform, see Deploy and Test Flow