Greenhouse – Basic Authentication
Deprecation Notice
Please note that the Basic Auth Connection mechanism will be deprecated by Greenhouse in Aug 2026, causing your workflow to stop working. Here is the Deprecation Notice from Greenhouse.
Upgrade your workflow to OAuth Connection type and redeploy to keep your workflow running after API deprecation.
Generating API Key to set up Greenhouse connection
- Log in to your Greenhouse account as an administrator.
- Navigate to the
Configuretab and selectDev Centerfrom the dropdown menu. - In the Dev Center, click on
API Credential Management. - Click on
Create New API Keyto generate a new API key. - Make the following selections:
- API Type: Harvest
- Partner: Either choose
Unlisted Vendoror keep it empty. - Description: Enter a descriptive name for your API key, such as "Hire2Retire Key".
- After selecting the API type and description, click
Manage Permissionsto configure the required Harvest API permissions before creating the key. -
Select the following permissions based on the configuration of your workflow
Configuration-Specific Permissions
Configuration Additional Required Permissions Additional Optional Permissions Onboarding using Offer Start Date • Get: List Offers — Onboarding using Application Status • Get: Retrieve Application
• Get: List Applications• Get: Retrieve Application’s Current Offer Common Permissions
-
Required
- Get: Retrieve Candidate
- Get: List Candidates
- Get: Retrieve Job
-
Optional
- Get: Custom field
This permission is optional. Enable it only if your workflow uses custom applicant, candidate, job, or offer fields for mapping in Hire2Retire.
-
Required
-
Select Get: List Offers permission under Offers
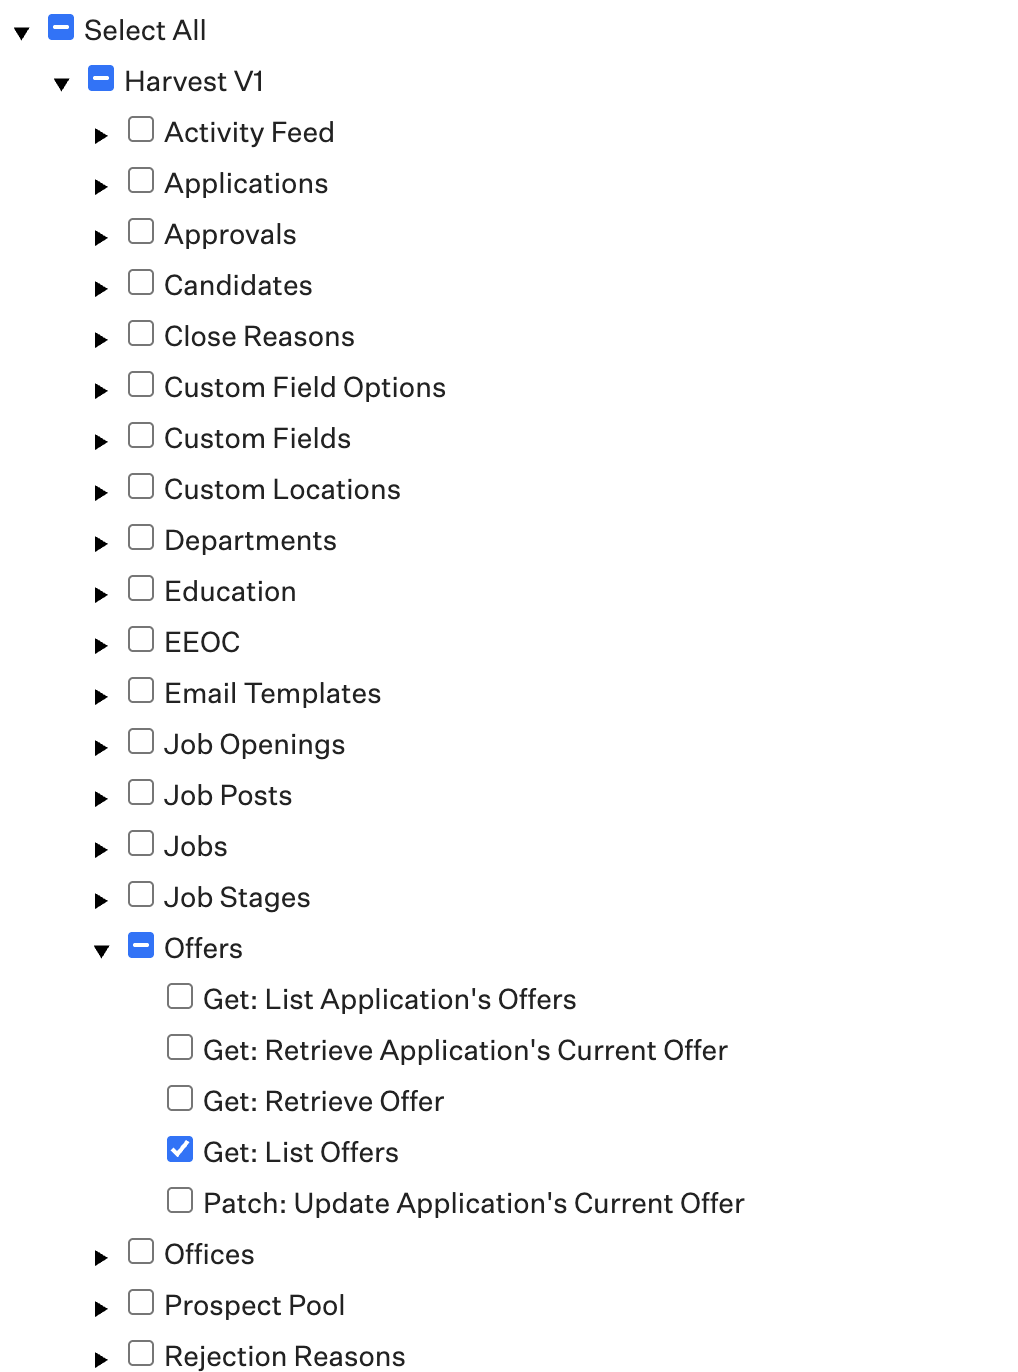 Figure 1. Offers API
 -
Select Get: Retrieve Application and Get: List Applications permission under Applications
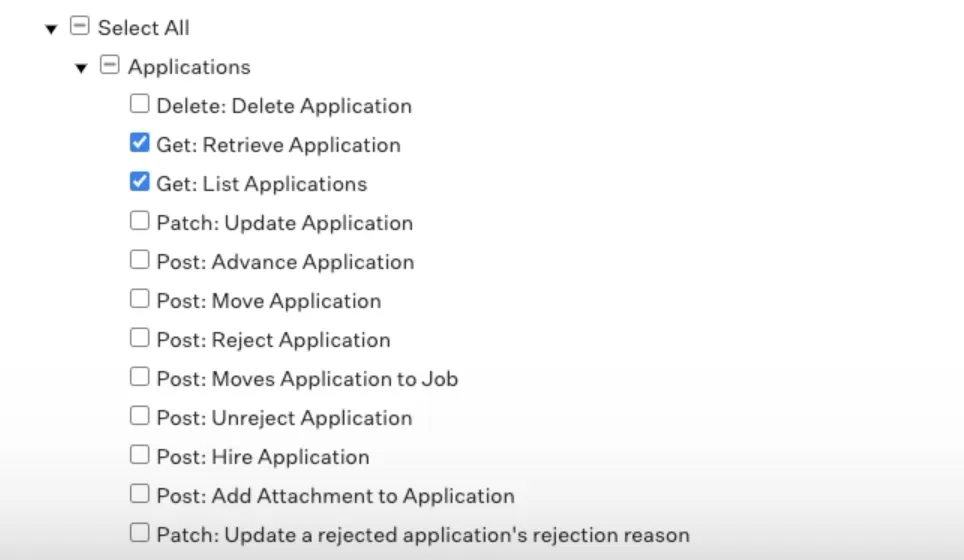 Figure 2. Applications API
 -
Select Get: Retrieve Candidate and Get: List Candidates permission under Candidates
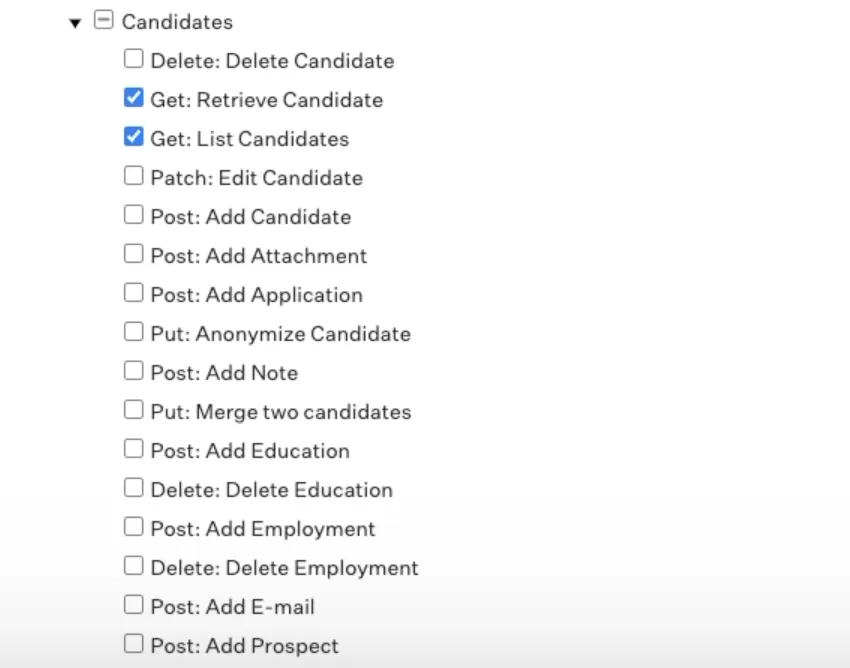 Figure 3. Candidates API
 -
Select Get: Retrieve Job permission under Jobs
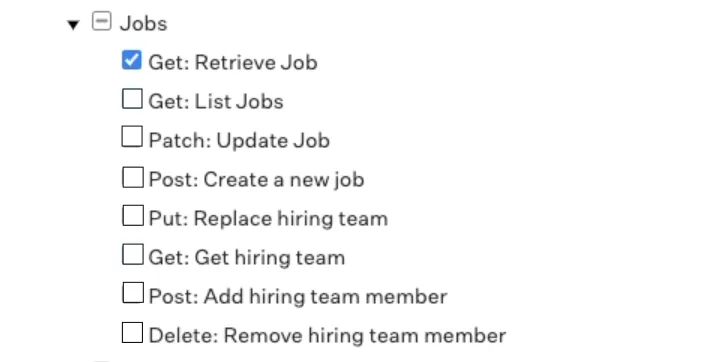 Figure 4. Jobs API
-
-
Optional
-
Select Get: Custom field under the Custom Fields to provide access to Applications, Candidates, Job & Offers Custom Fields
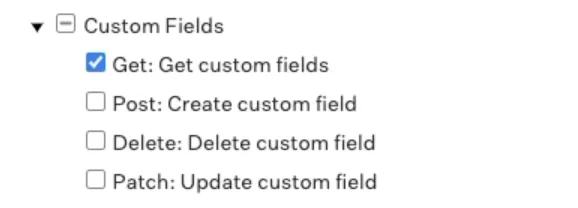 Figure 5. Custom Fields API
 -
Select Get: Retrieve Application's Current Offer under Offers to provide access to Candidate's Start Date
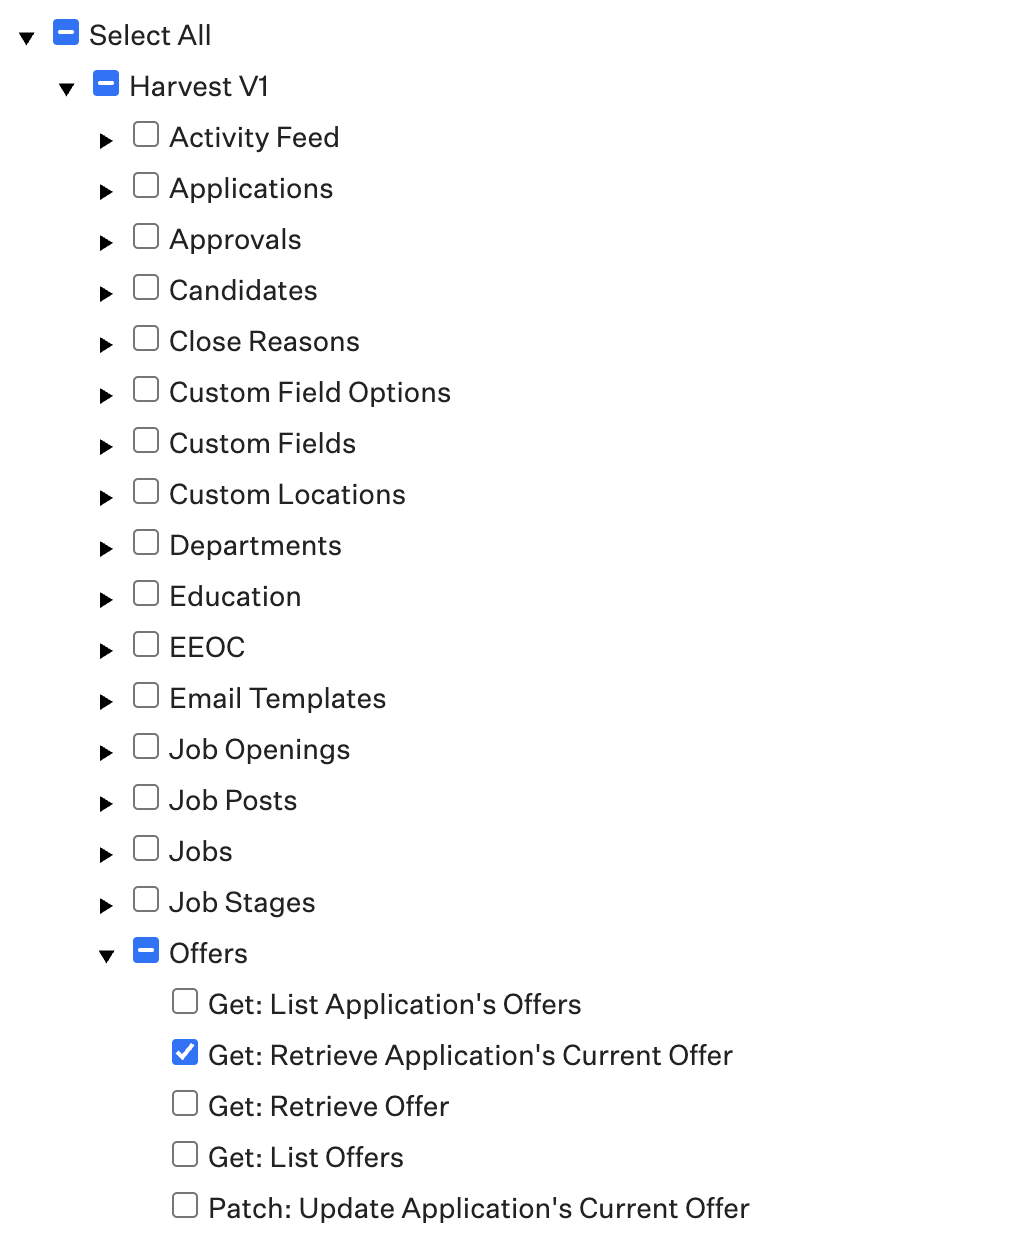 Figure 6. Offers API
-
-
-
Click
Createto generate an API key. Make sure to copy and securely store the generated API key since you won't be able to retrieve it again.
Create a Connection
Hire2Retire requires the following details to create a connection with your Greenhouse server:
-
API Key - The Harvest API key generated in Greenhouse, used by Hire2Retire to securely retrieve candidate, job, application, and offer data.
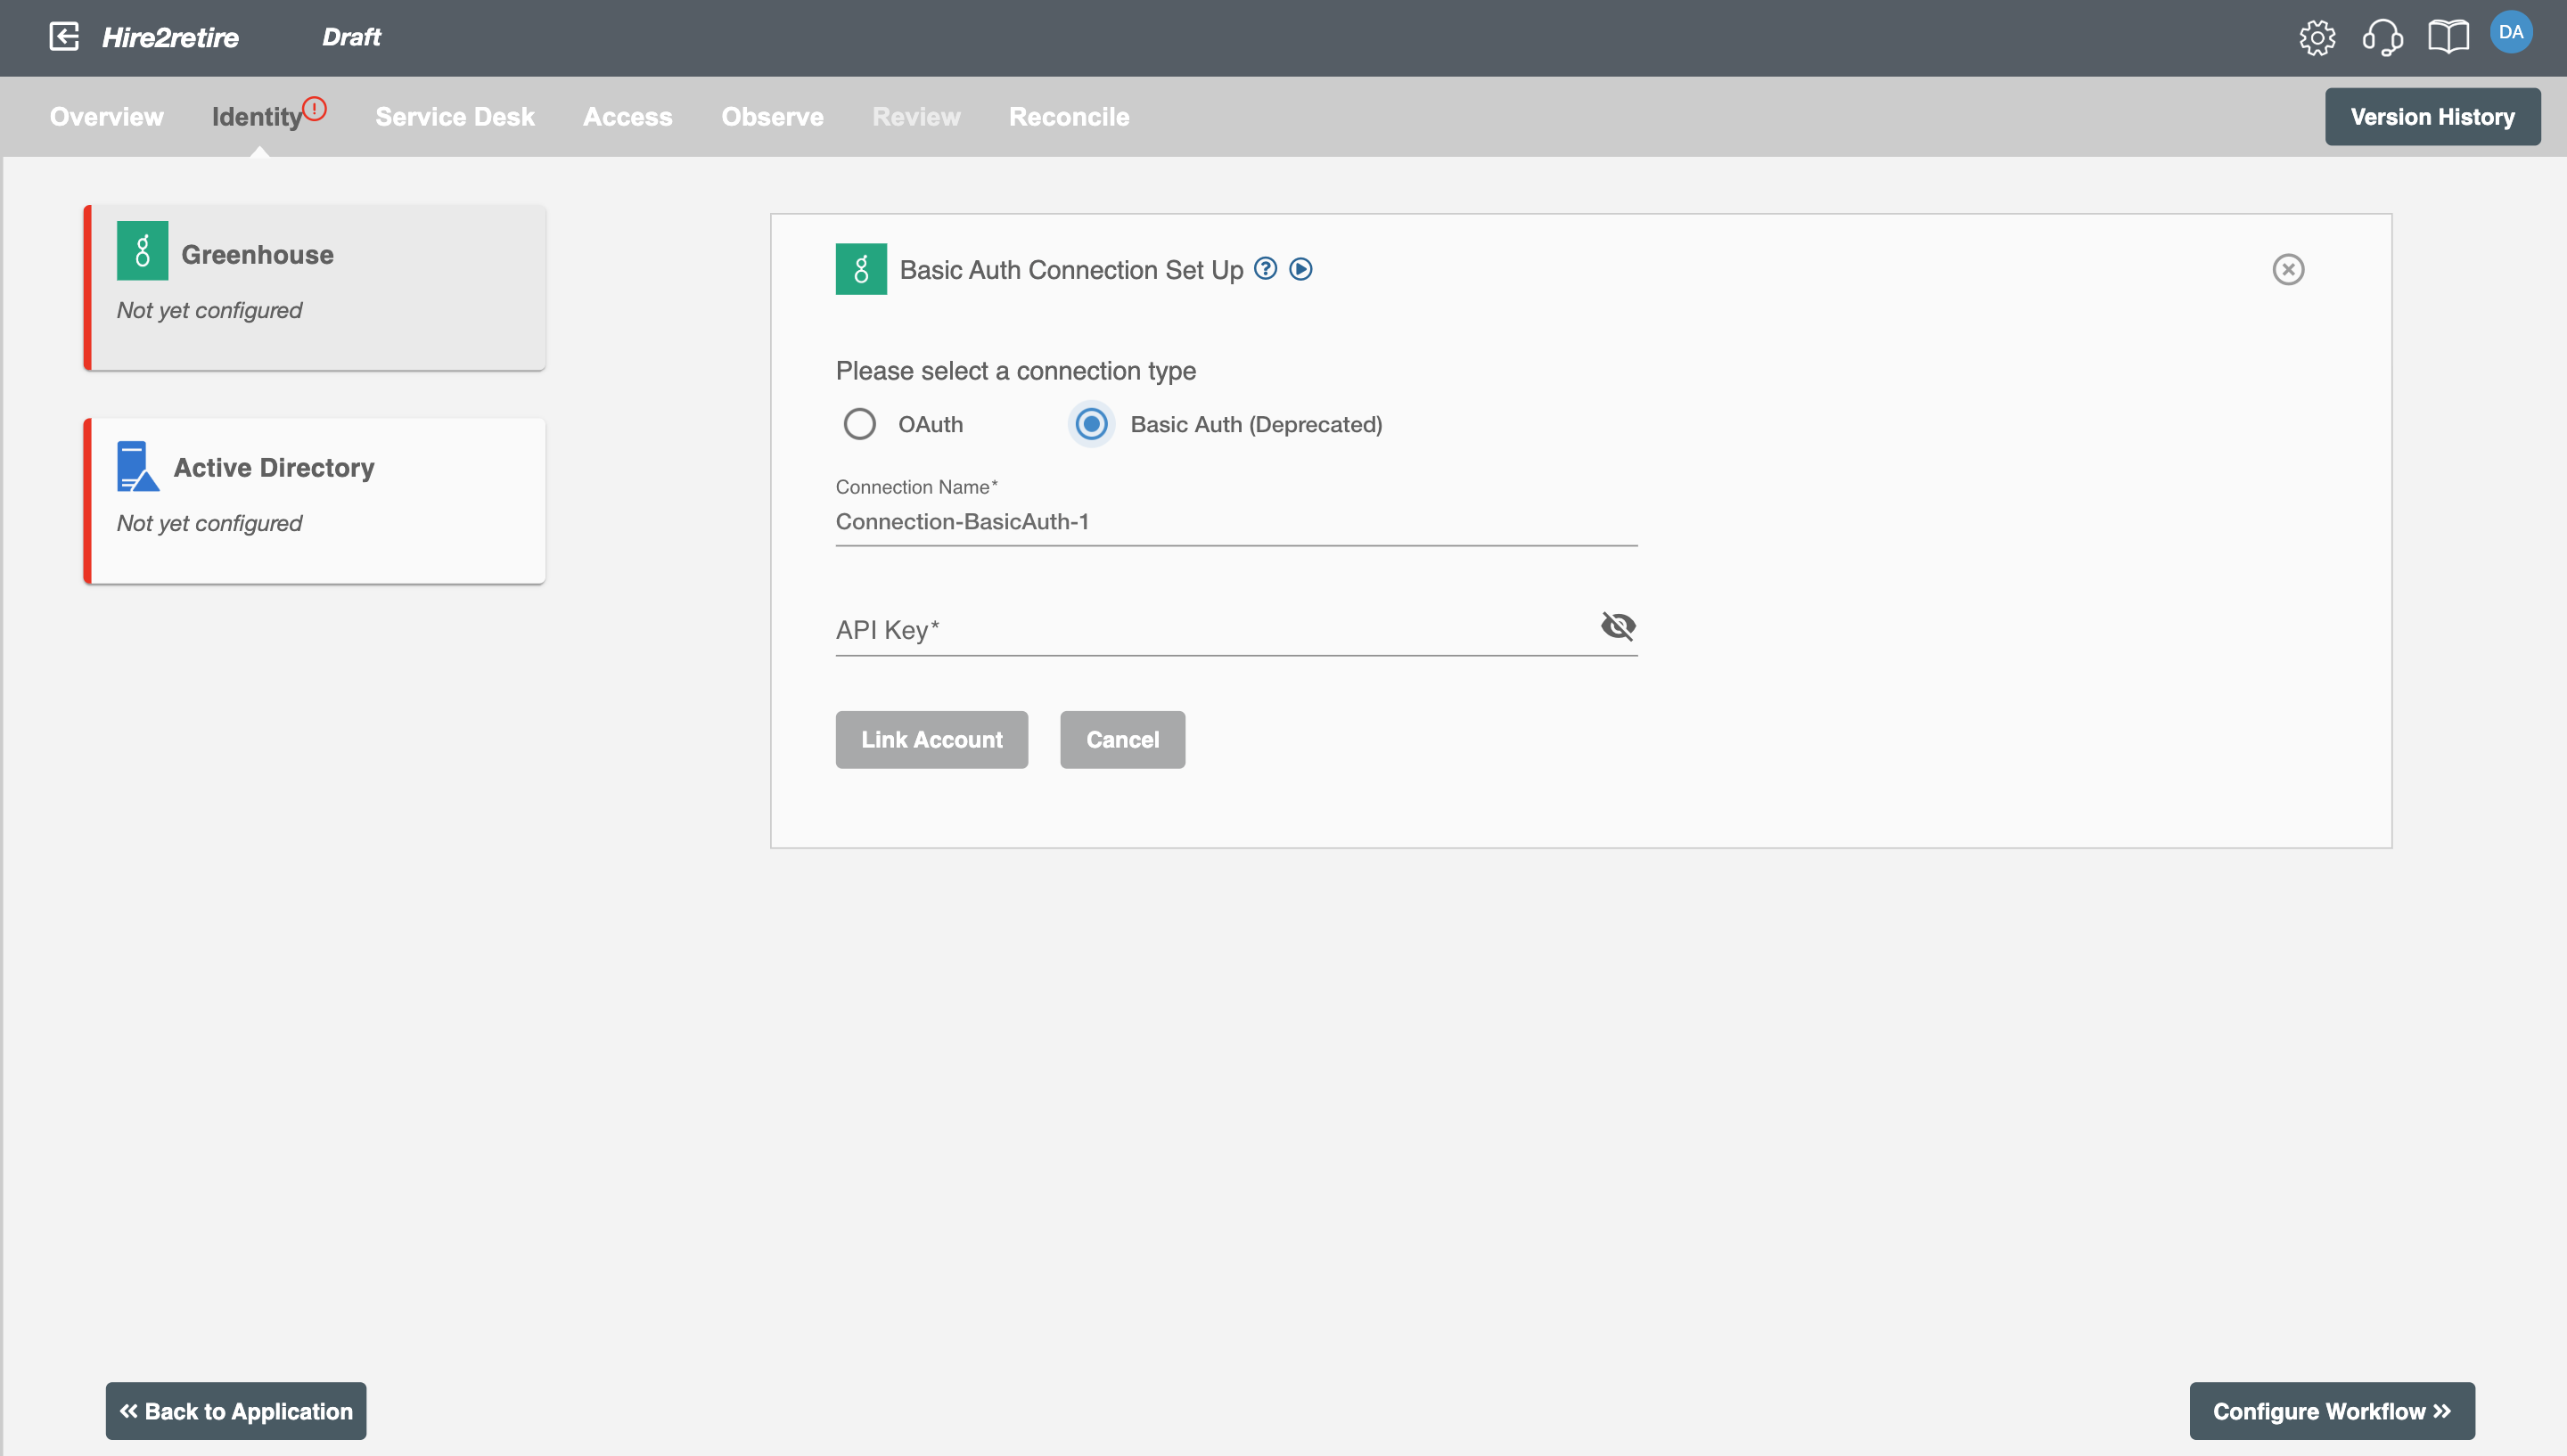 Figure 7. Greenhouse Connection Set Up page - Create Connection
For workflows that use the Offer Start Date for onboarding, Hire2Retire retrieves:
- Offers with an Accepted status, and an Offer Start Date that is within the past 6 months from the time the workflow runs.
- Offers with a Rejected status for the termination events in the IdP.
Configuration
Once you have successfully configured the connections, you can continue with the Design section to configure the rest of the workflow following these steps in order.
- ATS Data Definition
- ATS to AD Profile Map
- Lifecycle Business Rules
- Employment Status
- Organizational Unit Assignment - Only defined in on-premise Active Directory
- Group Memberships
- Security Group Memberships
- Distribution List Memberships
- Microsoft 365 Groups Memberships Only defined in Hybrid (with Exchange Online Services) and Entra ID
- Entra ID Distribution List Memberships Only defined in Entra ID and Hybrid, when Exchange Online Services is configured
- Entra ID Security Groups Only defined in Hybrid (with Enable Entra ID Security Groups) and Entra ID
- Mail Enabled Security Group Memberships Only defined in Entra ID and Hybrid, when Exchange Online Services is configured
- Mailing List Assignment Provided in Google Workspace
- Communication Hub
Deployment
Once your workflow has been setup, you can optionally setup notifications and archival for your workflow.
- Compliance and Audit Trail
- Run Mode
- Error Notifications
- Monitor Receipt of Scheduled HR Extract
- Environment
Otherwise, you can proceed to deploy and test it on the Hire2Retire platform, see Deploy and Test Flow