Ceridian (API-Integration)
Introduction
Ceridian is a cloud-based HCM platform that offers a comprehensive solution for managing various aspects of HR, including payroll, benefits, workforce management, and talent management. This platform assists in handling every stage of an employee's journey, from recruitment and onboarding to compensation and career development.
Ceridian Connection Set Up
Hire2Retire is a pre-packaged integration solution for managing the employee lifecycle. This product takes employee data as input and syncs it to AD by applying the rules and transformation logic configured during flow setup.
To process data from Ceridian using Hire2Retire, please ensure that you have granted the necessary permissions.
Required Permissions
Please update the necessary permissions for the specified user role by following these steps:
Step 1: Configure Feature Access
-
From the hamburger button on the top left of your screen, click on System Admin > Roles
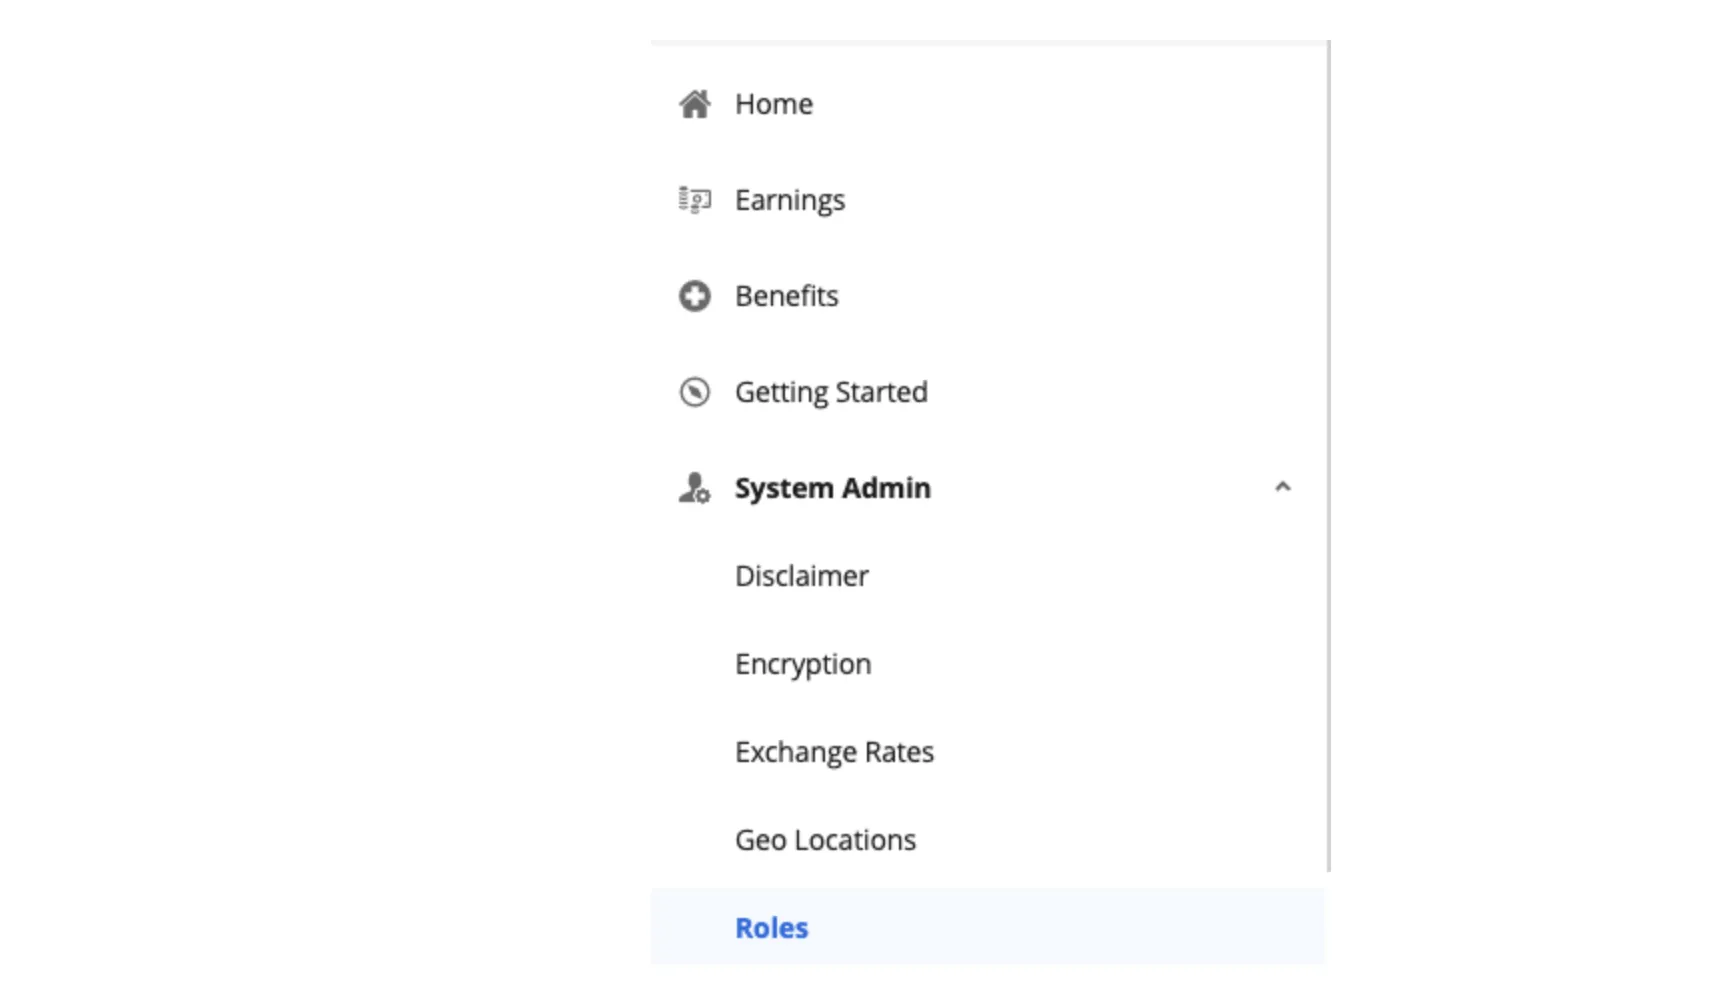 Figure 1. Configure Feature Access
 -
Navigate to the "Features" tab. Ensure that both "HCM Anywhere" and the "Web Services" option under it are checked.
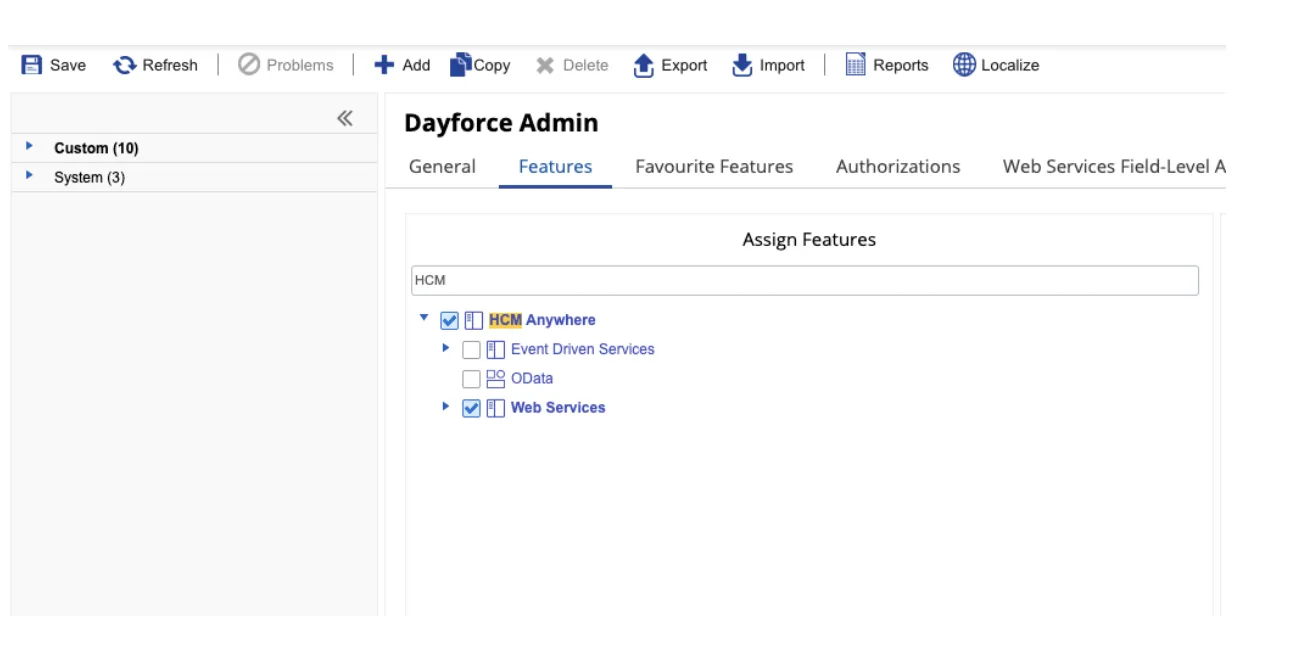 Figure 2. Configure Feature Access
 -
Expand "Web Services" and make sure to check "Read Data".
If you want to use
WriteToHRfeature, ensure that "Patch/Post Employee HR Data" is checked.
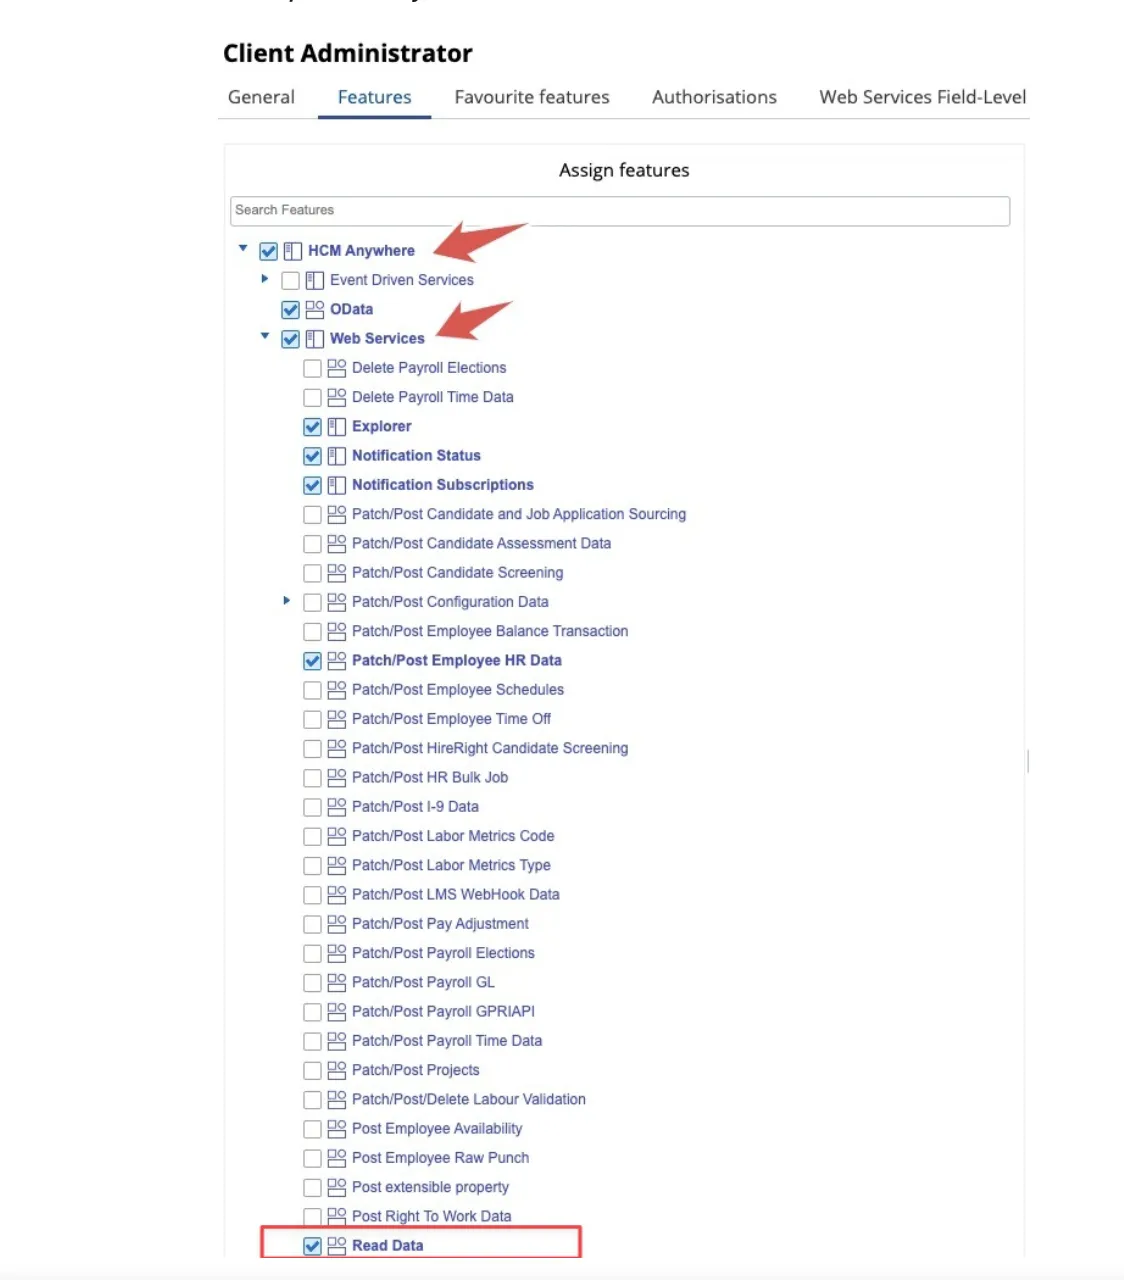 Figure 3. Configure Feature Access
To enable Employee Contact synchronization, click on the "Authorizations" tab and enable Can Read, Can Create, and Can Update permissions for Employee Contact Information and Employee Contact Information – Business.
 Figure 4. Employee Contact Information permissions required
Step 2: Configure Field-Level Access
-
Navigate to "Web Services Field-Level Access" and select the "RESTful Services" option.
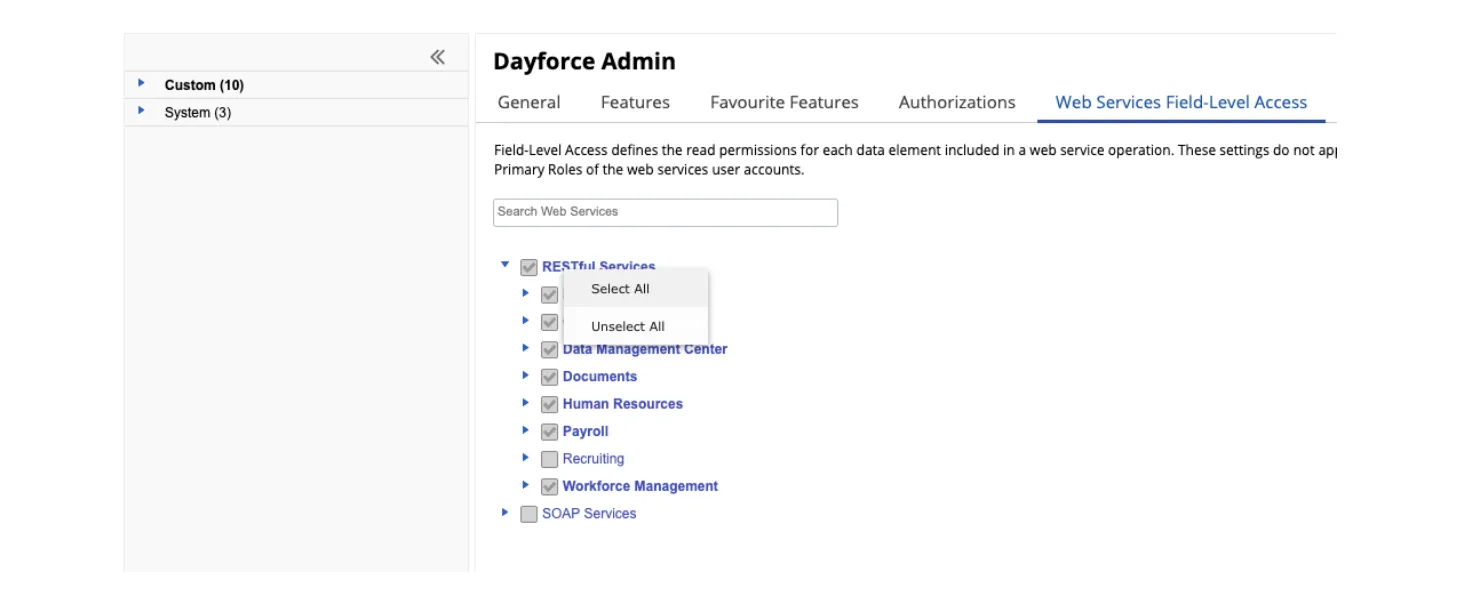 Figure 5. Select Web Services Field Level Access
 -
Click on "Human Resources" and expand "Employee".
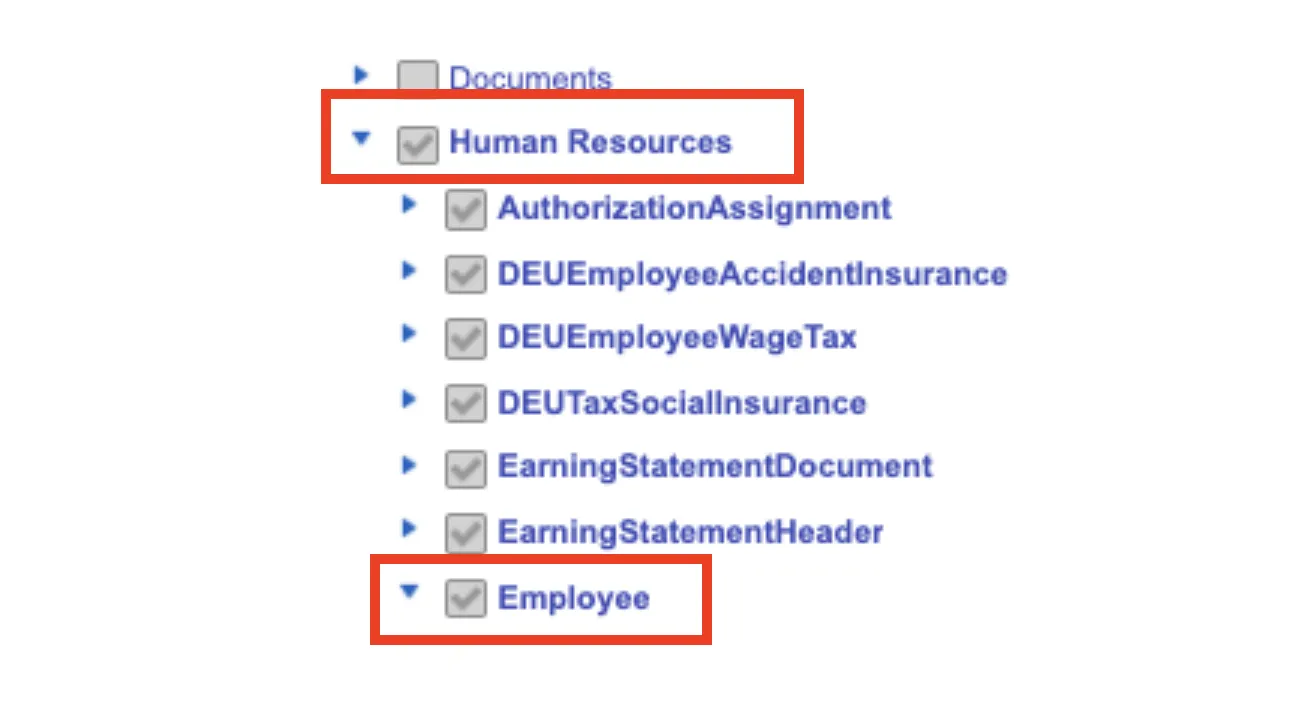 Figure 6. Select Human Resources Section
 -
Scroll to the last option and ensure that "XRefCode" is enabled. Also, check all the attributes that you want to configure on the Hire2Retire portal.
 Figure 7. Enable Employee XRefCode.
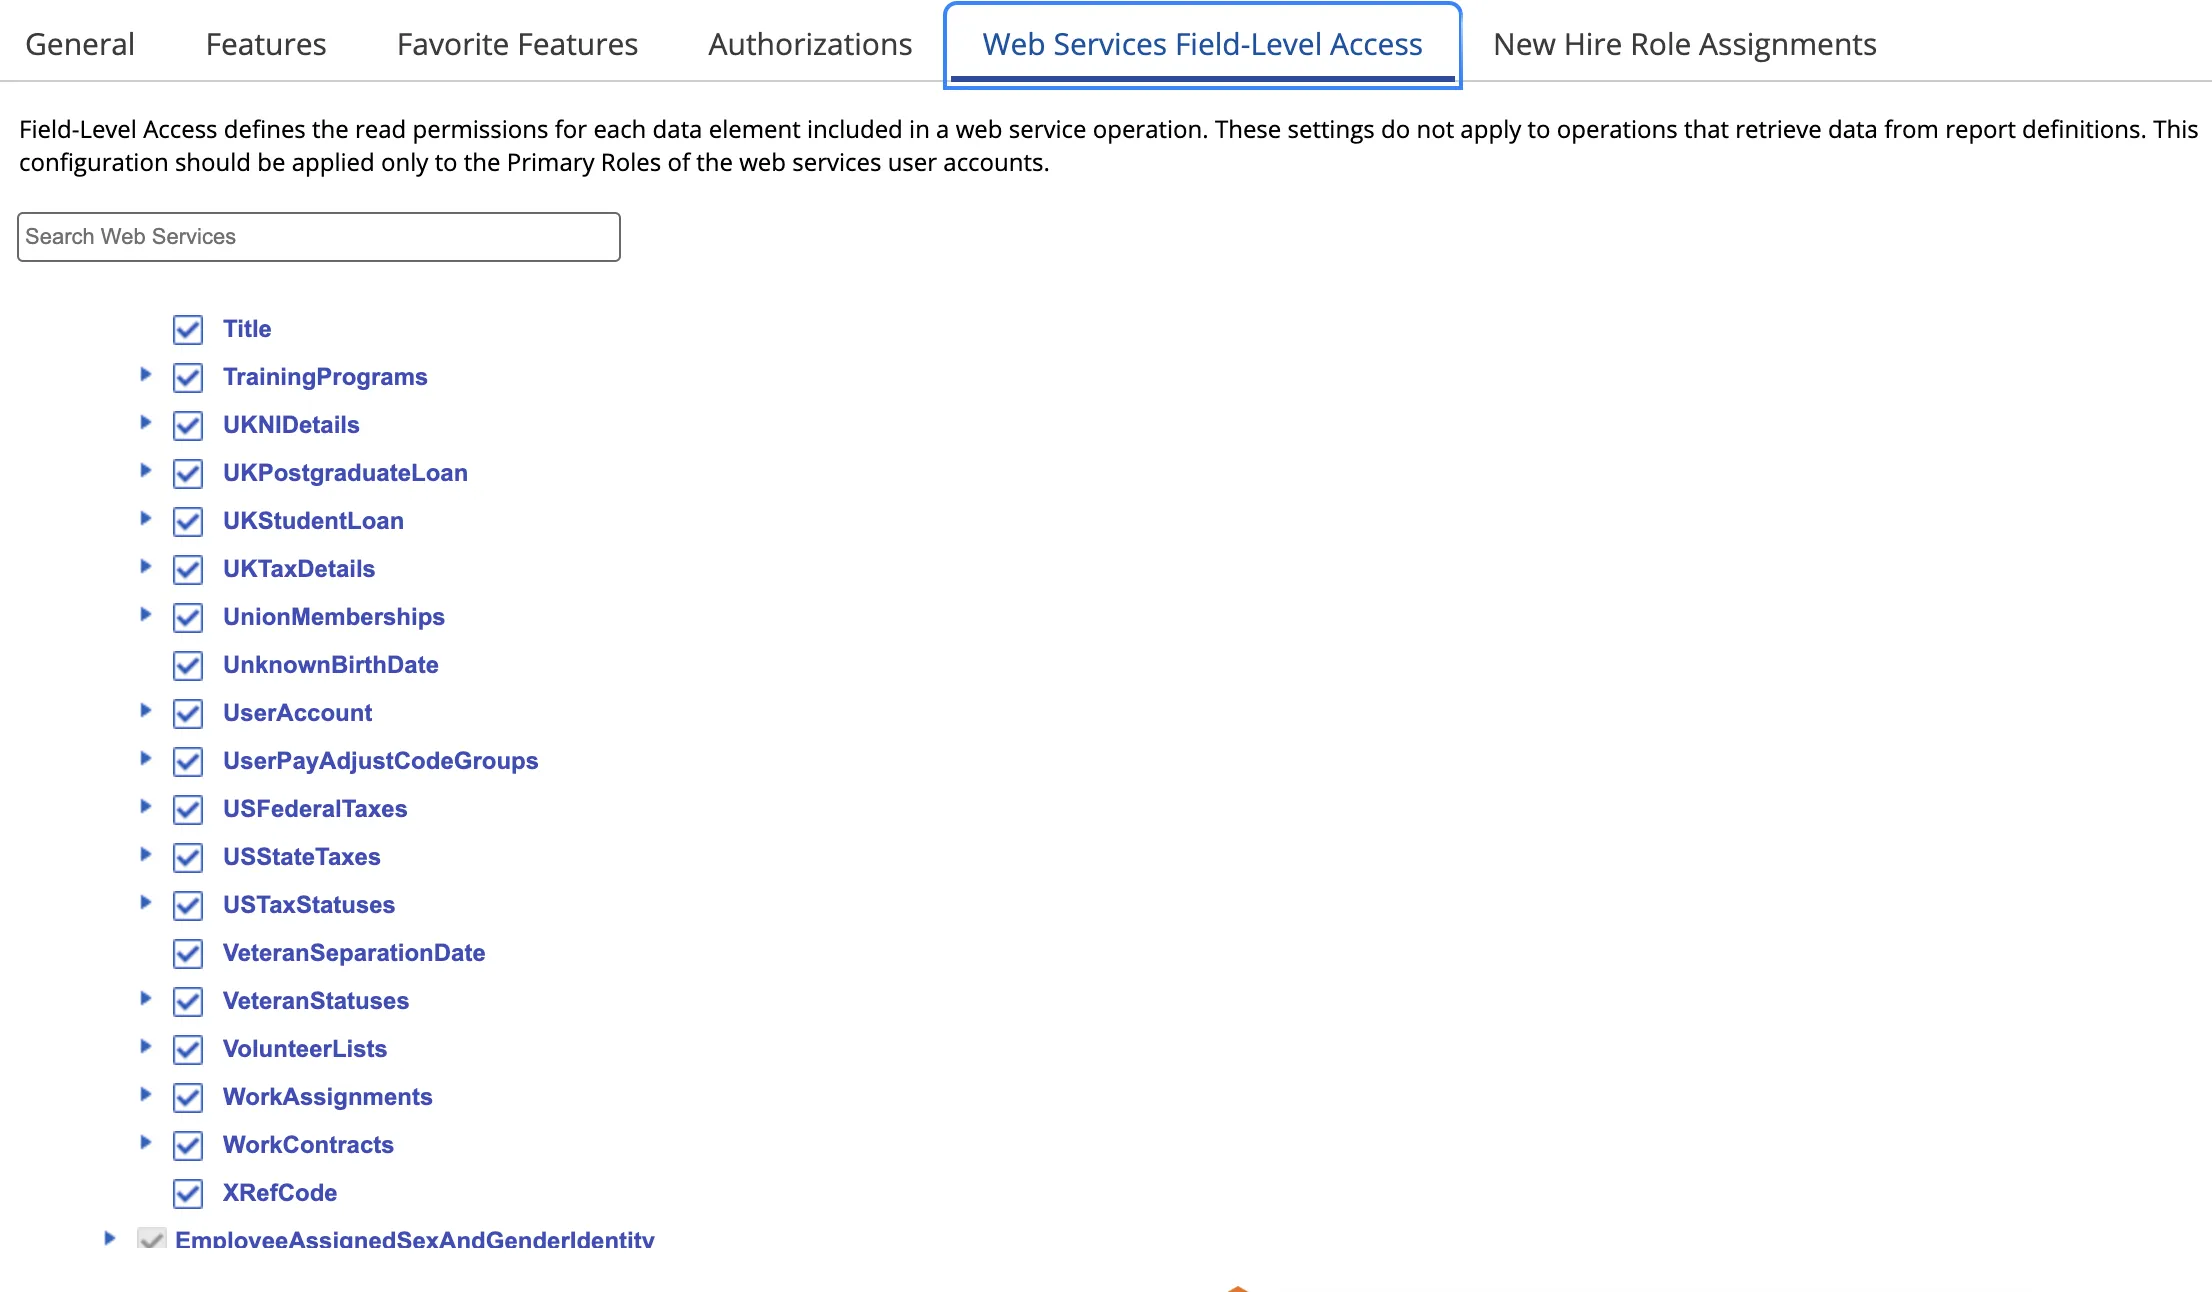 Figure 8. Enable Employee Attributes.
Step 3: To sync the employment status of an employee, click on the "Authorizations" tab and check the "Employment Status" > "Can Read" checkbox.
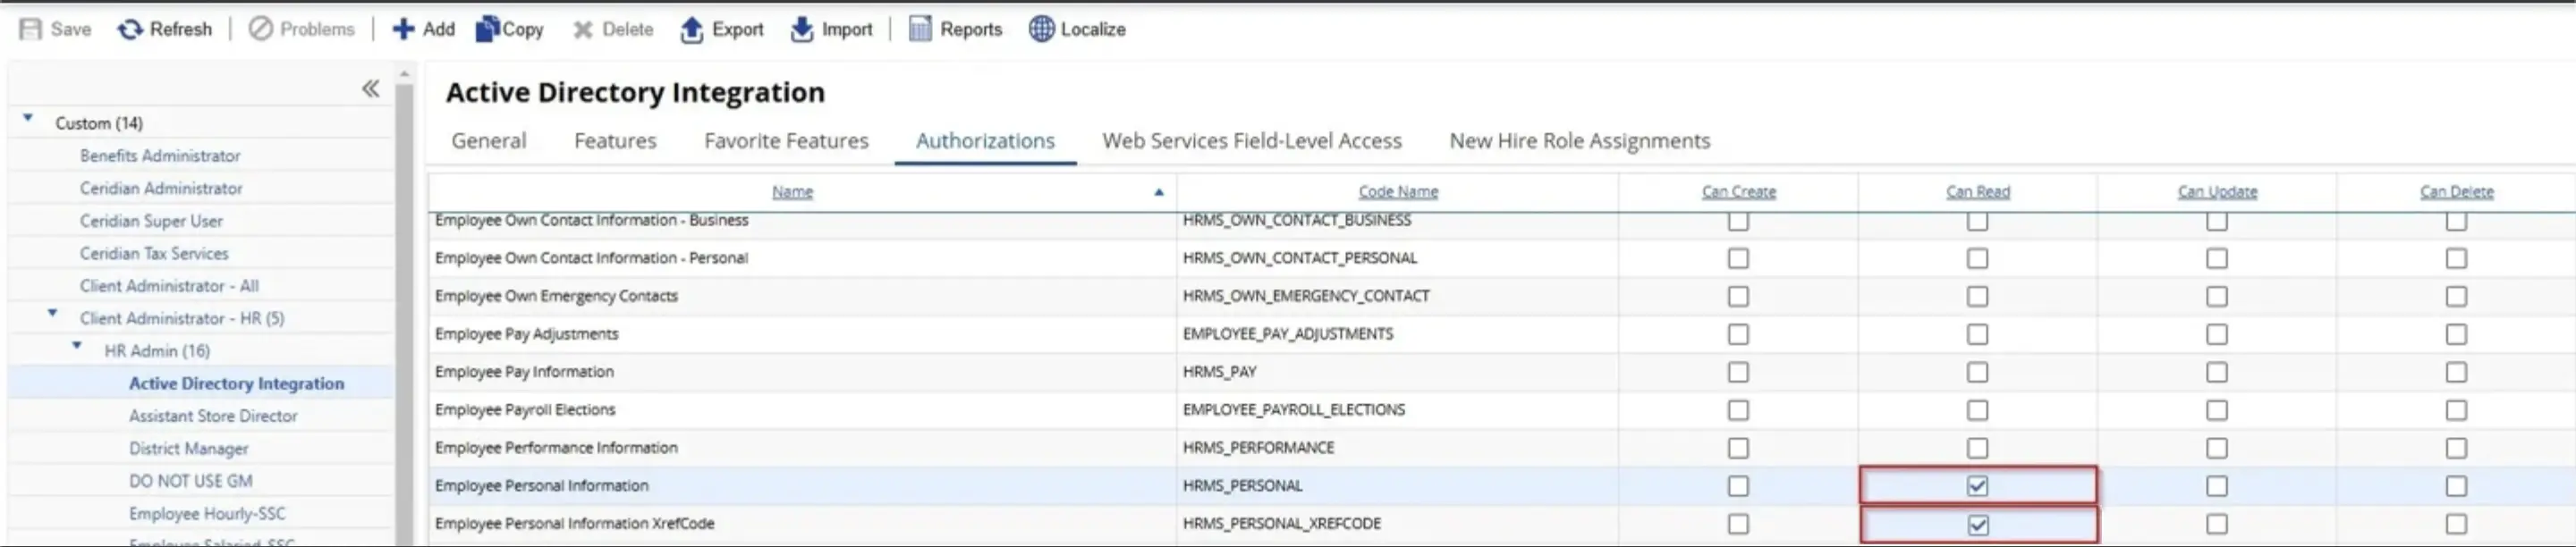
Step 4: To ensure that all date-related attributes are included in the API response, click on the "Authorizations" tab and enable "Can Read" permission for Employee Personal Information and Employee Personal Information XRefCode.
Create a Connection
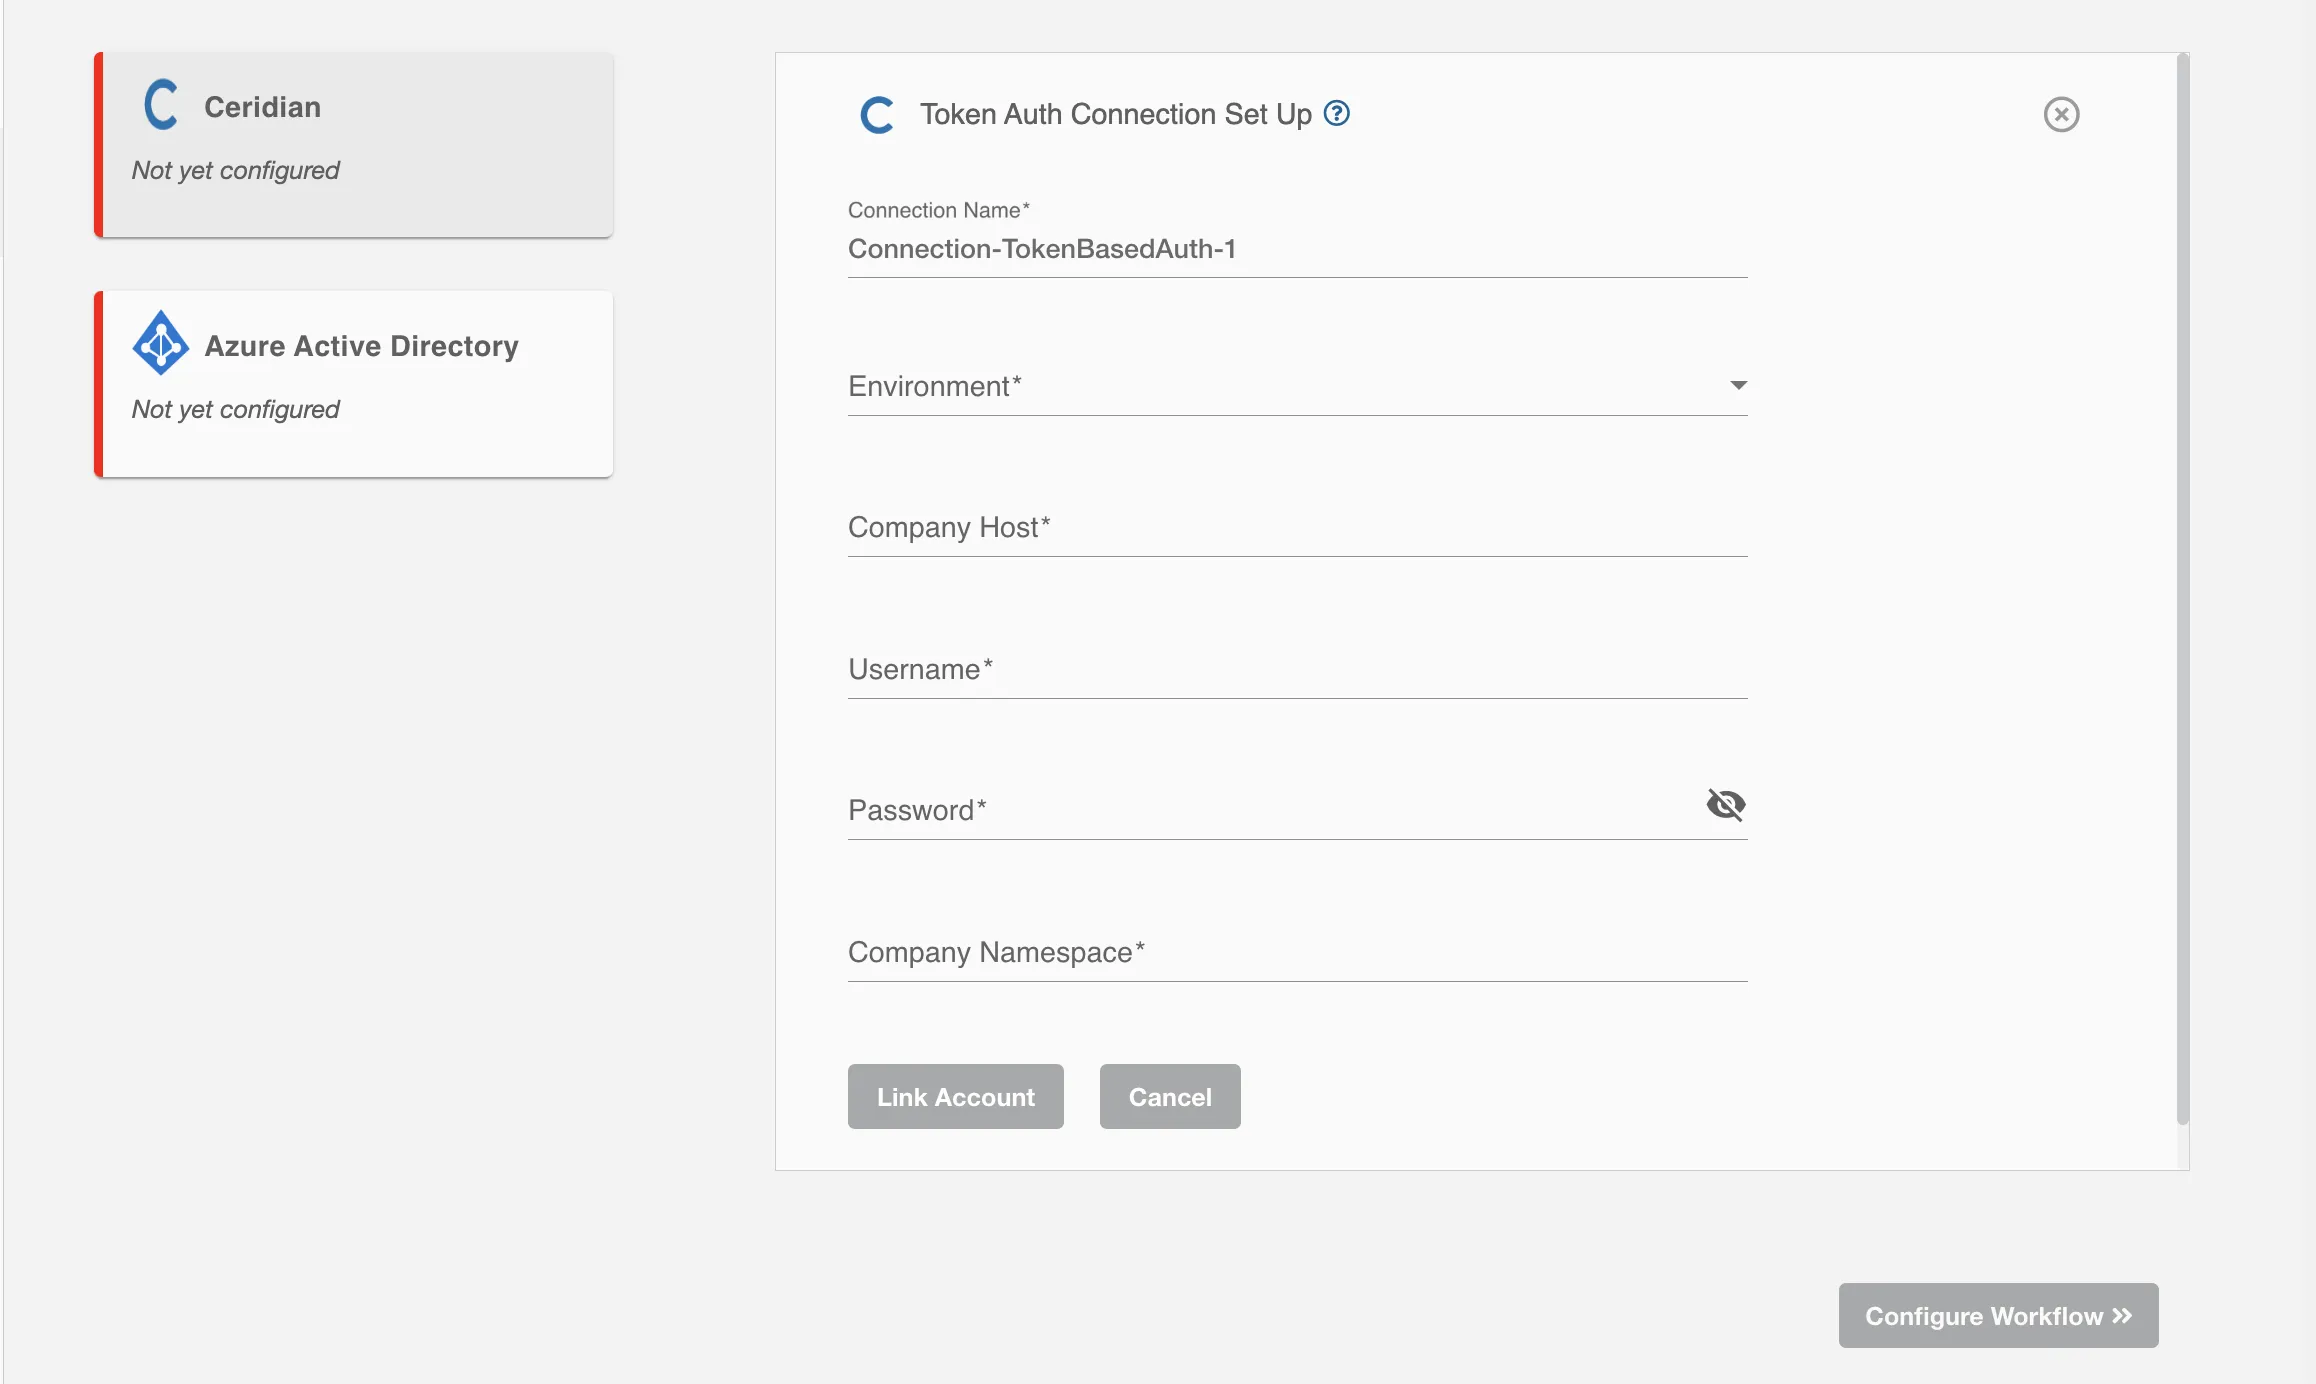
Hire2Retire requires the following details to create a connection with your Ceridian server:
-
Connection Name - A user-defined nomenclature for your connection. By default, the connection name is "Connection-TokenBasedAuth", you can change the name as per your preference.
-
Environment - The specific Ceridian Dayforce environment, such as Production, Staging, or Development.
-
Company Host - The server or network location where the company's data and services are hosted.
-
Username - Name of the Dayforce user dedicated to web service calls.
-
Password - Password of the specified user.
-
Company Namespace - Uniquely identifies the client's Ceridian Dayforce instance and is needed to log in.
Configuration
Once you have successfully configured the connections, you can continue with the Design section to configure the rest of the workflow following these steps in order.
- Ceridian Report Definition
- HR to AD Profile Map
- Lifecycle Business Rules
- Employment Status
- Organizational Unit Assignment - Only defined in on-premise Active Directory
- Group Memberships
- Security Group Memberships
- Distribution List Memberships
- Microsoft 365 Groups Memberships Only defined in Hybrid (with Exchange Online Services) and Entra ID
- Entra ID Distribution List Memberships Only defined in Entra ID and Hybrid, when Exchange Online Services is configured
- Entra ID Security Groups Only defined in Hybrid (with Enable Entra ID Security Groups) and Entra ID
- Mail Enabled Security Group Memberships Only defined in Entra ID and Hybrid, when Exchange Online Services is configured
- Mailing List Assignment Provided in Google Workspace
- Communication Hub
Deployment
Once your workflow has been set up, you have two optional features you can set up before deploying it.
- Compliance and Audit Trail
- Run Mode
- Error Notifications
- Monitor Receipt of Scheduled HR Extract
- Environment
Otherwise, you can proceed to deploy and test it on the Hire2Retire platform, see Deploy and Test Flow