BambooHR
BambooHR is an HCM application for storing and managing Employees. Hire2Retire supports BambooHR API to retrieve employee data from user's instance.
BambooHR Connection Set Up
The Hire2Retire platform provides two connection types for BambooHR applications:
- OpenID Connect (Recommend) - OpenID Connect is an identity layer built on top of OAuth 2.0, enabling secure user authentication and identity verification for applications
- Basic Auth - This option requires you to generate an API key in your BambooHR account and provide that key for making API calls.
OpenID Connect
- Connection Name - A user defined nomenclature for your connection. By default, the connection name is "Connection-OpenID Connect", you can change the name as per your preferences.
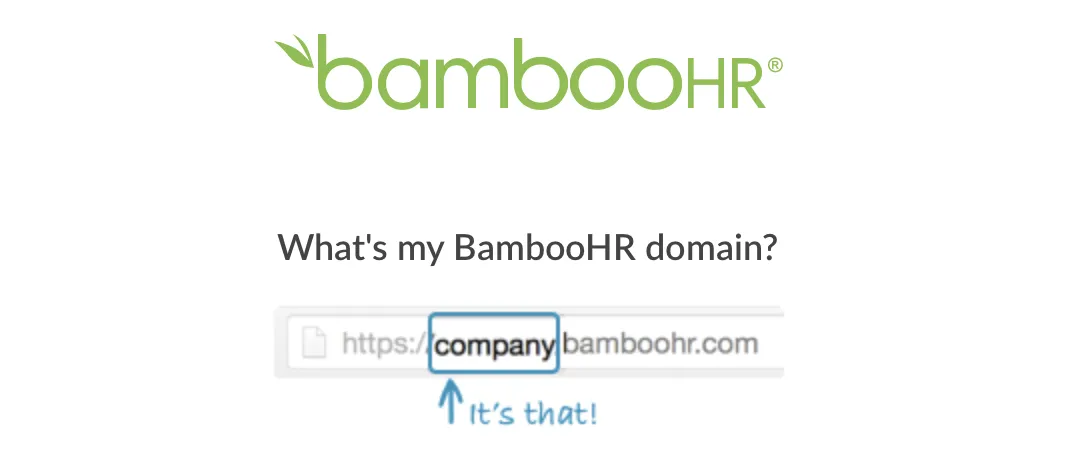
- Company Domain - The BambooHR Domain Name. The Domain Name appears in the url of your account. For example, in https://company_name.bamboohr.com/ the Domain Name is the company_name.
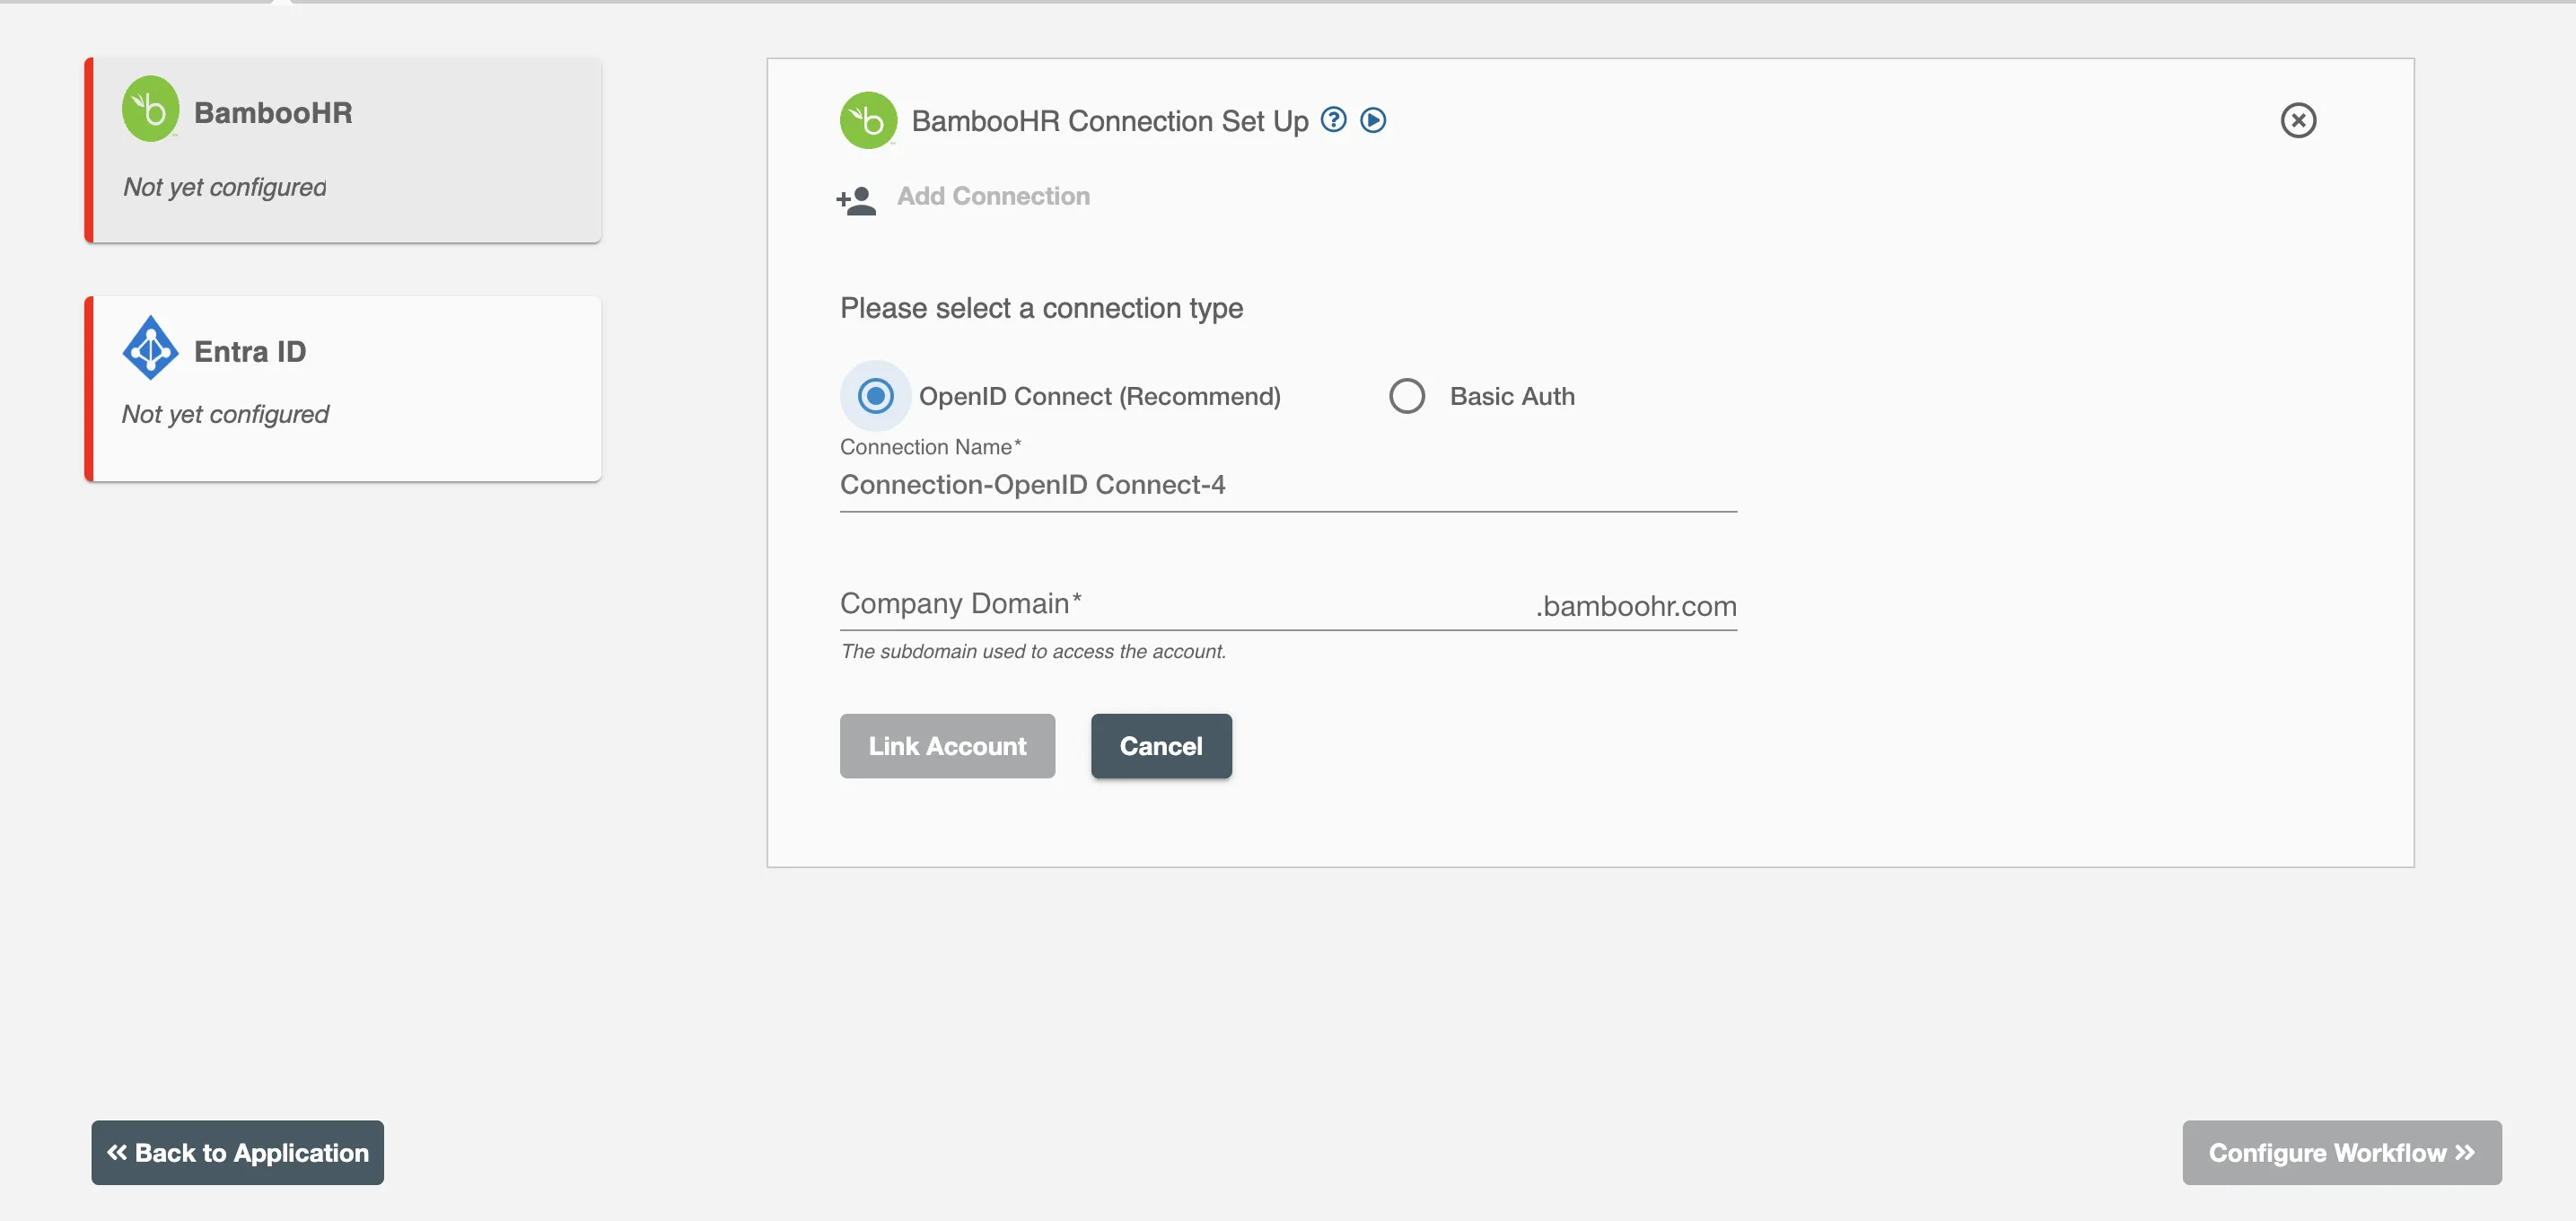
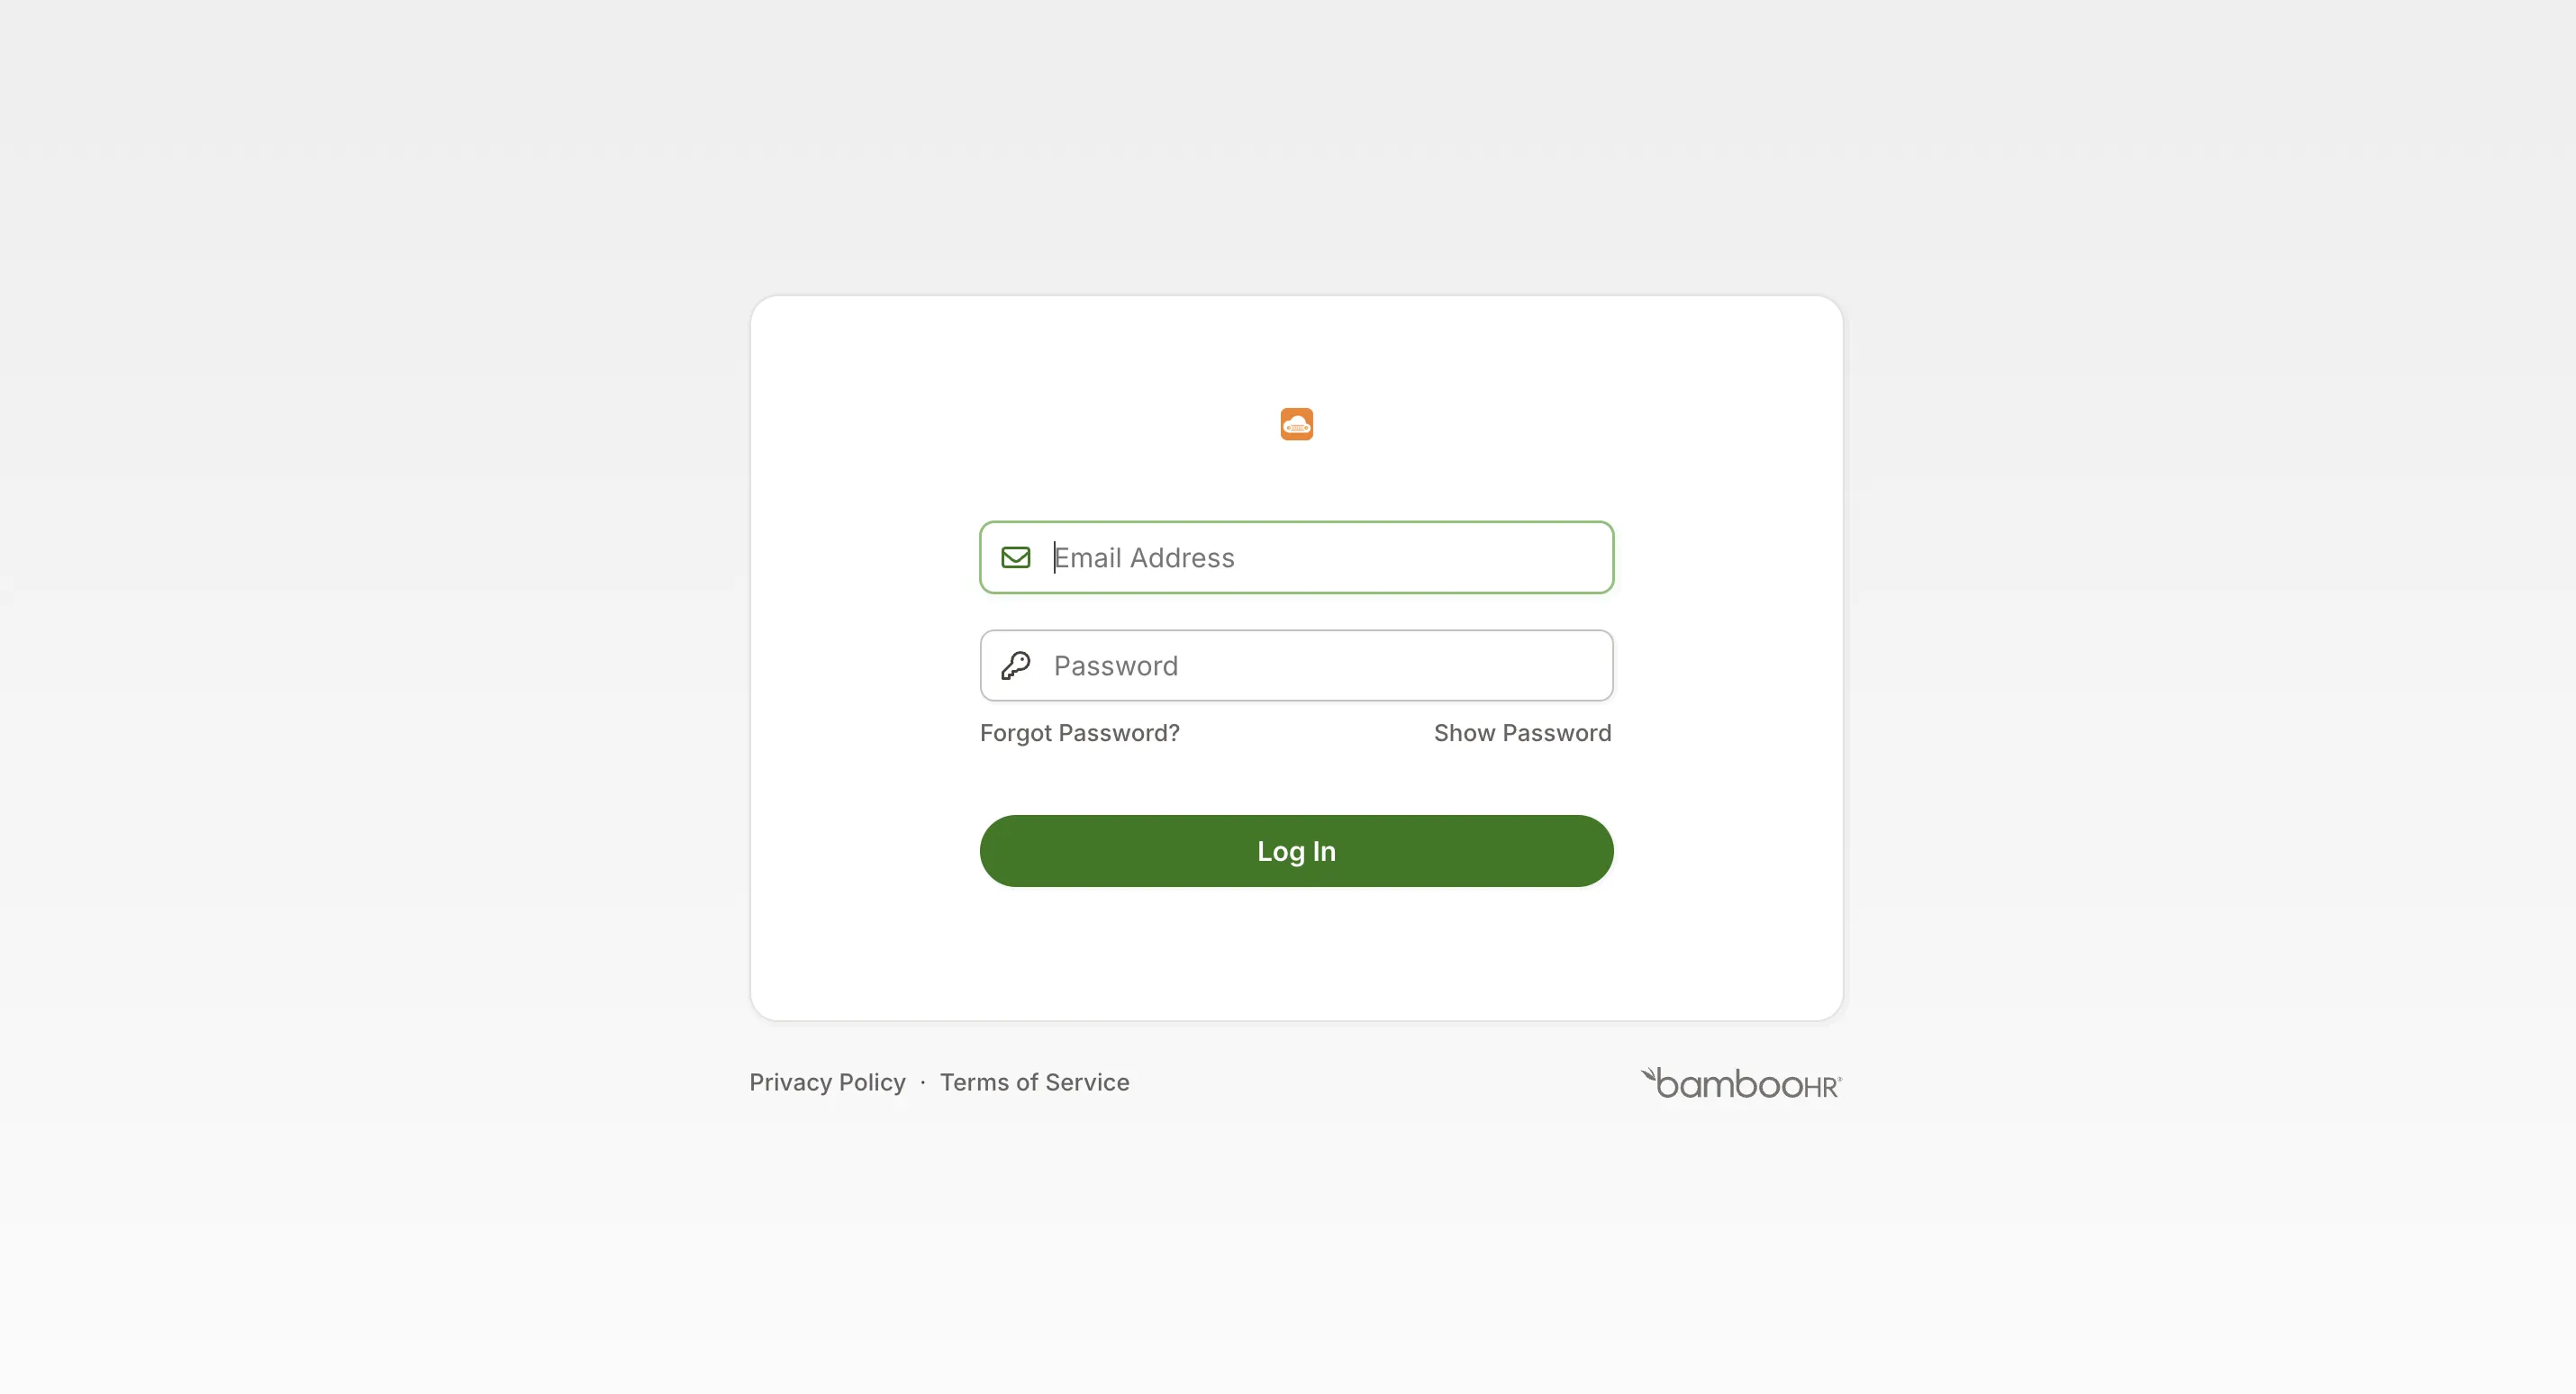
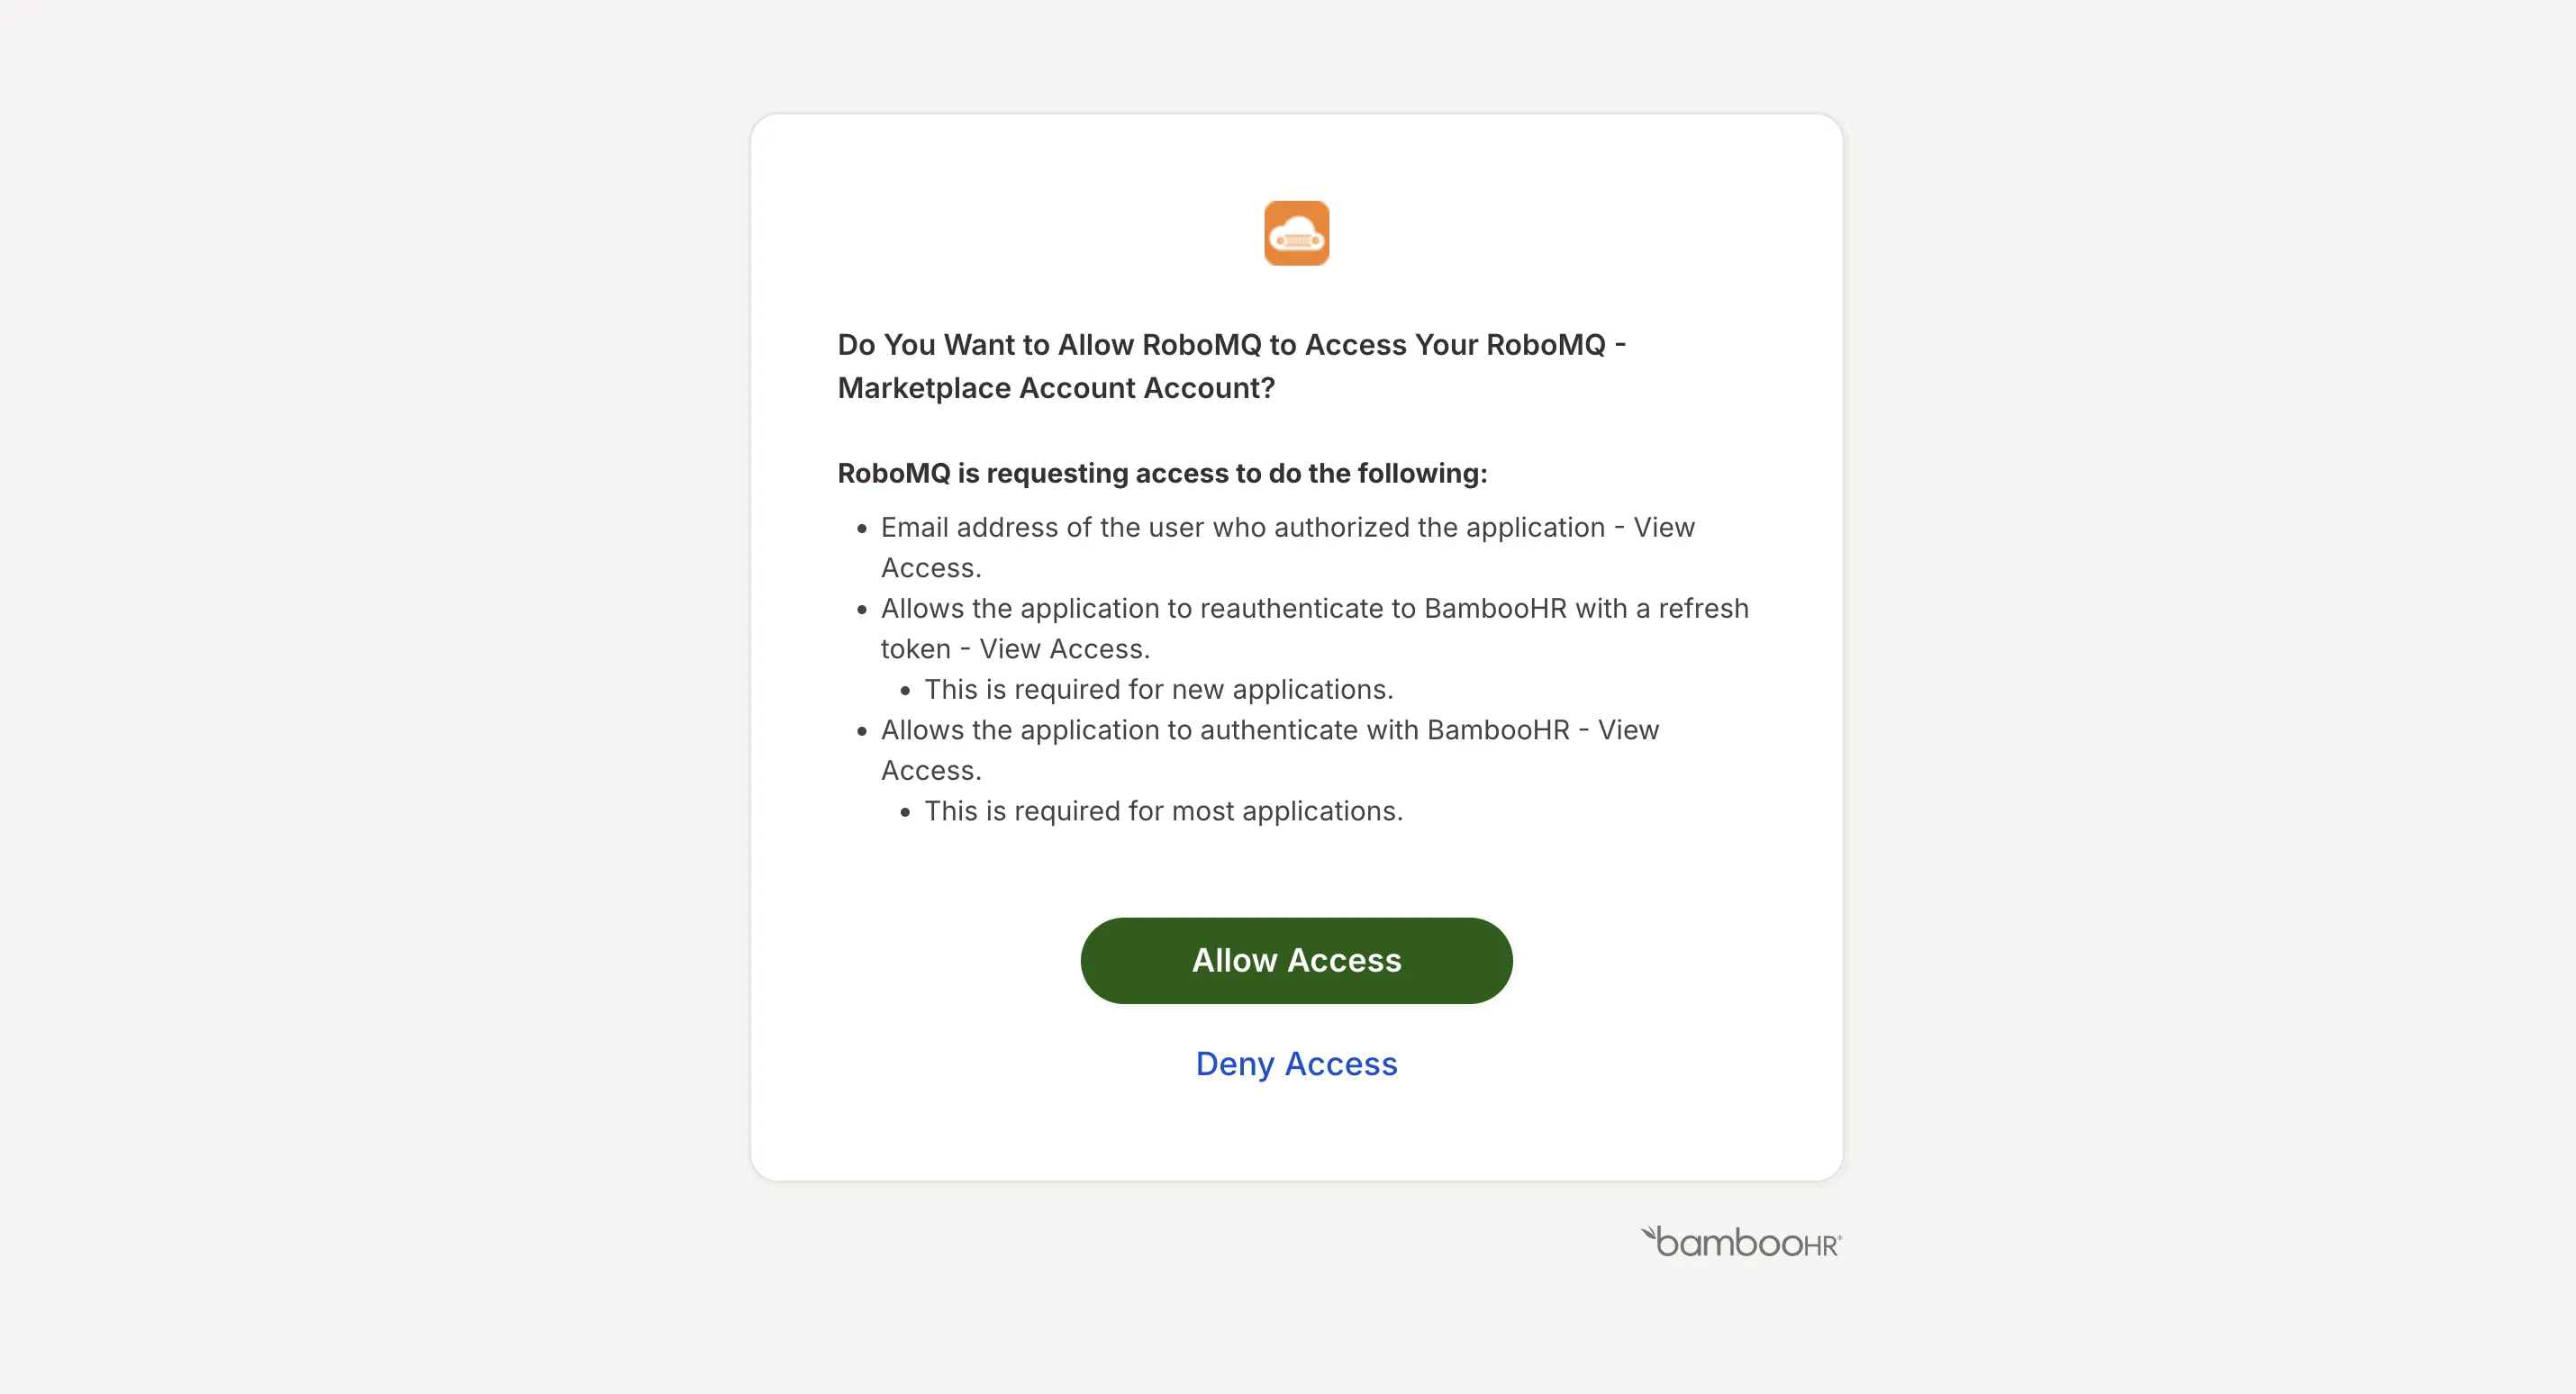
On clicking the 'Link Account' button, you will be redirected to BambooHR Authorization screen and then enter the Service account details to grant BambooHR access for this flow.
By allowing access, you are authorizing RoboMQ to access your BambooHR account.
Creating a service account
Steps for creating a service Account:
- Log into the BambooHR (https://app.bamboohr.com/login/) using your BambooHR account.
- Enter your BambooHR Domain.
- Enter login details to login.
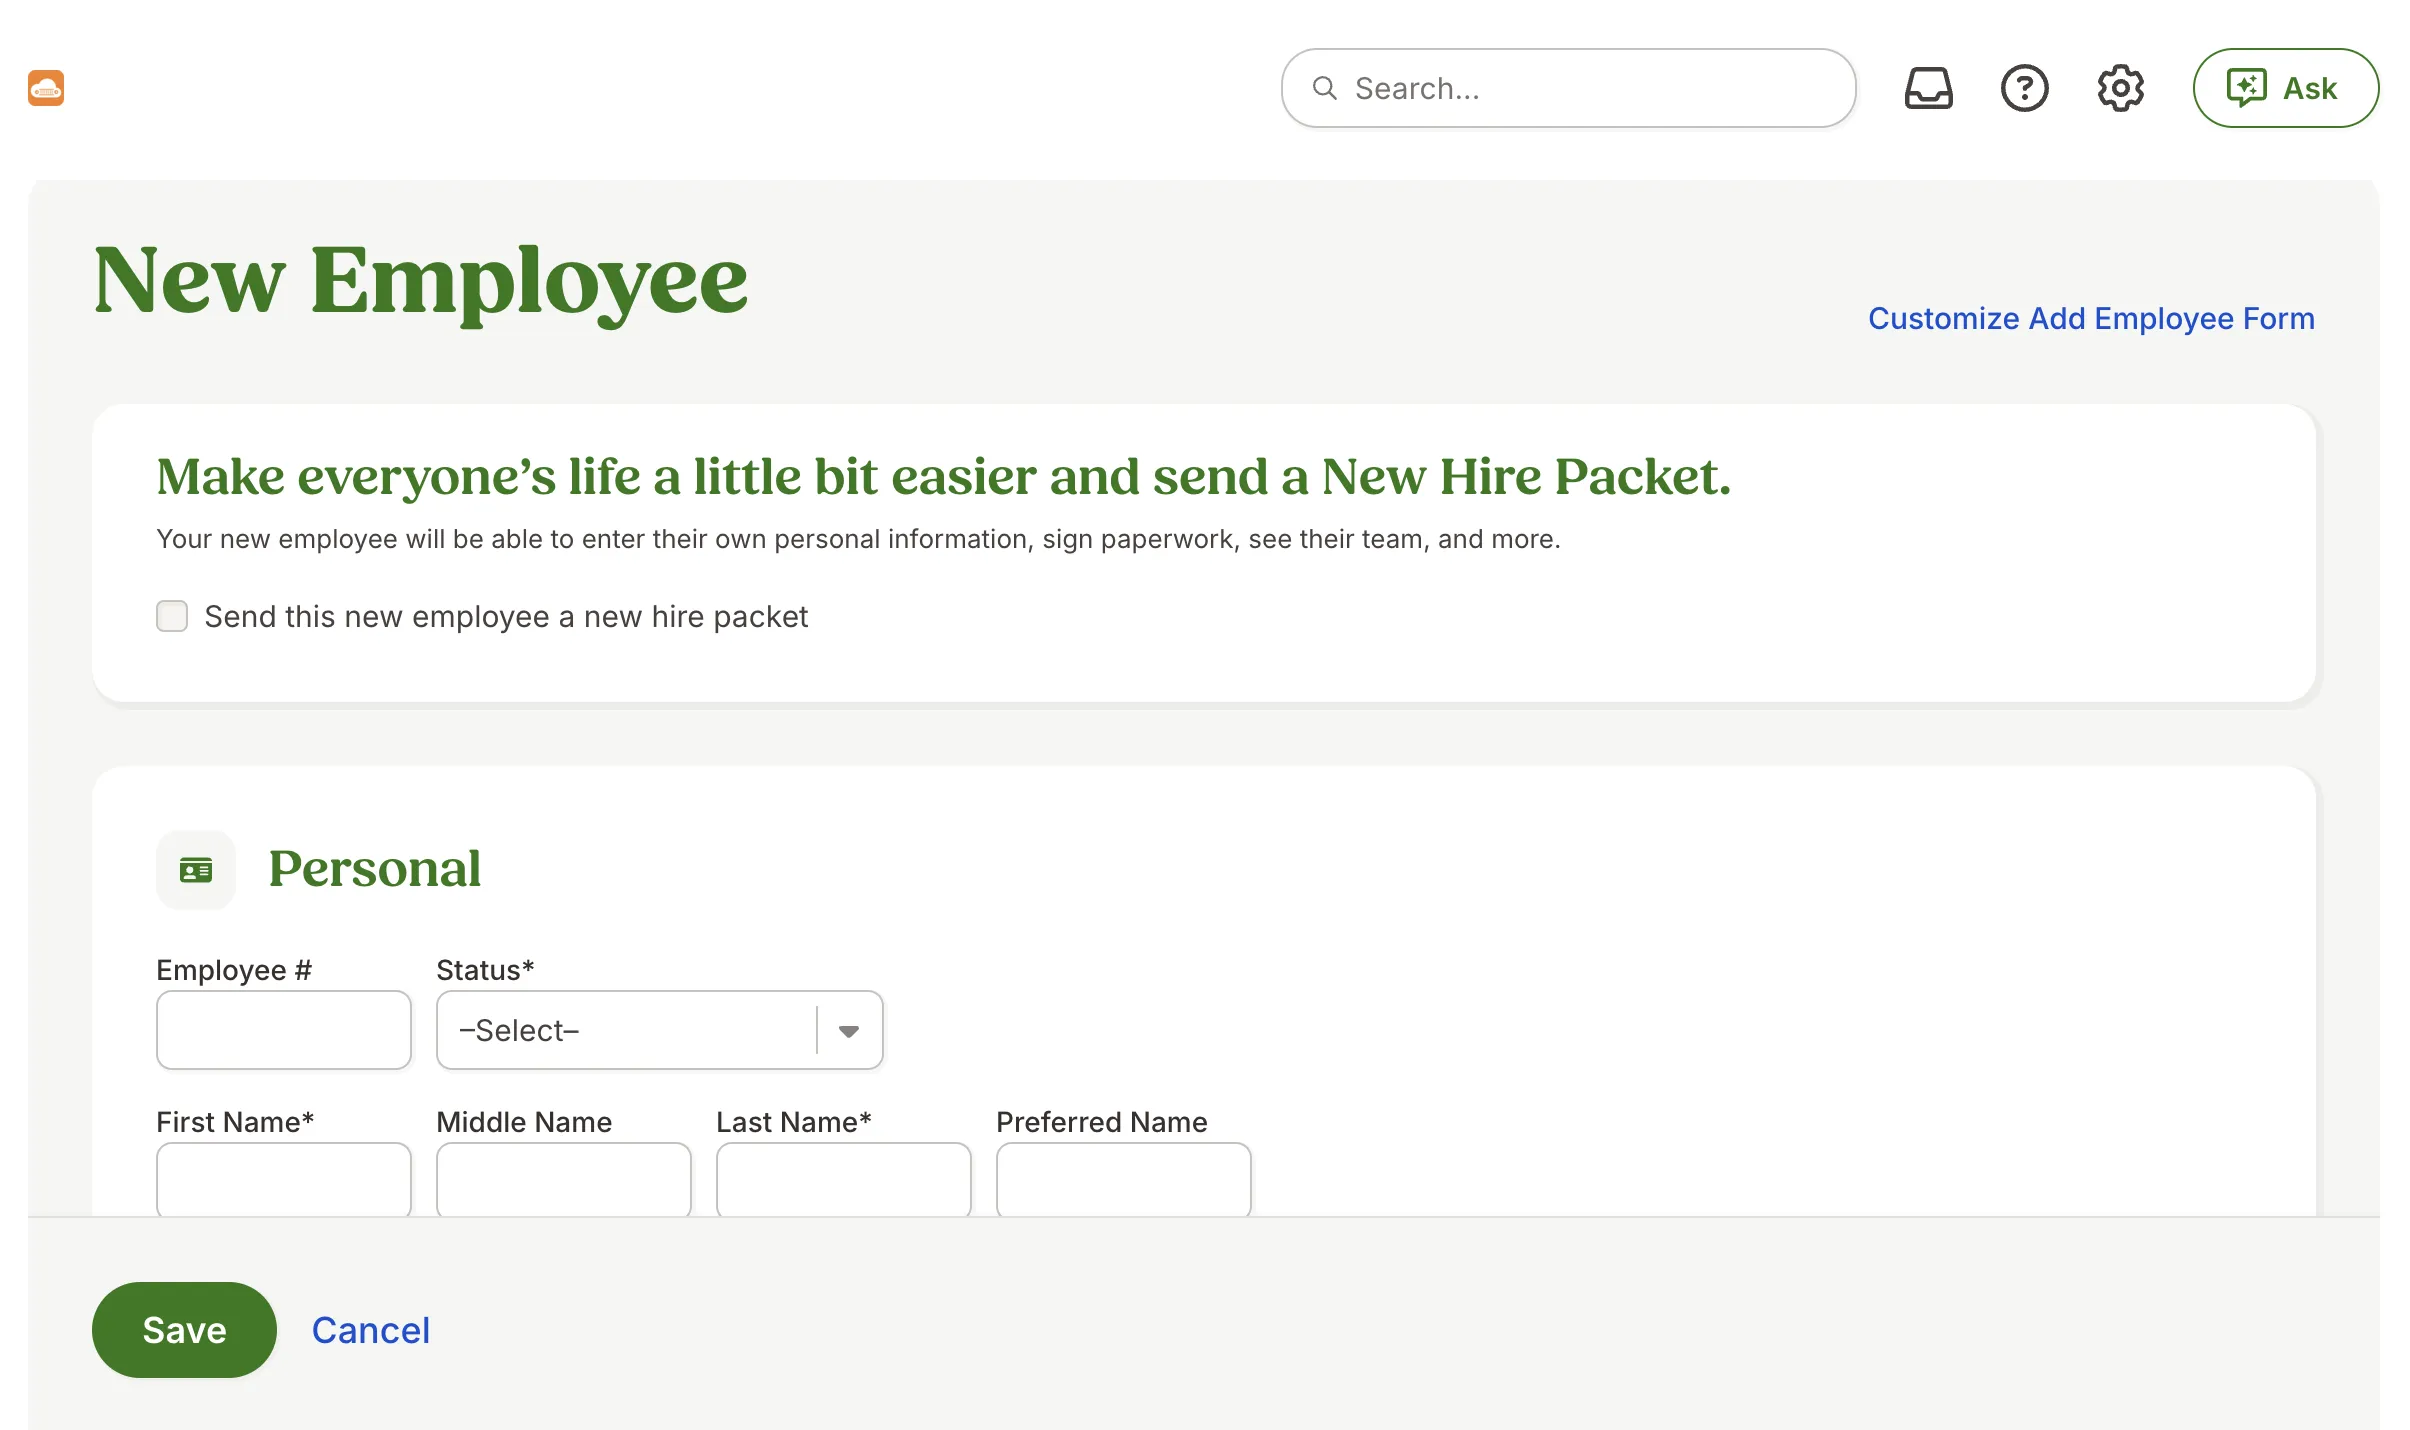
- From the right section click on (+)New.
- Click on New Employee to add a new Employee.
- You can provide access level to the service account based on the attributes you want HiretoRetire to pull.
Basic Auth Connection
- Connection Name - A user defined nomenclature for your connection. By default, the connection name is "Connection-Basic Auth", you can change the name as per your preferences.
- API Key - The BambooHR API key assigned to the user that you noted in the API Provider Setup.
- Company Domain - The BambooHR Domain Name. The Domain Name appears in the url of your account. For example, in https://company_name.bamboohr.com/ the Domain Name is the company_name.
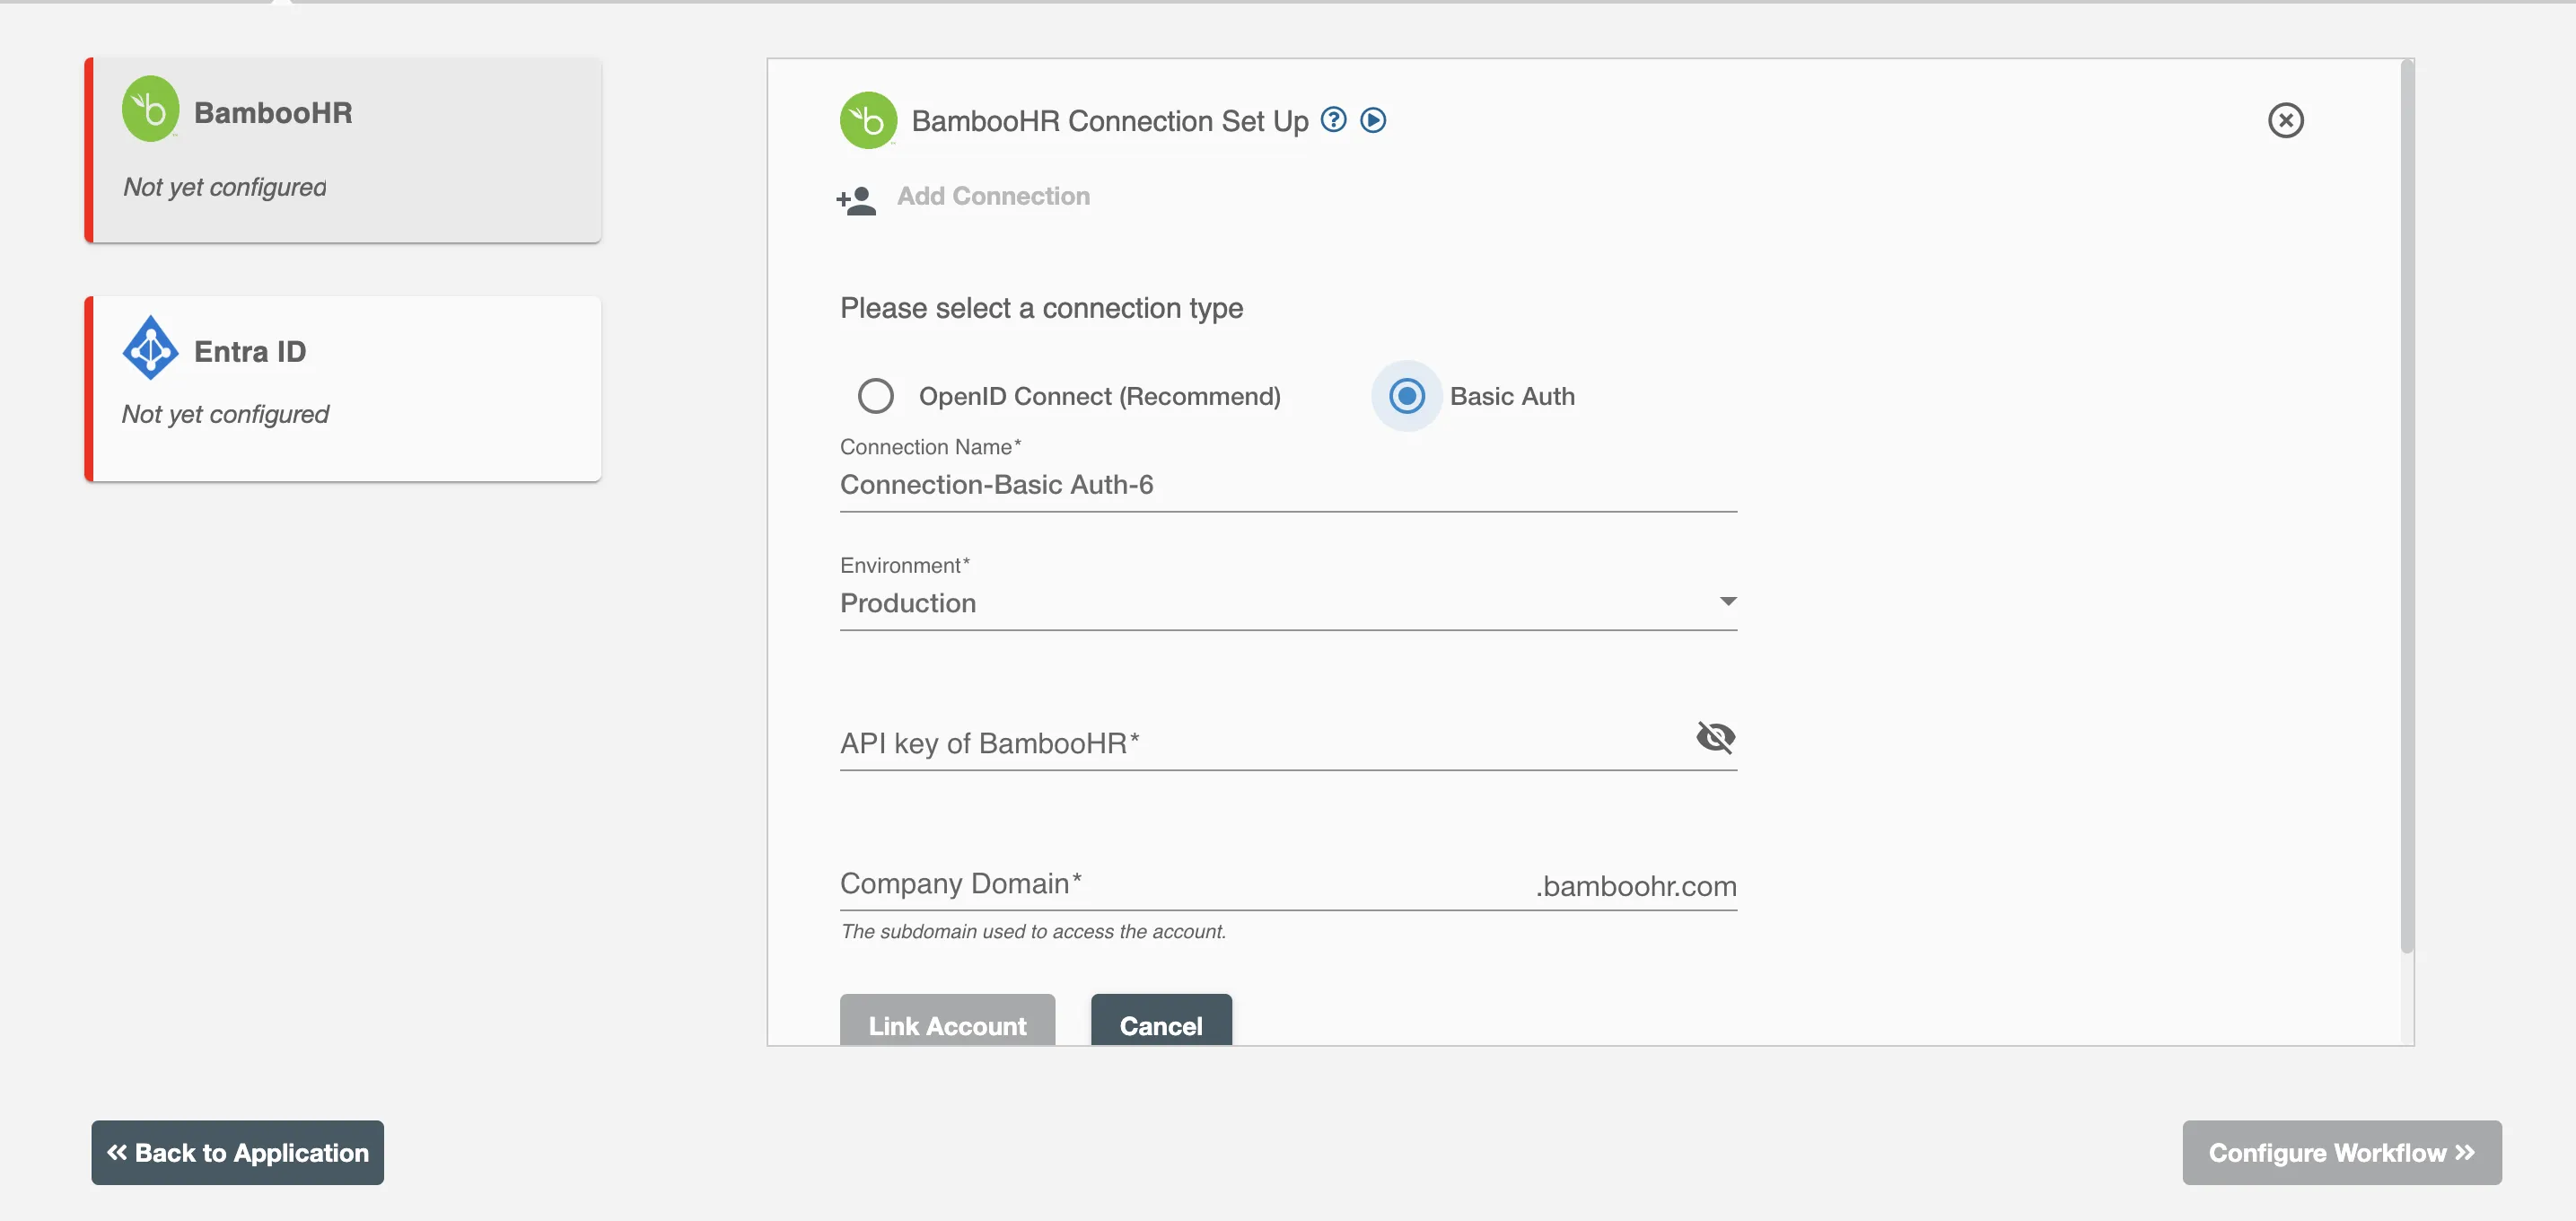
To authenticate a BambooHR connection, you must use your API Key and the BambooHR Domain that you use to log in to BambooHR.
How to Generate API Key
Steps for Generating API Key:
- Log into the BambooHR (https://app.bamboohr.com/login/) using your BambooHR account.
- Enter your BambooHR Domain.
- Enter login details to login.
- From the right profile navigation select API keys.
-
Click on Add New Key to add a new API key.
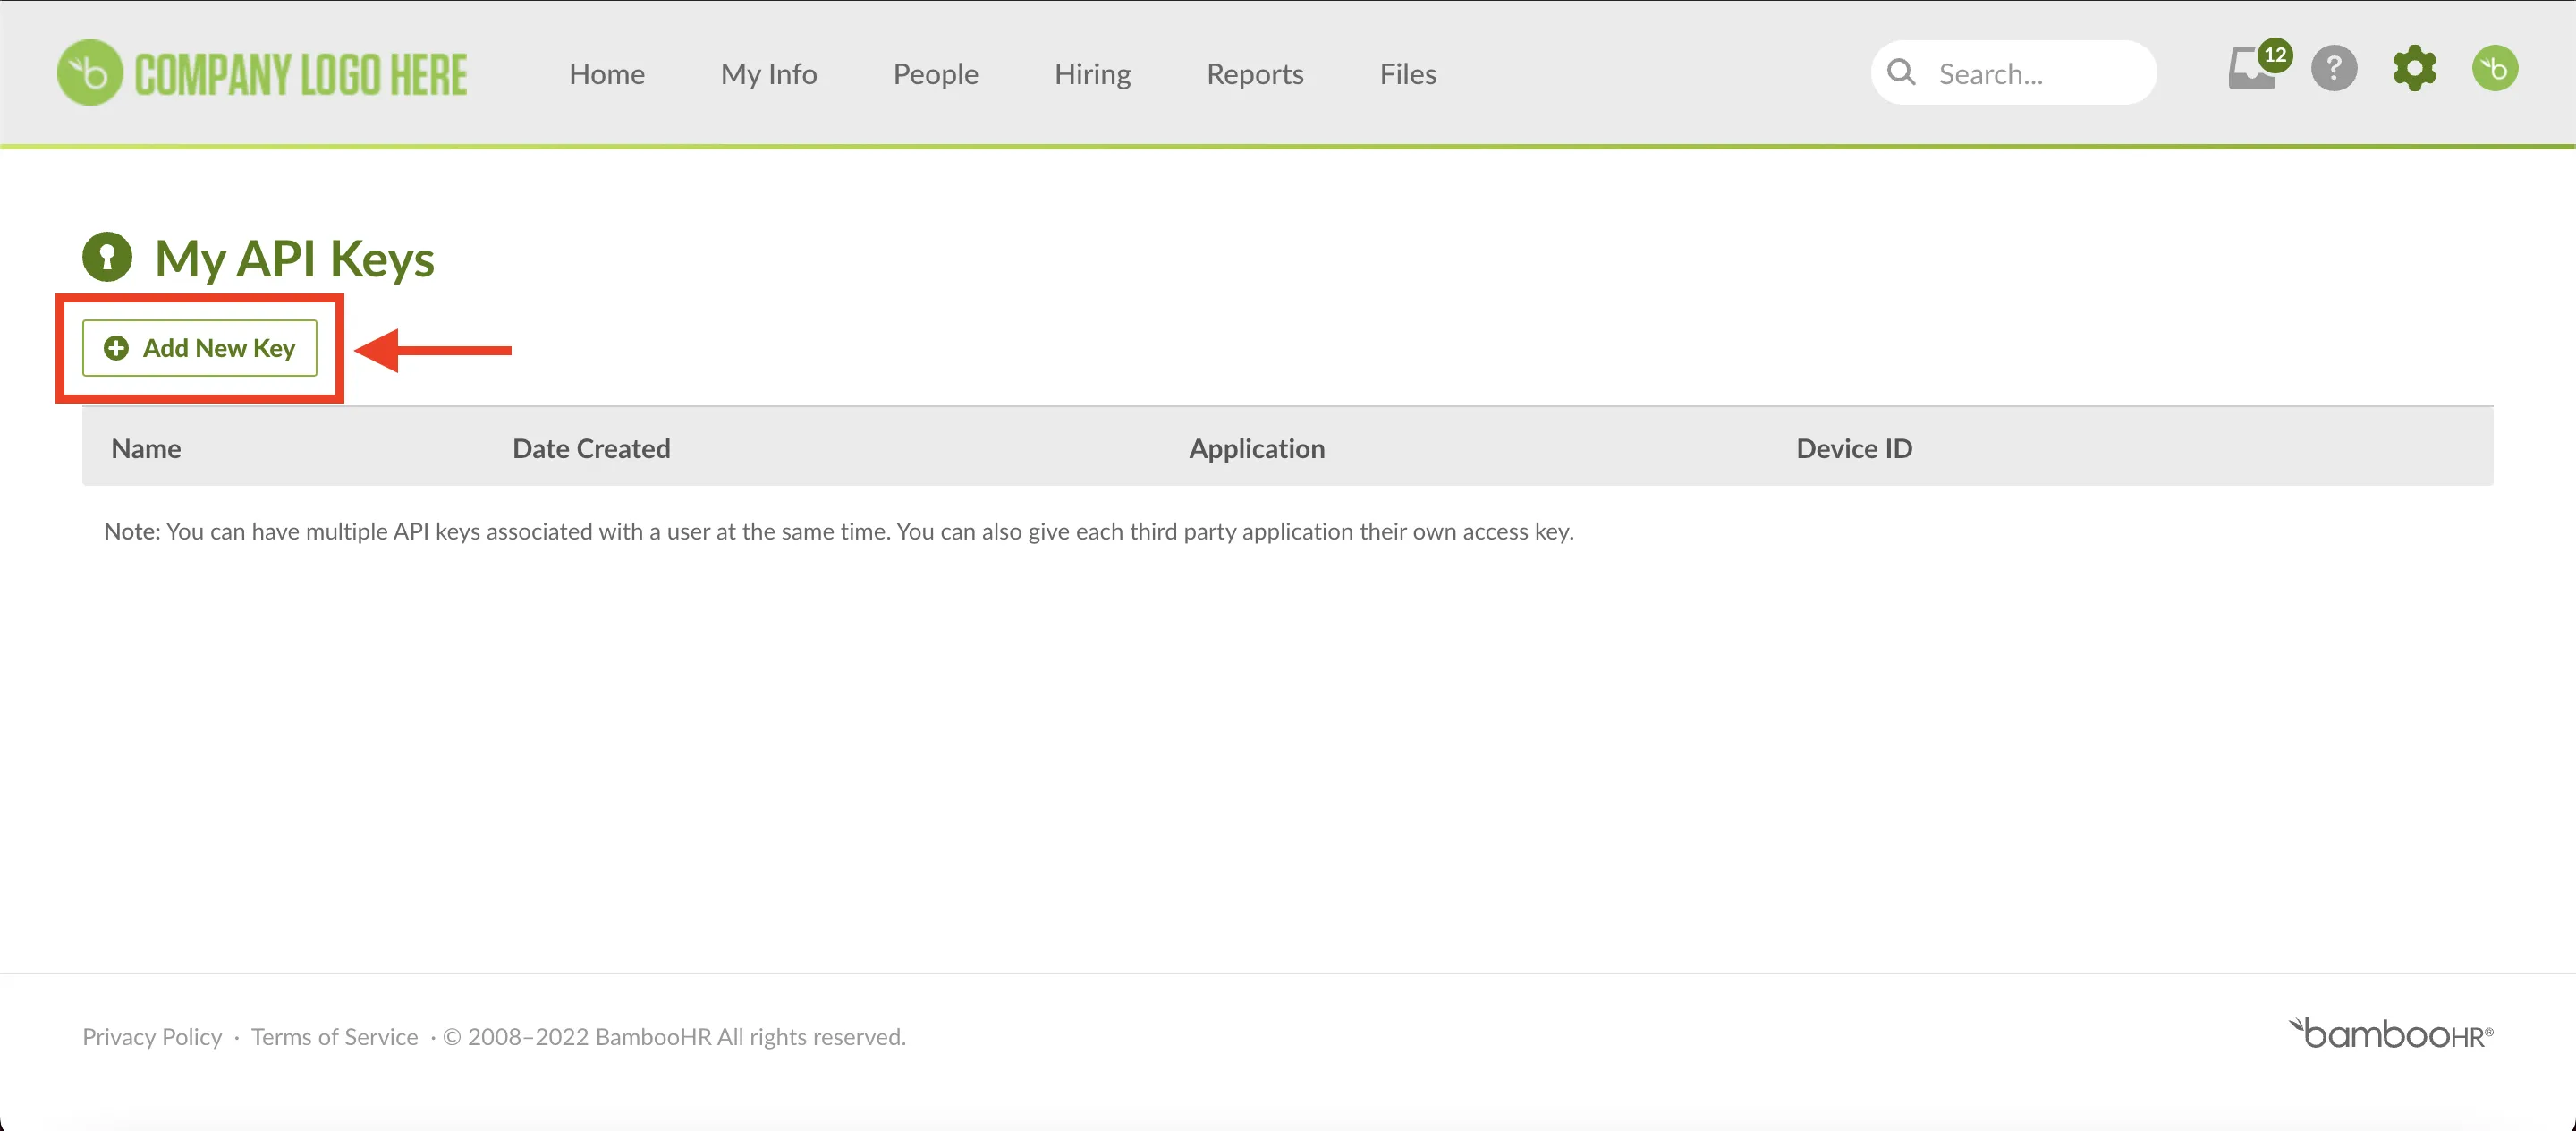 Figure 5 Adding New API Key
 -
Give a name to the API key and then click on “Generate key” after that an API key will be generated.
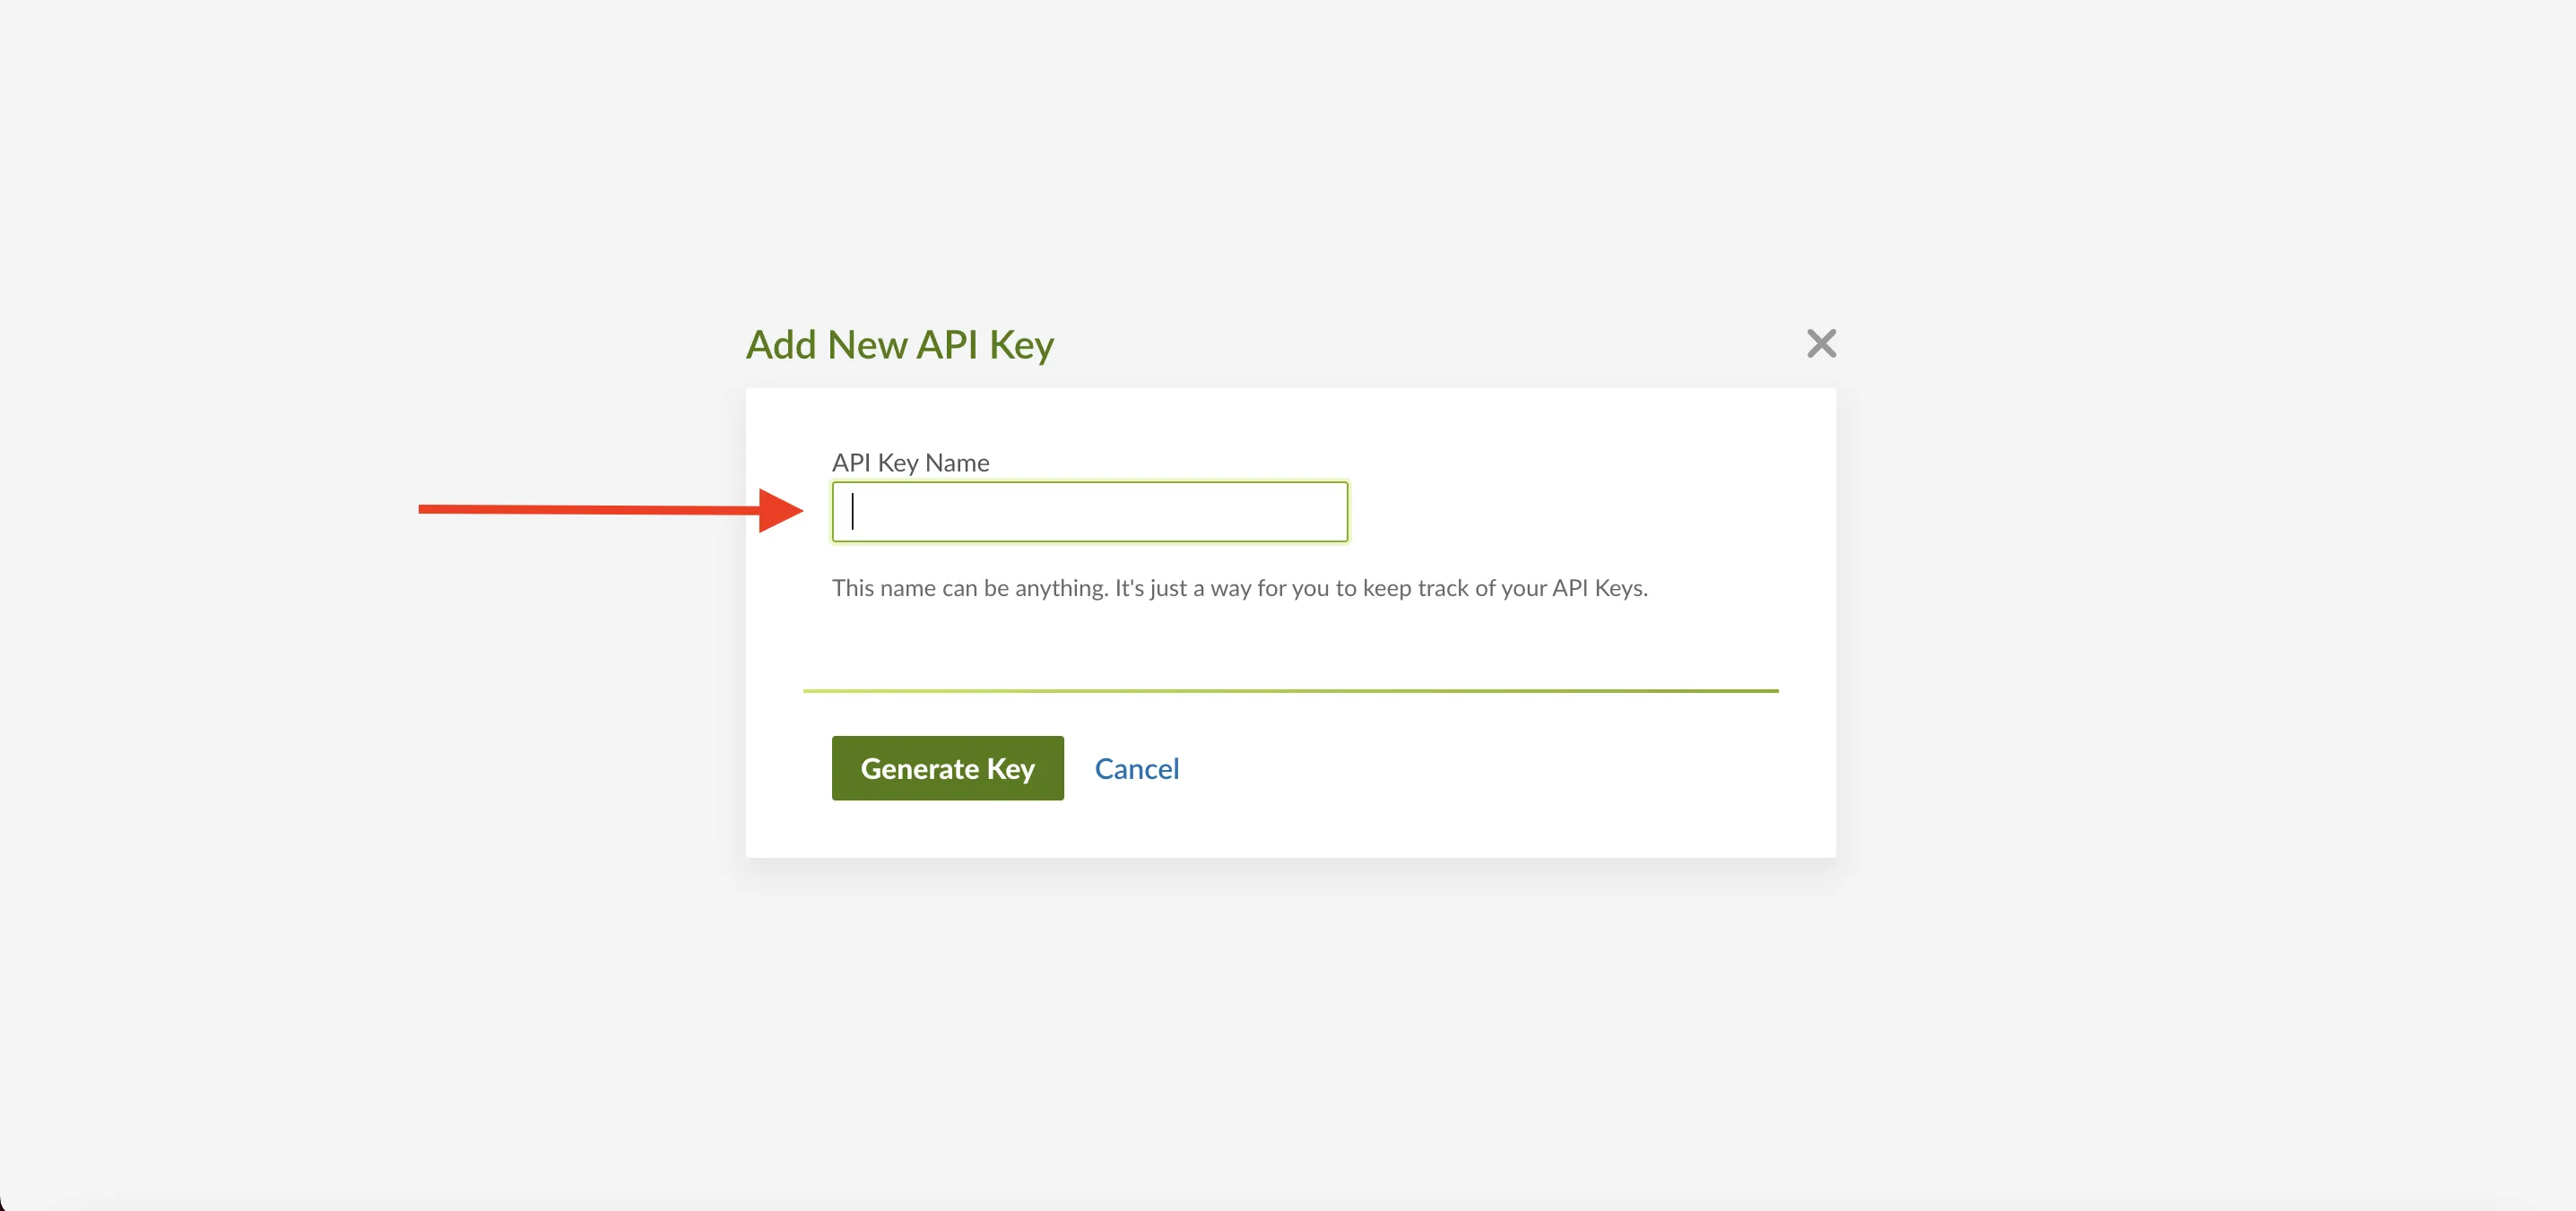 Figure 5.1 New API Key Name
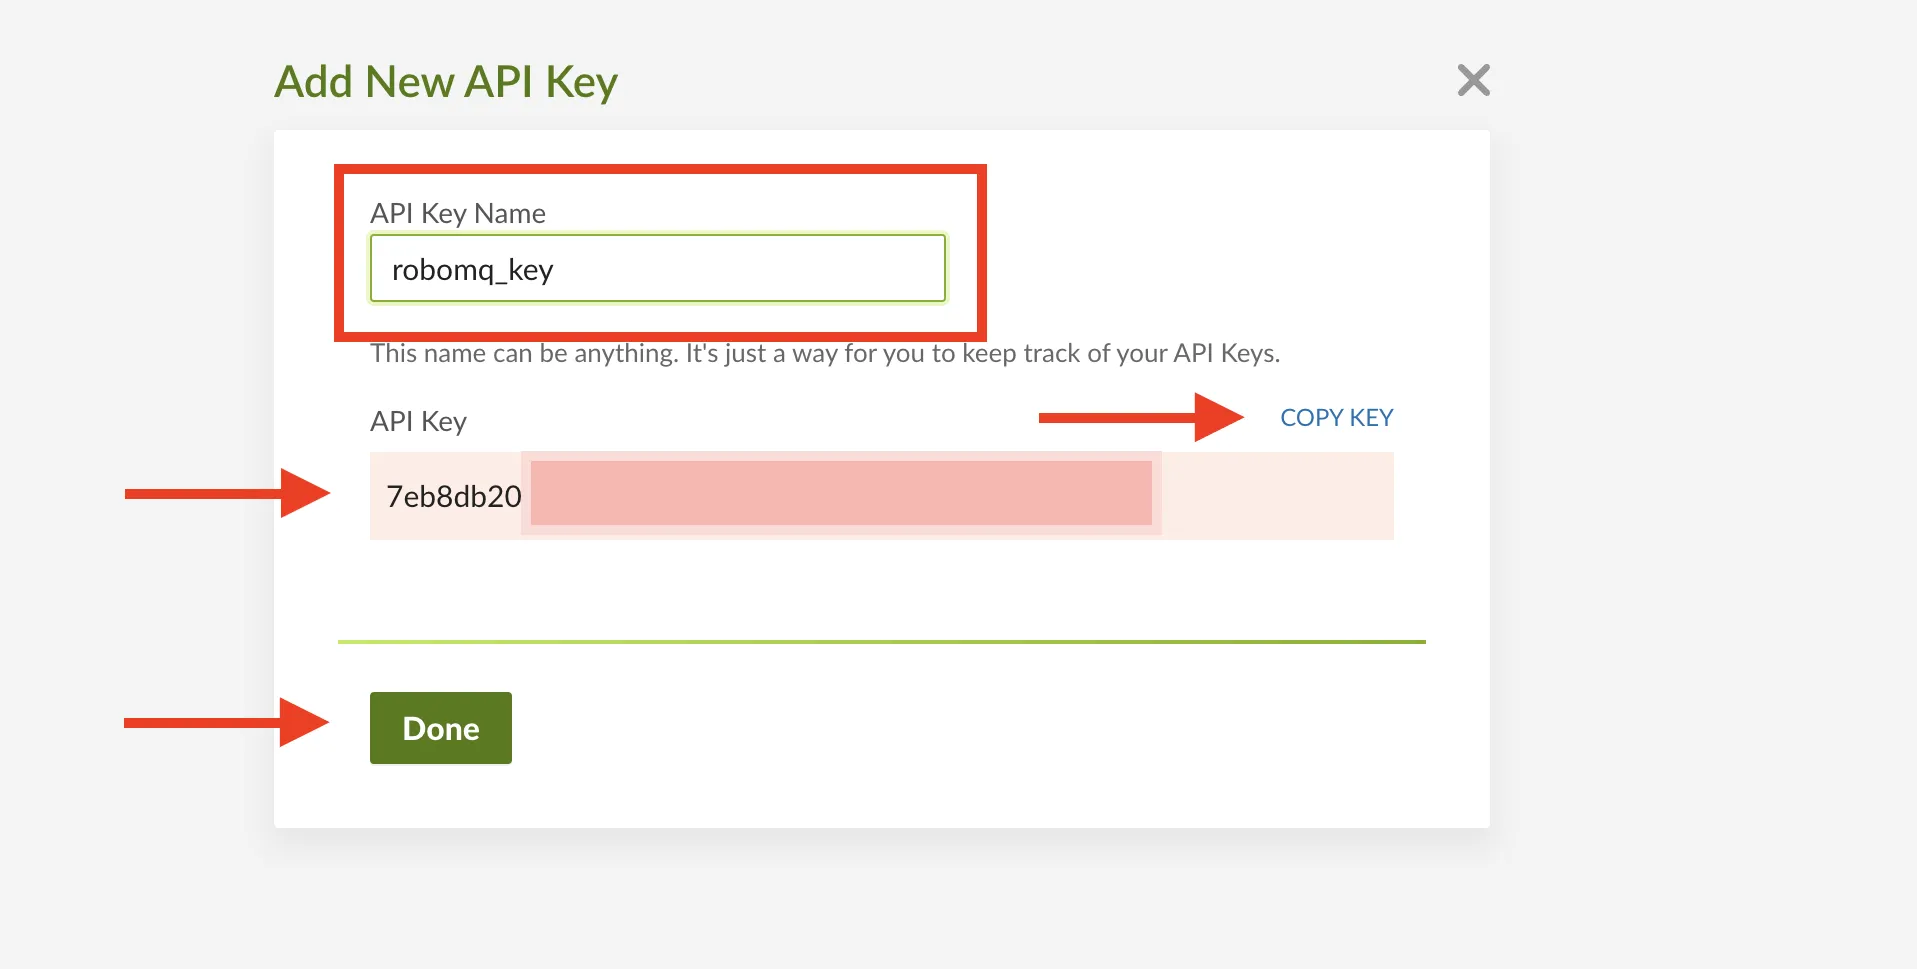 Figure 5.2 New API Key Name
Access Level in BambooHR
To utilize Hire2Retire, a user must possess a specific set of permissions granting read access to data fields, enabling them to view details for all employees.
Additionally, if a user chooses to activate the Write to HR feature, user should also have write permissions specifically for modifying work email addresses.
To grant the permissions, please follow these steps:
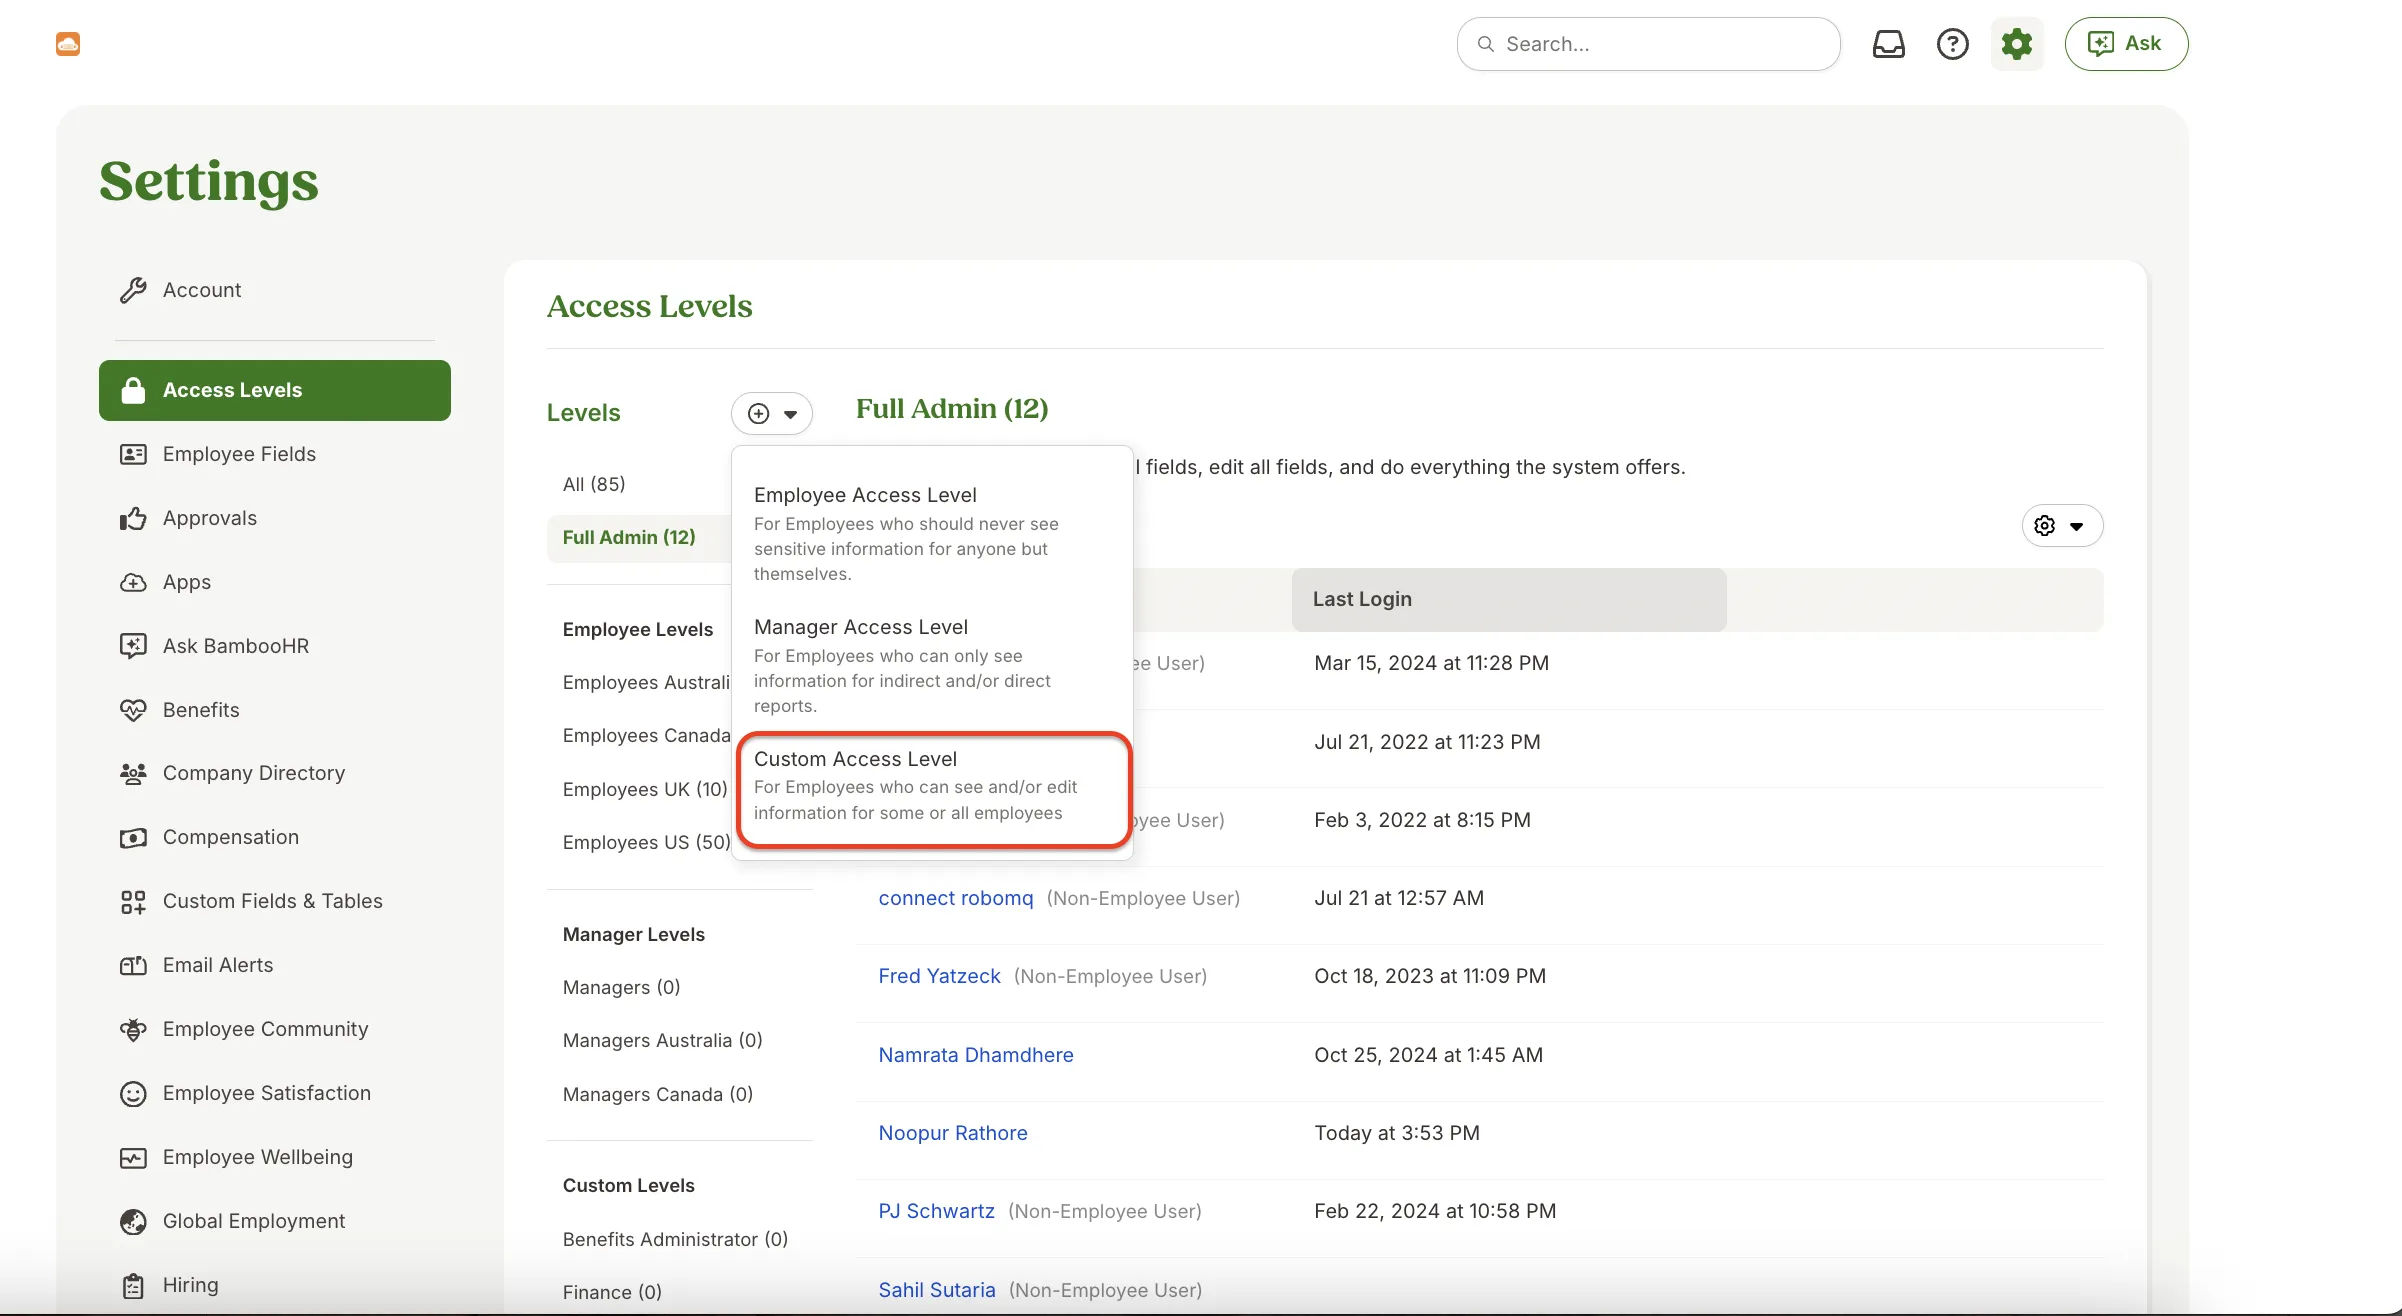
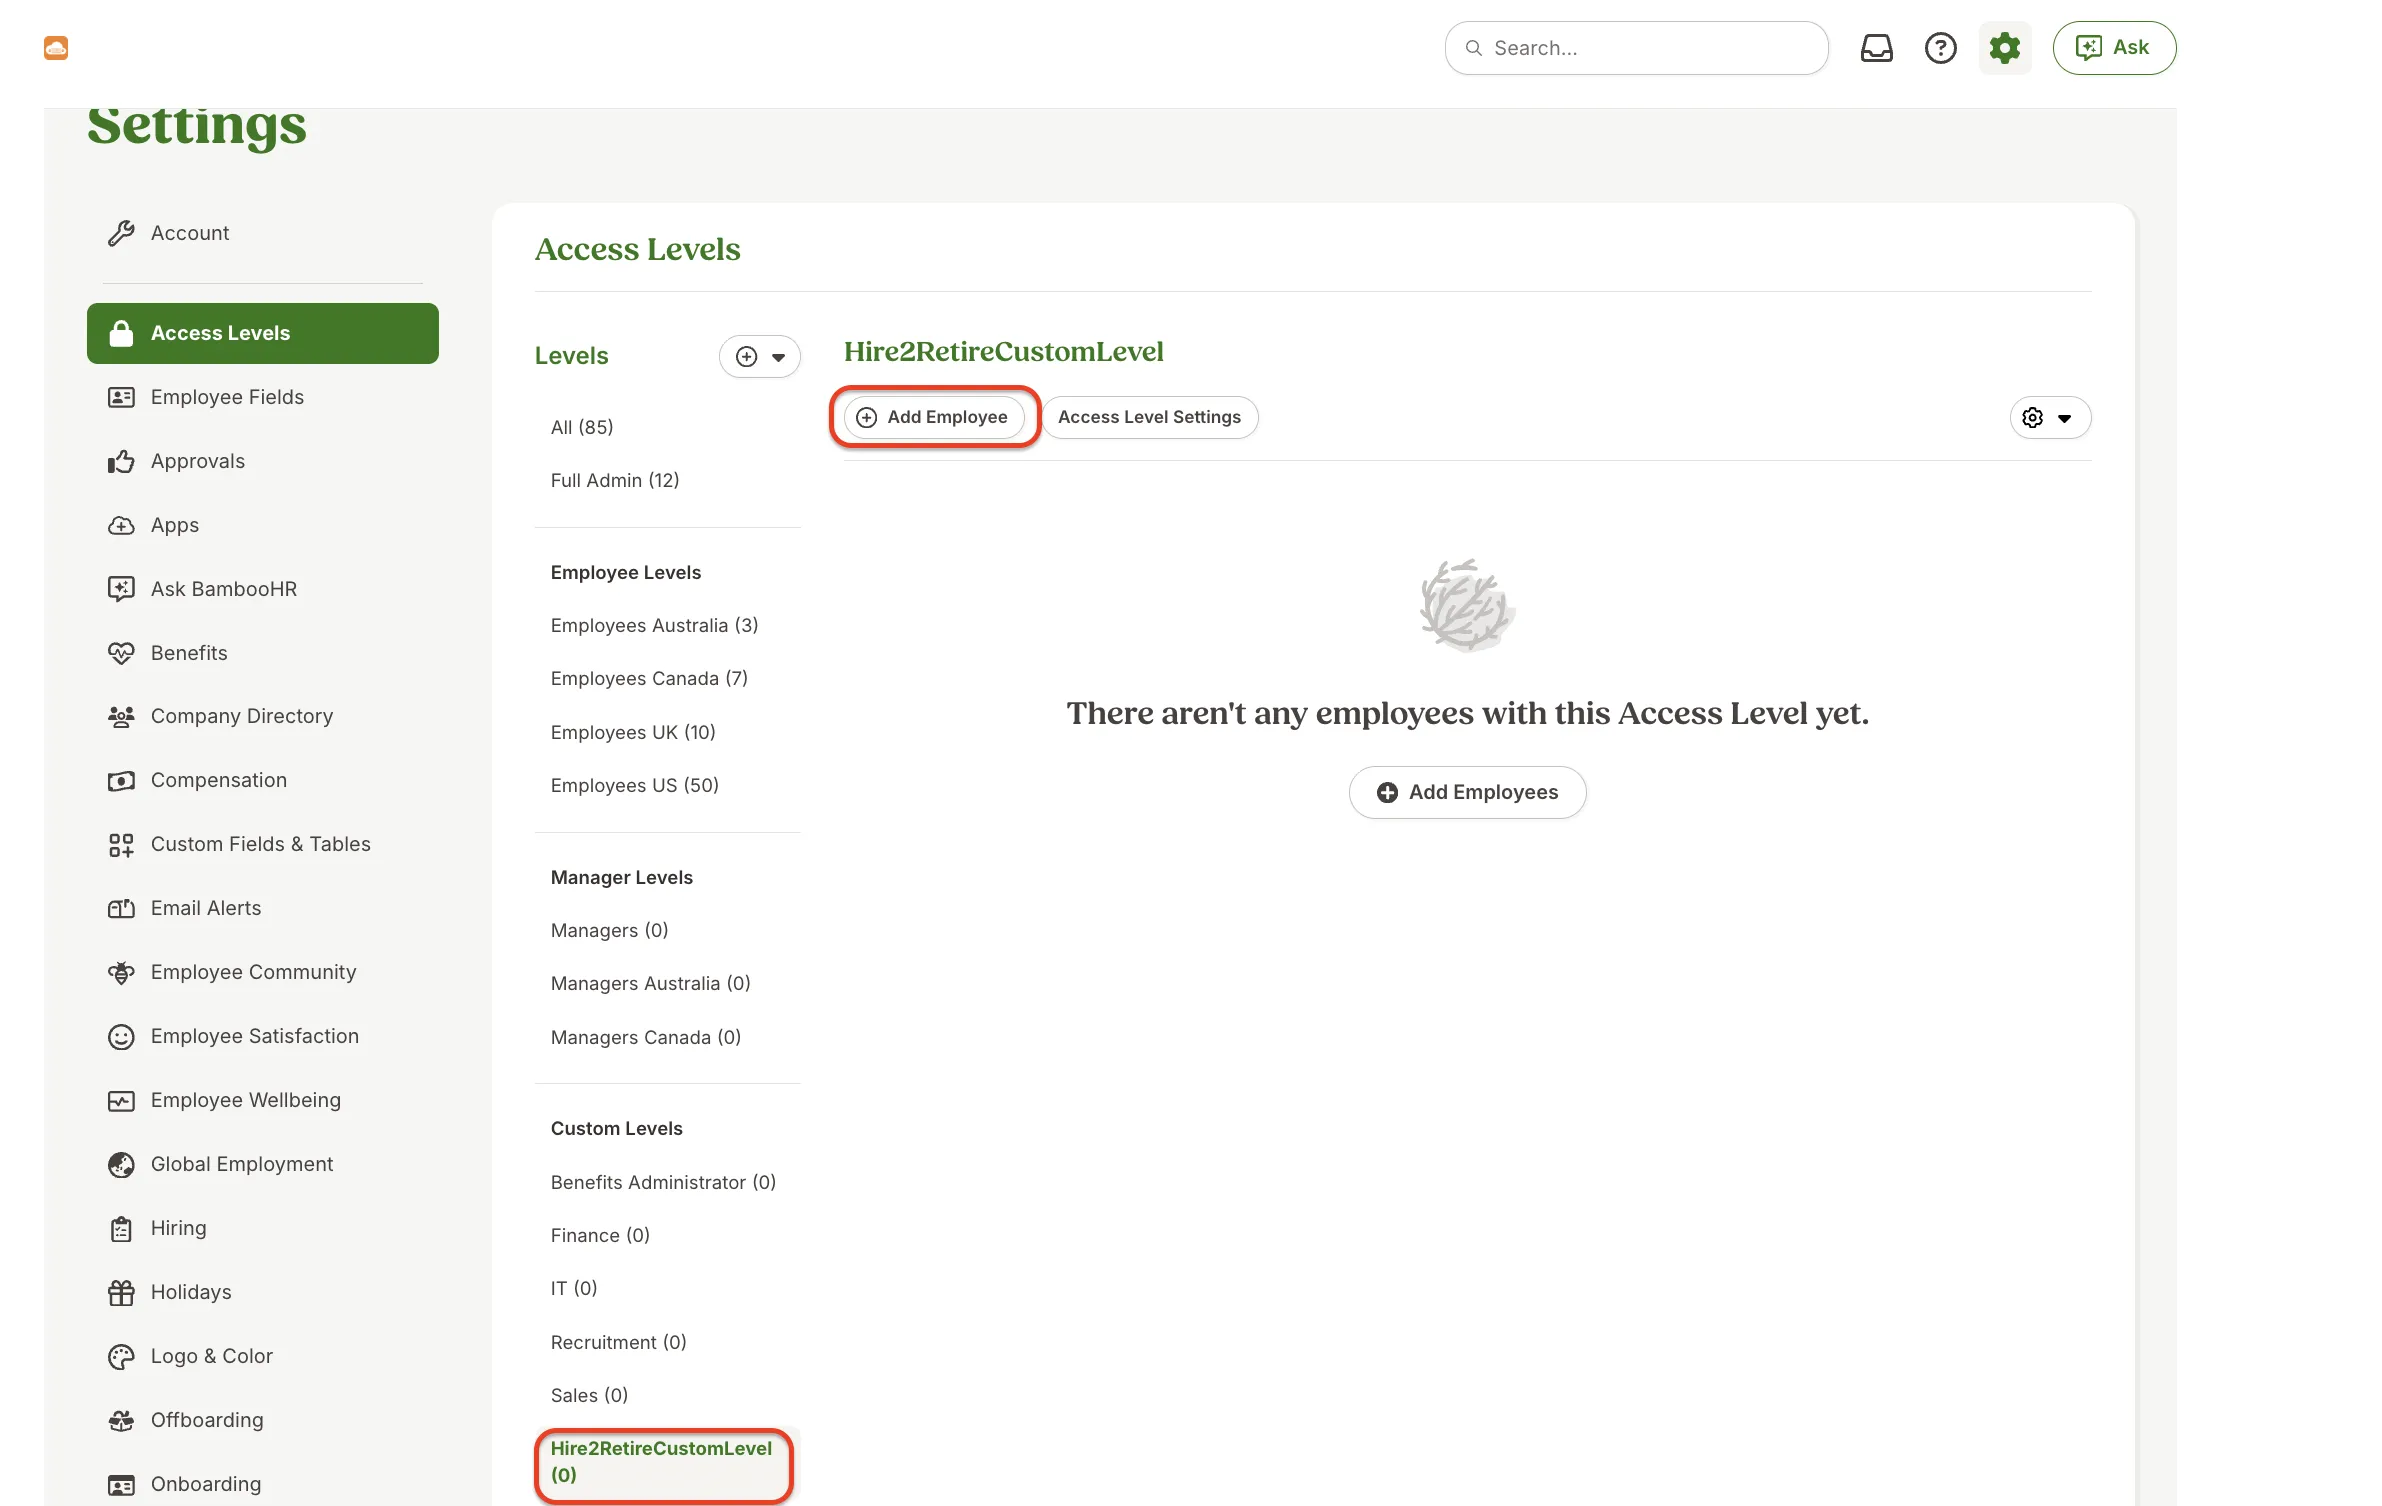
Step 1: Choose Custom Access Level from Settings >> Access Levels >> Click on “Add” symbol right to “Levels”.
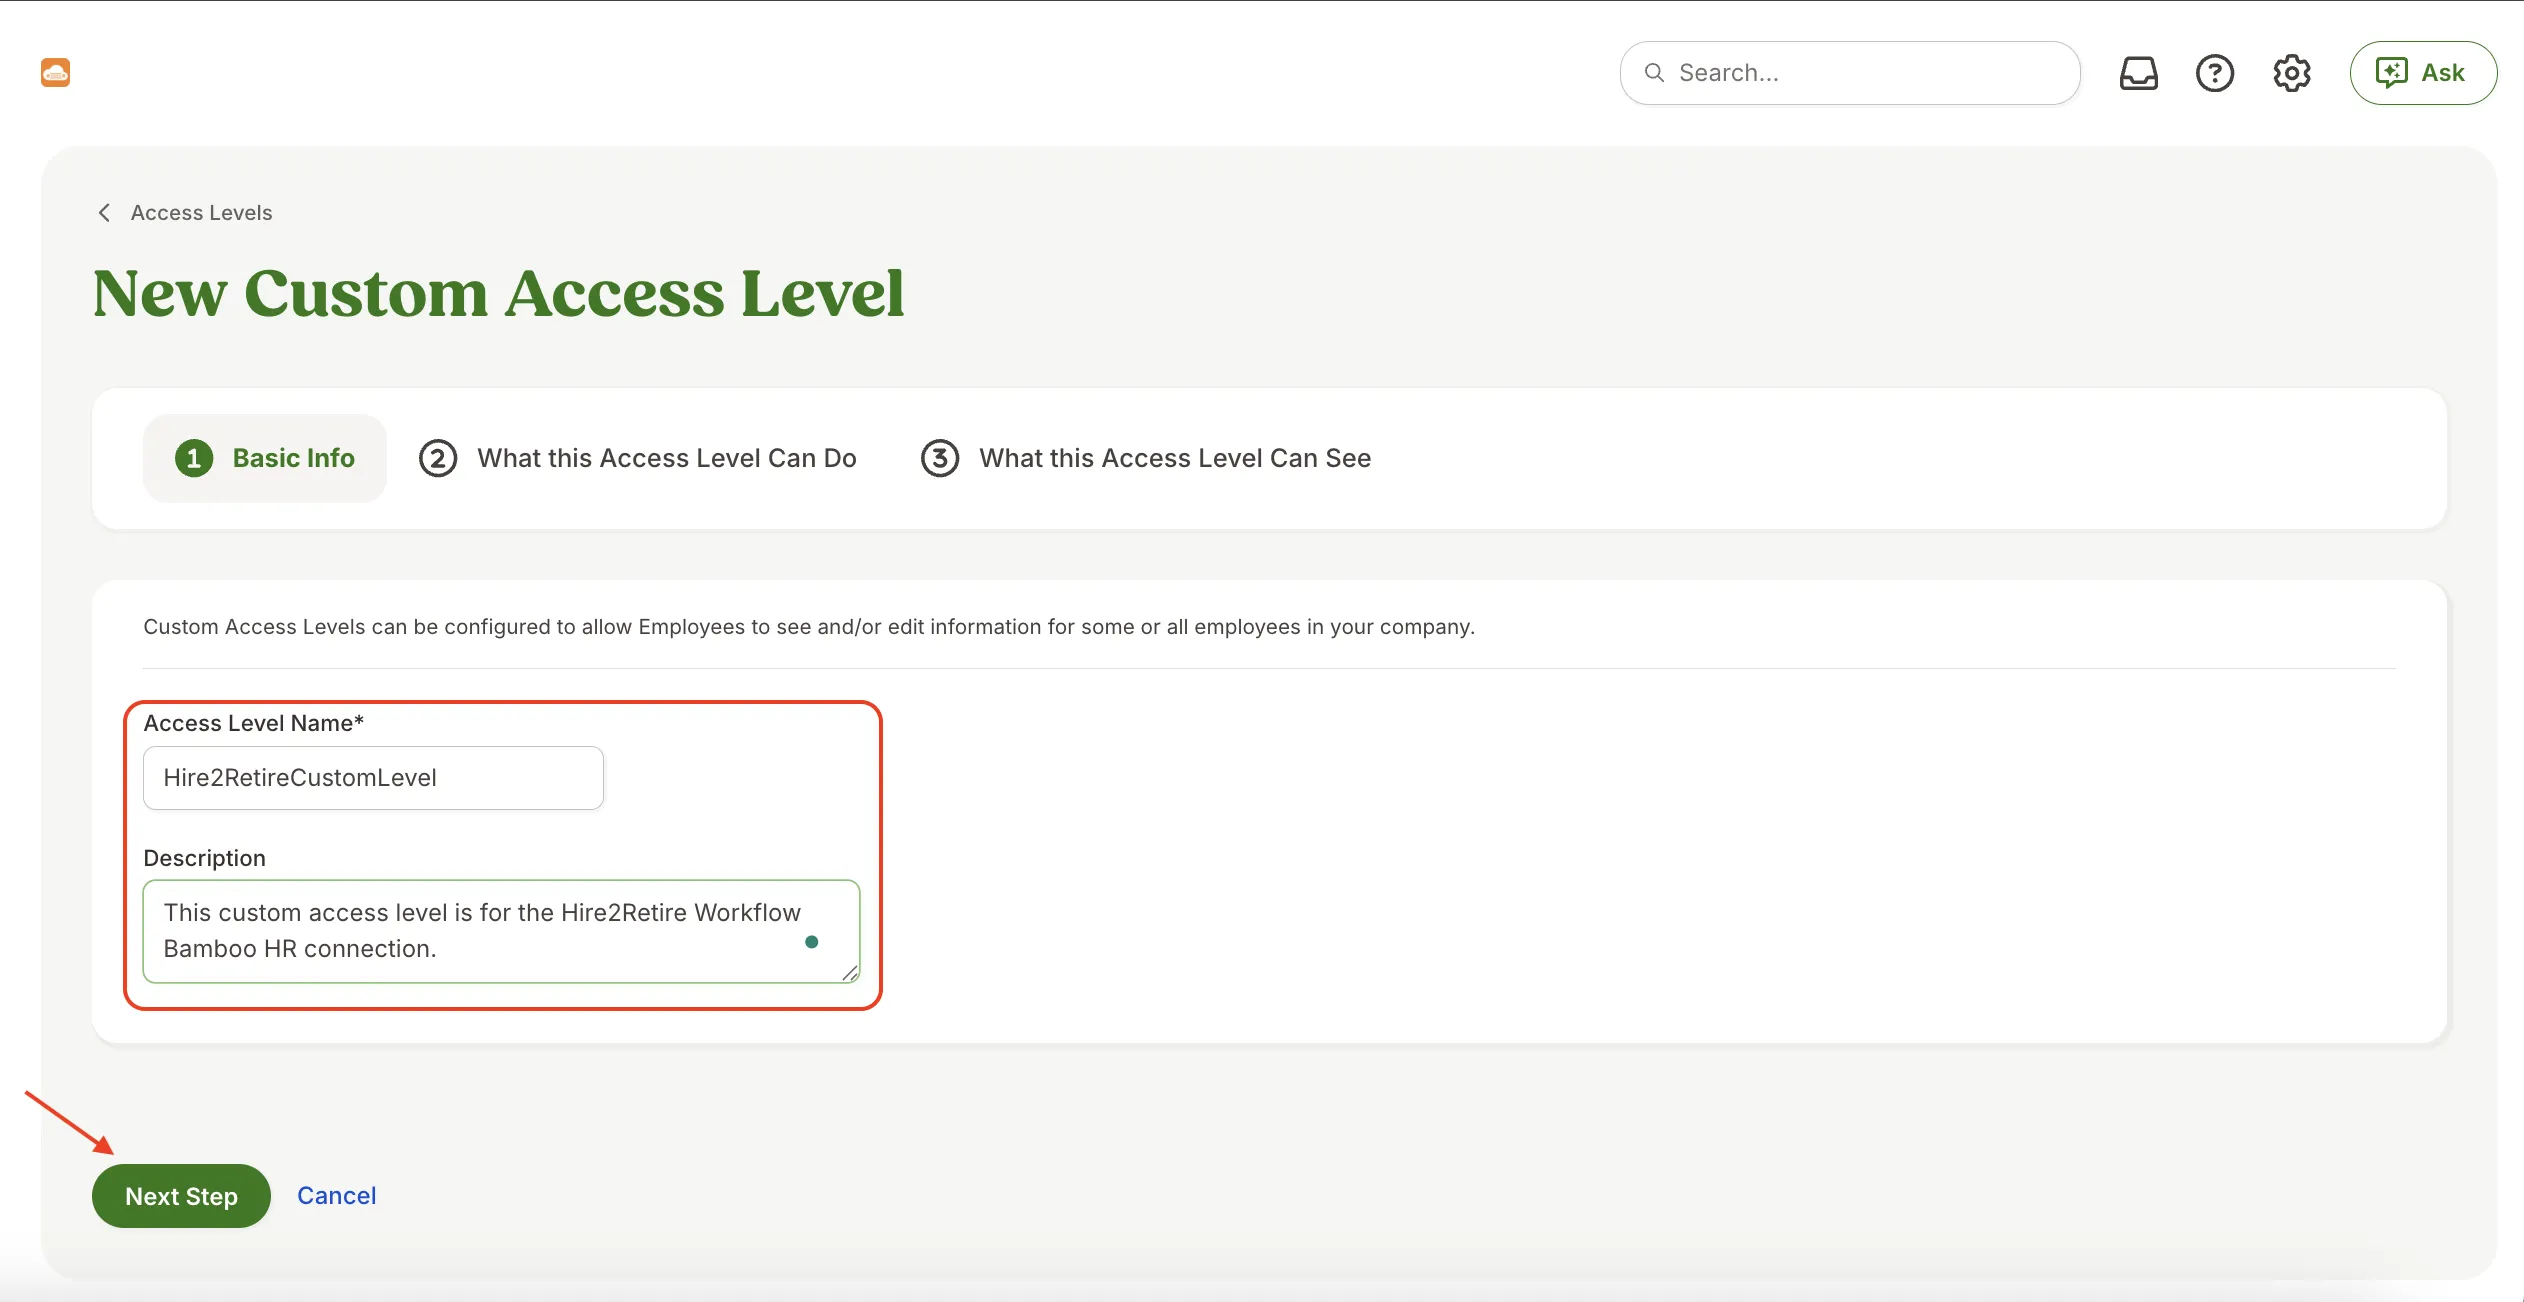
Step 2: Fill in the “Access Level Name” and “Description” and click on “Next Step”.
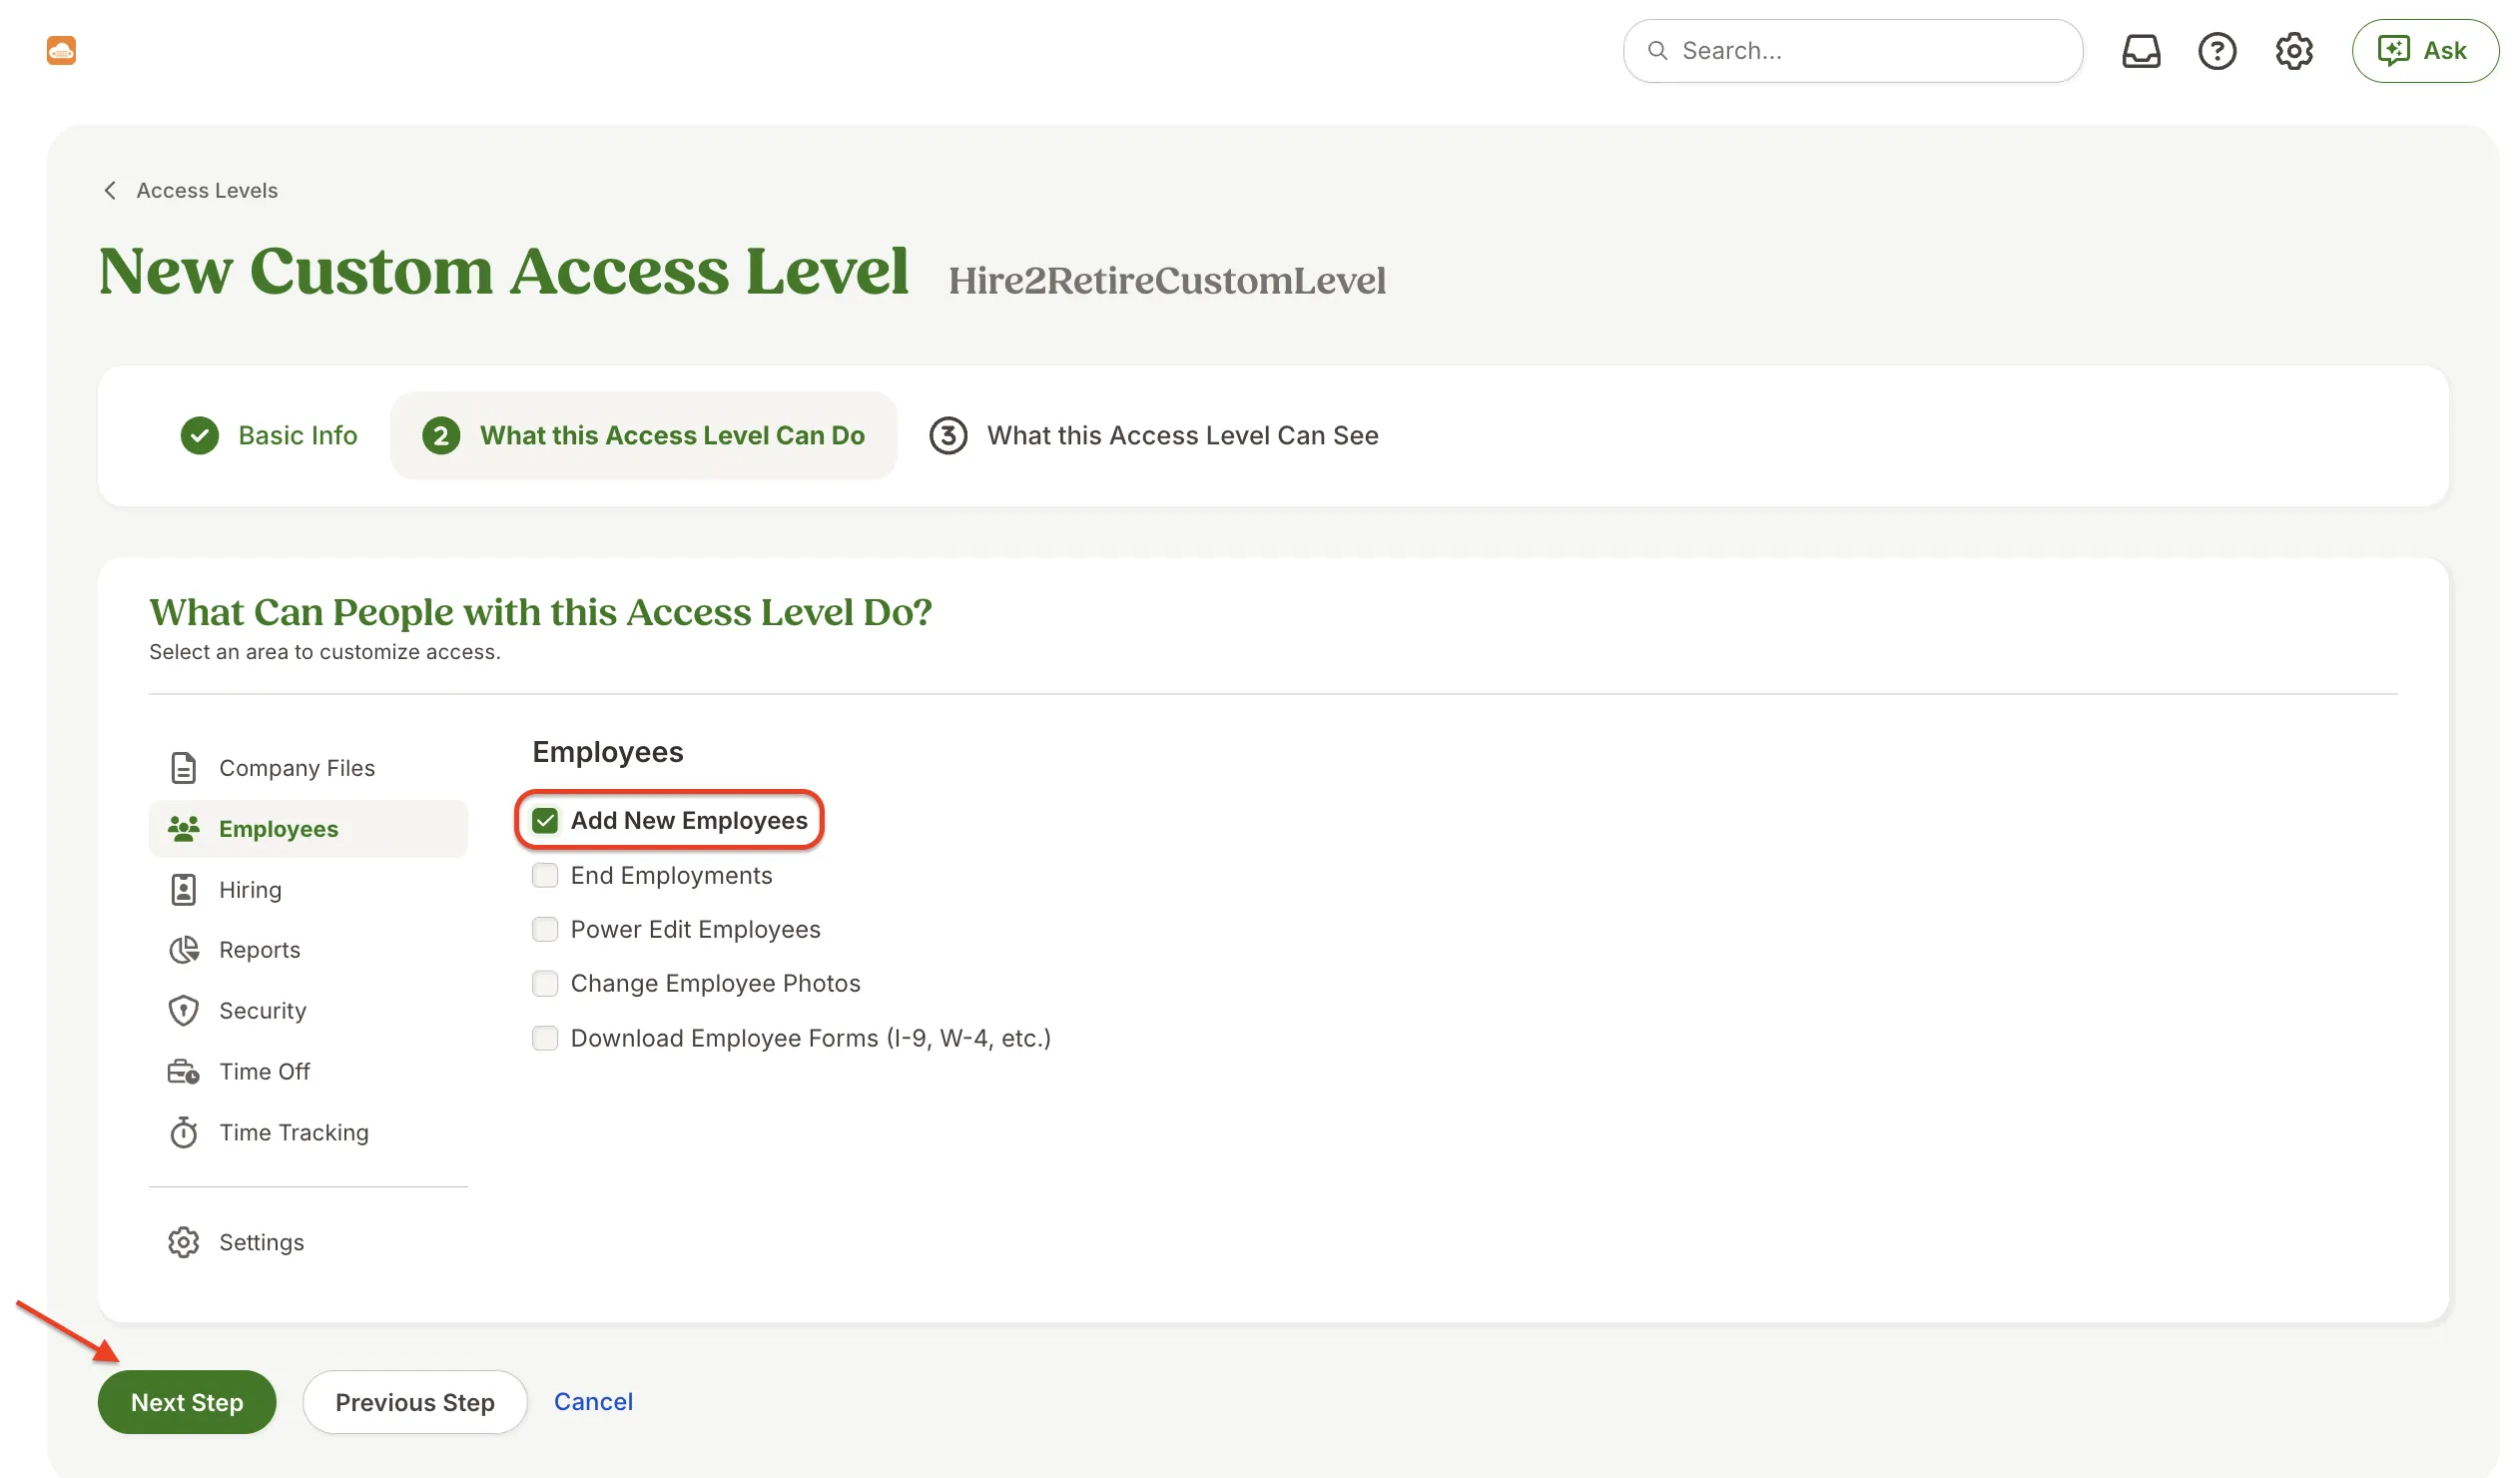
Step 3: Choose the operations that people assigned to this access level can perform, then click "Next Step".
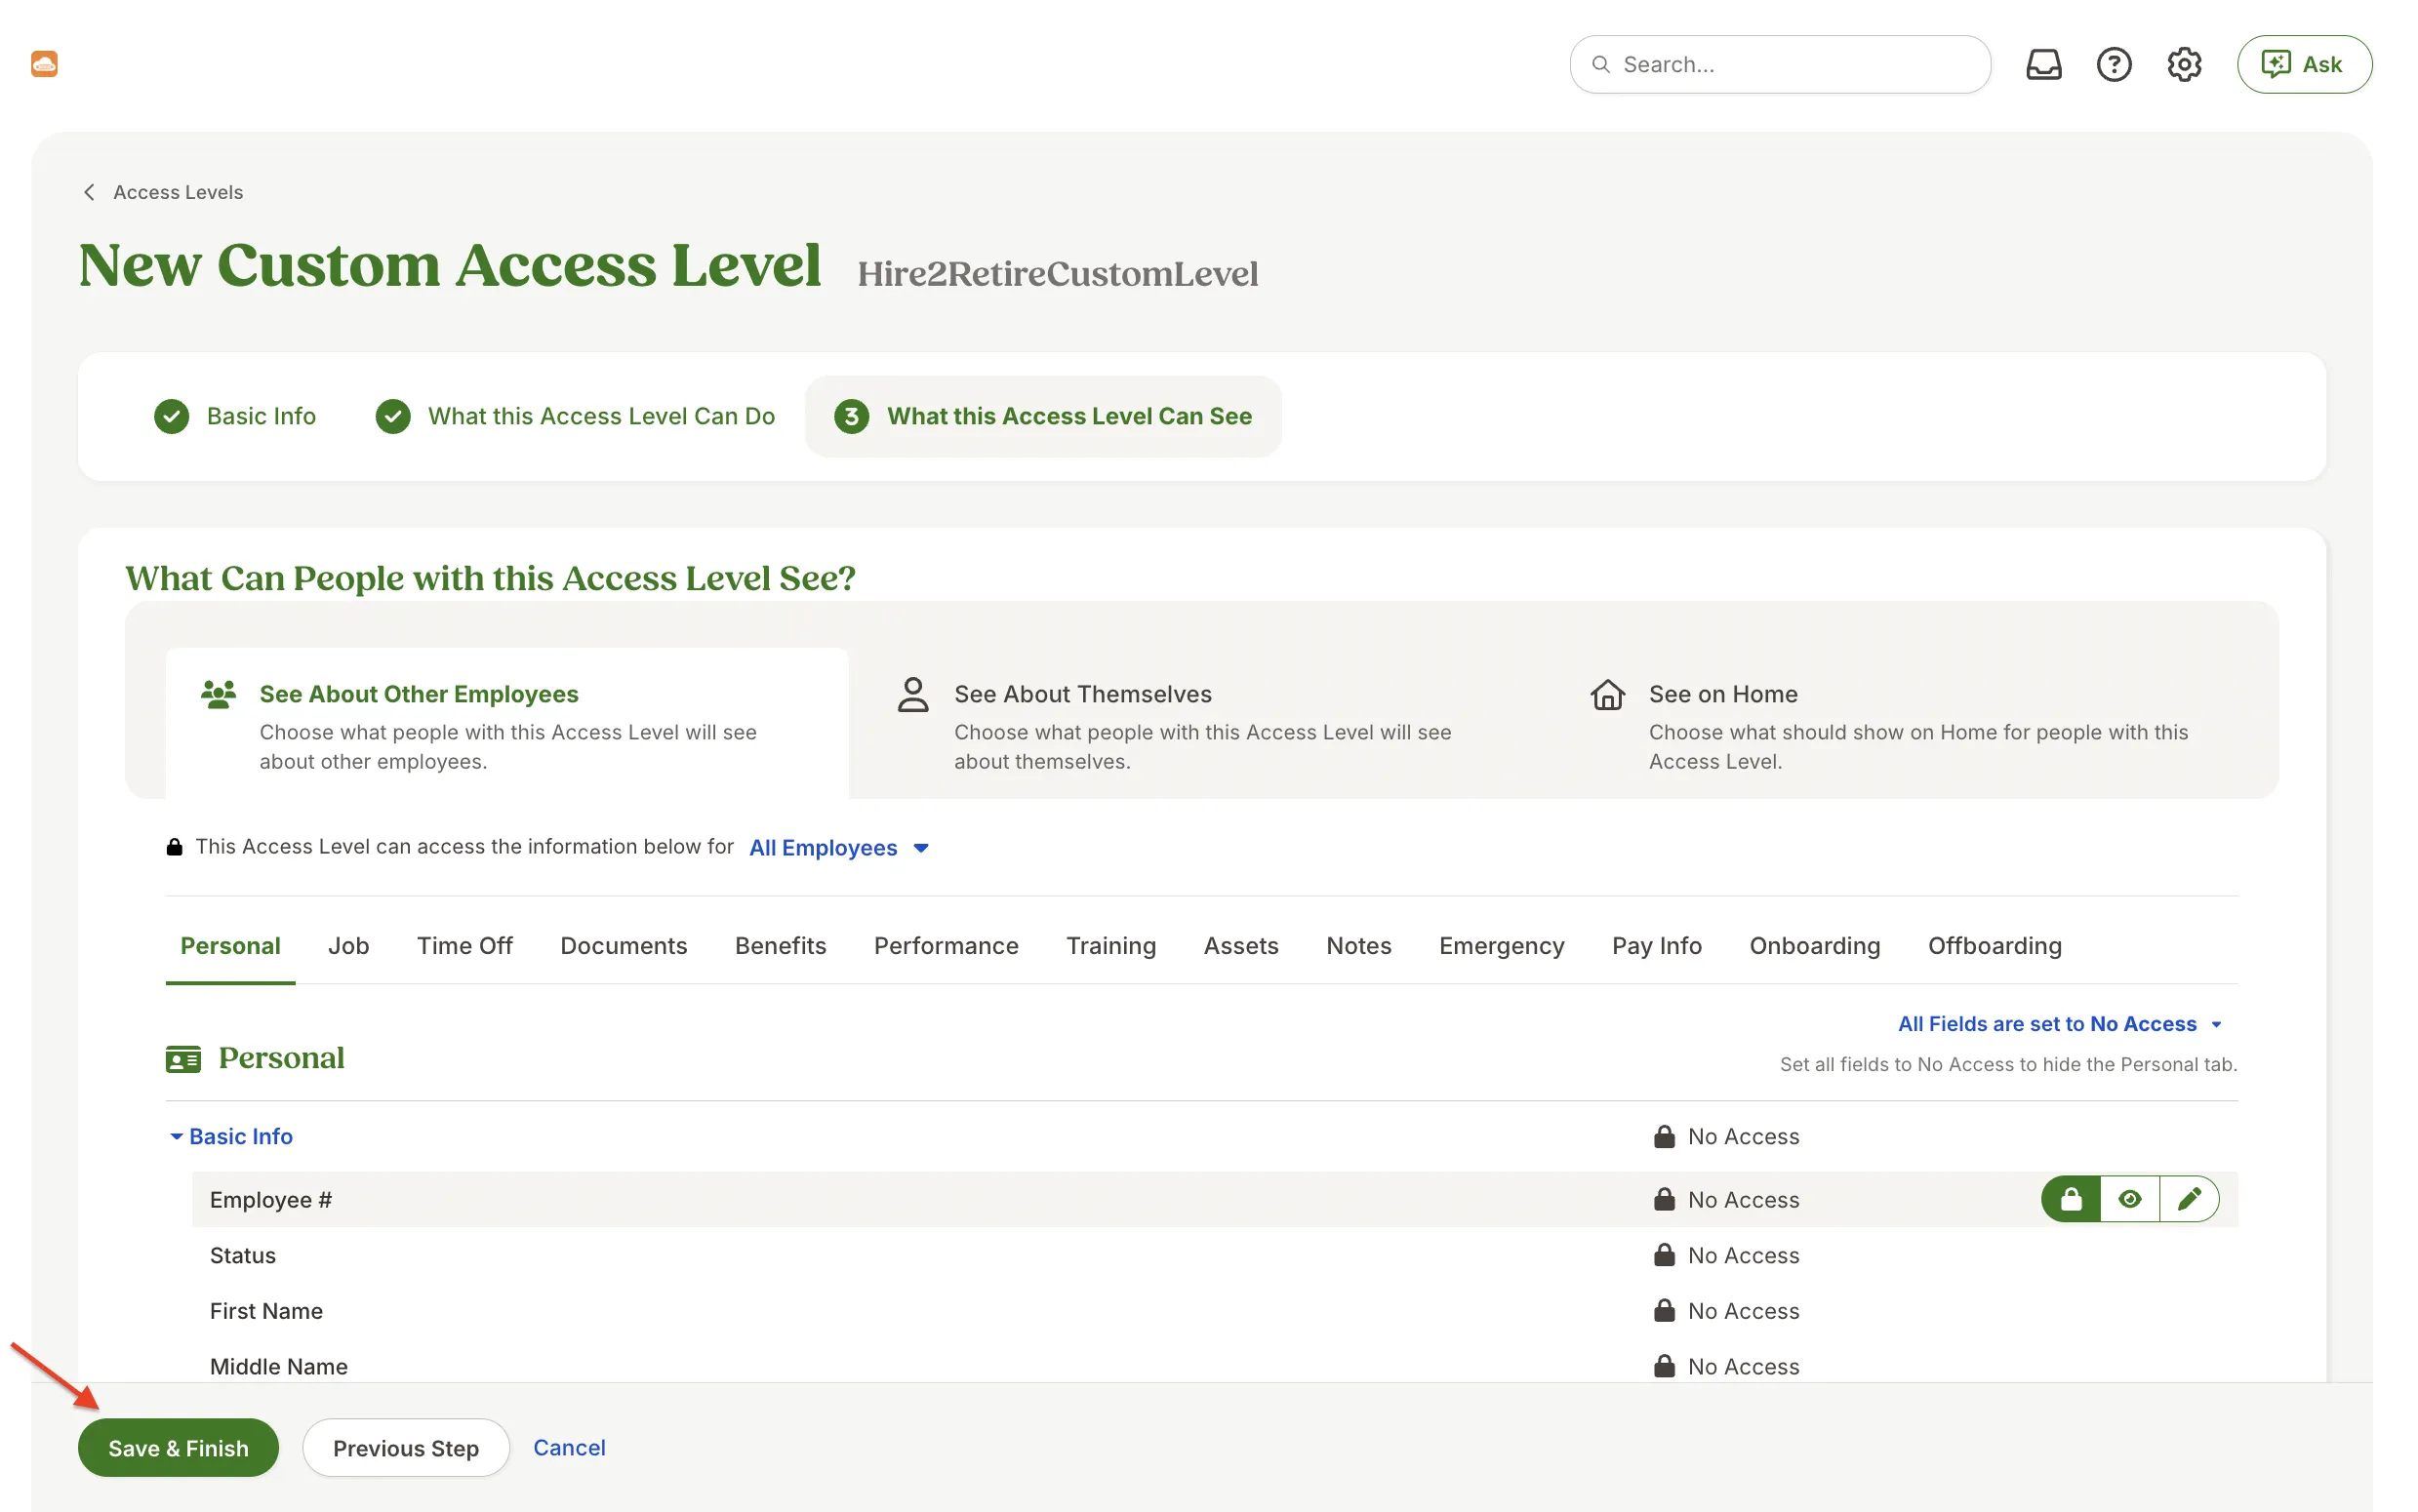
Step 4: Select what people with this access level can see or edit about other employees or about themselves. Here, we can customize single fields accordingly and click on “Save and Finish” after making all the required changes.
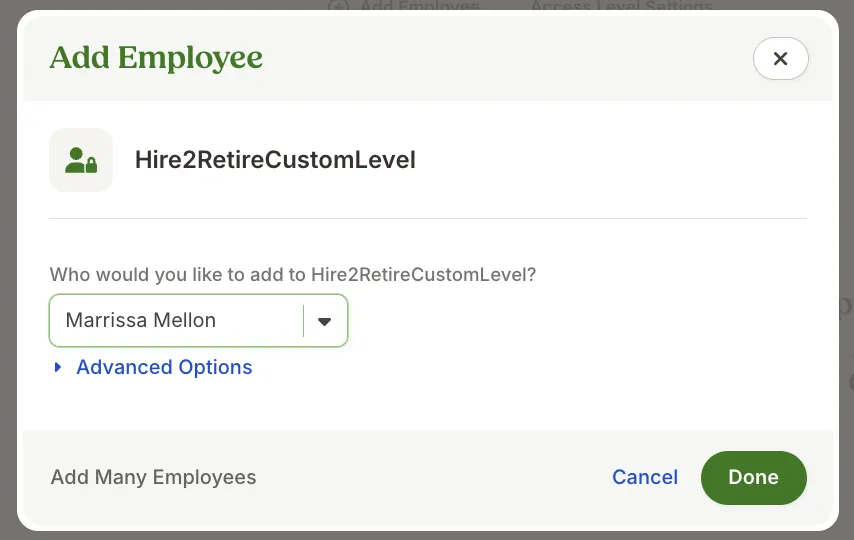
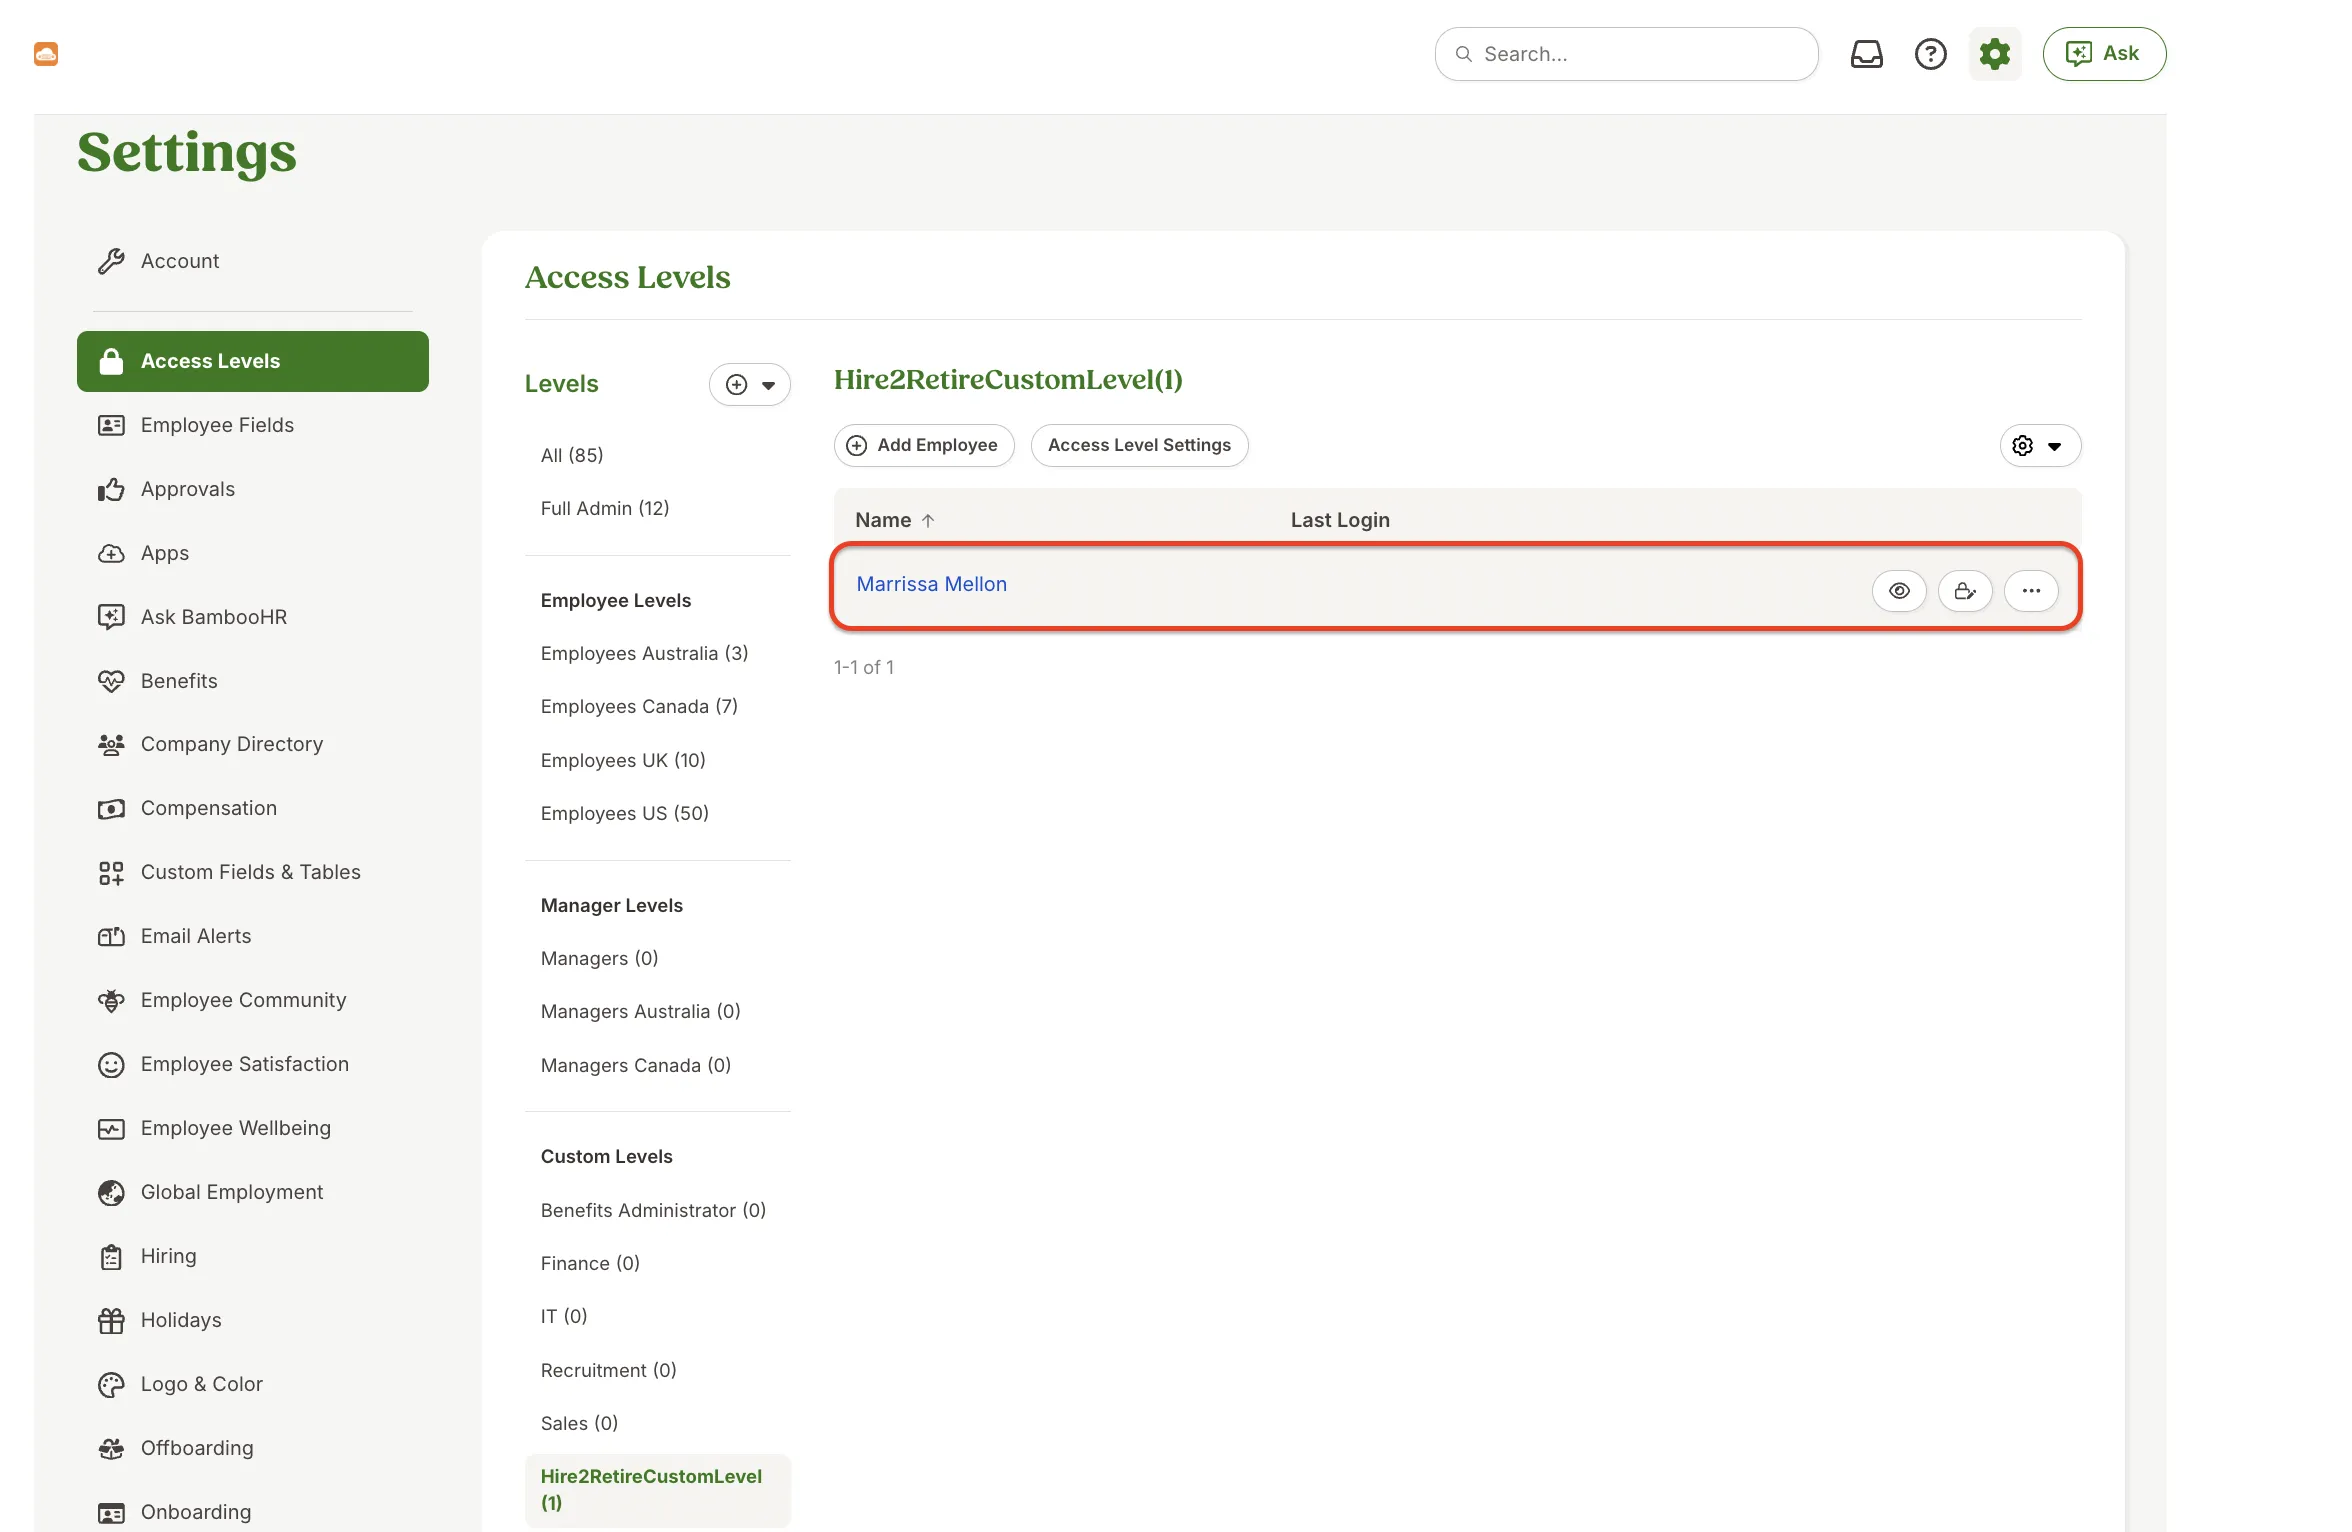
Step 5: After creating the Access Level, add the employees we want to give access according to the access level created. Click on “Add Employees” and select the employee to put under this custom level.
BambooHR provides different access levels to determine the user's access to information. To know about different access levels, refer Different Access Level in BambooHR
Getting Your Company Domain Name in BambooHR
The domain name appears in the url of your account. Take a look at the address bar when you are logged in to BambooHR. The text just before .bamboohr.com is your domain. For example, in https://company.bamboohr.com/ the domain name is 'company'.
Configuration
Once you have successfully configured the connections, you can continue with the Design section to configure the rest of the workflow following these steps in order.
- HR Data Definition (BambooHR API Integration)
- HR to AD Profile Map
- Lifecycle Business Rules
- Employment Status
- Organizational Unit Assignment - Only defined in on-premise Active Directory
- Group Memberships
- Security Group Memberships
- Distribution List Memberships
- Microsoft 365 Groups Memberships Only defined in Hybrid (with Exchange Online Services) and Entra ID
- Entra ID Distribution List Memberships Only defined in Entra ID and Hybrid, when Exchange Online Services is configured
- Entra ID Security Groups Only defined in Hybrid (with Enable Entra ID Security Groups) and Entra ID
- Mail Enabled Security Group Memberships Only defined in Entra ID and Hybrid, when Exchange Online Services is configured
- Mailing List Assignment Provided in Google Workspace
- Communication Hub
Deployment
Once your workflow has been setup, you have two optional features you can setup before deploying it.
- Compliance and Audit Trail
- Run Mode
- Error Notifications
- Monitor Receipt of Scheduled HR Extract
- Environment
Otherwise, you can proceed to deploy and test it on the Hire2Retire platform, see Deploy and Test Flow