Connection
Auth0 on Hire2Retire supports OAuth Client Credentials Authentication.
We at RoboMQ pay utmost attention to keeping your account secure. See our Security and Privacy Policies to learn more about how RoboMQ handles your account access.
Obtain Client Credentials on Auth0
Auth0 application on Hire2Retire uses OAuth Client Credentials authentication which needs client ID and client secret of OAuth application created Auth0. By linking your Auth0 account with Hire2Retire, you can authorize RoboMQ to have a delegated access on your behalf.
Please follow the mentioned steps below to obtain the client credentials on Auth0:
-
Log into your Auth0 account with your admin access by visiting this link
-
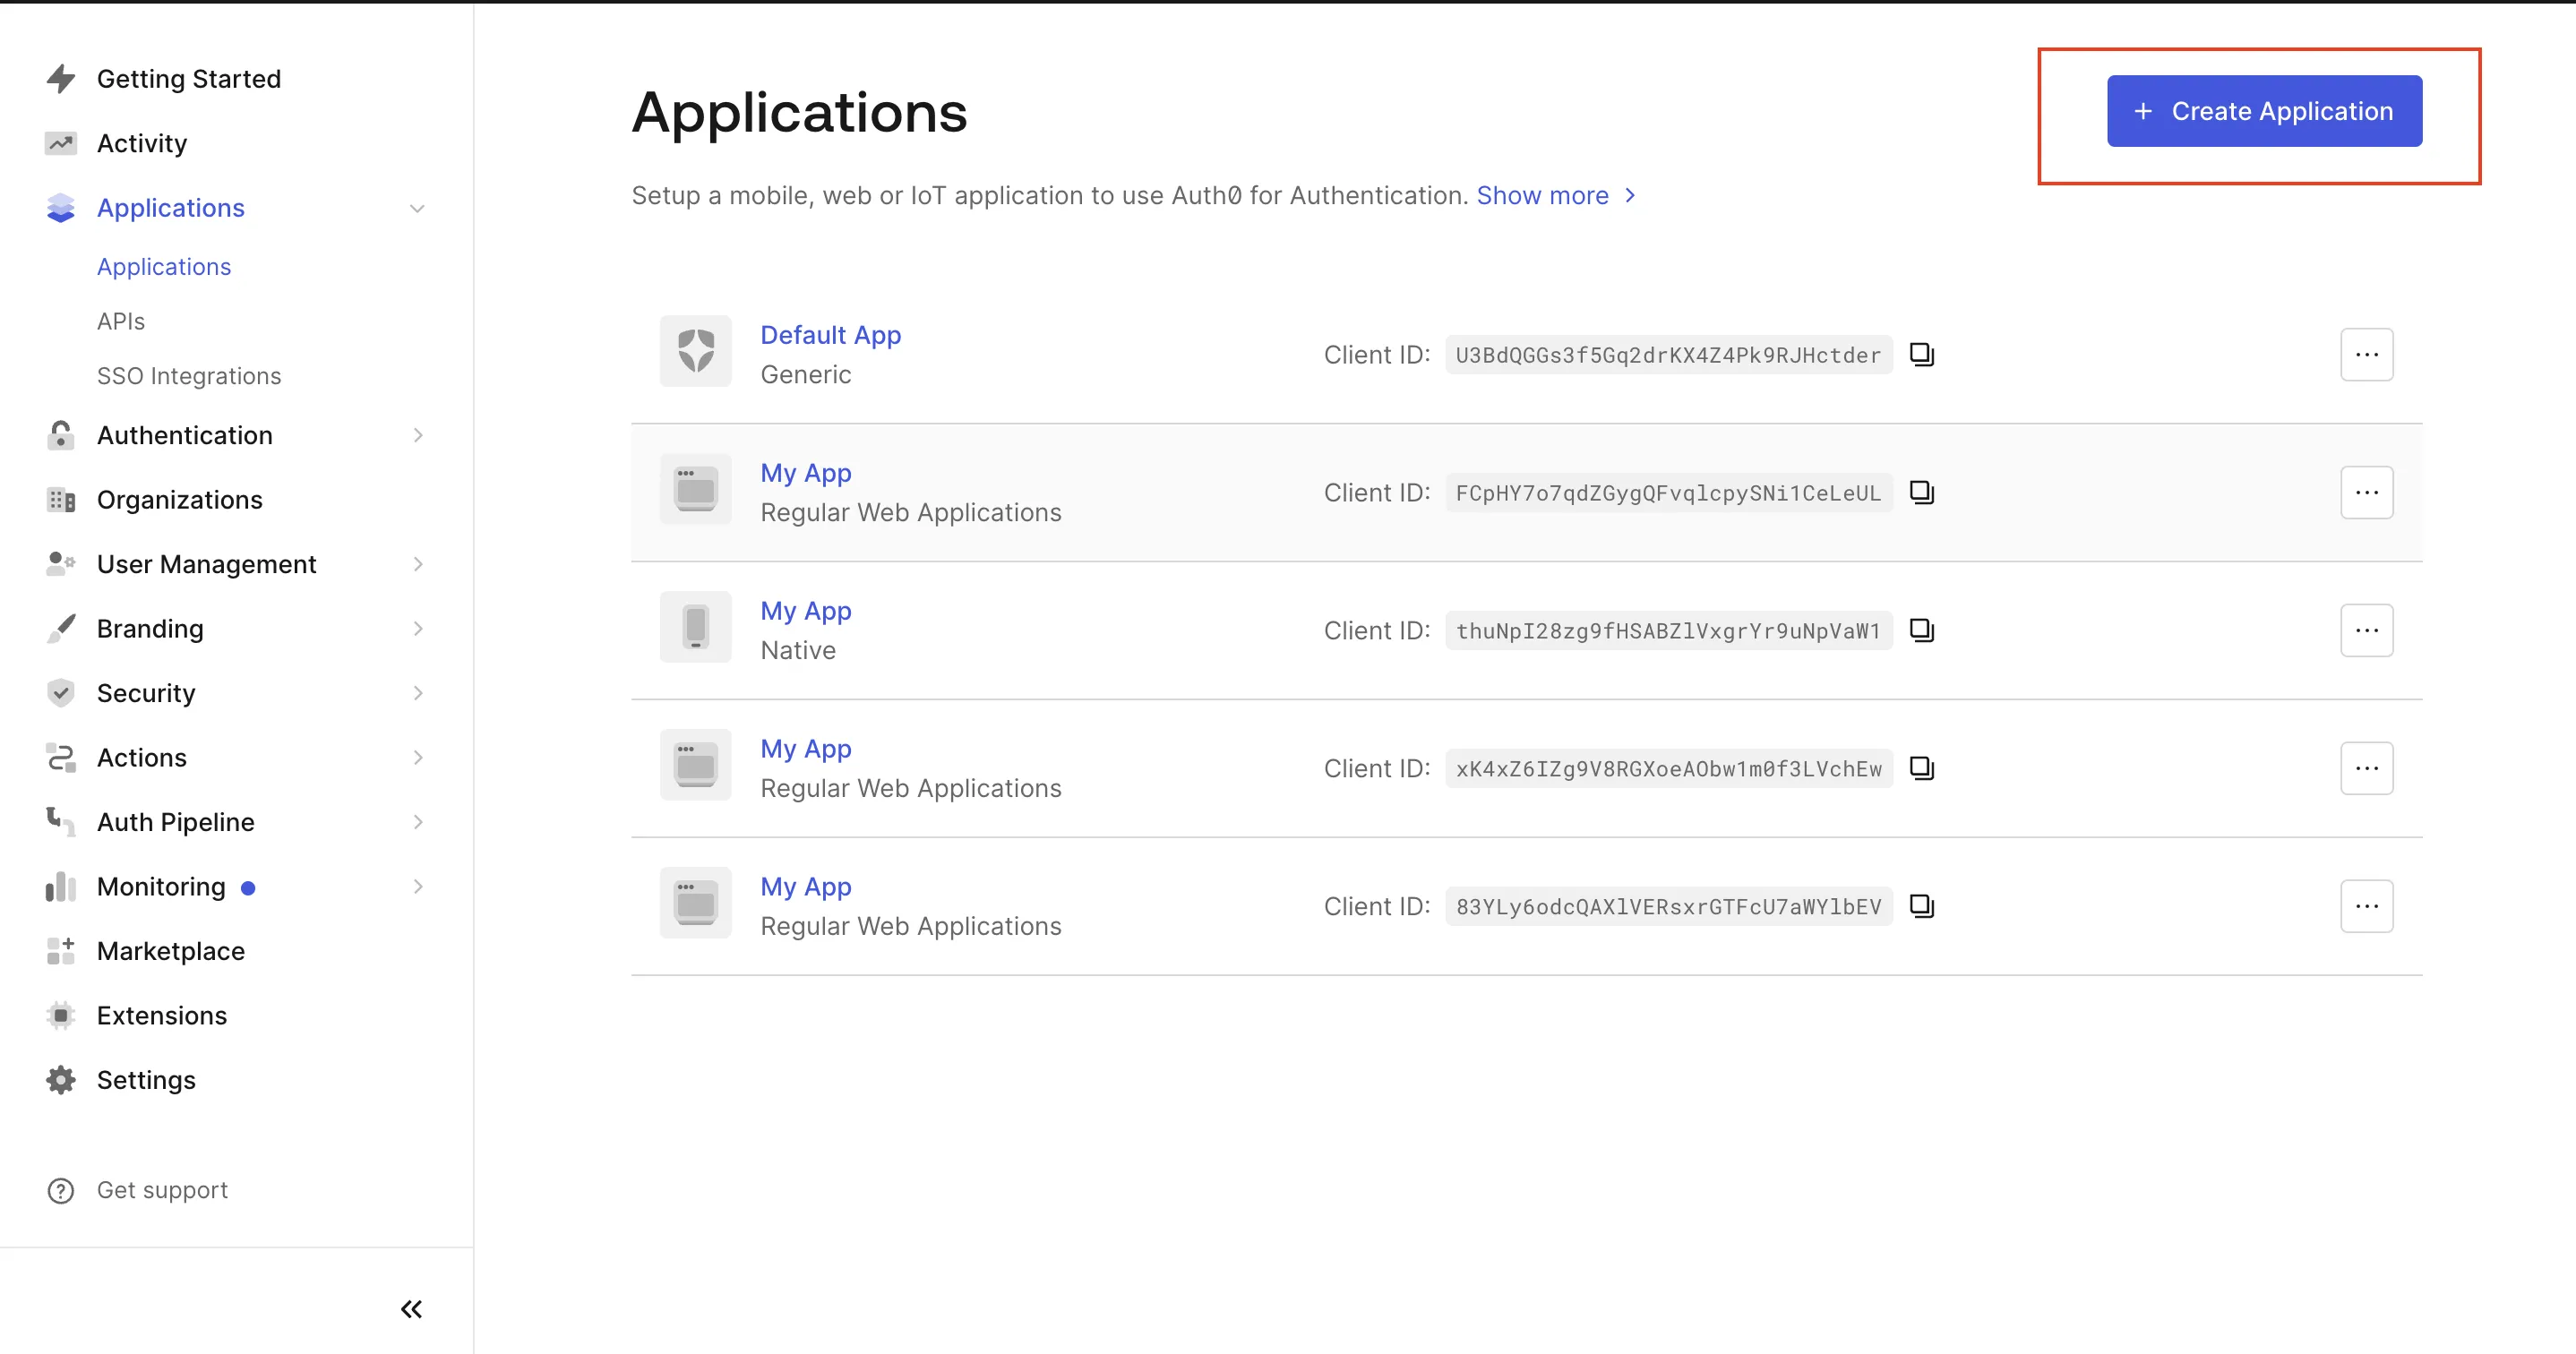
Go to
Applications>Applicationsand clickCreate Application.
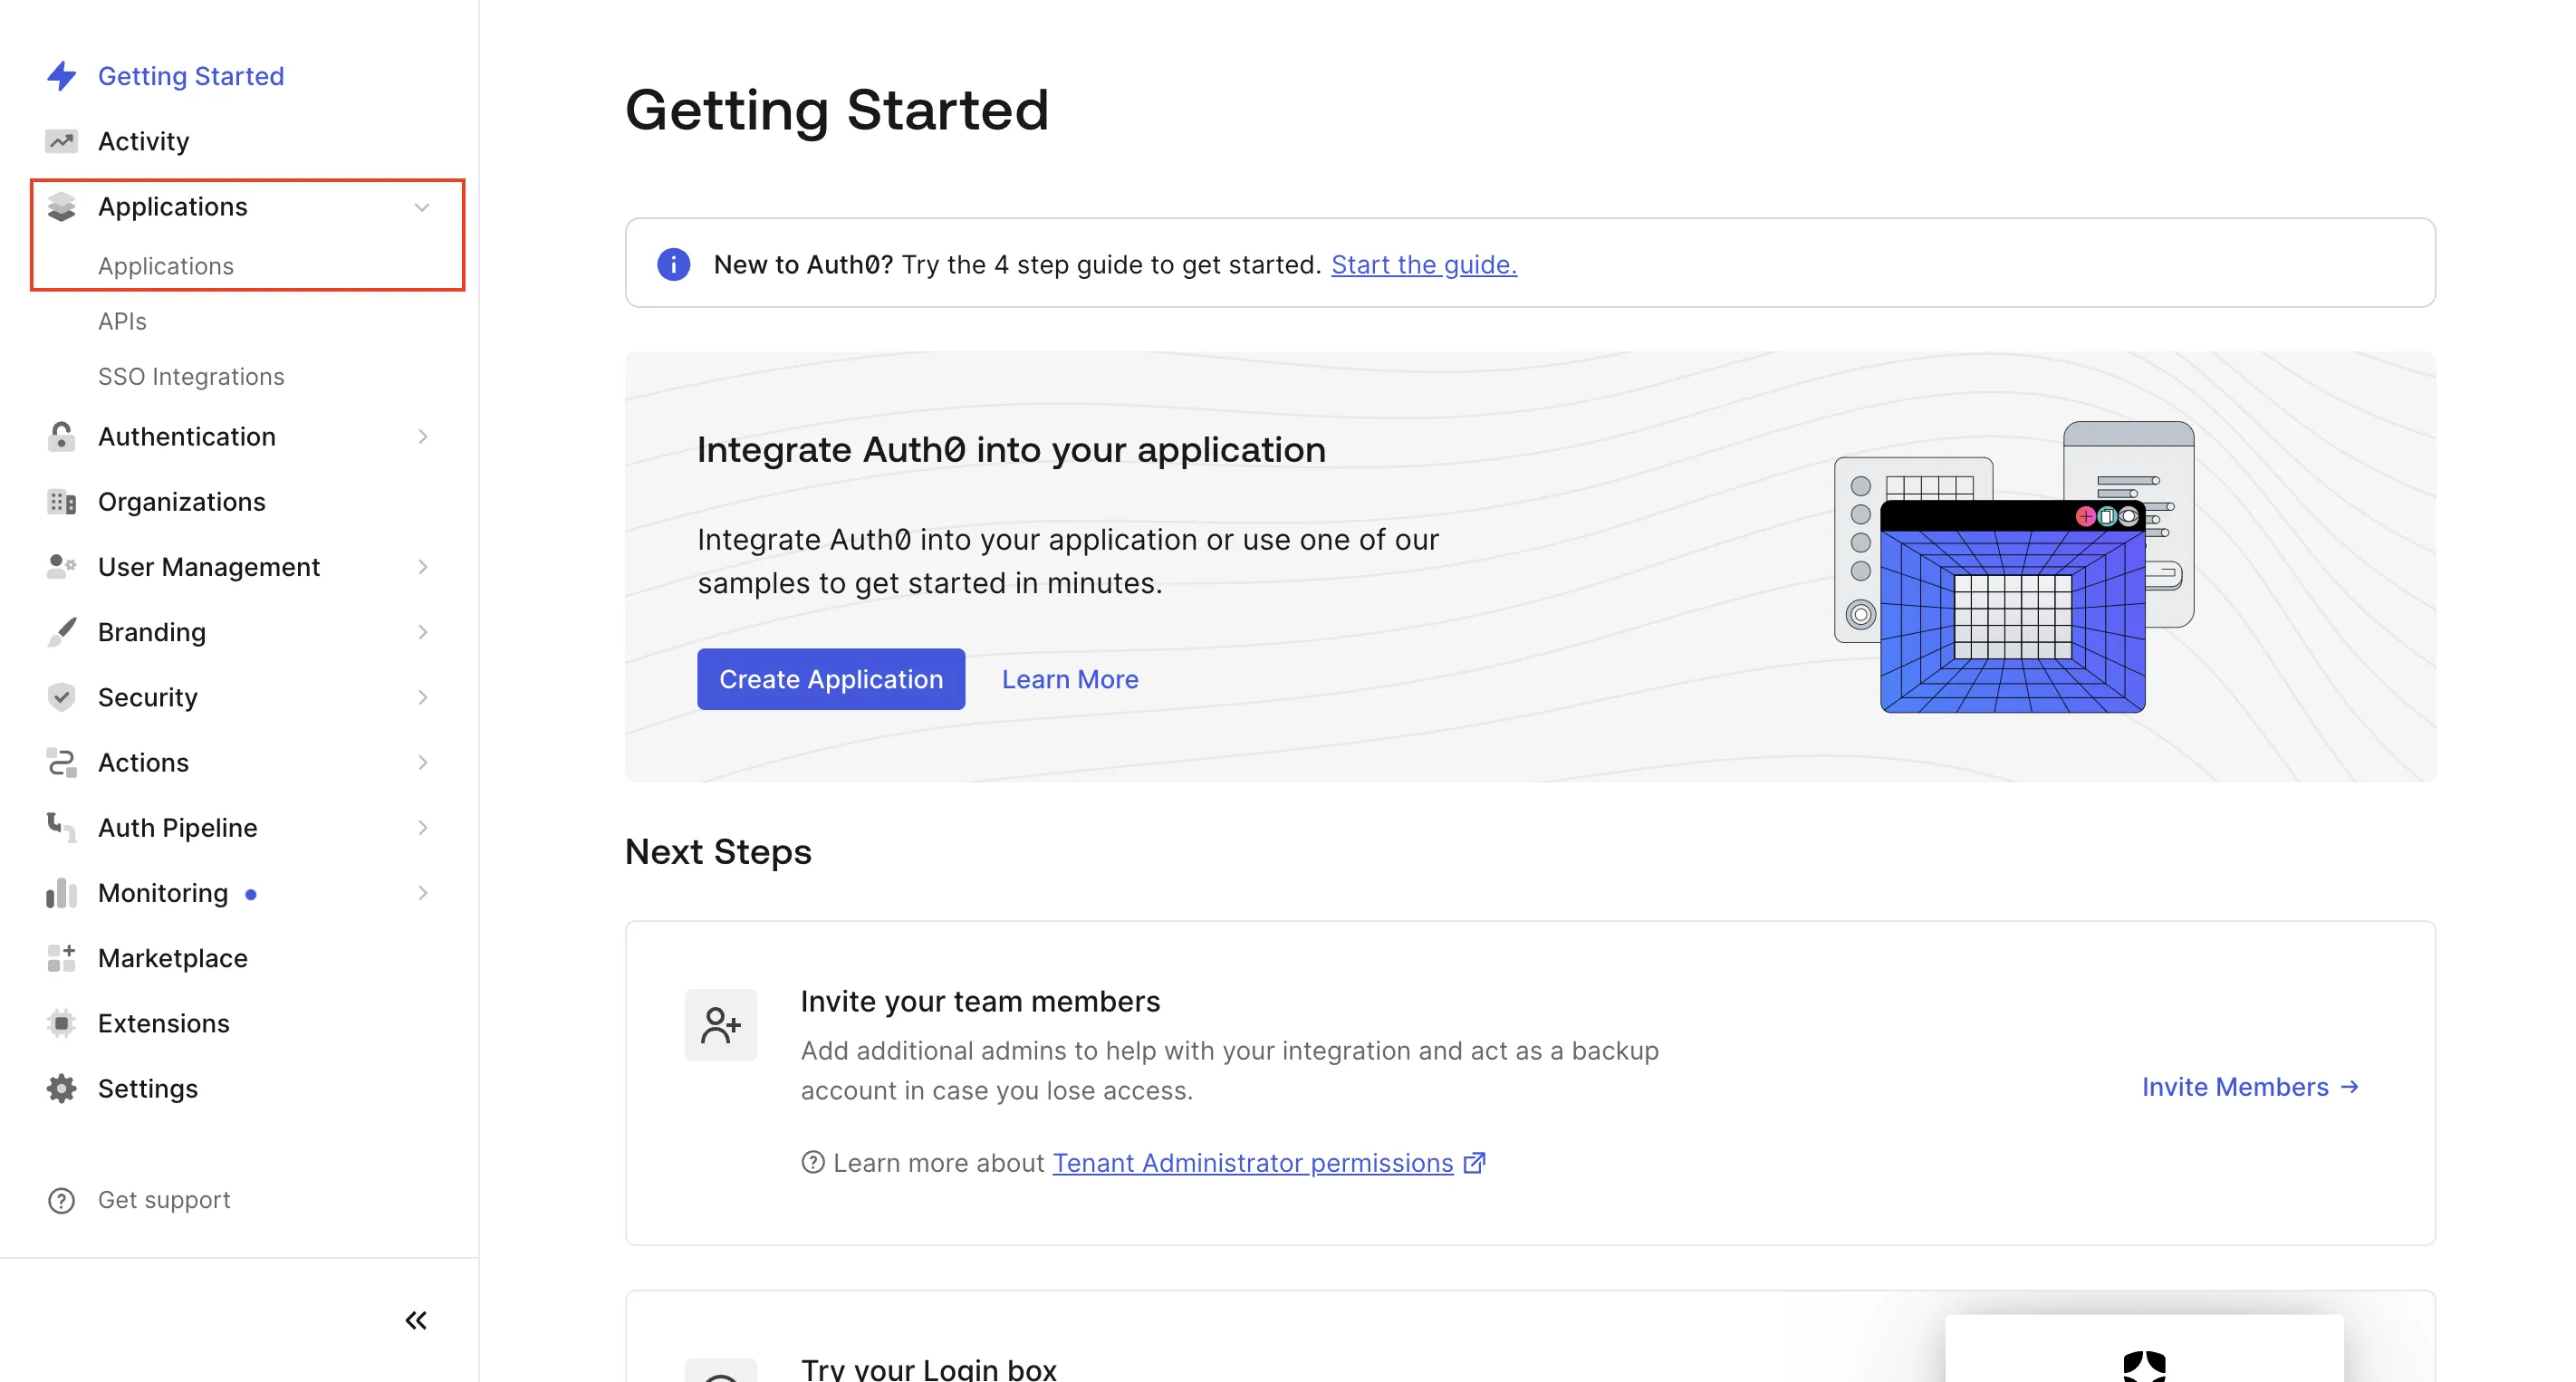
Figure 1. Auth0 Applications
-
Provide name to your OAuth application and choose application type as
Regular Web Applications.
Figure 3. Provide application name and choose application type -
Go to
Settingstab and copy the domain name, client ID and client secret. These credentials are needed while creating a connection with Auth0 on Hire2Retire Access.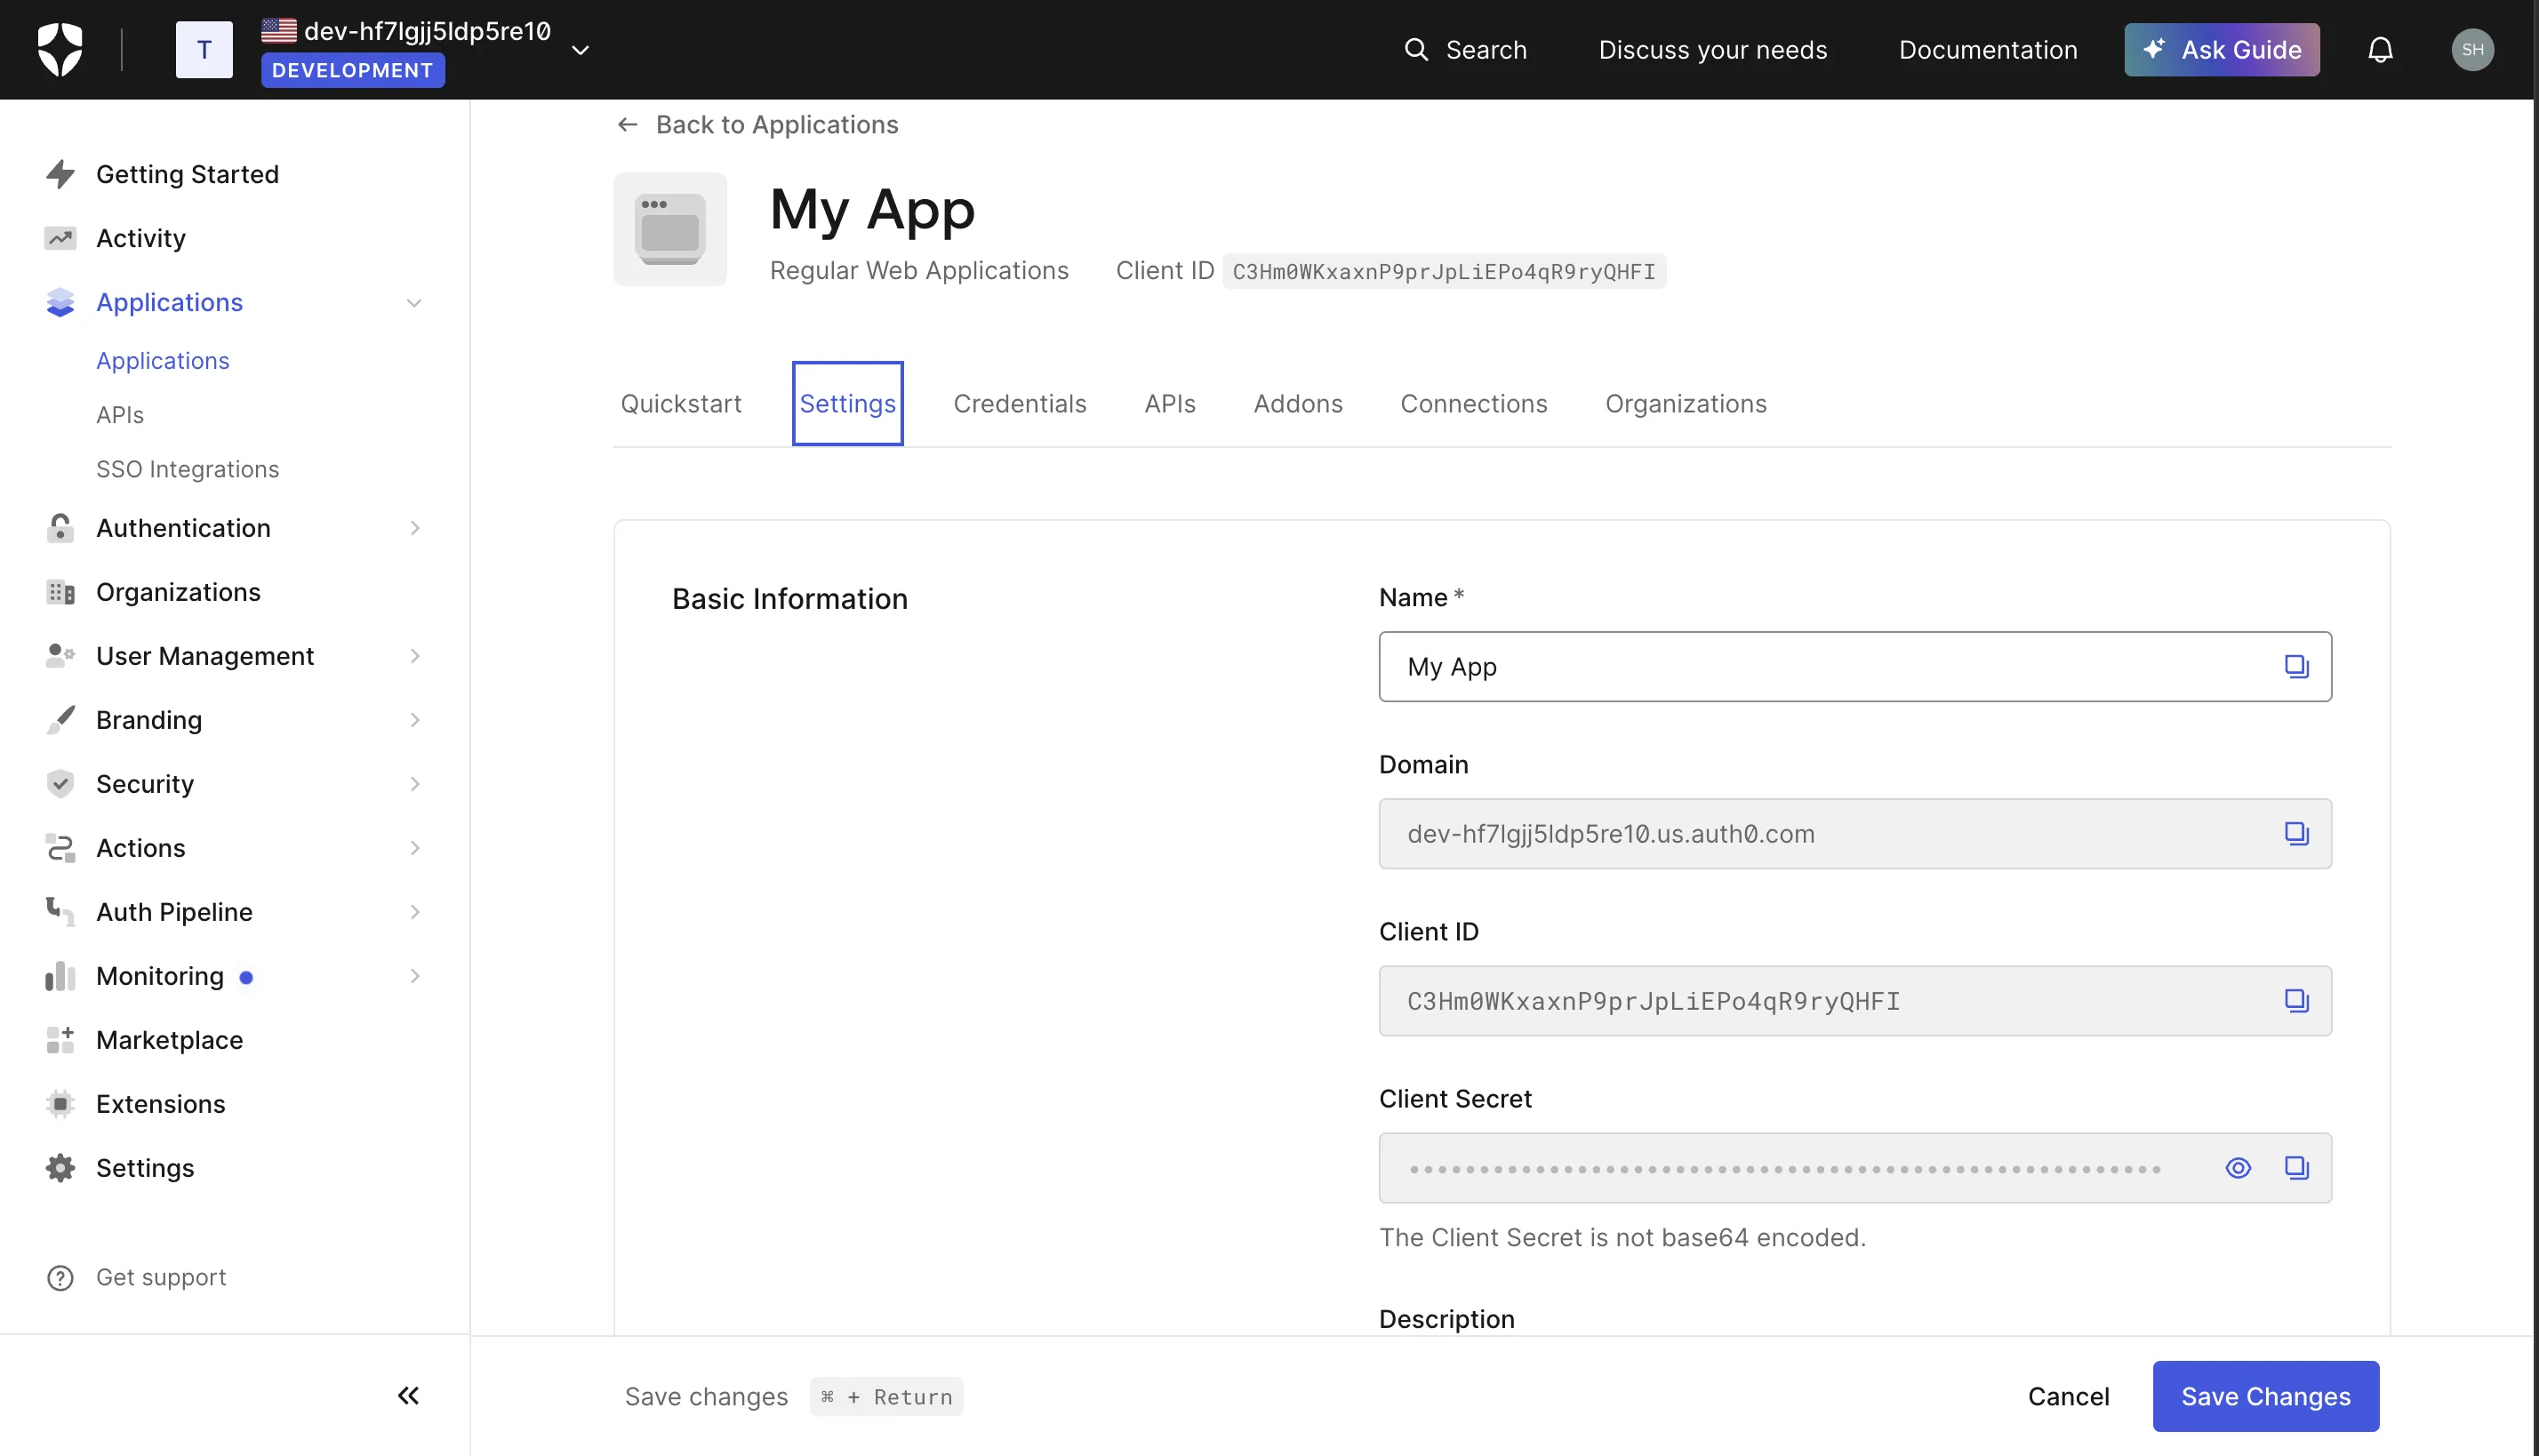
Figure 4. Obtain the client credentials -
Go to APIs tab and authorise the Auth0 Management API and expand it. Give the following permissions read:users, update:users, delete:users, create:users, read:roles, create:roles, delete:roles, and update:roles.
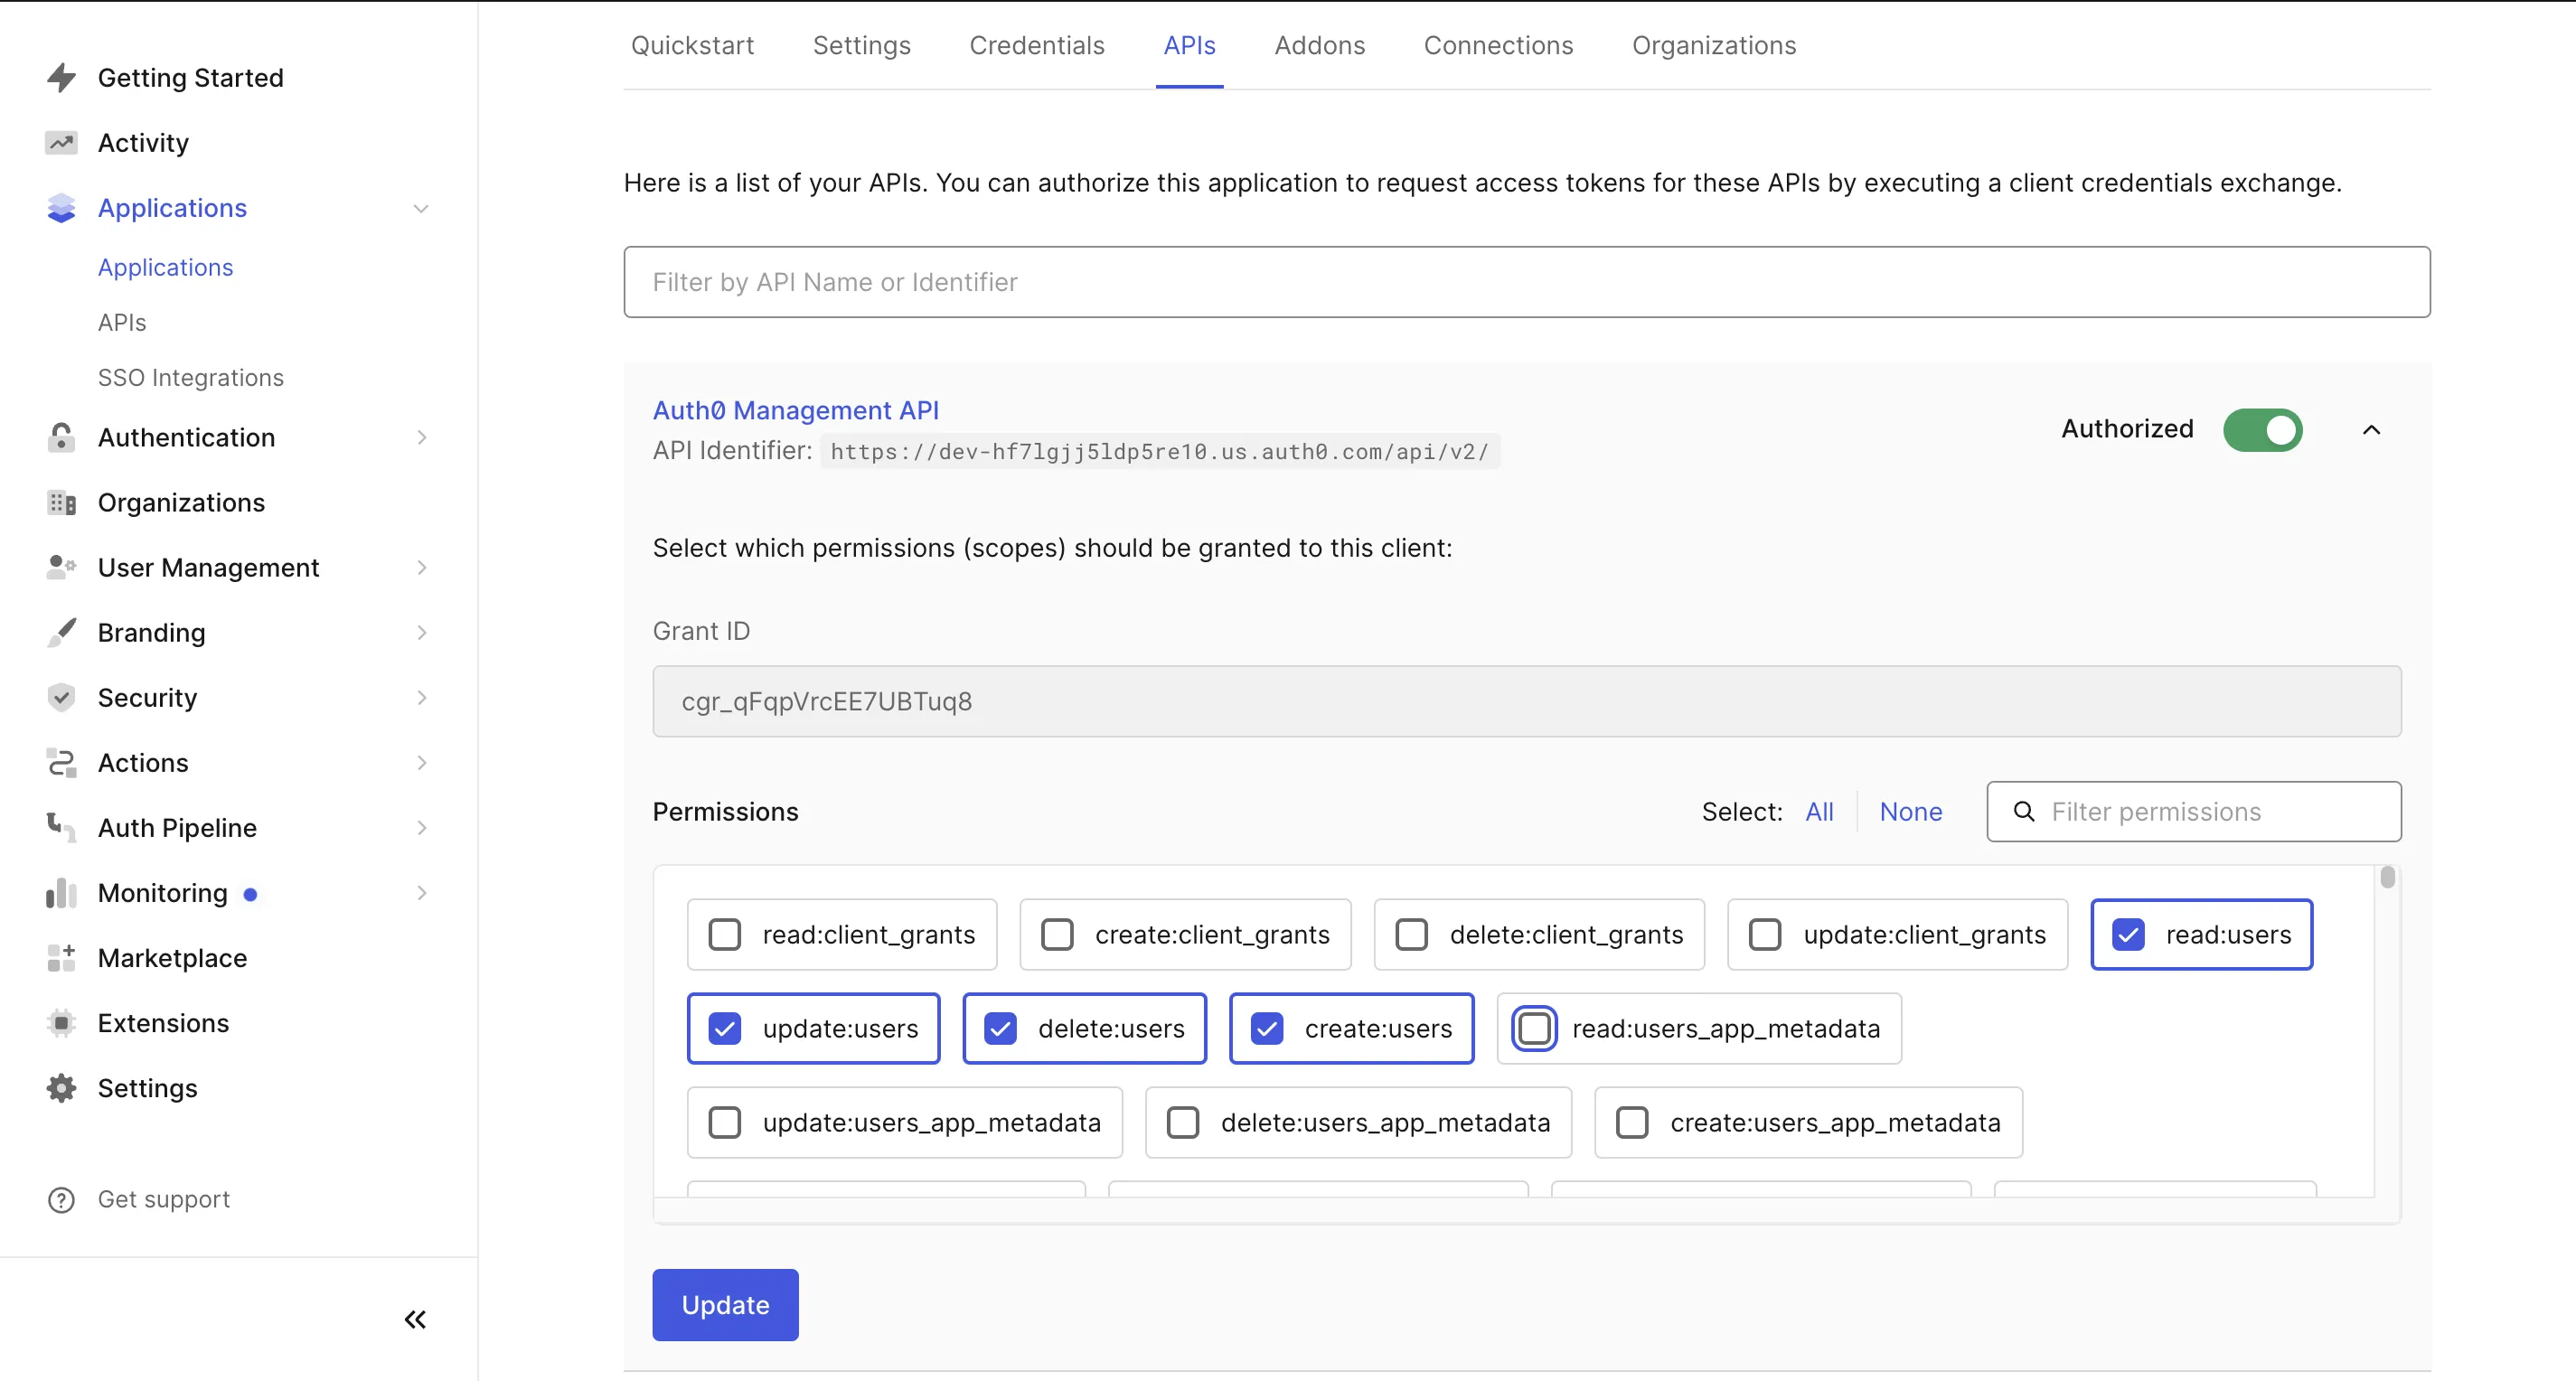
Figure 5. Provide necessary permissions
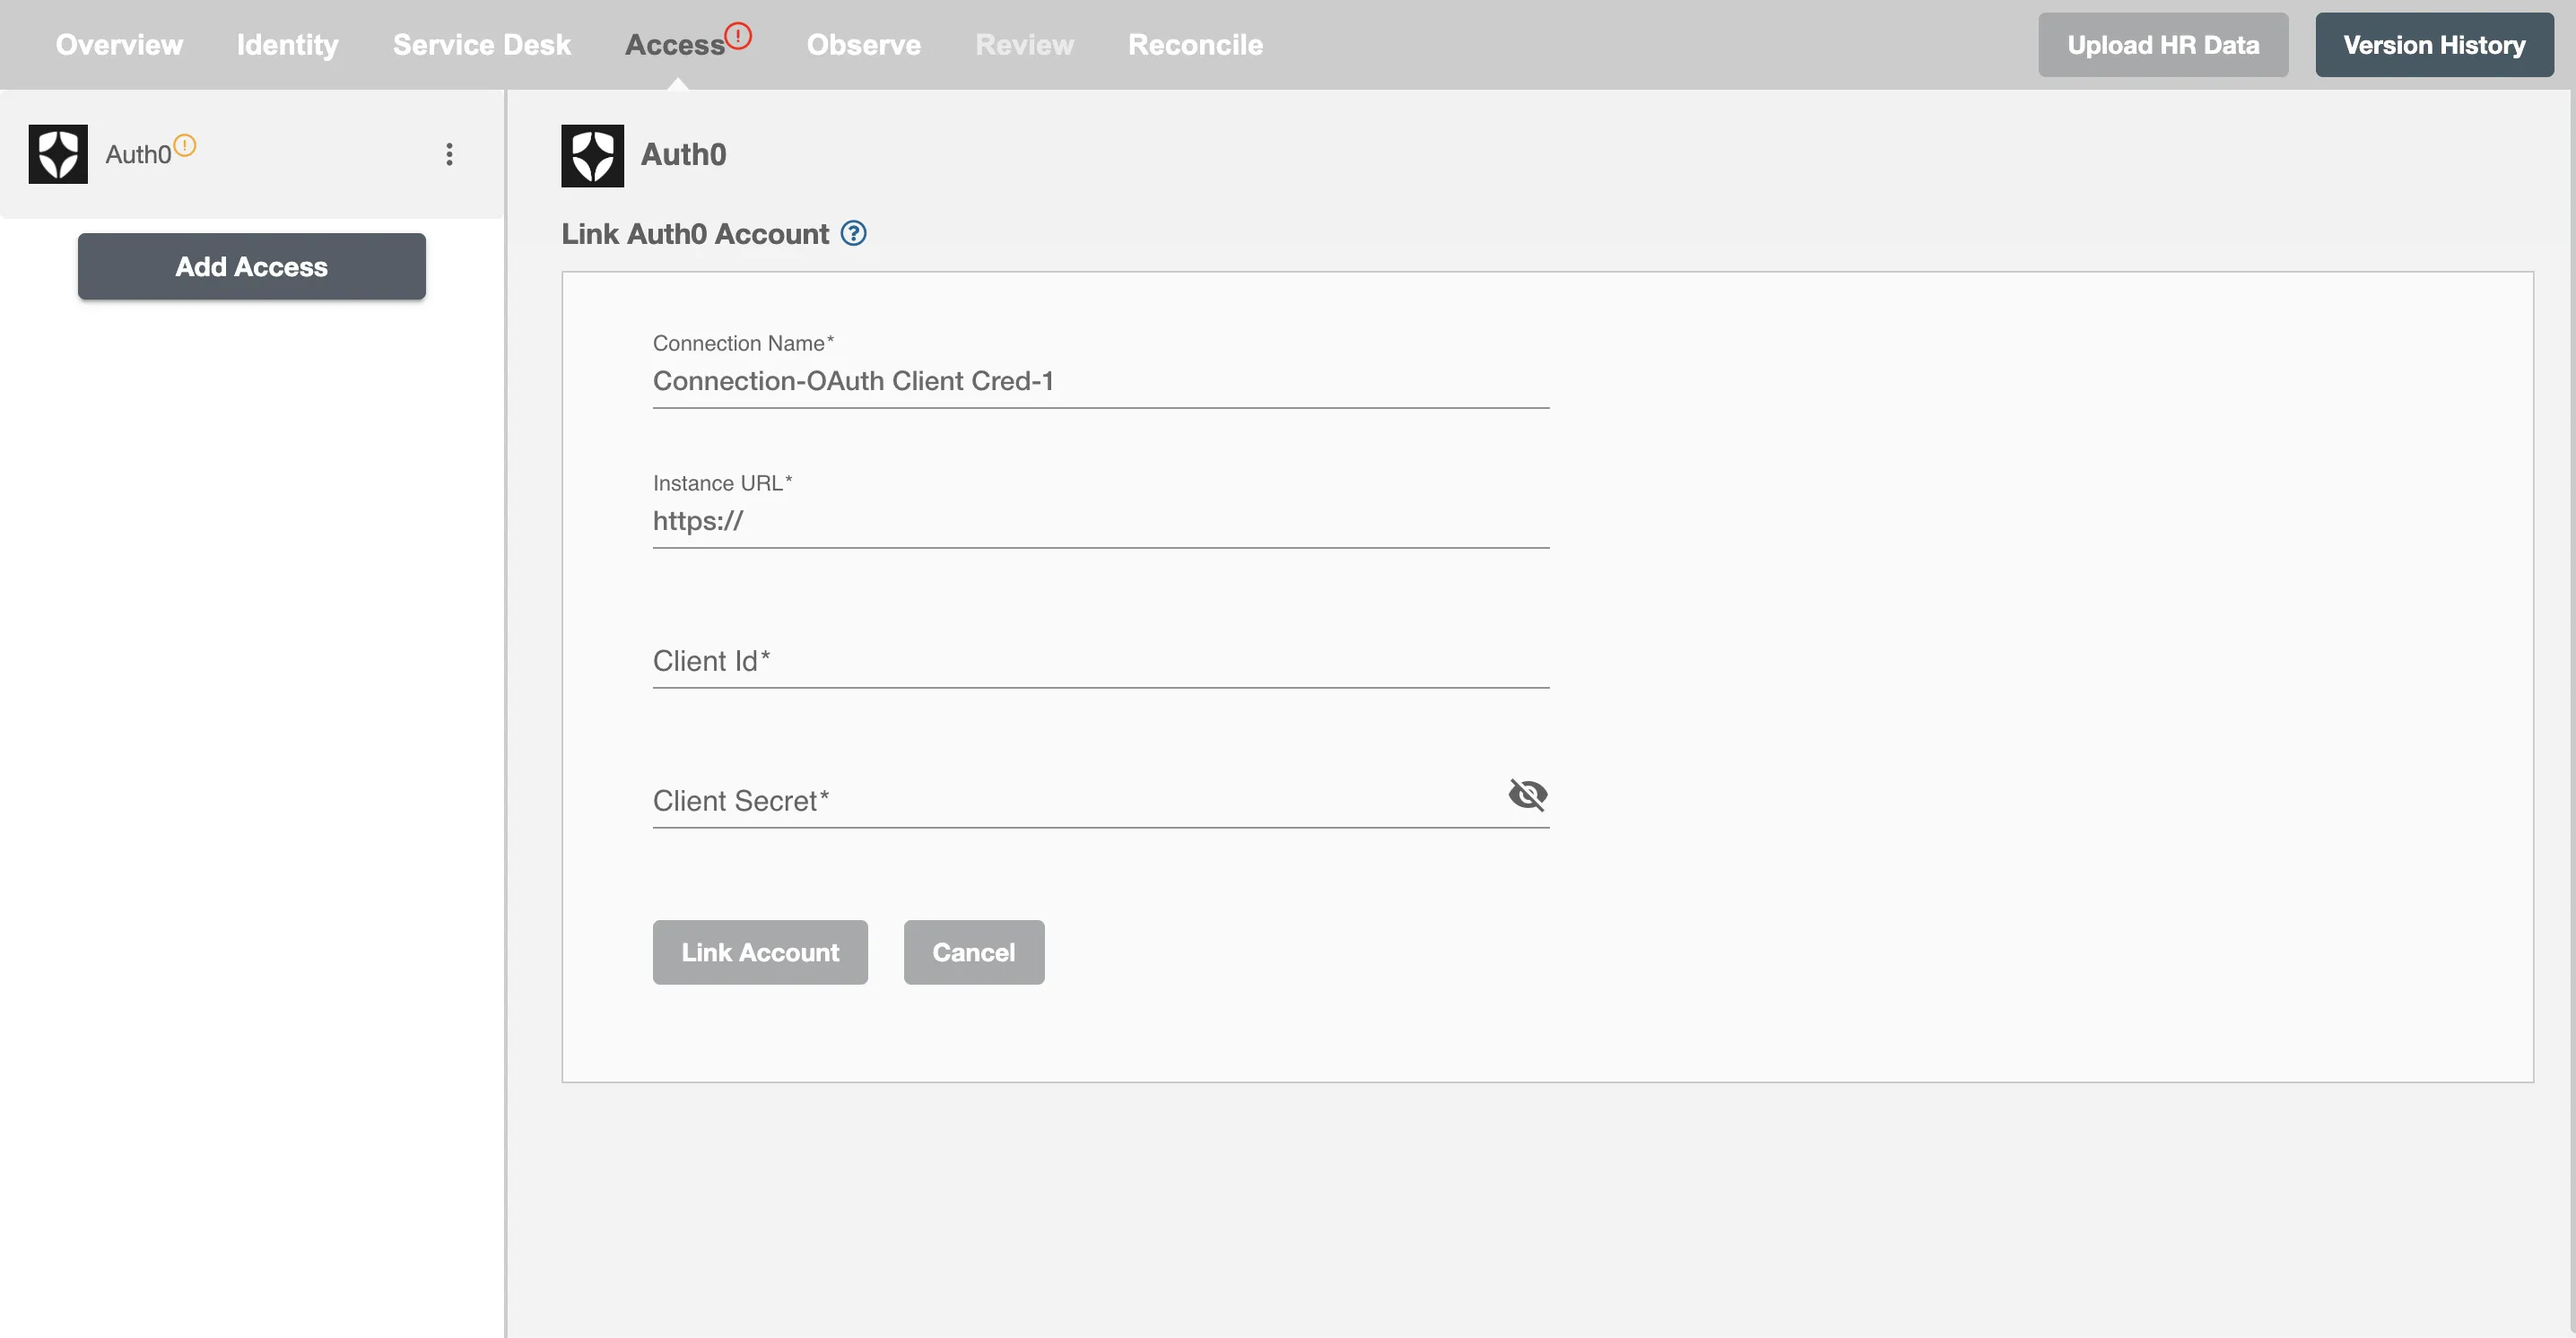
Link Auth0 Account on Hire2Retire
To link your Auth0 account using OAuth Client Credential authentication mechanism, you need to provide your domain name as Instance URL, Client ID and Client Secret obtained by following the above mentioned steps.