Connection
SAP Cloud Idnentity Services on Hire2Retire supports Basic Authentication.
We at RoboMQ pay utmost attention to keep your account secure. See our Security and Privacy Policies to learn more about how RoboMQ handles your account access.
| Object | Permission |
|---|---|
| User | Can Provision and Deprovision Users |
Set up SAP Cloud Identity Services for provisioning
-
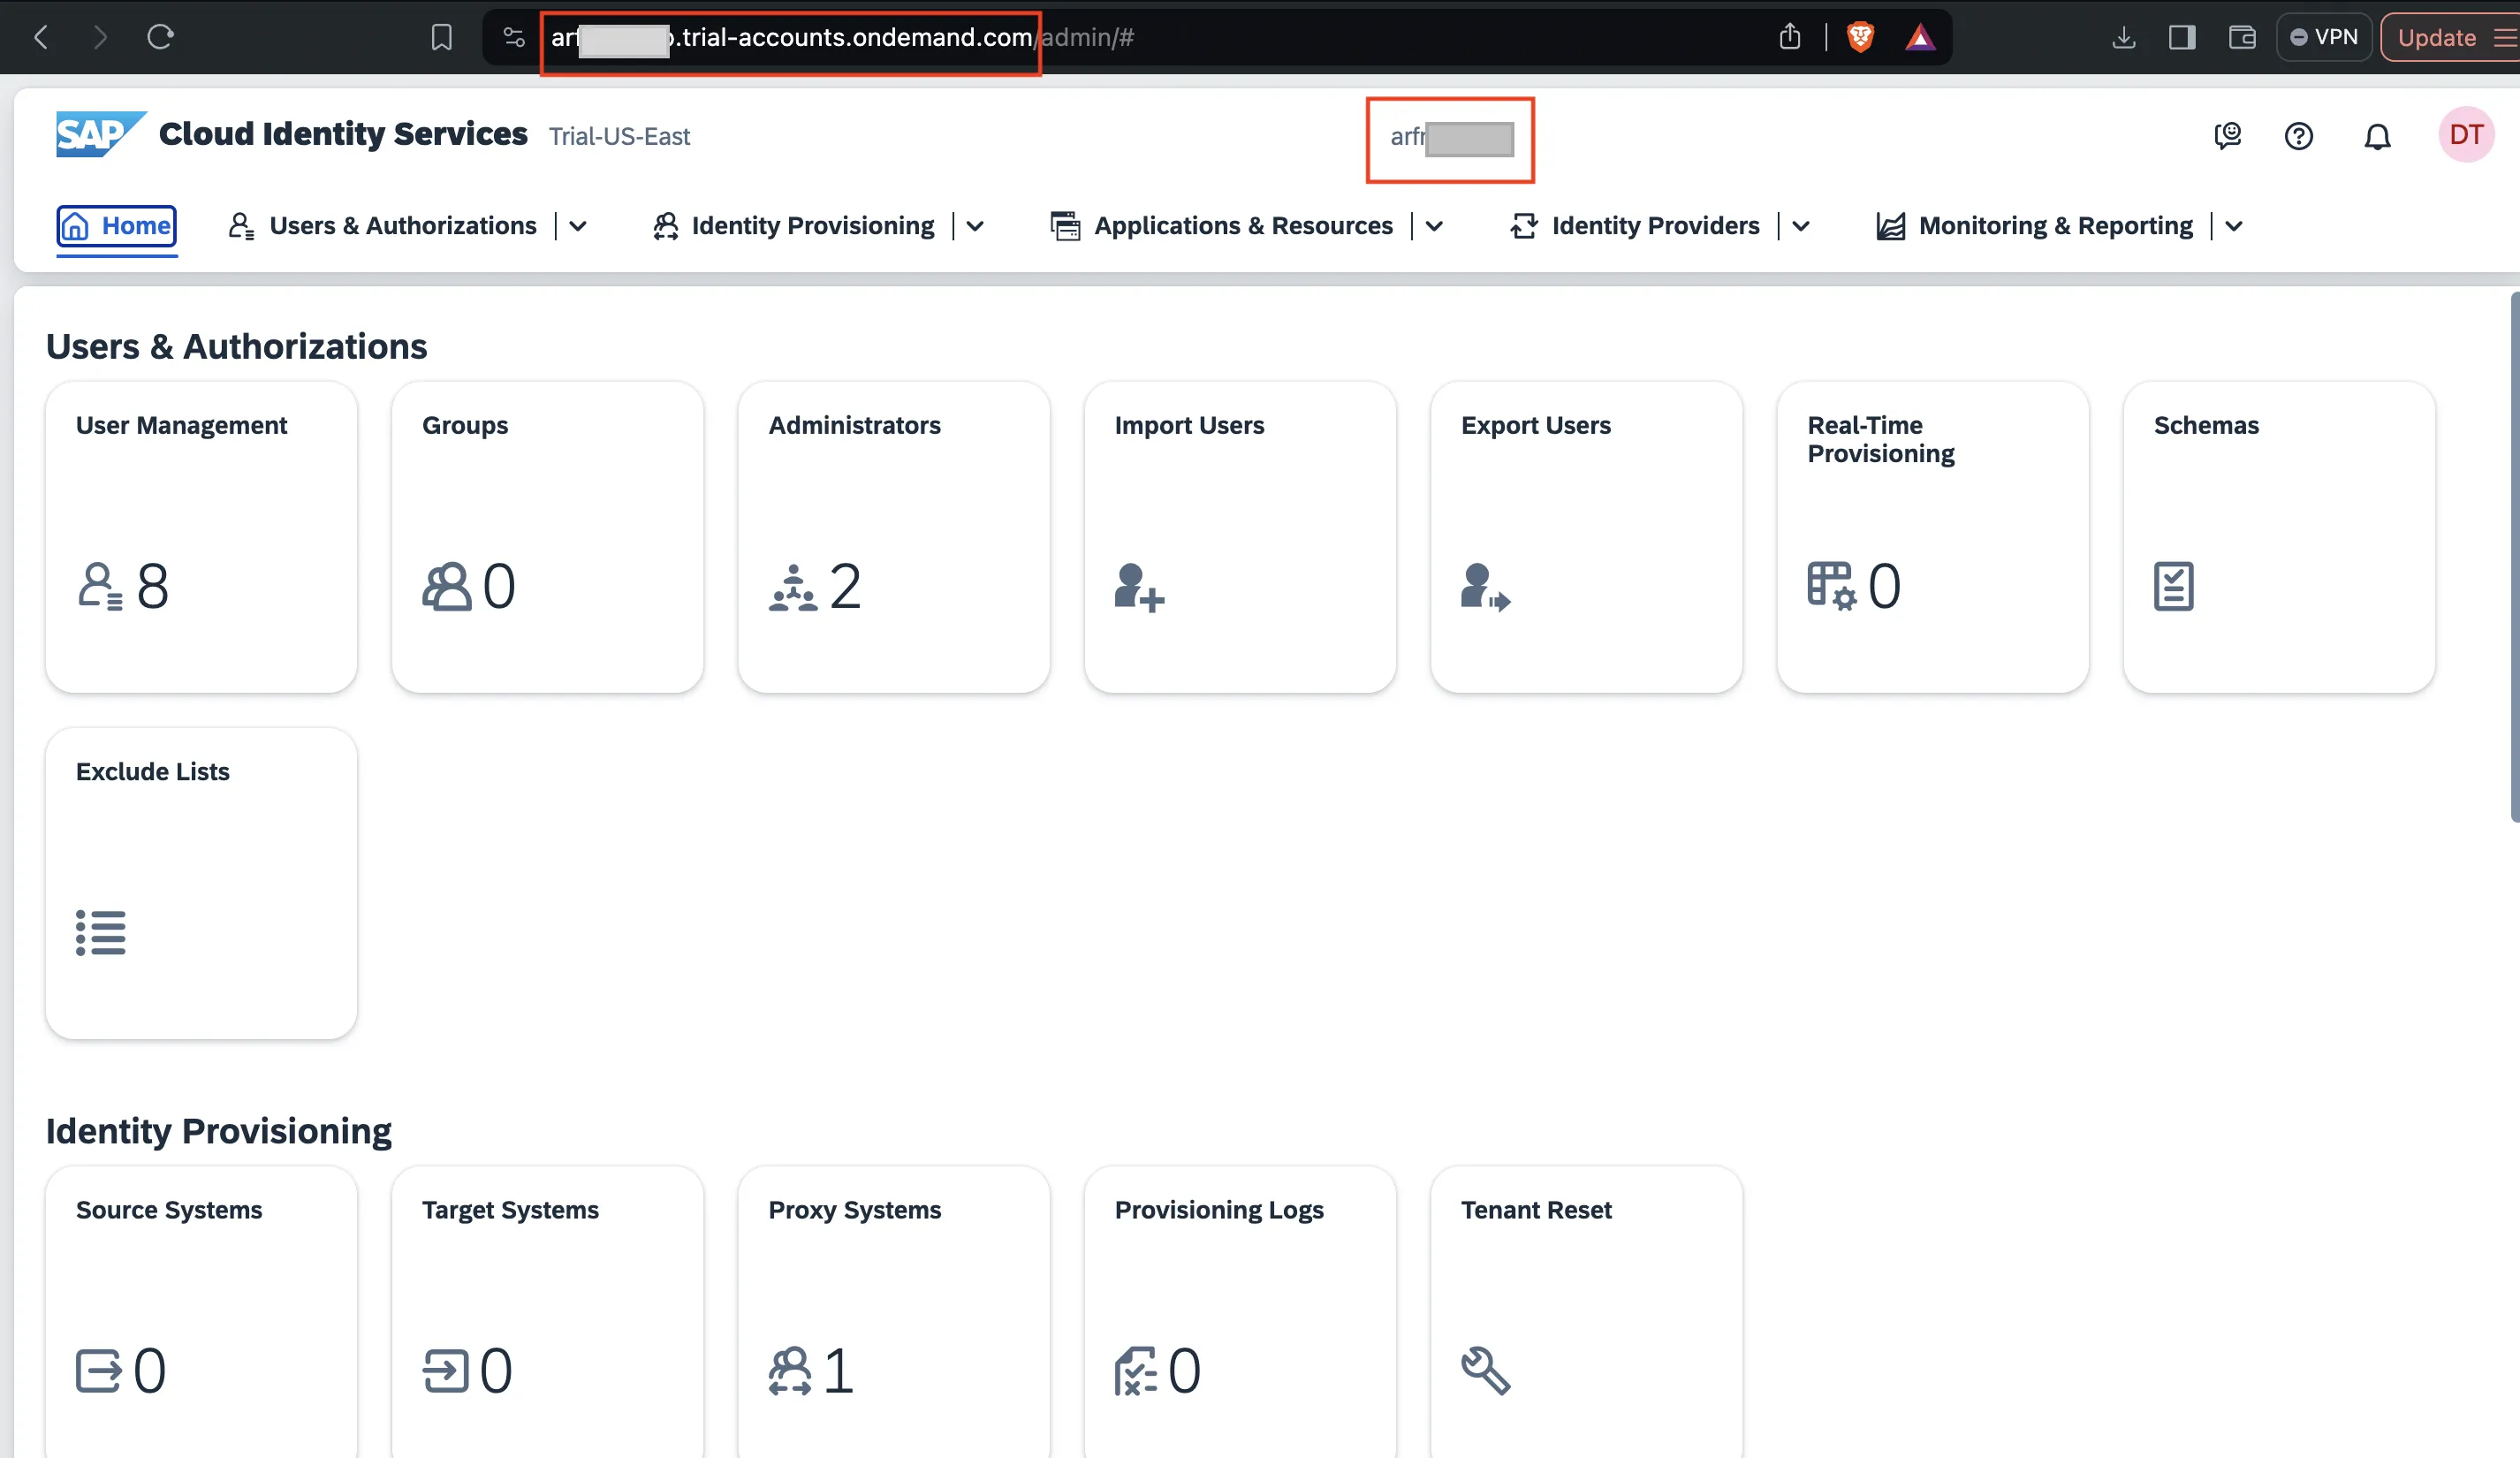
Sign in to your SAP Cloud Identity Services Admin Console,
https://<tenantID>.accounts.ondemand.com/adminorhttps://<tenantID>.trial-accounts.ondemand.com/adminif a trial. Navigate to Users & Authorizations > Administrators.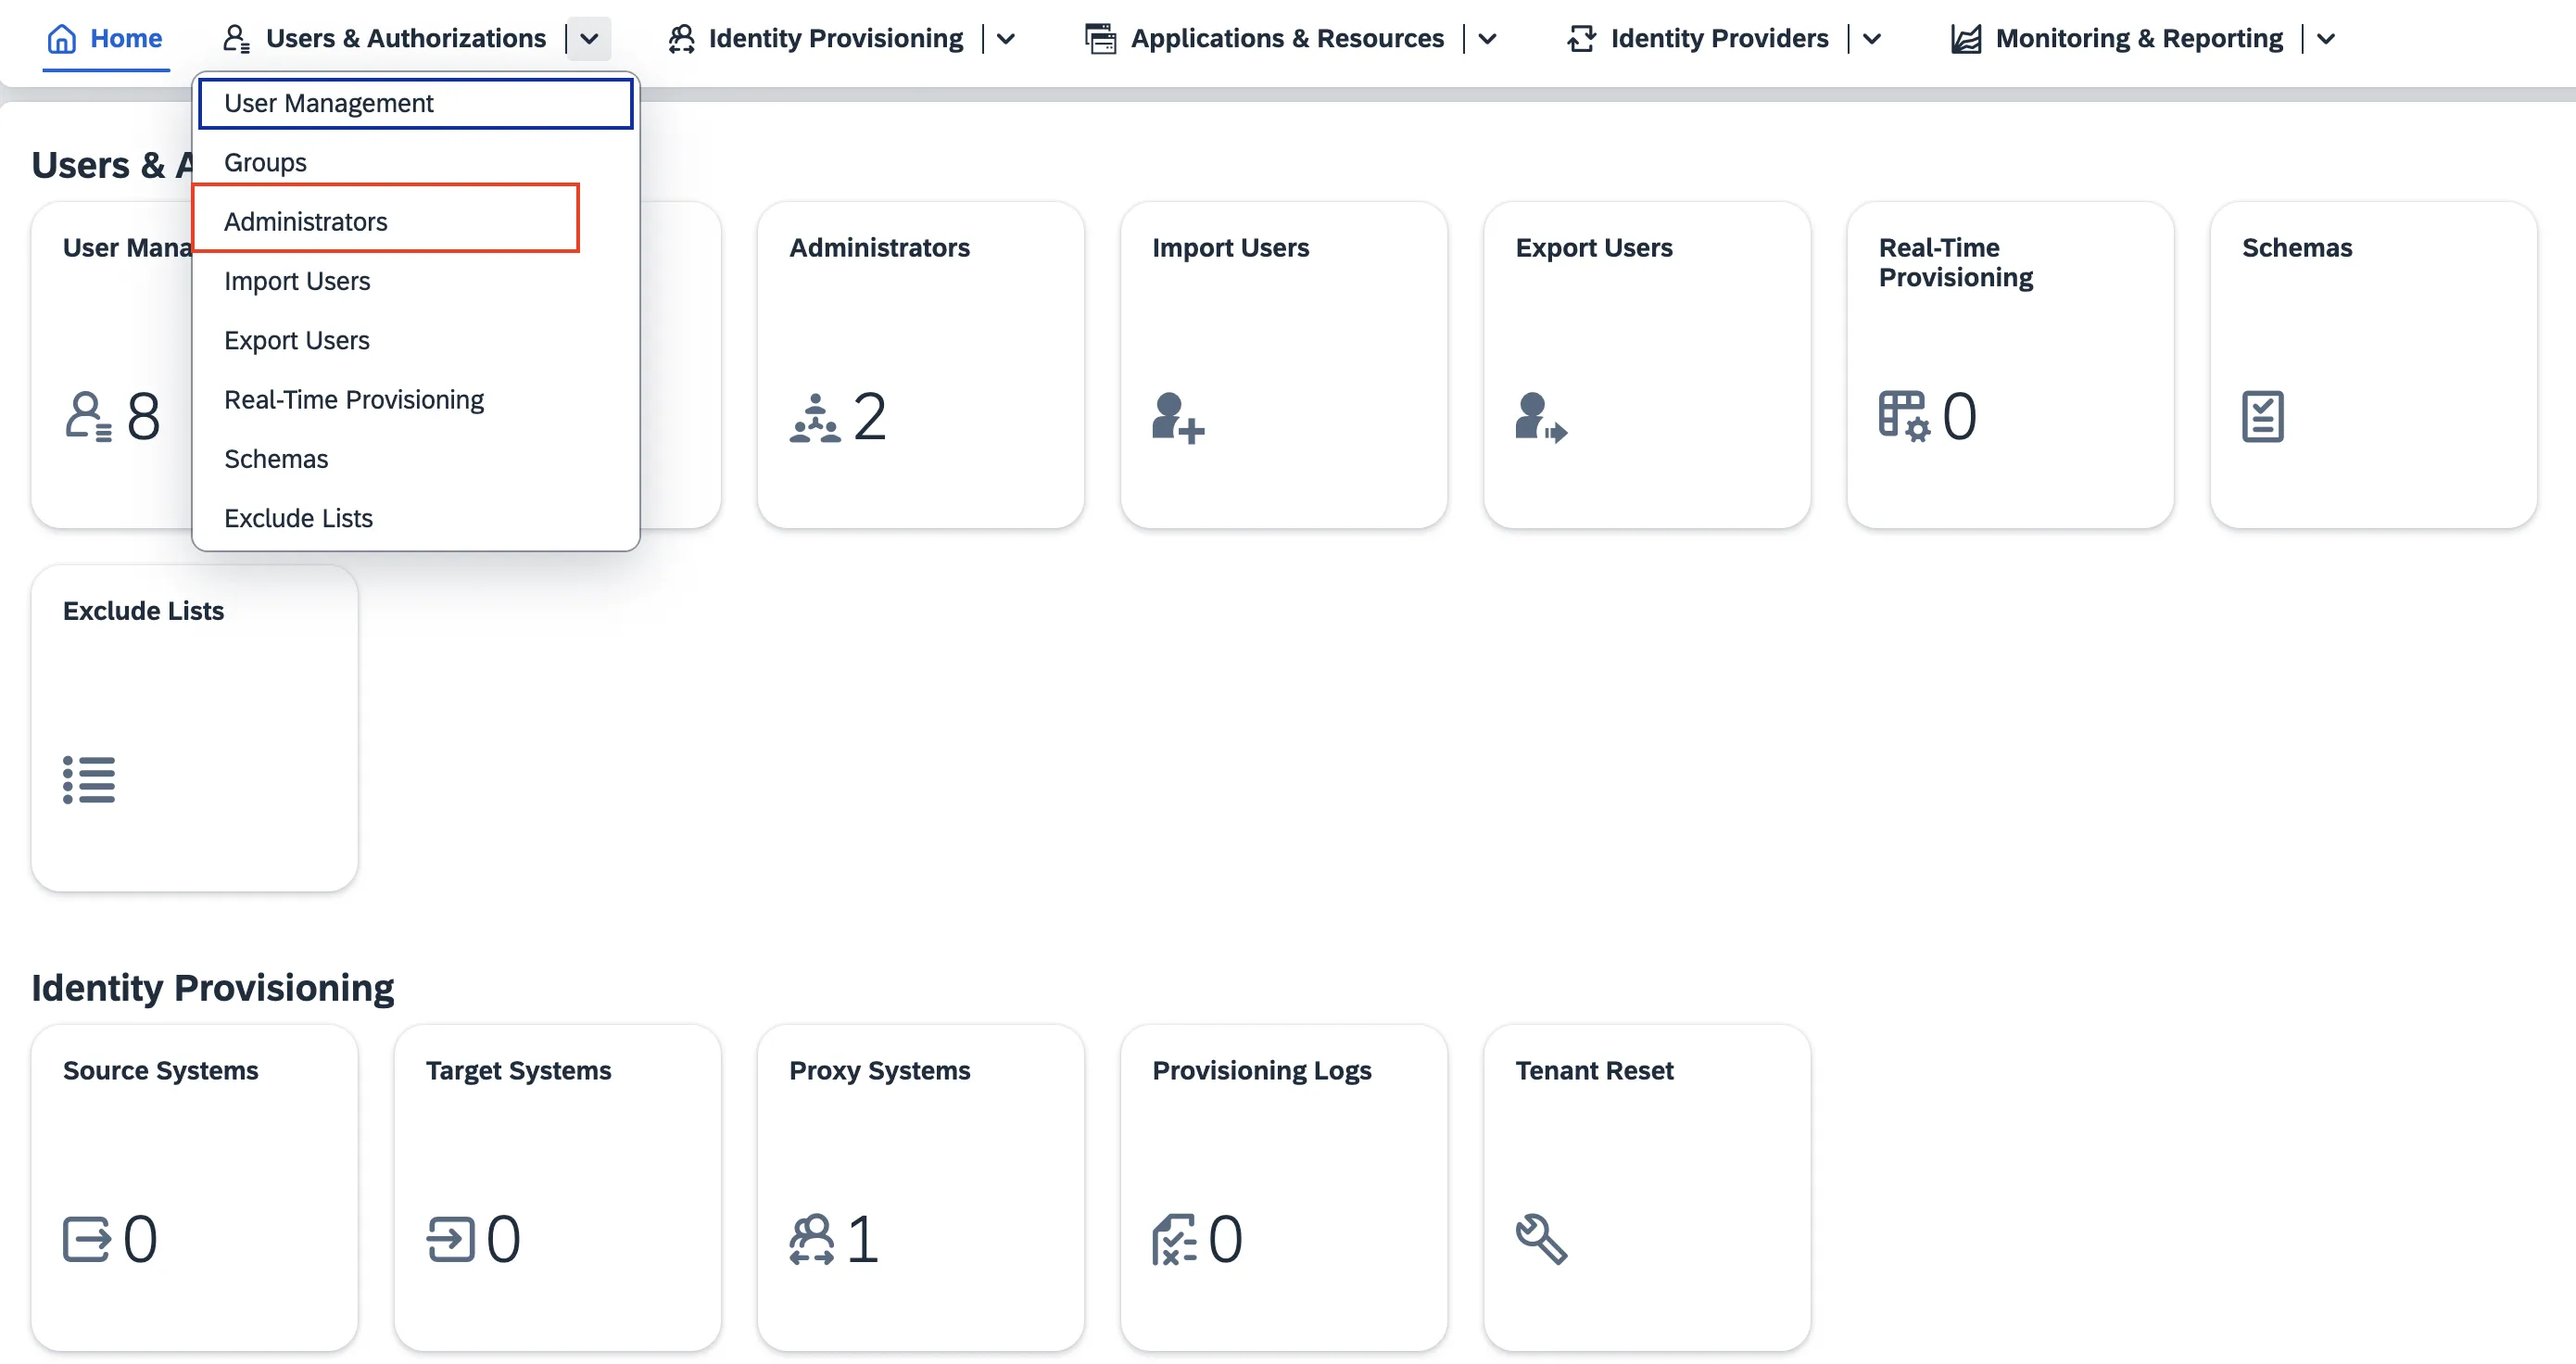 Figure 1. SAP Cloud Identity Services Admin Console
 -
Press the +Add button on the left hand panel in order to add a new administrator to the list. Choose Add System and enter the name of the system.
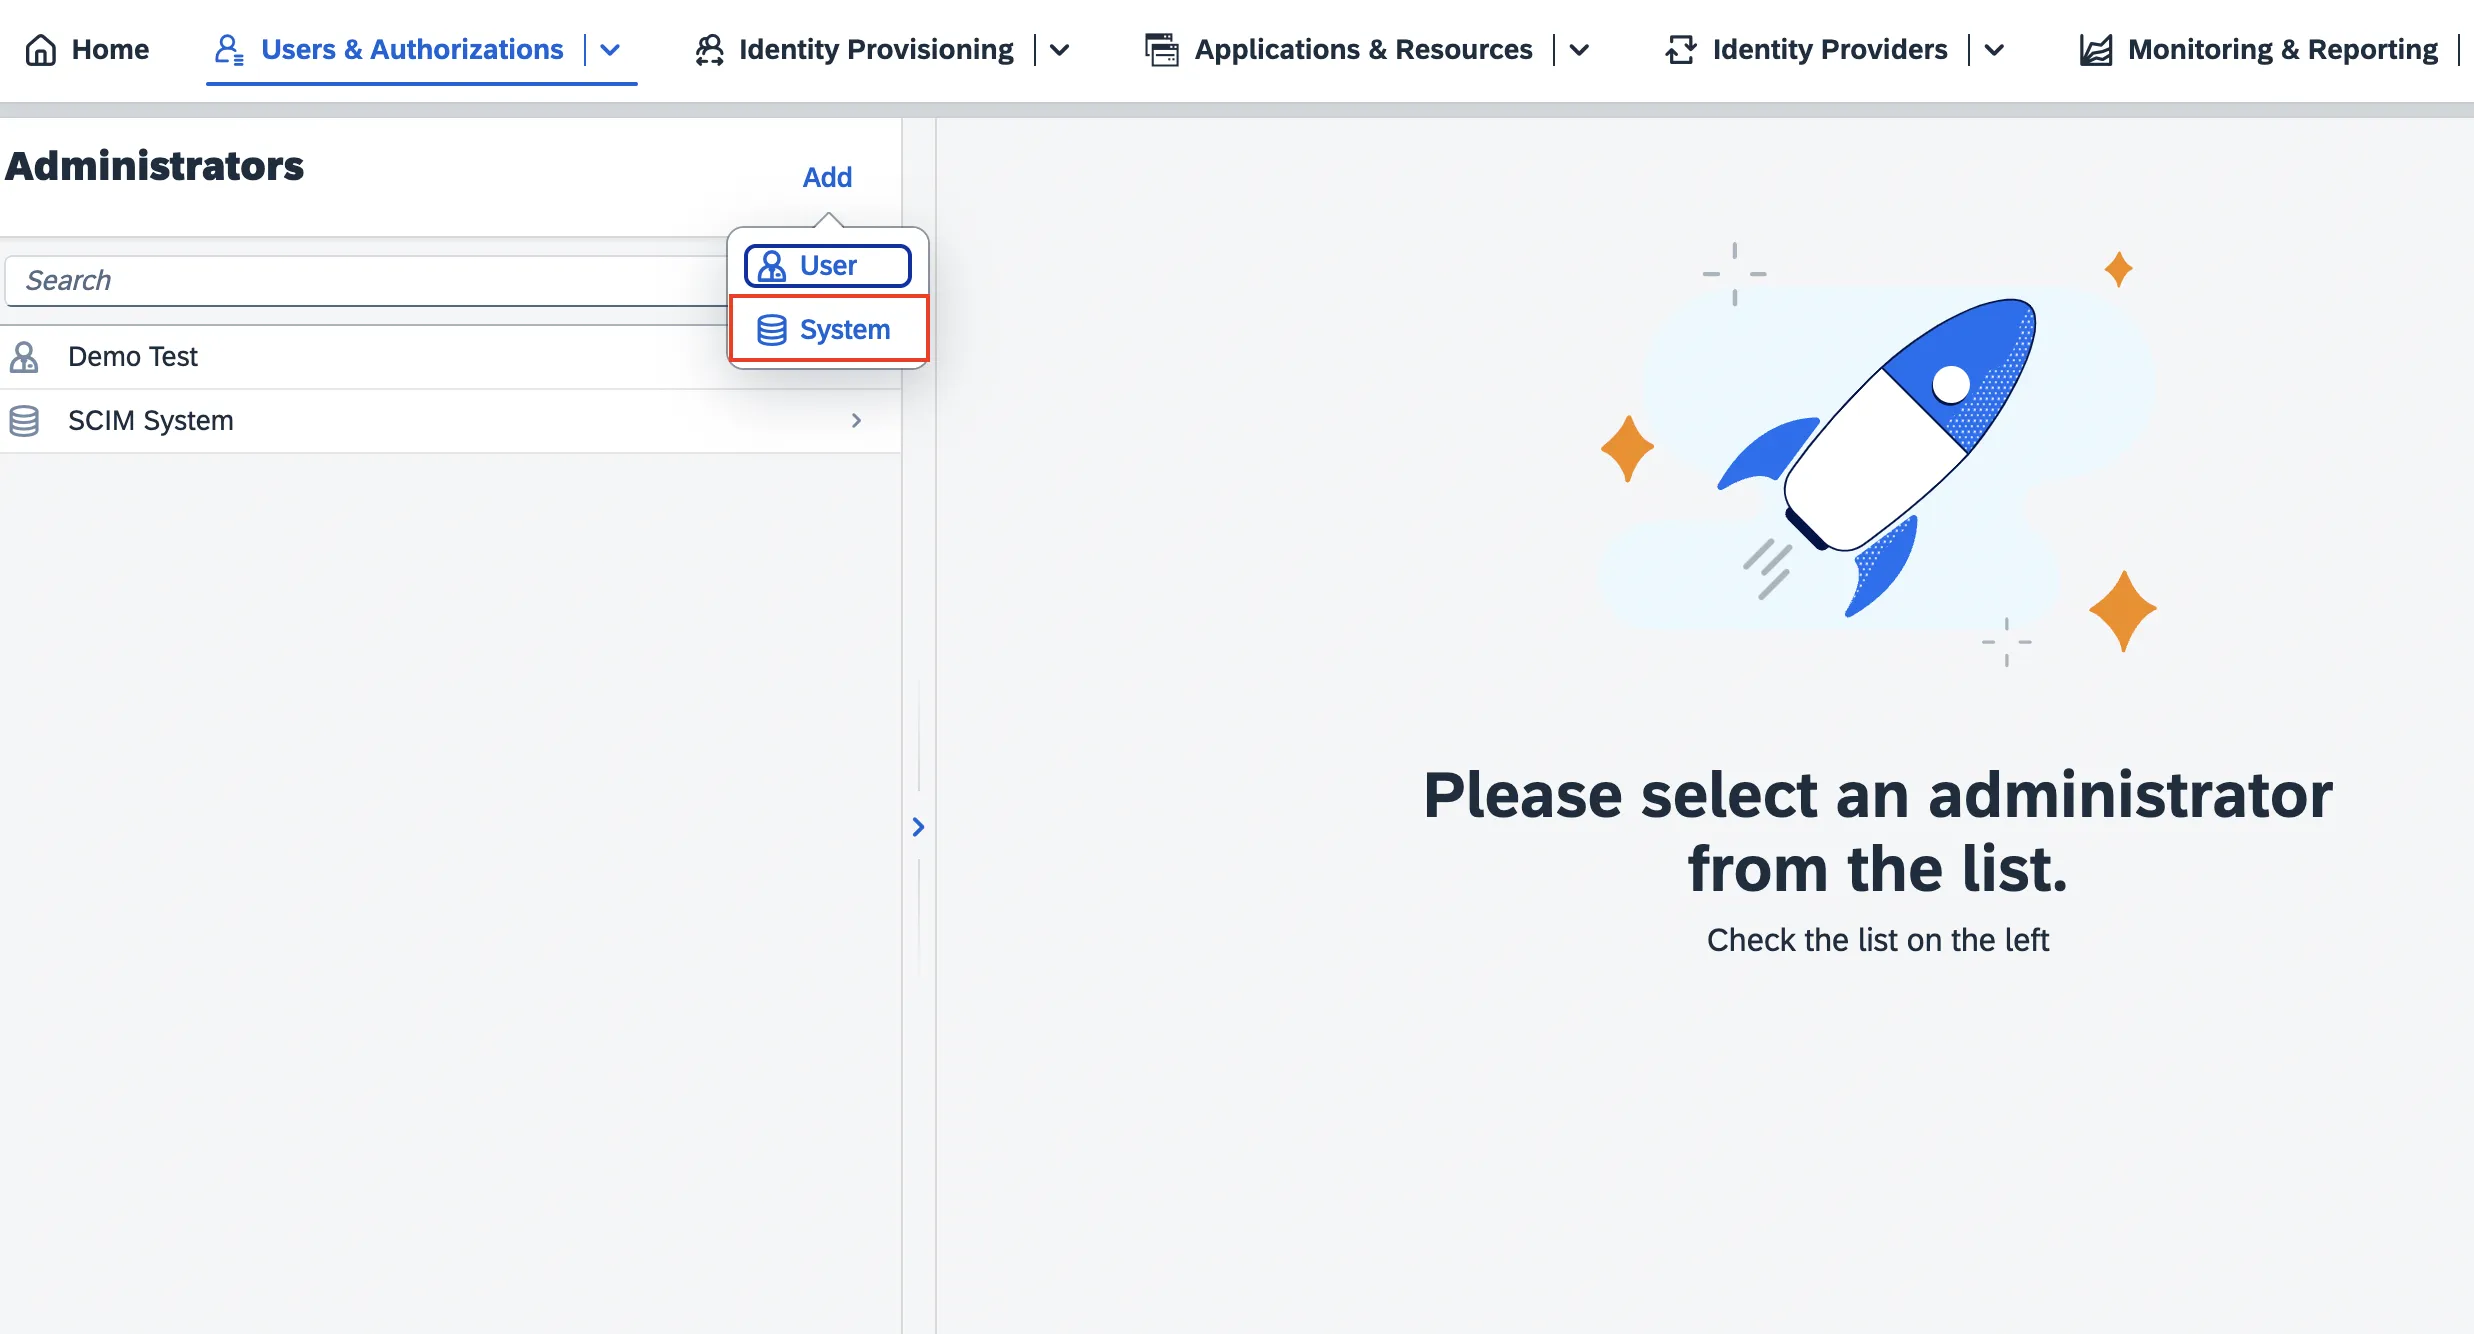 Figure 2. Add Administrator System
 -
Under Configure Authorizations, switch on the toggle button against Manage Users. Then click Save to create the system.
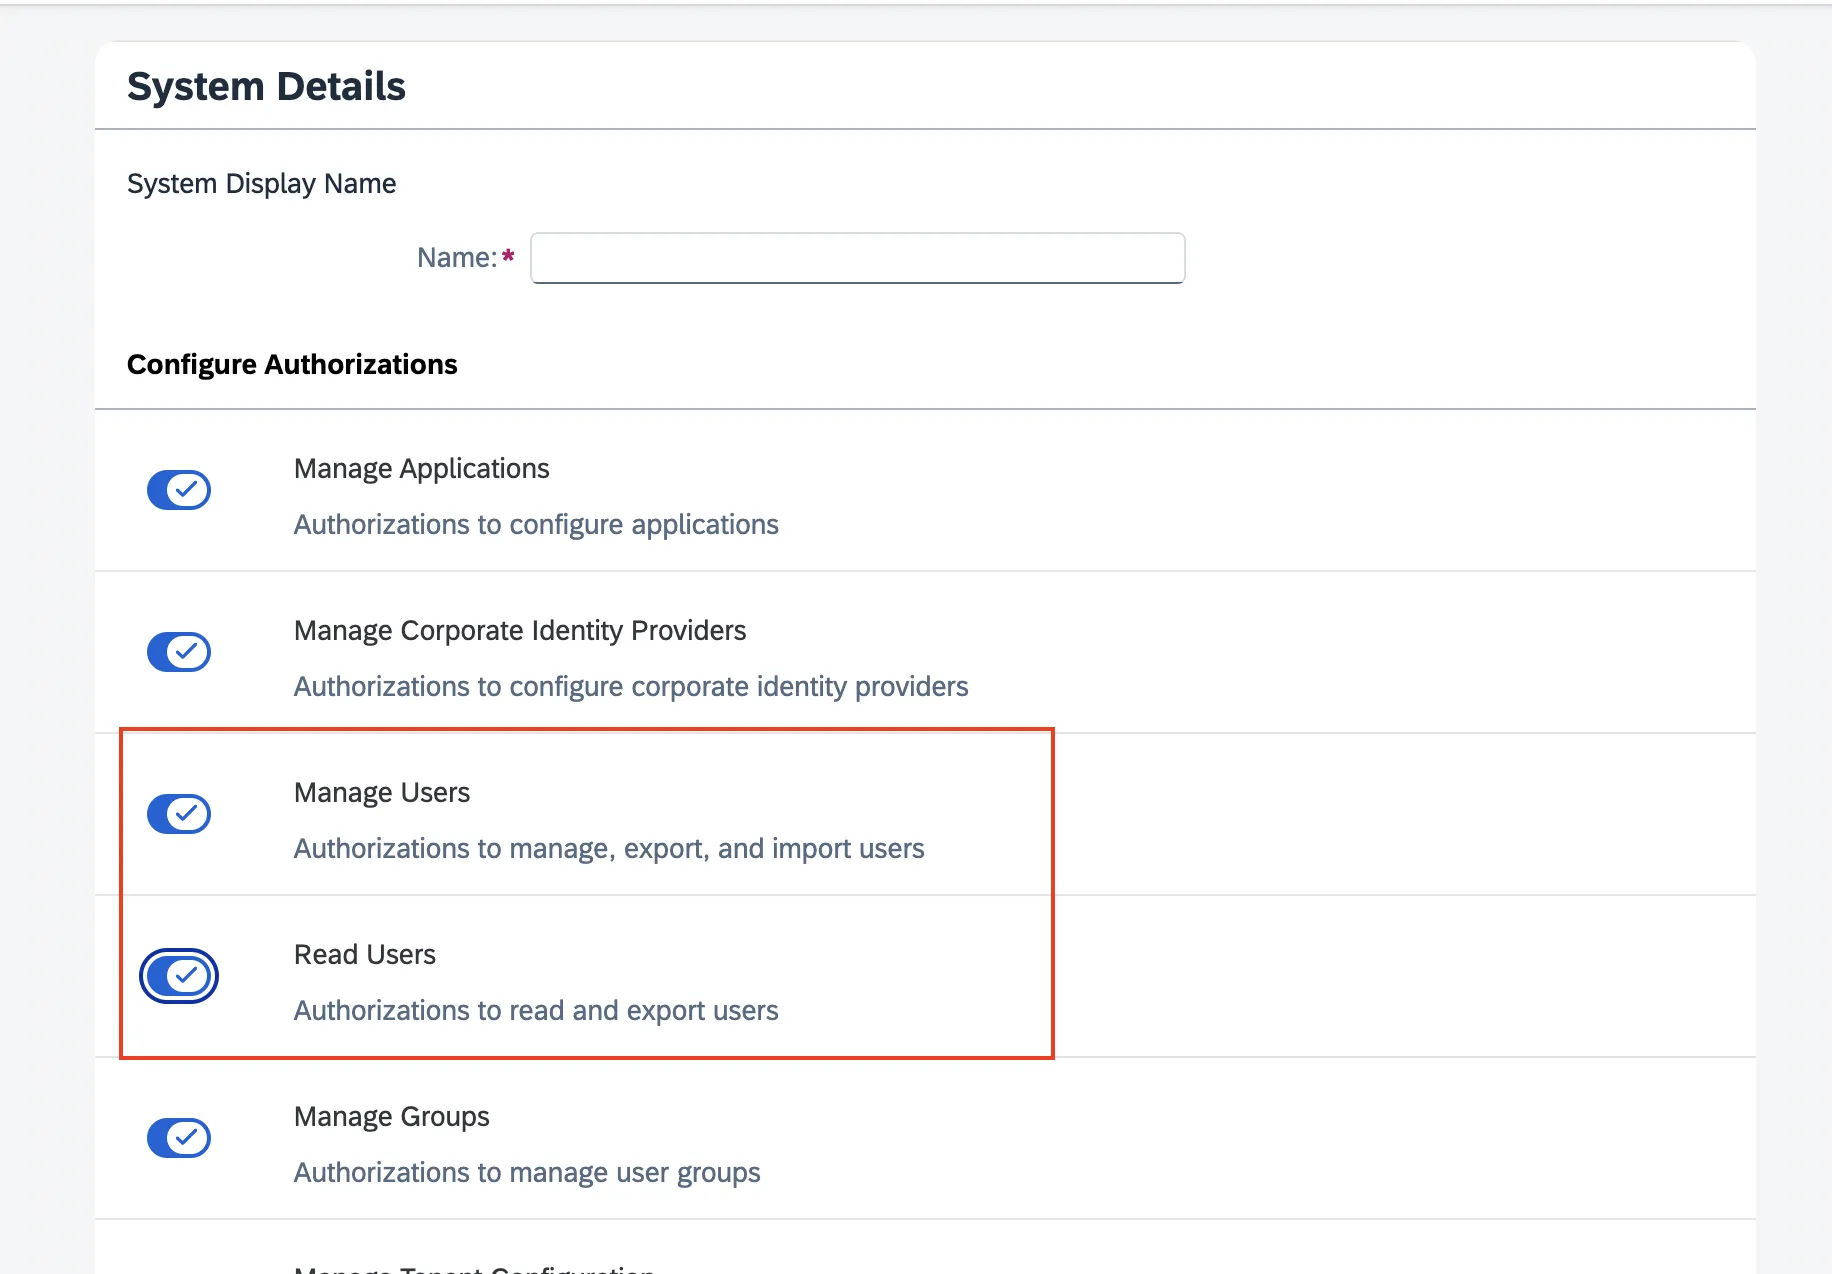 Figure 3. Configure Authorization for Administrator System
 -
Copy the Client ID and Client Secret that is generated by SAP. These values will be entered in the client id and client sercret fields respectively while creating connection on Hire2Retire provisioning, which you'll set up in the next section.
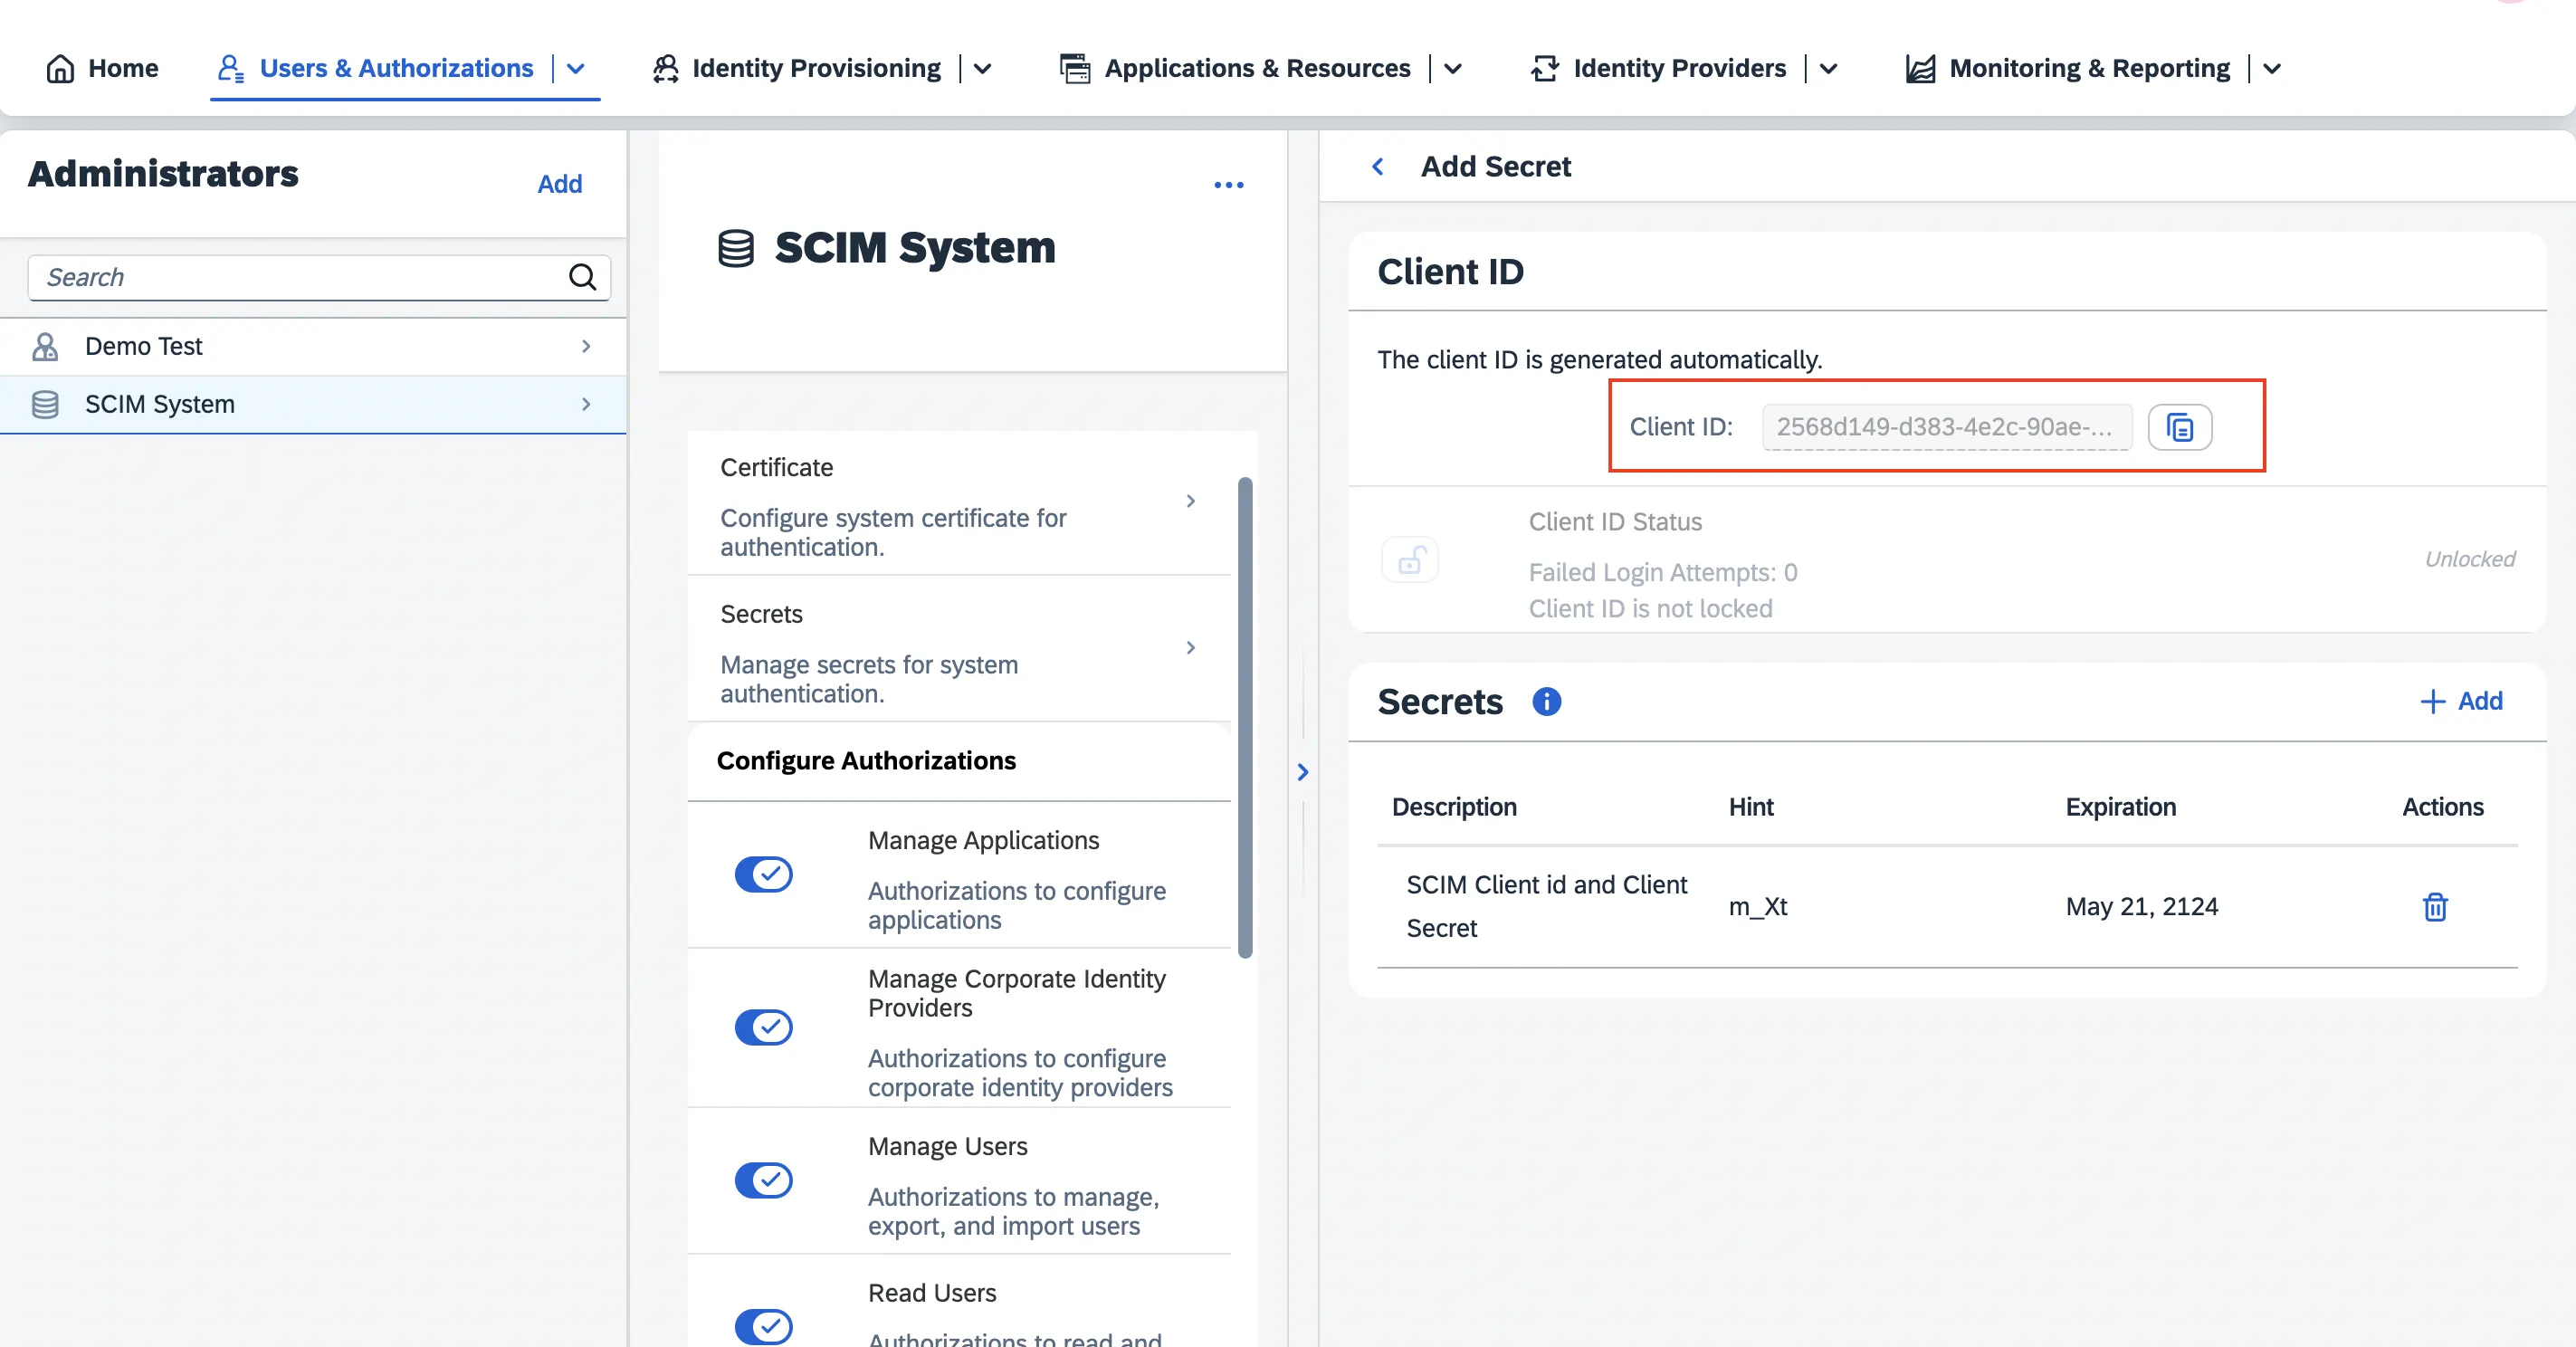 Figure 4. Obtain the Client Id and Client Secret
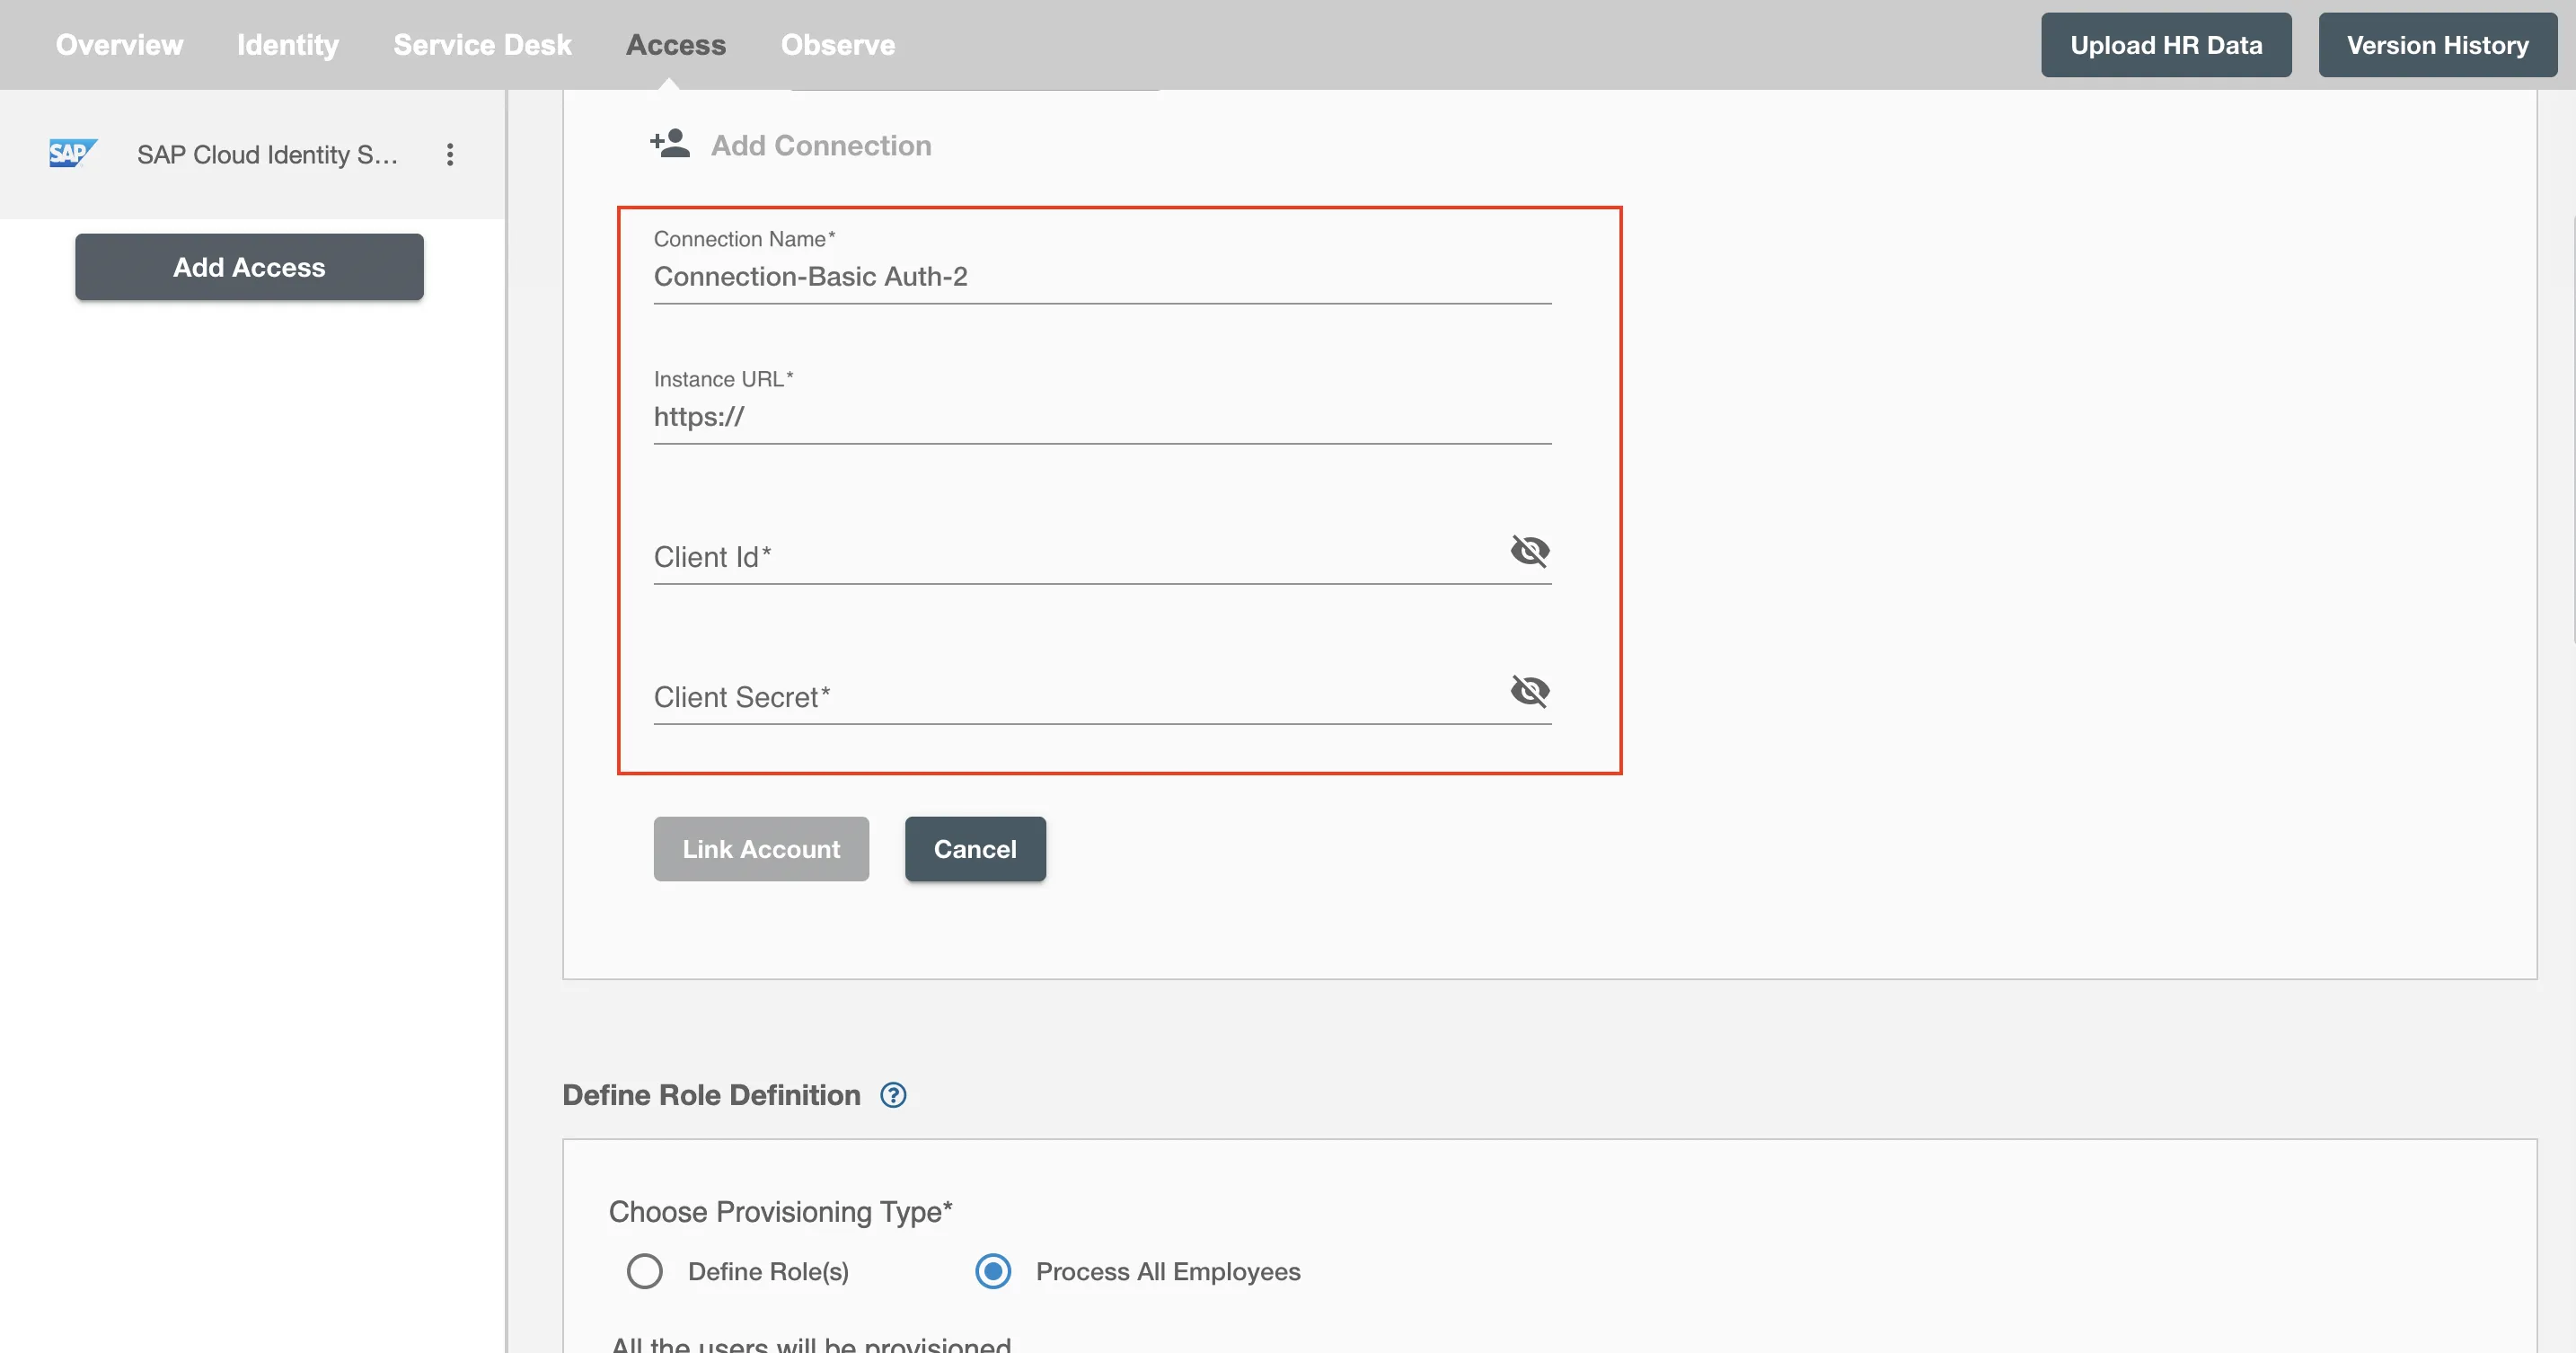
Link SAP Cloud Identity Services account on Hire2Retire
Enter the Instance URL, client id and client secret that you have received by creating a adminstrator system mentioned above.
Instance url is https://<tenantID>.accounts.ondemand.com for production account and https://<tenantID>.trial.accounts.ondemand.com for a trial account. The tenant id can be found at the top middle of the admin console window or in the url of the admin console.