Connection
Atlassian on Hire2Retire uses API Key Authentication.
An API key serves as a security token, facilitating authentication and authorization to access and interact with the SCIM API offered by the application. Atlassian cloud supports API Key authentication for SCIM. The User provisioning SCIM APIs allows seamless integration of your organization with Hire2Retire.
Please refer to the document User Provisioning for rest APIs to know more about User Provisioning with API authentication in Atlassian.
We at RoboMQ pay utmost attention to keep your account secure. See our Security and Privacy Policies to learn more about how RoboMQ handles your account access.
| Object | Permission |
|---|---|
| User | Can Provision and Deprovision Users |
Create account in Atlassian
Learn how to create an account on Atlassian.
Generate API Key
-
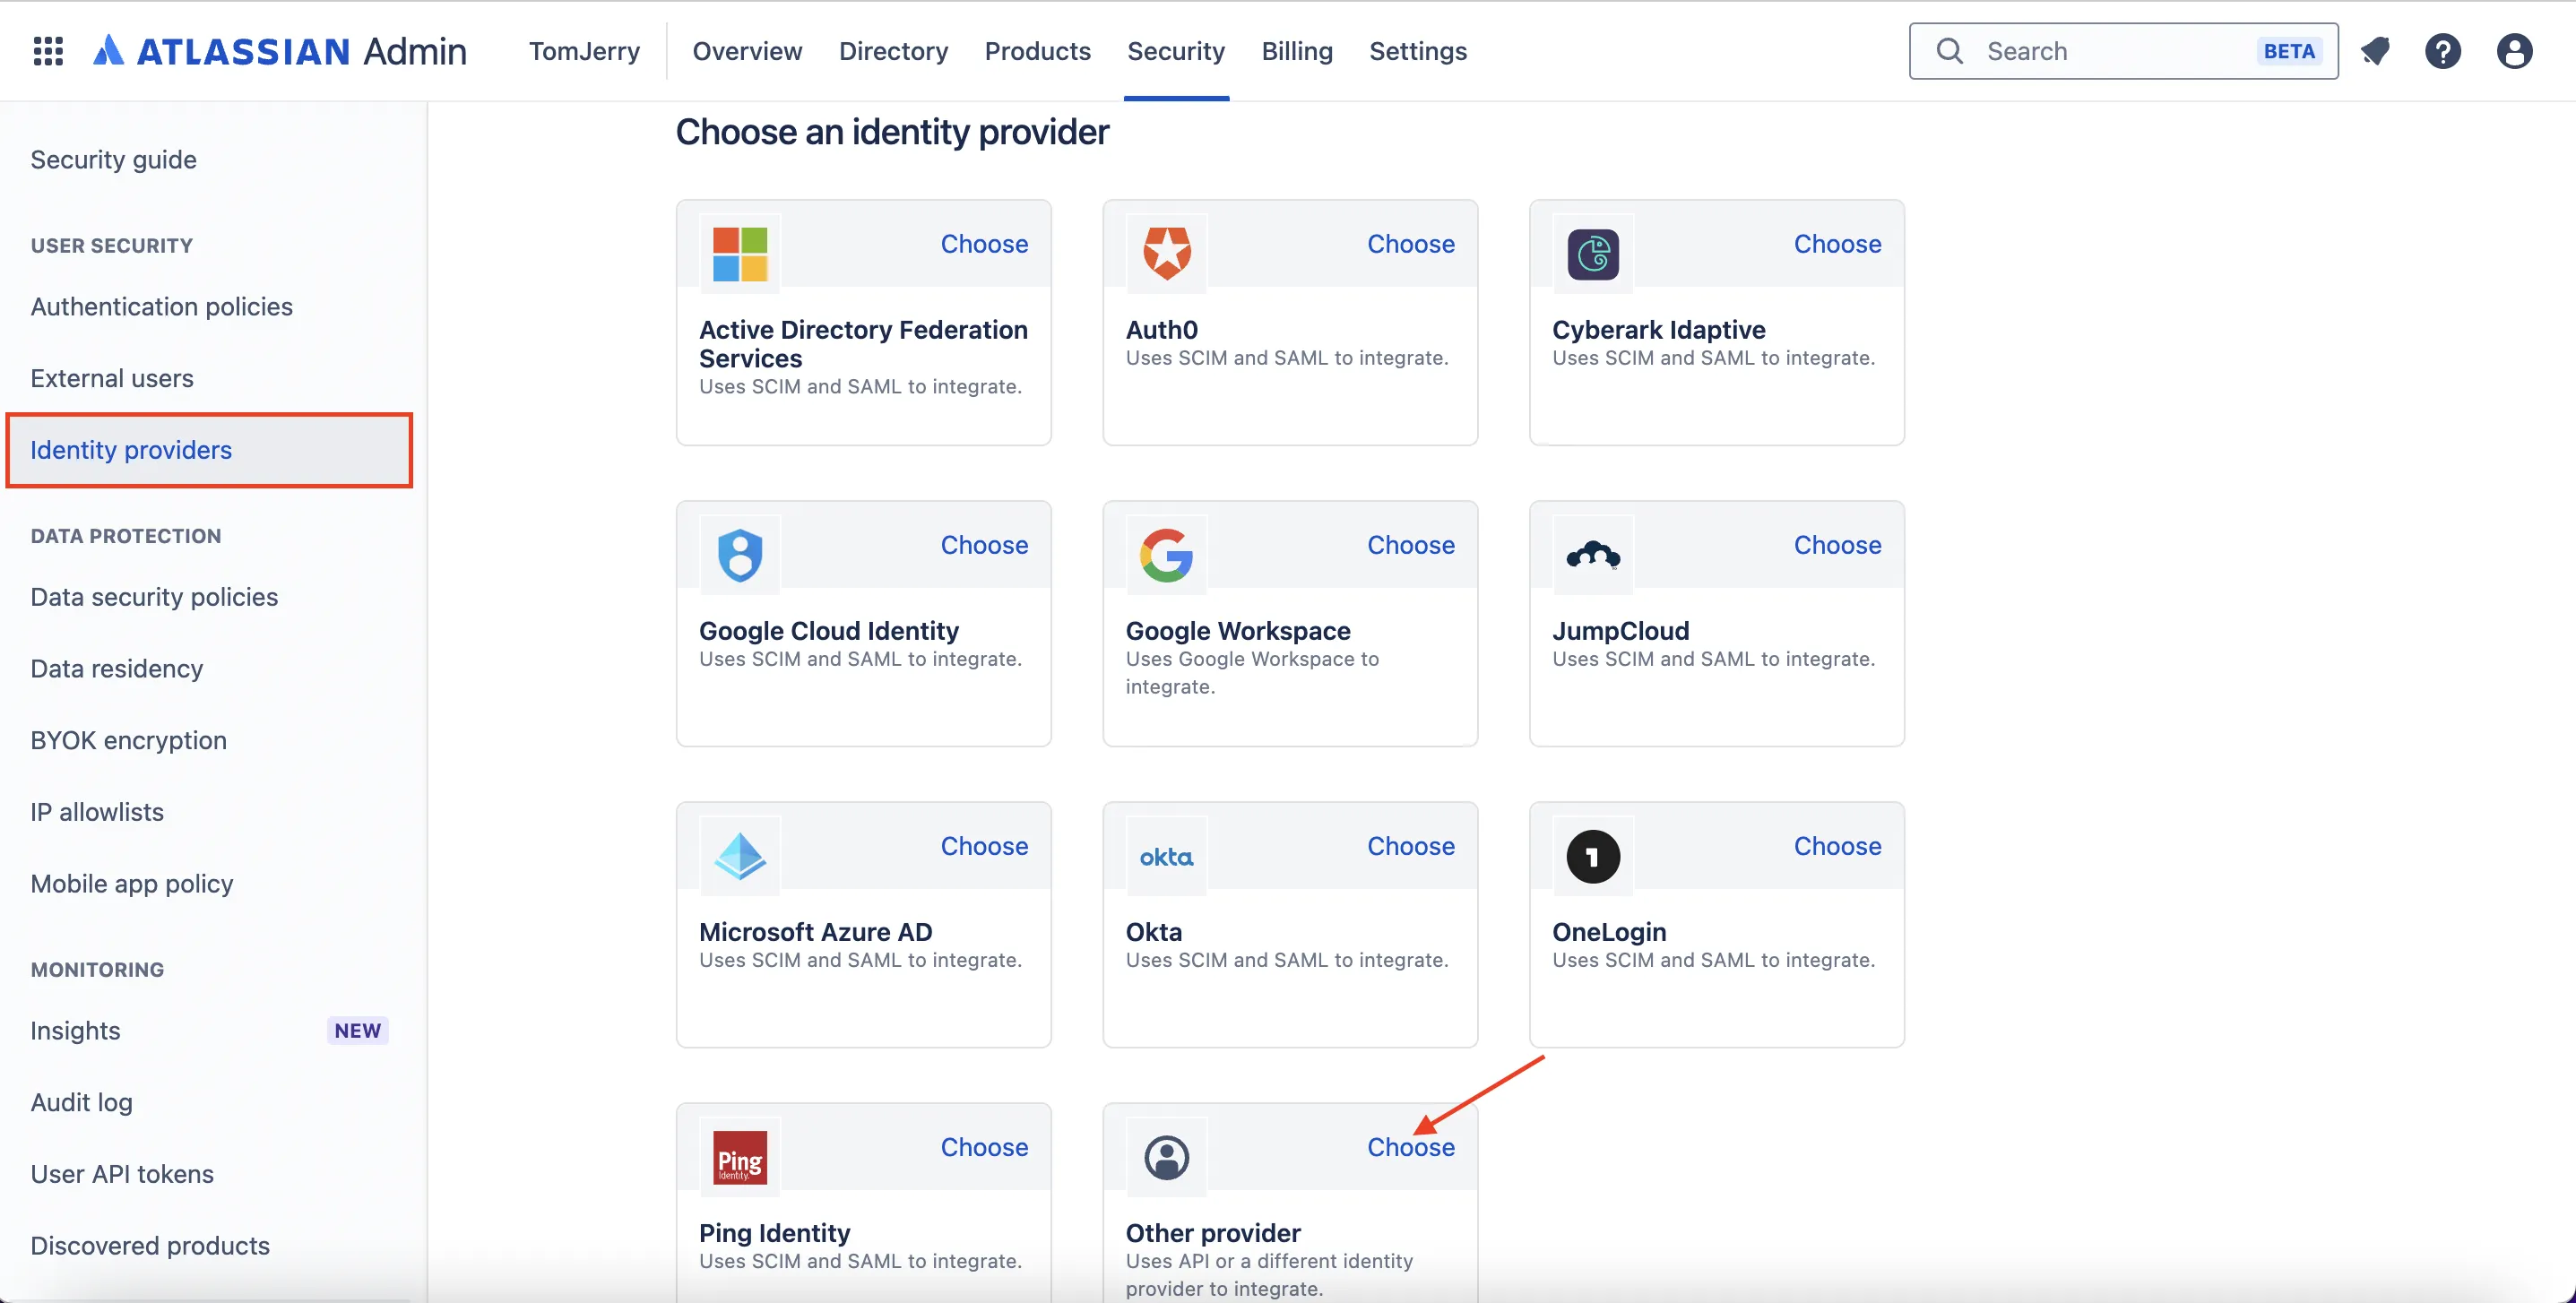
Login into your admin account admin.atlassian.com.
-
Go to
Securitysection and SelectIdentity providers. -
Choose
Other Providerfrom the available identity provider options.
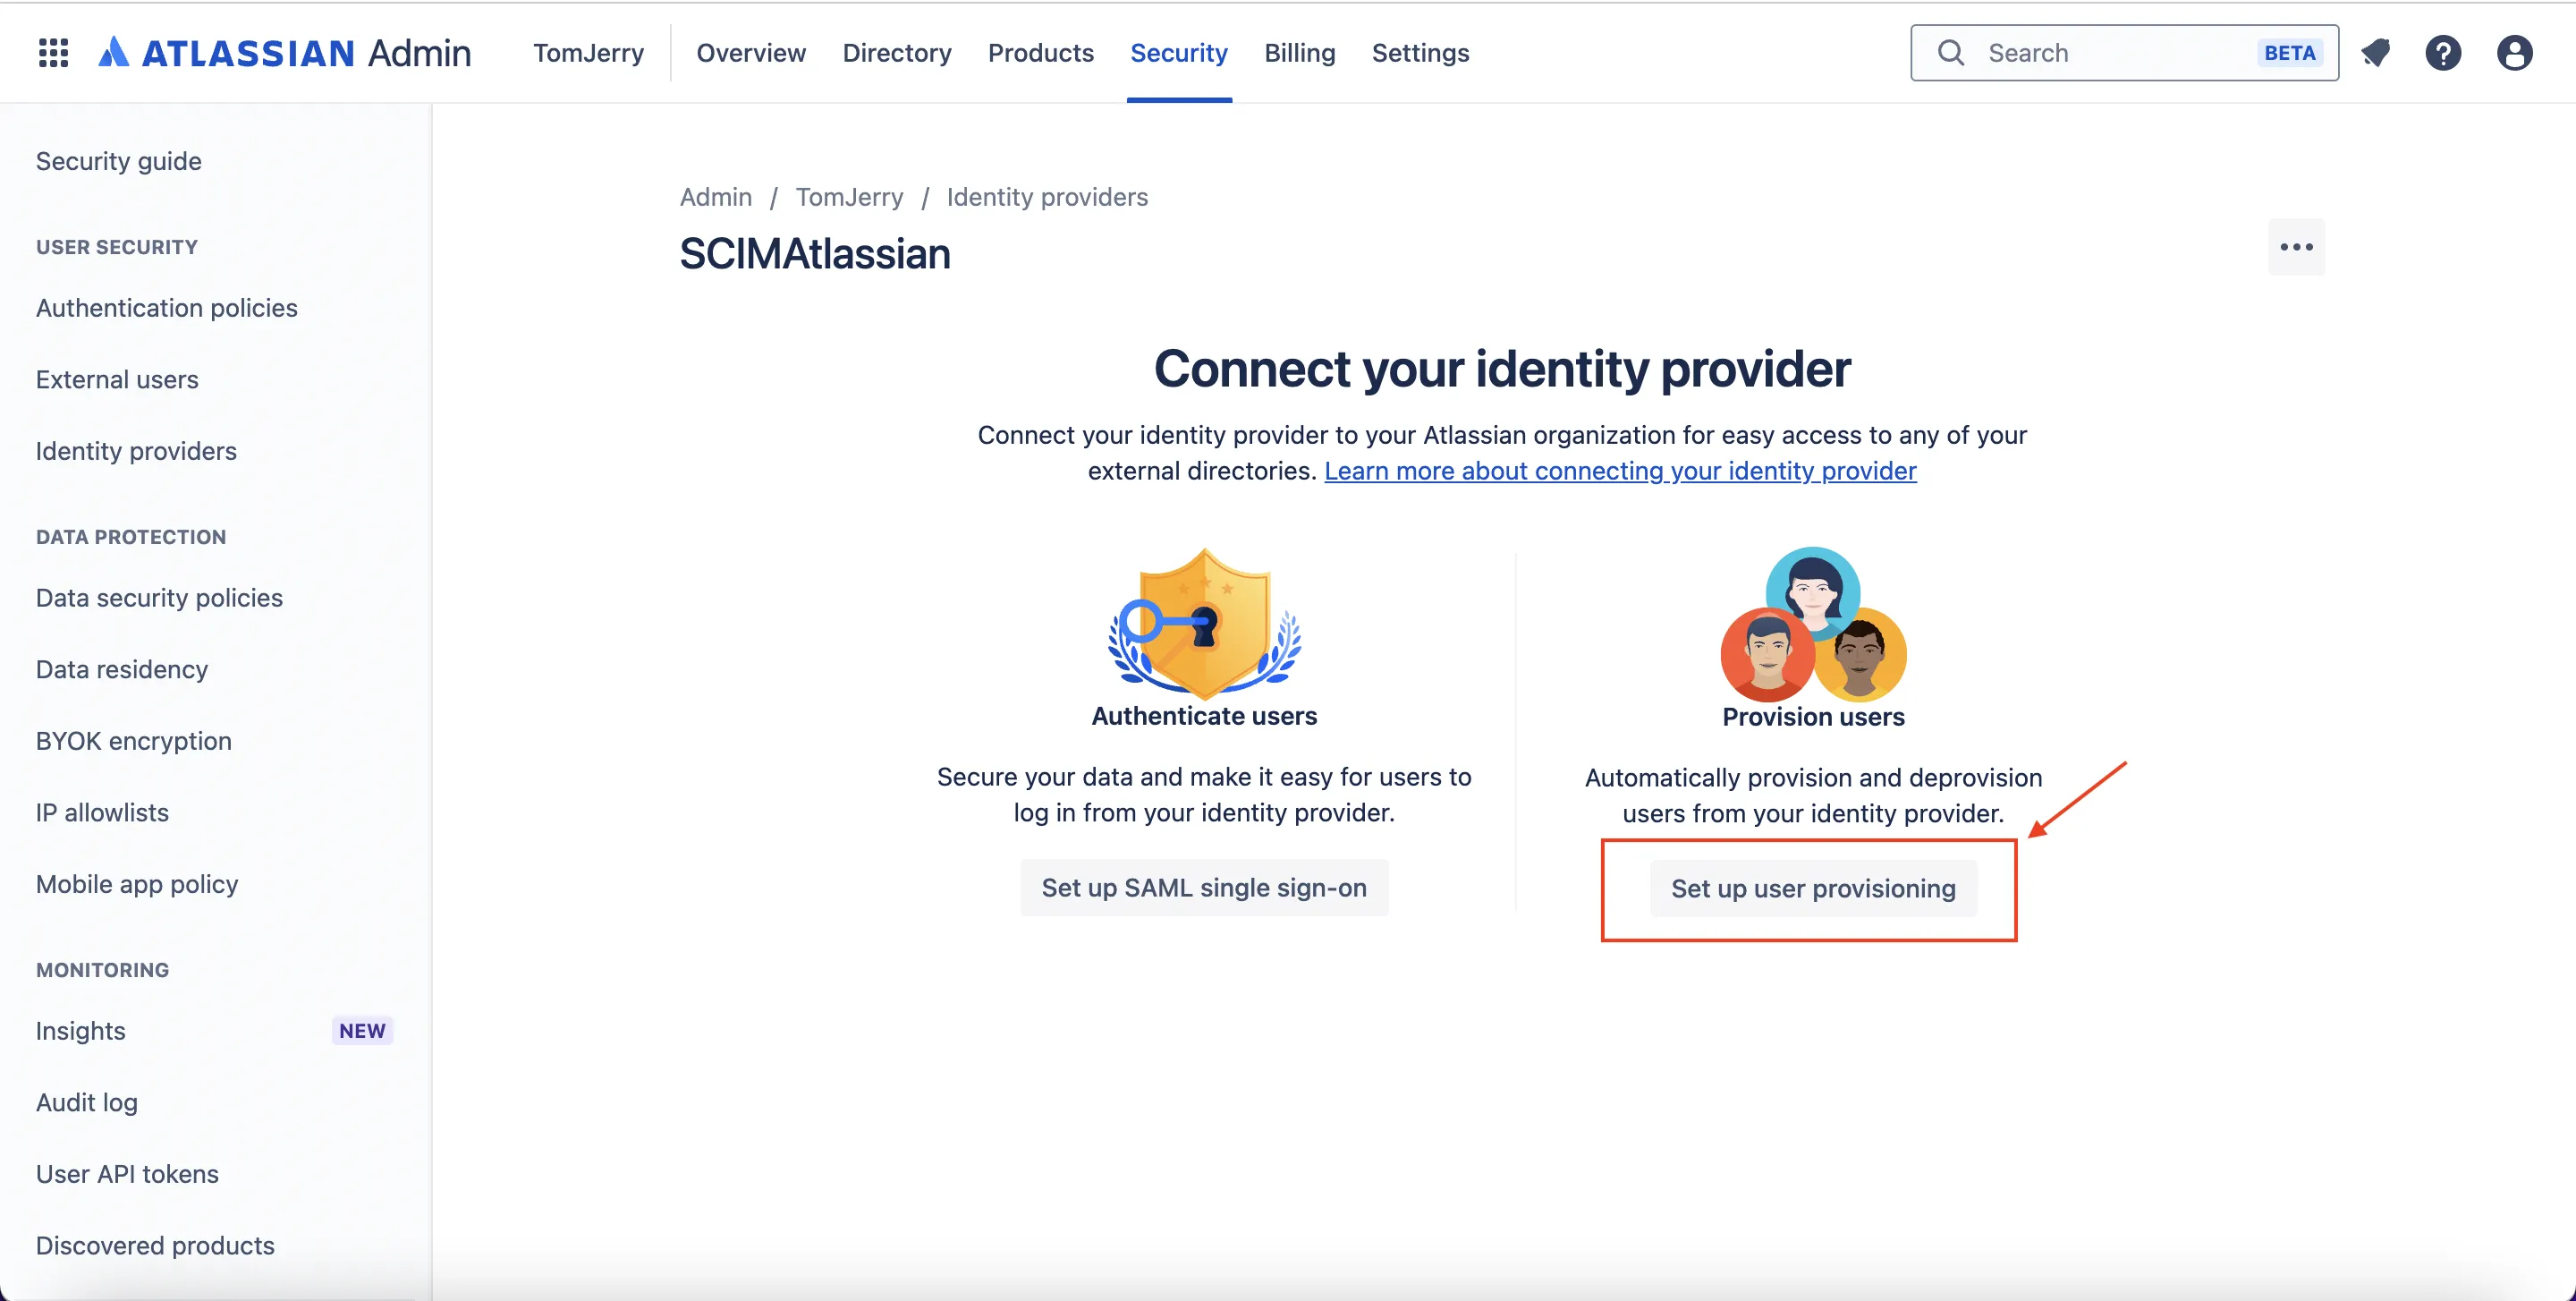
- Provide a name for your directory.

- Select
Set up user provisioningand proceed to the next step.
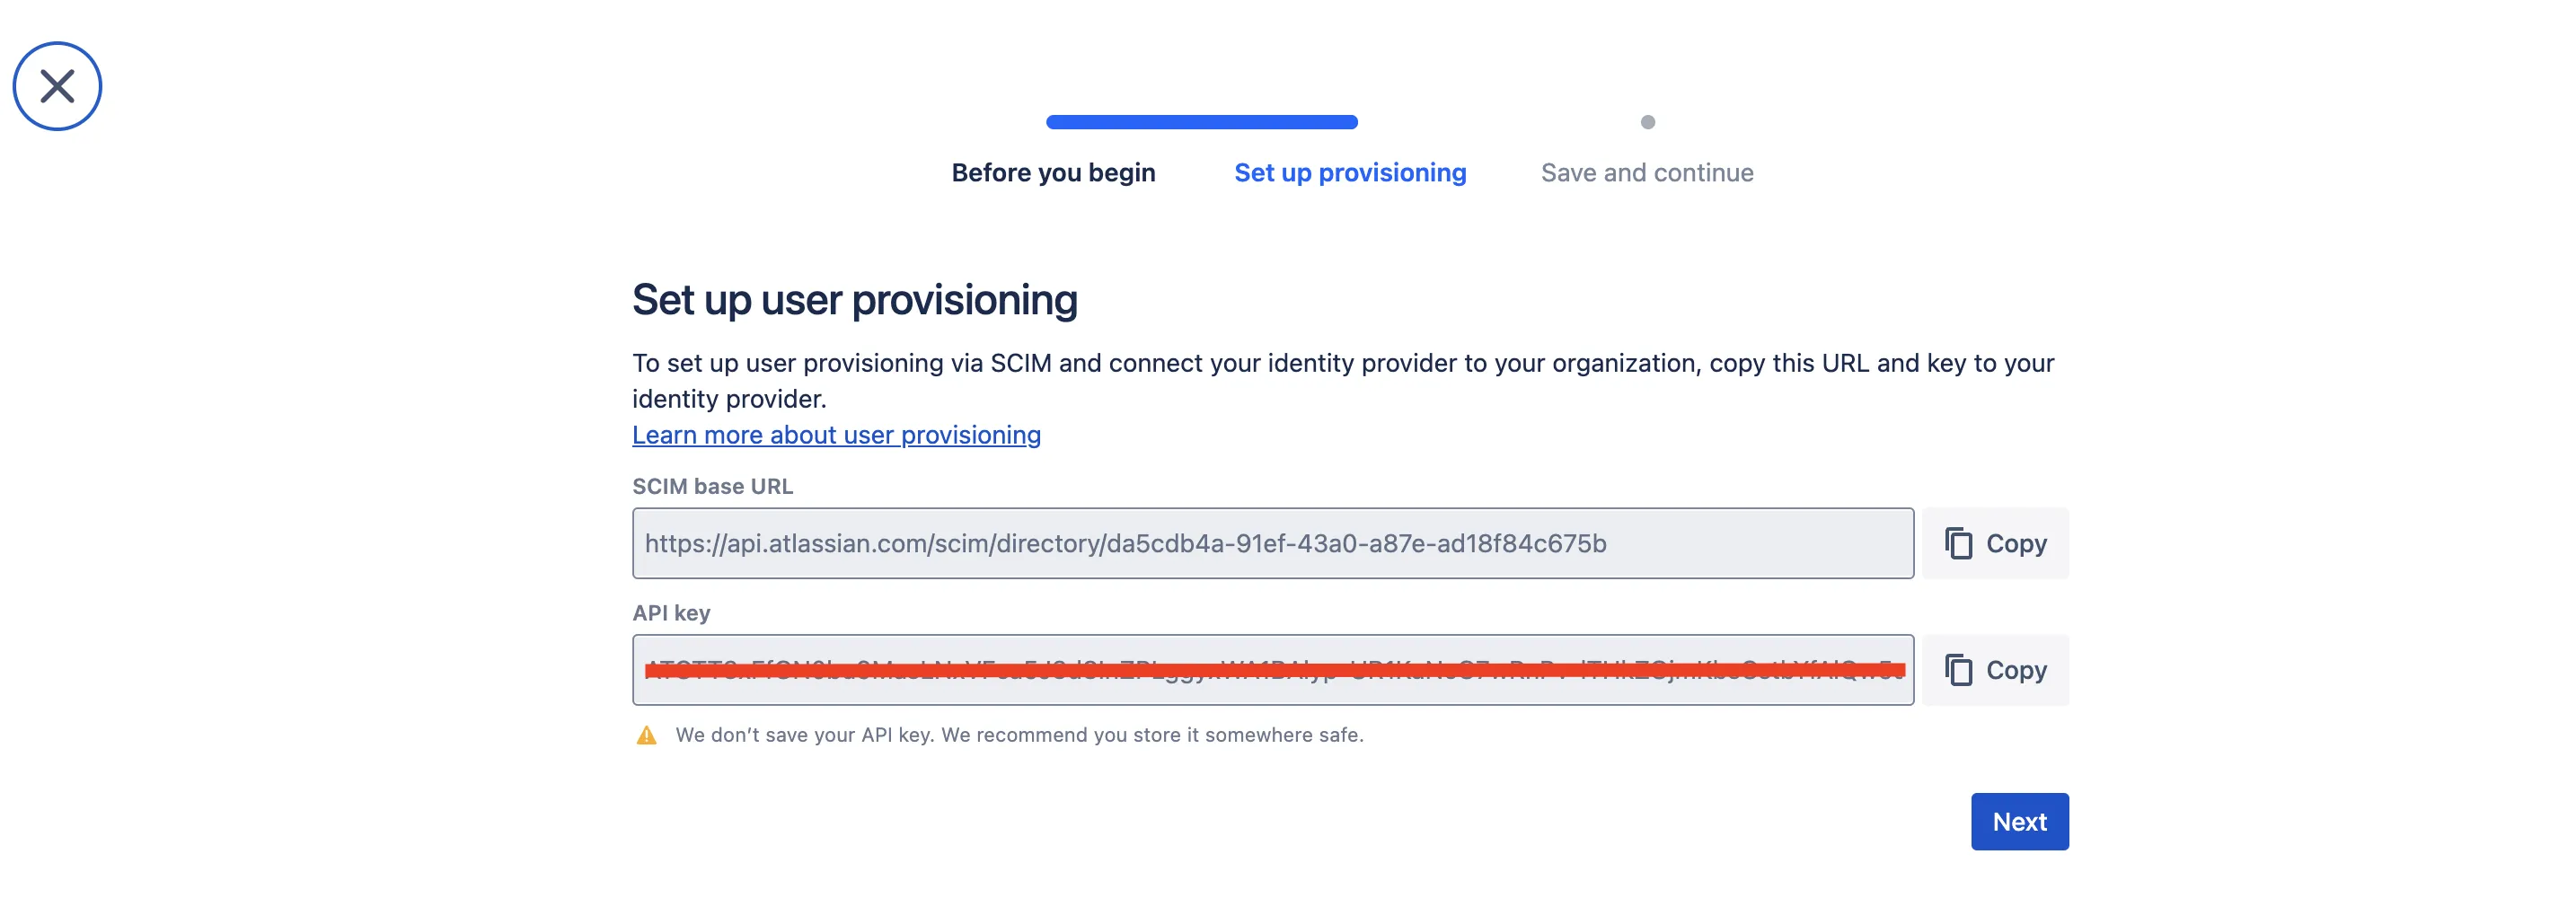
- You will be provided with a
SCIM base URLand anAPI Key. The last segment of this URL, after the final/, represents yourDirectory ID. Copy these details and securely save them in your records. Then, click onNextto proceed with the setup.
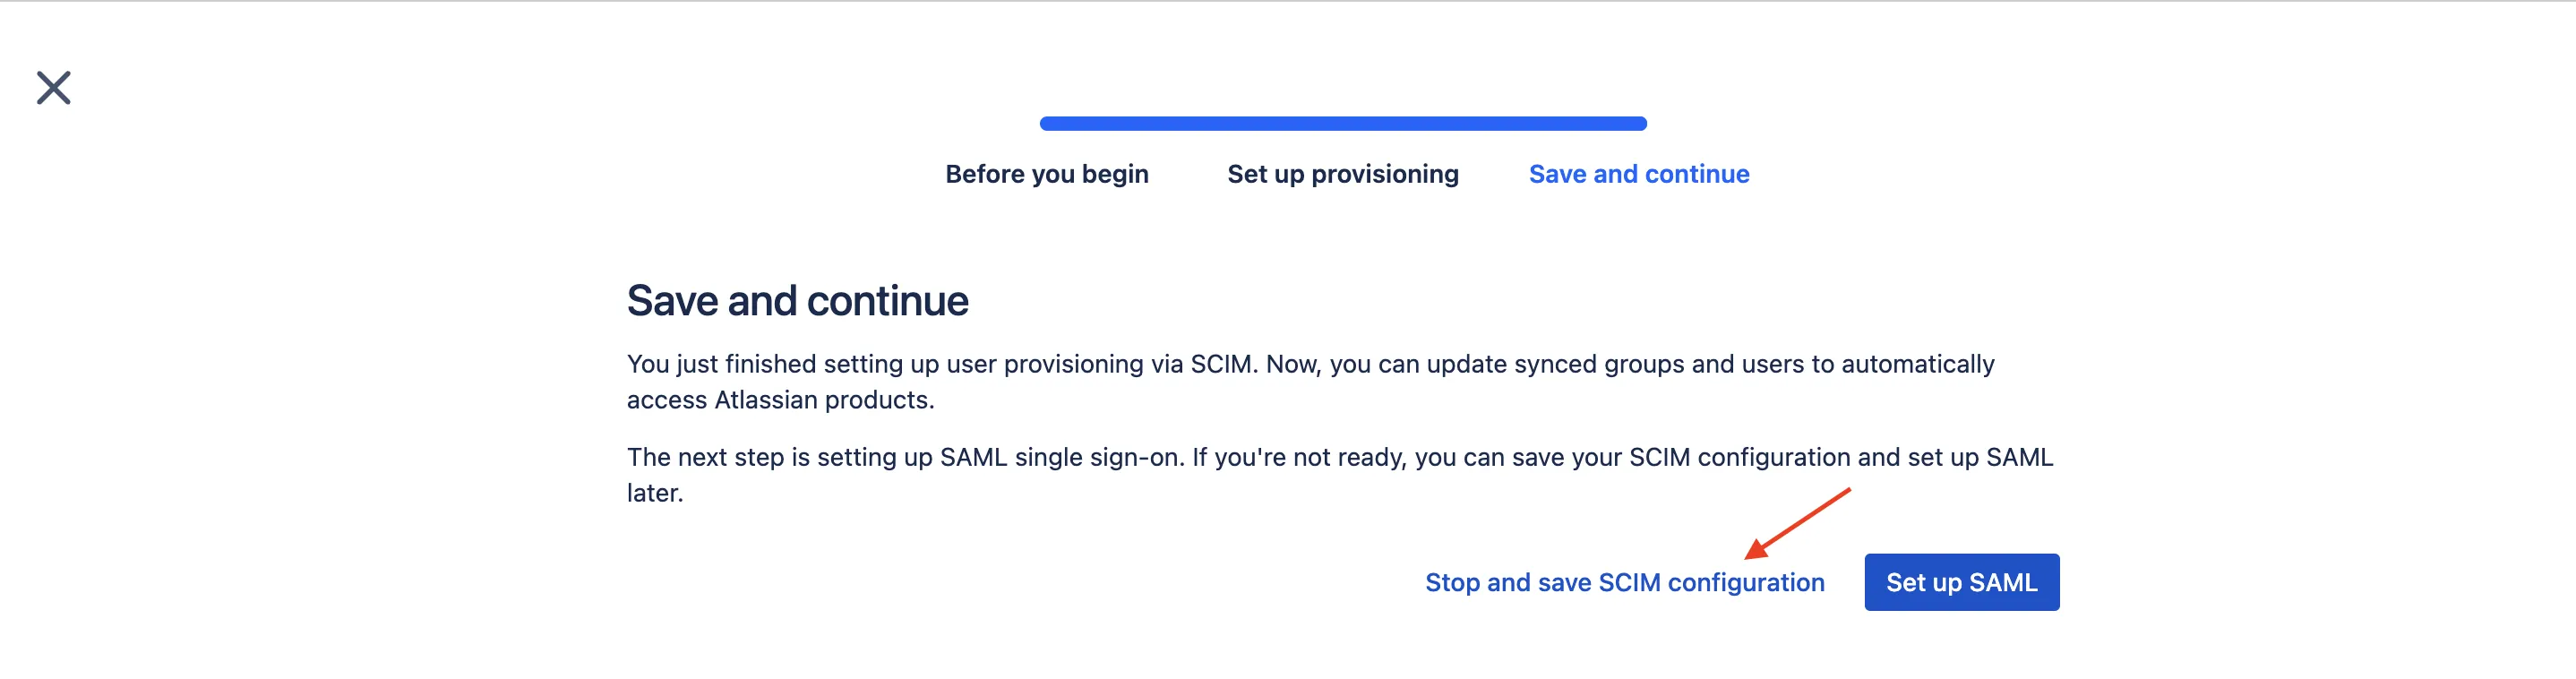
- Click
Stop and save SCIM Configurationto save your SCIM Configuration.
Link domains to your SCIM Directory
-
Navigate to
Security > Identity providerson Atlassian and choose the SCIM directory you previously created during the setup process. -
On the right-hand corner, click on the three dots (...) and select
Link Domain.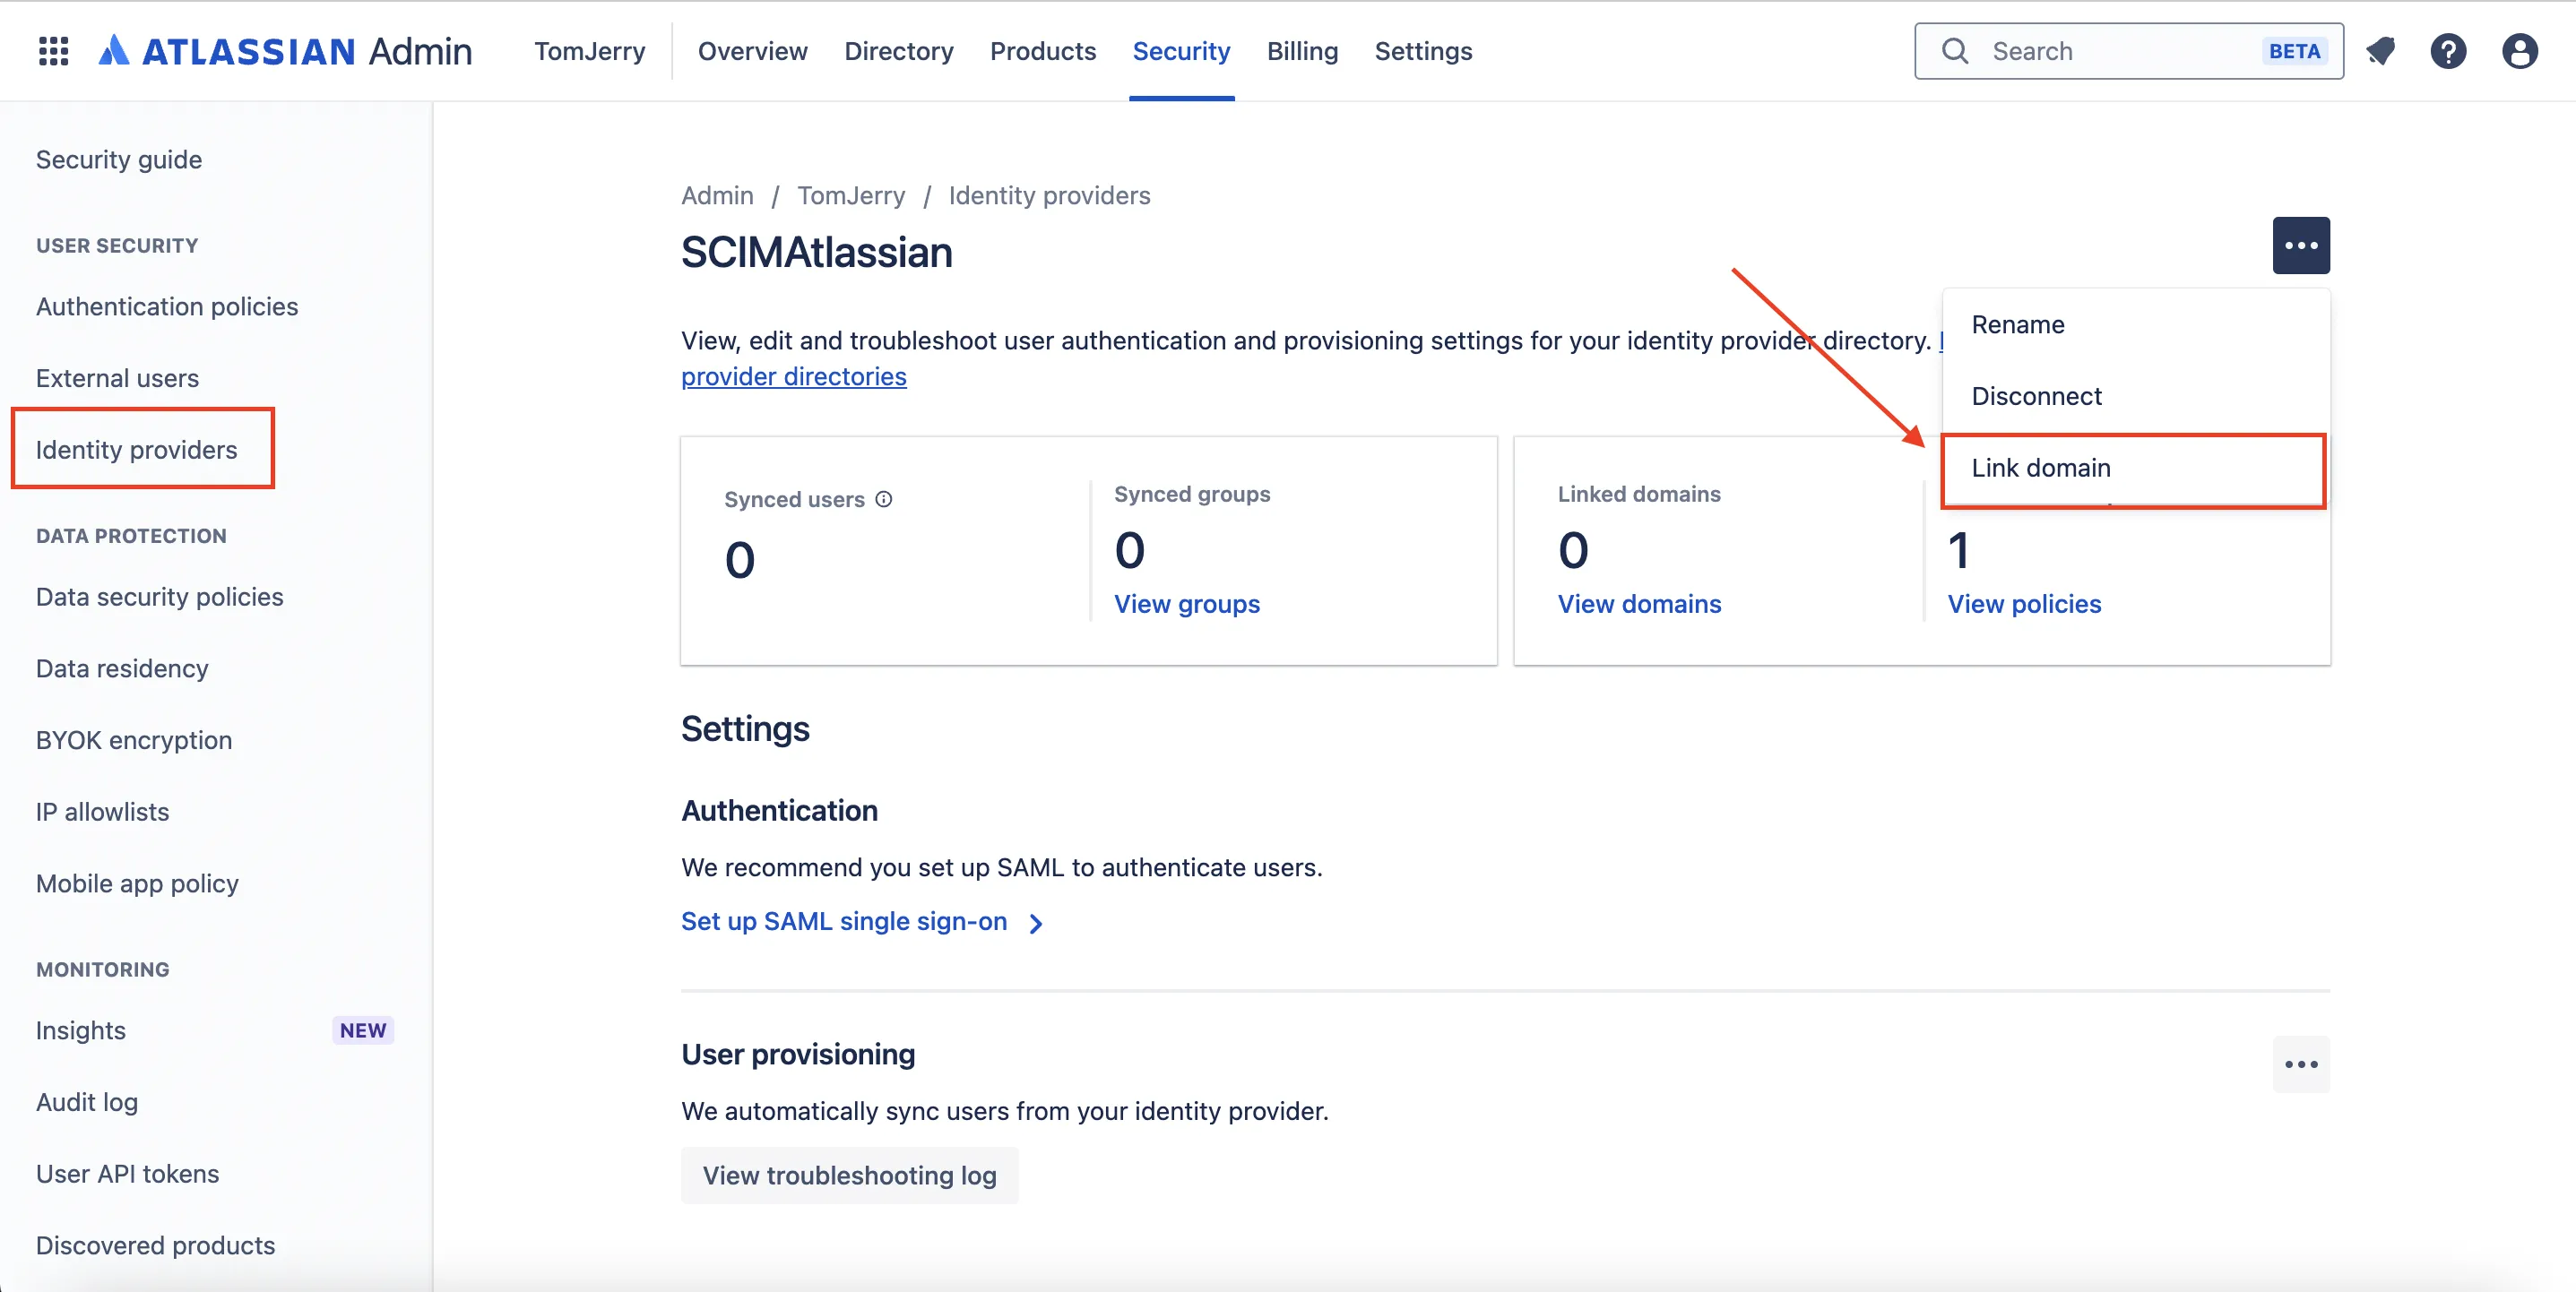
- Choose your verified domain from the available options. If your domain is not yet verified, click Verify domain in Atlassian for detailed instructions on how to complete the verification process.

- After selecting your verified domain, click
Confirm.
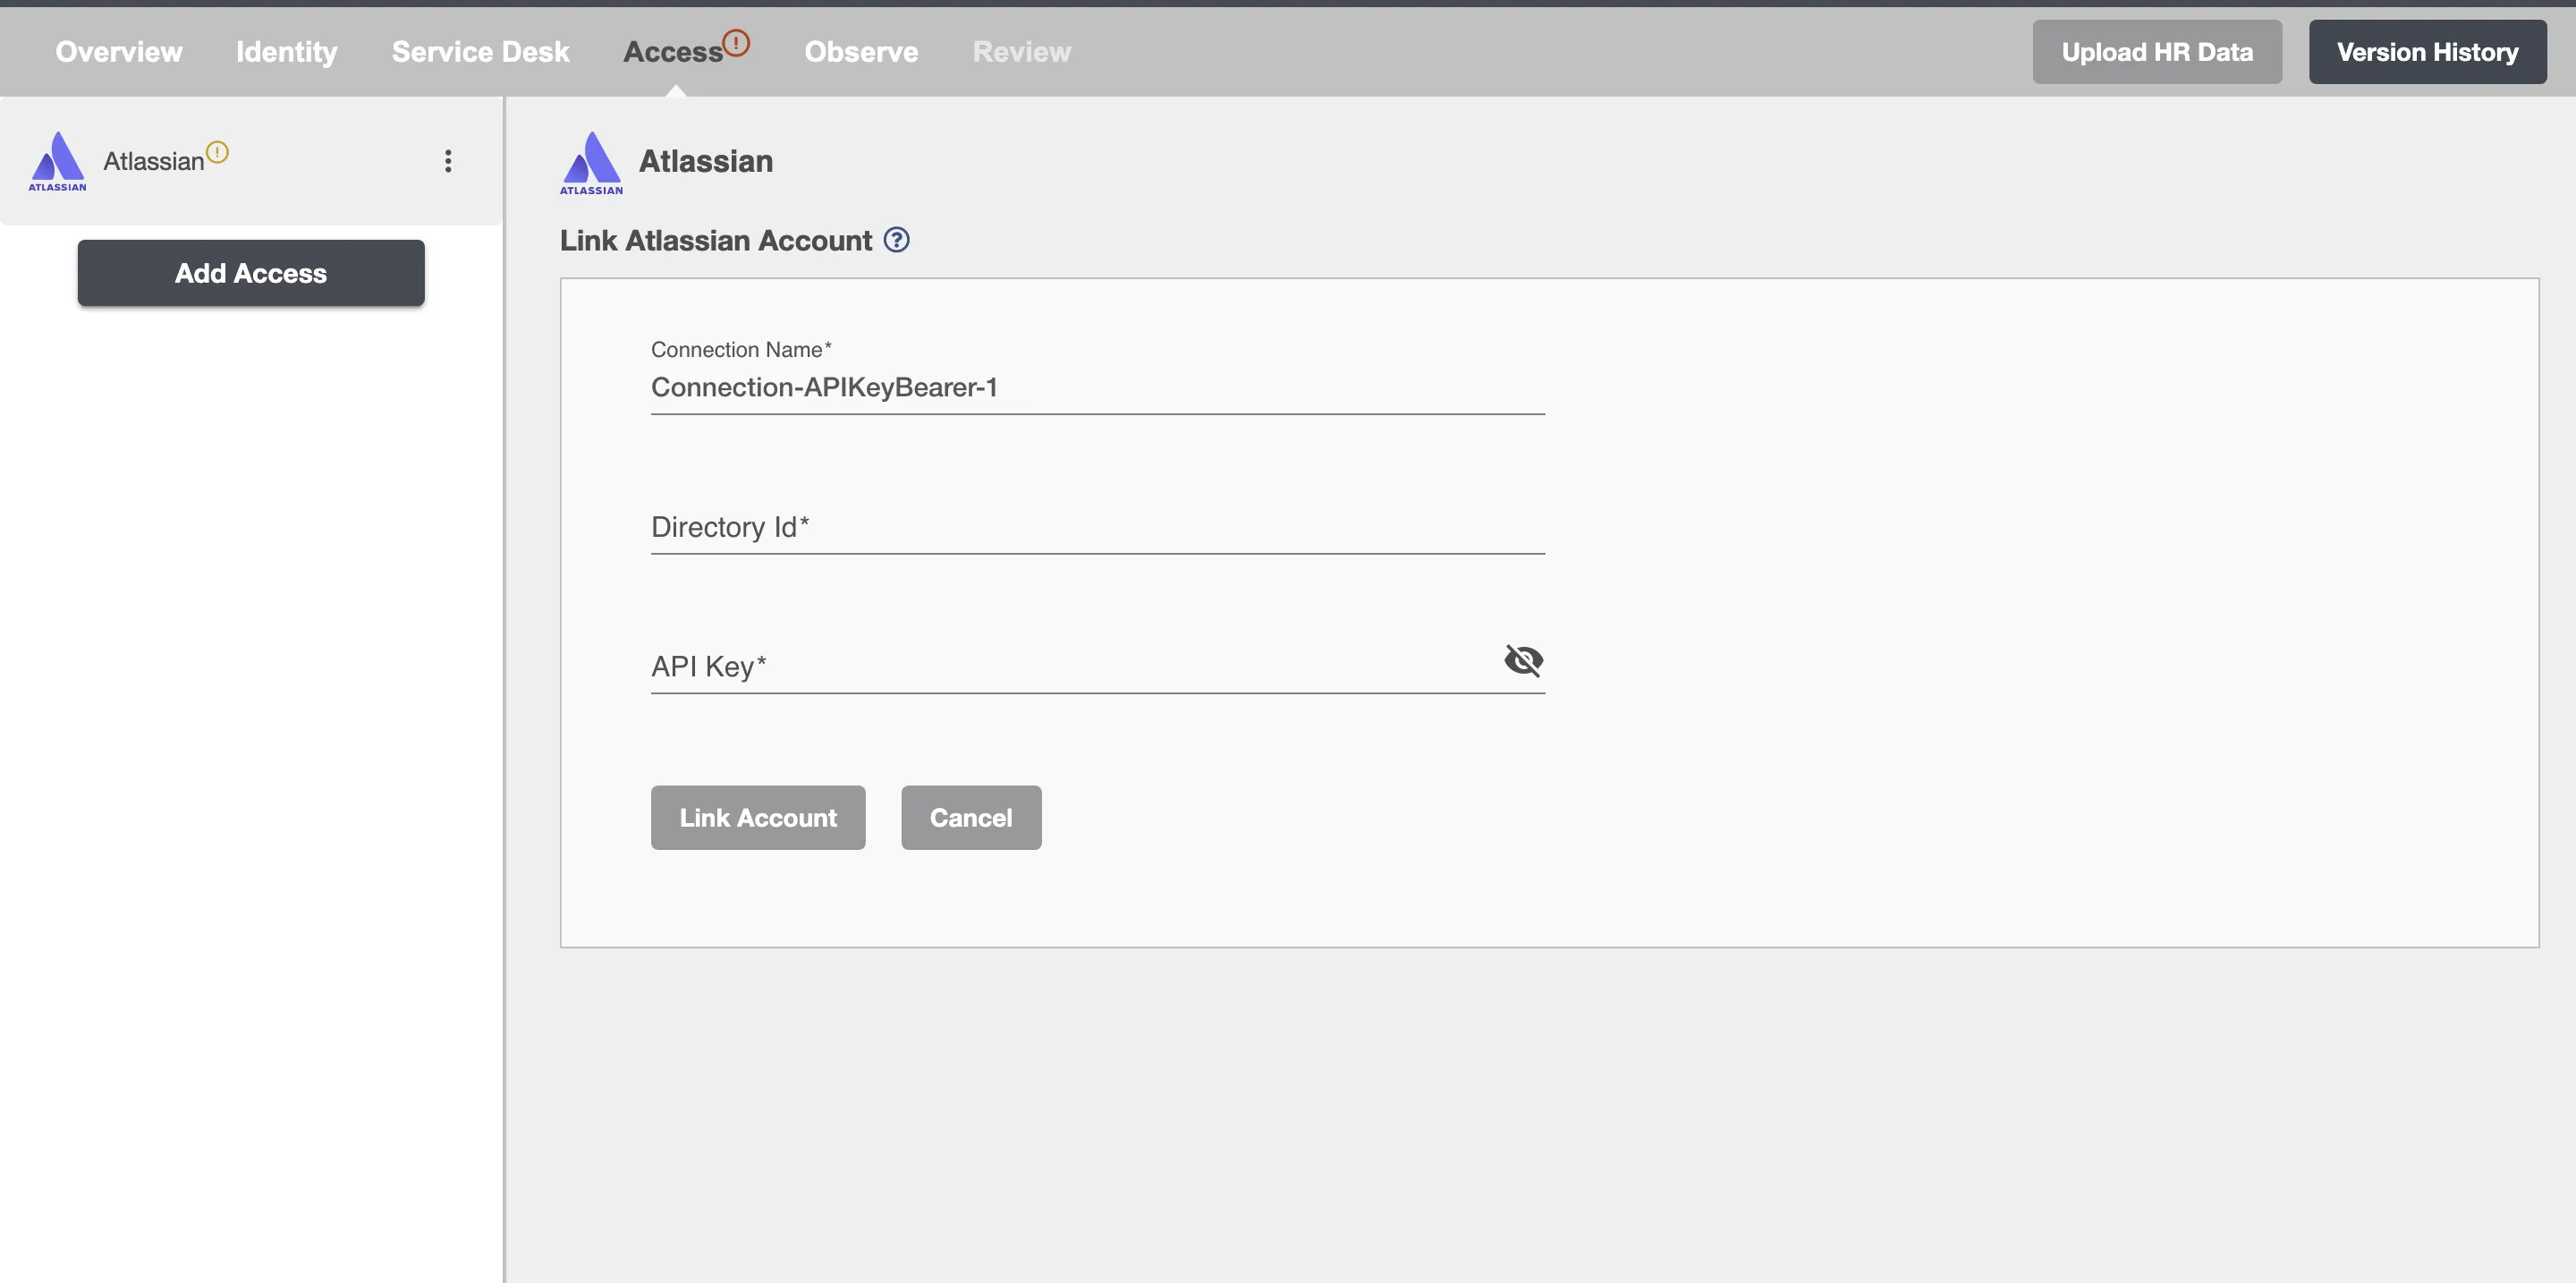
Link Atlassian account on Hire2Retire
To link your Atlassian account using API Key and Directory Id, you have to specify your Directory Id and API key.