Paymaster
Paymaster is a comprehensive payment processing platform that enables businesses to accept and manage payments securely and efficiently. It offers a wide range of features and functionalities to handle various payment methods, automate processes, and ensure seamless financial transactions.
Create a Connection
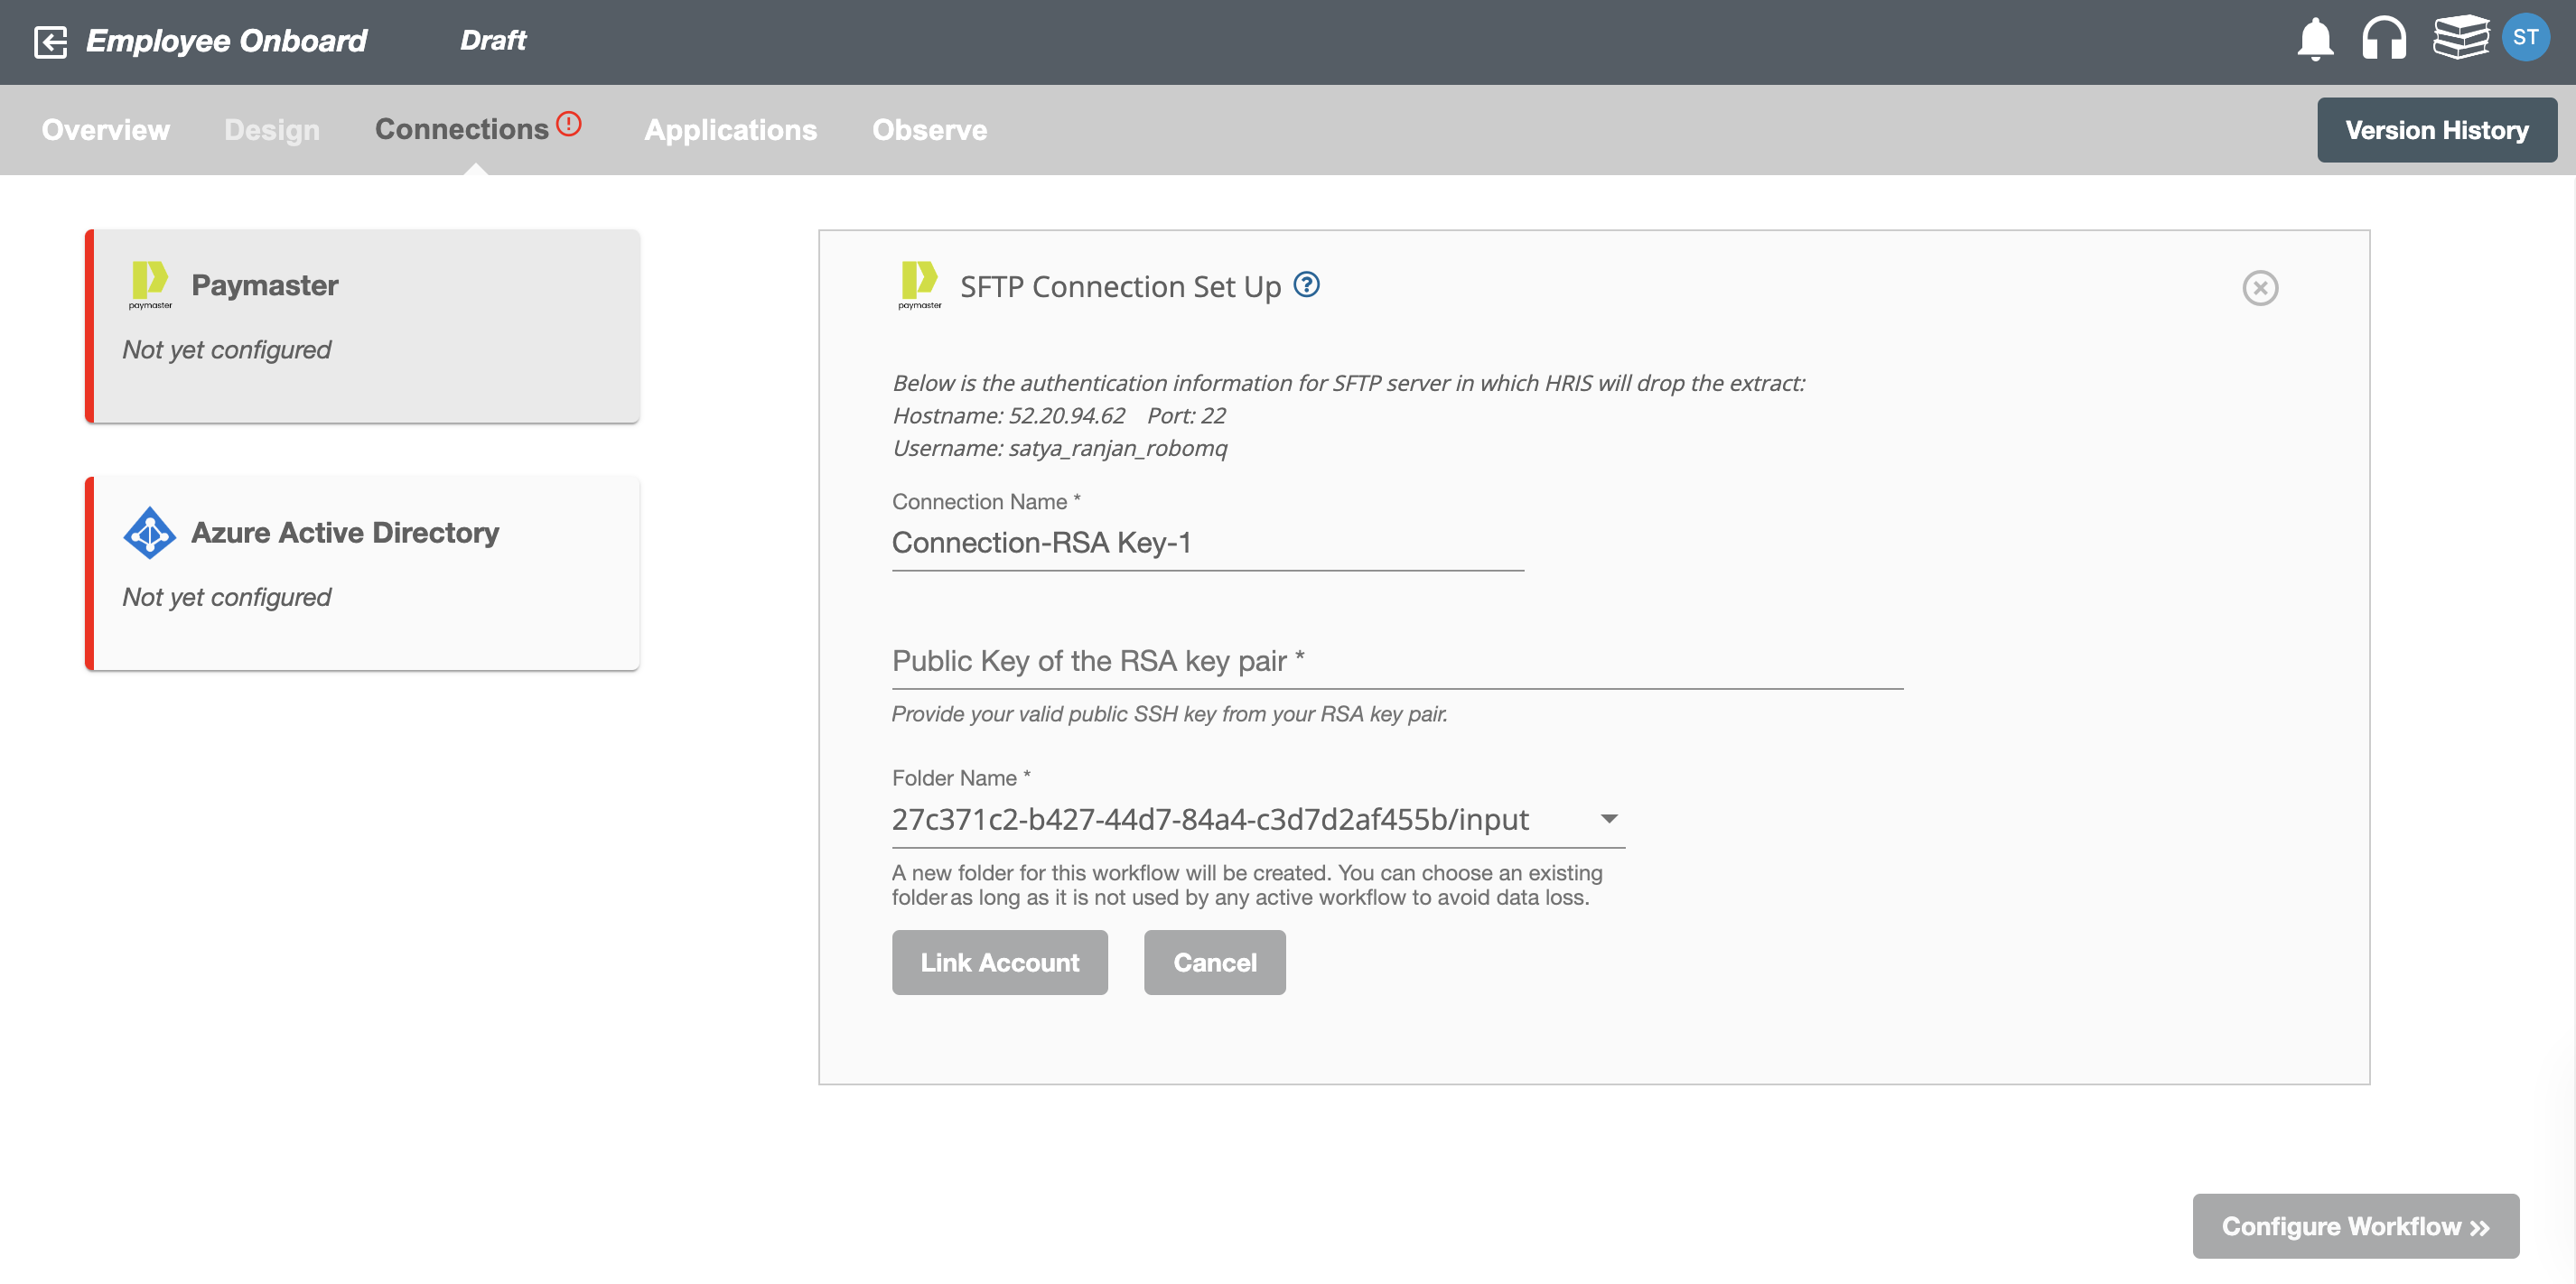
In order to connect Paymaster to SFTP, you must provide the public key of your RSA key pair (SSH key).
Hire2Retire requires the following details to create a connection with your Paymaster server:
-
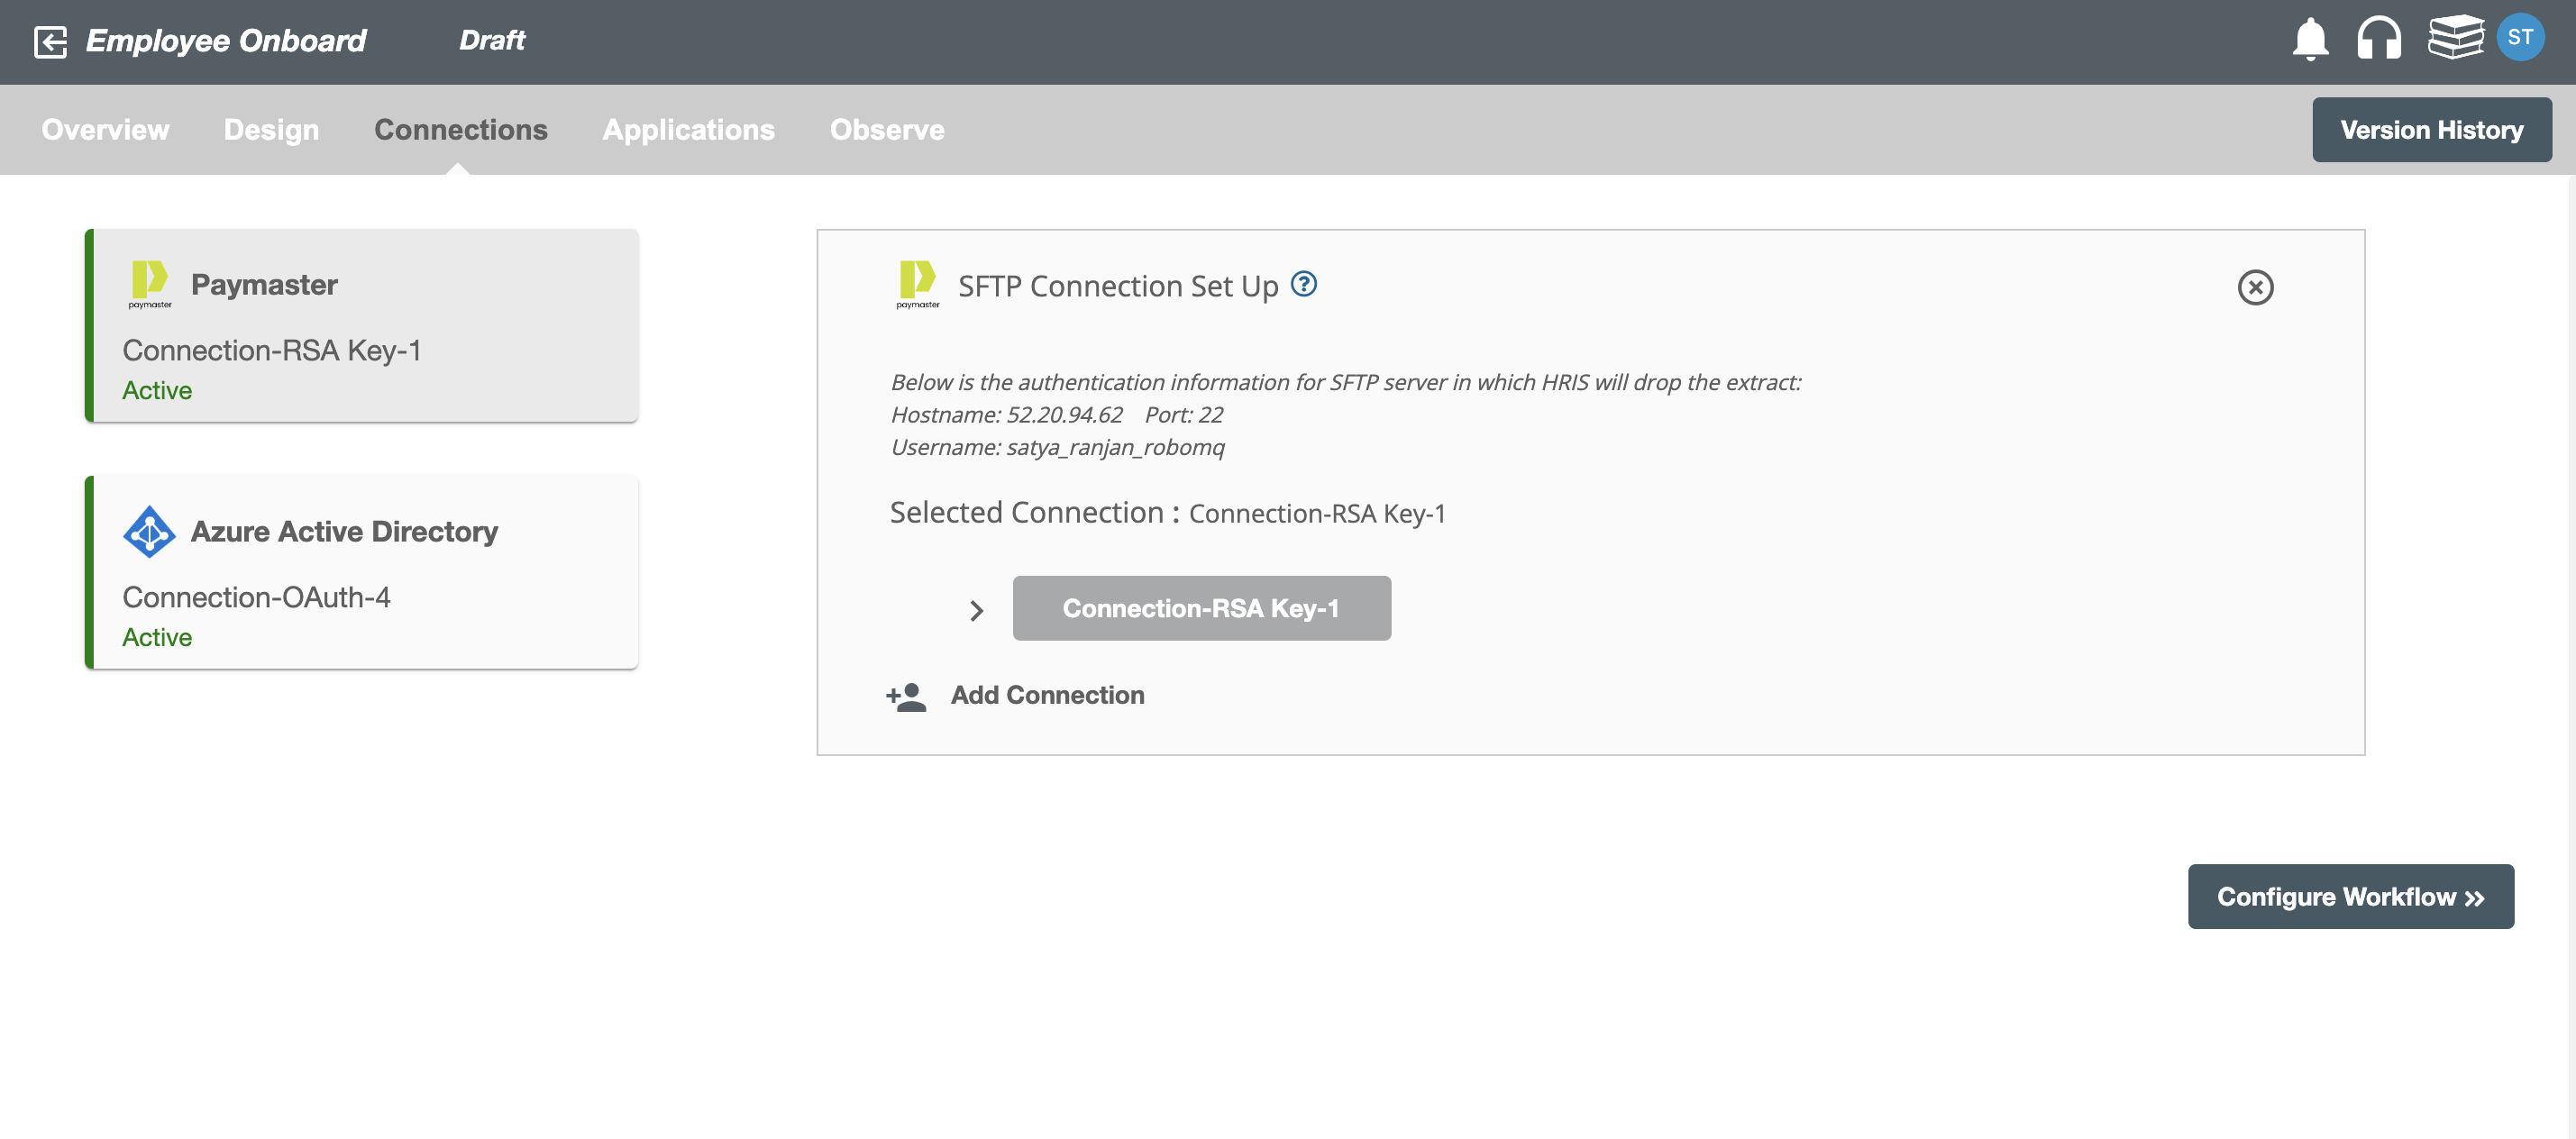
Connection Name - A user-defined nomenclature for your connection. By default, the connect name is "Connection-RSA Key", you can change the name as per your preference.
-
Public Key of the RSA key pair - The public key of your RSA key pair (SSH key).
-
Folder Name - A new folder for the current workflow will be created by default. You can also select folders using dropdown option from existing workflows.
Testing your SFTP upload before going live
During the testing phase of your workflow, you can simply upload HR reports directly from your local environment using your own RSA key. Learn How to create RSA key pairs on MacOS or Linux
How to connect to the Hire2Retire SFTP server to drop the HR Data
You will find the details to connect to the Hire2Retire SFTP server on the Paymaster Connection Set Up page.
-
Hostname - The host name provided is the IP address of Hire2Retire SFTP Server.
-
Port - The TCP/IP port on which the Hire2Retire SFTP server is listening.
-
Username - SFTP username to connect to the Hire2Retire SFTP server.
-
Folder Name - SFTP folder for the current workflow. The current Hire2Retire workflow will listen to the incoming extract files from the given folder path.
Configuration
Once you have successfully configured the connections, you can continue with the Design section to configure the rest of the workflow following these steps in order.
- HR Data Definition
- Lifecycle Business Rules
- Employment Status
- HR to AD Profile Map
- Organizational Unit Assignment - Only defined in on-premise Active Directory
- Security Group Assignment
- Distribution List Assignment
Deployment
Once your workflow has been setup, you have two optional features you can setup before deploying it.
Otherwise, you can proceed to deploy and test it on the Hire2Retire platform, see Deploy and Test Flow