Overview
Using the Provisioning on Hire2Retire you can provision and deprovision users on Planview.
Read the official documentation of Planview here.
Define Role Definition
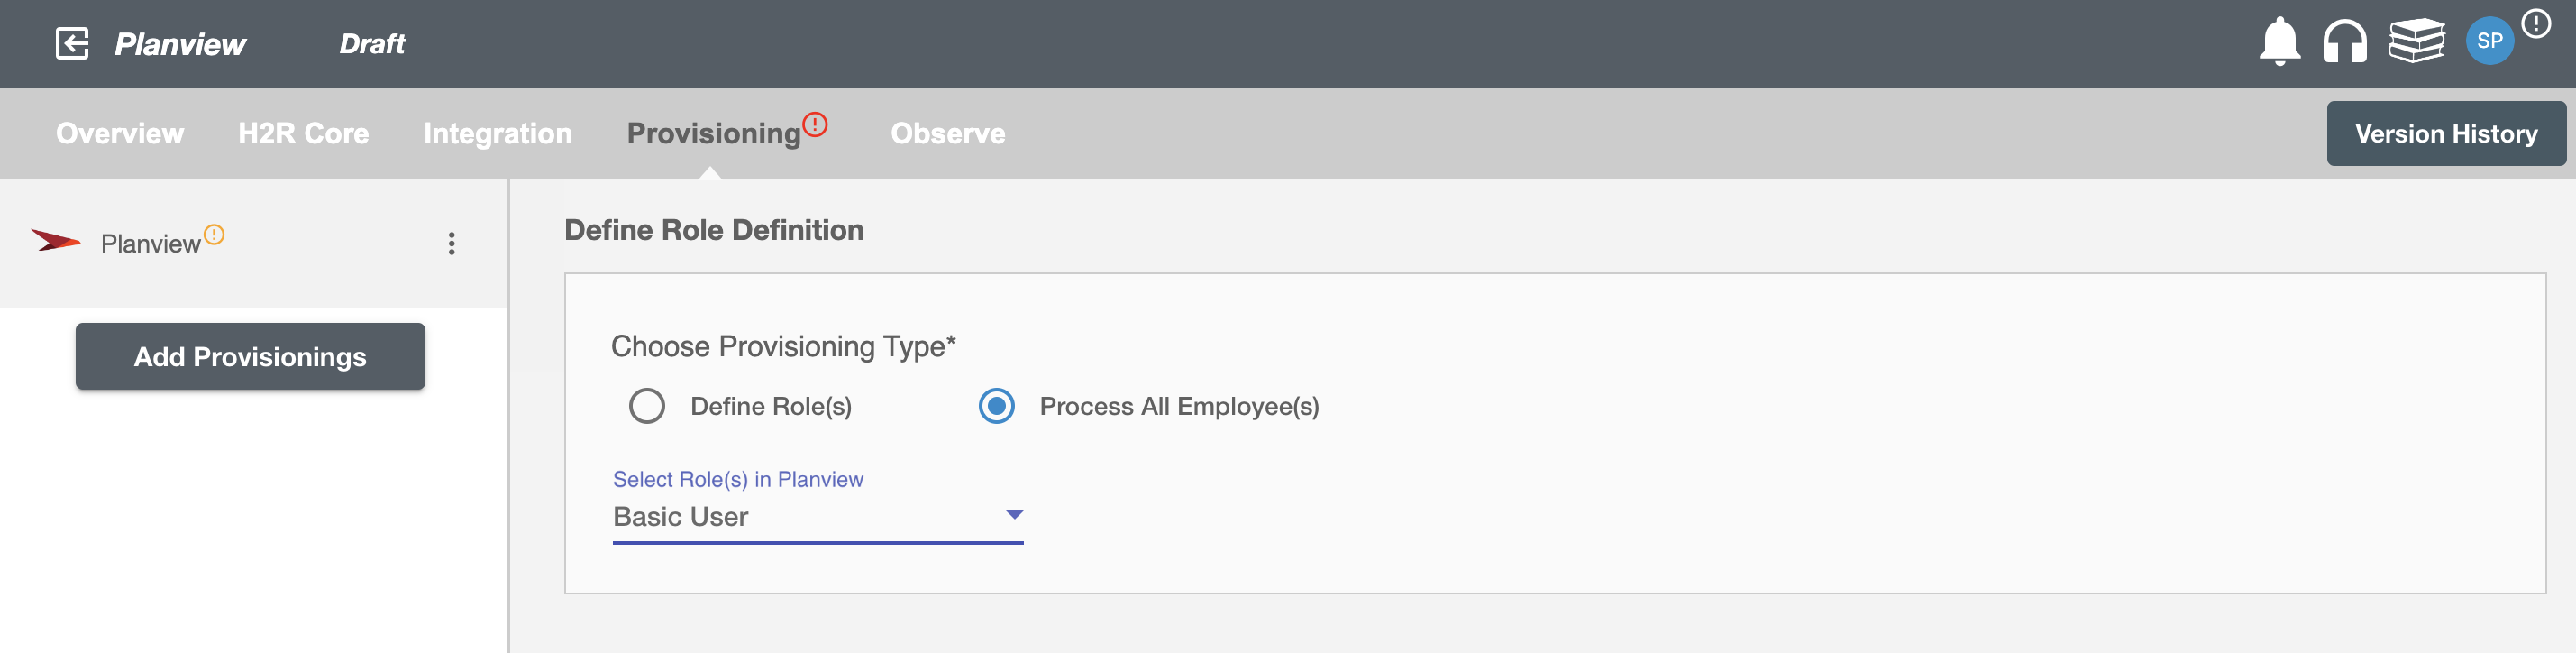
Provisioning Type
Define Role(s)
You can assign a Role to any user based on their AD attributes. You can define complex conditions using AND and OR logic. You can also use the Group memberships in AD to define Roles. The Roles are used to assign specific privileges and licenses in Planview. For Example: In Figure 2, the rules are defined on the basis of Department(Equals). If the rules are passed then only user(s) will get provisioned. If no rule passes and the user(s) is present in Planview then deprovisioning is performed for the user(s).
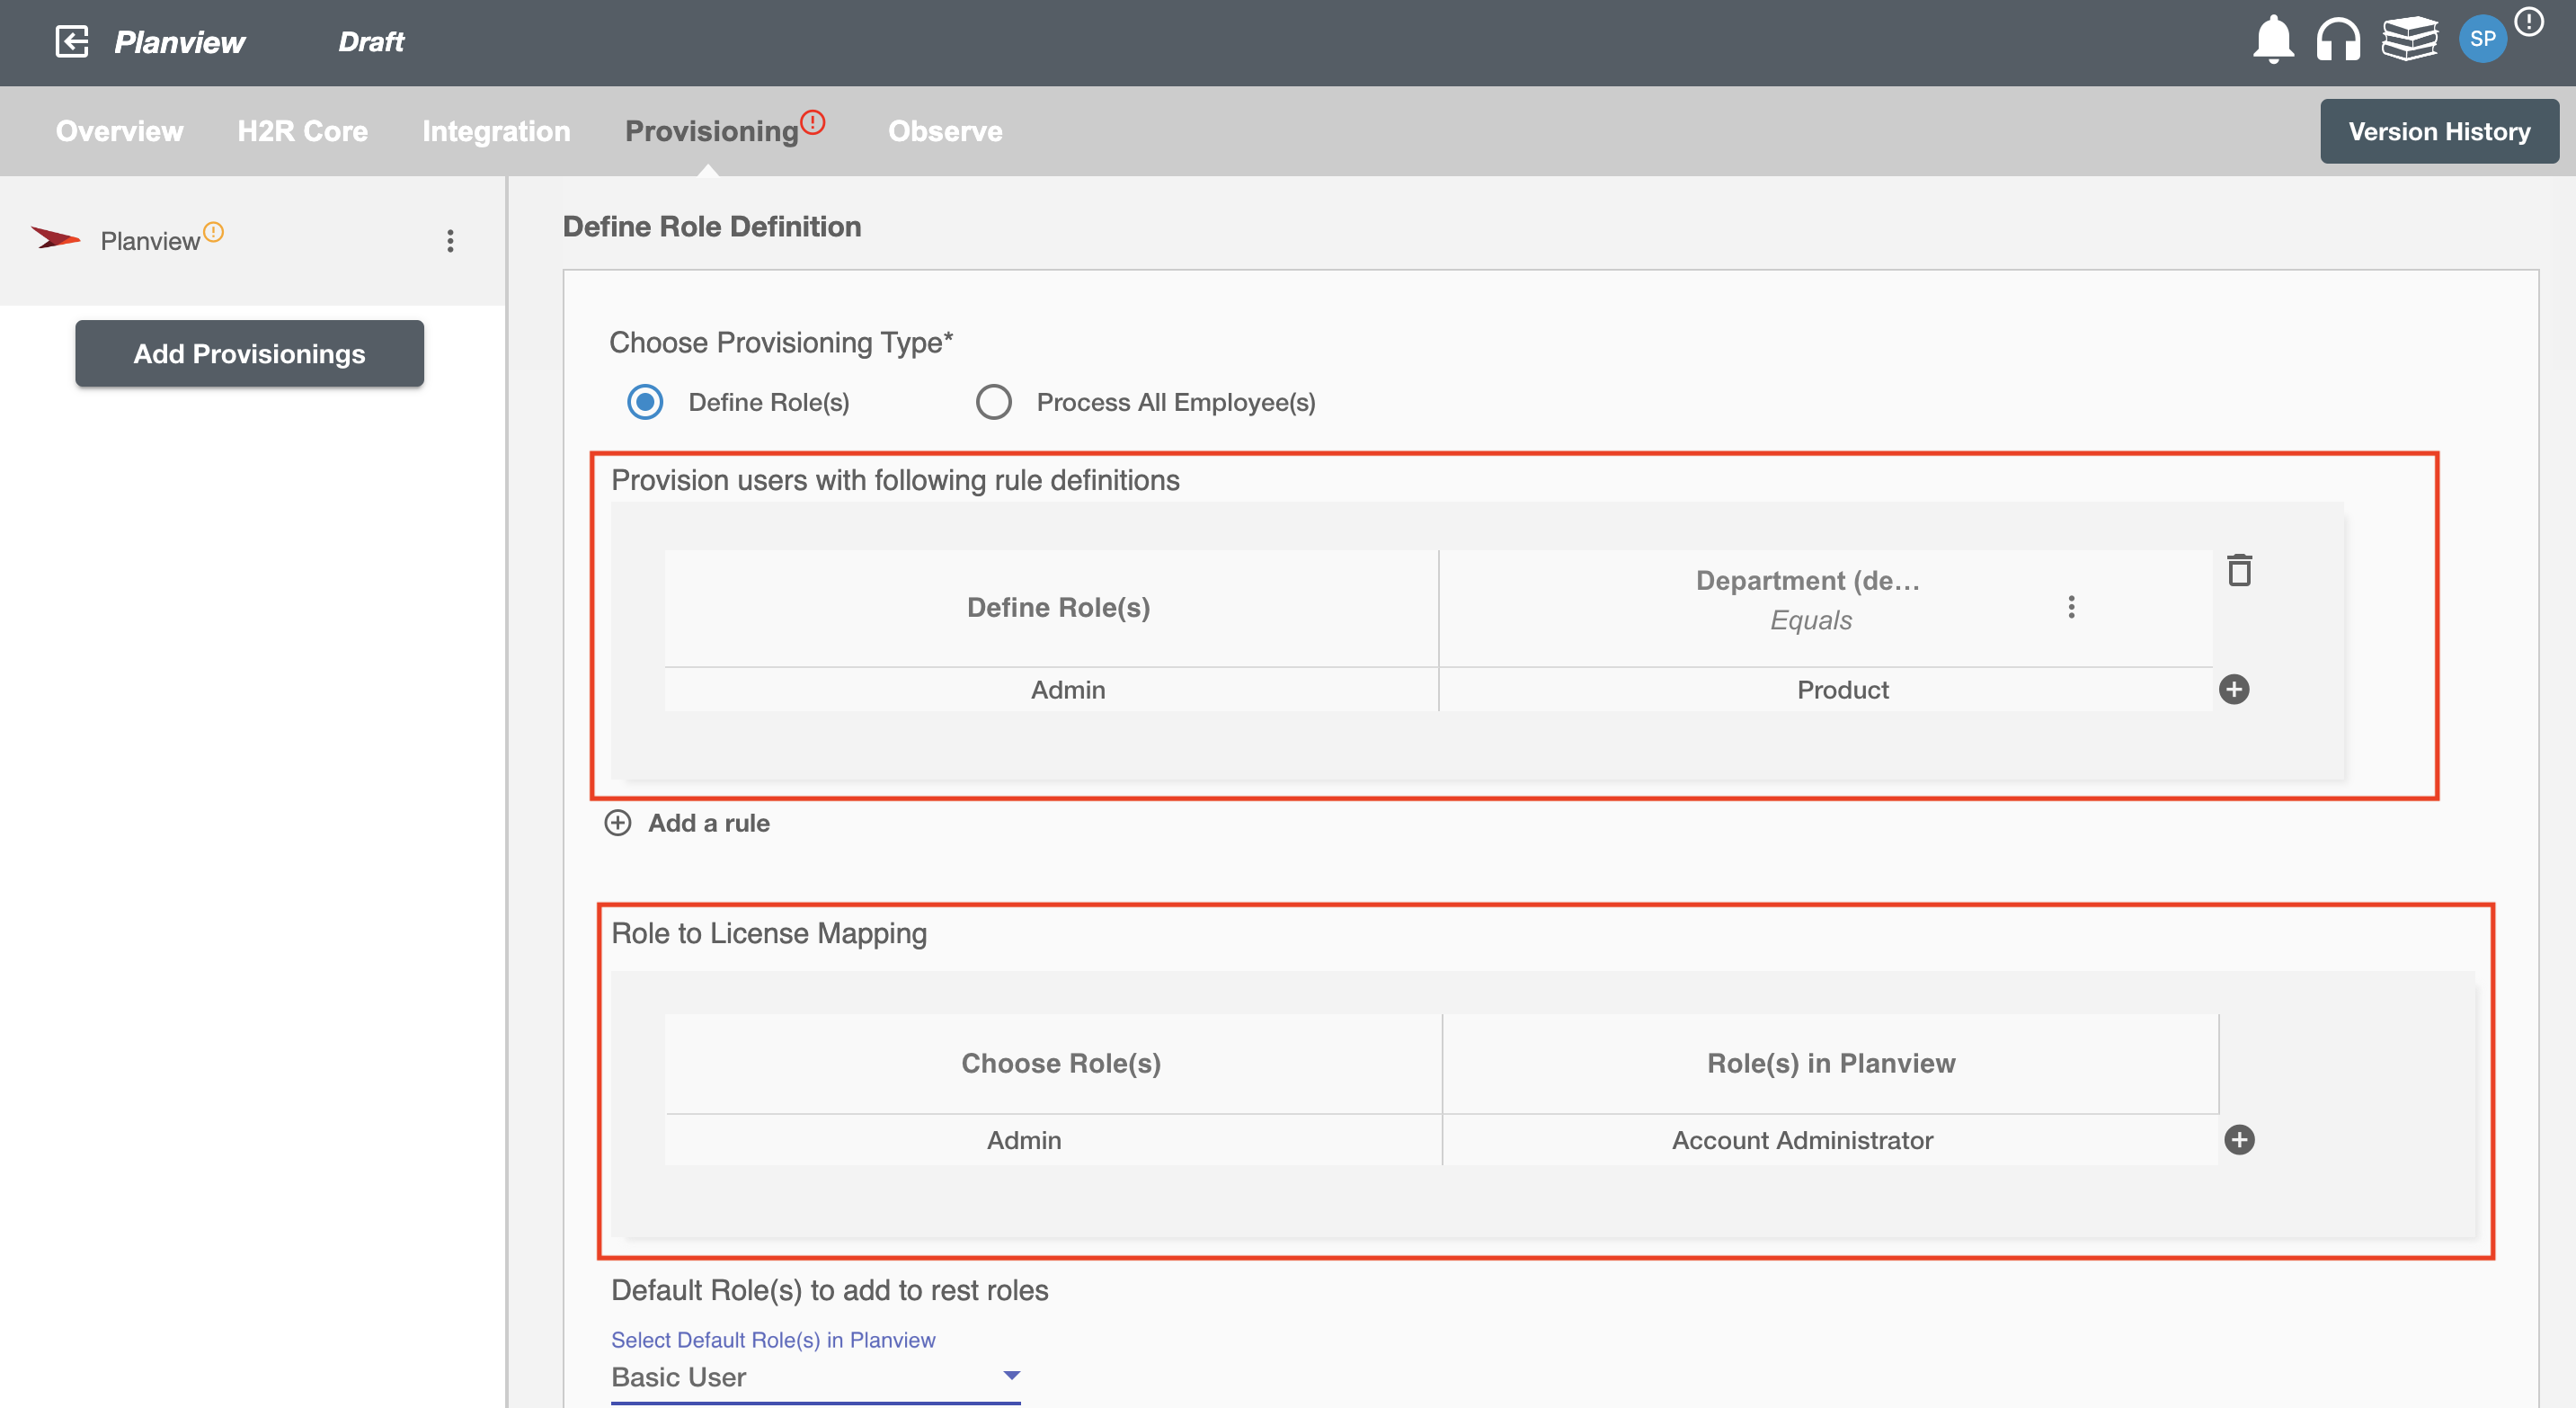
Map the rules defined in first table with the Roles provided by Planview. You can also select default roles in Planview. For if and only if 'Admin' Role is passed and it is not mapped in the second table then the selected default Role will be assigned to the user(s).
Process All Employees
All user(s) will be provisioned on Planview.
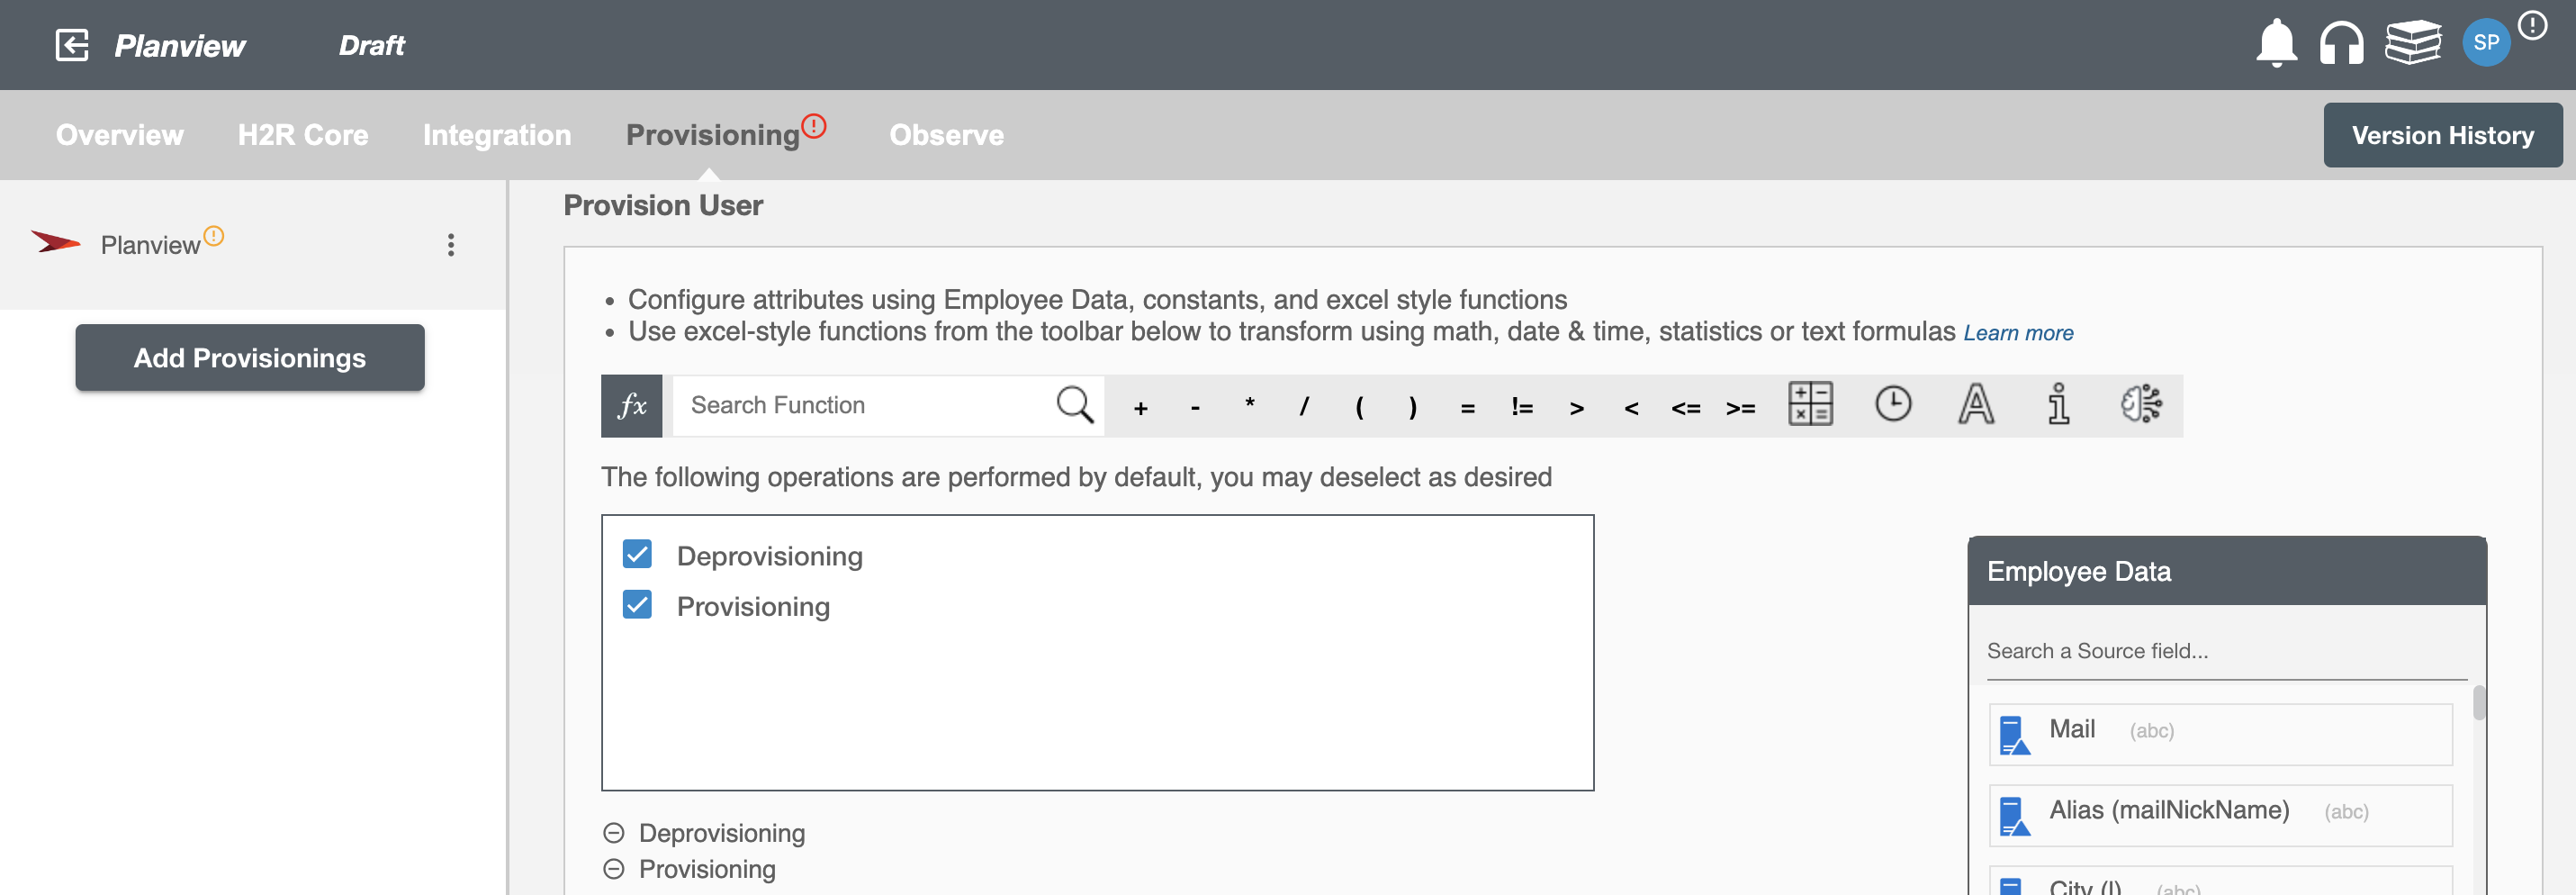
Provision User
You can decide to either provision or deprovision using Provisioning.
You can provision one or more user(s) according to the requirement. User(s) can be created, updated or reactivated in provisioning operation. You can deprovision one or more user(s) according to the requirement. User(s) can be terminated in deprovisioning operation.
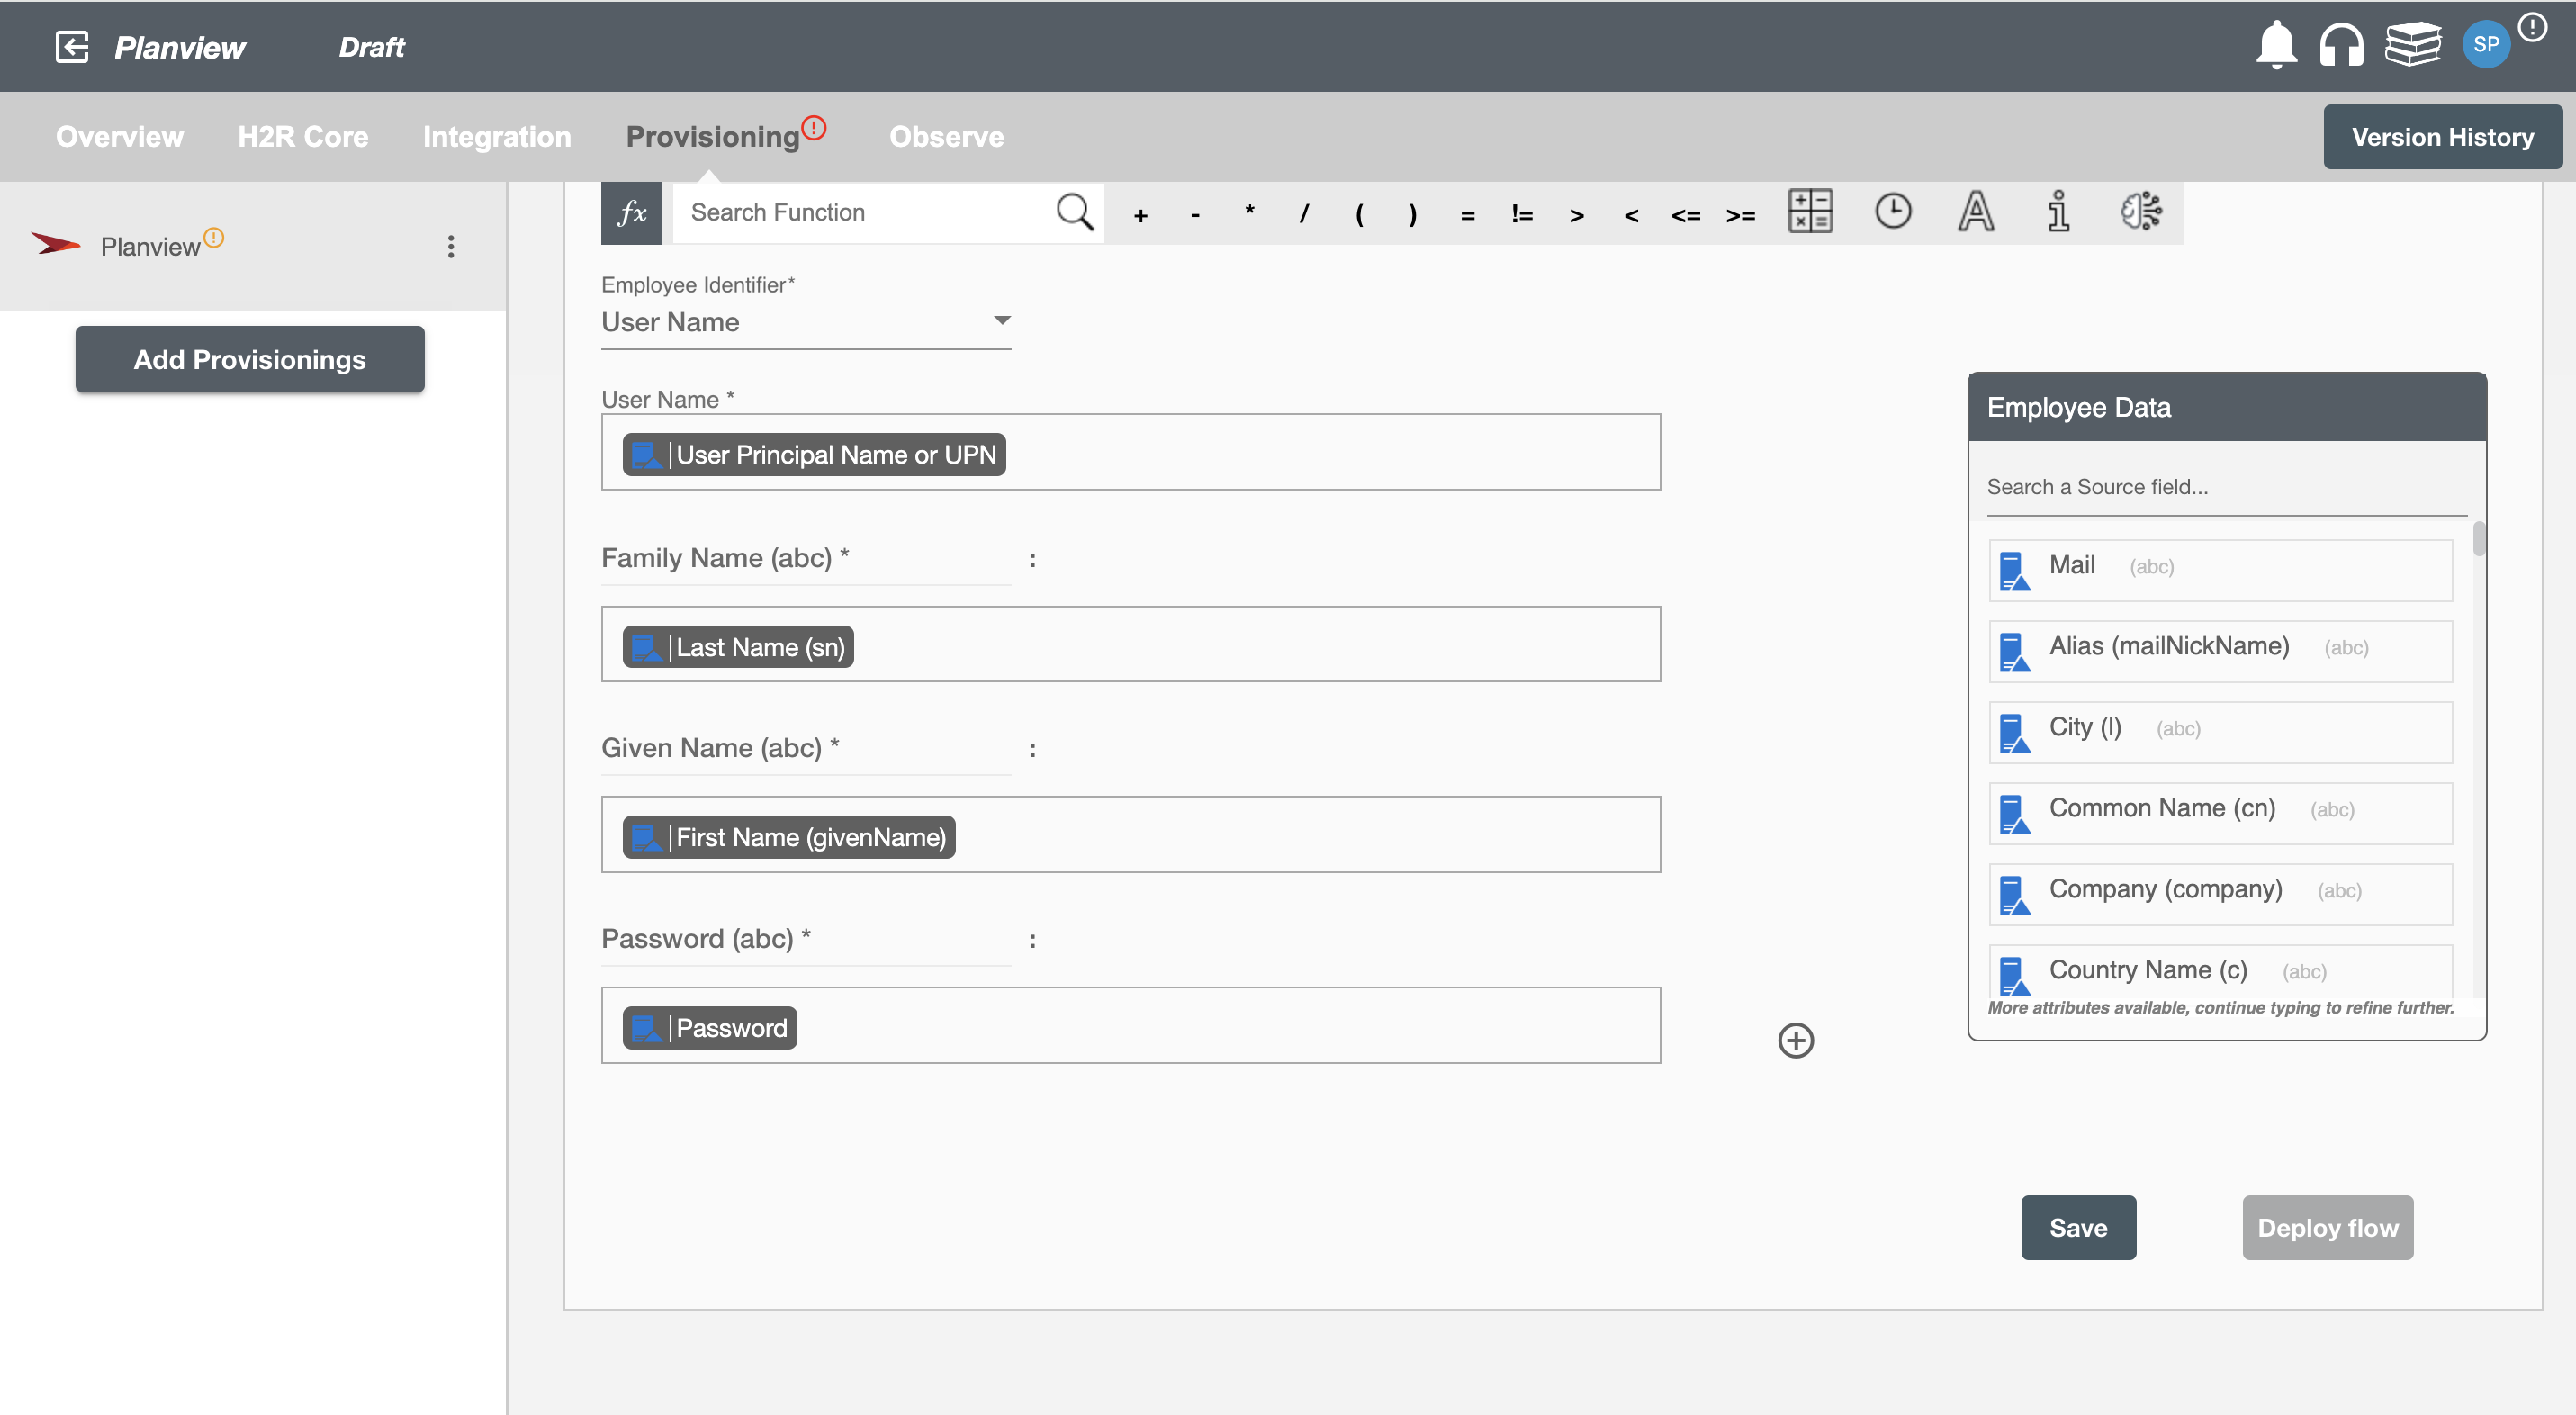
Map attributes on Planview
You can select the attributes provided by Planview that you want to populate. You can map values from AD/AzureAD/Hybrid to populate these attributes. You can also use Hire2Retire's powerful data transformation capabilities using Excel Style functions.