Creating an Email Template
You can create an email template for different Identity Management Systems and Lifecycle events and use it in flows.
-
Step 1: On the
Email Templatestab on account setting page, Click on theNew Email Templatebutton on top, enter Template Name and Choose Application. The email template will be visible in the flows with Identity Management as the Chosen Application. For example, if you create a template for Azure Active Directory, then the email template will be only visible for flows which have Azure active directory as their Identity Management.Note that email templates created with
“Hybrid or On-prem AD”will be visible in flows withHybridas well asActive Directoryas their Identity Managemet System.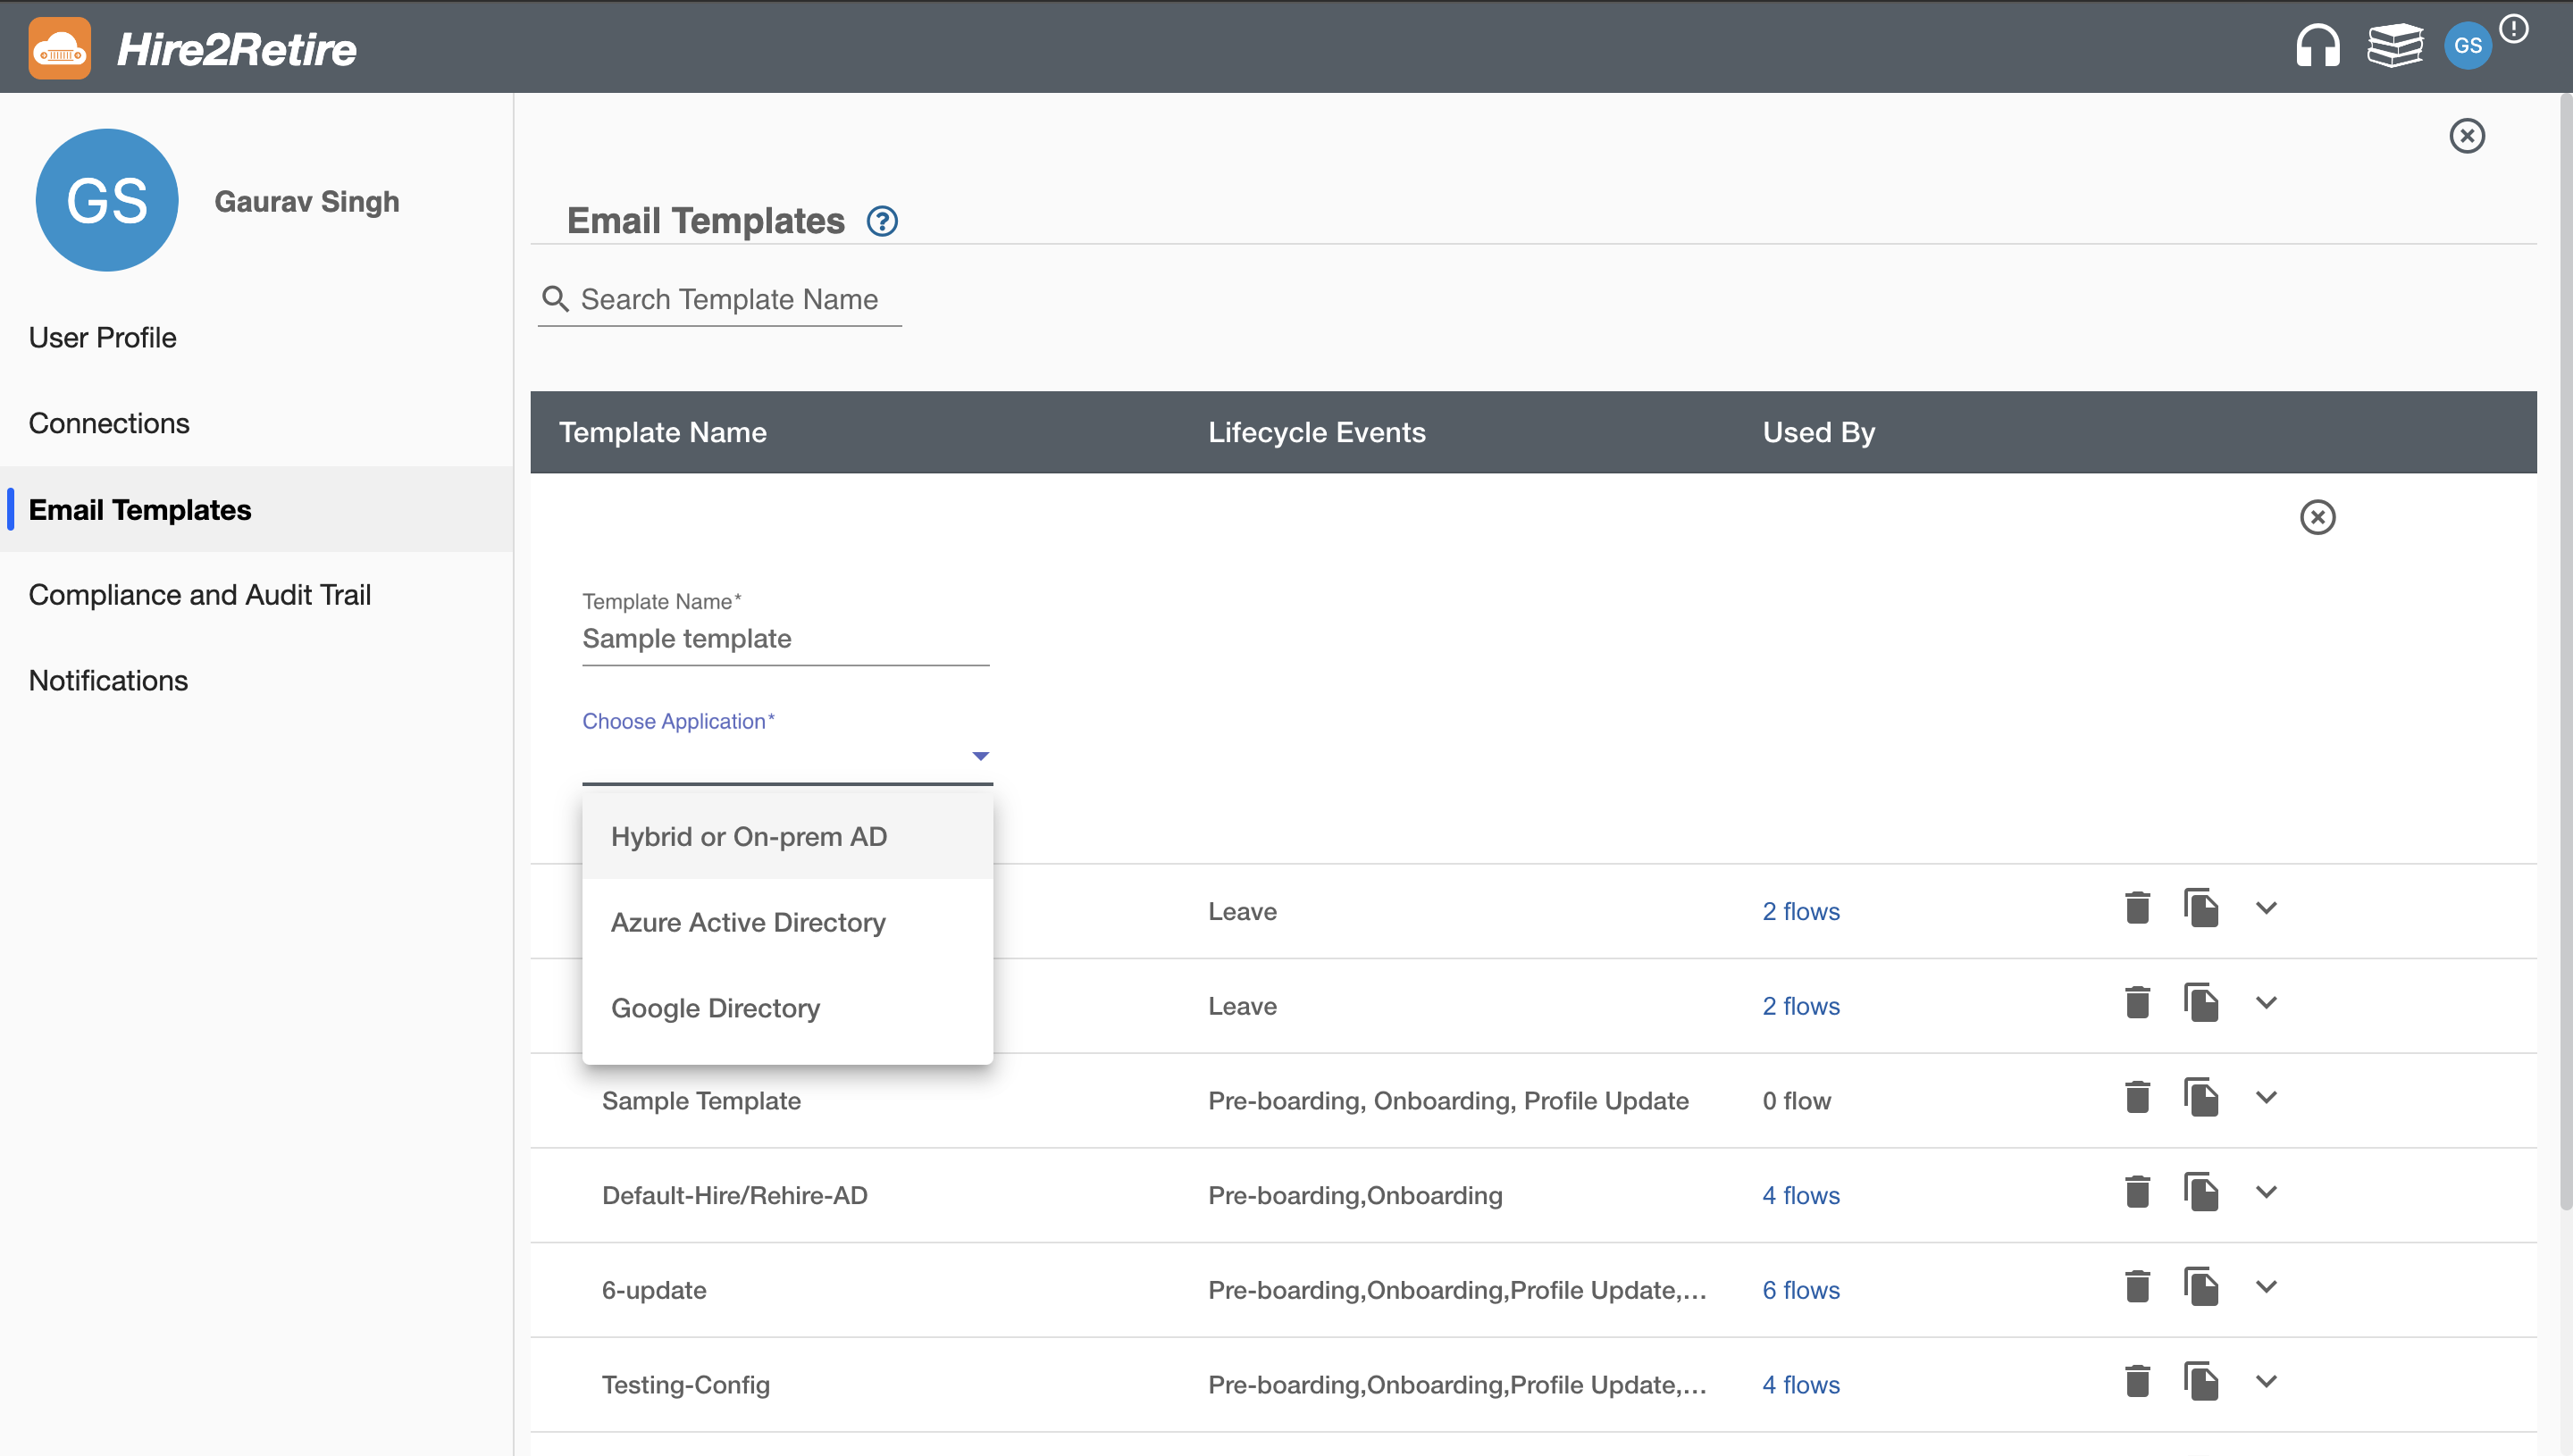 Figure 1. Entering Template Name and choosing Identity Management System.
 -
Step 2: After Choosing Lifecycle Event template form will appear. Select lifecycle event for which you want to create the template. An email template can be created for multiple lifecycle events. The template will be visible in different lifecycle event(s) on the Communication Hub page while creating hiretoretire workflow. You can check
Define a condition based on Directory attributes to receive mailwhere the condition(s) will be defined of Directory attributes such as first select attribute then operation for it and then define the condition according to requirement. You will receive mail when the condition(s) of attributes are satisfied.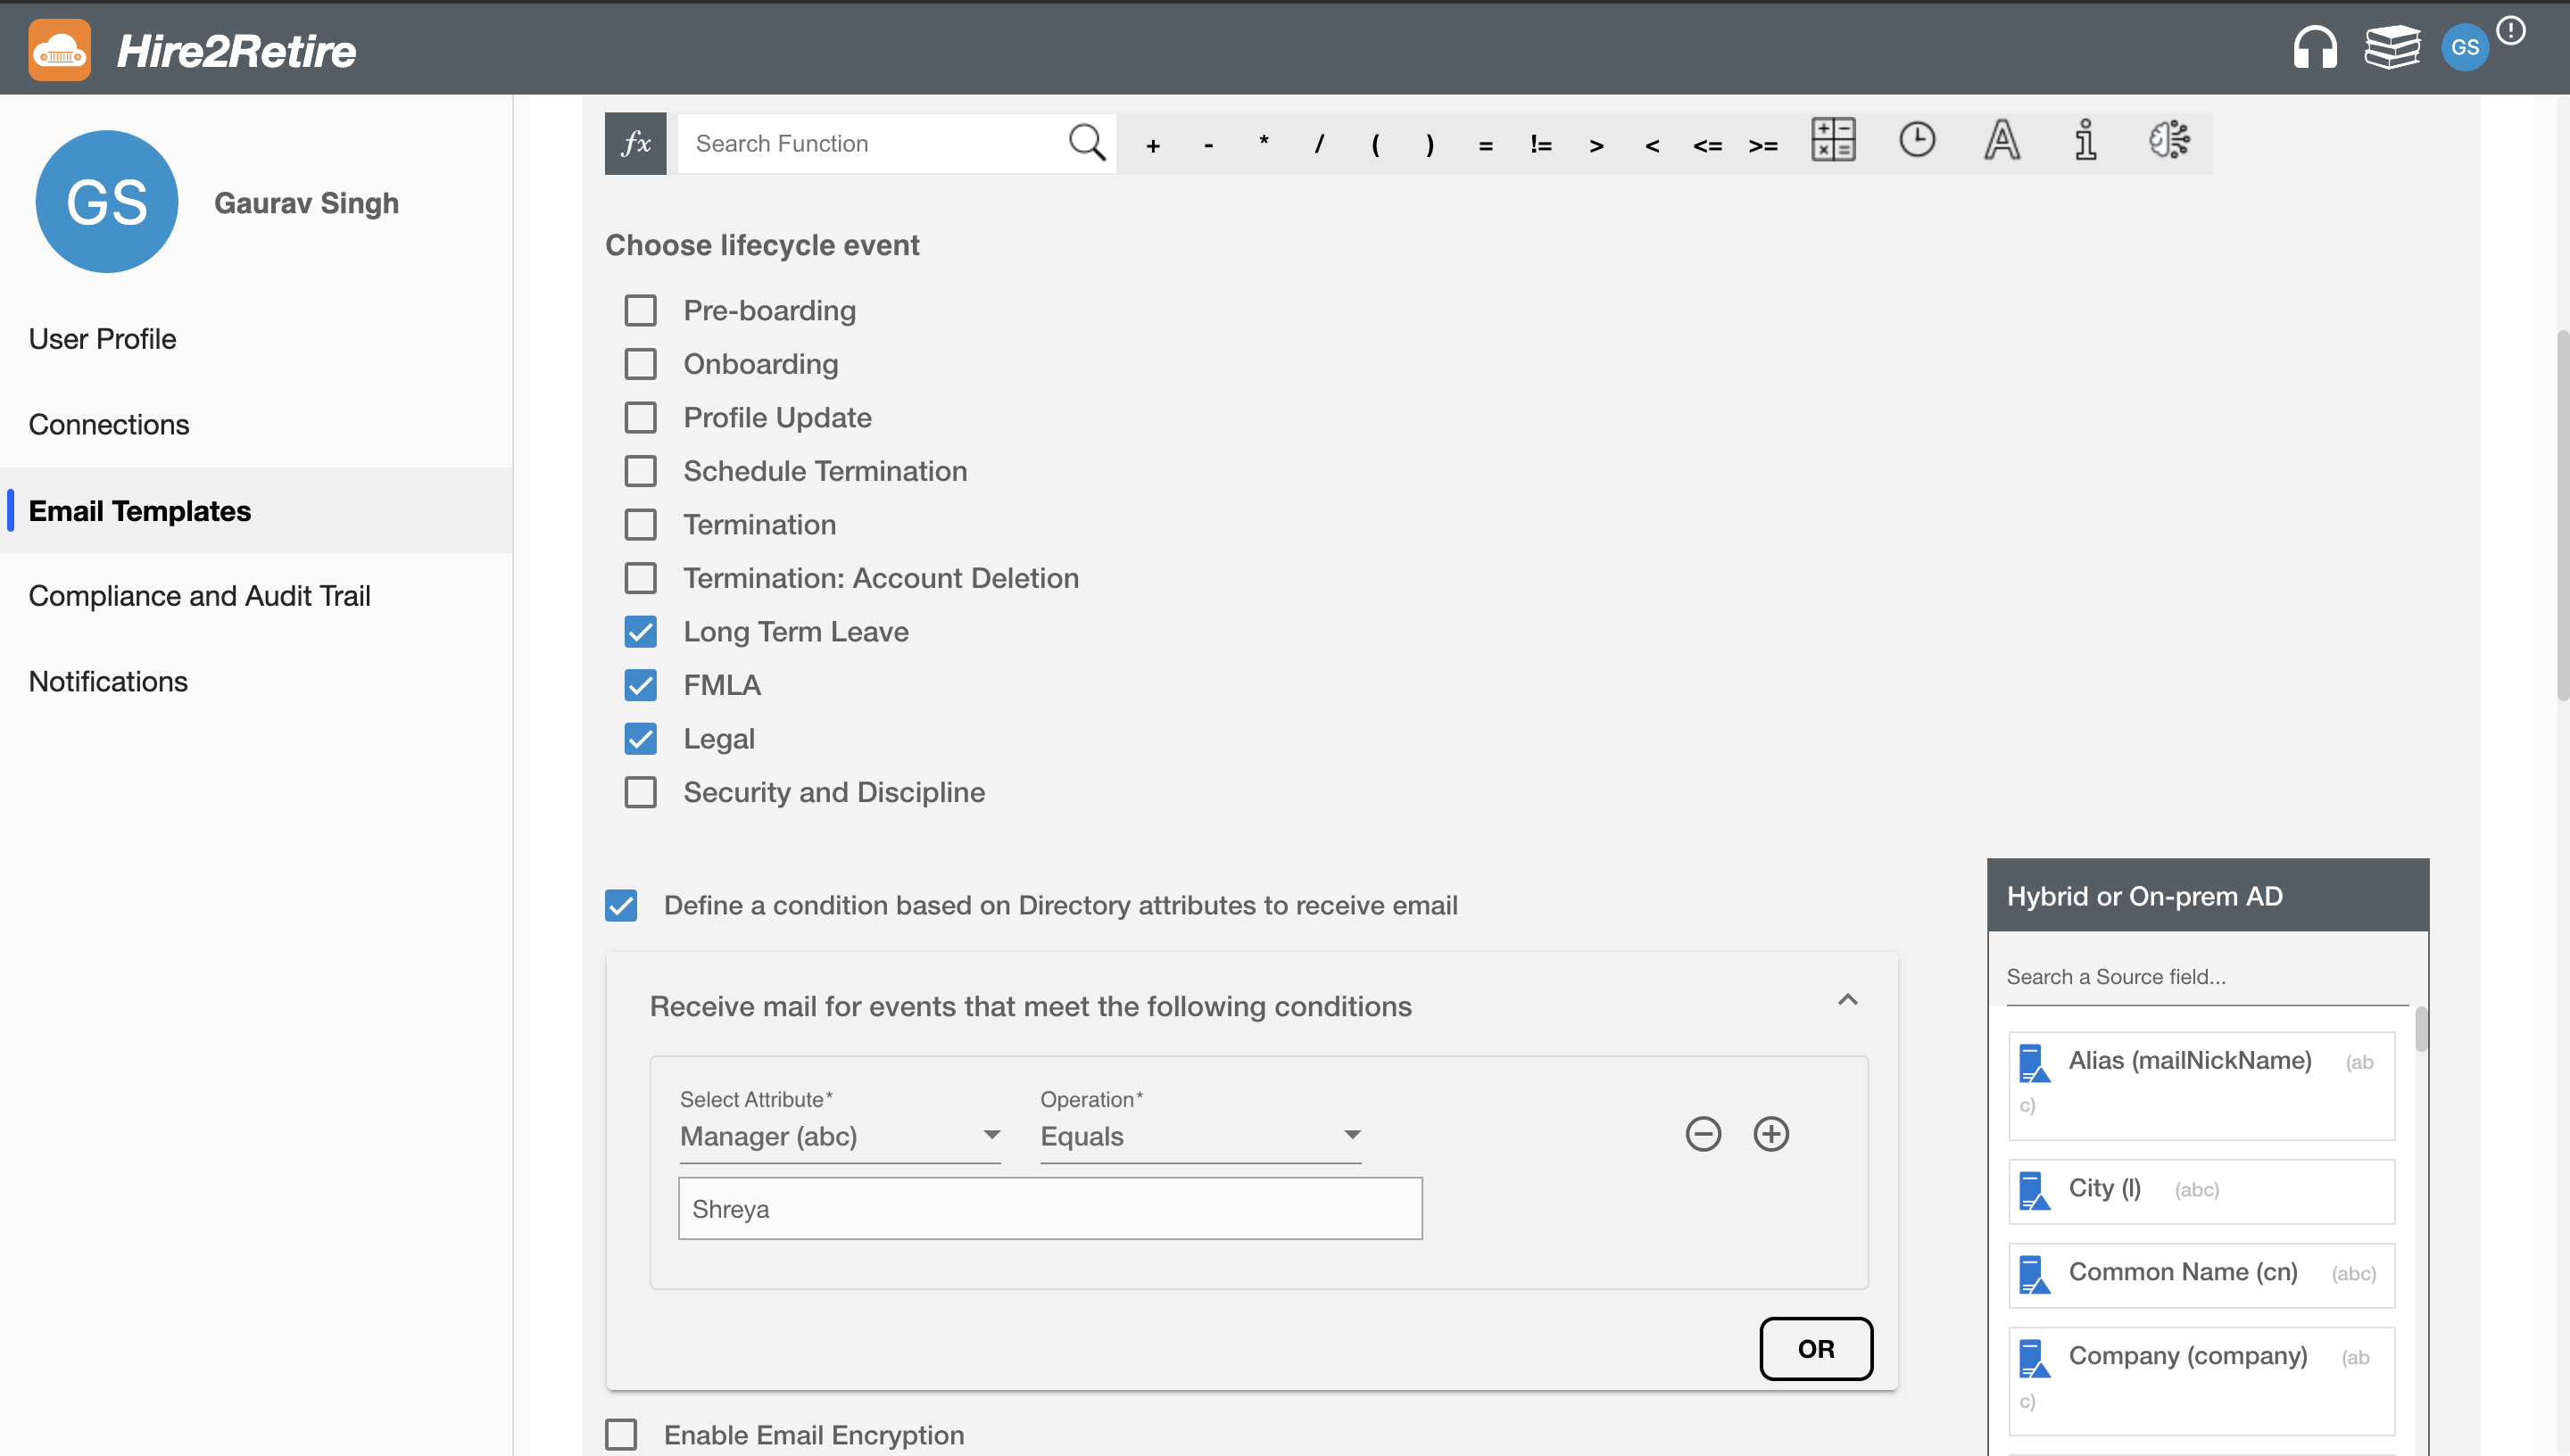 Figure 2. Choosing Lifecycle Events for the template
 -
Step 3: Fill the email format. From field is by default
hire2retire@robomq.ioand disabled. You can fill multiple comma seperated values in To, cc, Bcc. You can also checkNotify ManagerCheckbox if they want to send mail to the the manager. Note that it is mandatory to fill either one of two fileds, i.e.,ToorNotify Manger.Reply tofield signifies the email of person who should get reply if someone replies to an email sent fromhire2retire@robomq.io. Every field supports mapping from the mapping table available. -
Step 4: Fill the mandatory
subjectandbodyfield. Email body supports multiline text.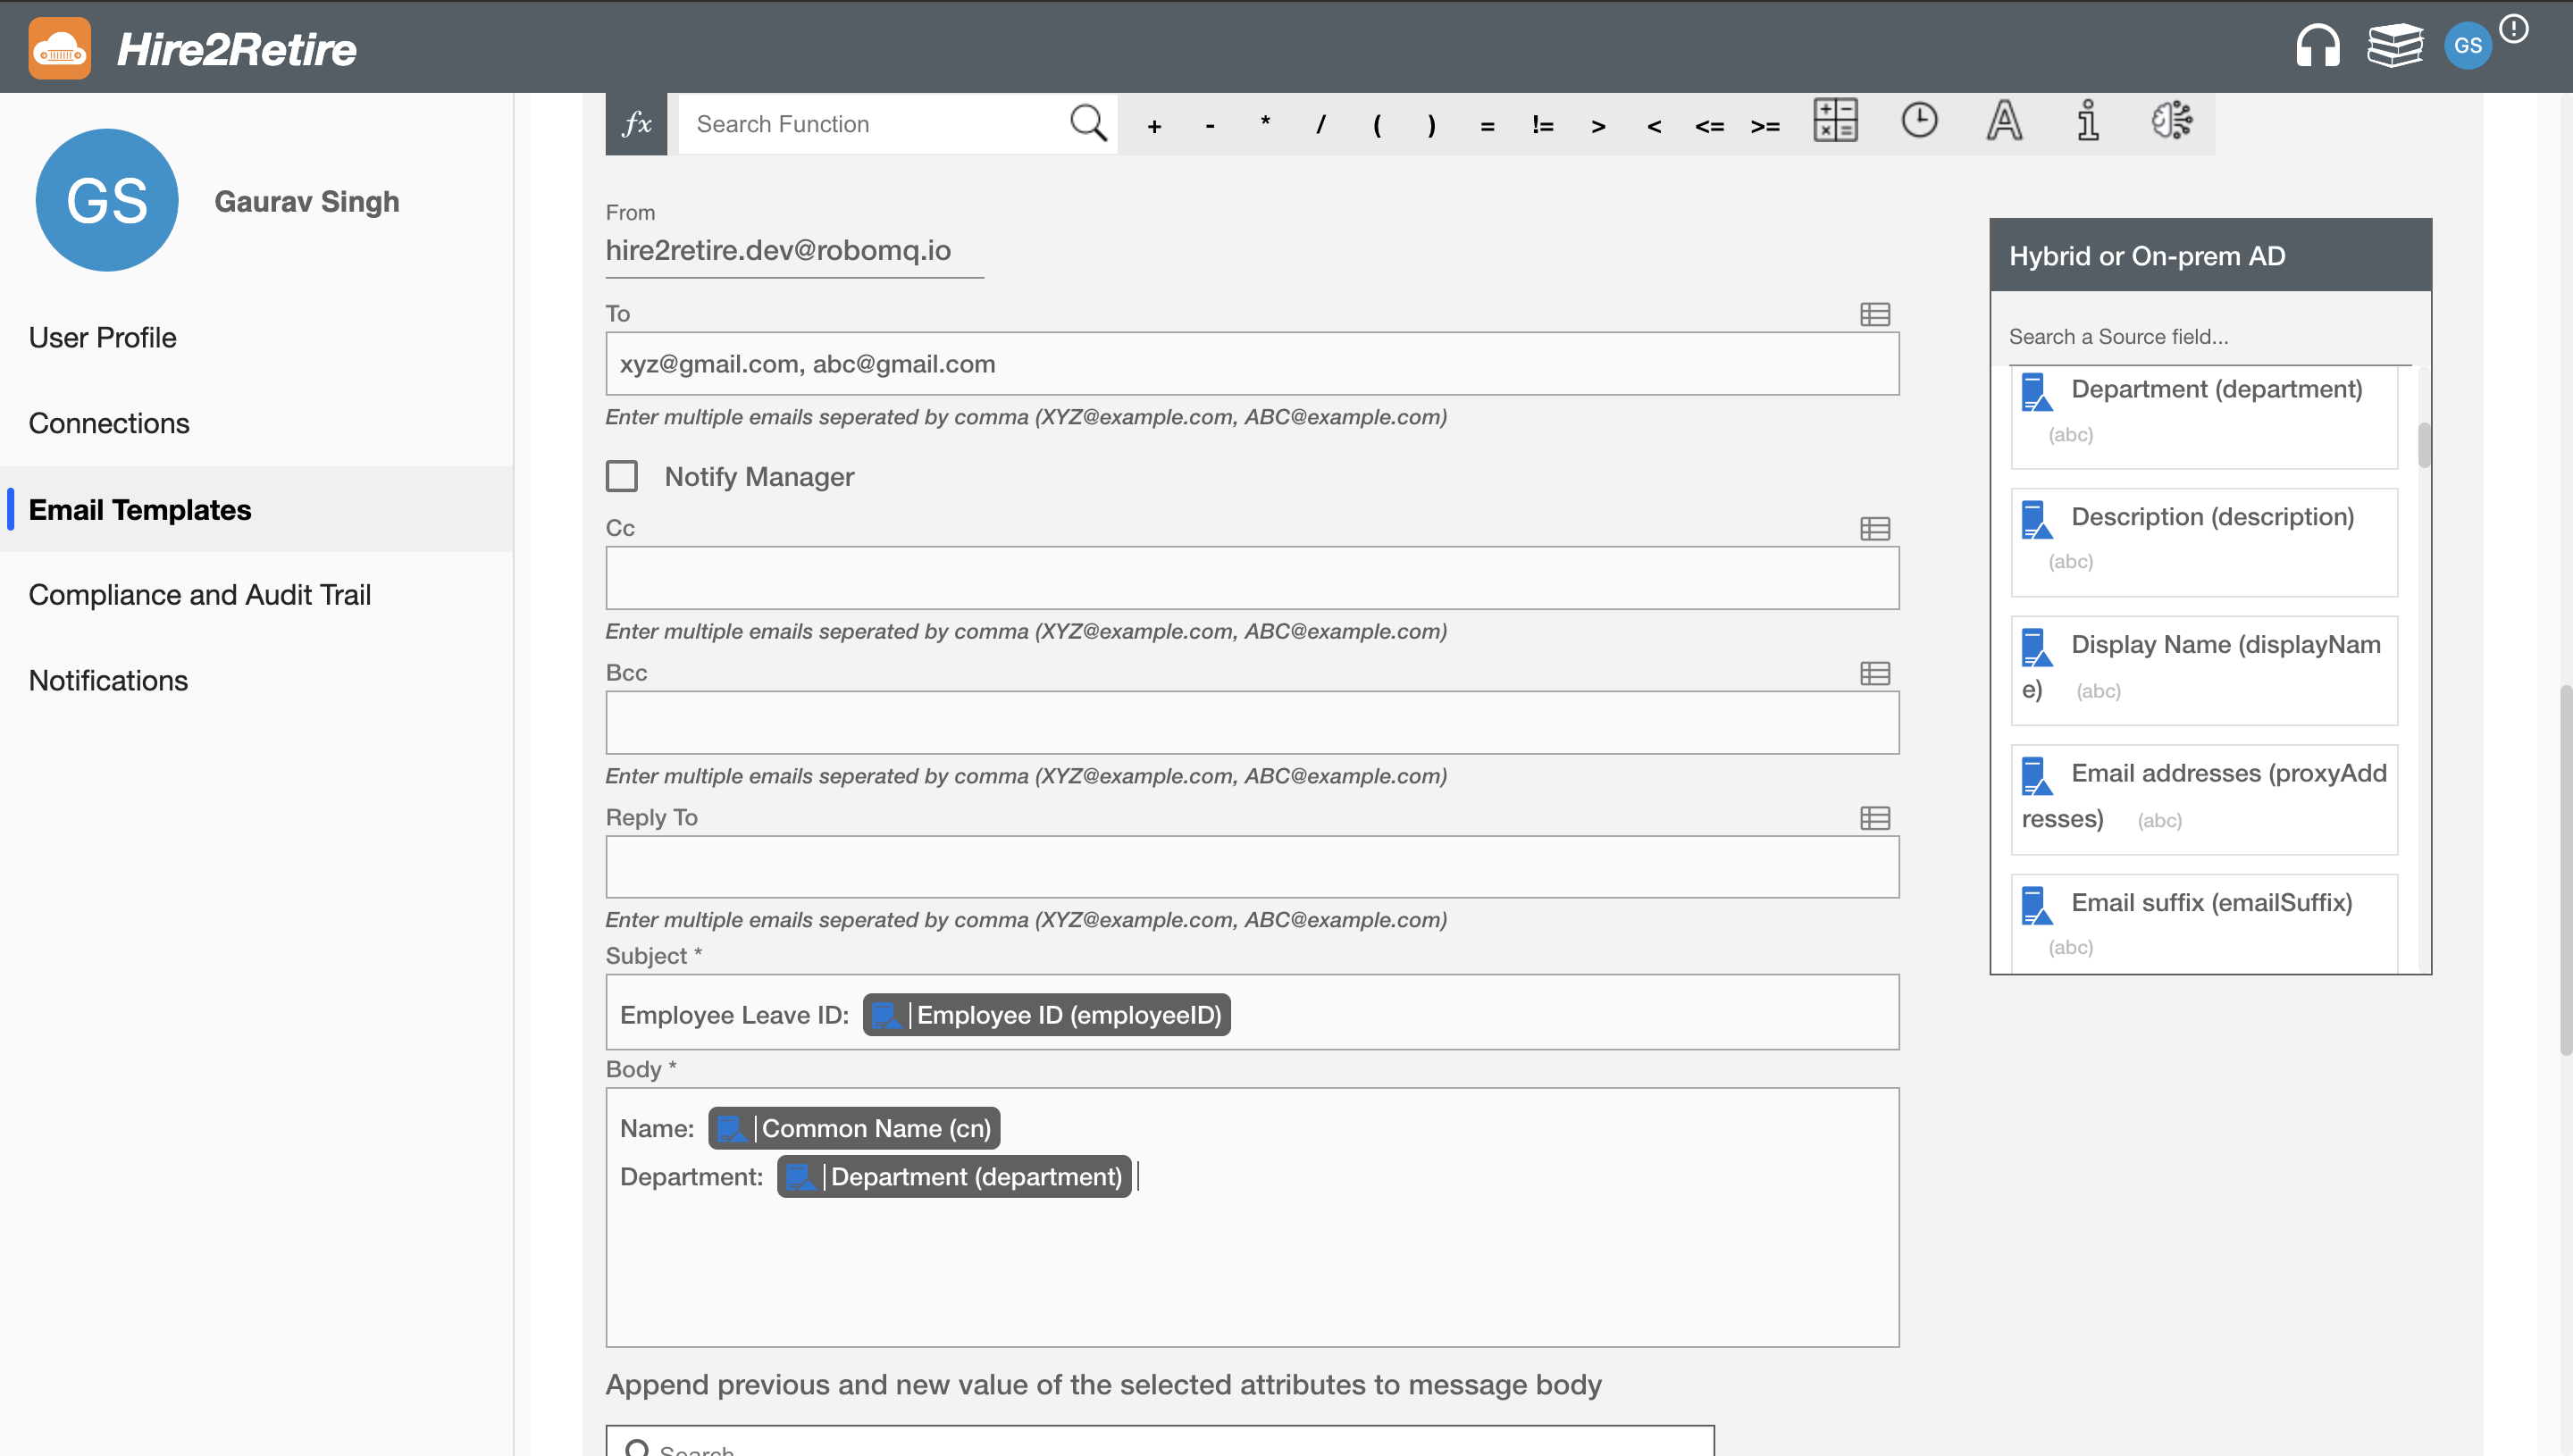 Figure 3. Filling template
You can also choose the atrributes from
Append previous and new value of the selected attributes to message bodyso, that if you made any changes in the selected Directory attributes while performing any lifecycle events then the email will be received with the updated attributes detail. After filling all mandatory fields, click on theSavebutton. The expansion panel will close. You have successfully created your email template.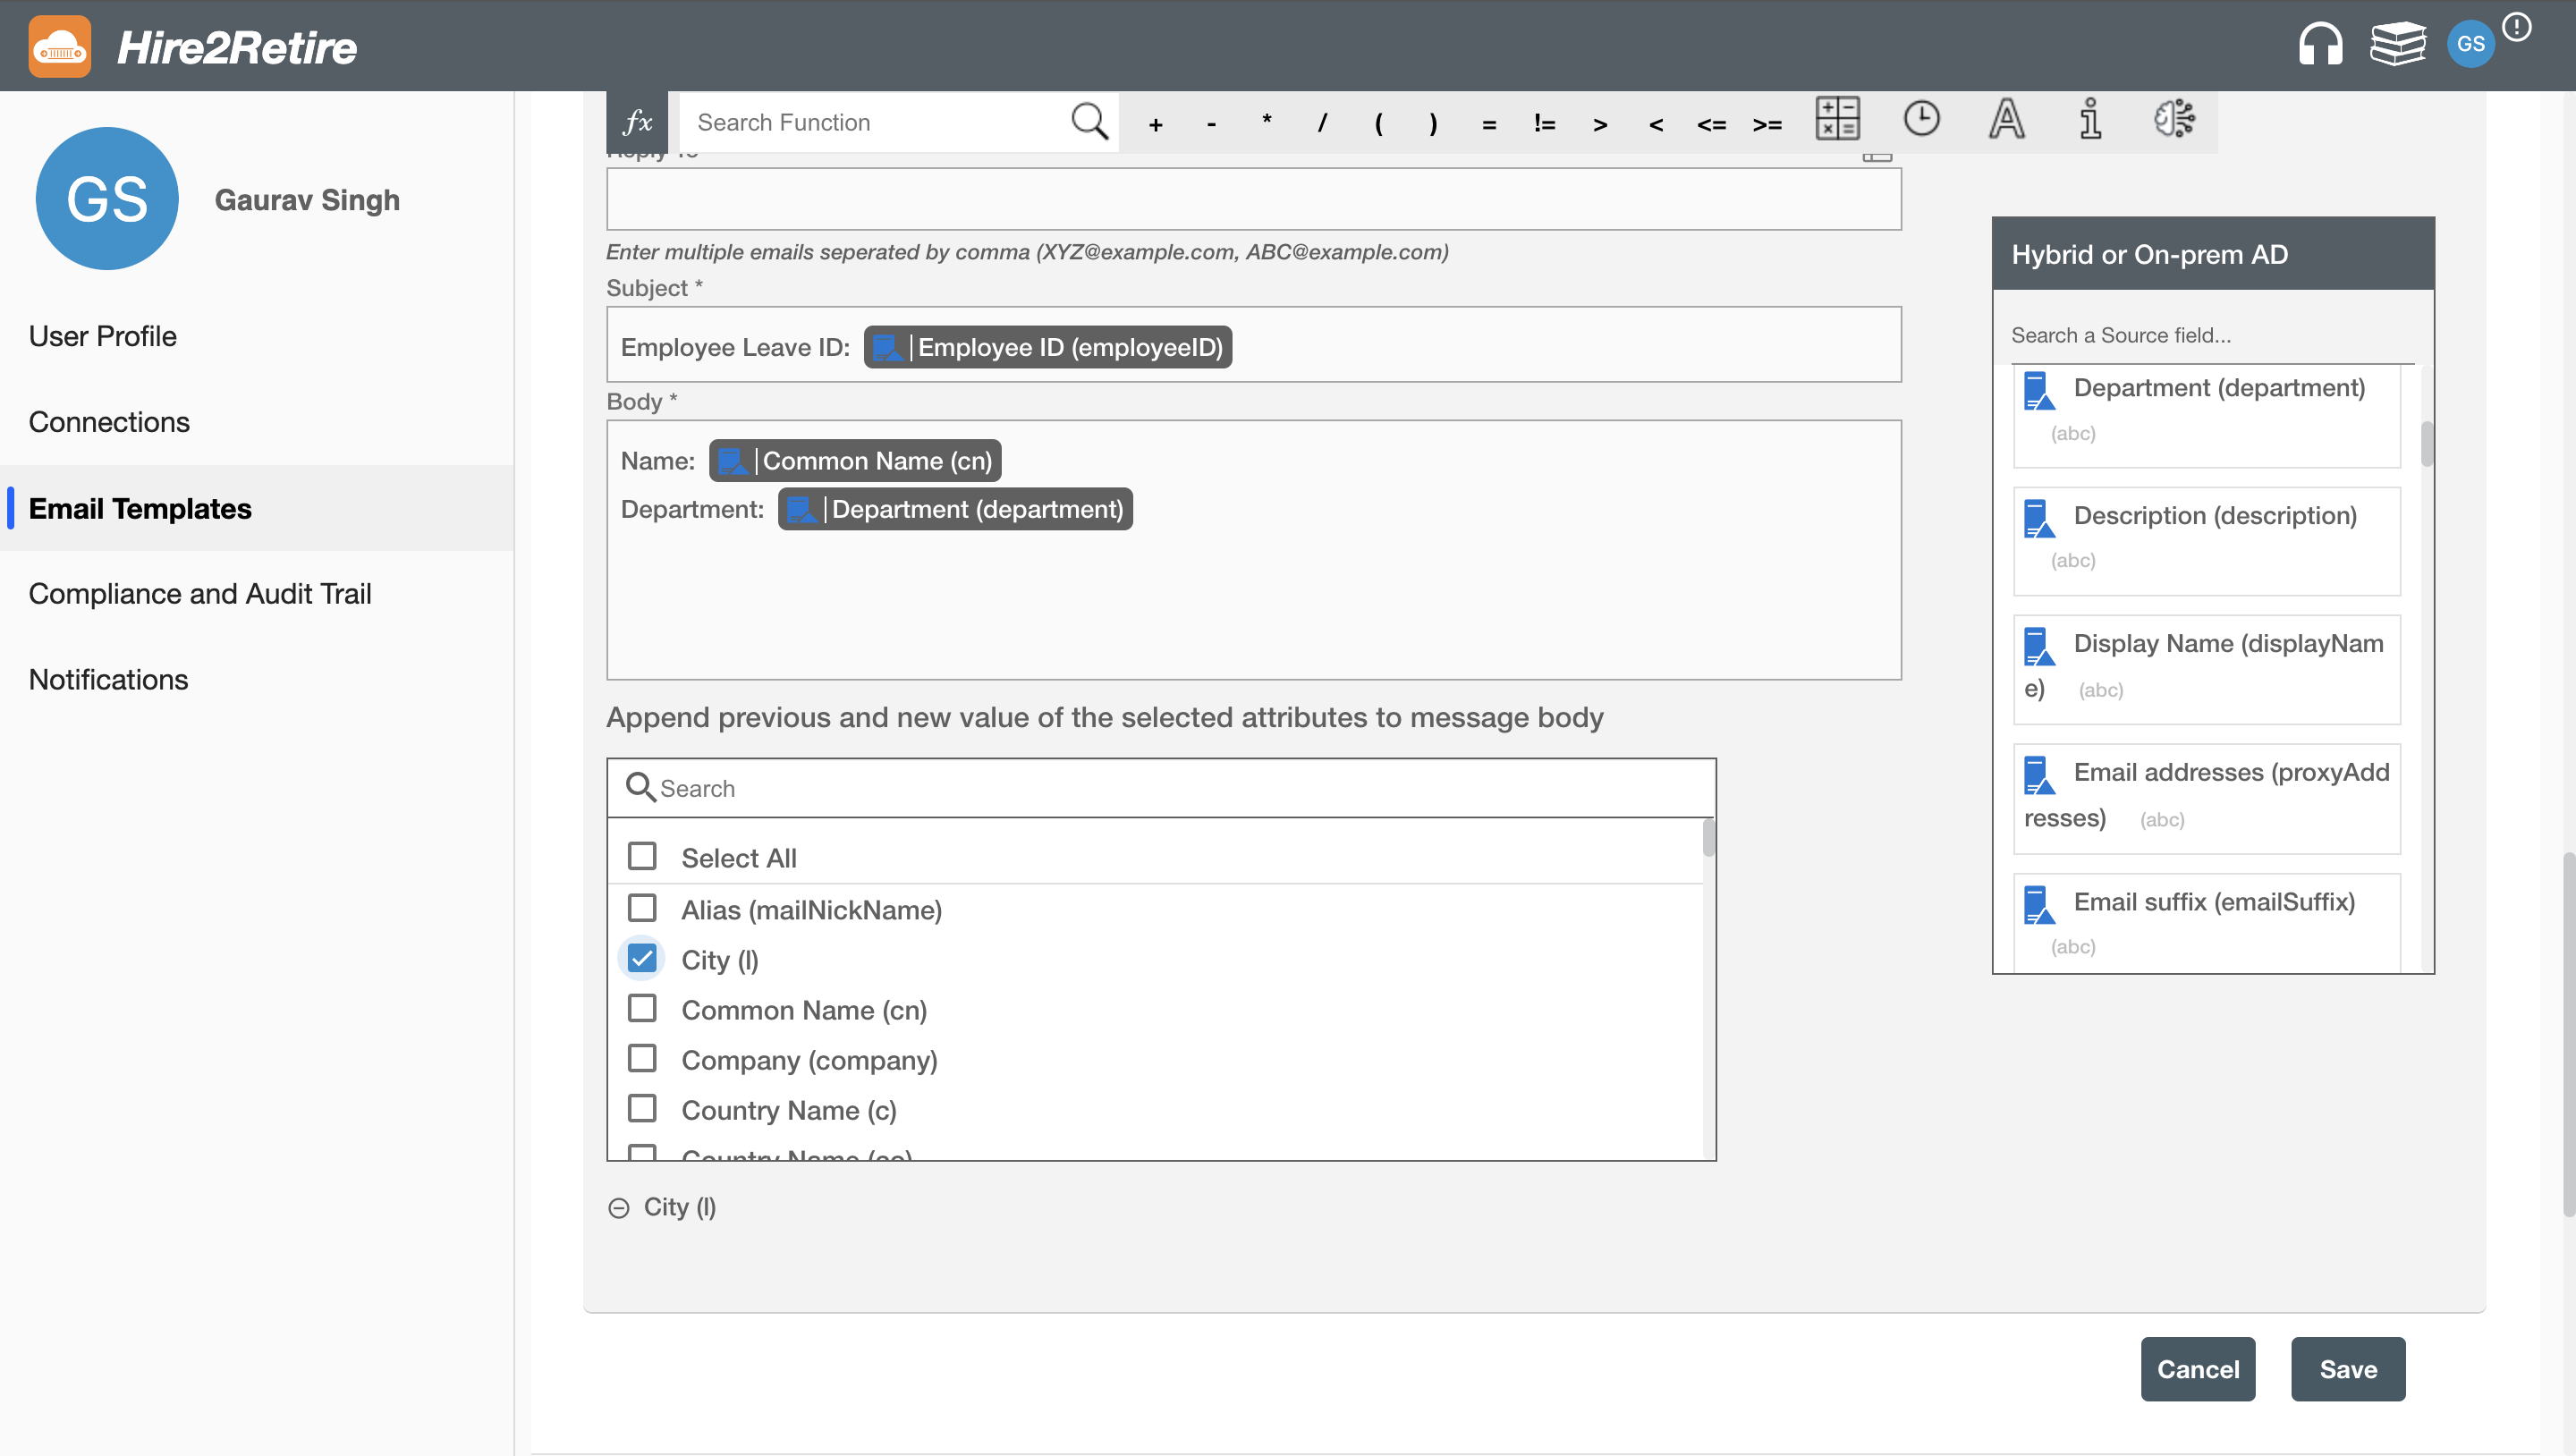 Figure 4. Filling template