Connection
Webex on Hire2Retire uses OAuth2.0 authentication.
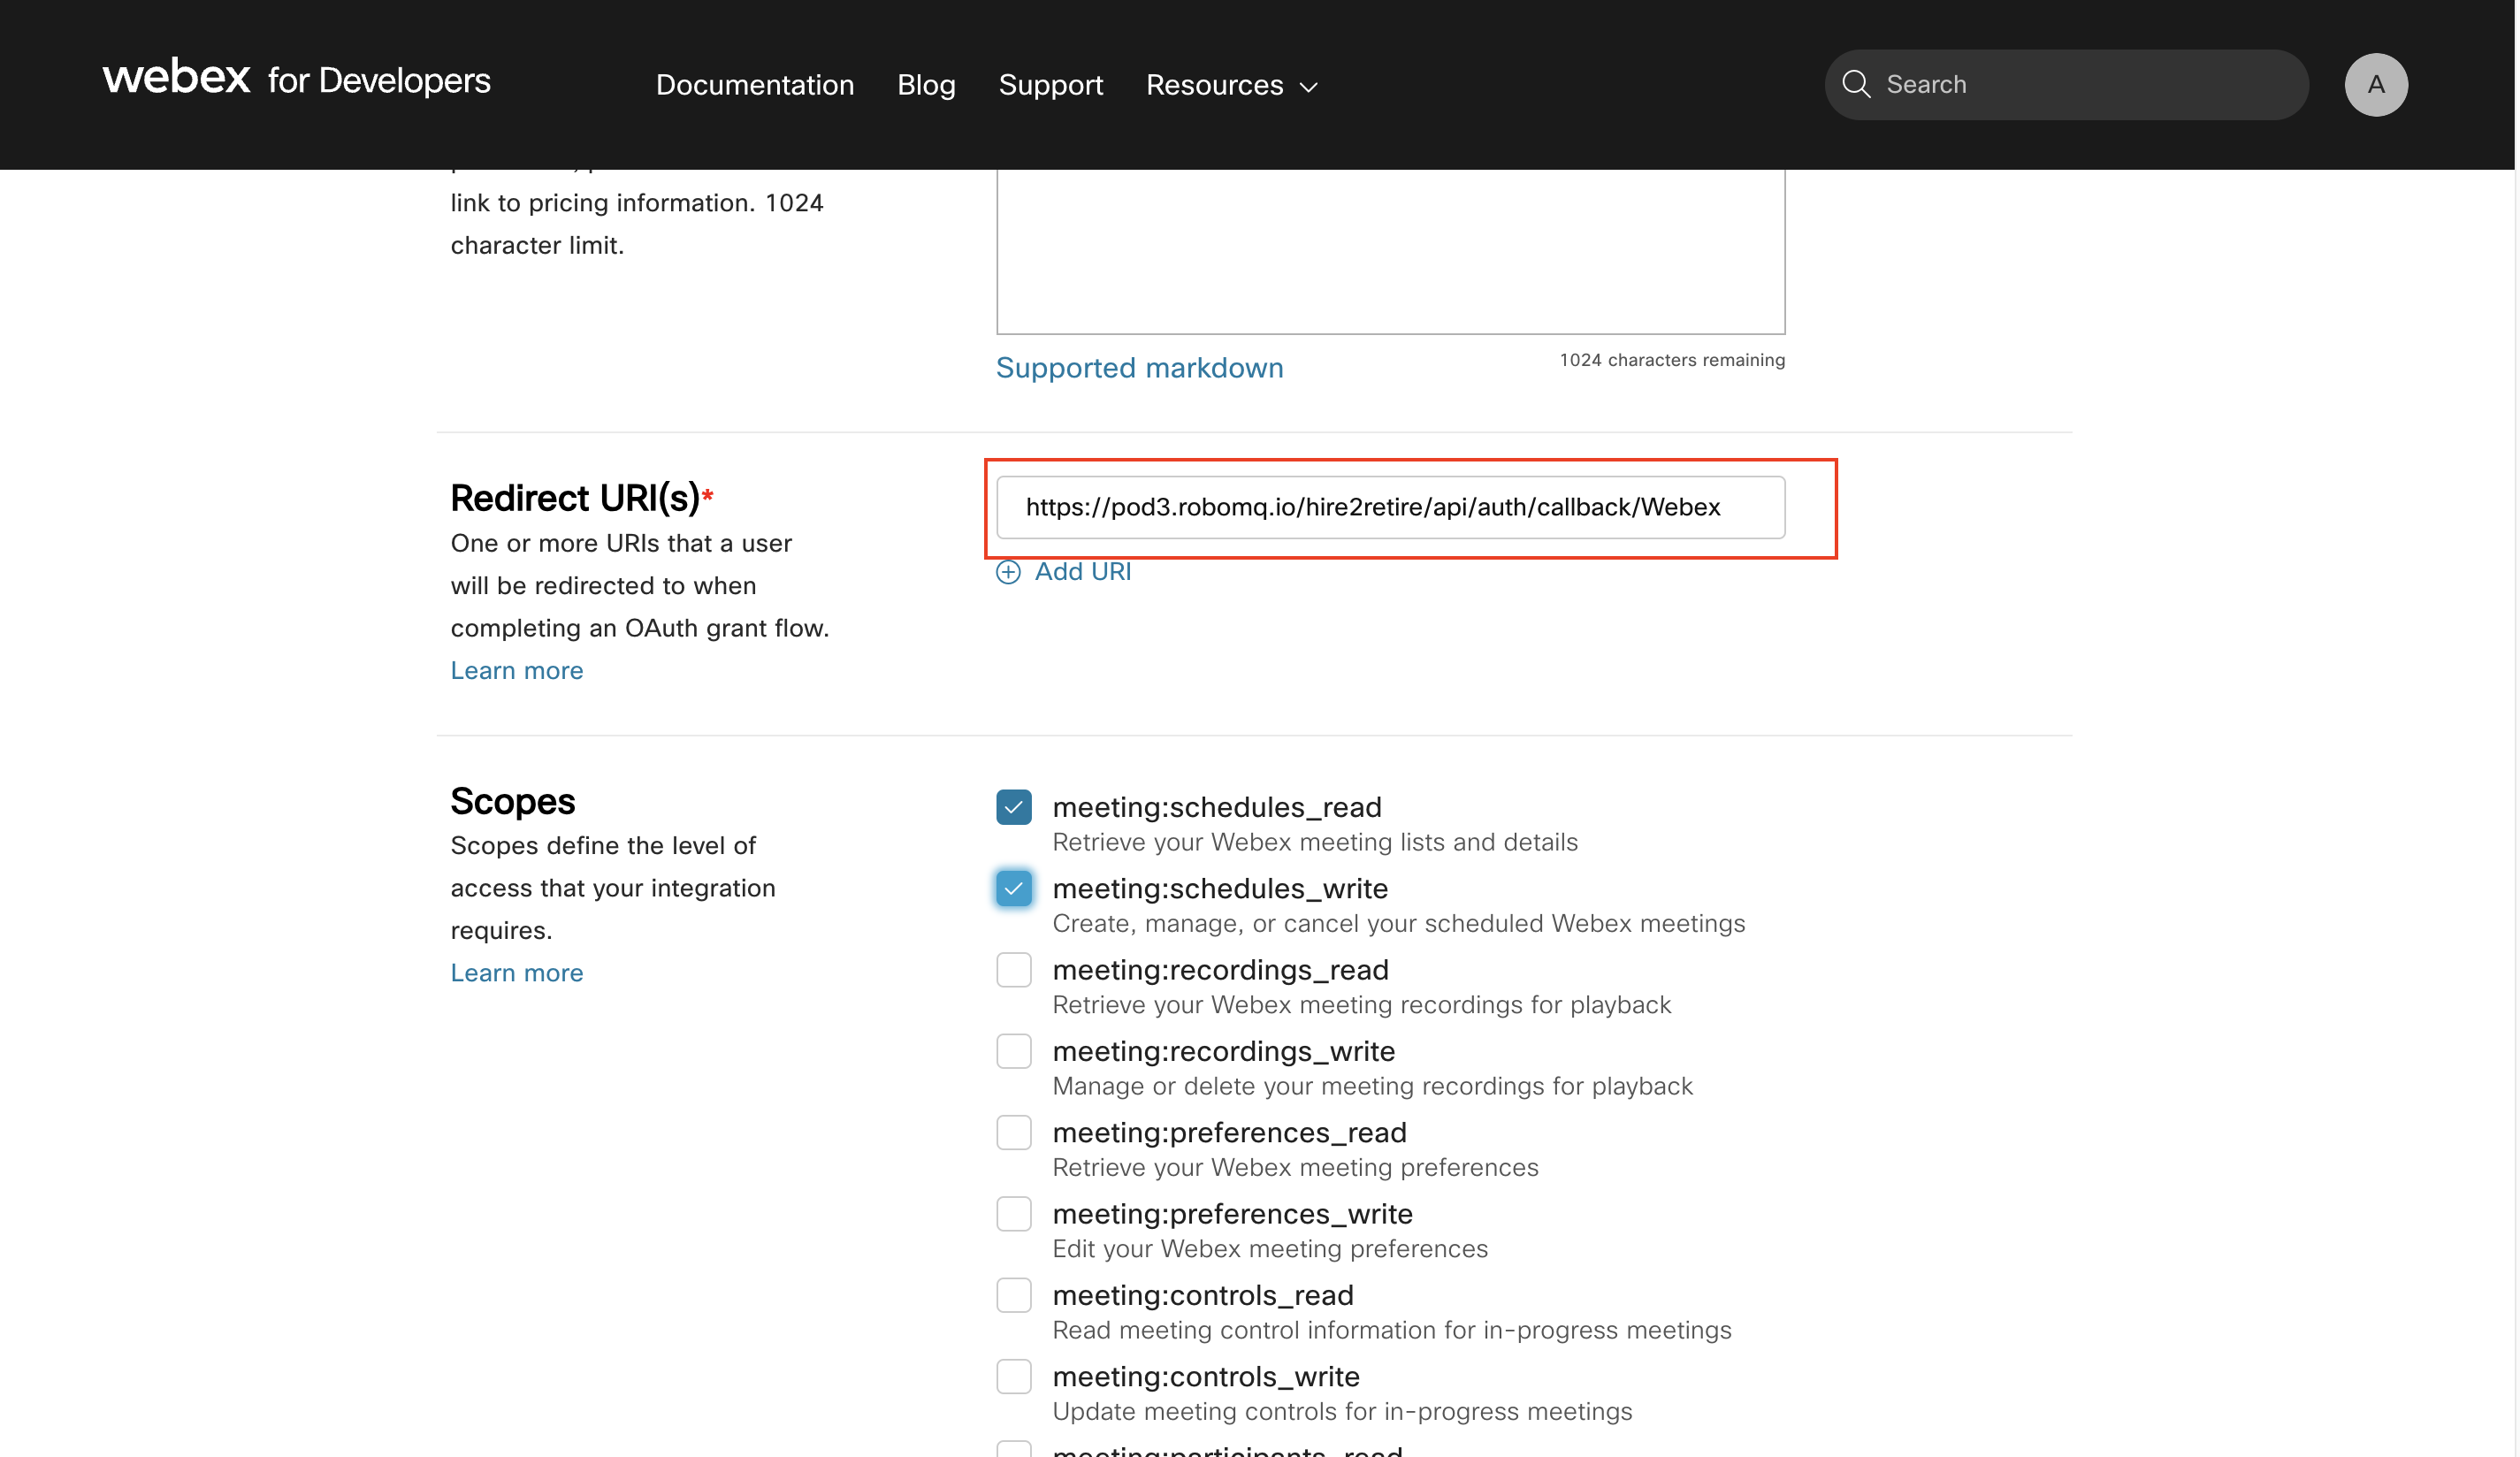
Please refer to the link to set up OAuth Ingeration on Webex. Integrations are how you request permission to invoke the Webex REST API on behalf of another Webex user instead of asking users their password. Integrate our provided redirect URI into your application to enable seamless access token retrieval on your behalf. The designated redirect URI is: https://hire2retire.robomq.io/hire2retire/api/auth/callback/Webex.
We at RoboMQ pay utmost attention to keep your account secure. See our Security and Privacy Policies to learn more about how RoboMQ handles your account access.
How to enable OAuth settings on Webex
Webex application on hire2retire uses OAuth authorization. By linking your Webex account with hire2retire, you can authorize RoboMQ to have a delegated access on your behalf. RoboMQ needs the following permissions on your account to provide a seamless integration experience. Please follow the steps to create the OAuth Integration after logging in Webex:
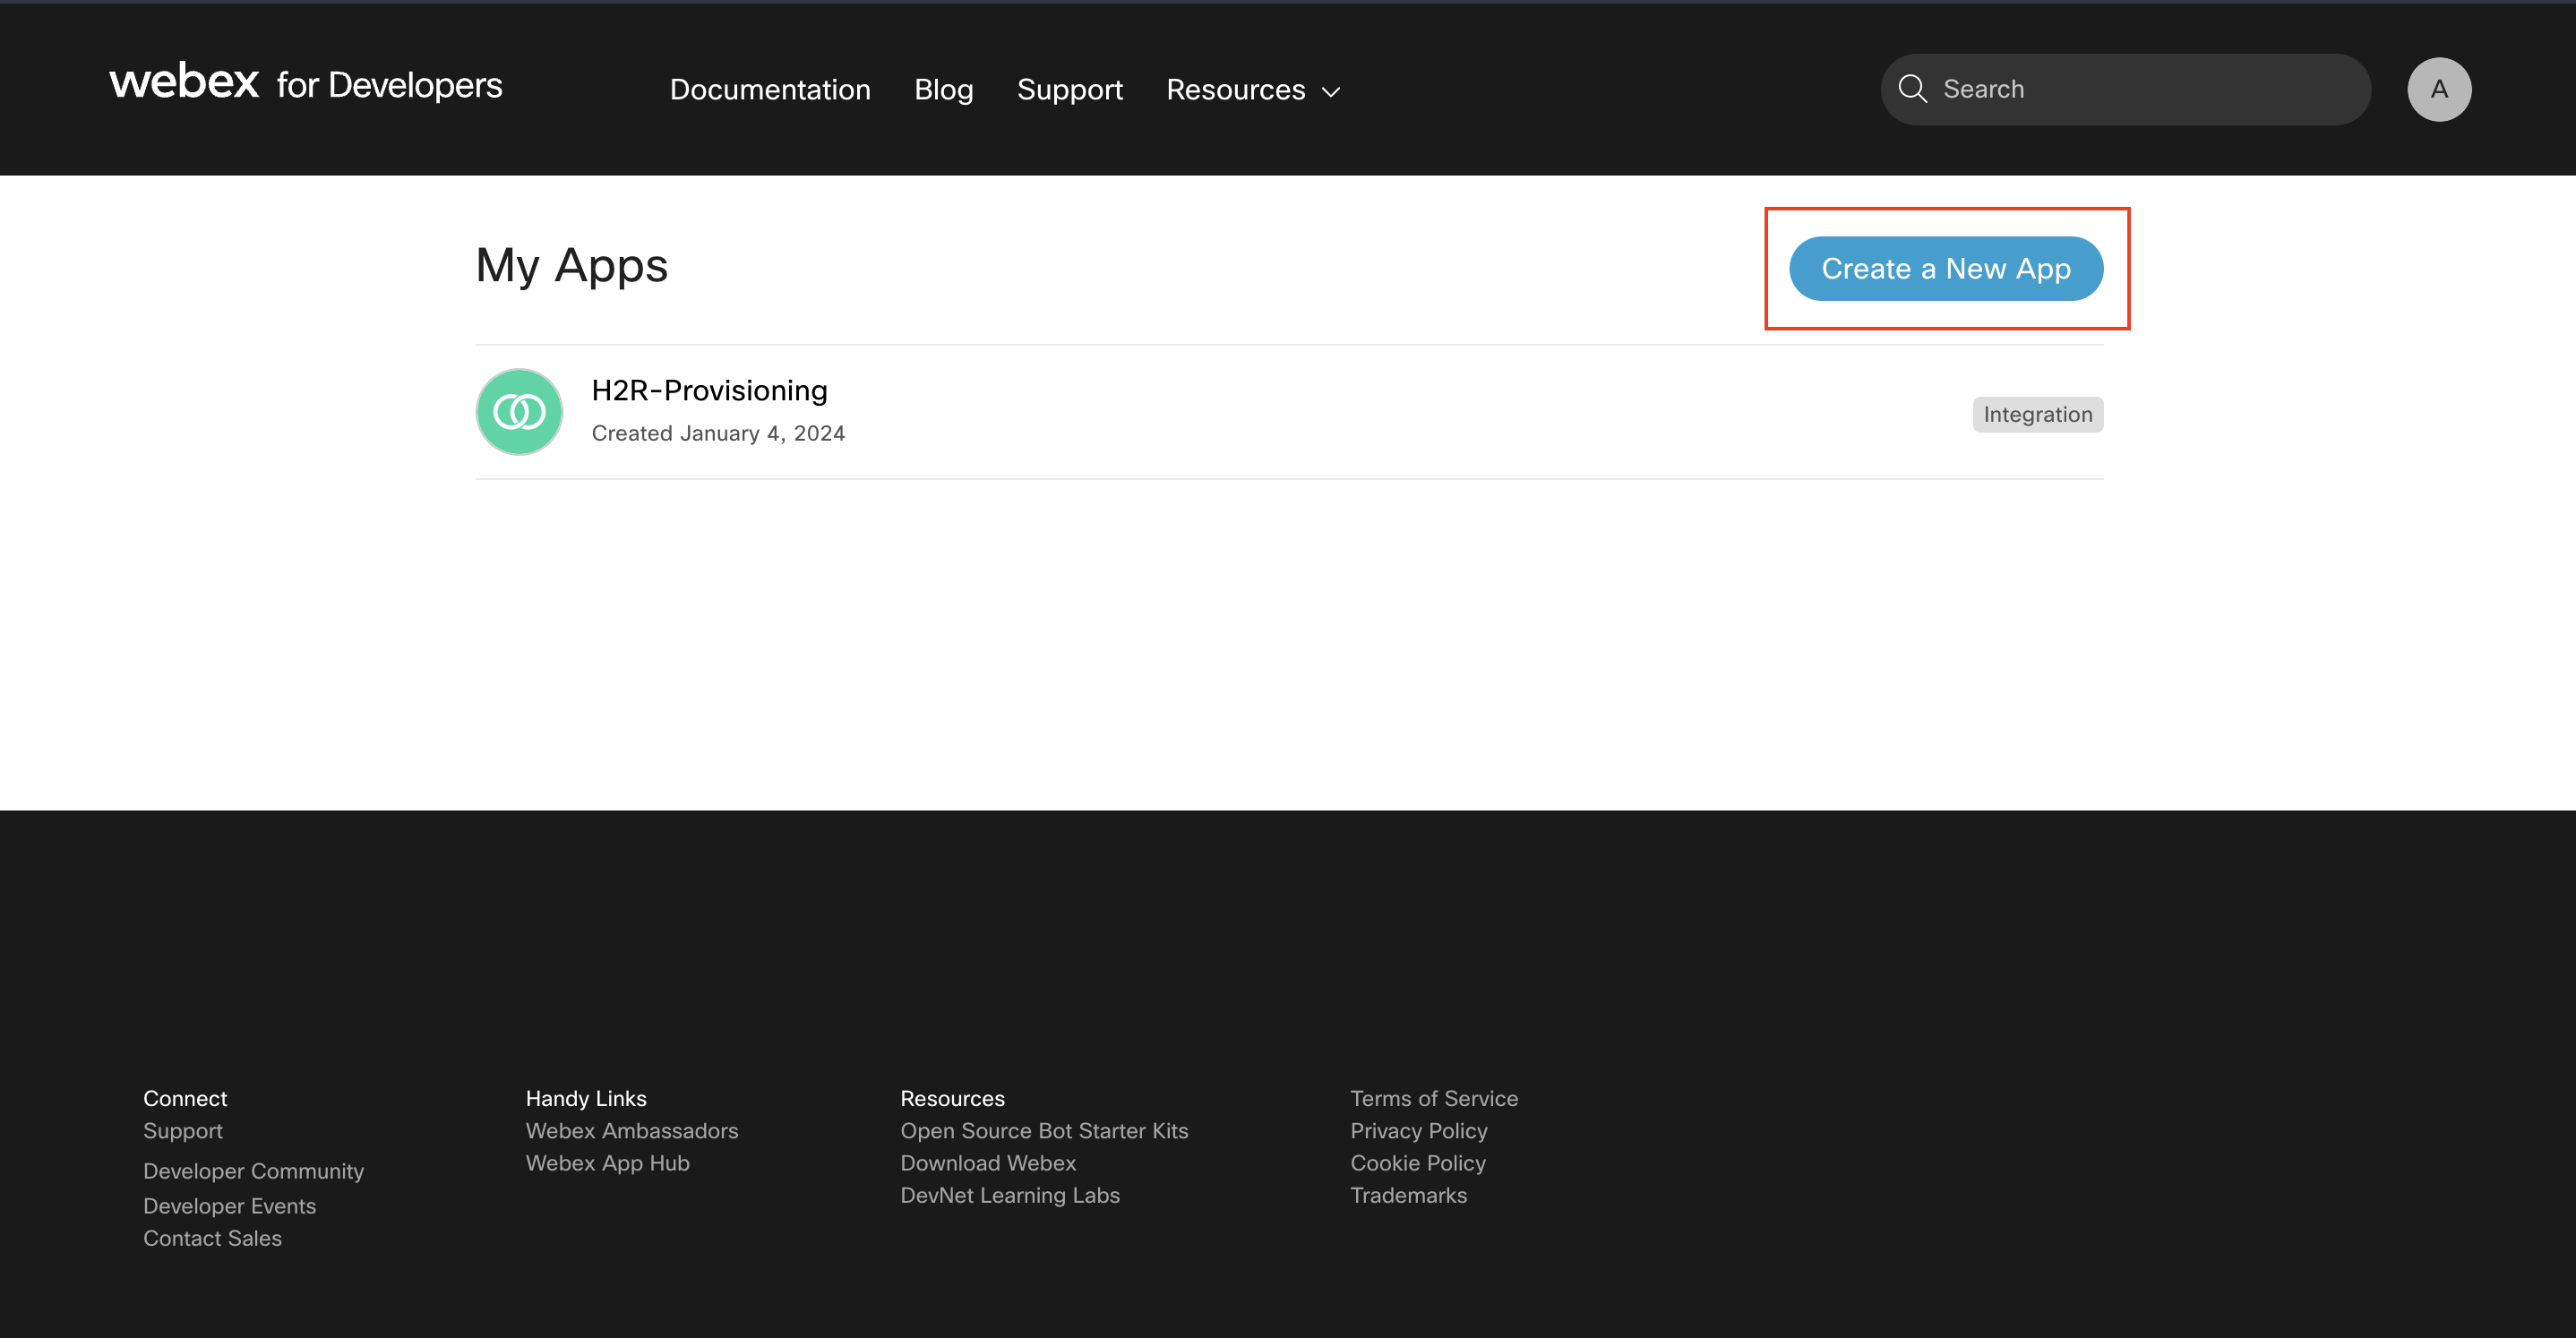
- Select "My Webex Apps" from the menu under your avatar at the top of the page, click "Create a New App" then "Create an Integration" to start the wizard.
![]()
- You'll need to provide some basic information like your integration's name, description, and logo. This information should be user-facing since that's what they'll see in the permission dialog.
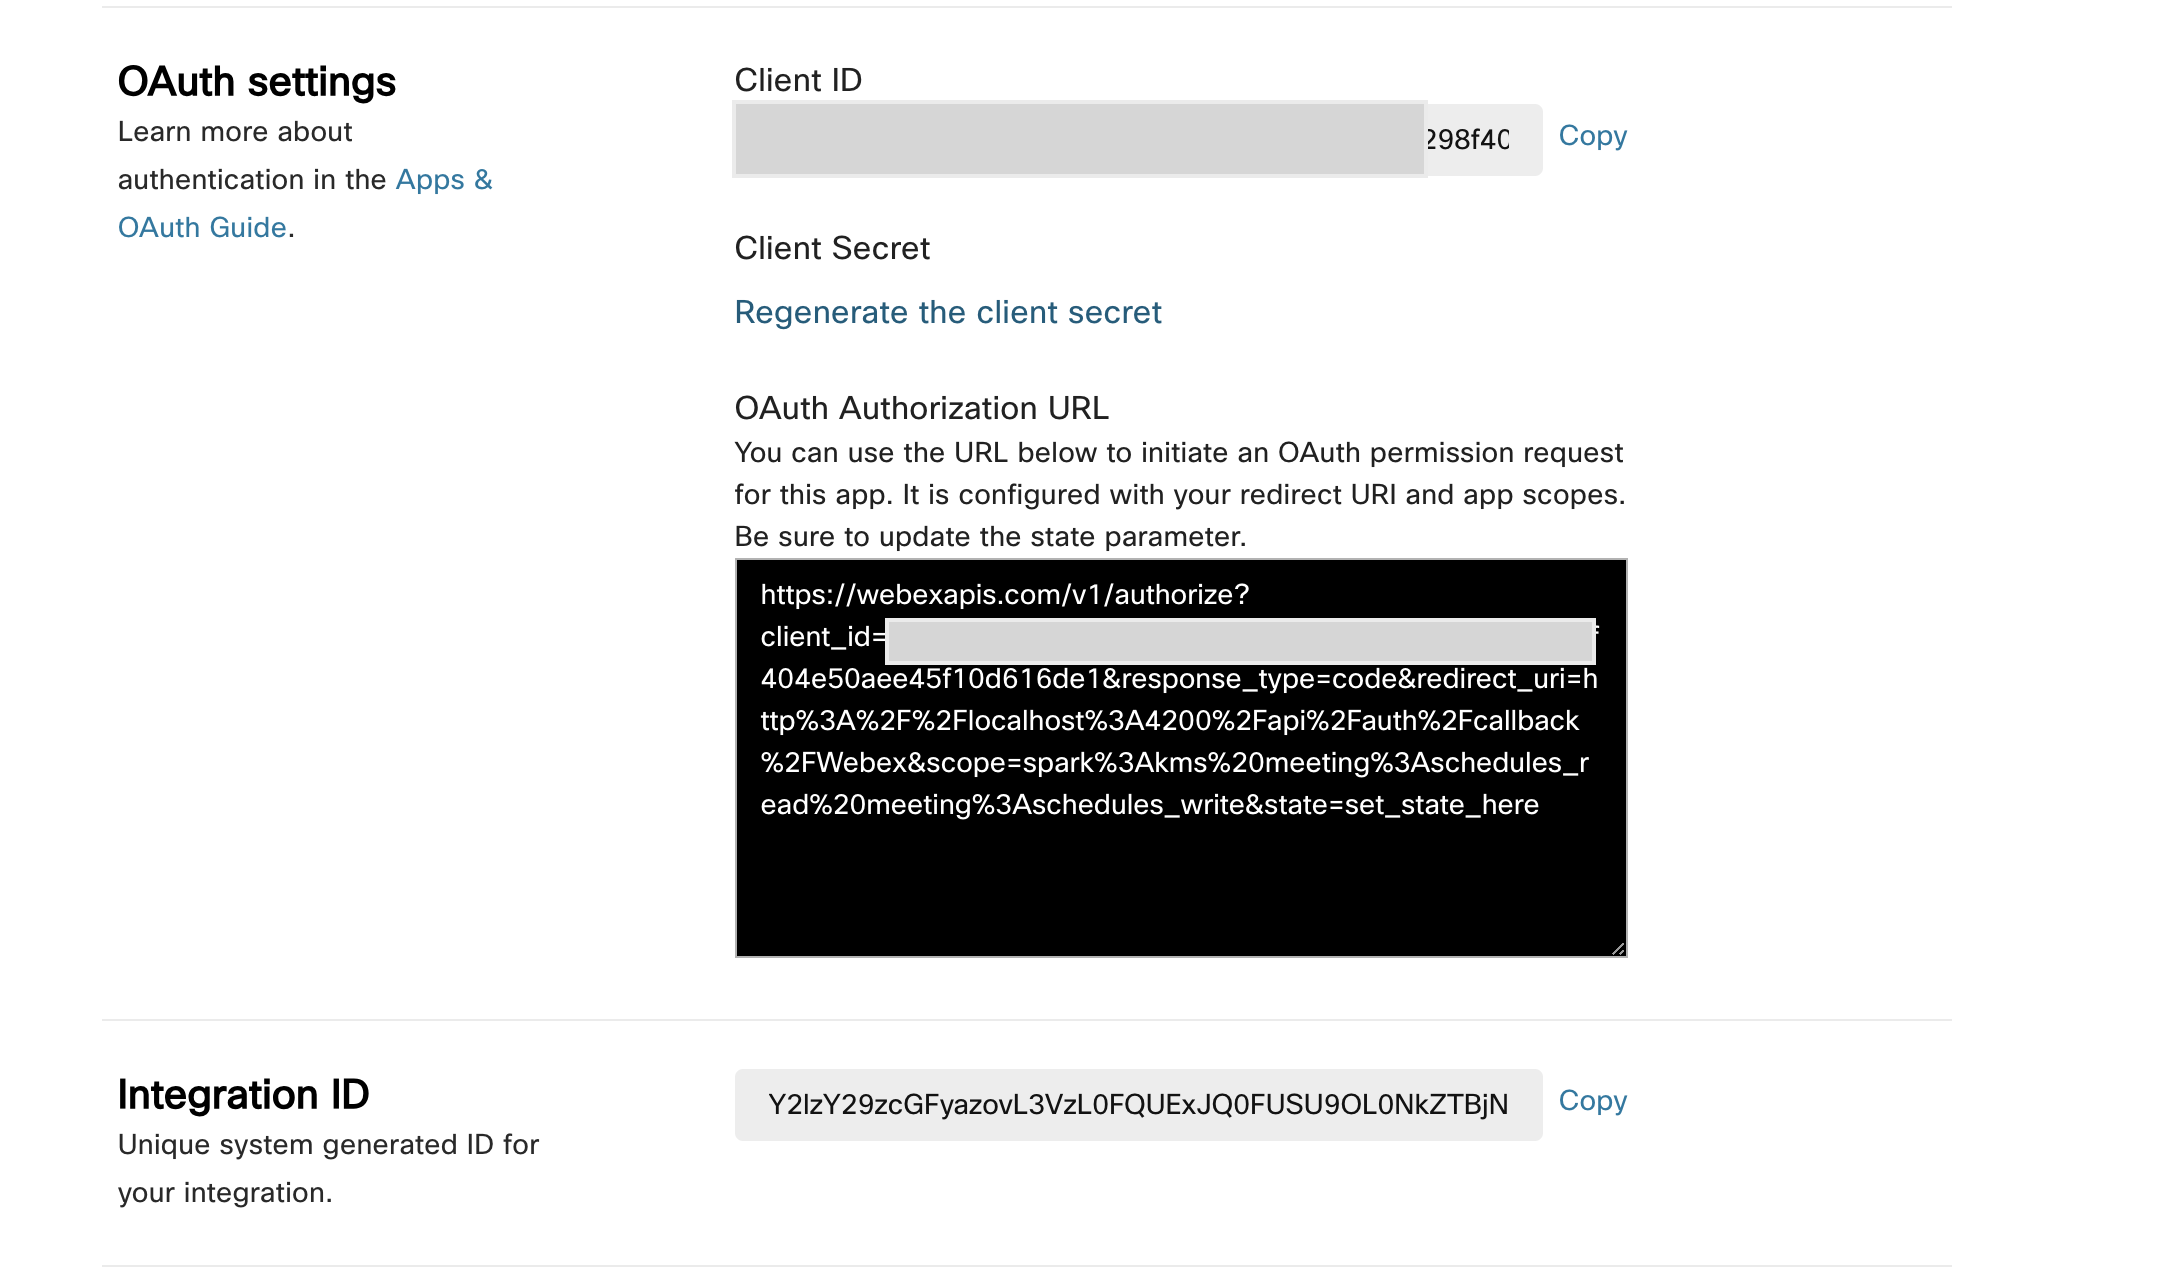
- After successful registration you'll be taken to a different screen containing your integration's newly created Client ID and Client Secret.
Link Webex account on Hire2Retire
Enter the client creds and scopes that you have received by creating an OAuth Integration as mentioned above.
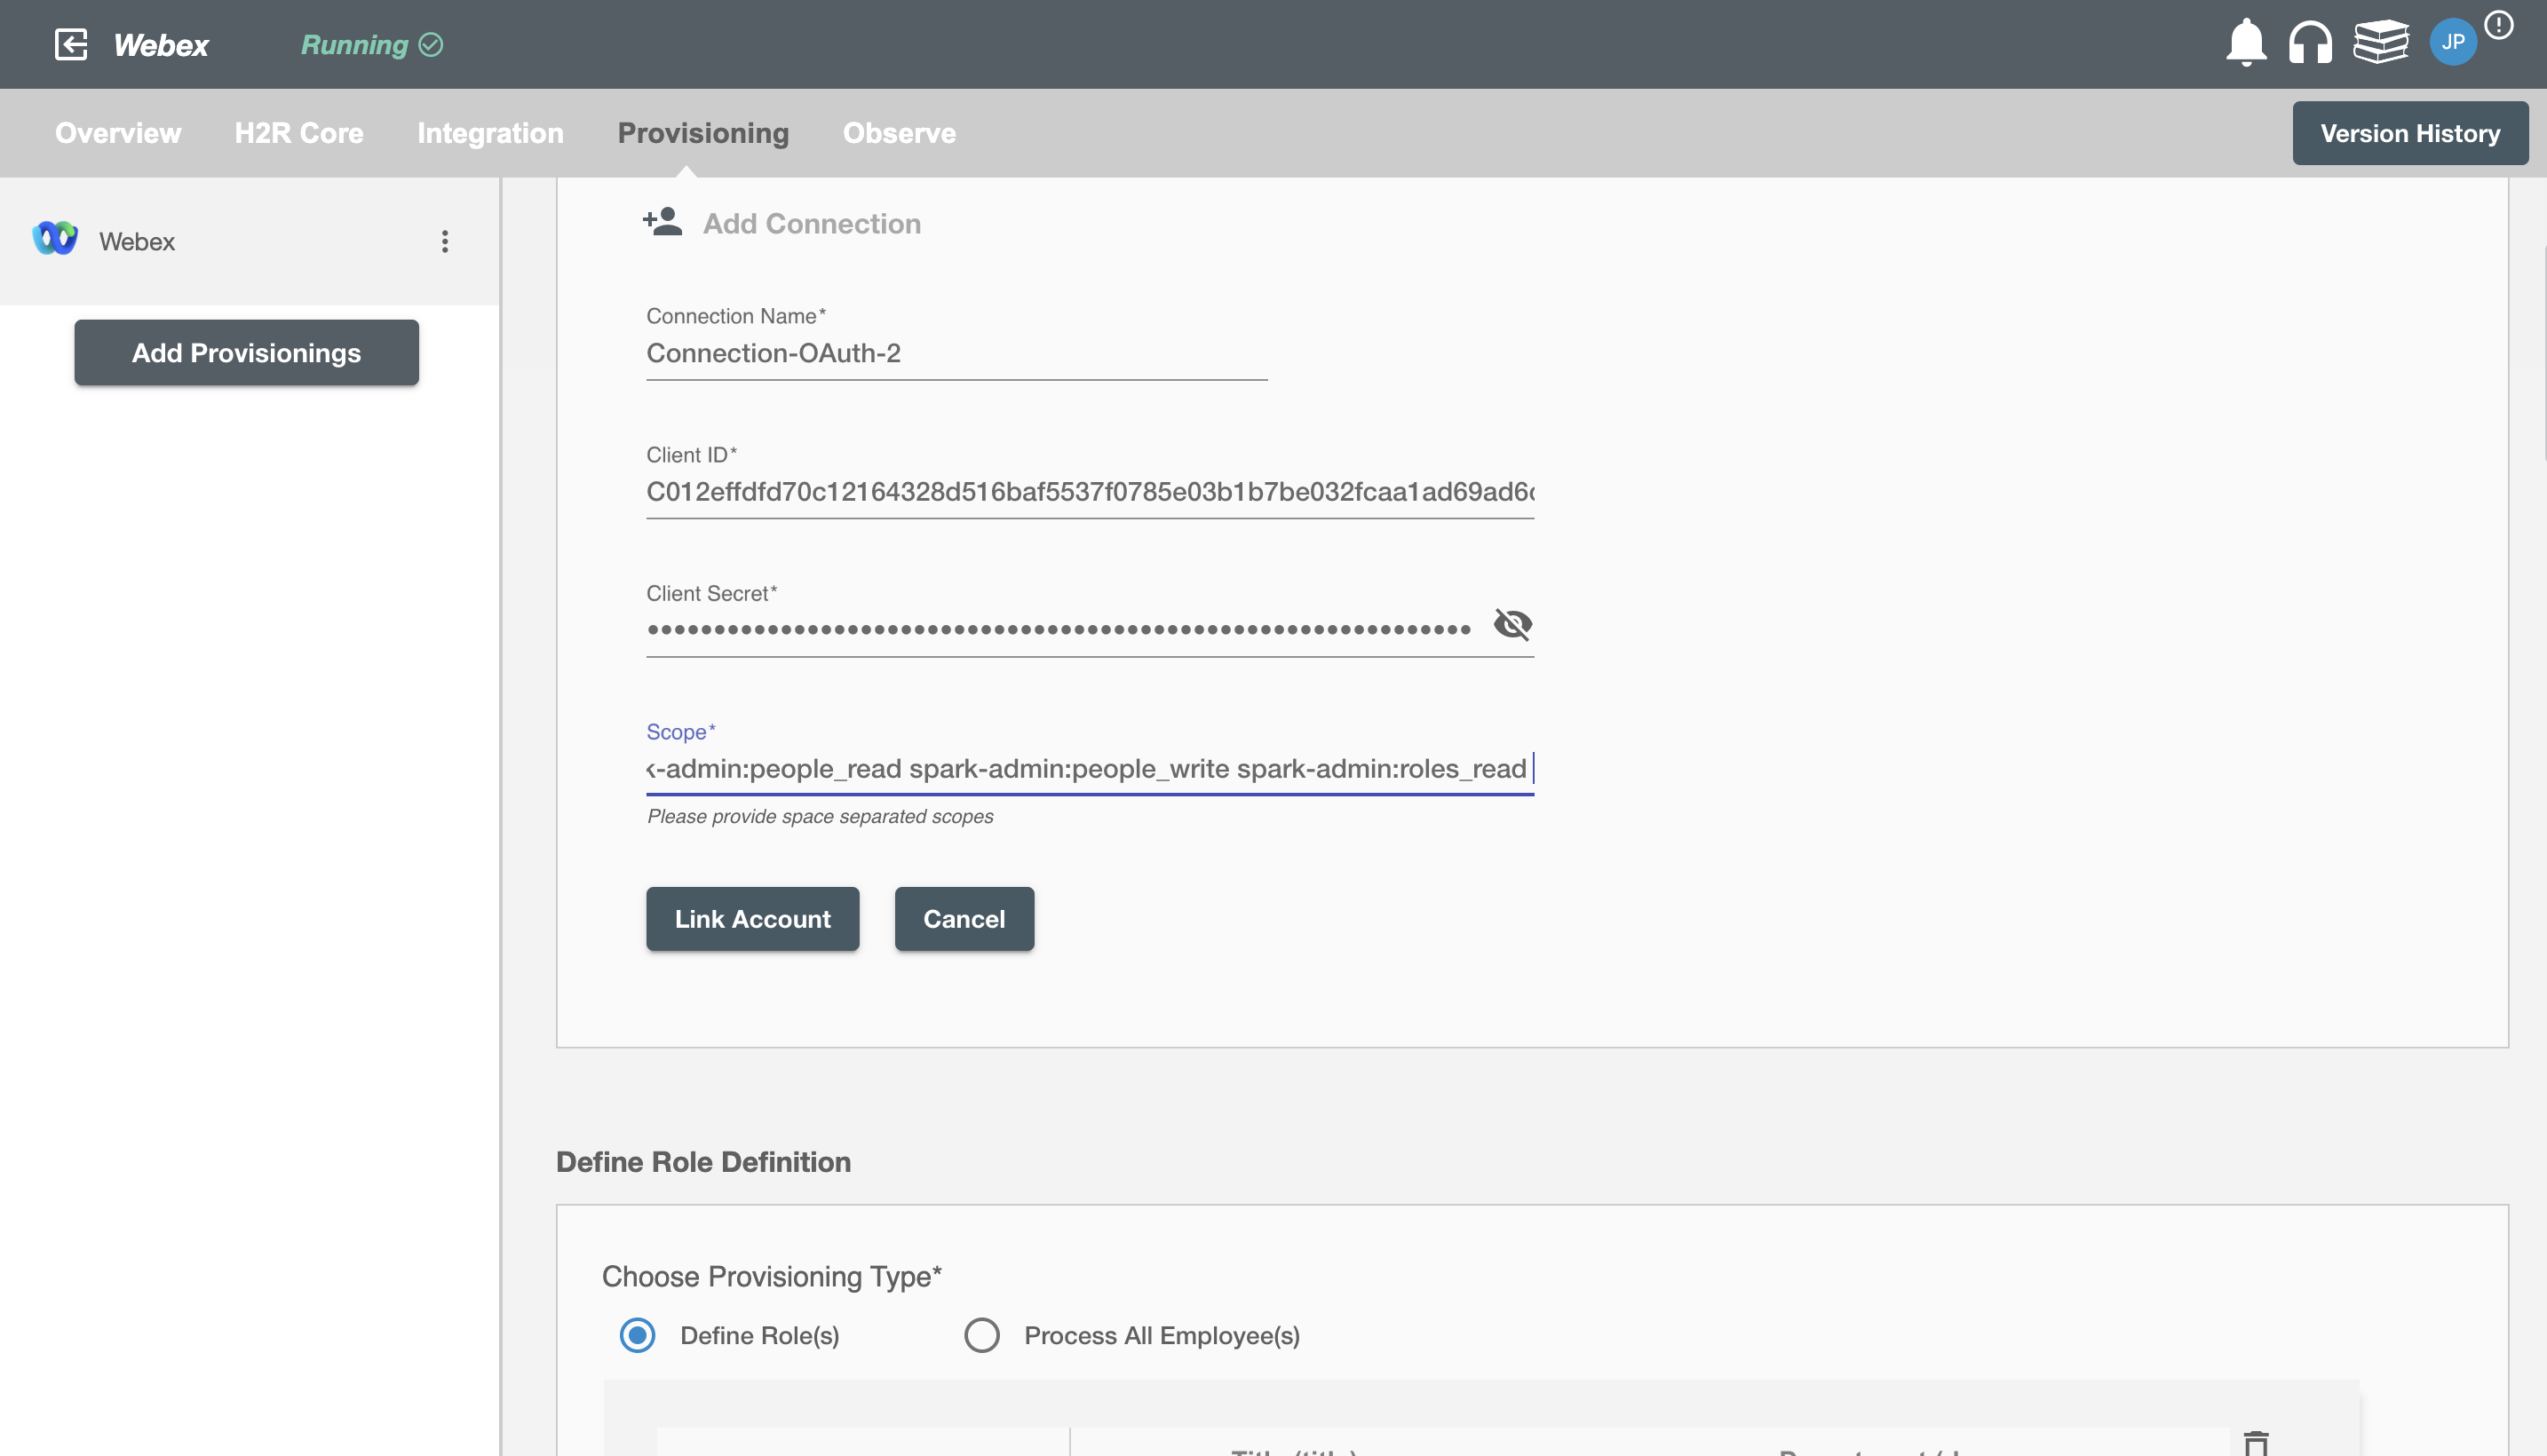
On clicking the 'Link Account' button, you will be redirected to Webex Account Authorization screen.
Enter the account details to use the Webex SCIM implementation for this flow.
Once the connection is established successfully, then you can define the roles and mapping on Hire2Retire Provisioning.