Connection
SolarWinds on Hire2Retire uses Token-Based Authentication. Please refer to the document SolarWinds API documentation to know more about token-based authentication in SolarWinds.
We at RoboMQ pay atmost attention to keep your account secure. See our Security and Privacy Policies to learn more about how RoboMQ handles your account access.
Link SolarWinds account on Hire2Retire
Step 1. Specify your SolarWinds Instance URL. When you open your SolarWinds account on the browser, you can find the SolarWinds Instance URL as https://YourDomain.samanage.com.
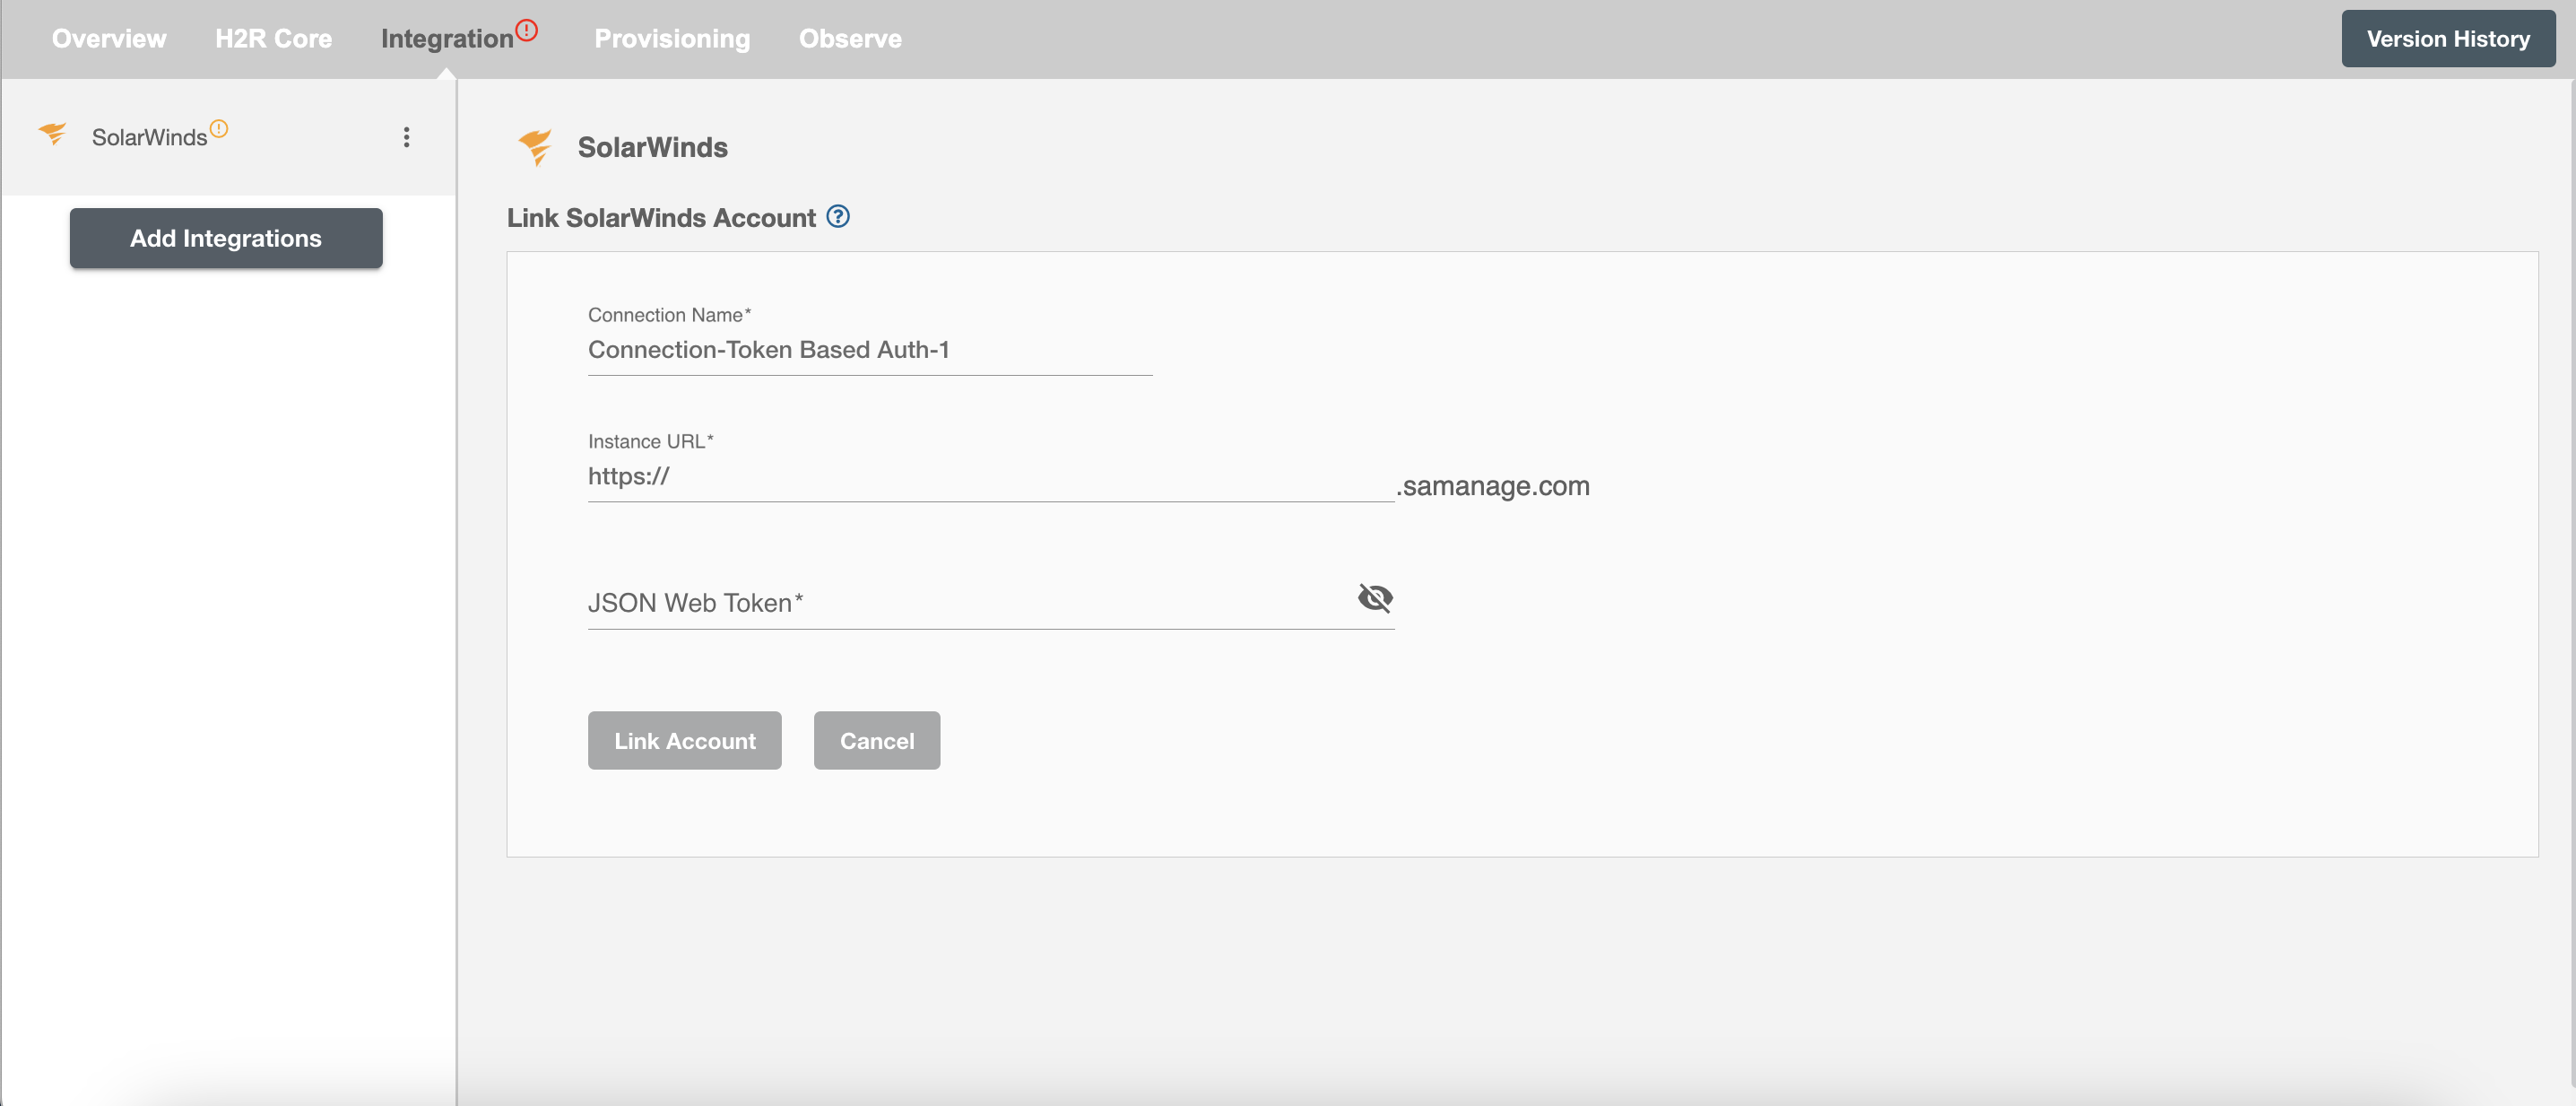
Step 2. Enter your SolarWinds JSON Web Token.
How to Generate JSON Web Token?
-
Login to your SolarWinds Console
-
Click on the
Setupicon on the bottom left corner of your portal.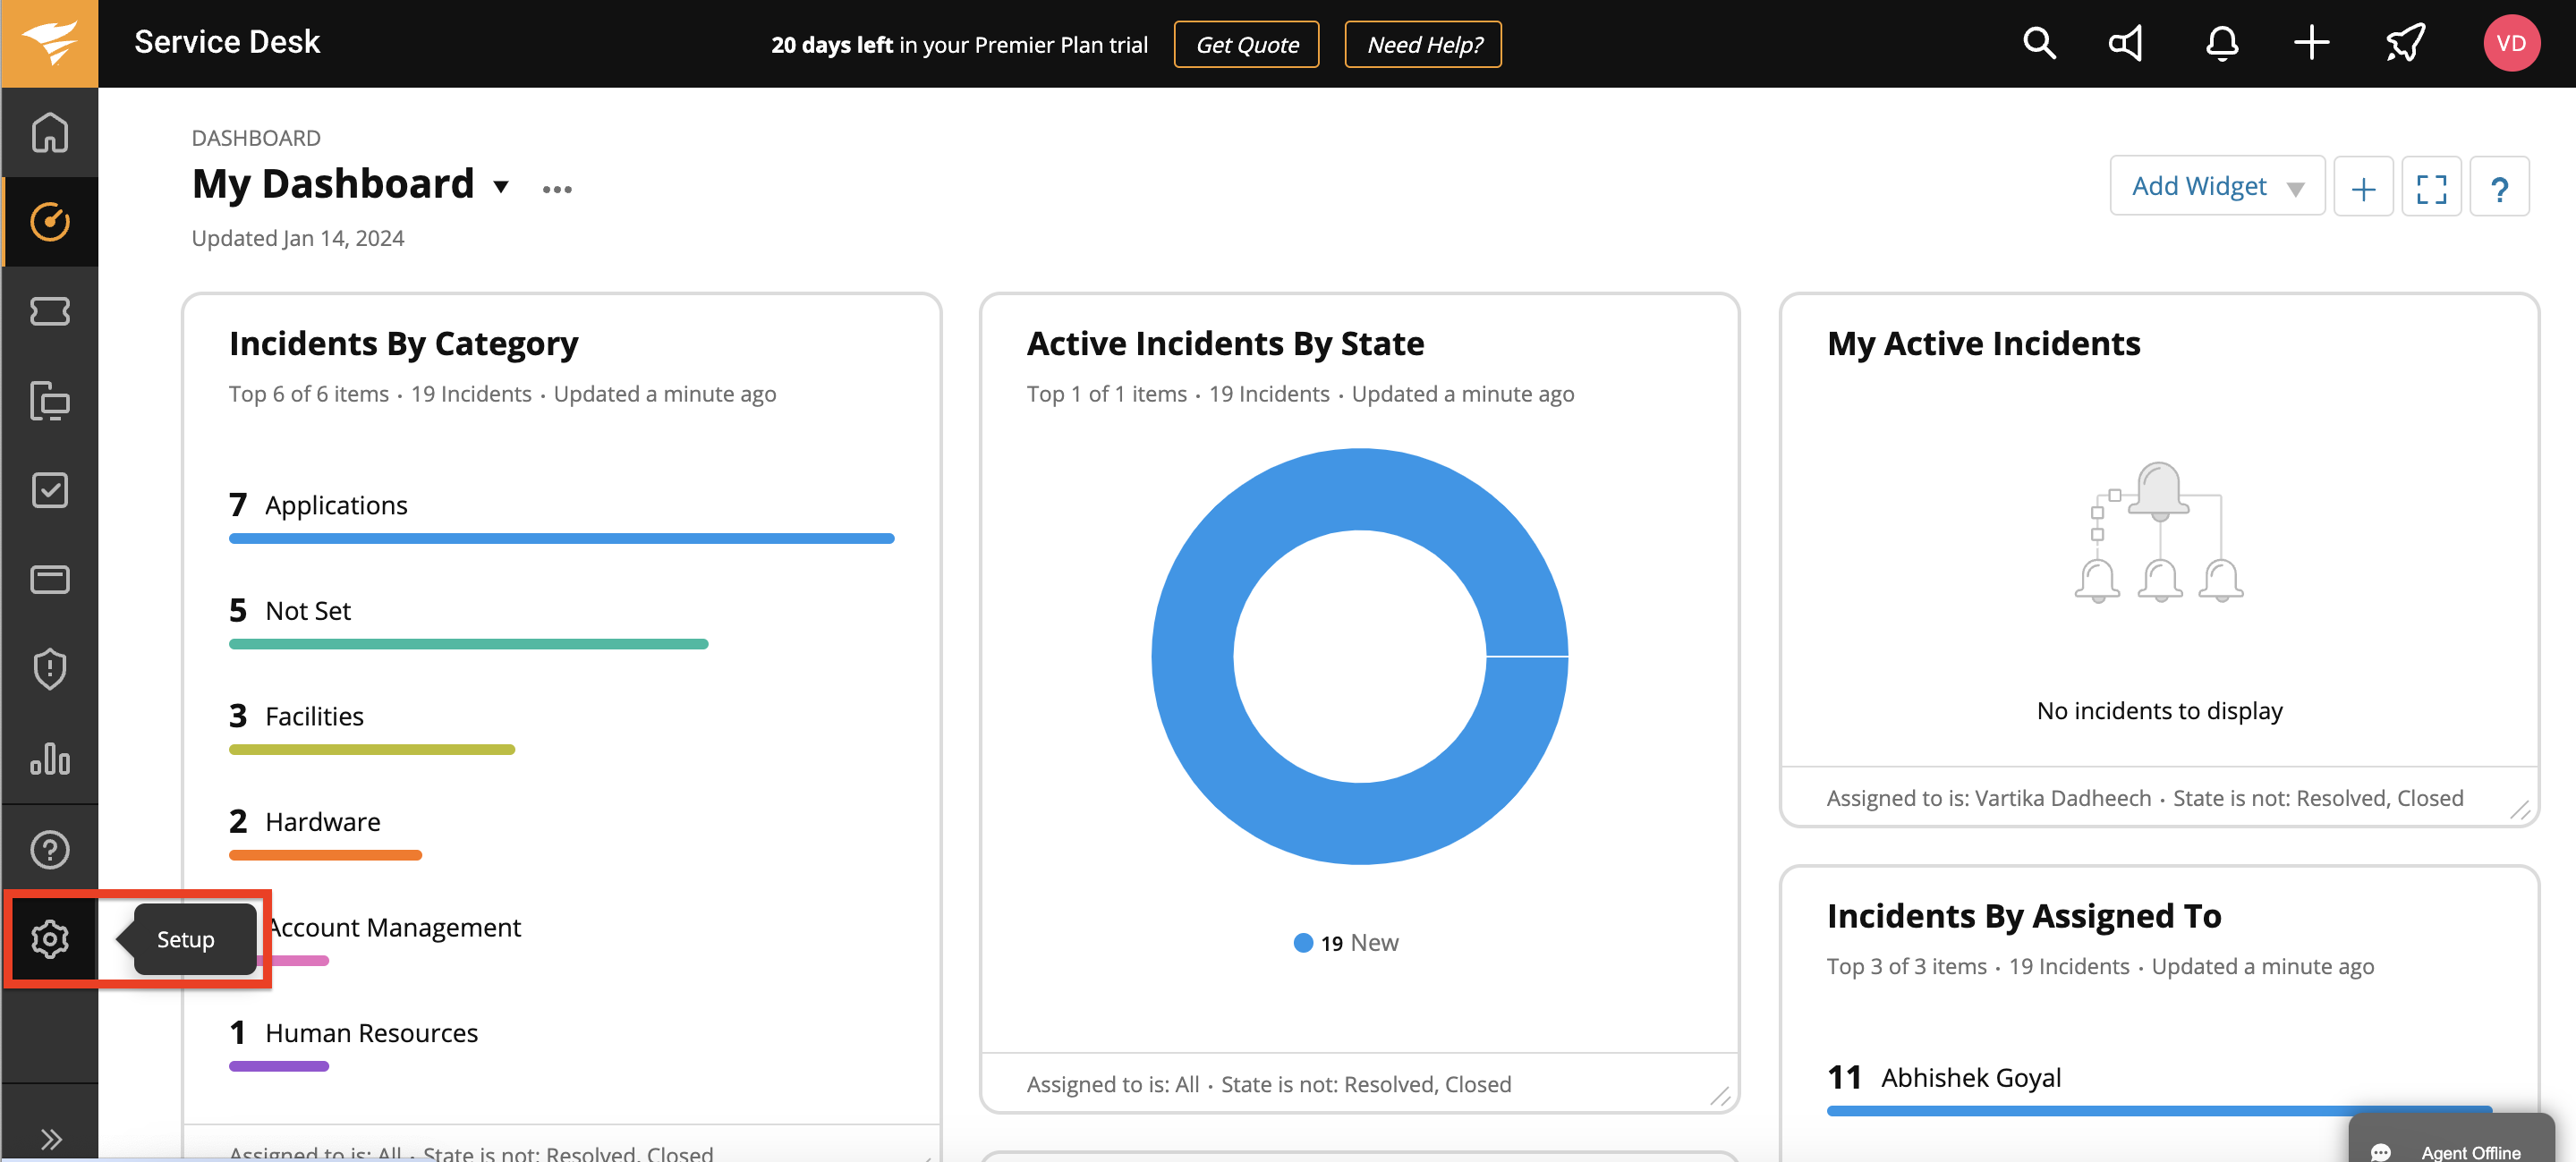
-
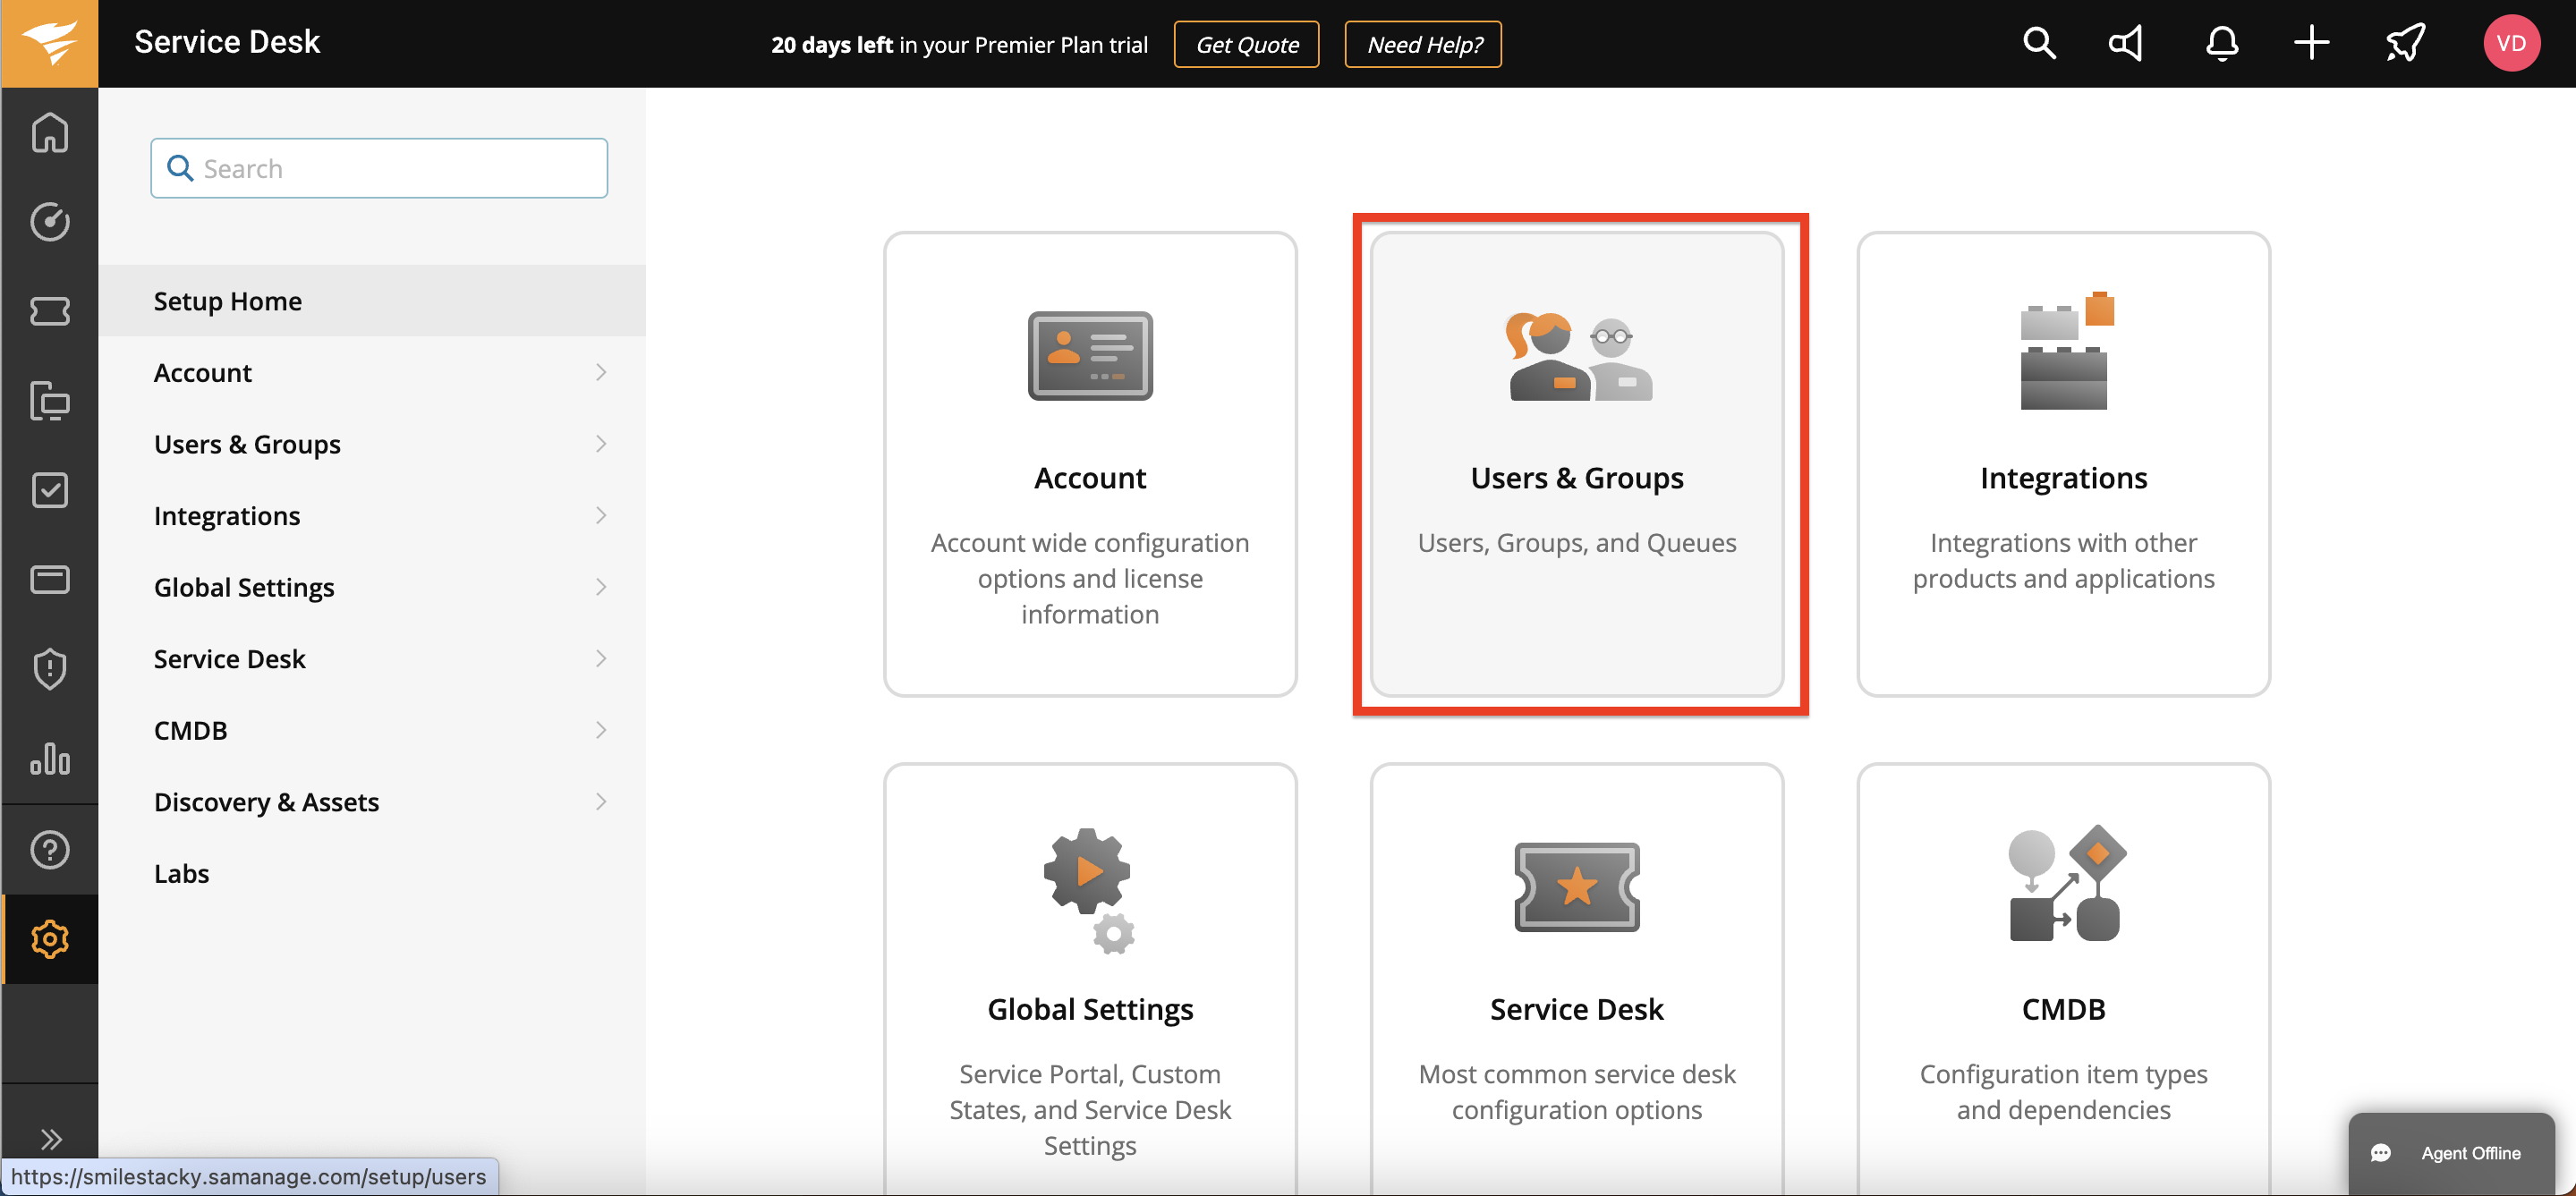
Click on the 'Users and Groups' option.
-
Under the
Allowed Domainstab in the Users section, select your service account username from the displayed users list.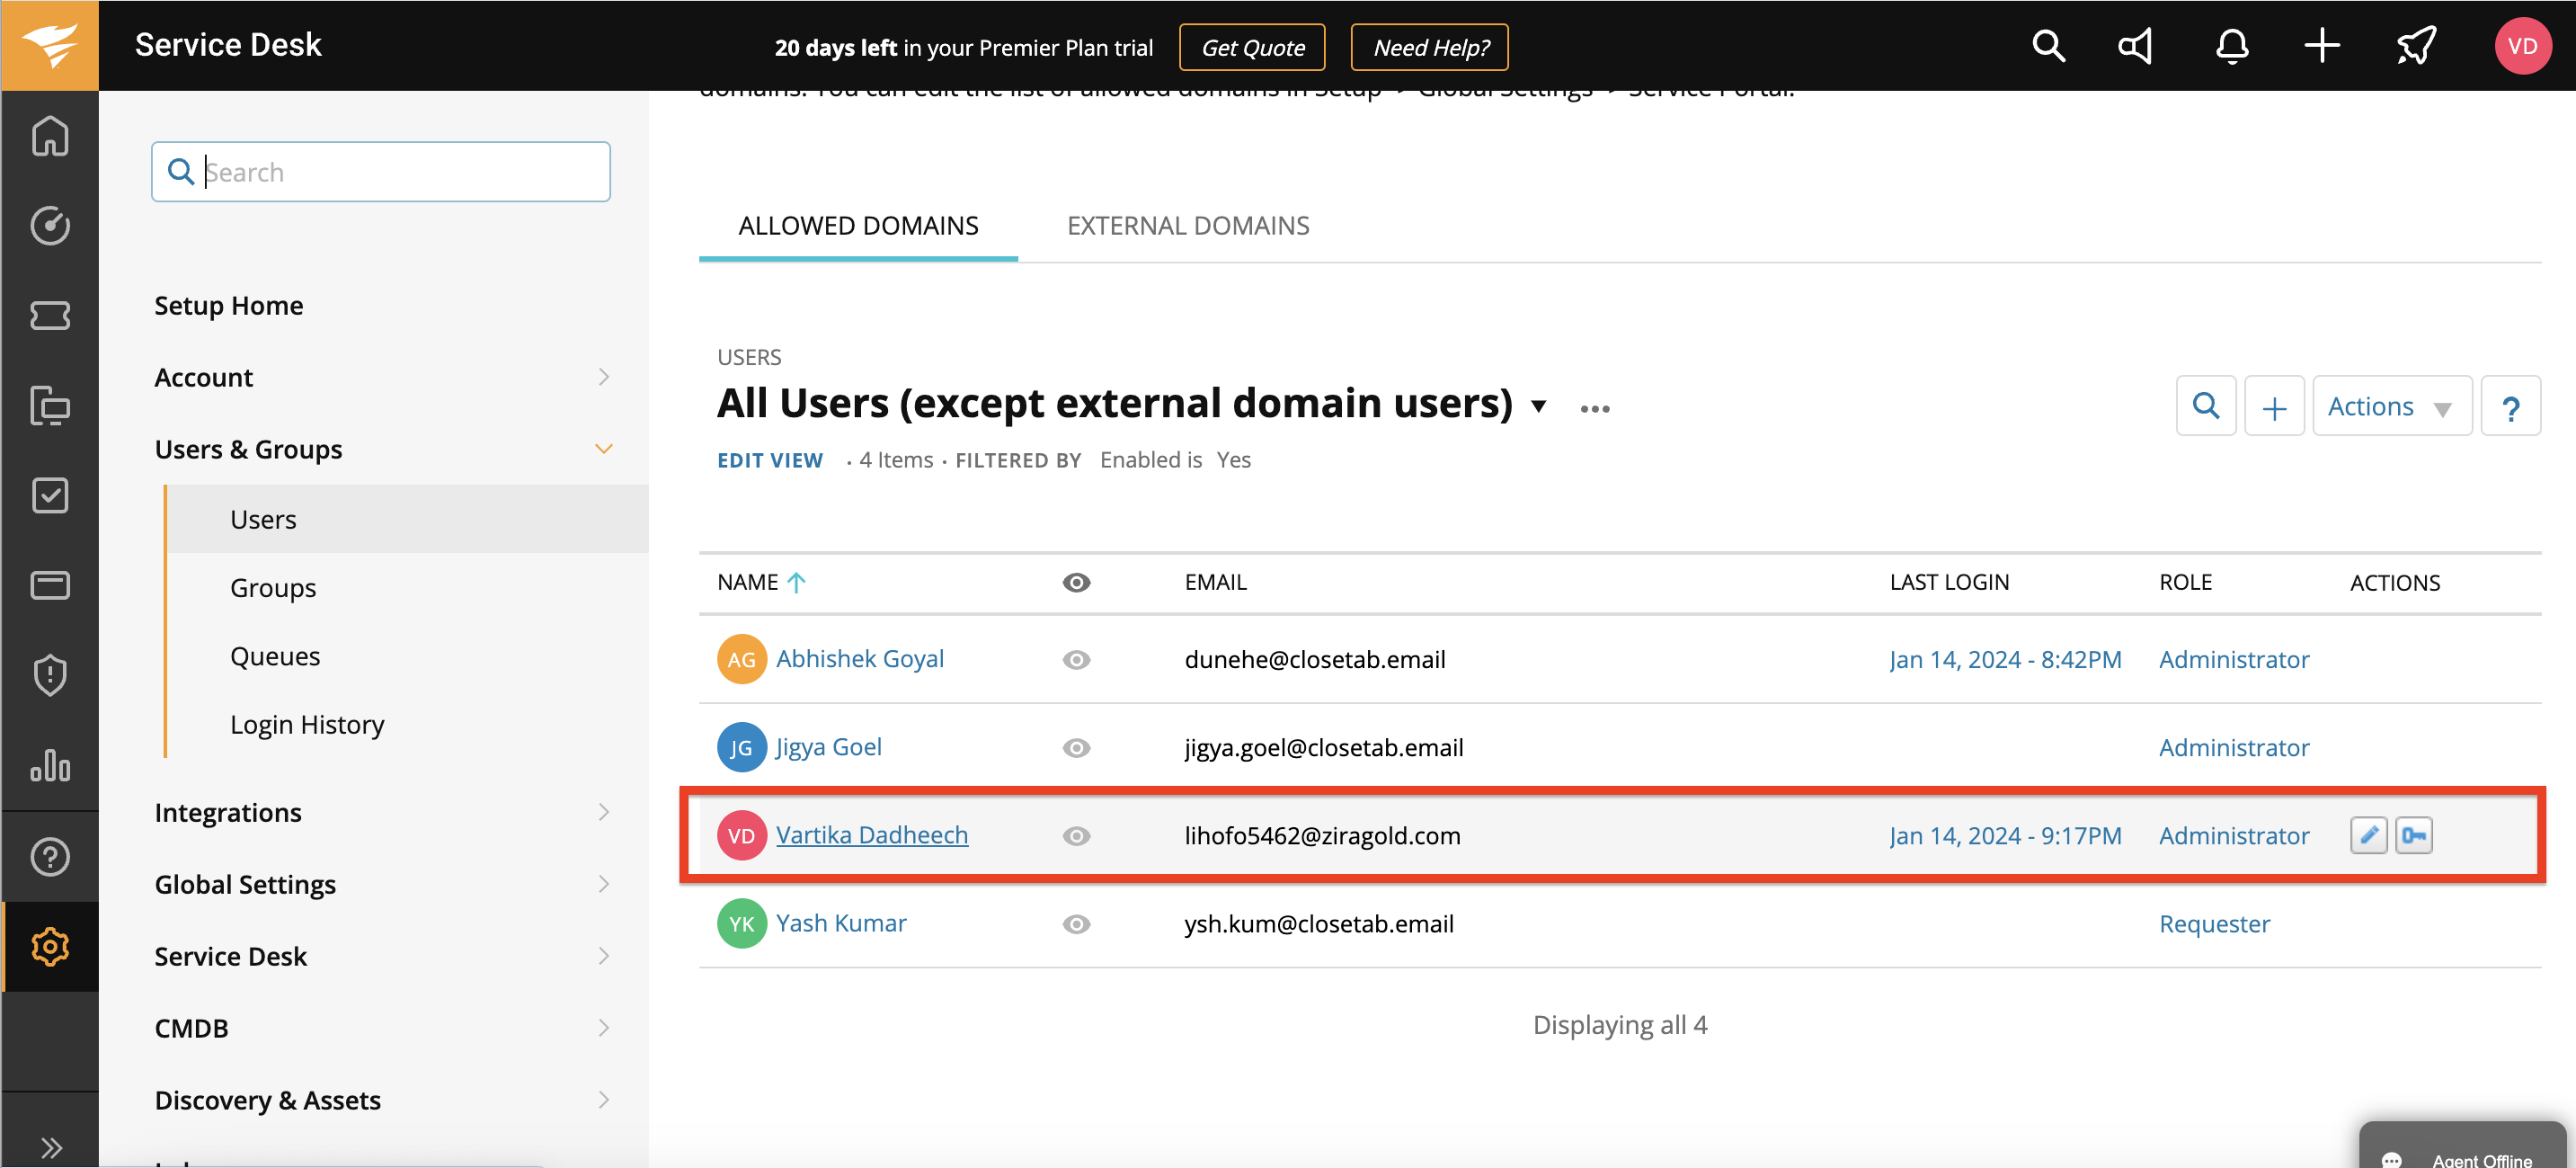
-
Click on the
Actionsdropdown displayed beside your username and select the Generate JSON Web Token option.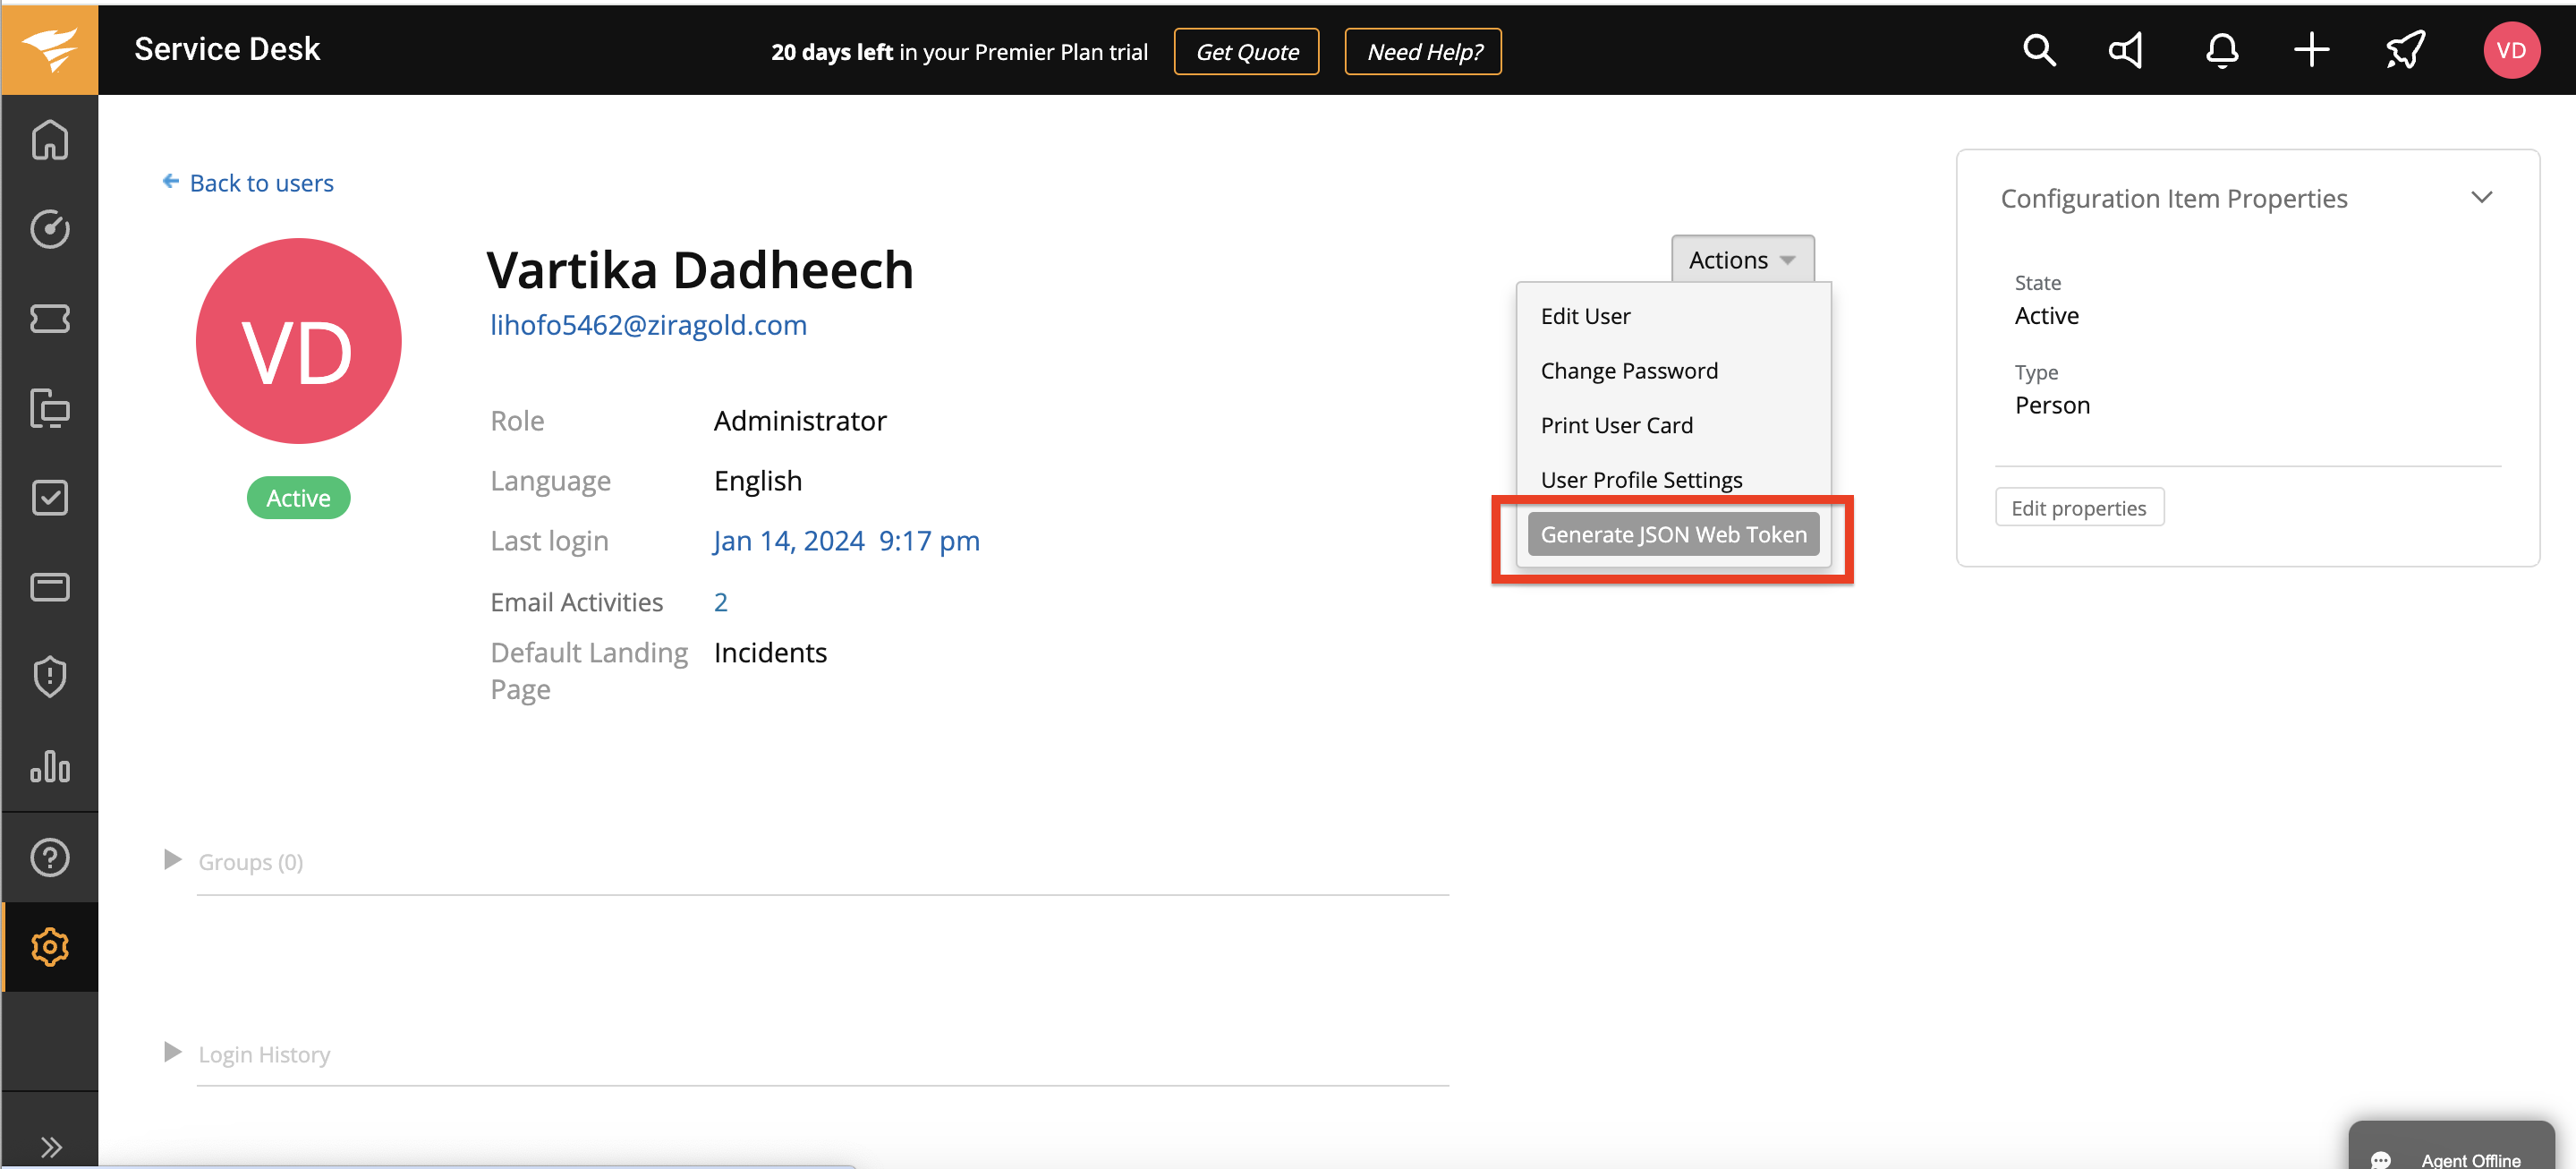
-
After the JSON Web Token is generated, click on the copy option and paste it on the Hire2Retire platform.
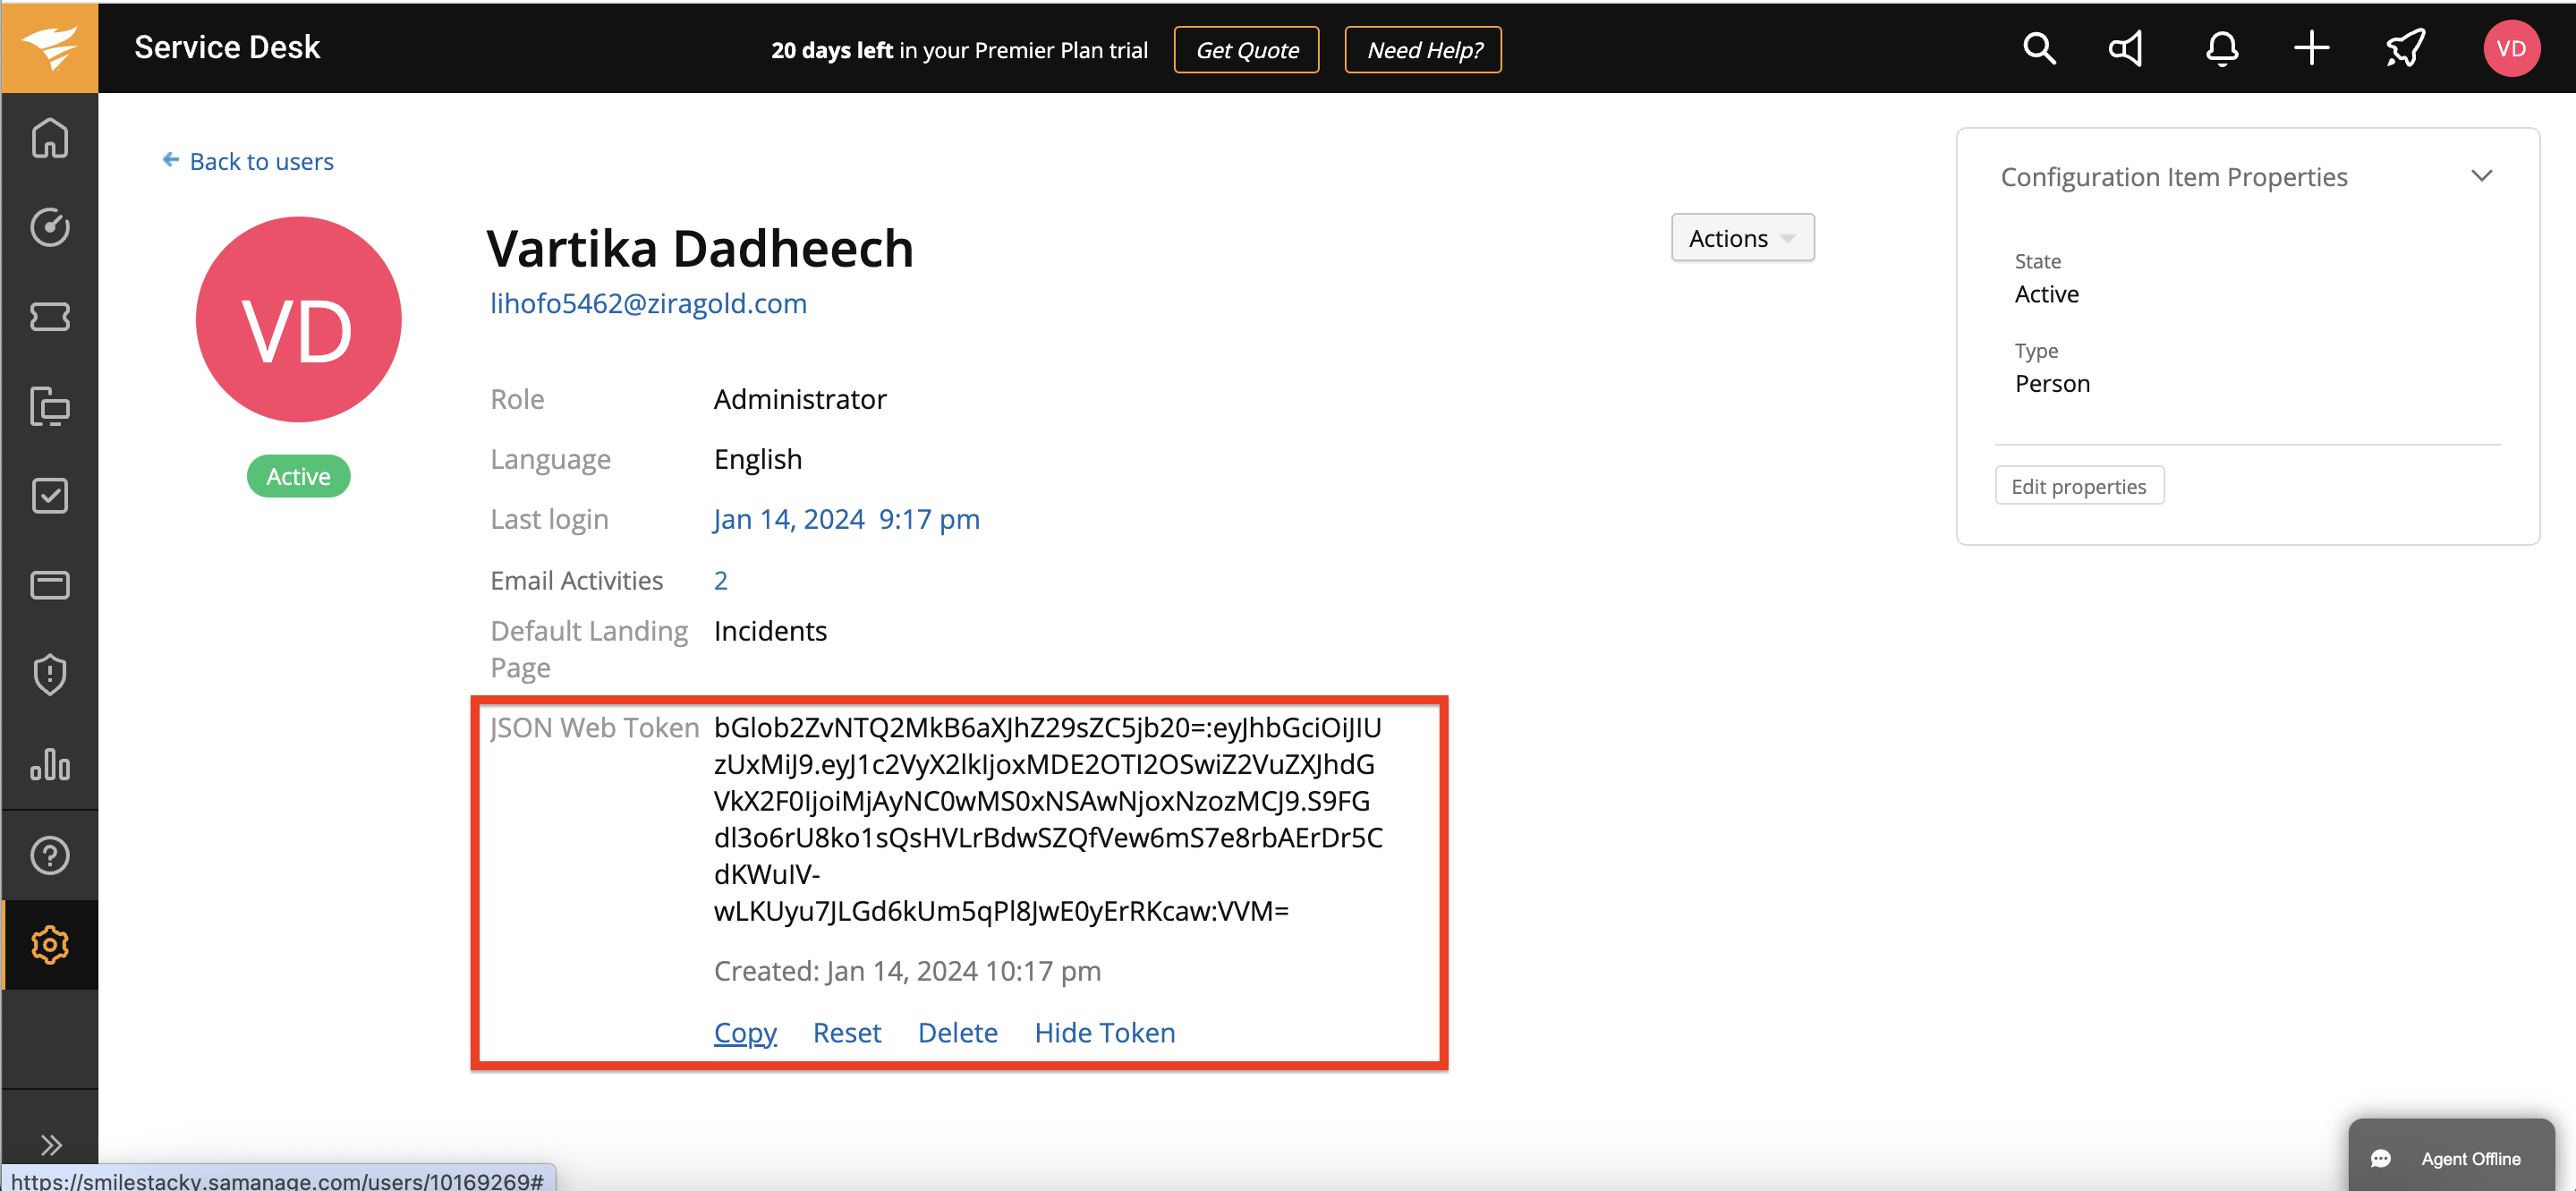 Figure 2. JSON Web Token generation for SolarWinds
Note: If the
ResetorDeleteoption is clicked, the existing connection with Hire2Retire will expire and you will need to establish a new connection with new JSON Web Token. -
After entering the required details, click on the Link Account button on Hire2Retire to successfully establish the connection.
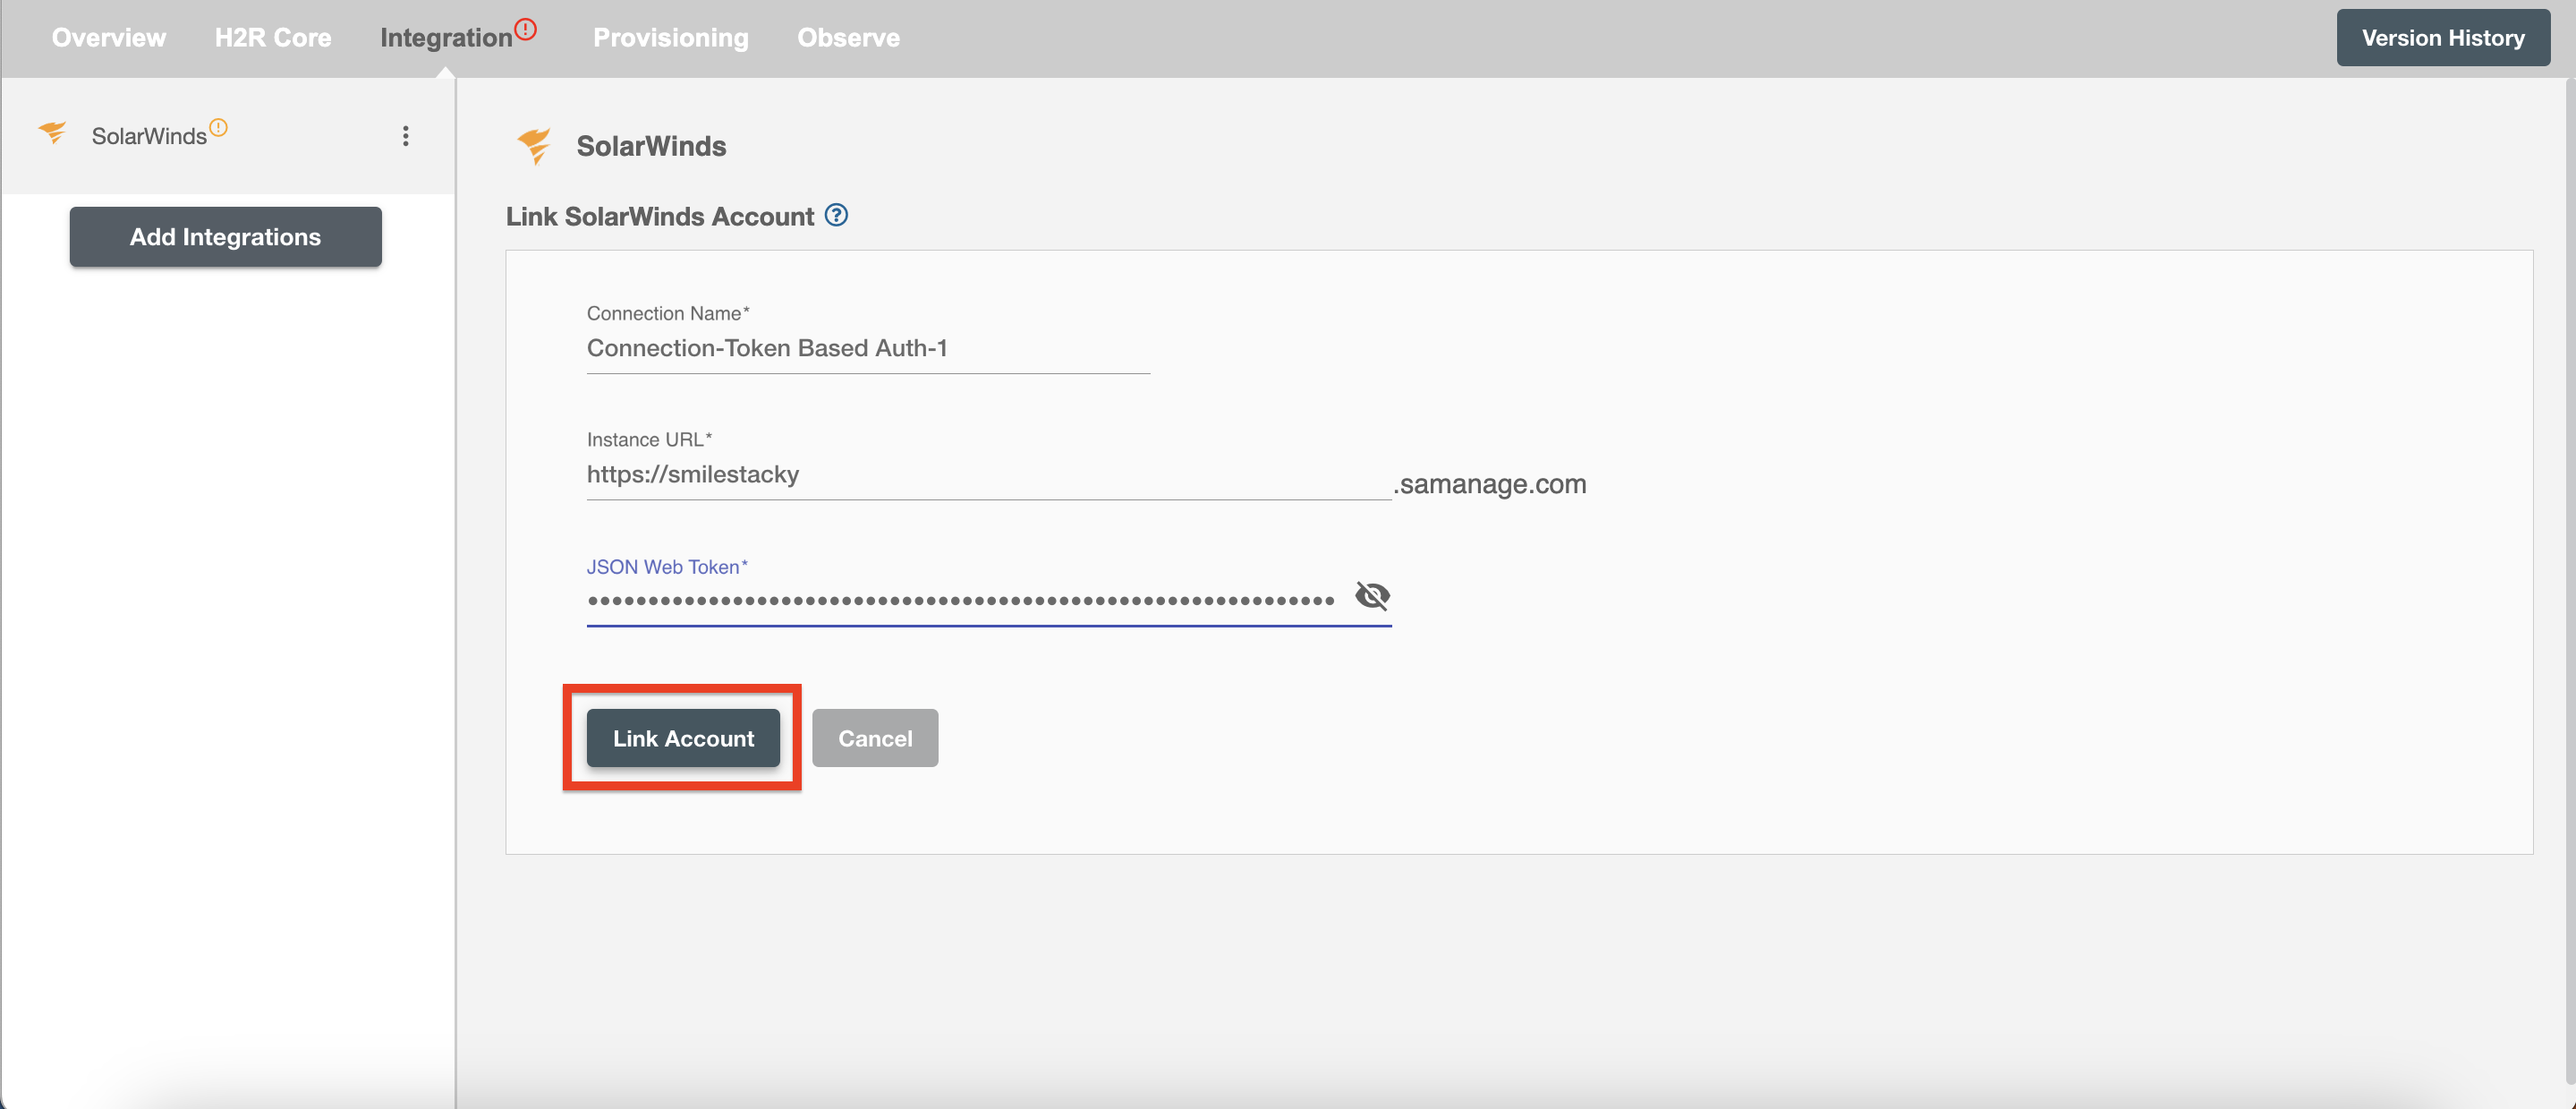 Figure 3. Establishing the Connection for SolarWinds on Hire2Retire